ORC Pantry Makeover- Week 8: Final Reveal of my Dream Vintage Cottage Pantry Makeover
The big reveal is finally here and I still can’t believe that we pulled this off in time! This space encompasses ME possibly more than any other room I’ve ever designed. In the midst of a challenging personal week, when I could’ve easily thrown in the towel, I threw all my emotion and energy into this space, and I think you can see that in every corner and detail. Not to mention, for the second time I failed to realize we were leaving on vacation in the middle of the final reveal week, cutting my time short (also did this with my playroom makeover on my first round in 2020!). Despite all that, we have a finished space that I am so proud of!
As usual, a ton of DIYs made up this project, including custom hand-painting tile and tiling a backsplash for the first time (and in two days!), painting and repurposing the antique upper cabinets, building a custom “tablecloth cupboard,” making all the curtains, wallpapering several walls, shelves, and a whole cabinet, building a custom giant plate rack, trimming the outside side cabinets, and more! I will share more in depth about the process for all of these as well as link all the items I used below!
I could not have finished this project without my husband Alex’s help, especially all the building (not his favorite, BUT did he not nail the plate rack?!). Also, thanks to all our friends, family, and my design team, who helped along the way! I had to call in all the reinforcements and extra sets of hands to get this one done in time!
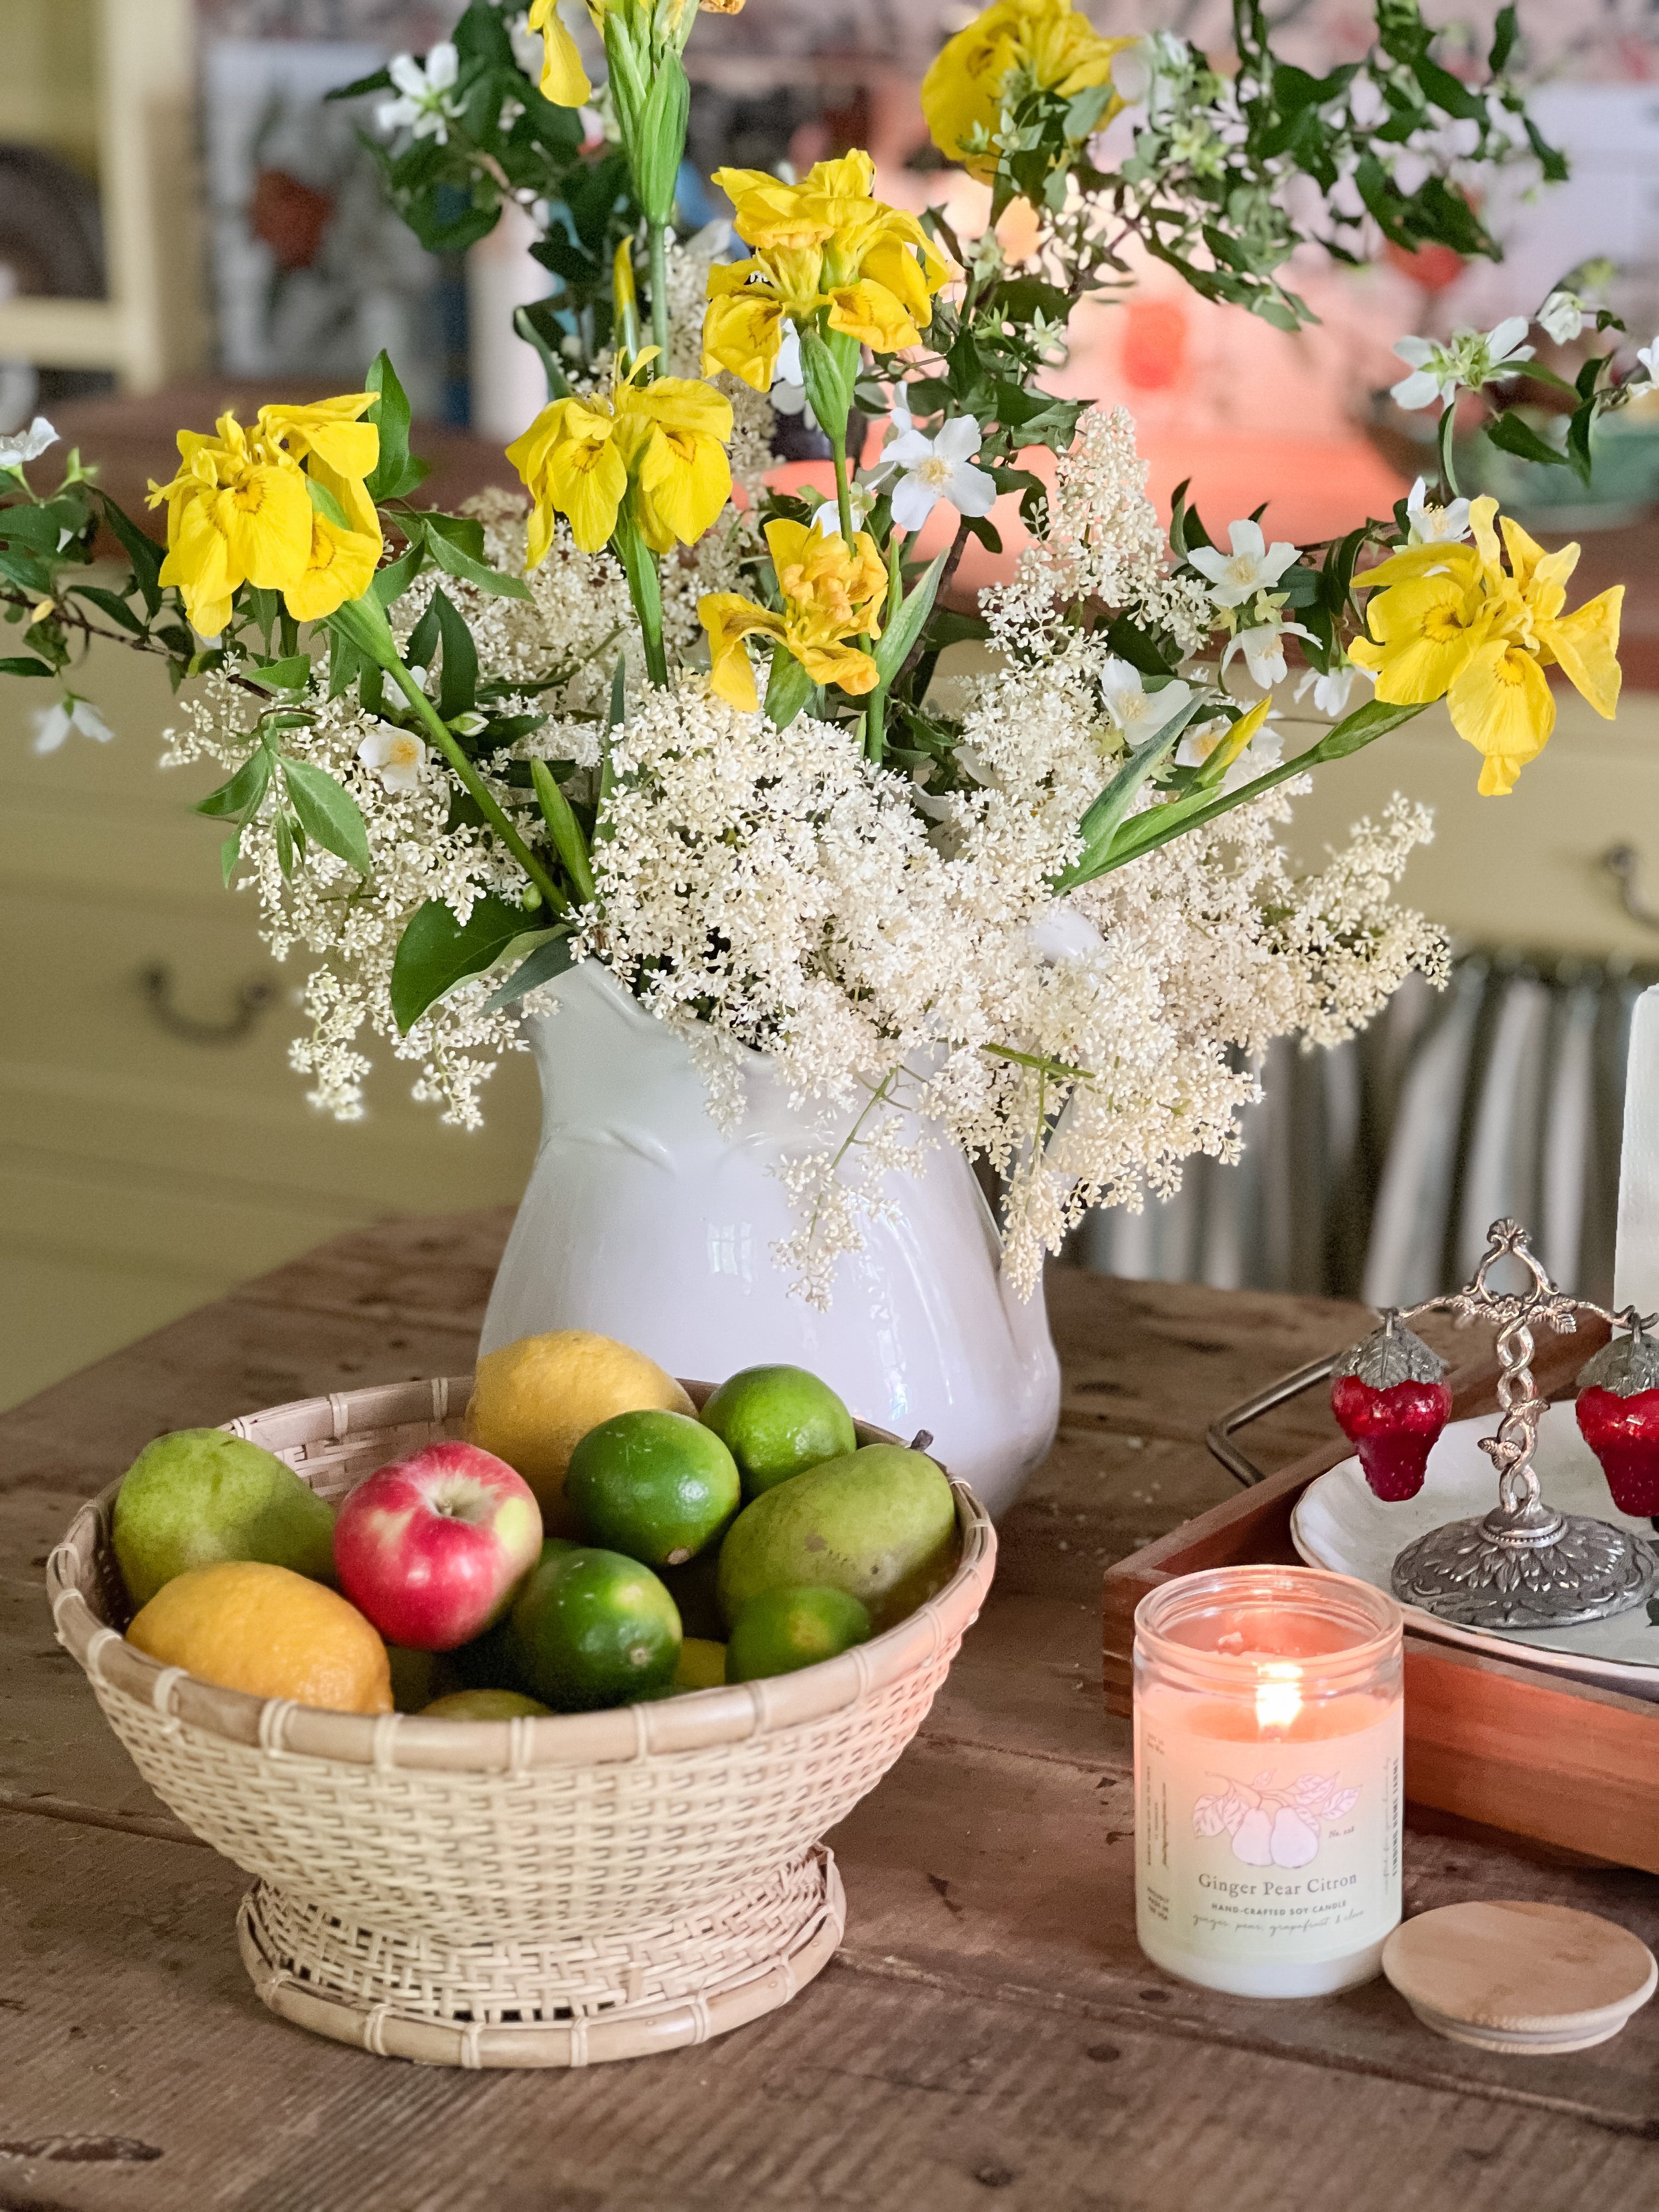
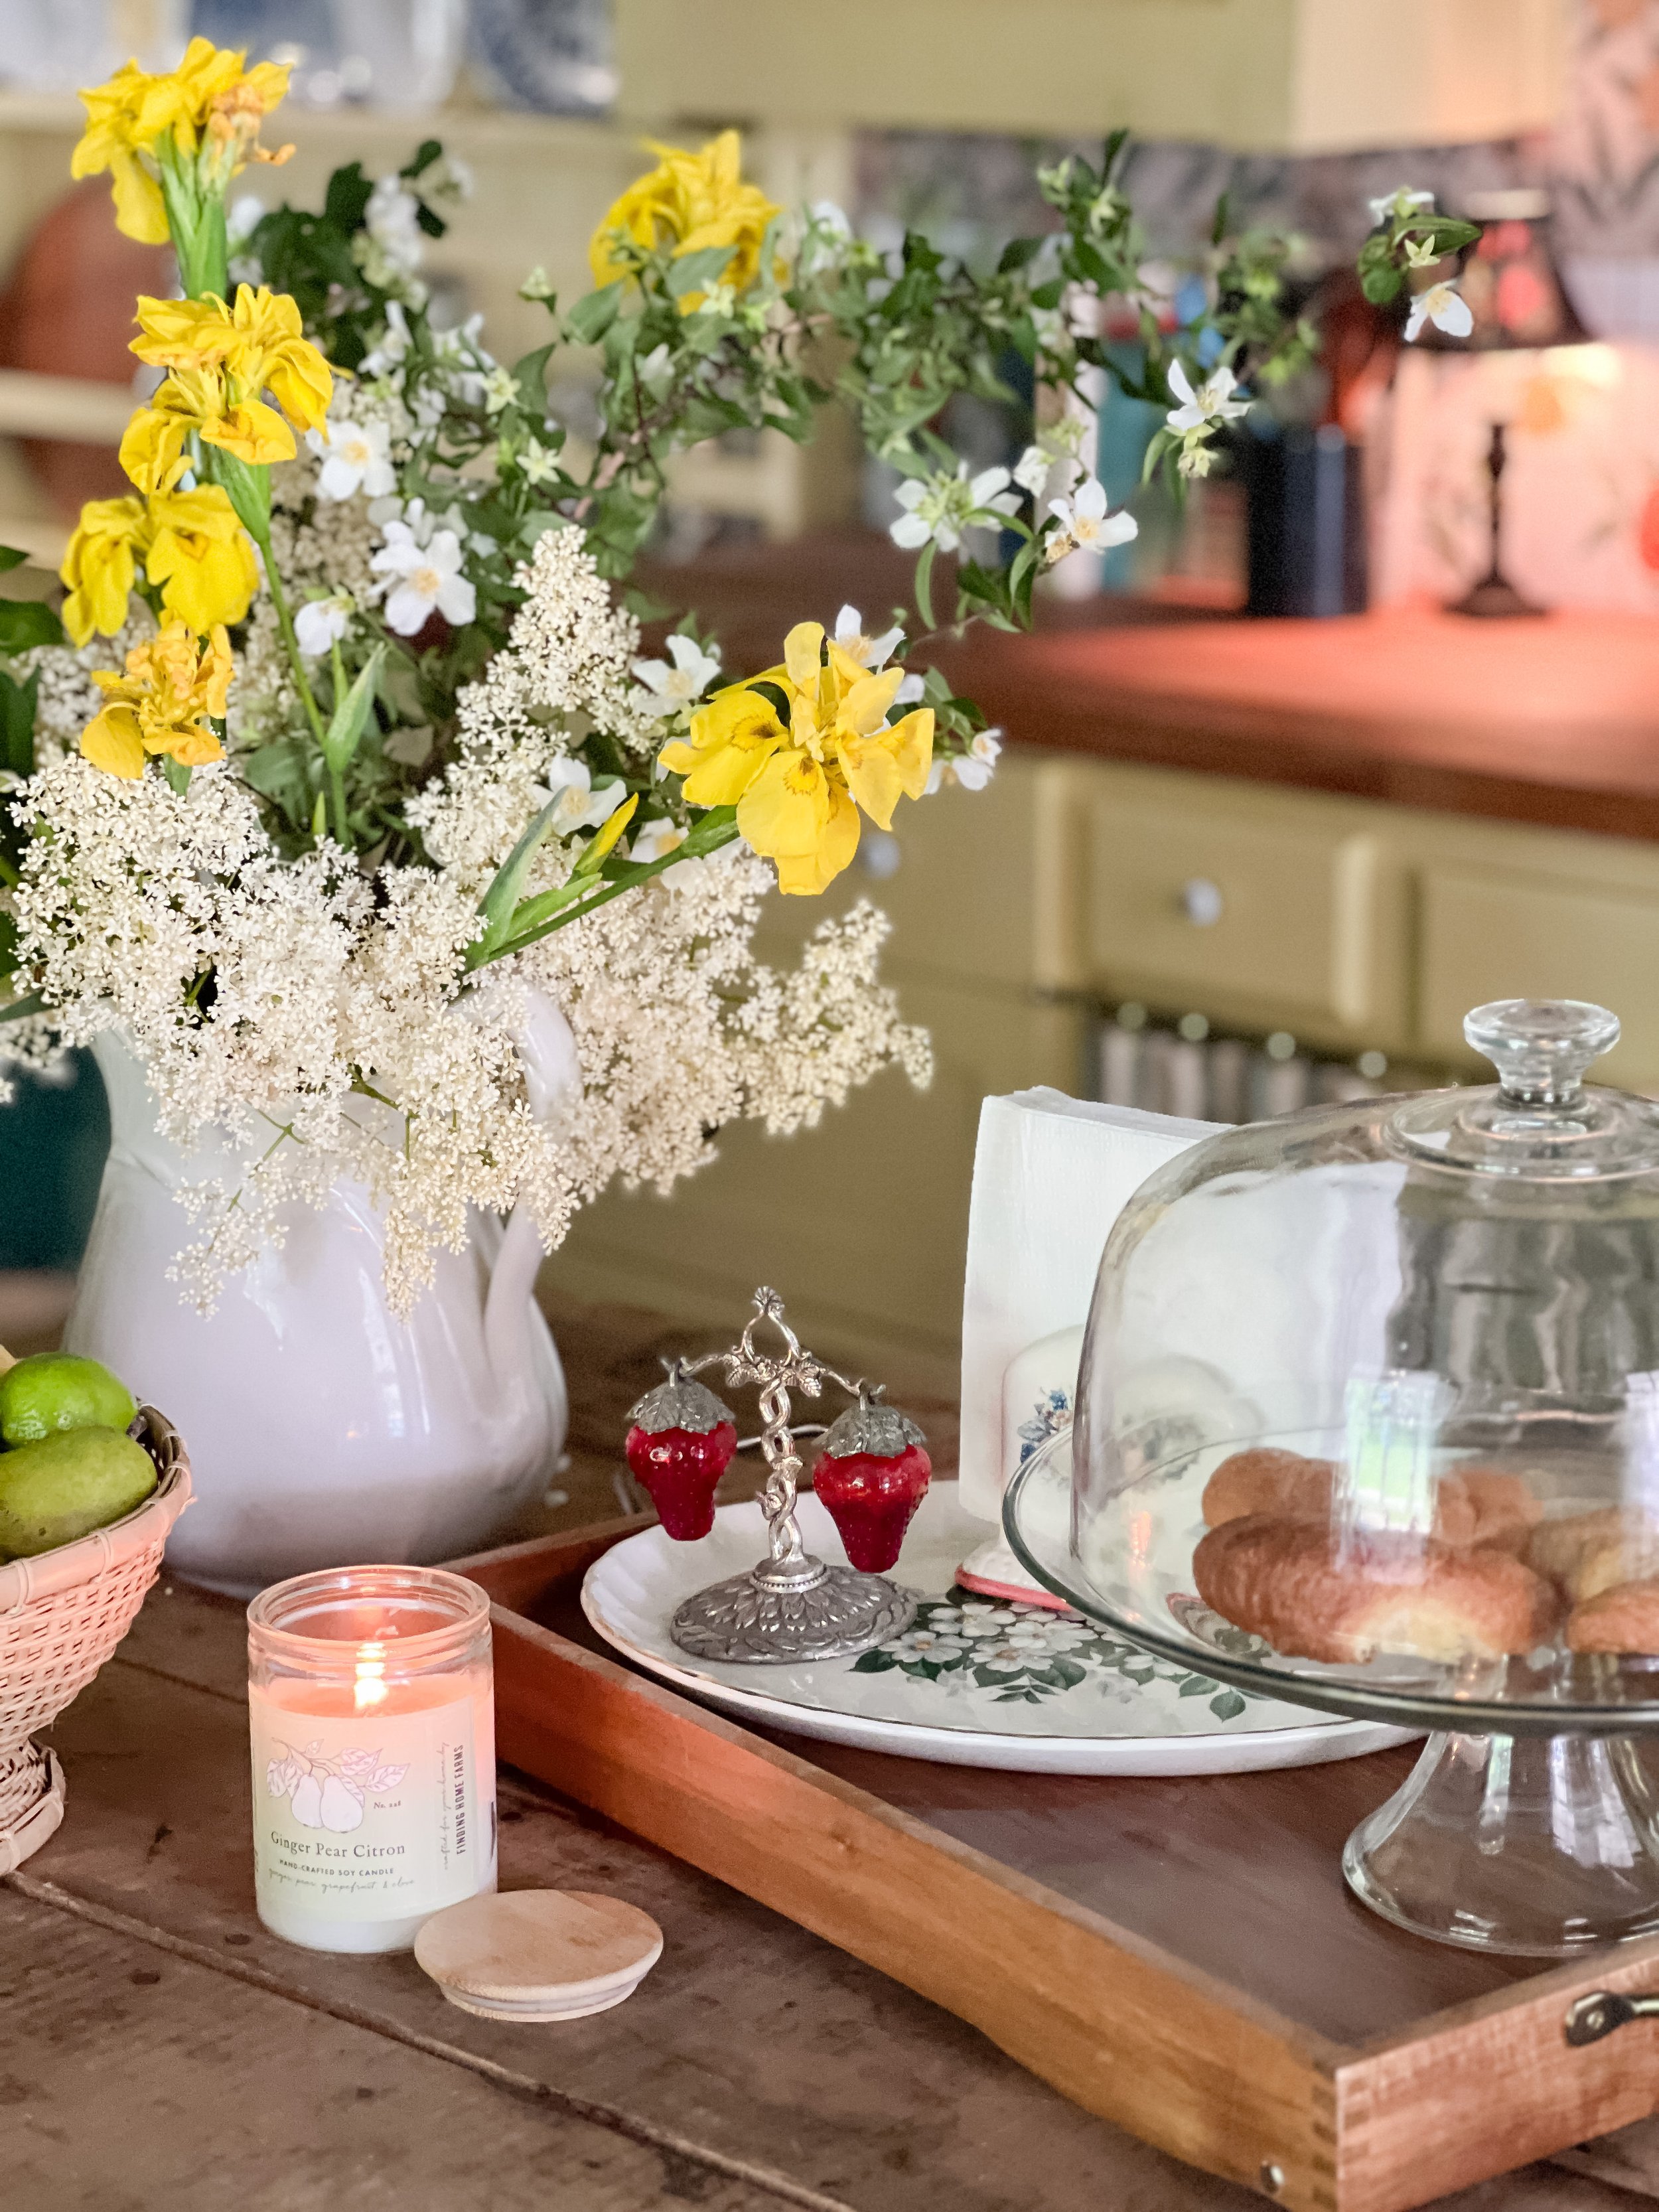
I truly love this transformation, and I’m so excited the time has come to share it with you guys! Take a look at TONS more photos below and details on every inch of the space. As always, if you have any questions, just ask below in the comments!
xoxo
Emily

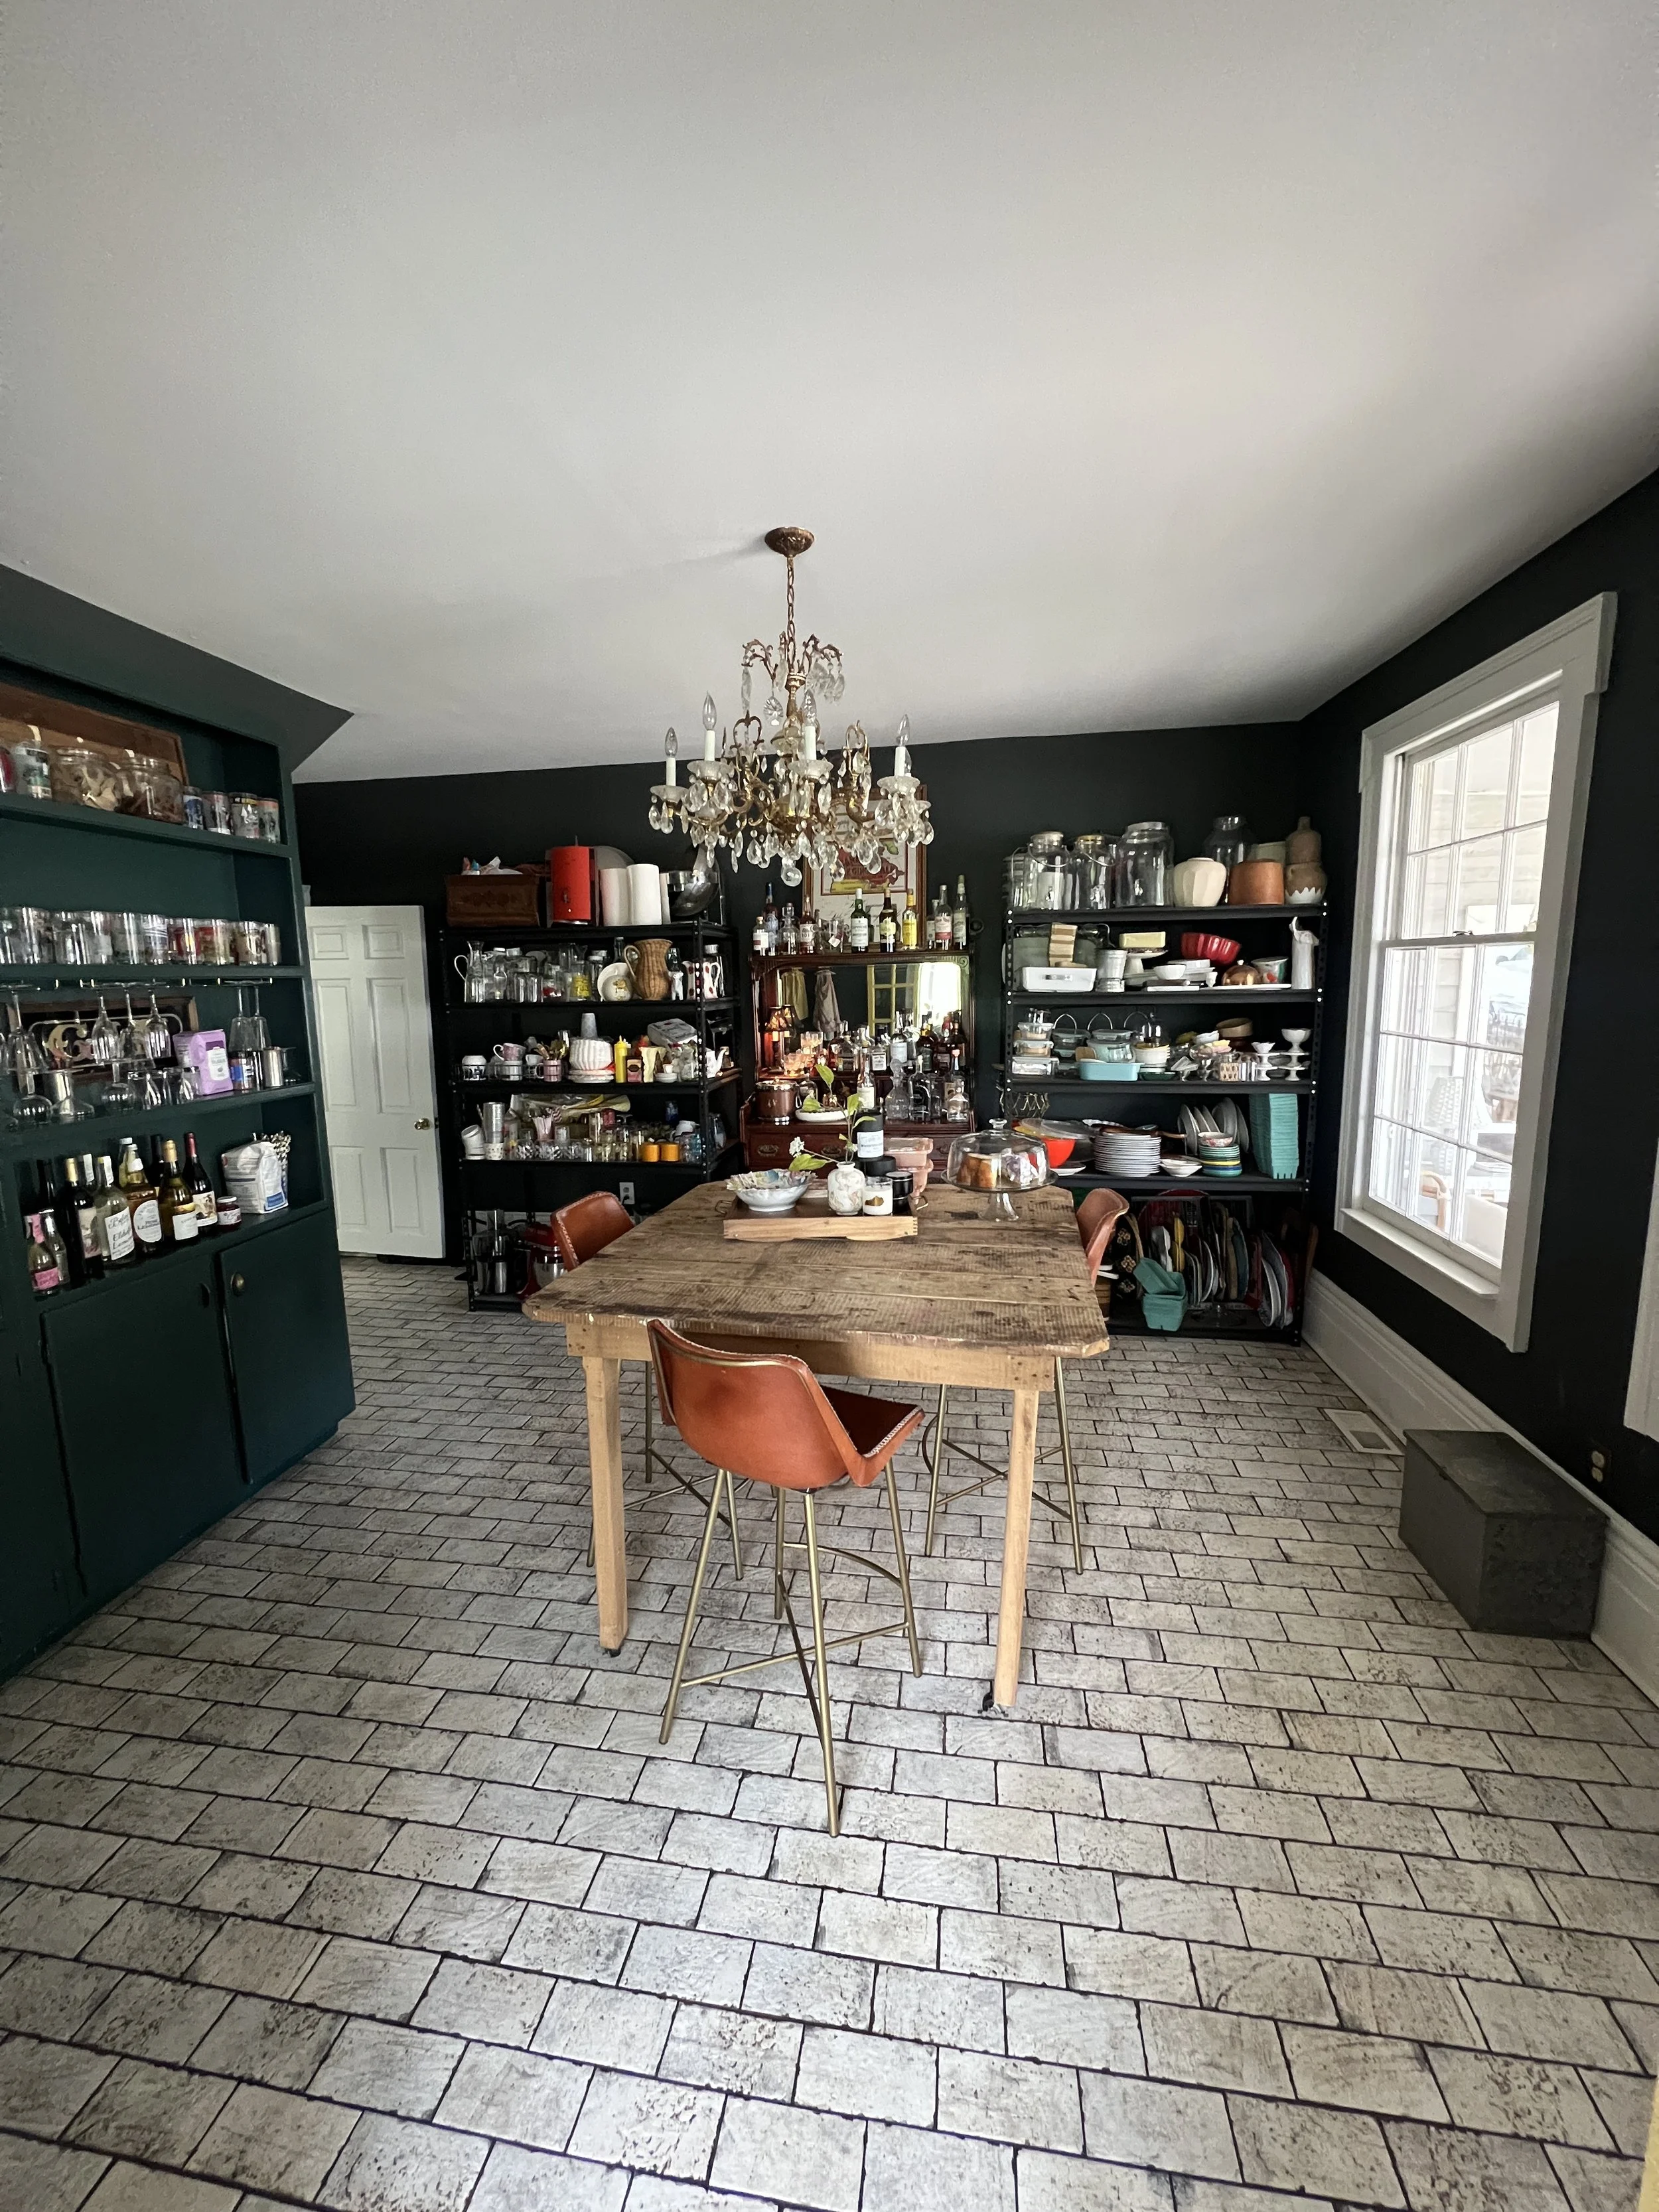
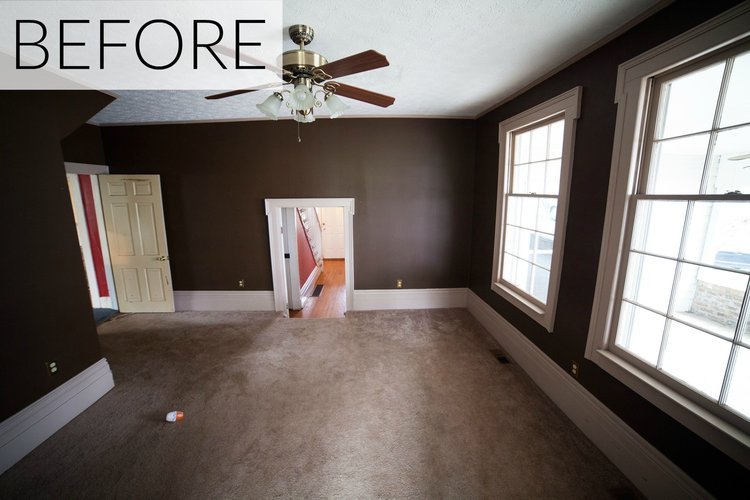
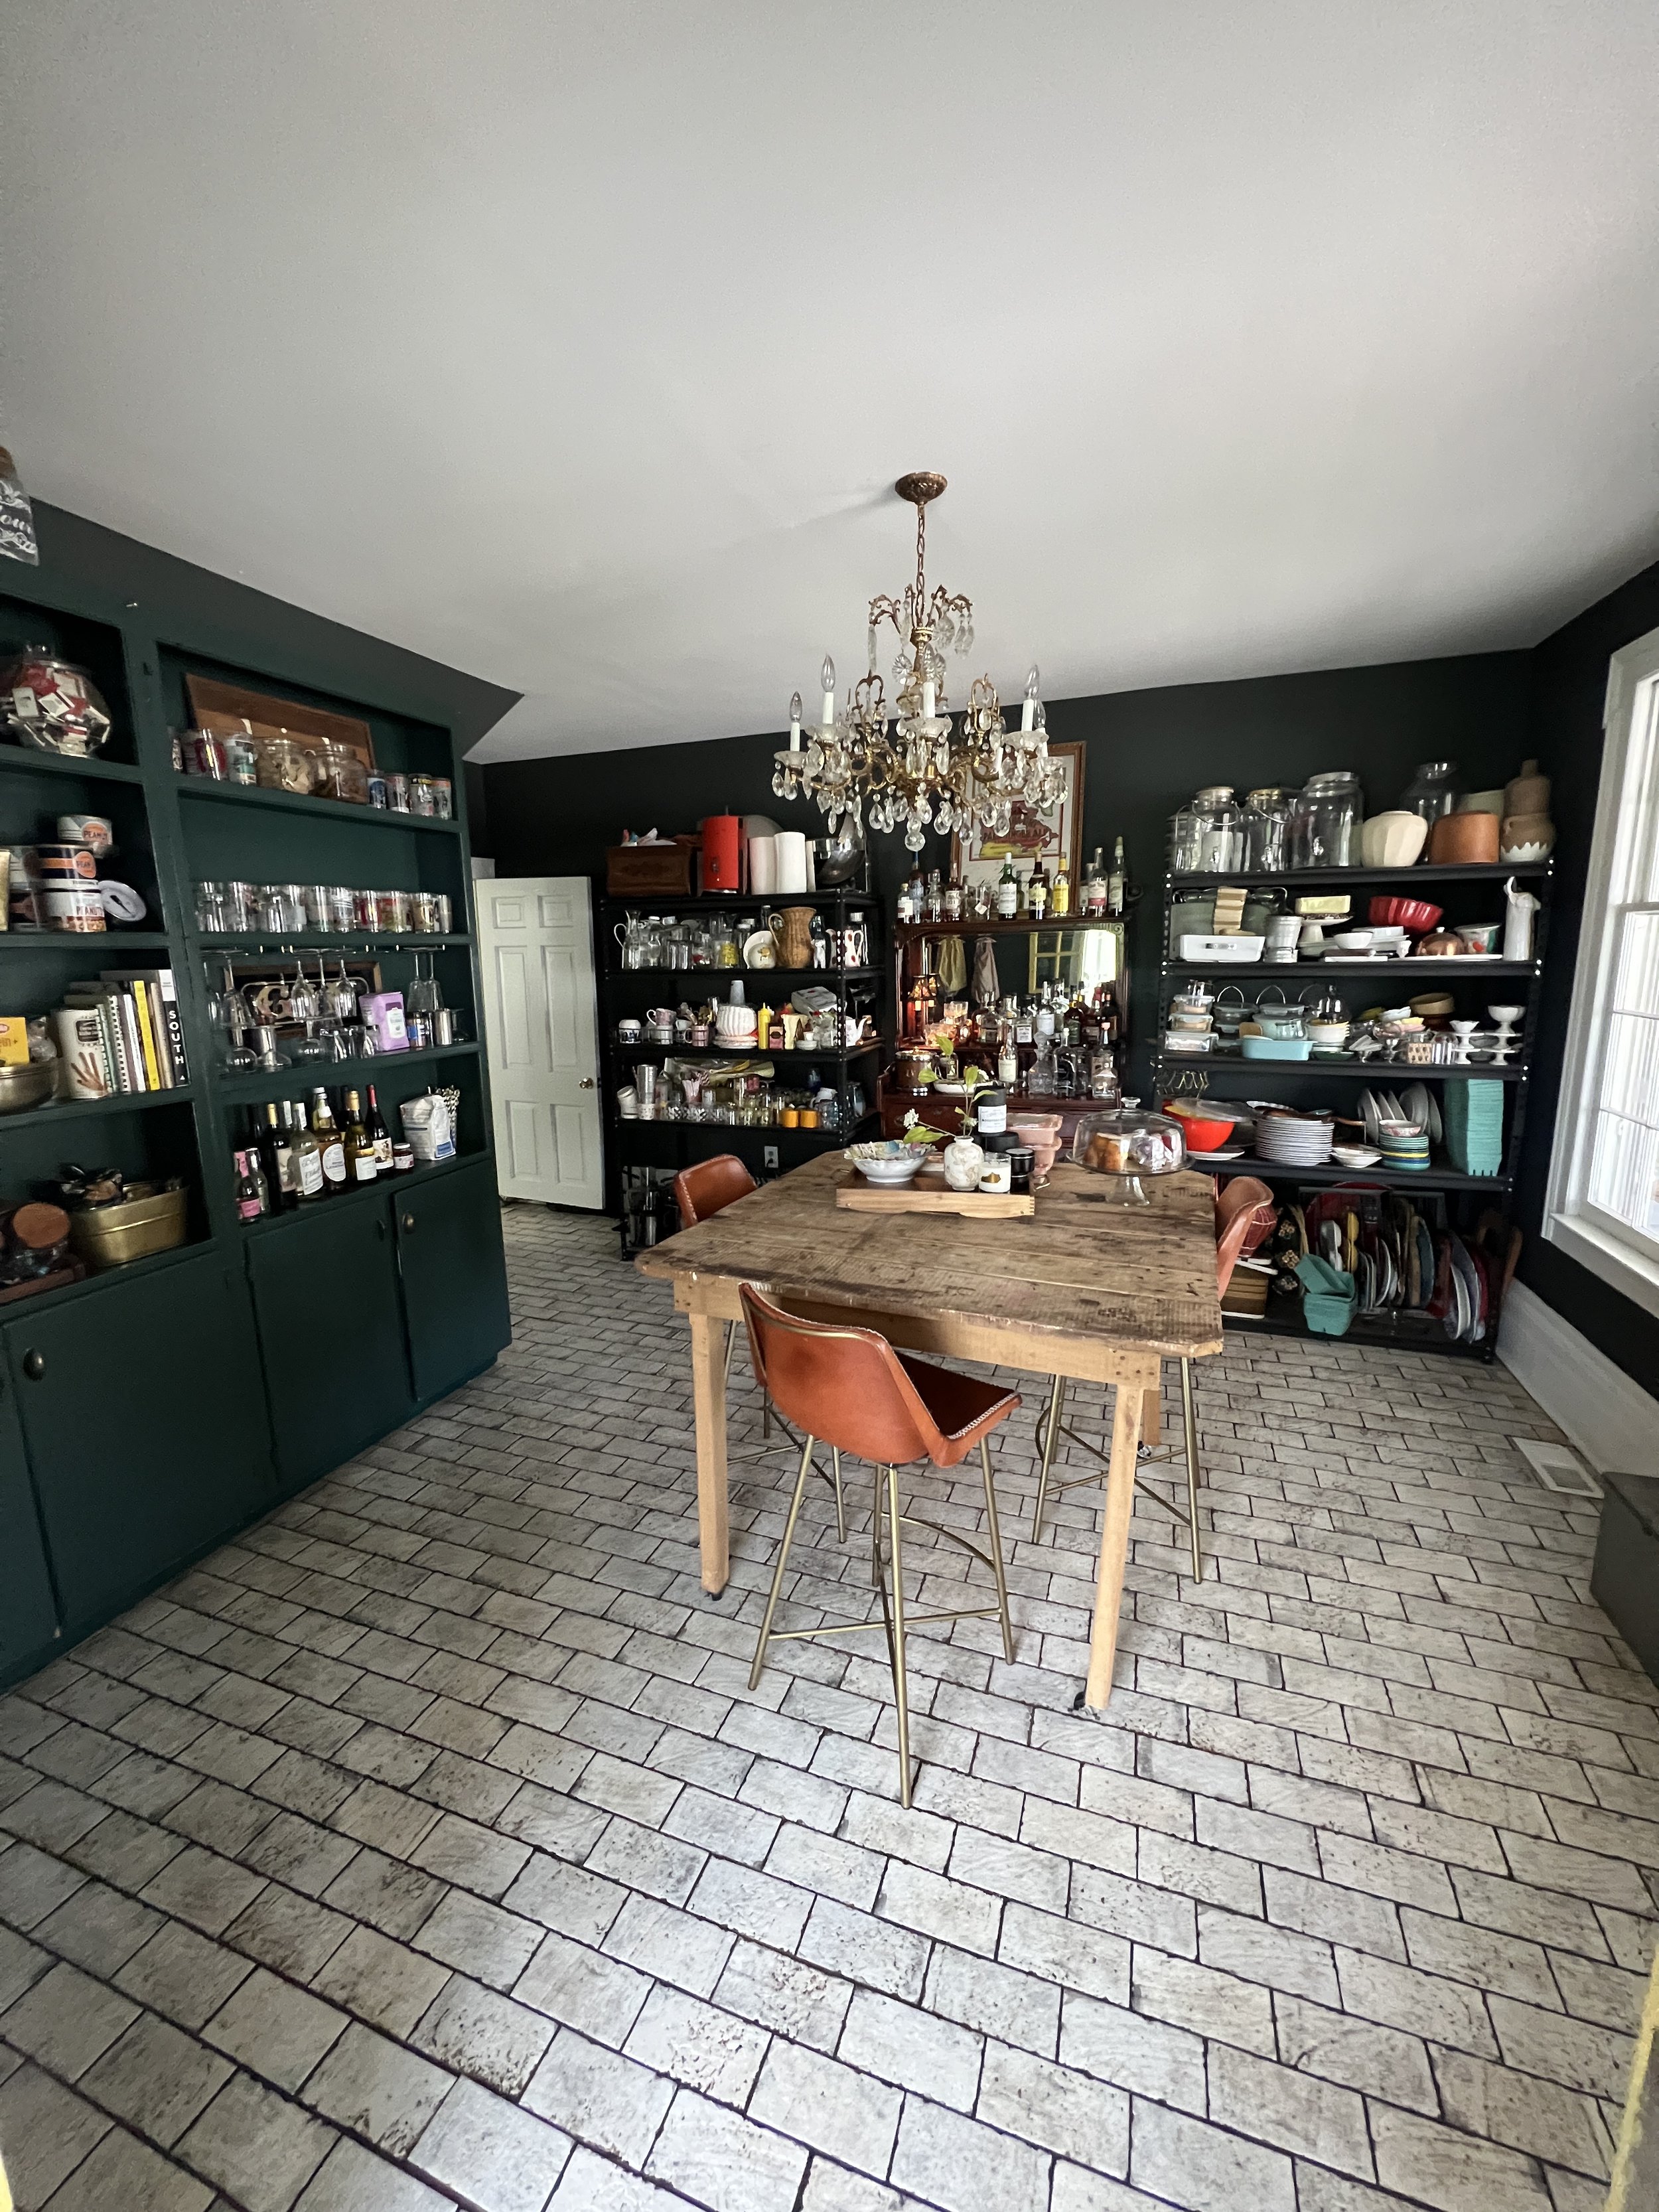
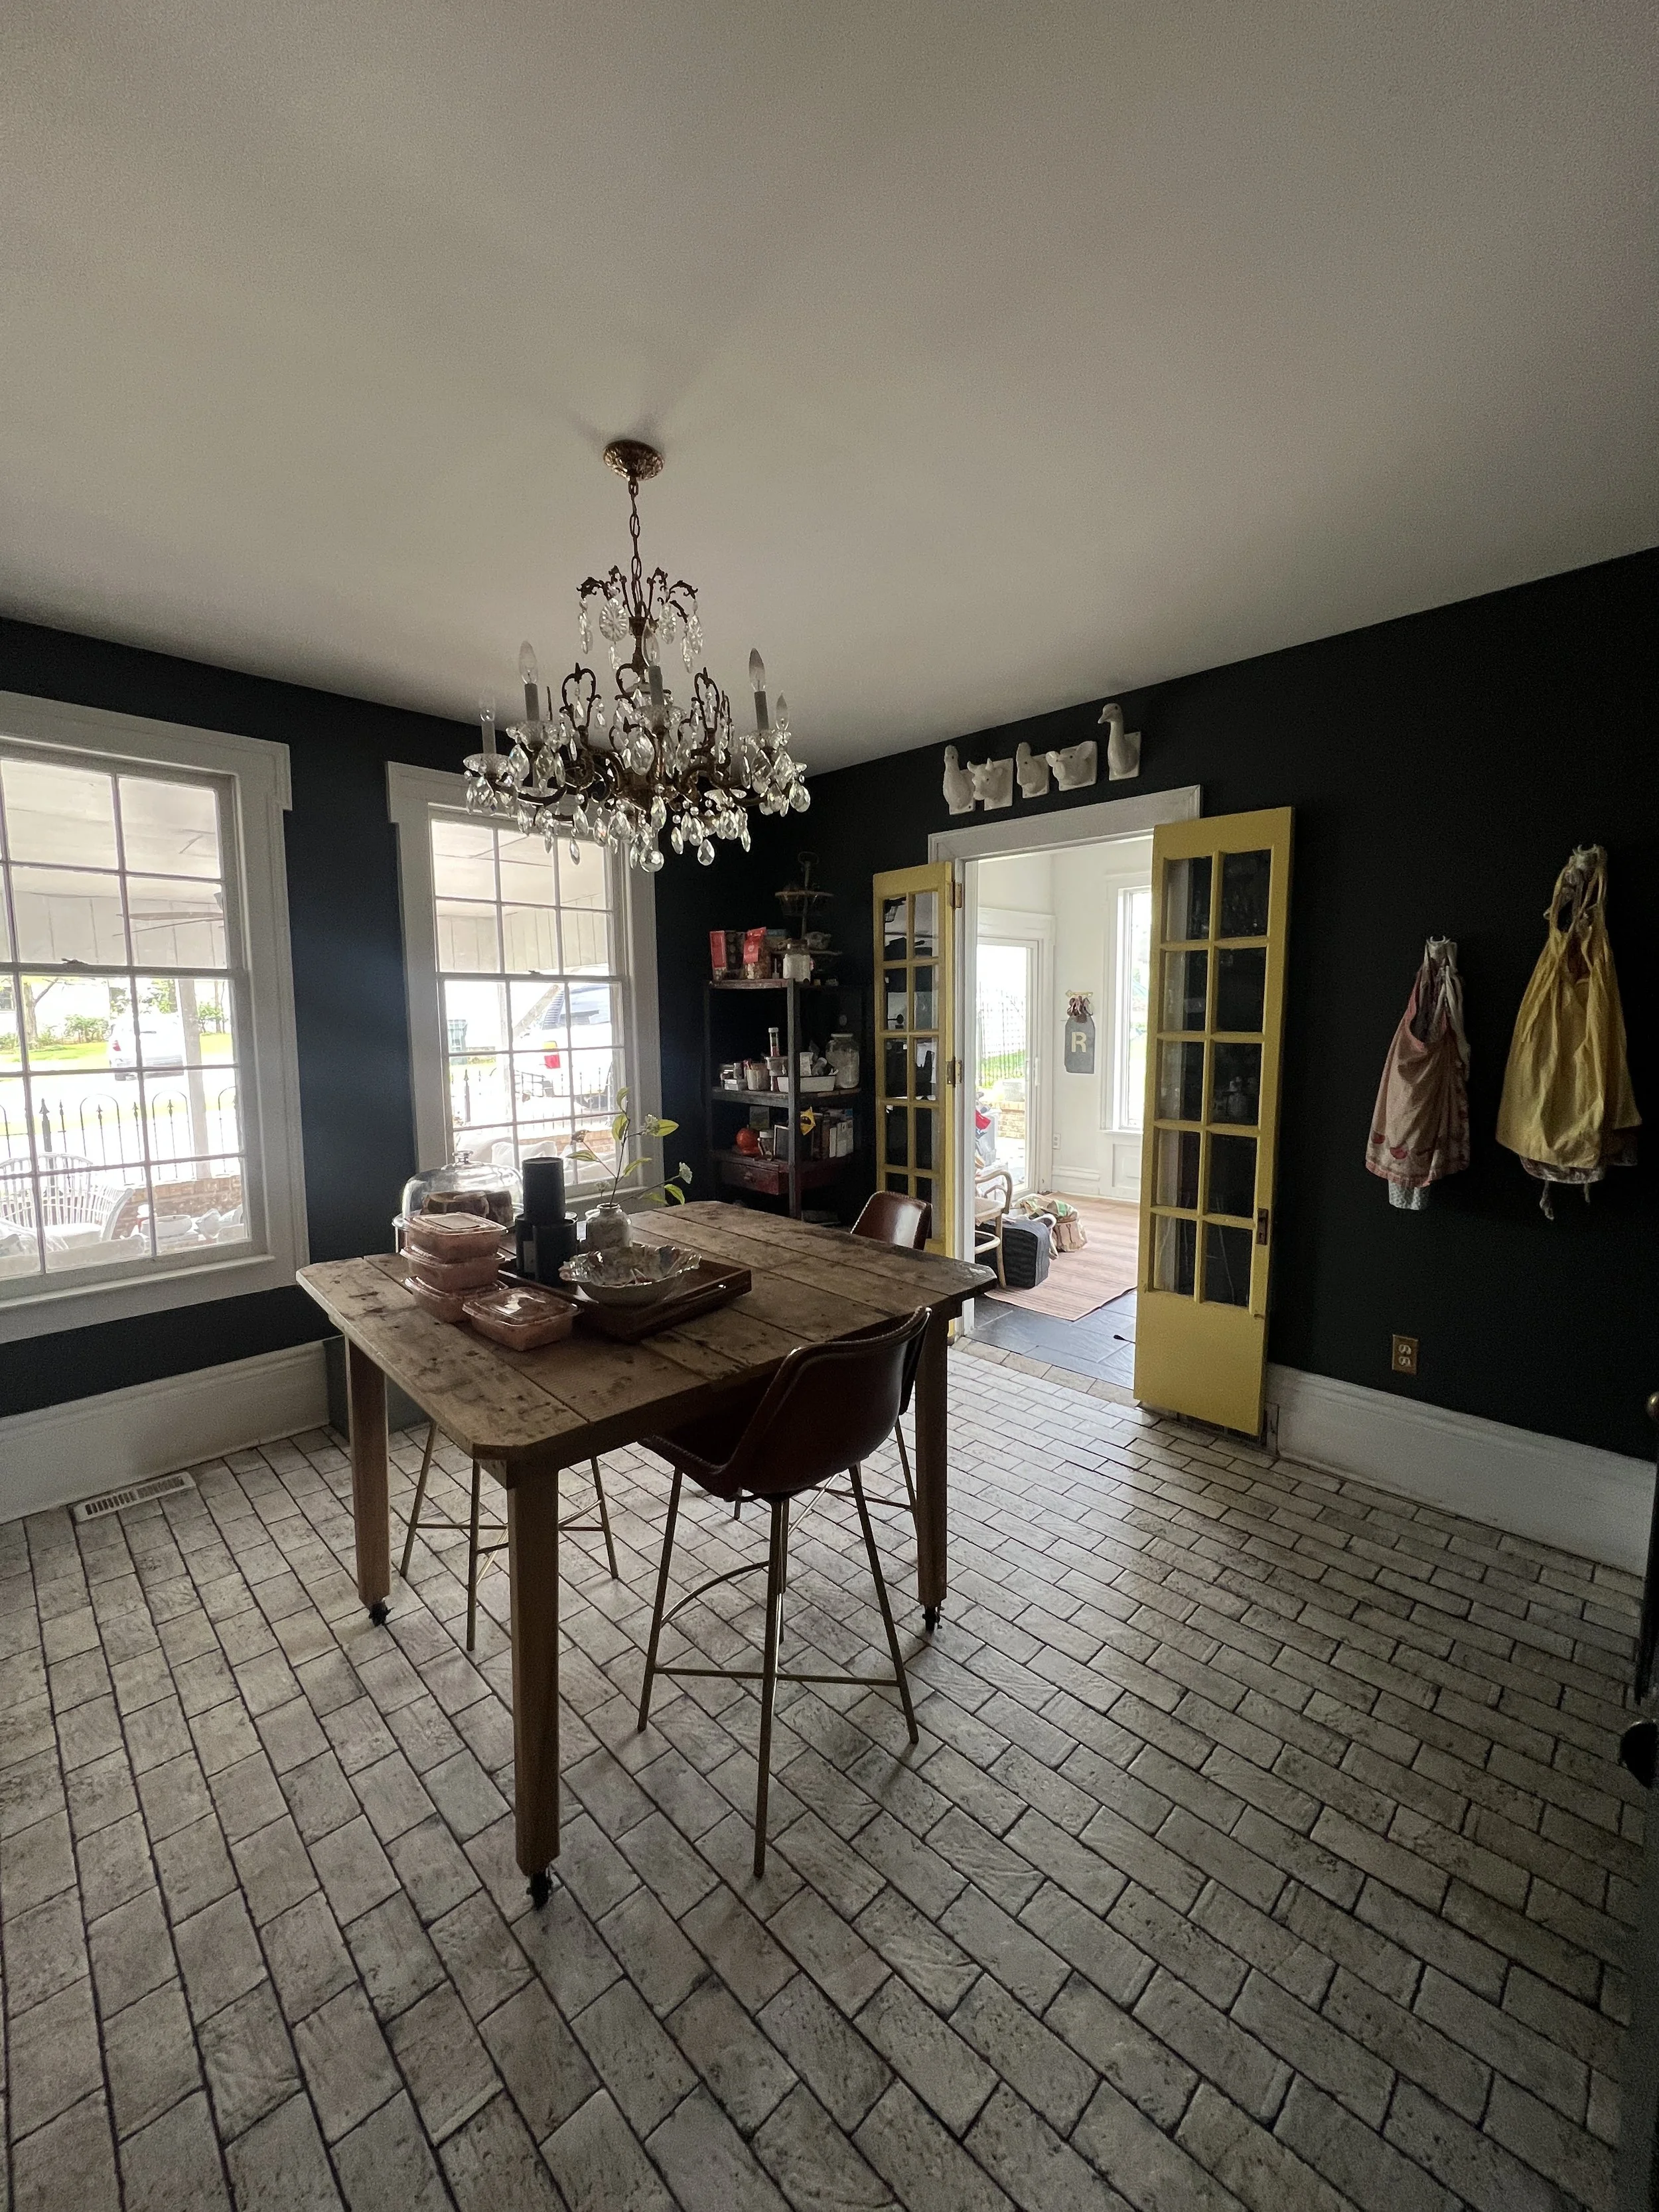
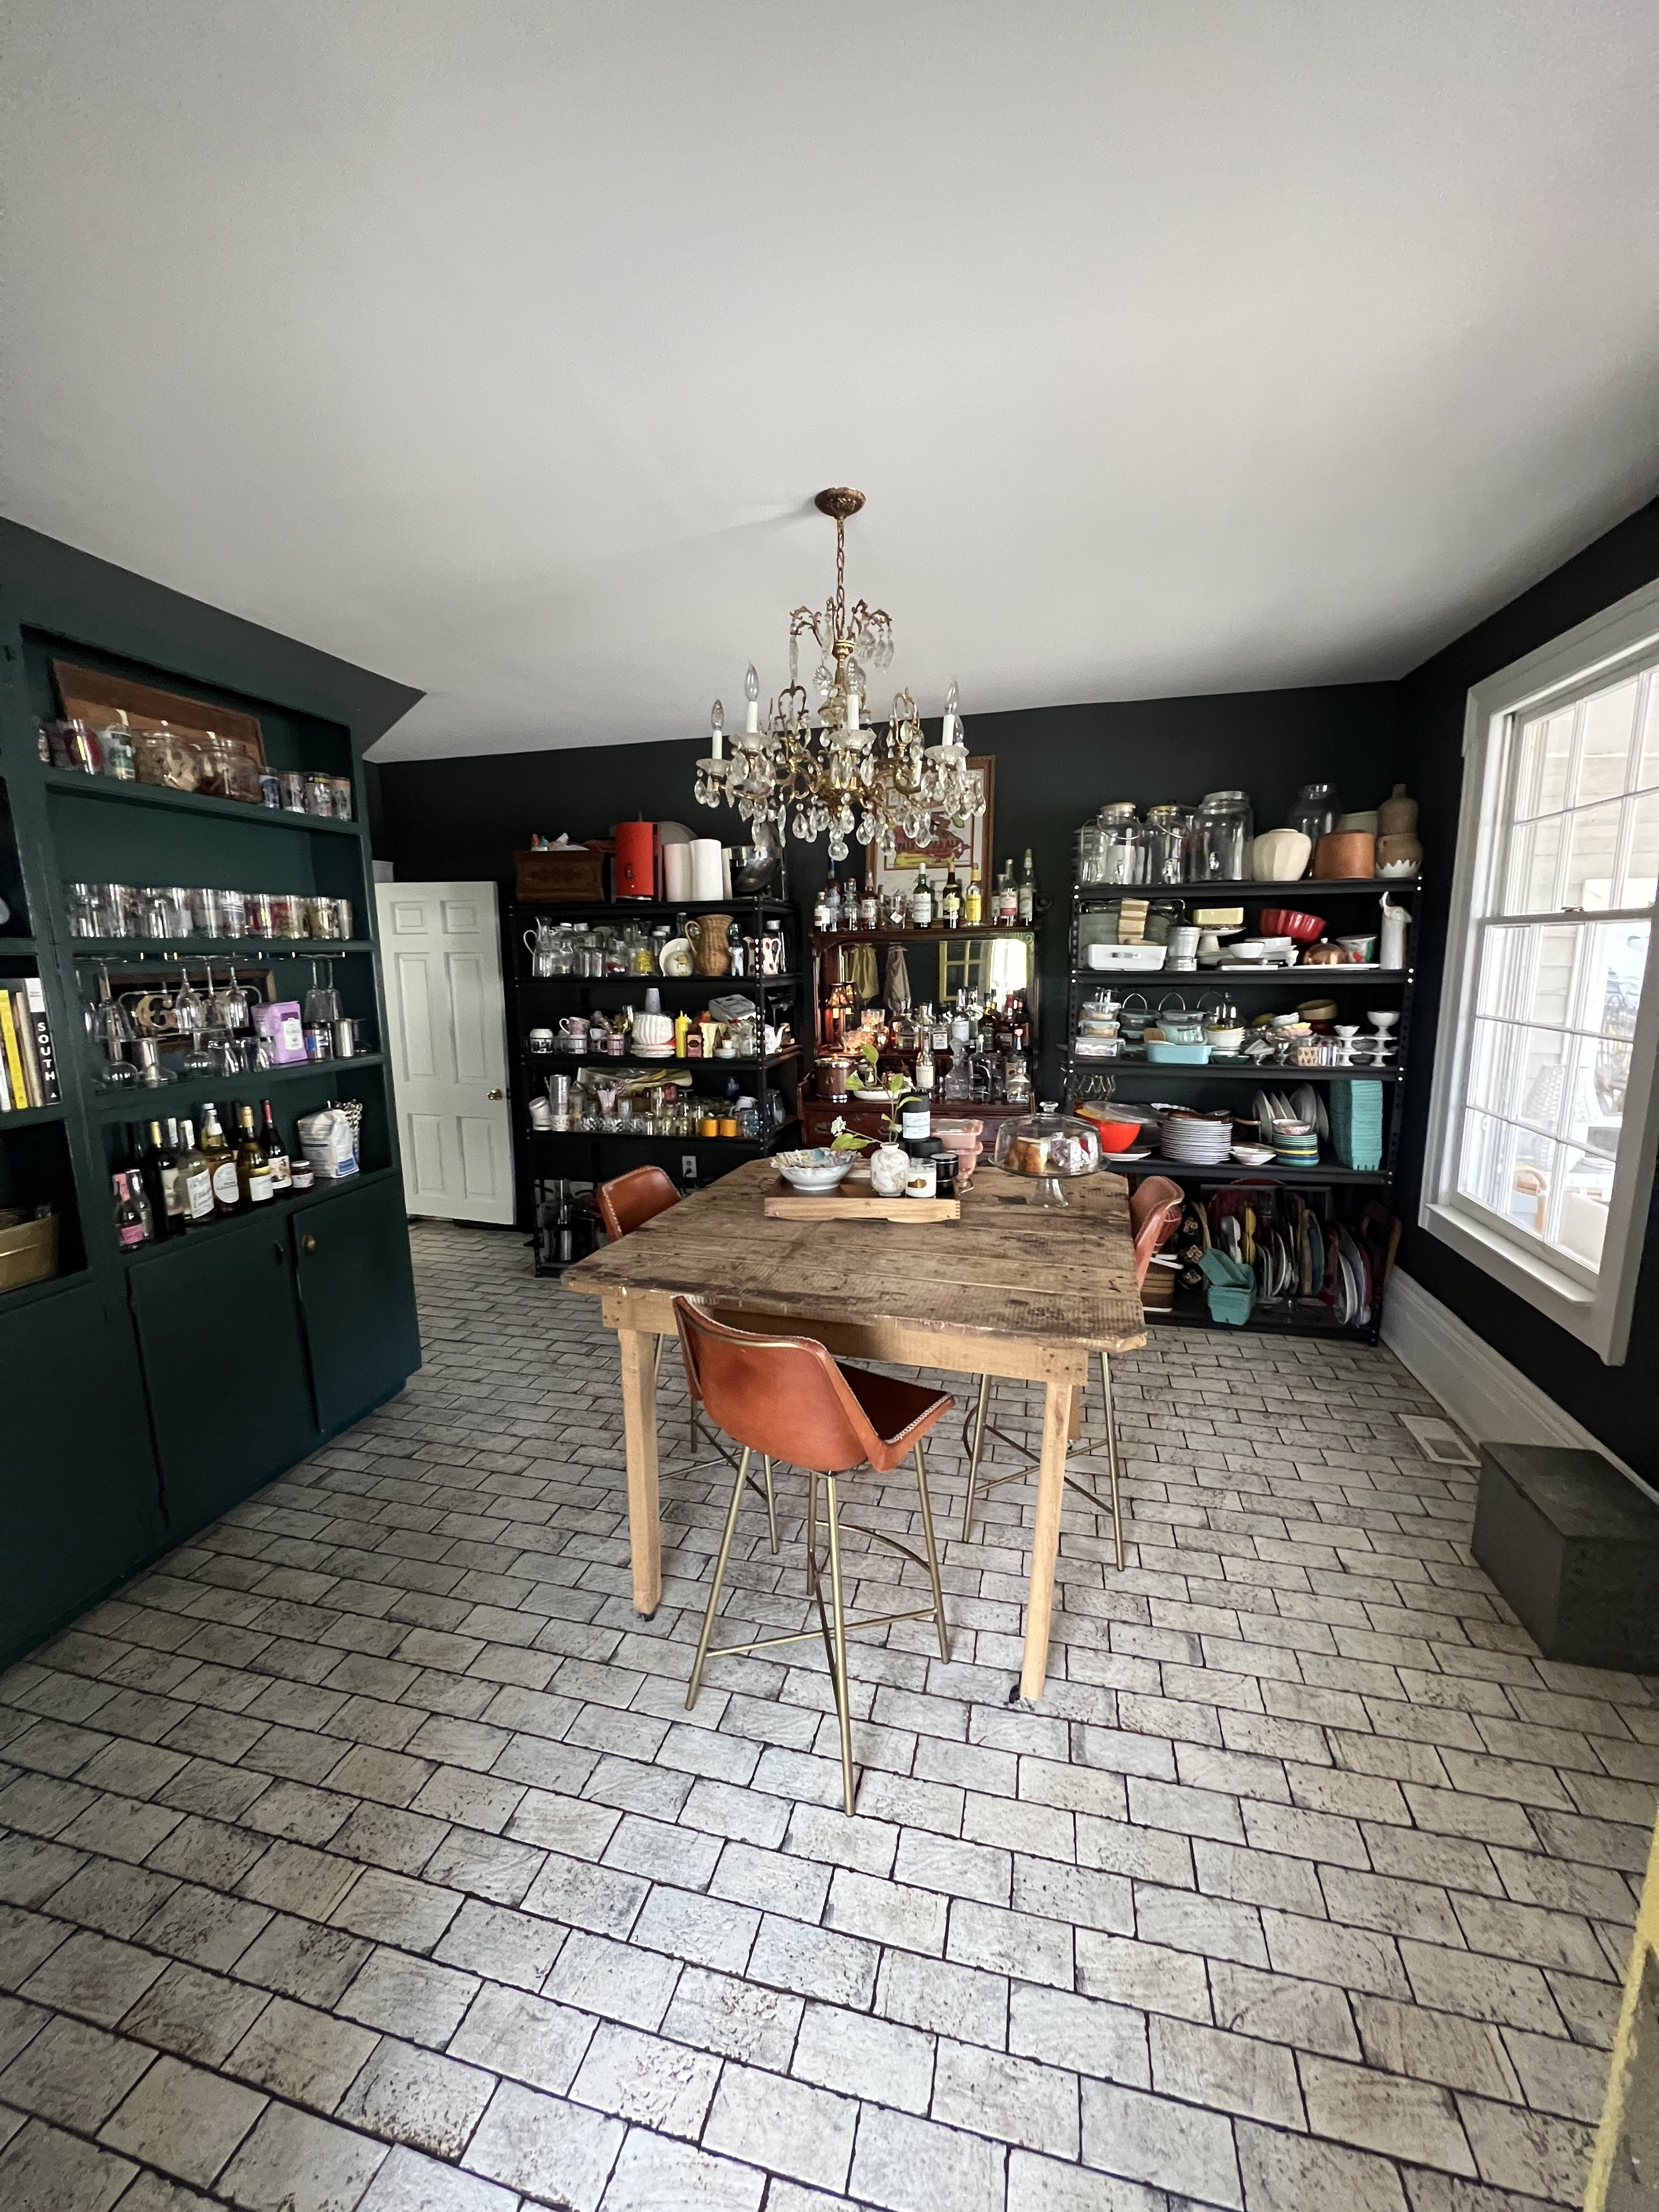
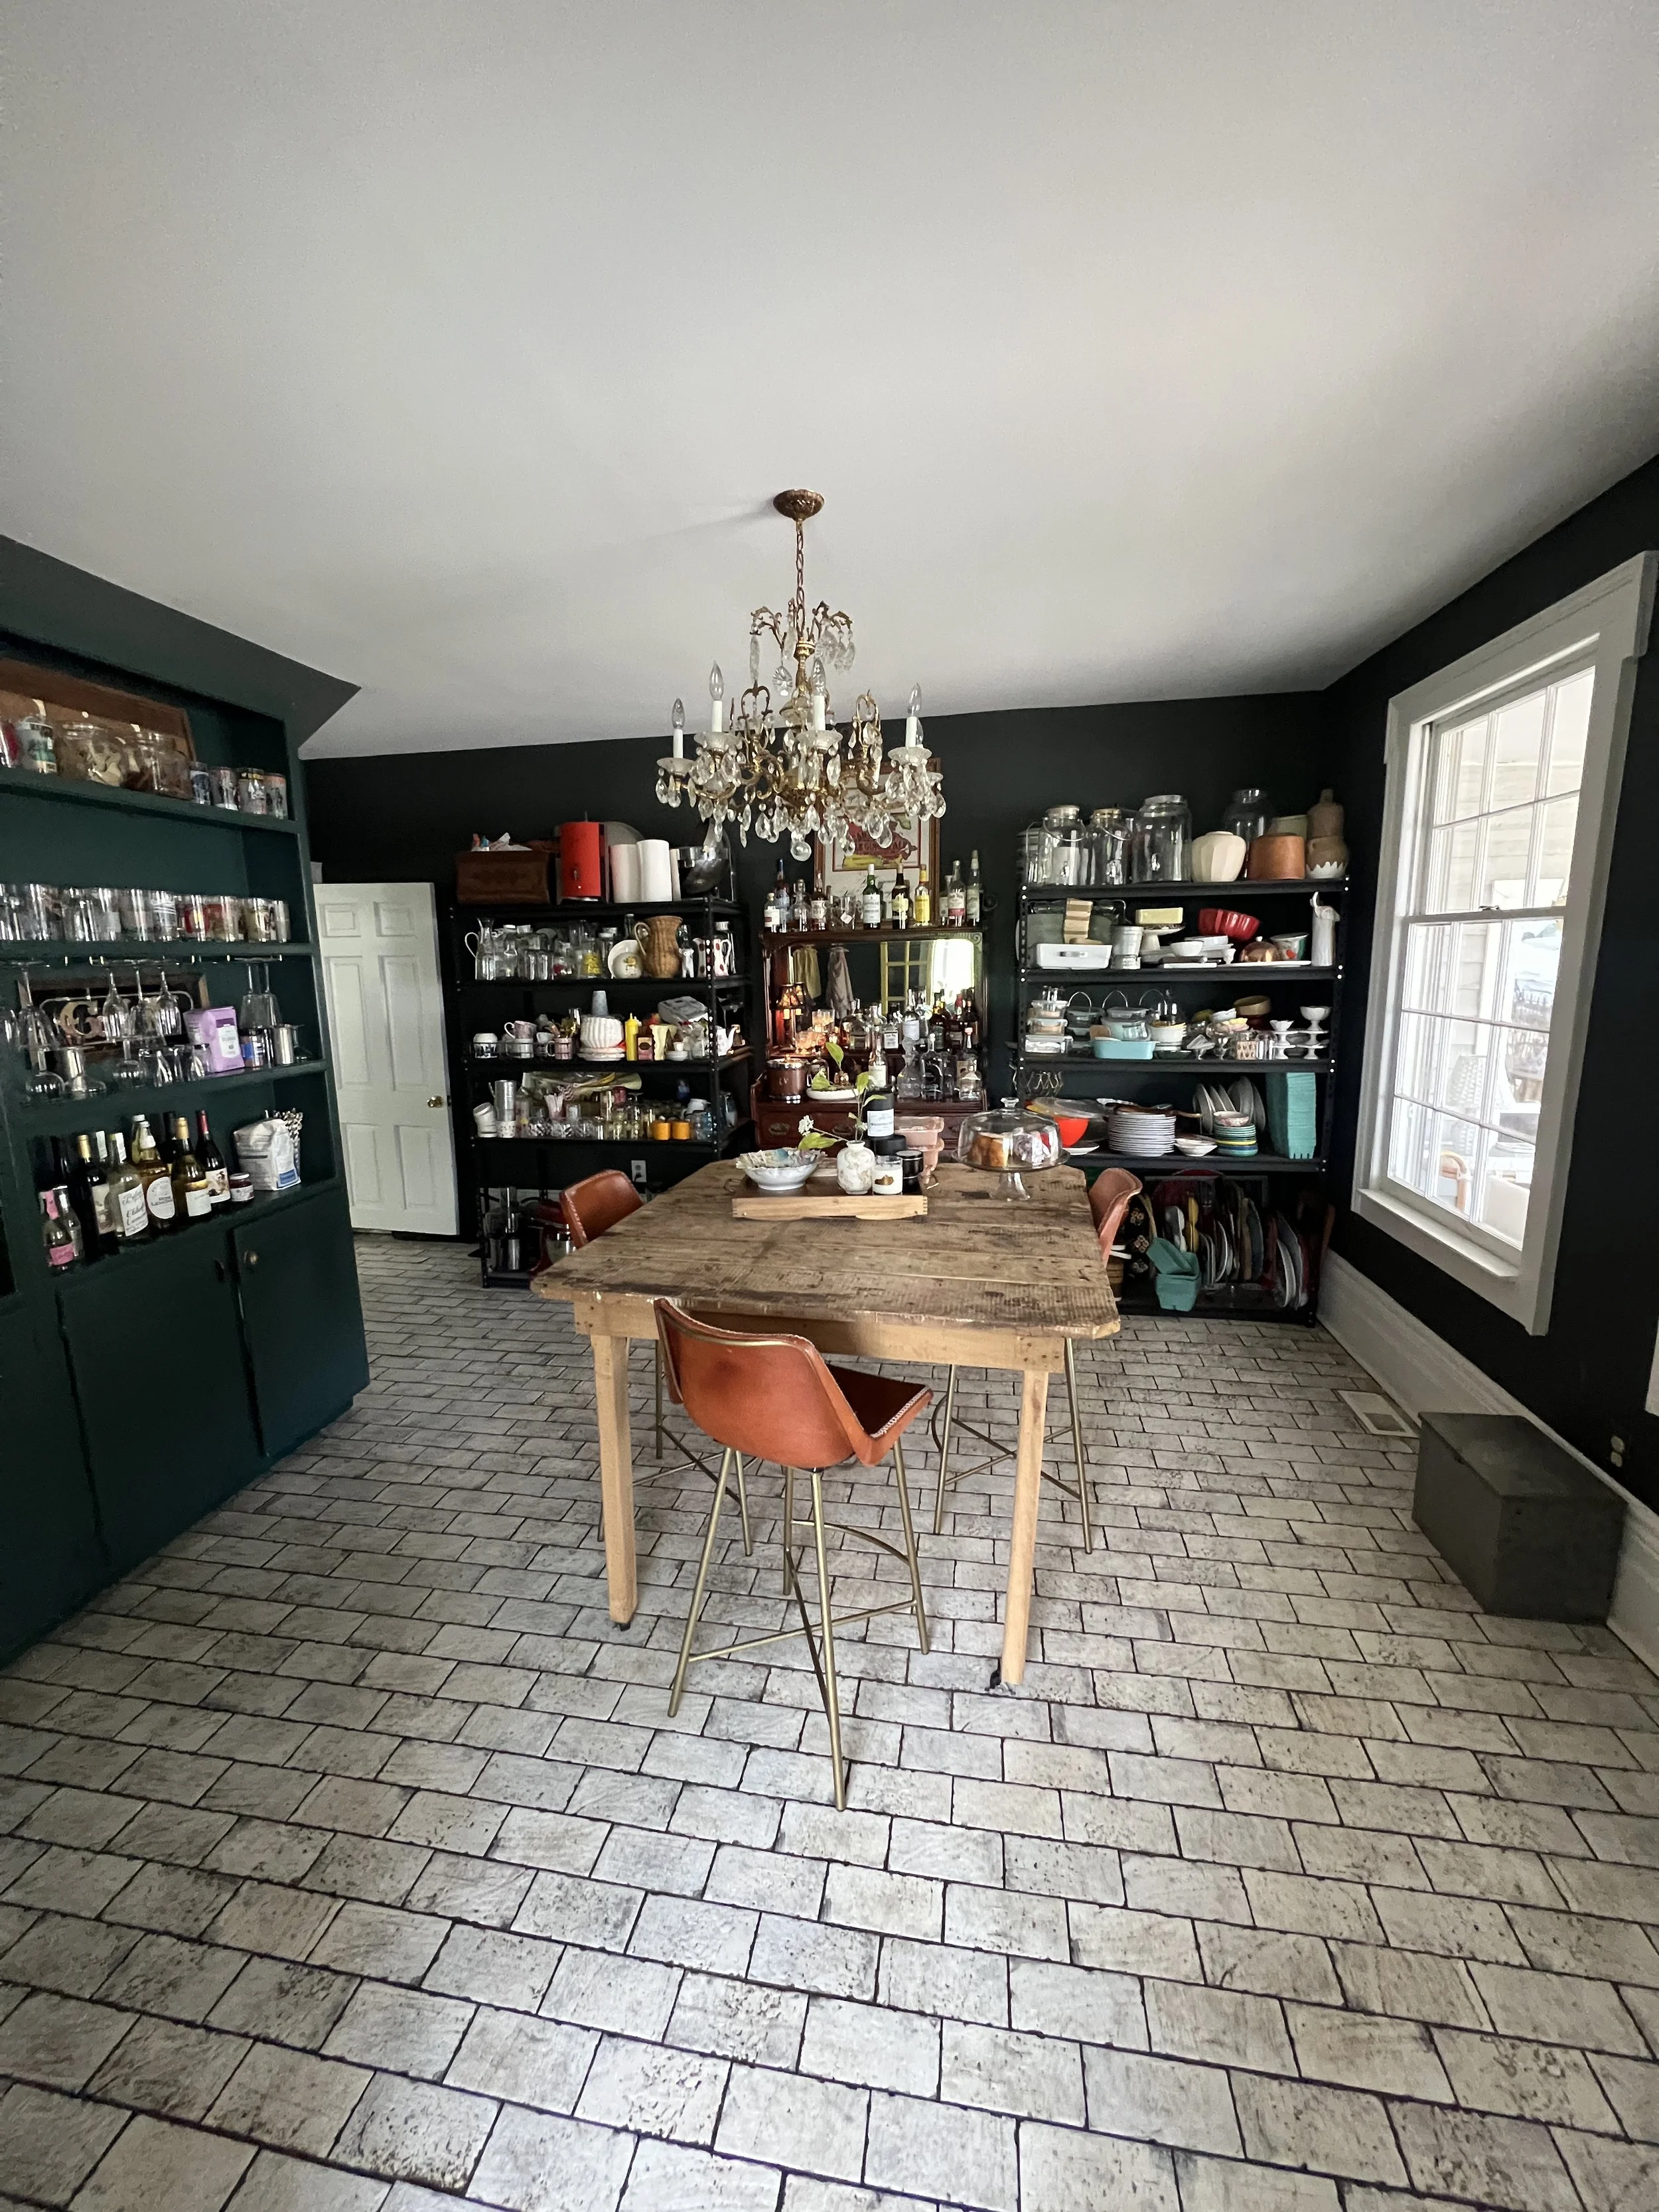
As a reminder- check out all the before photos of the space below and in my week 1 blogpost here!


Cabinet Color: Yosemite Yellow by Benjamin Moore (semi-gloss)
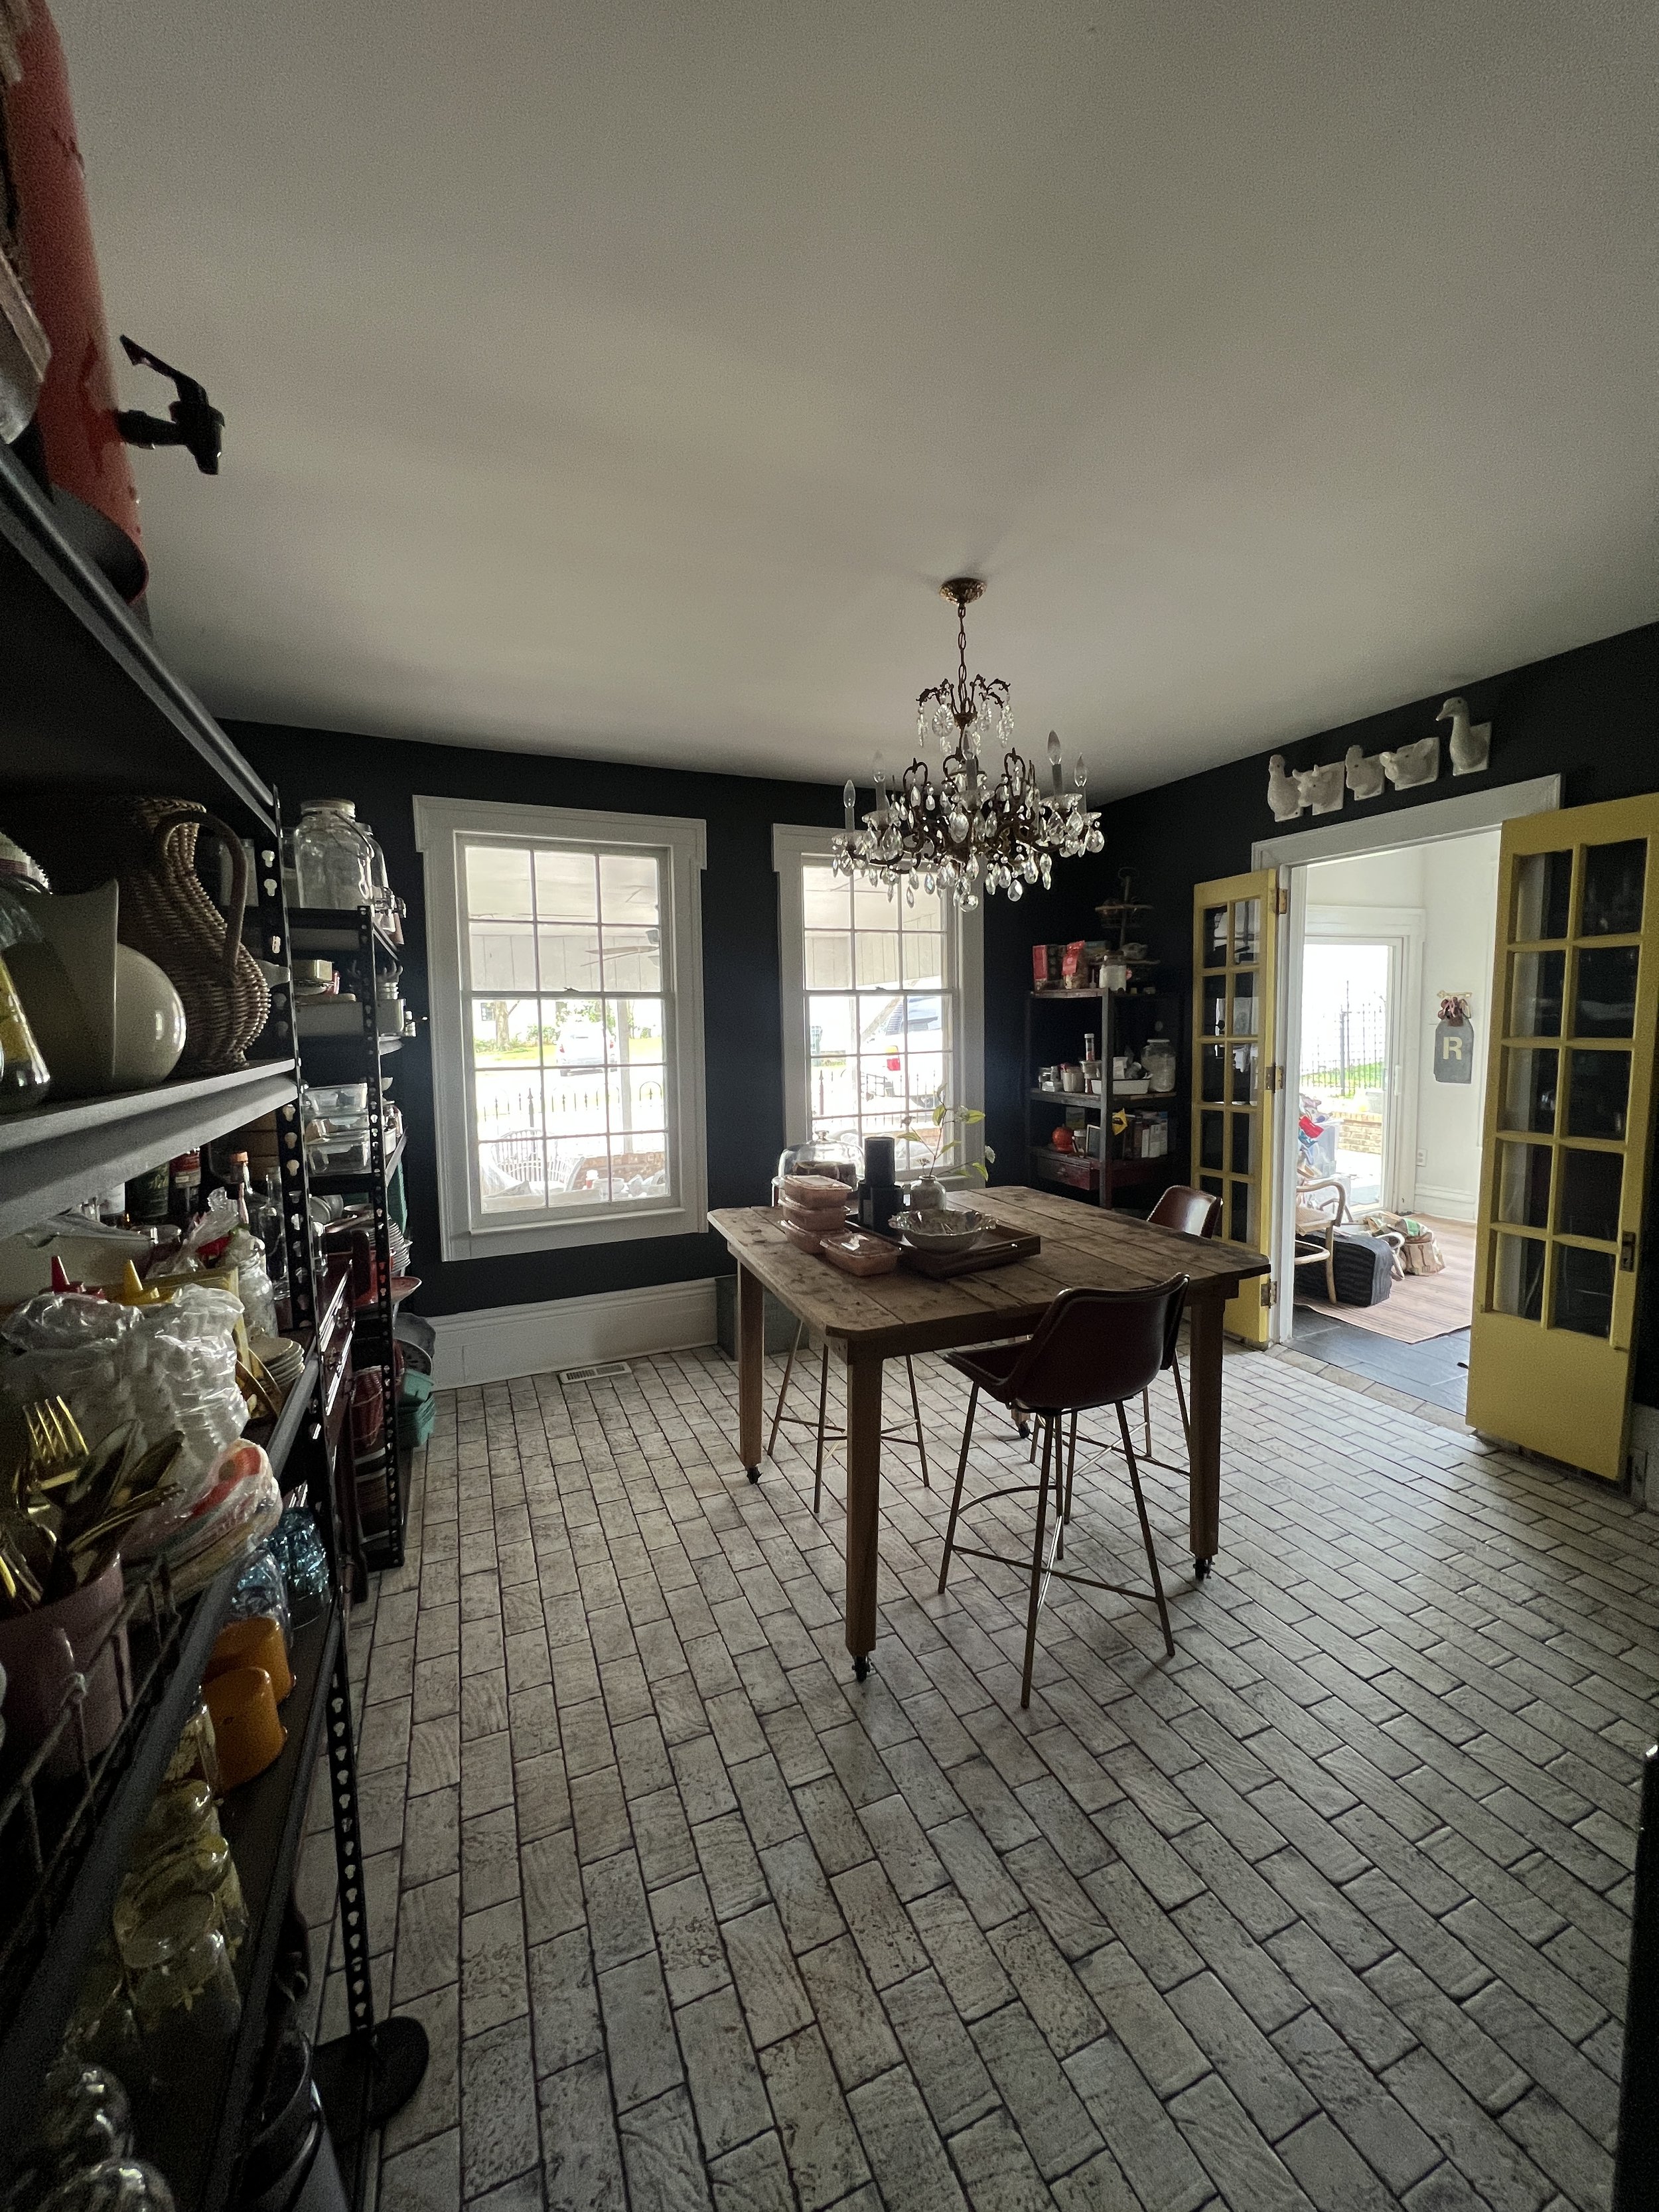
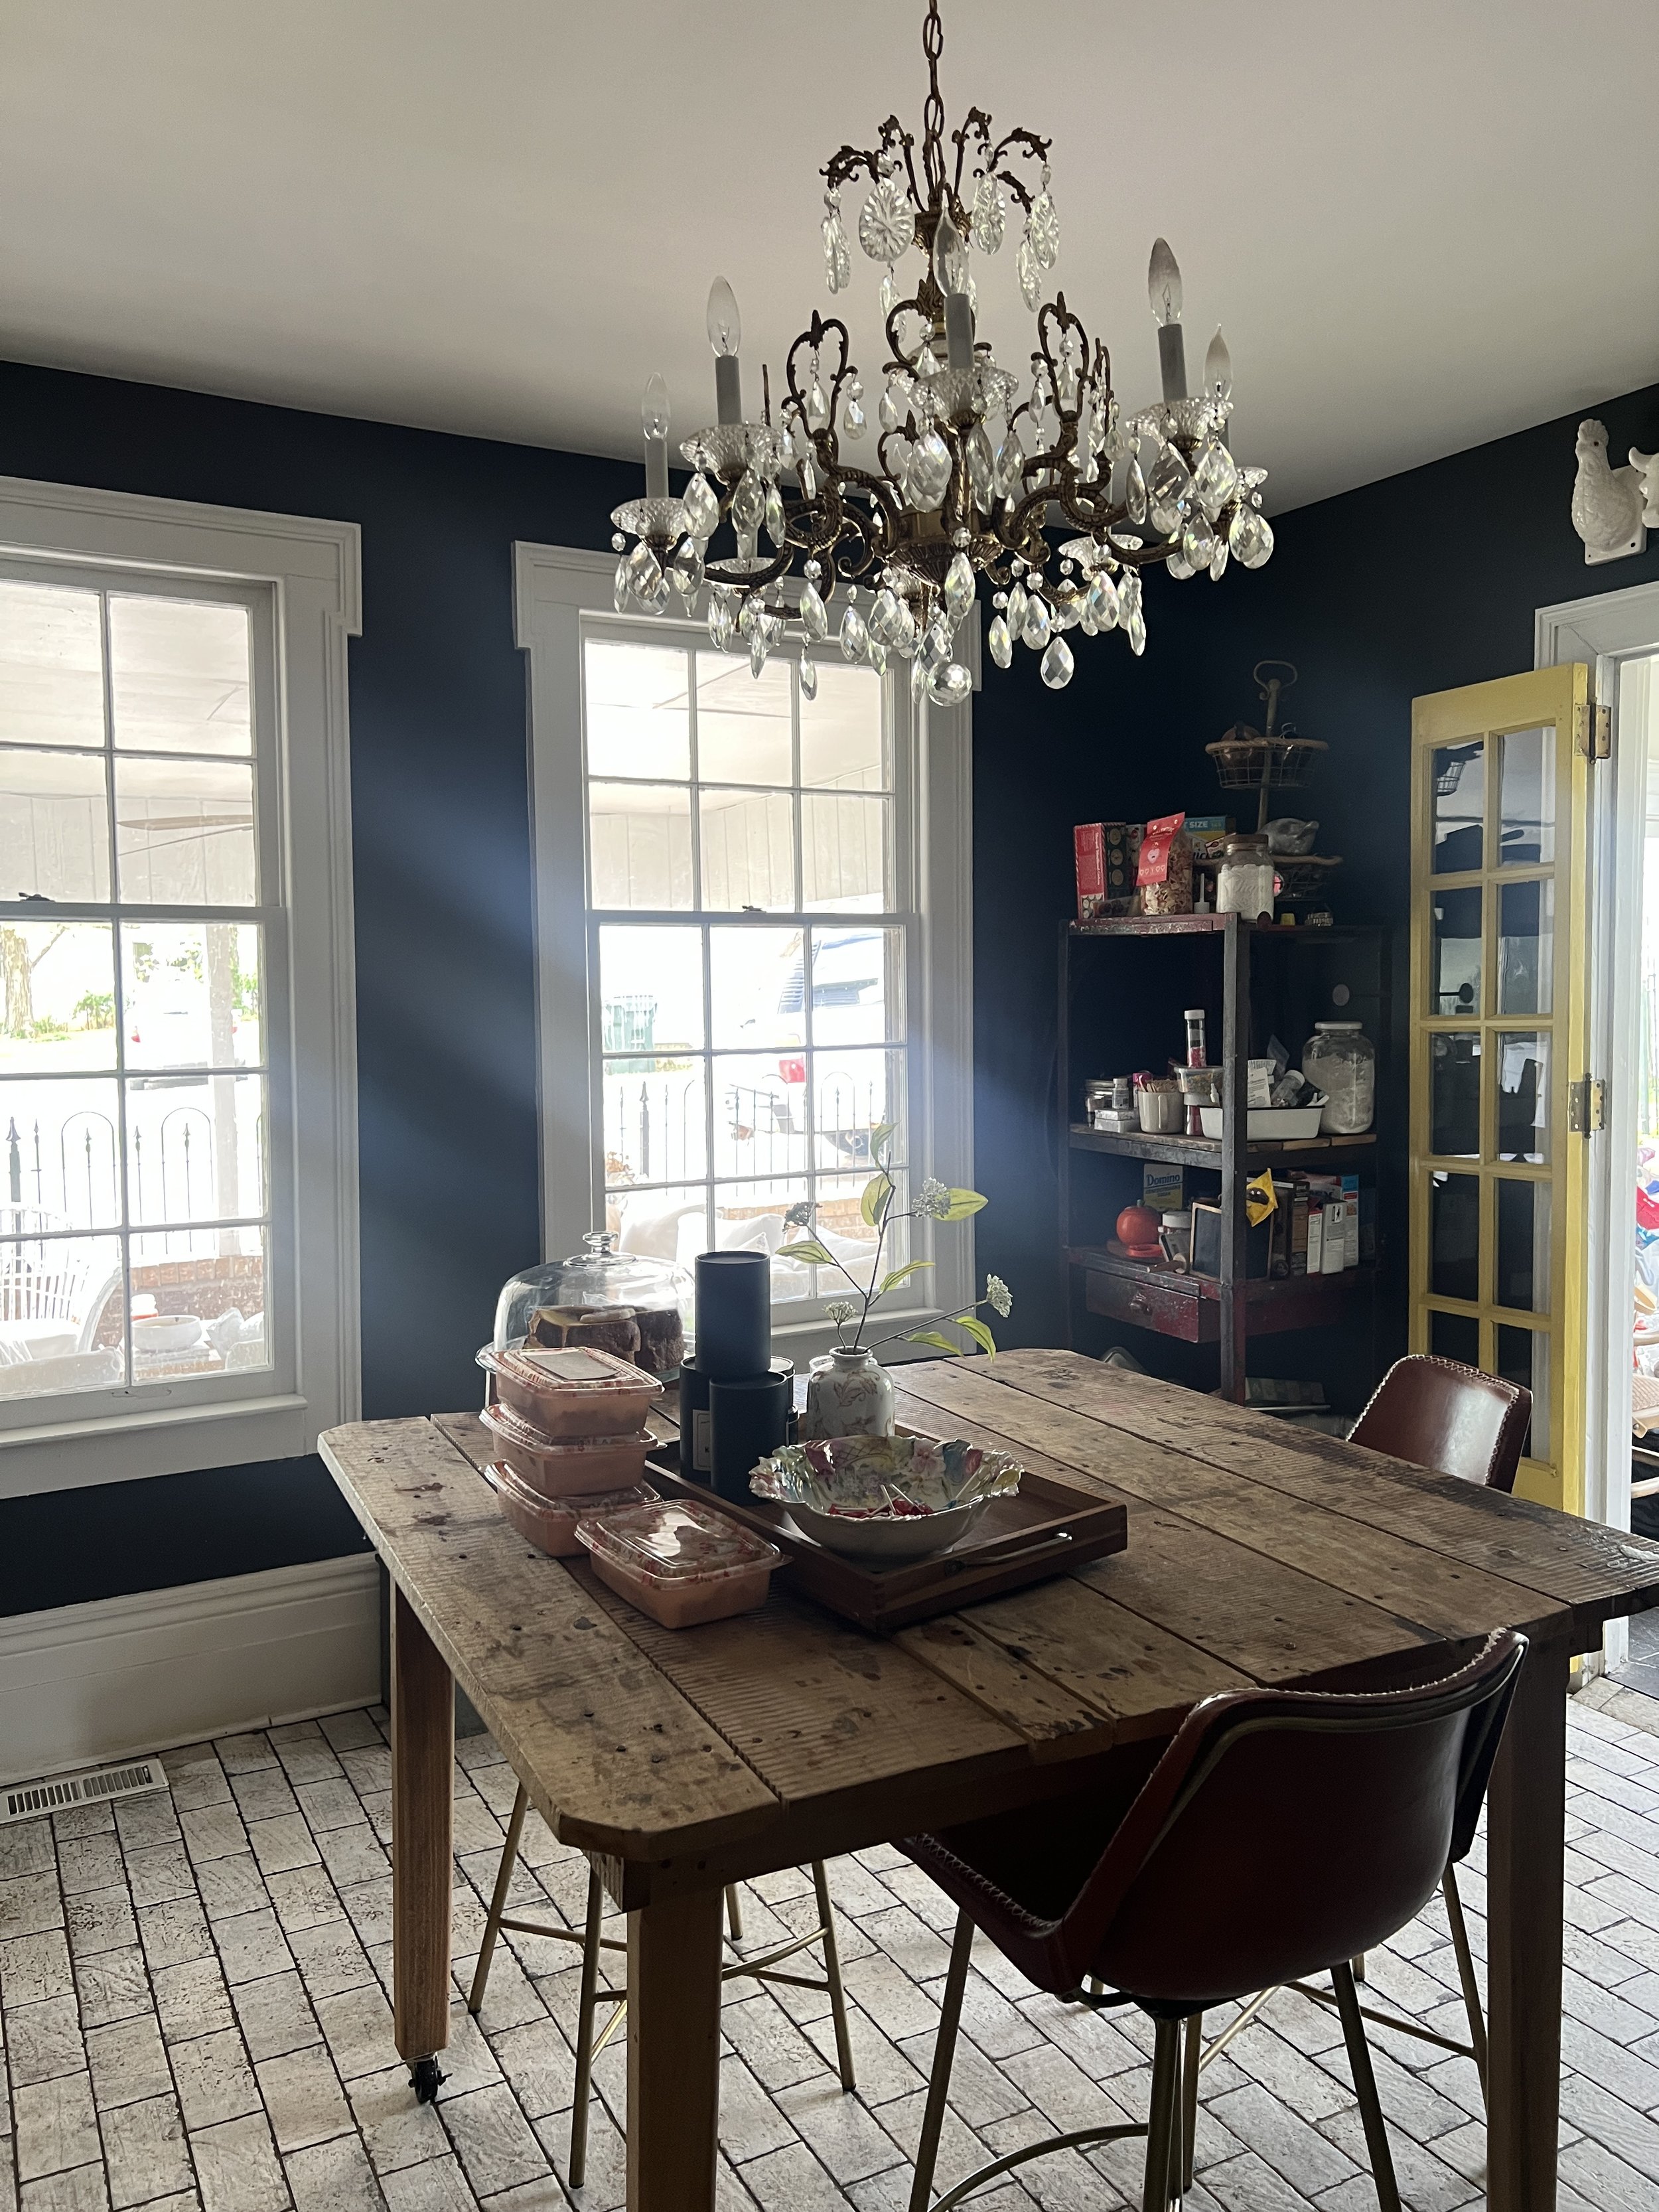
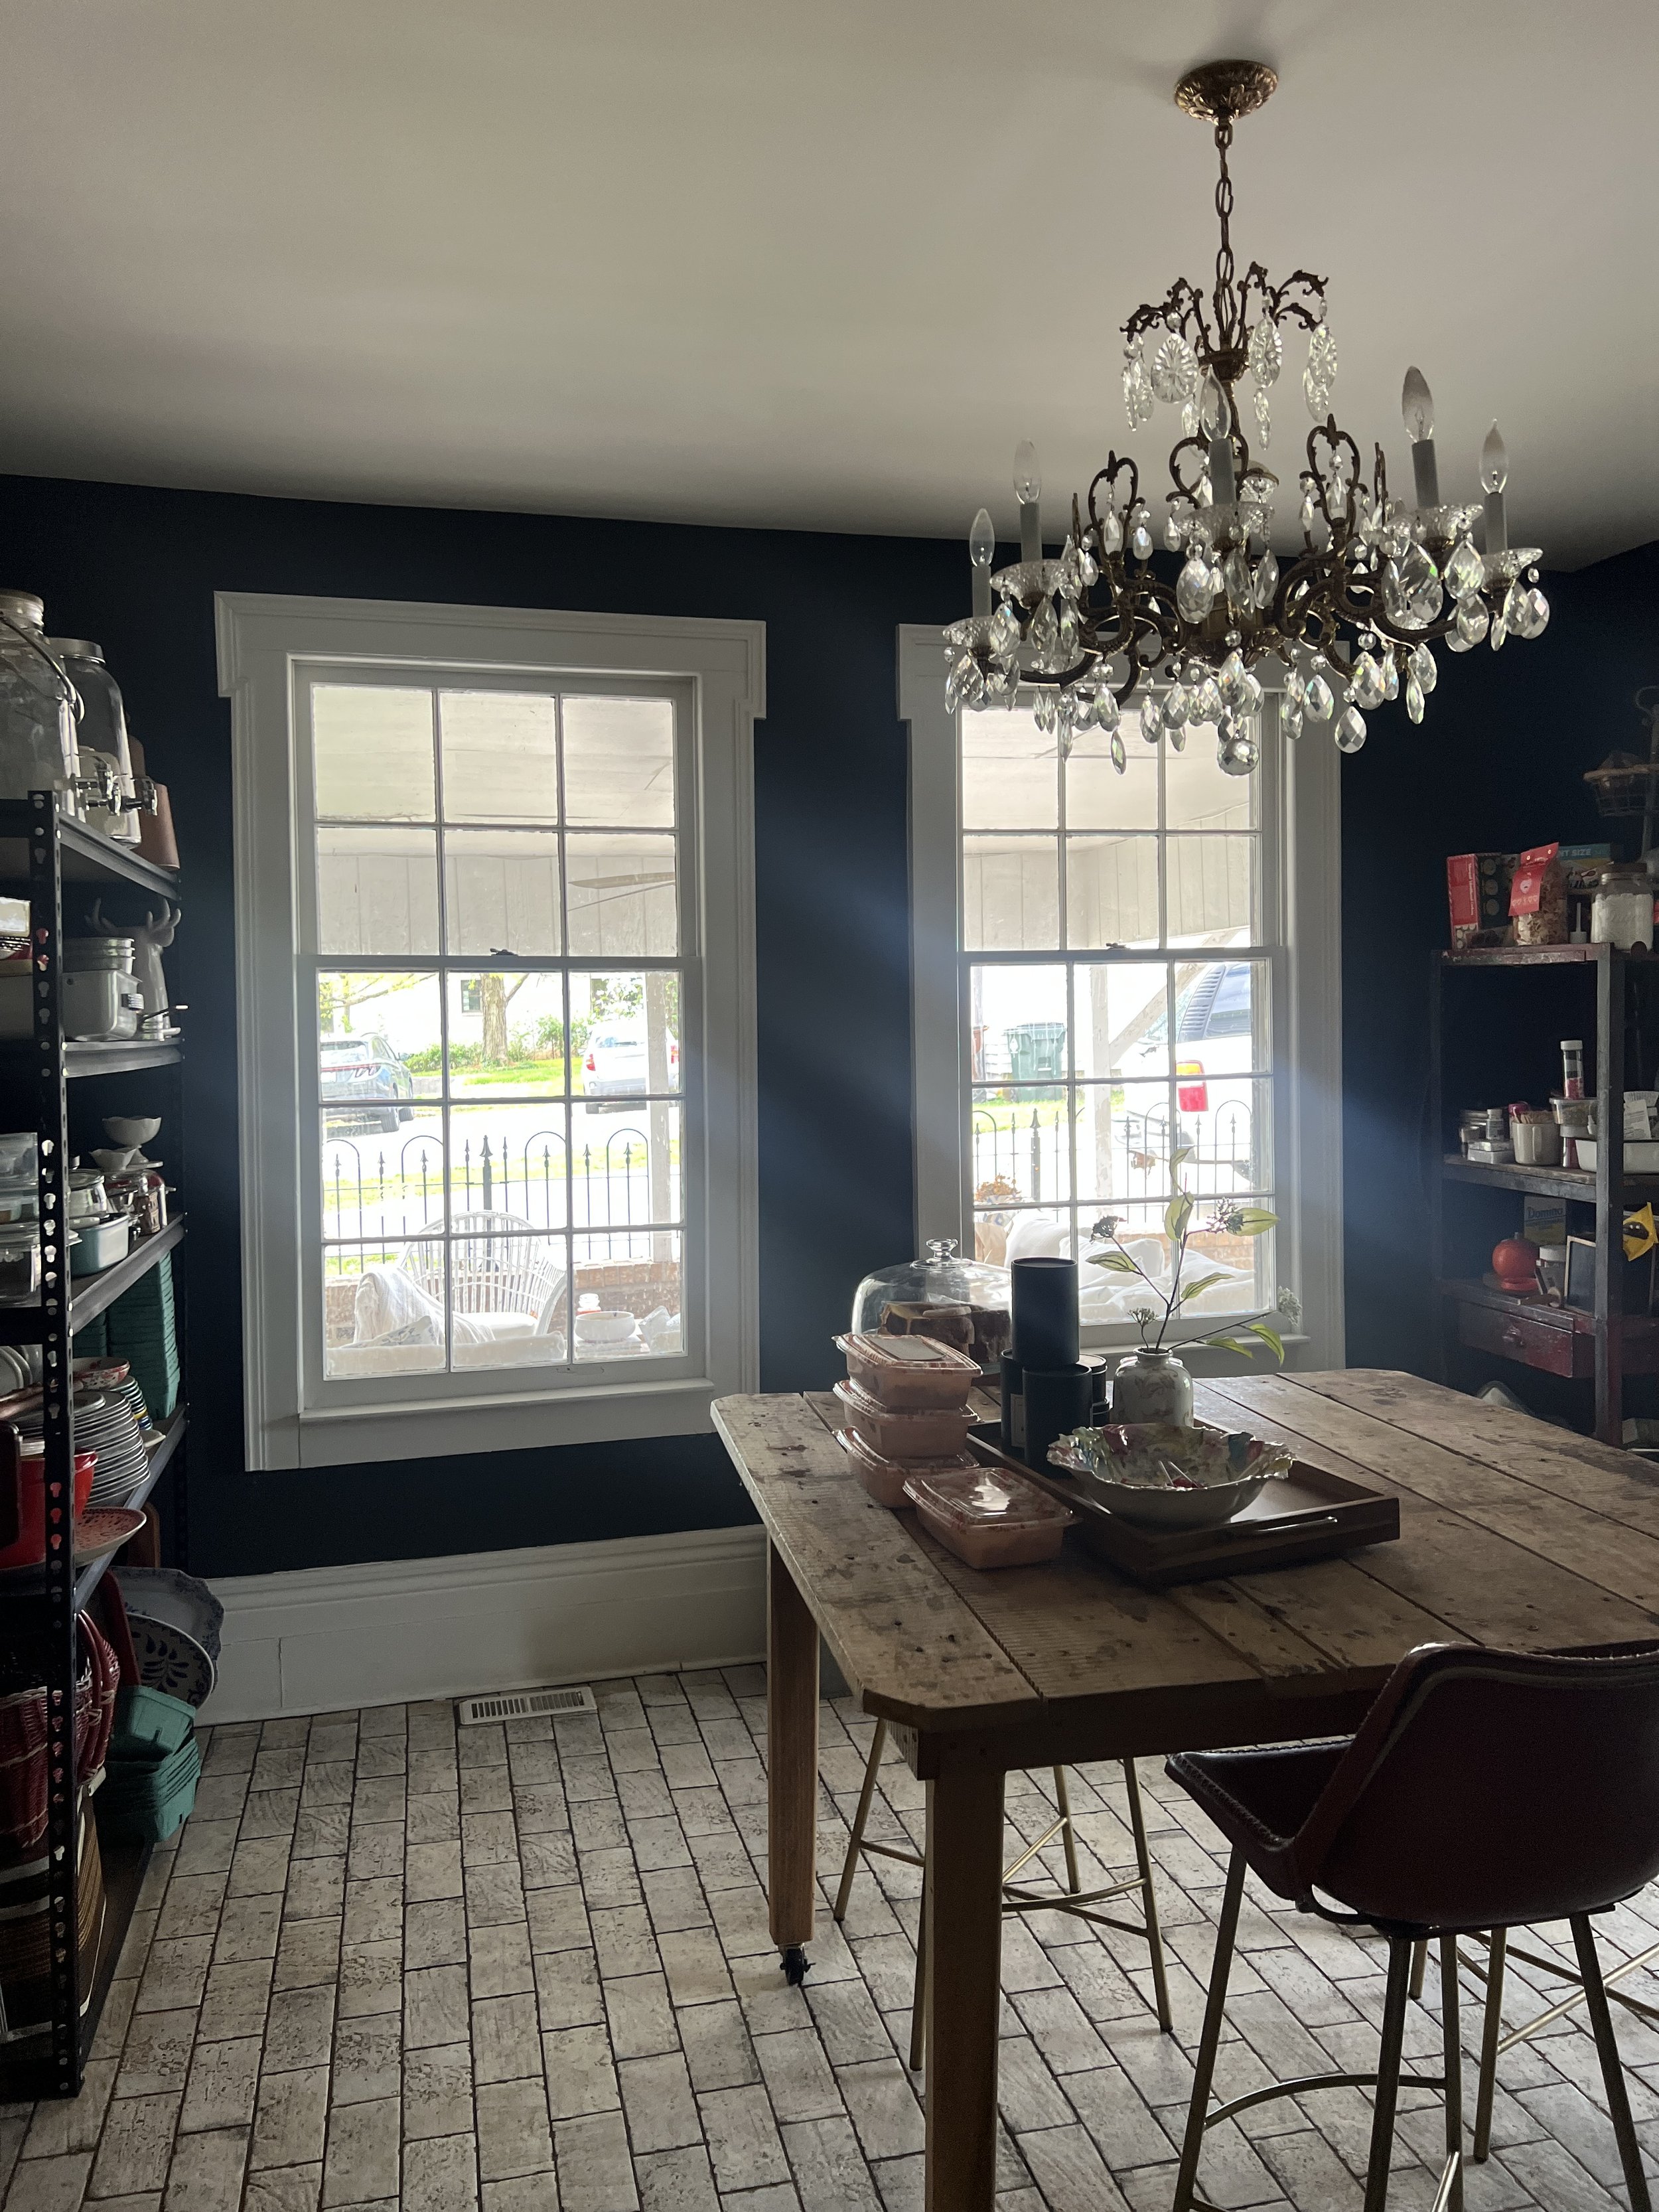
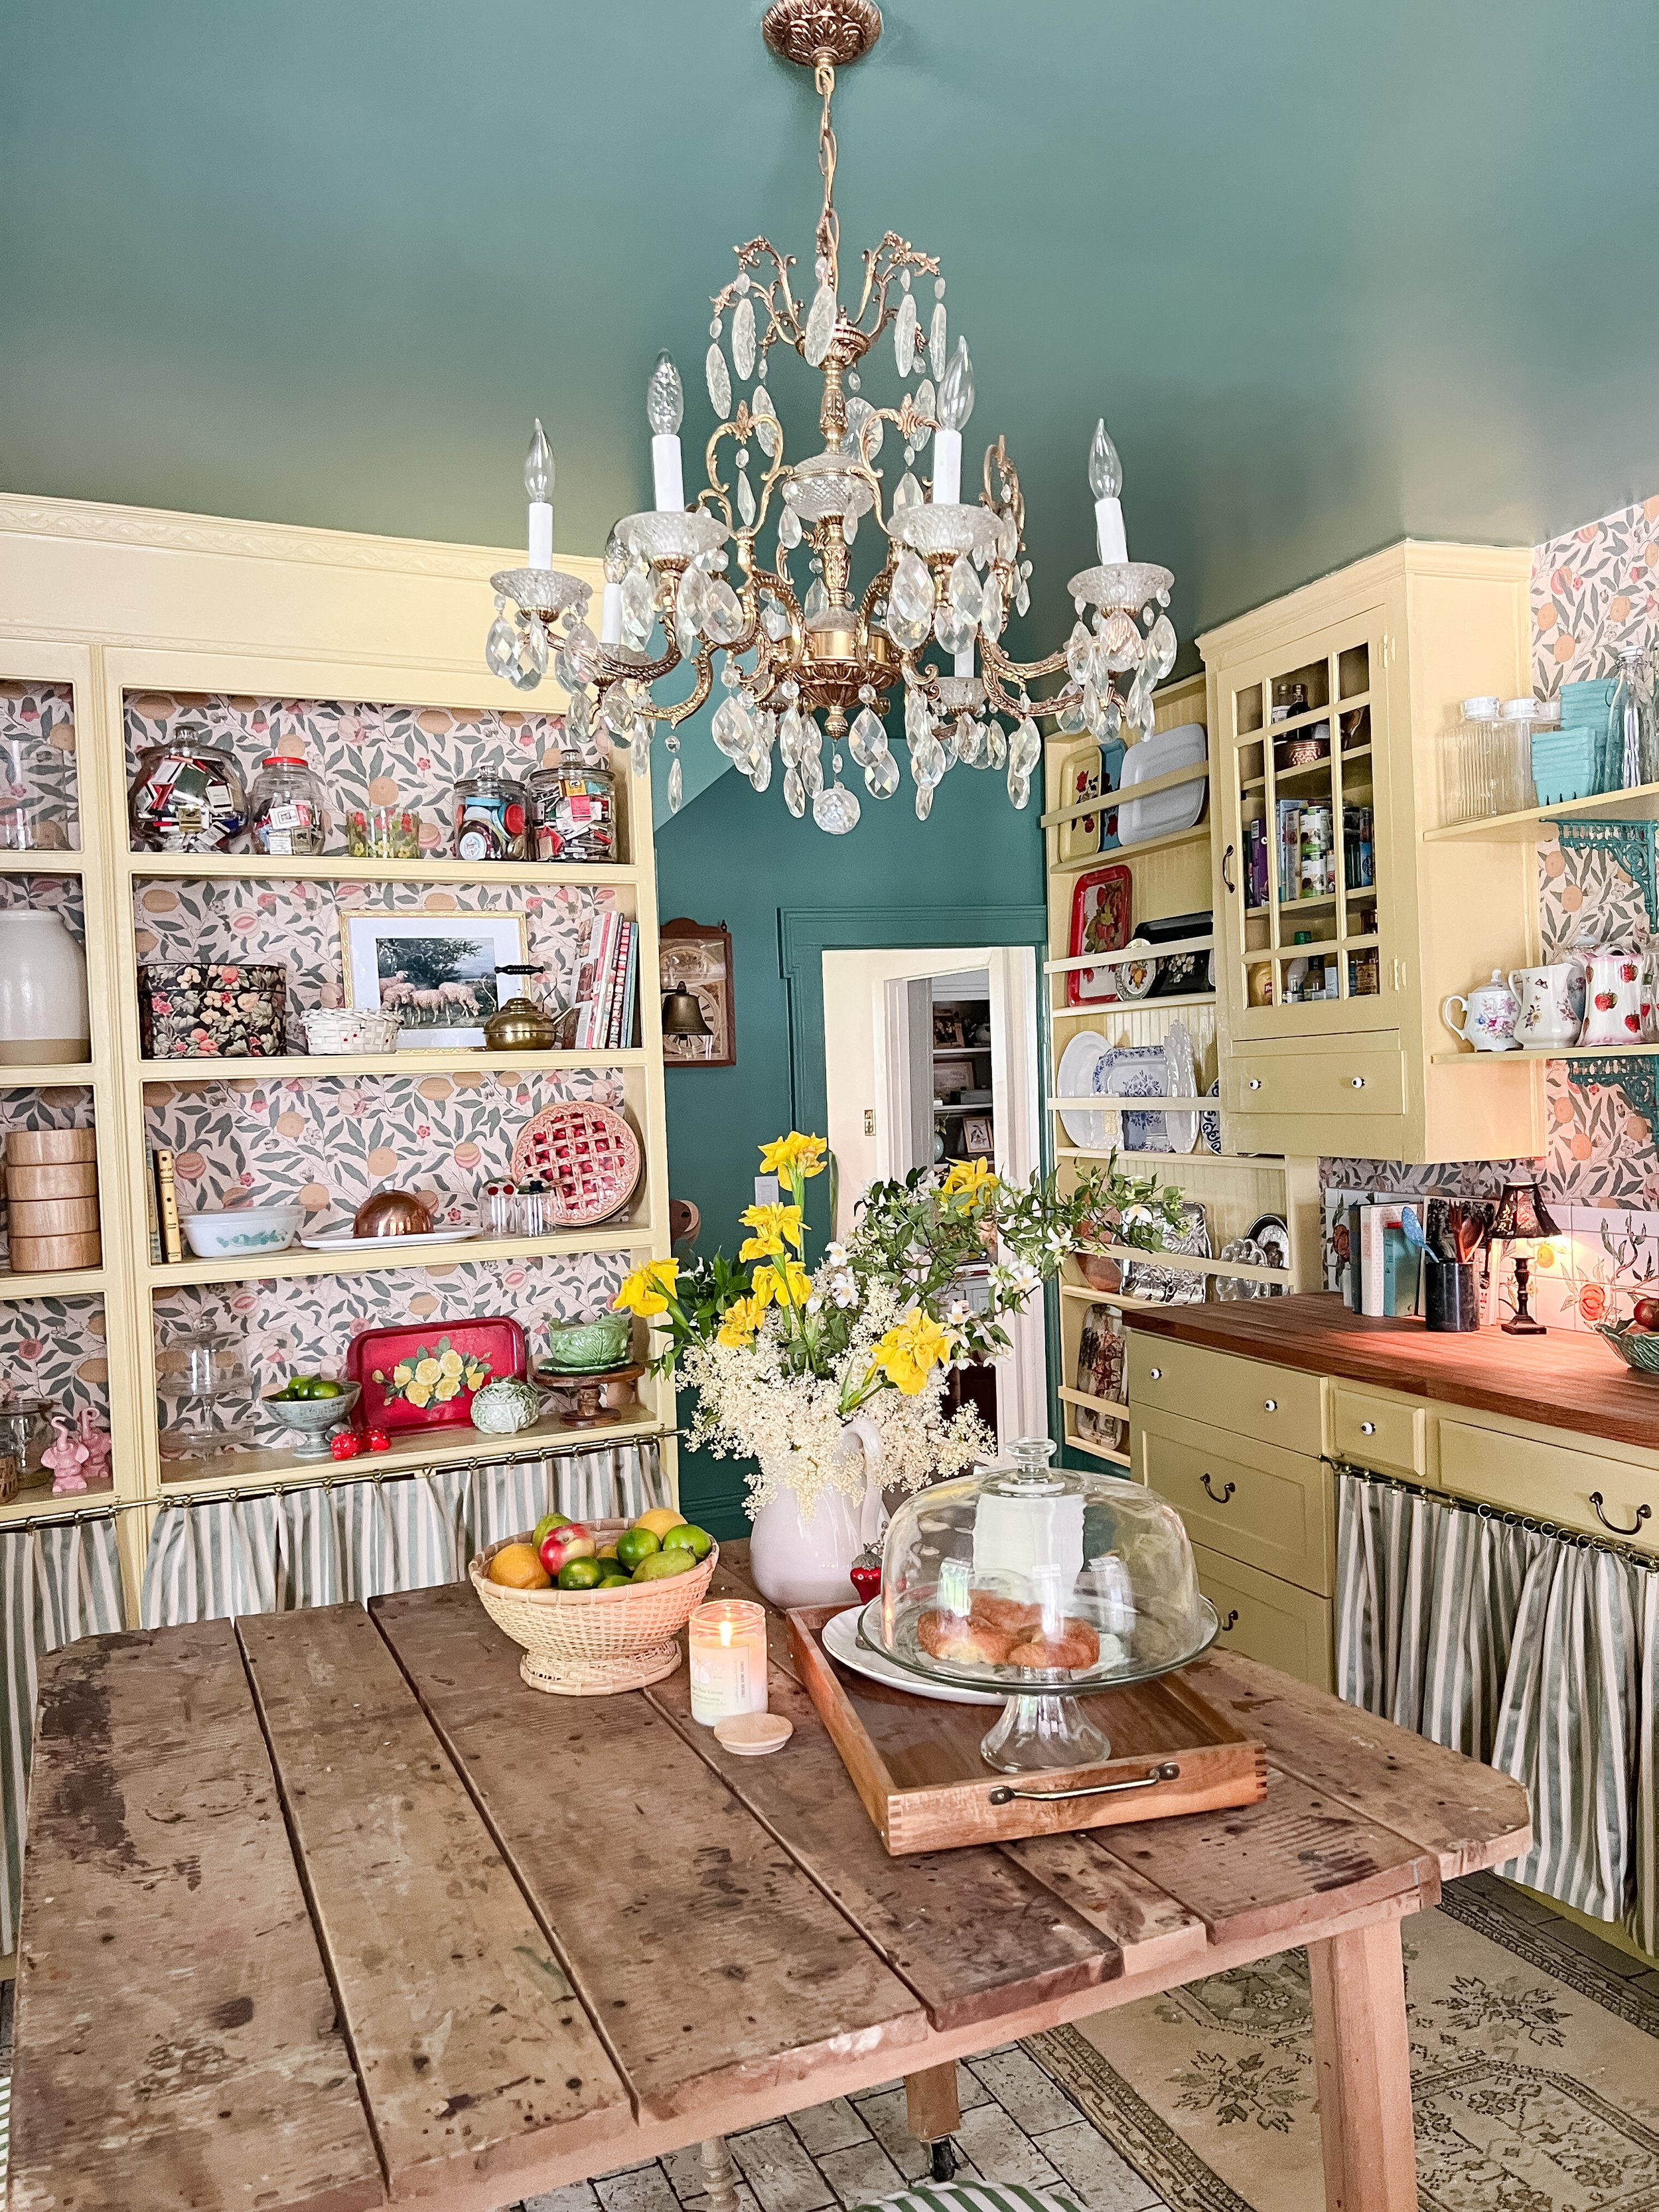
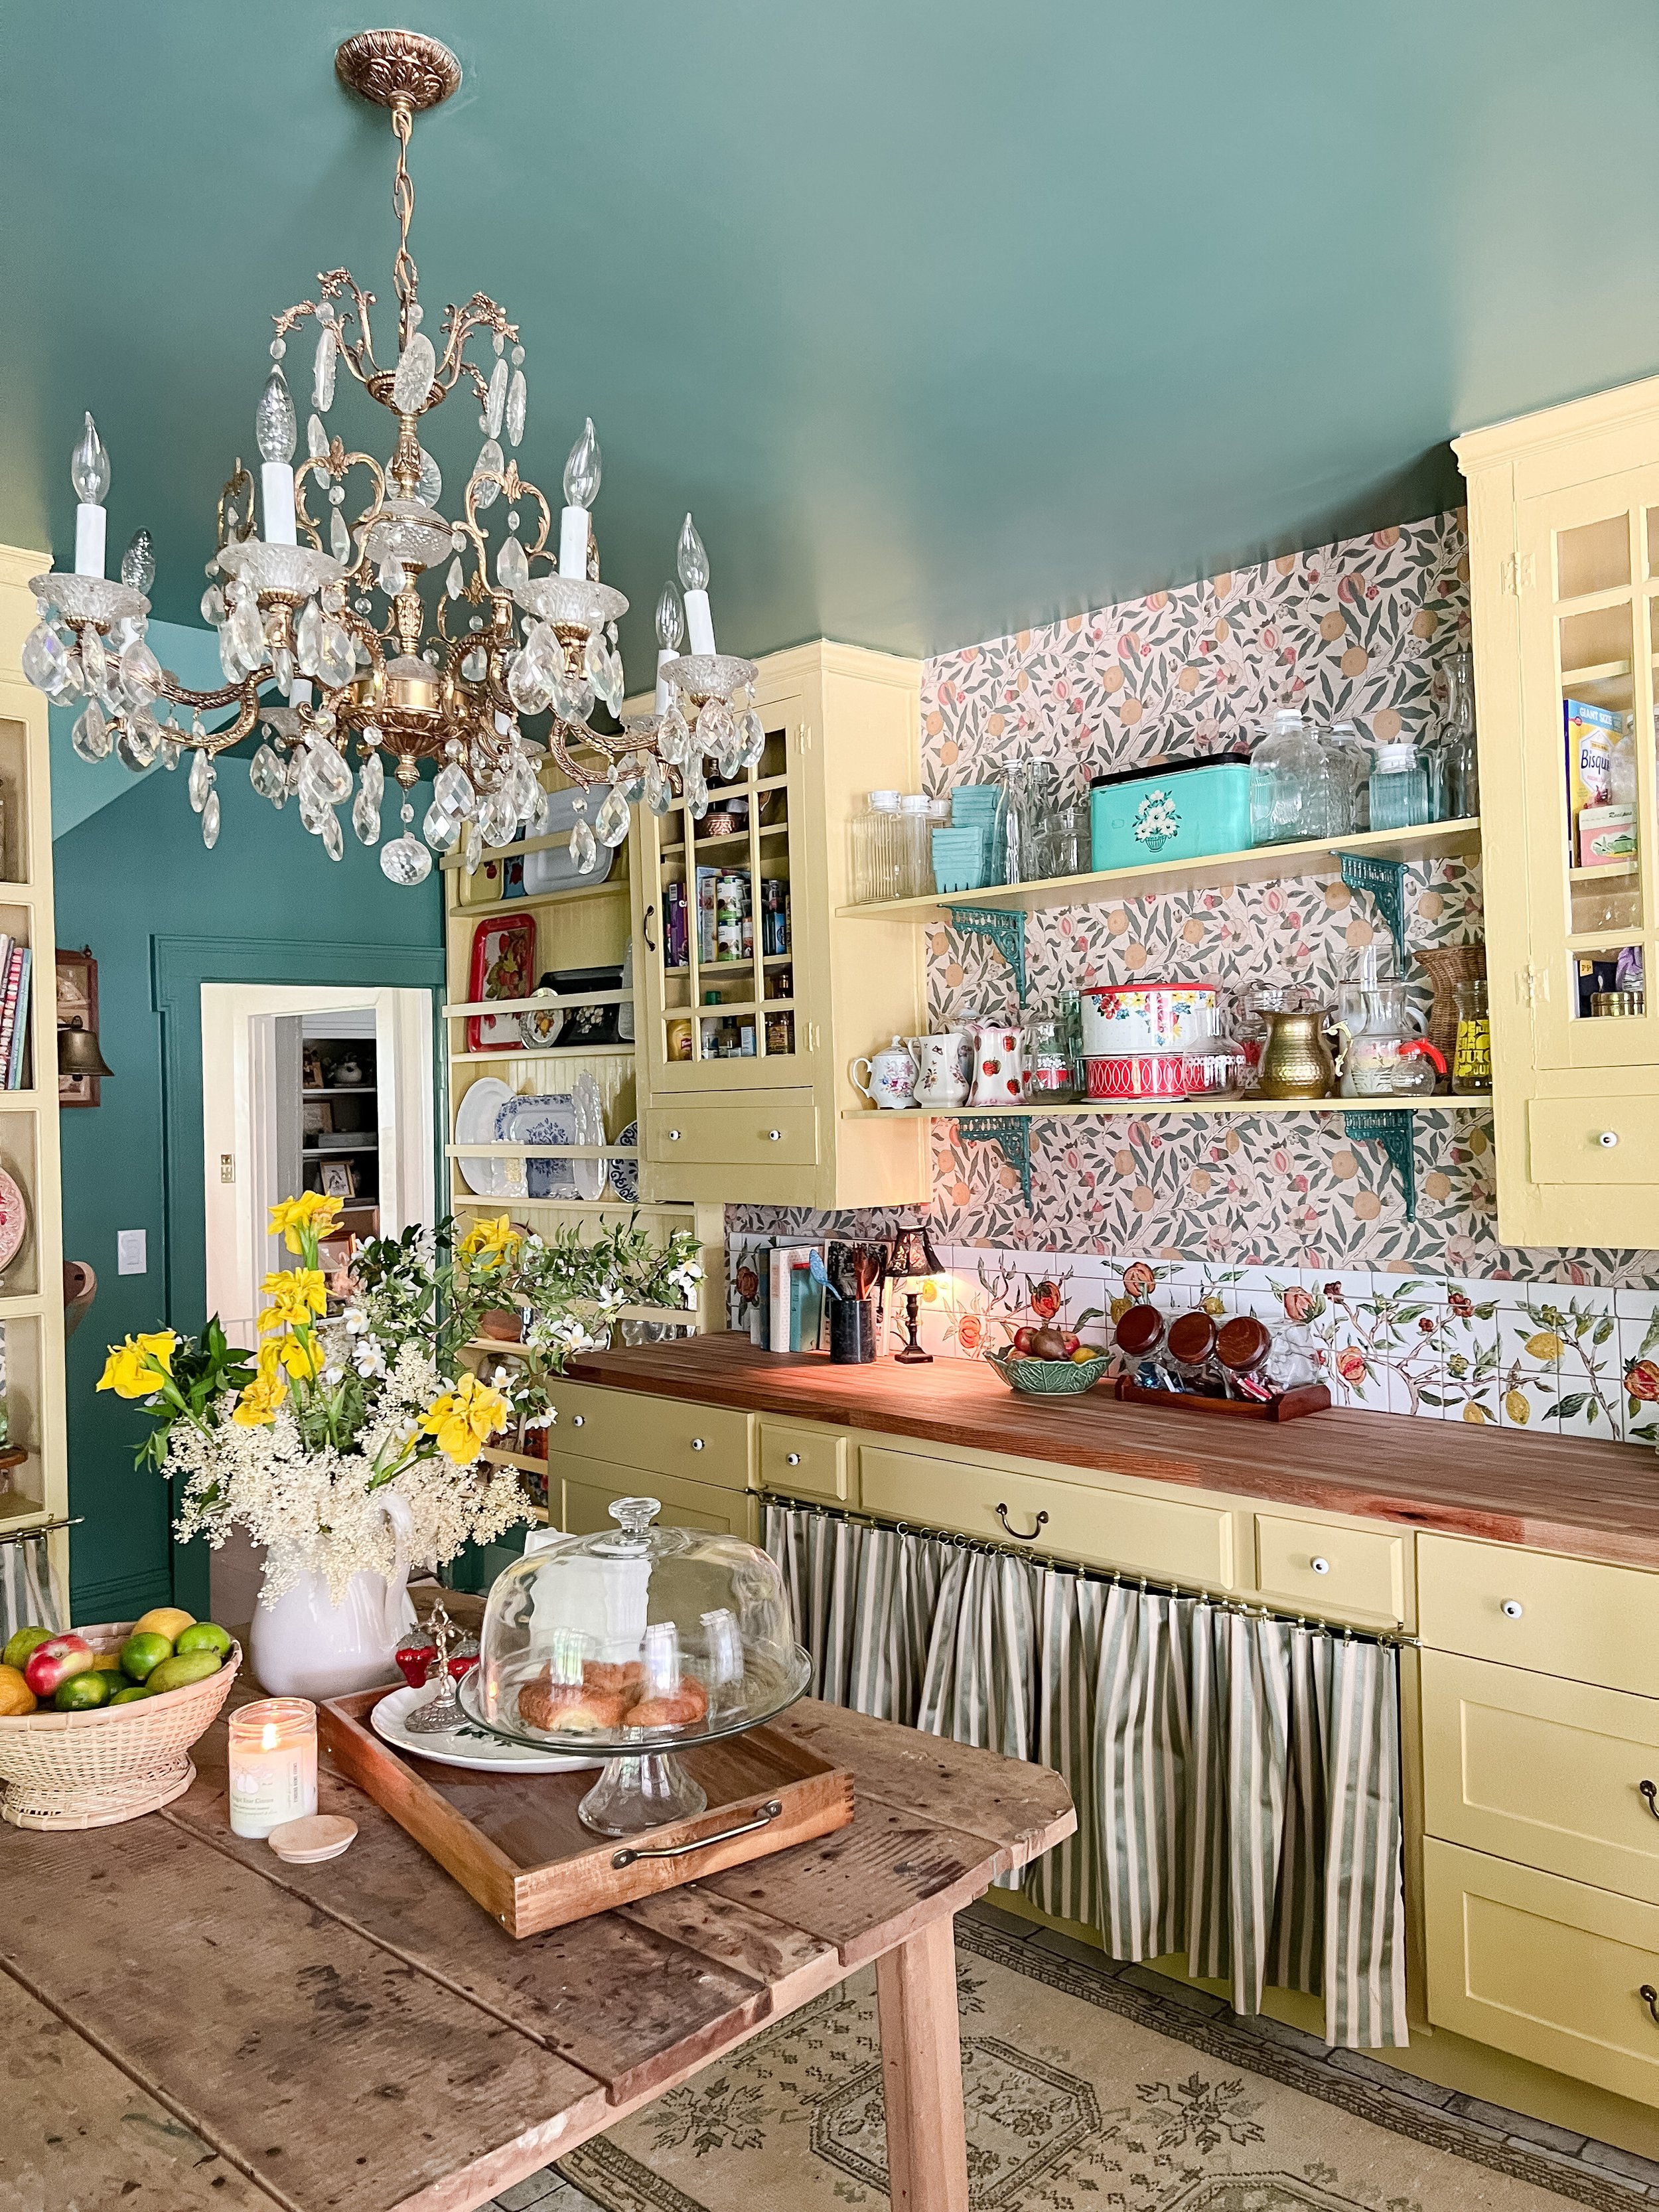
Wall and Trim Color: Hanging Vine by Valspar (eggshell on walls, semi-gloss on trim)

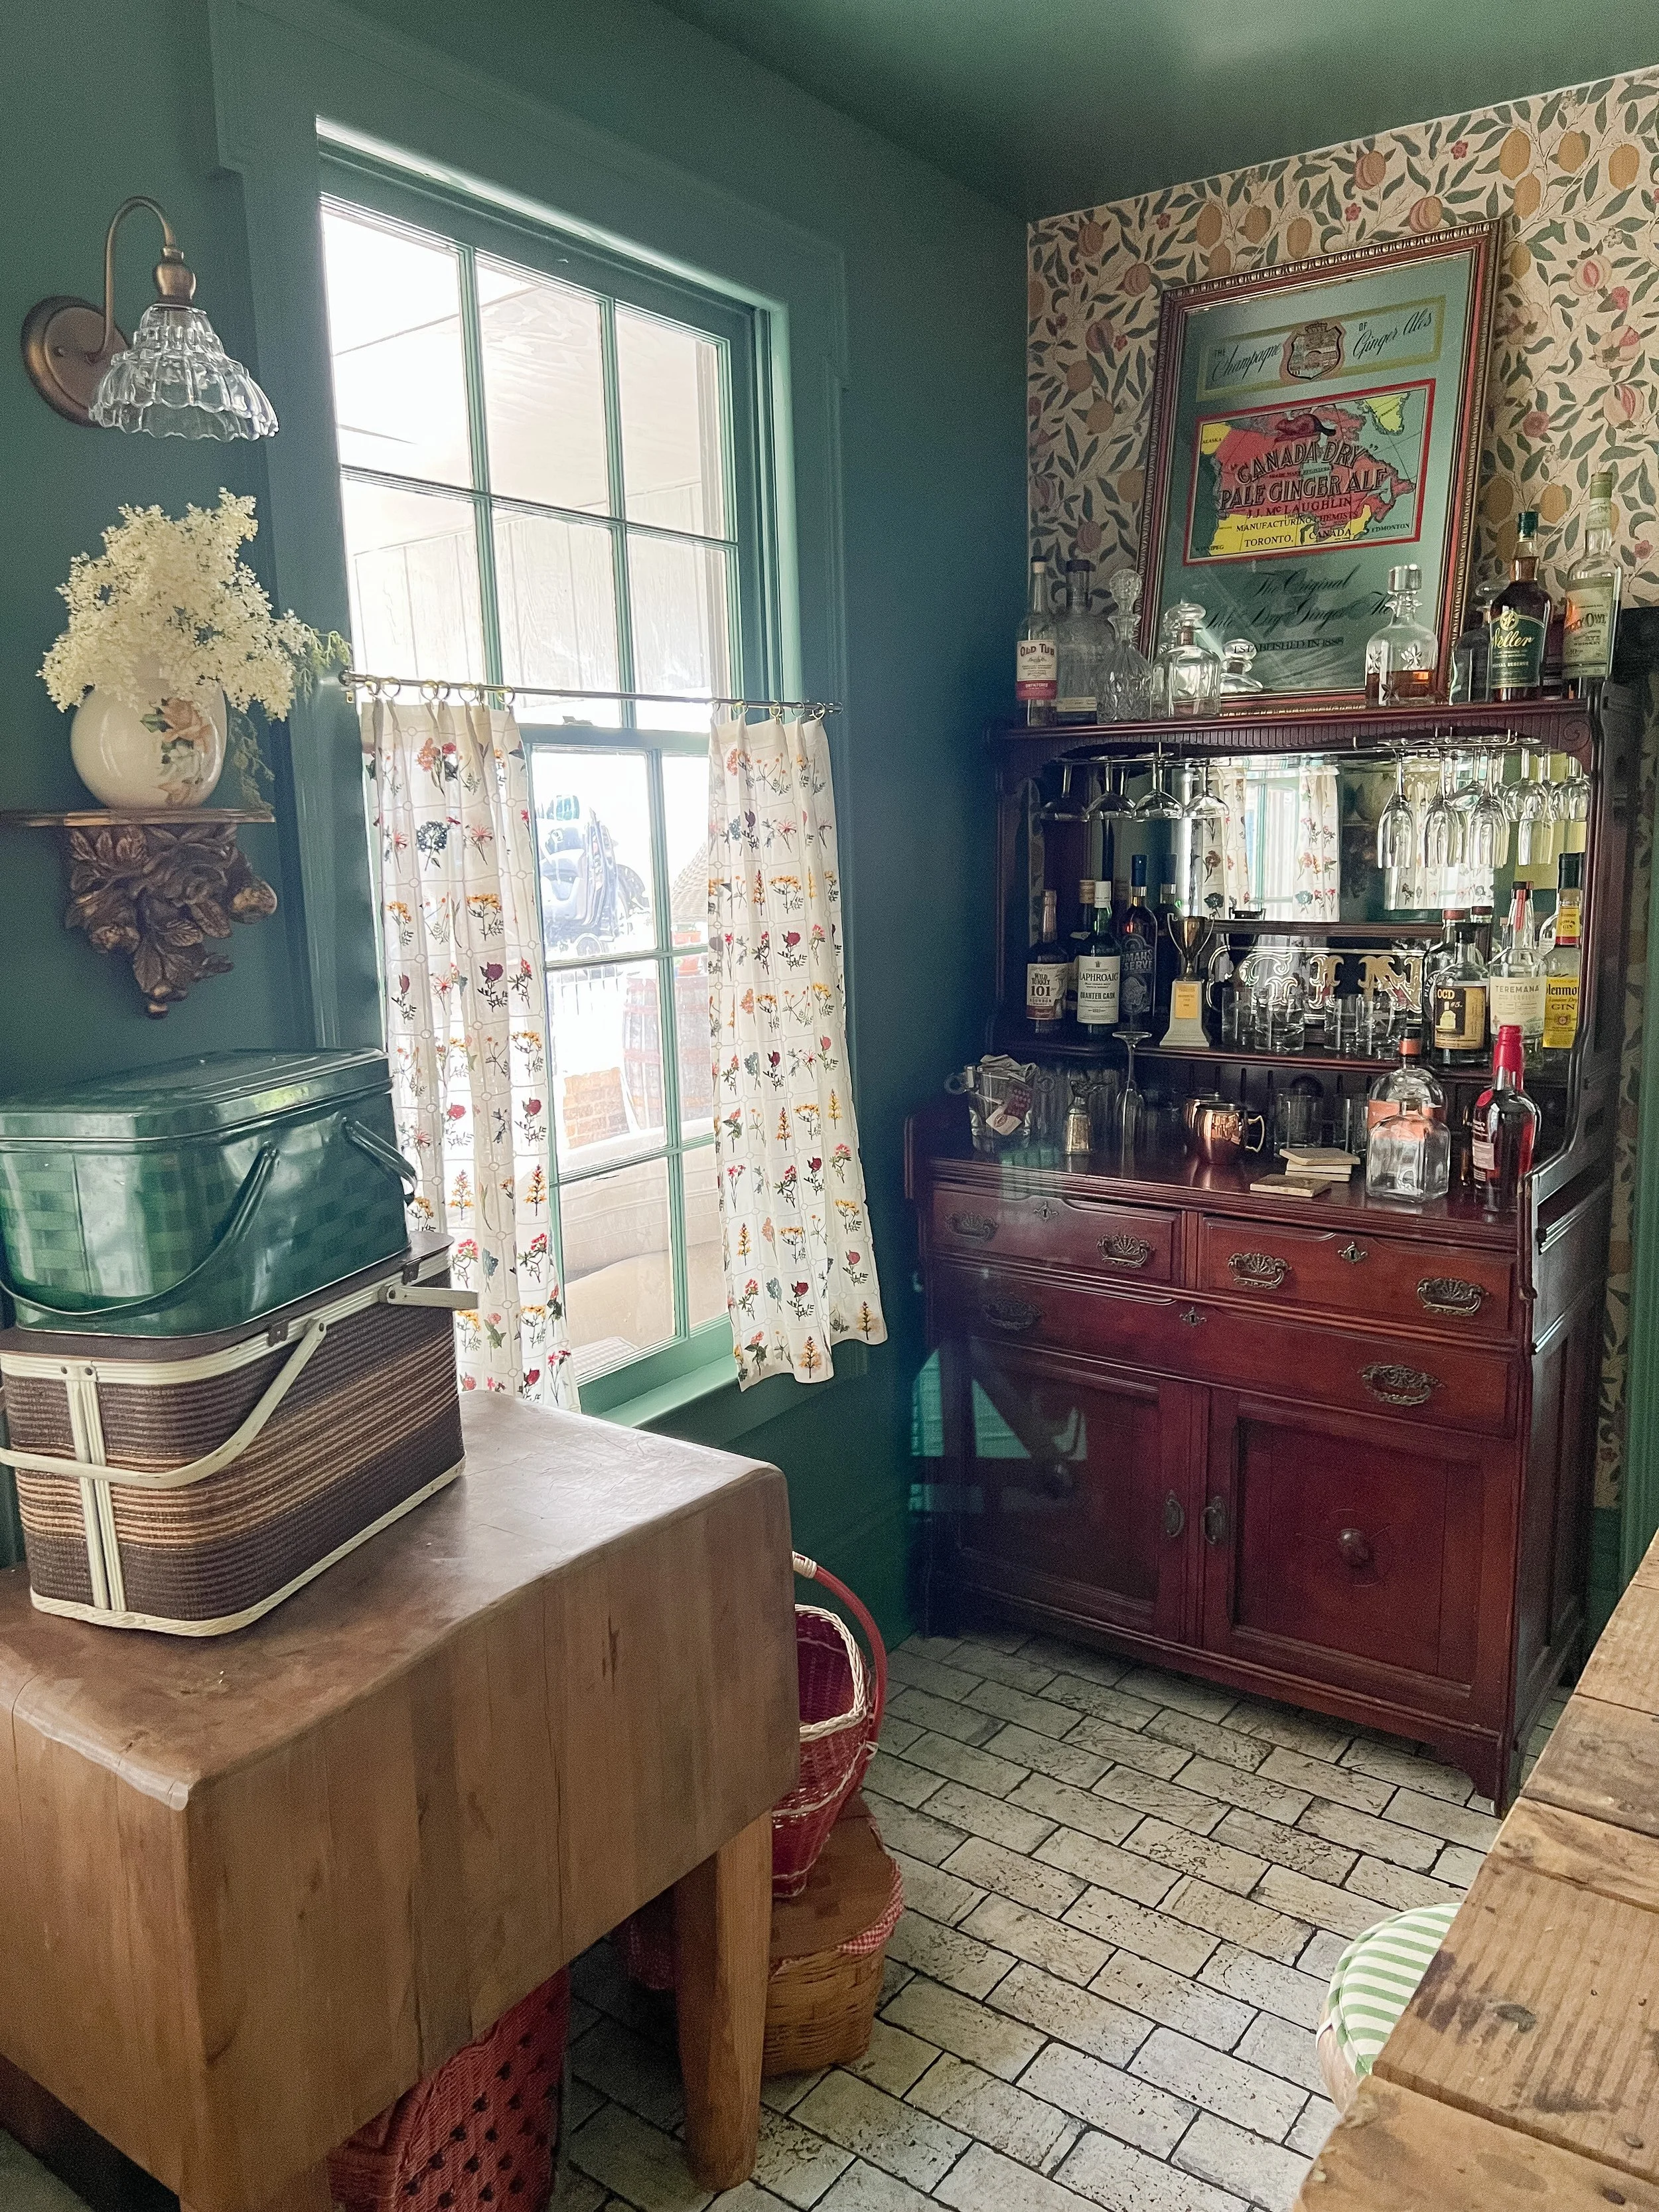
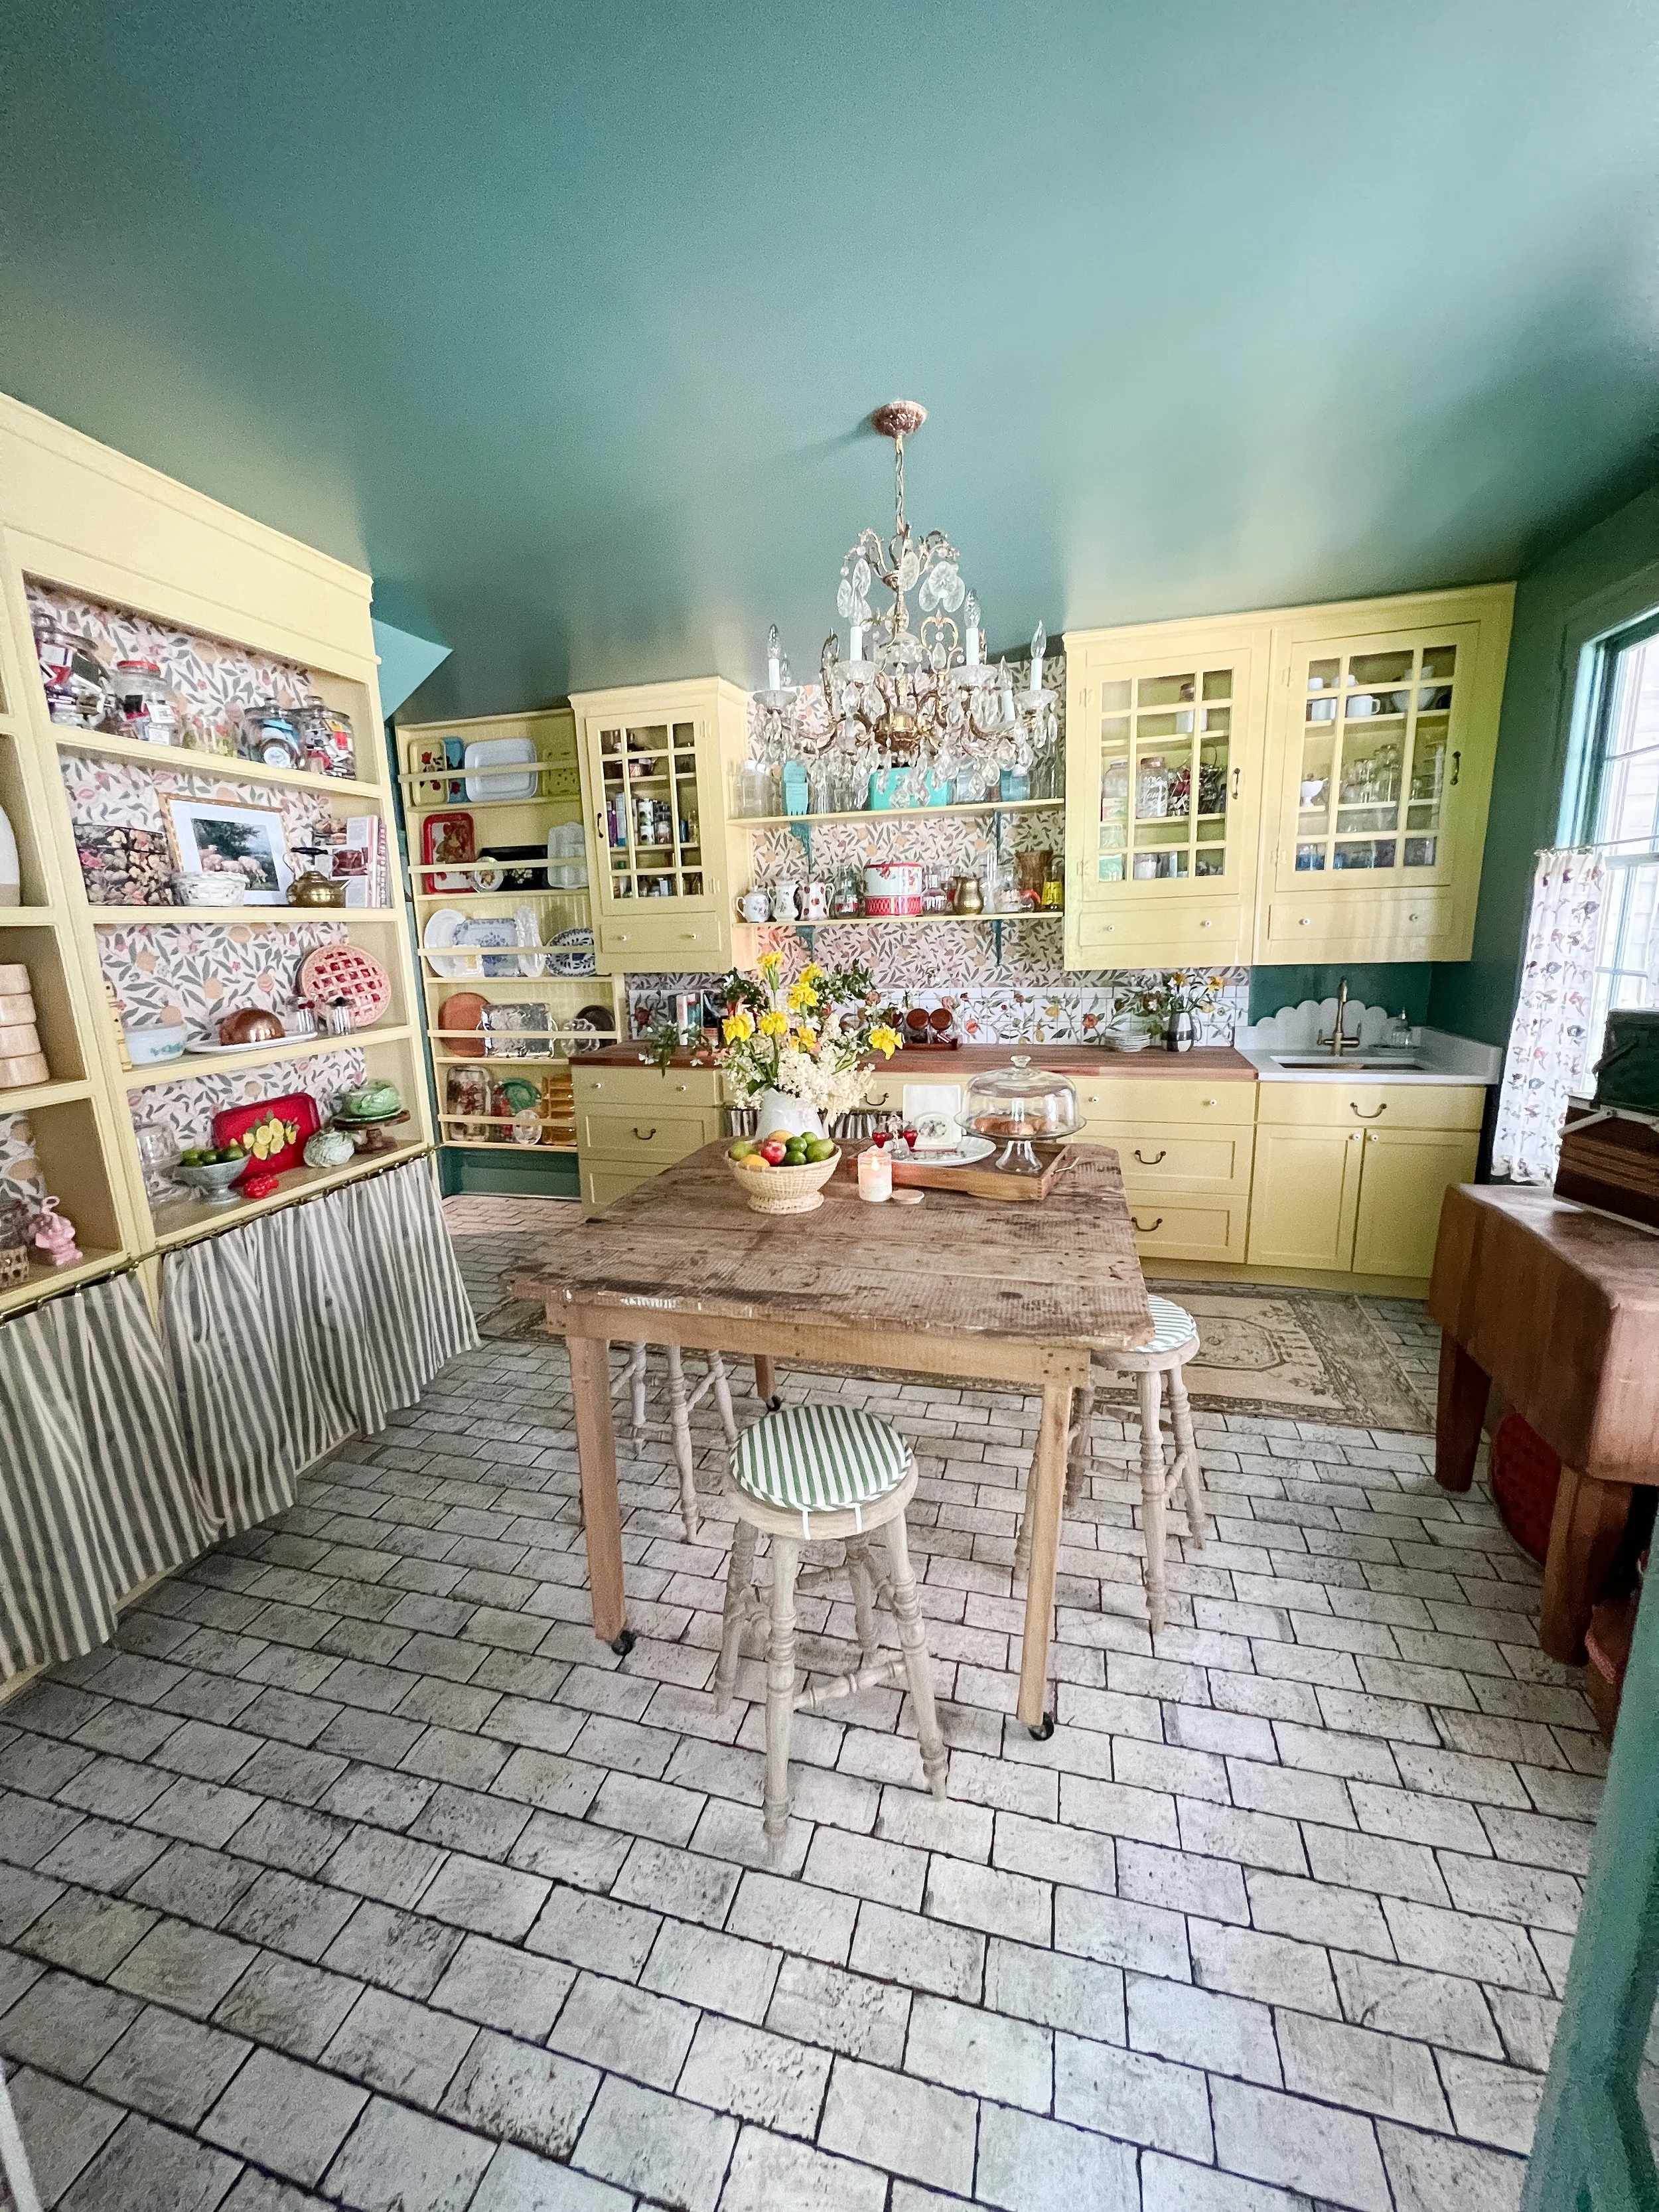
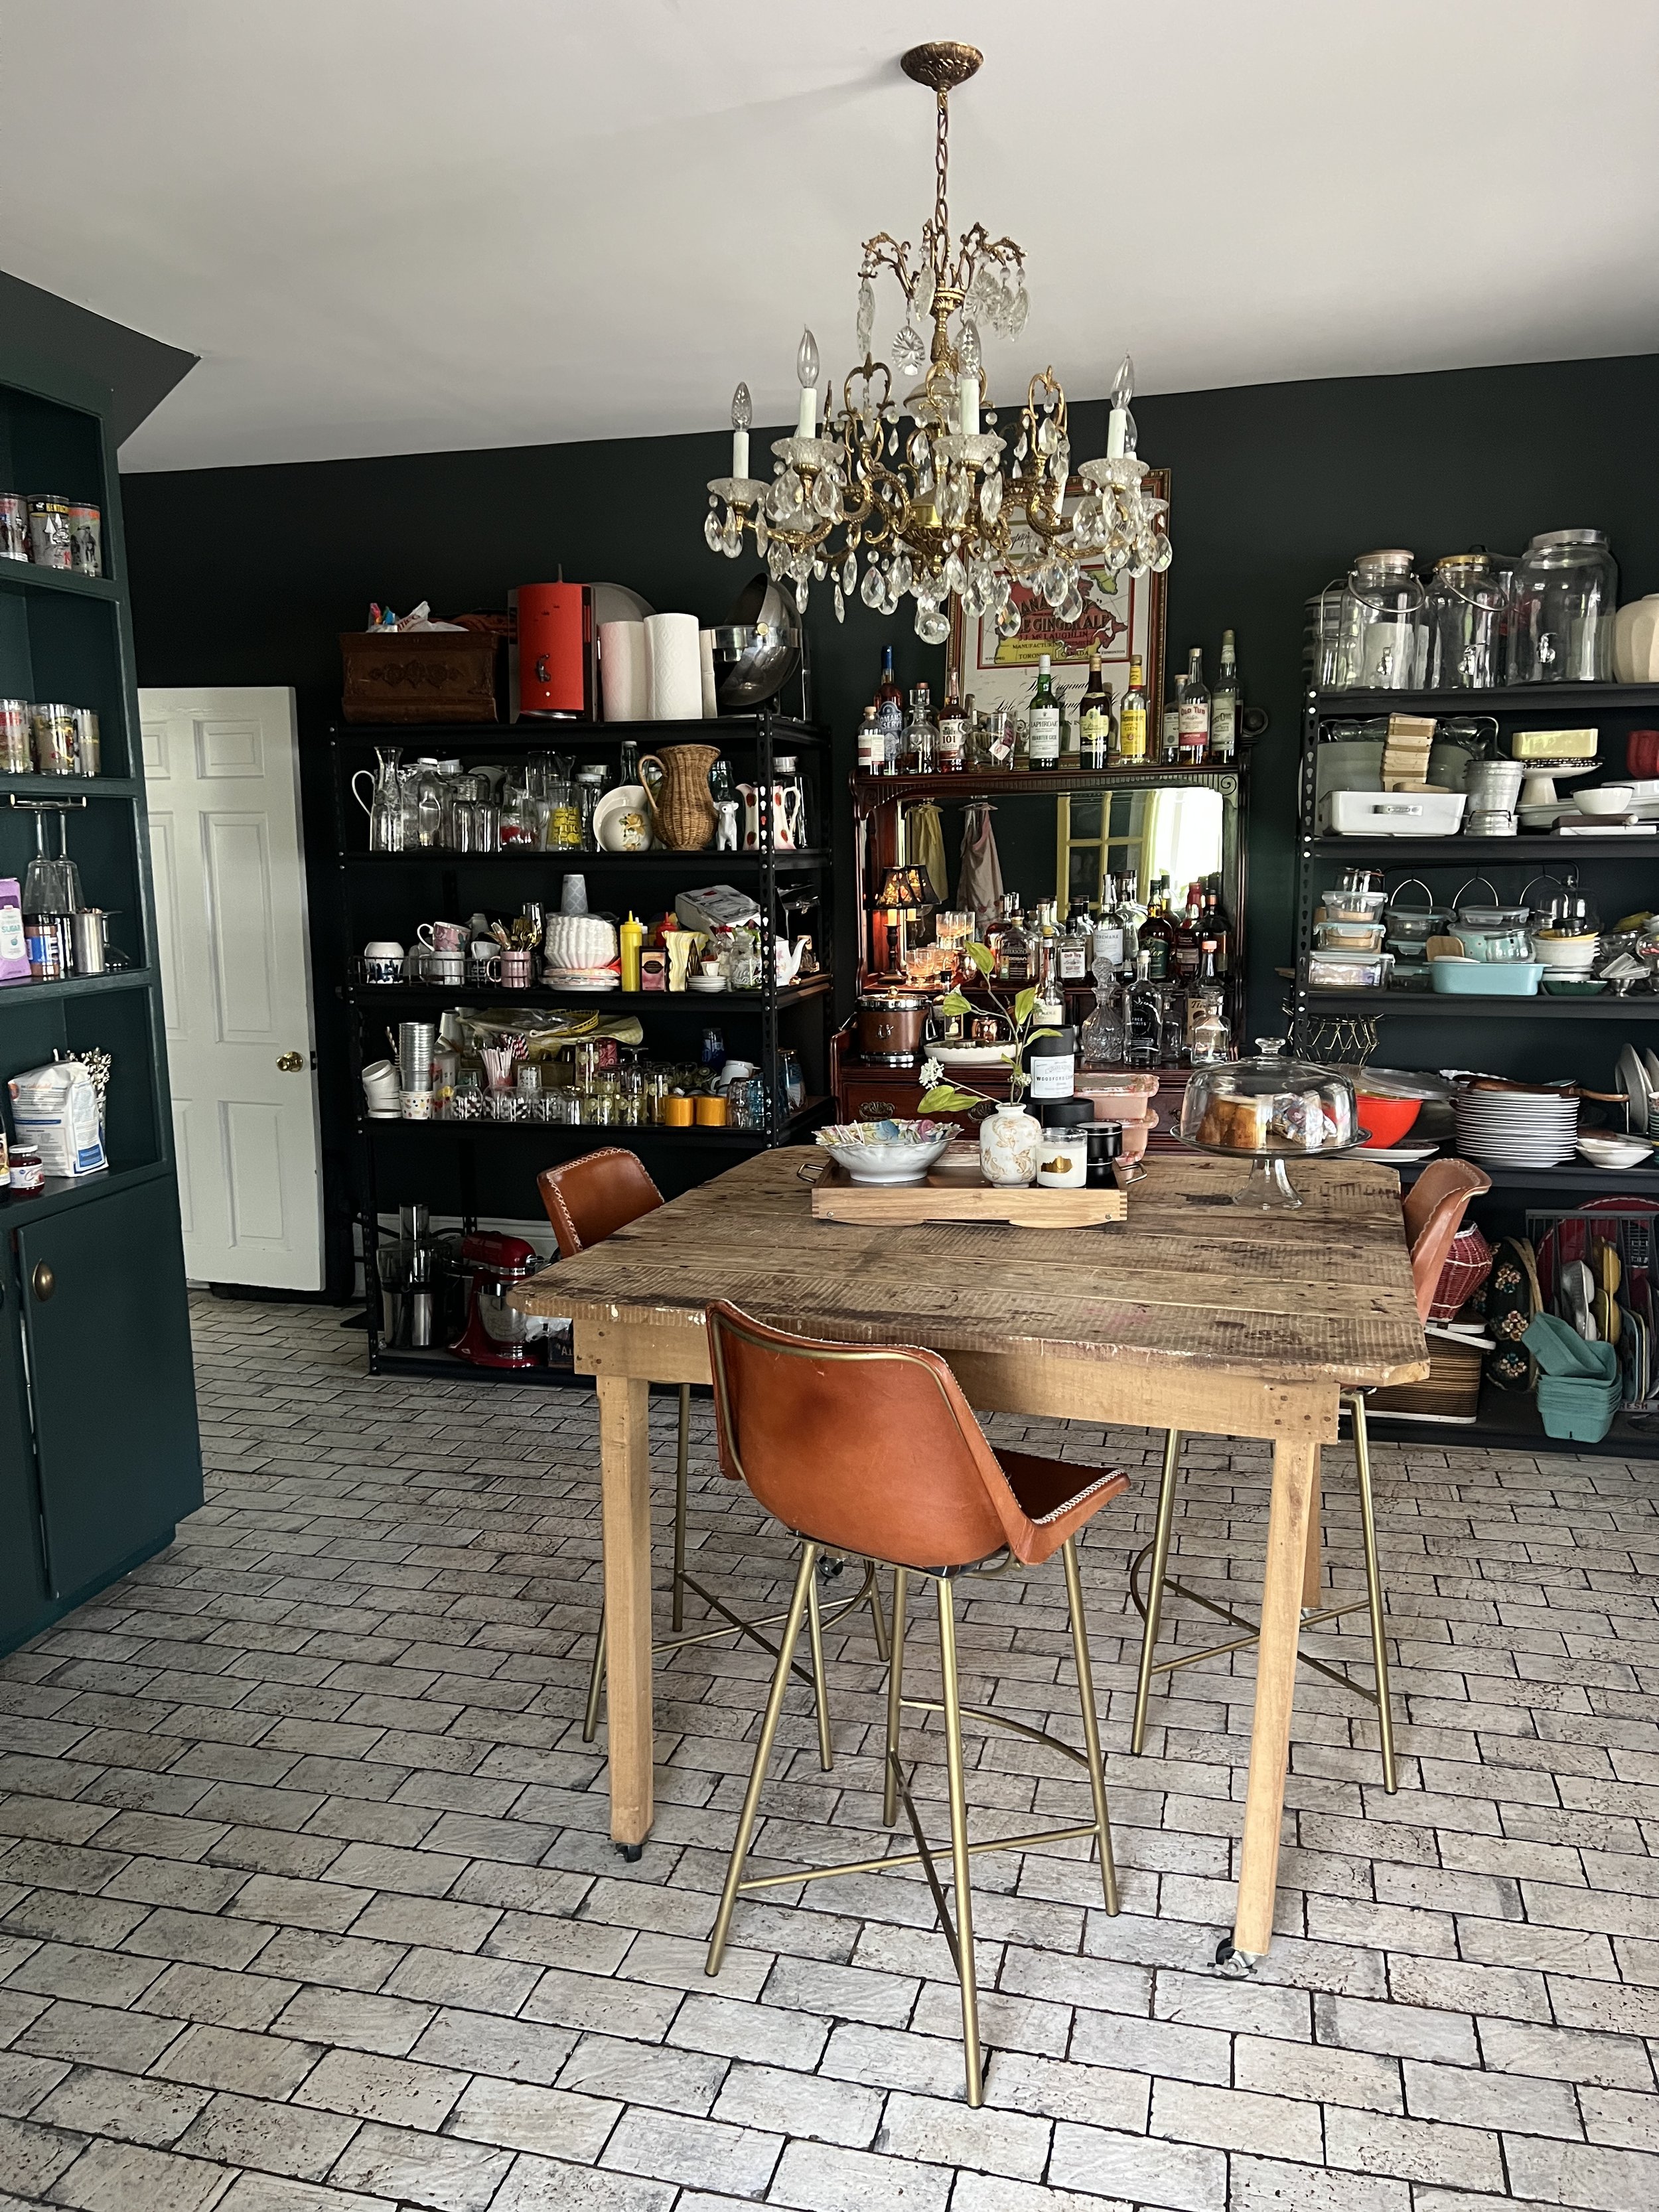
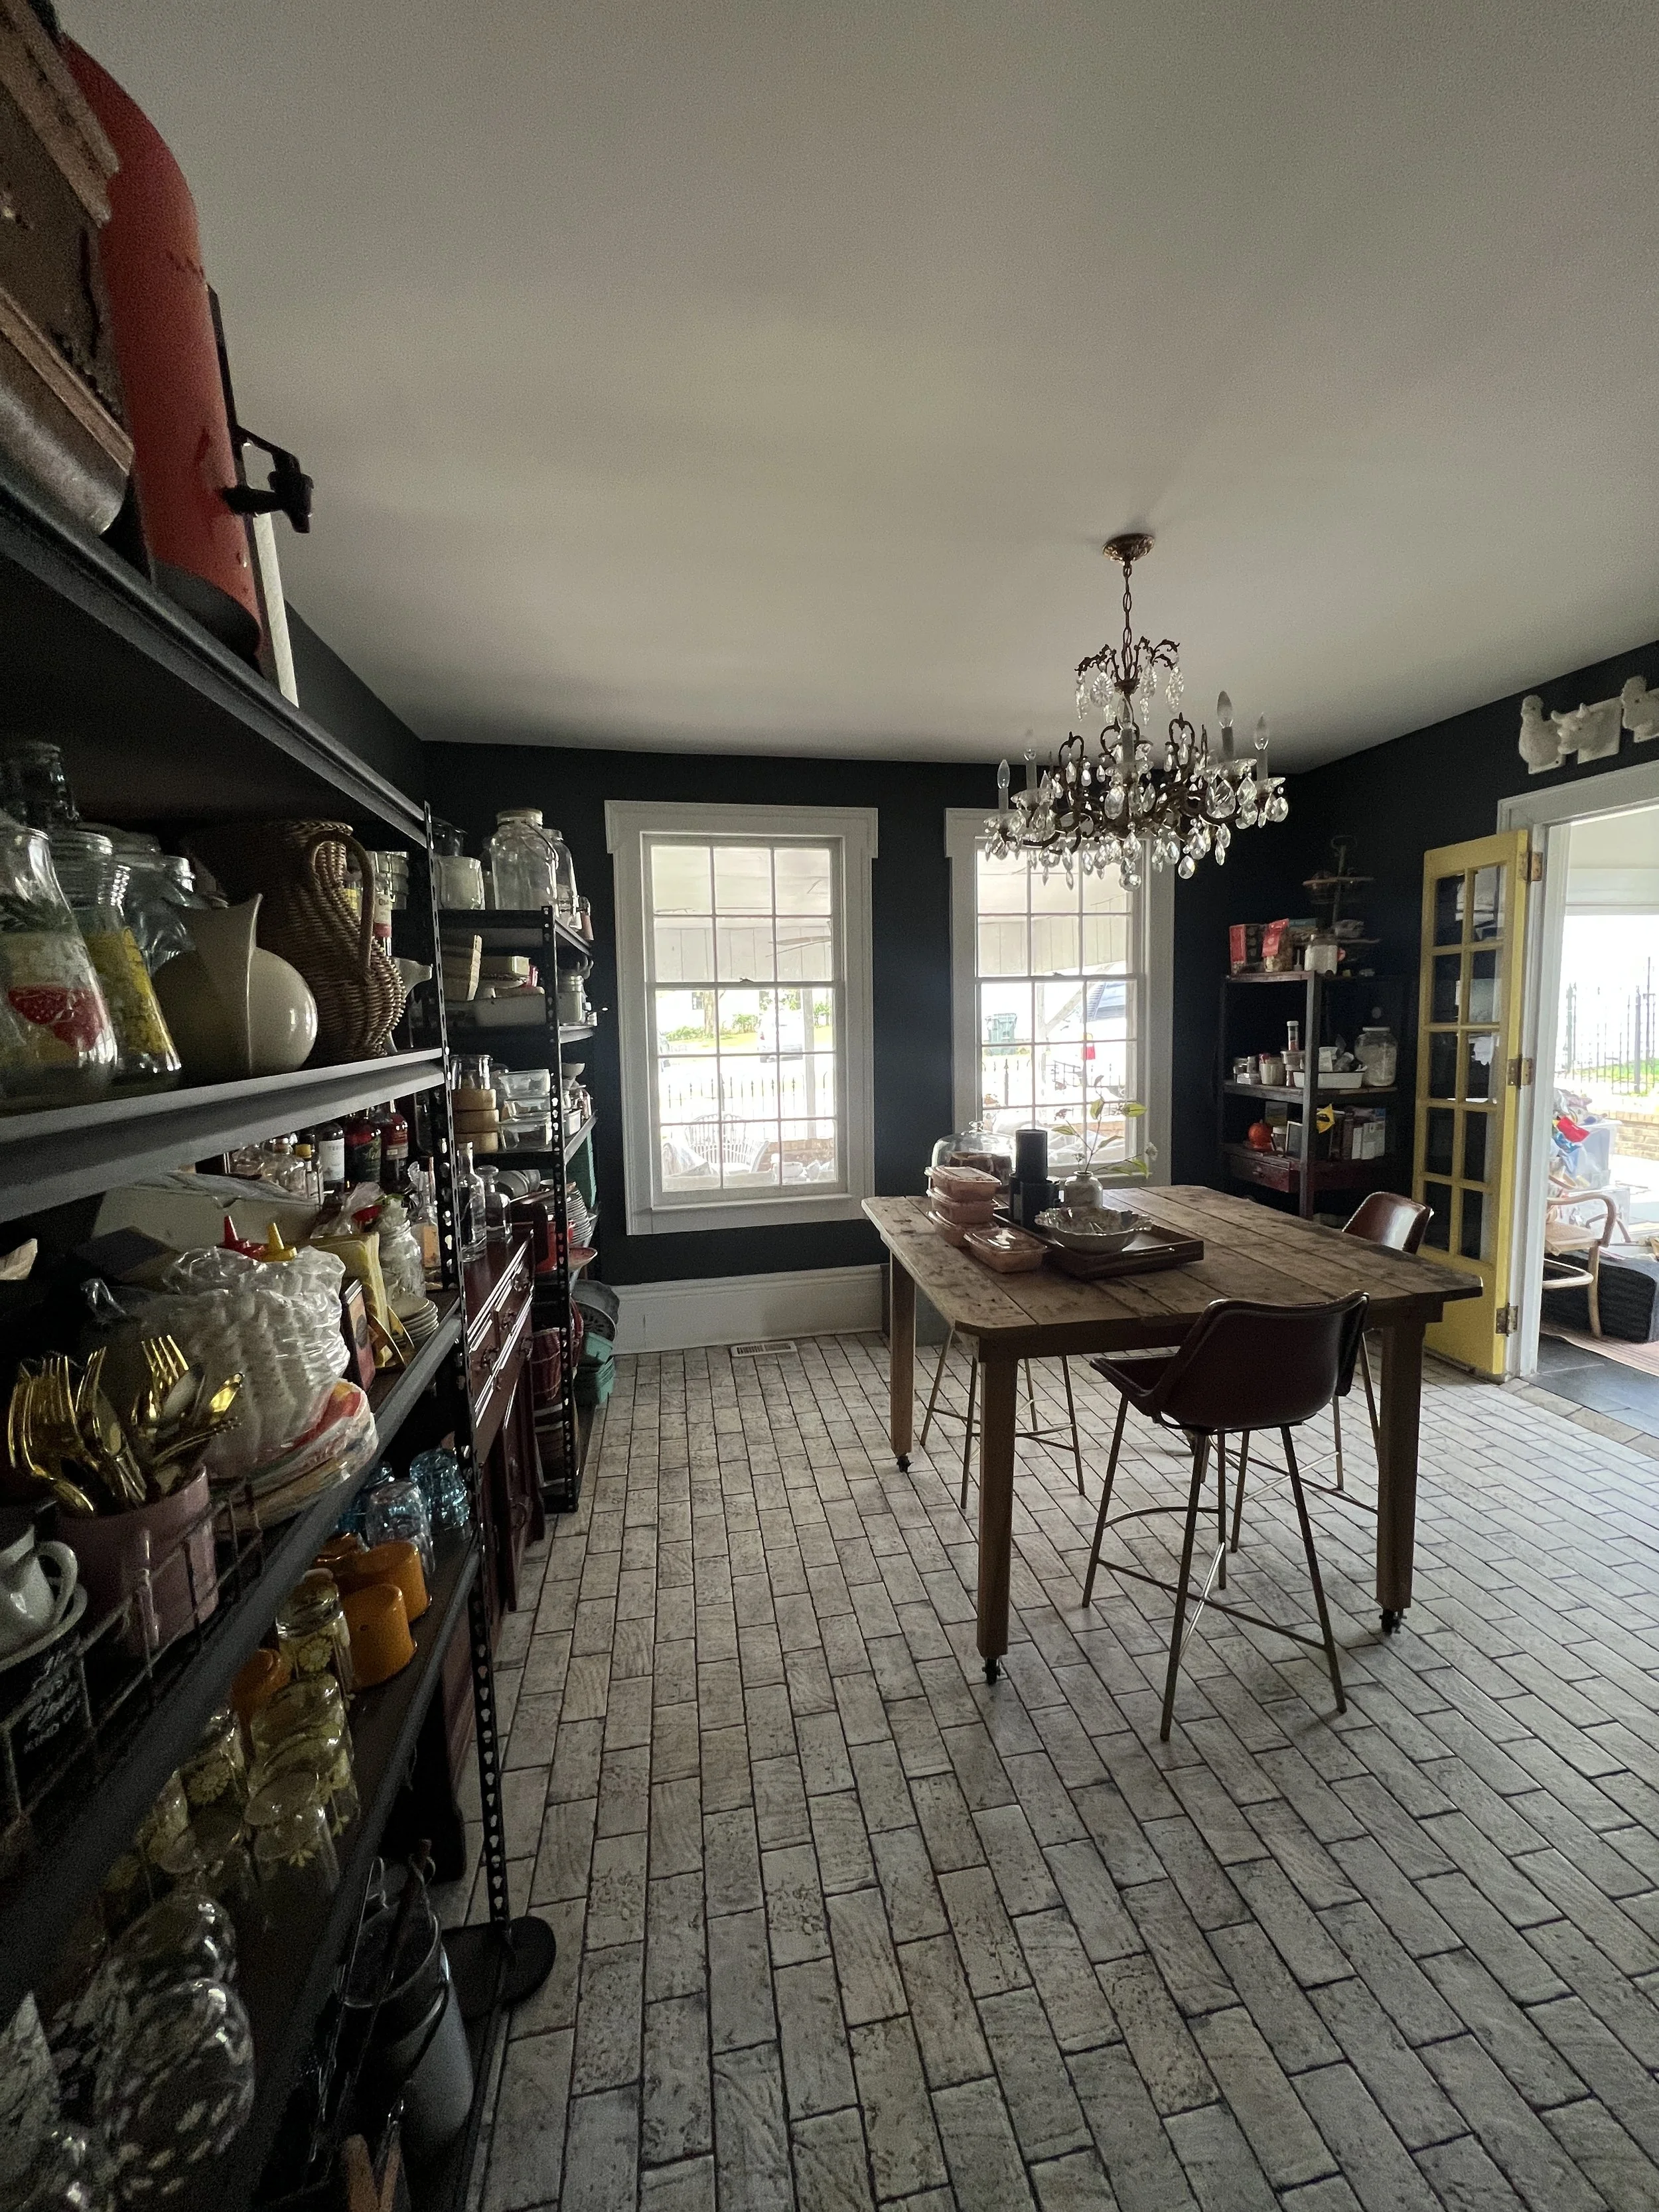
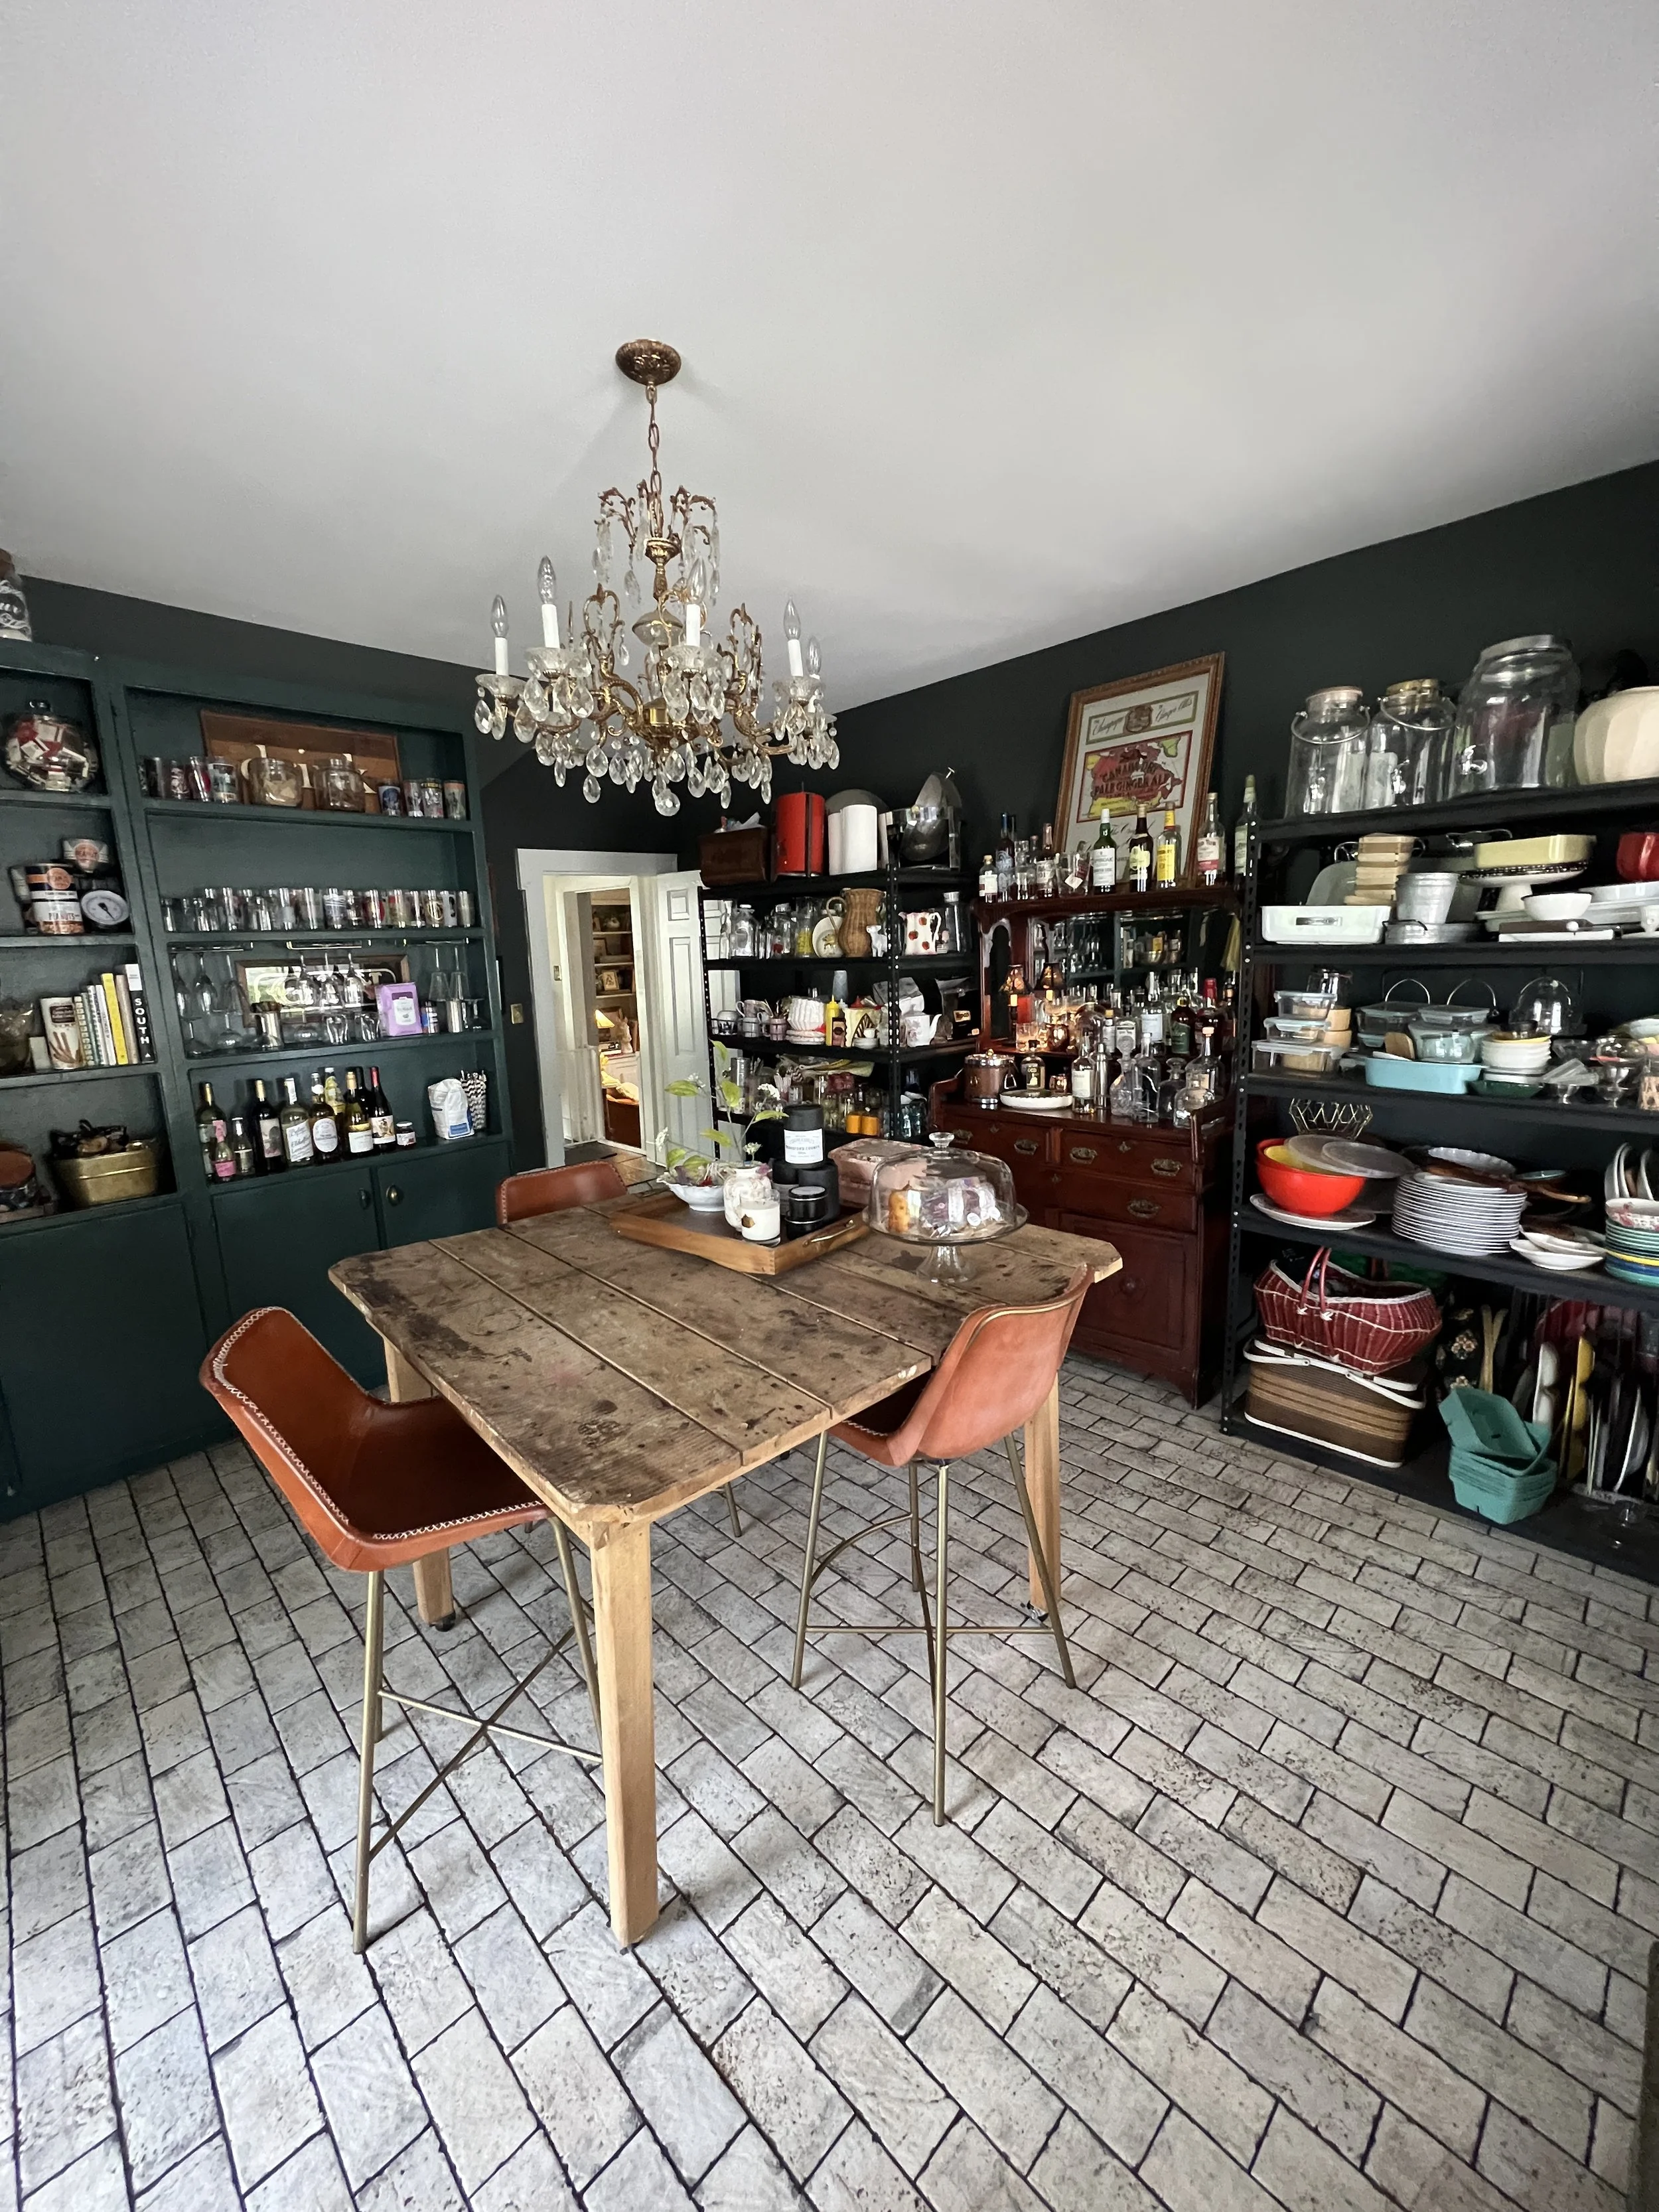
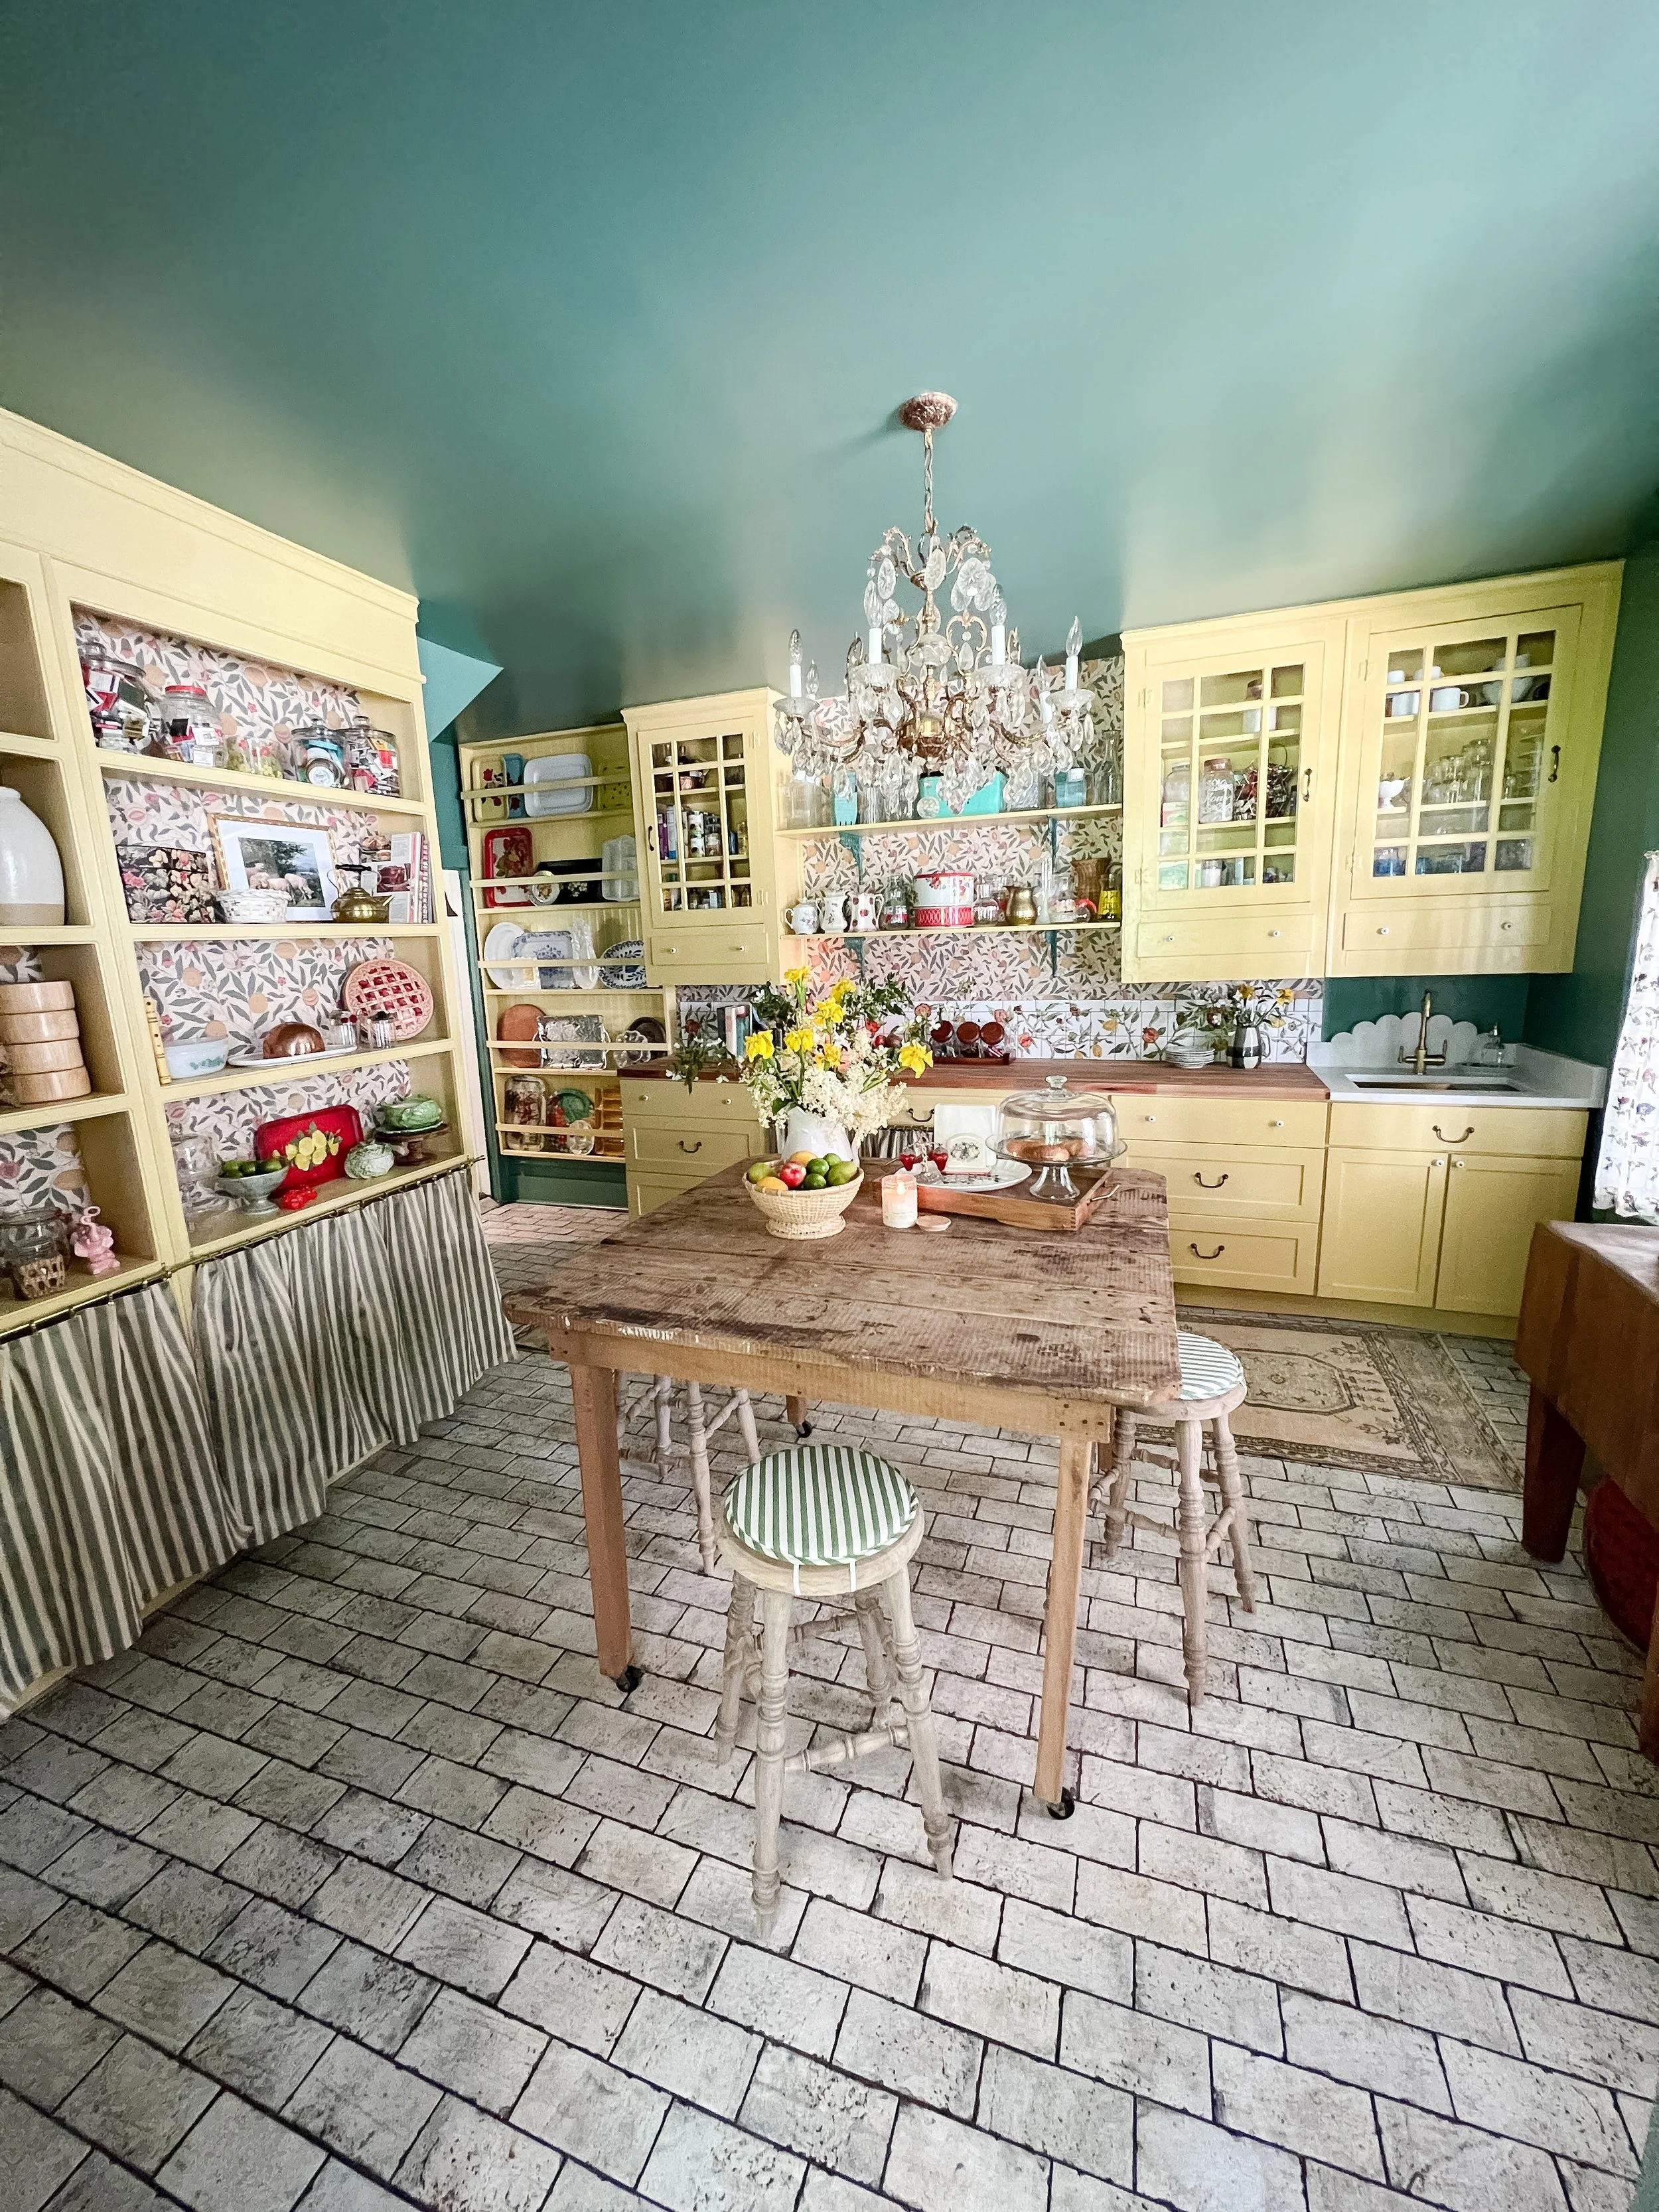
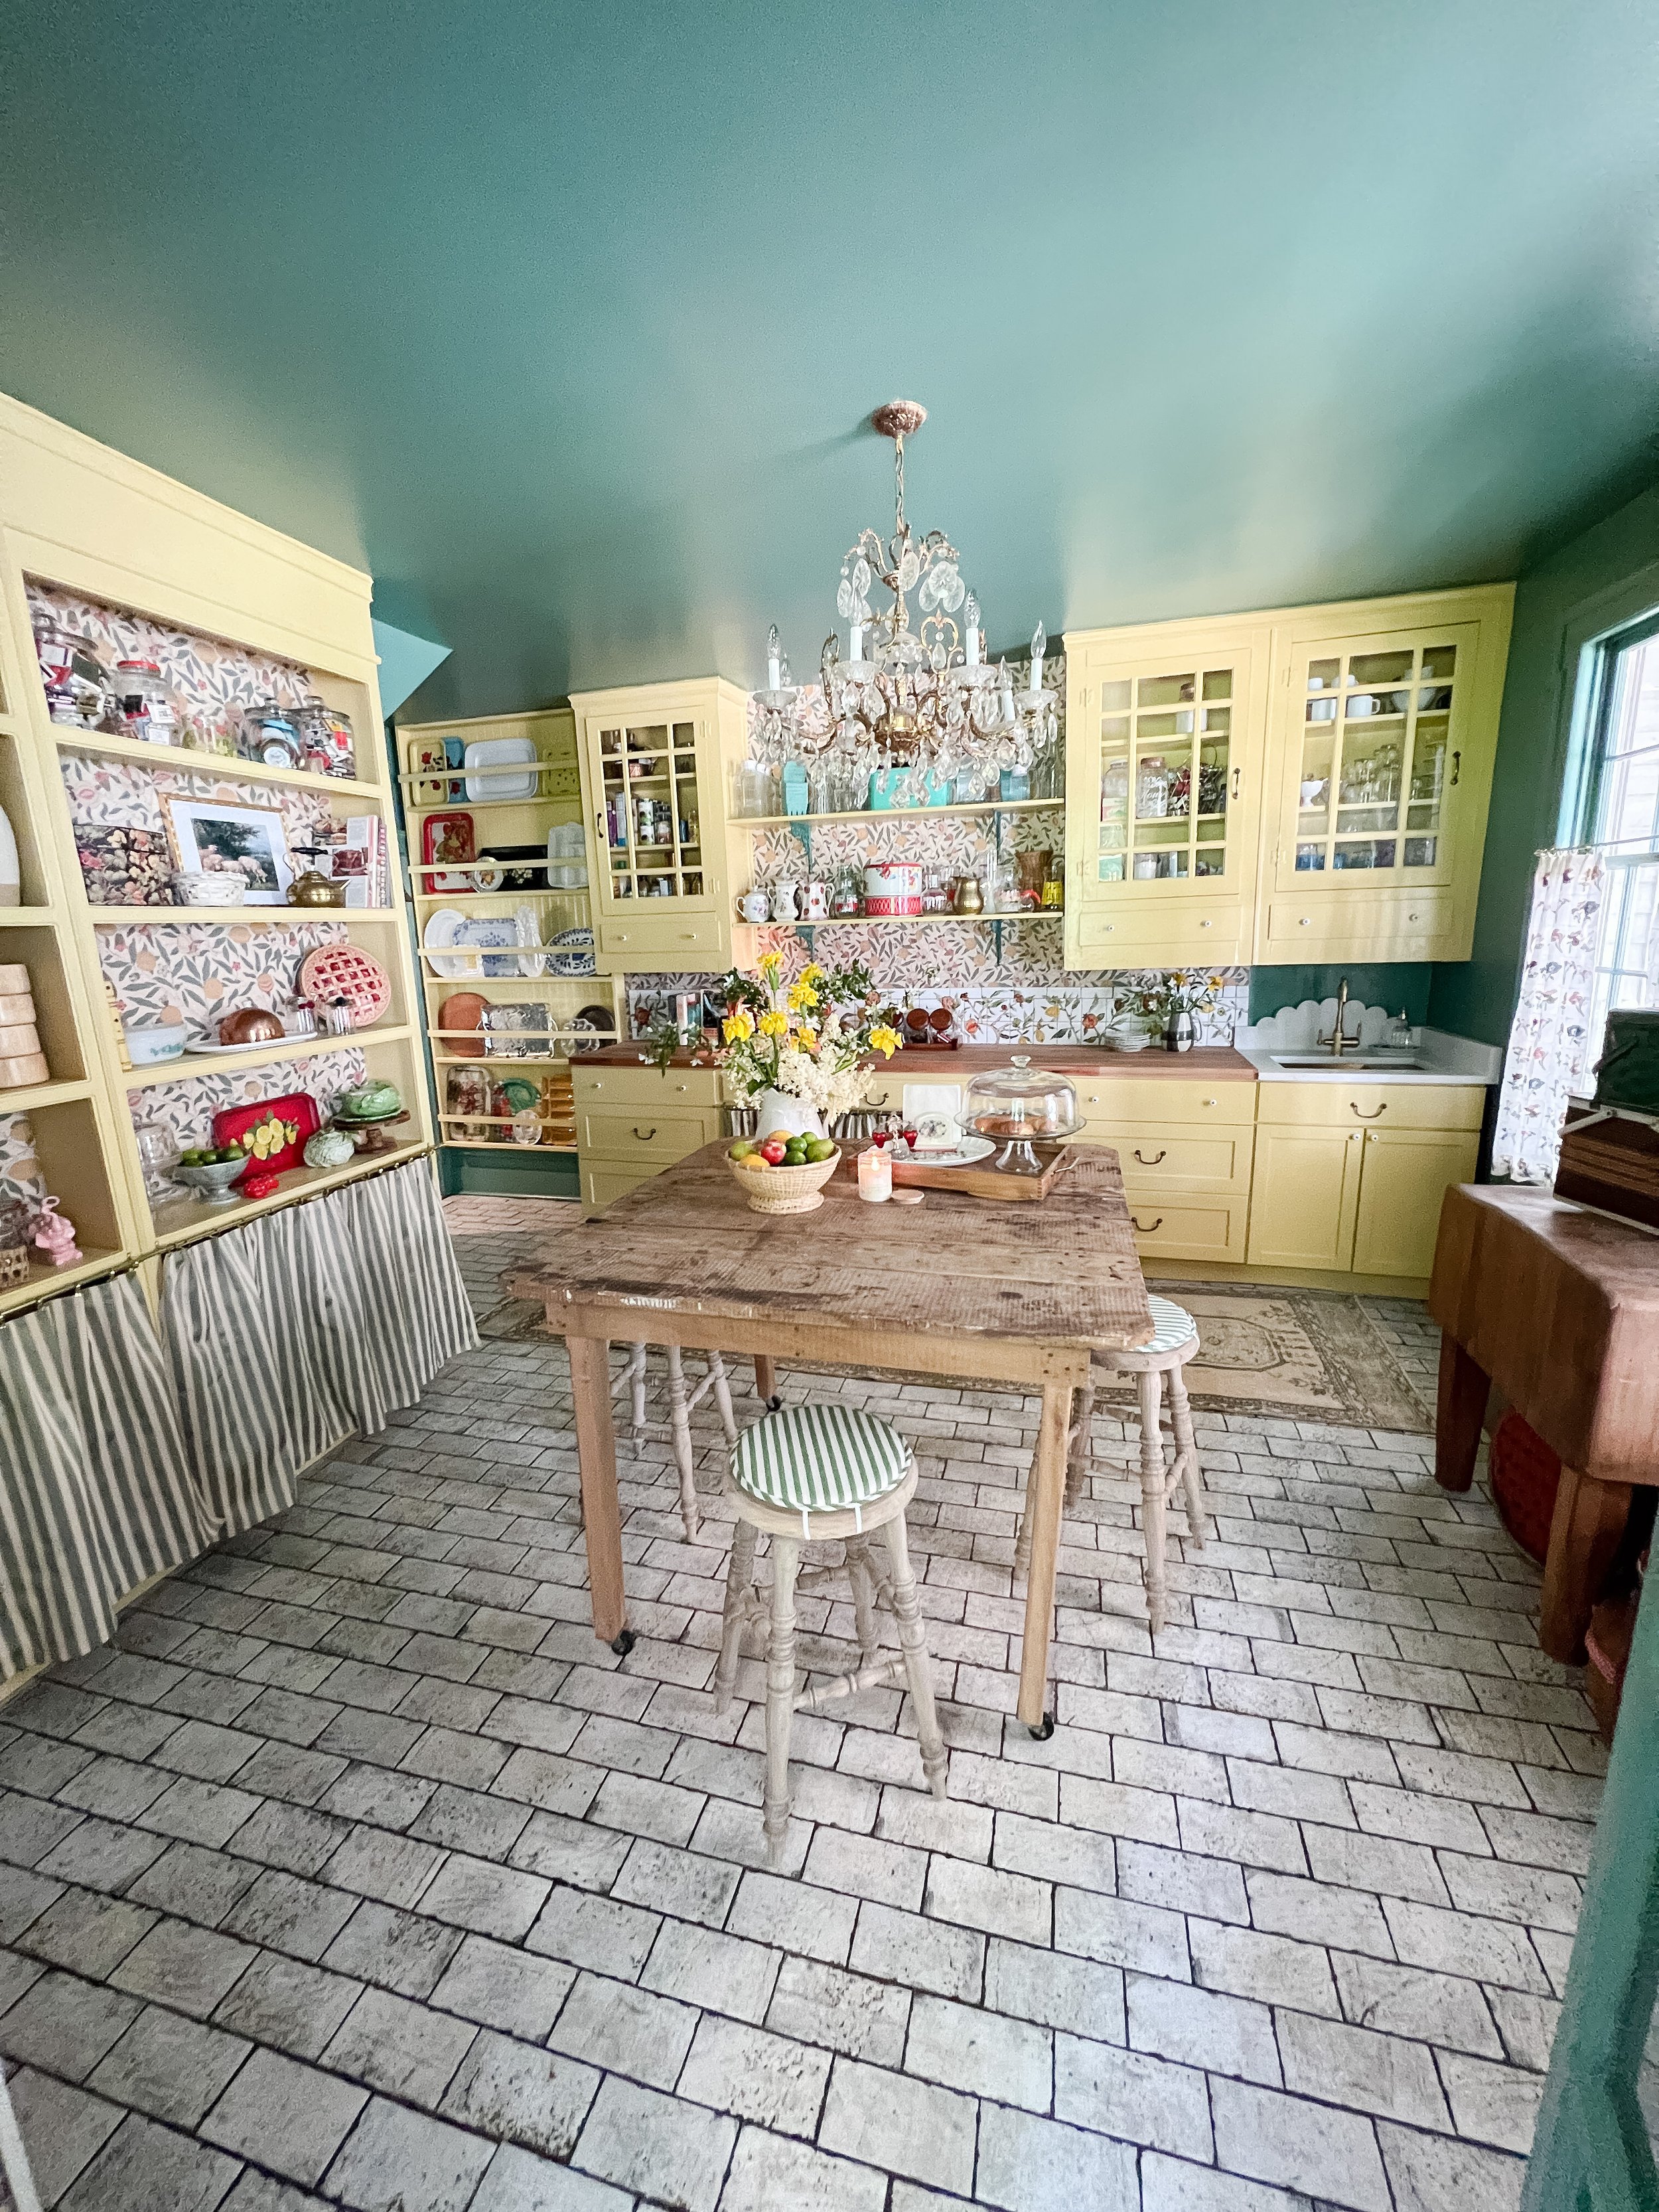
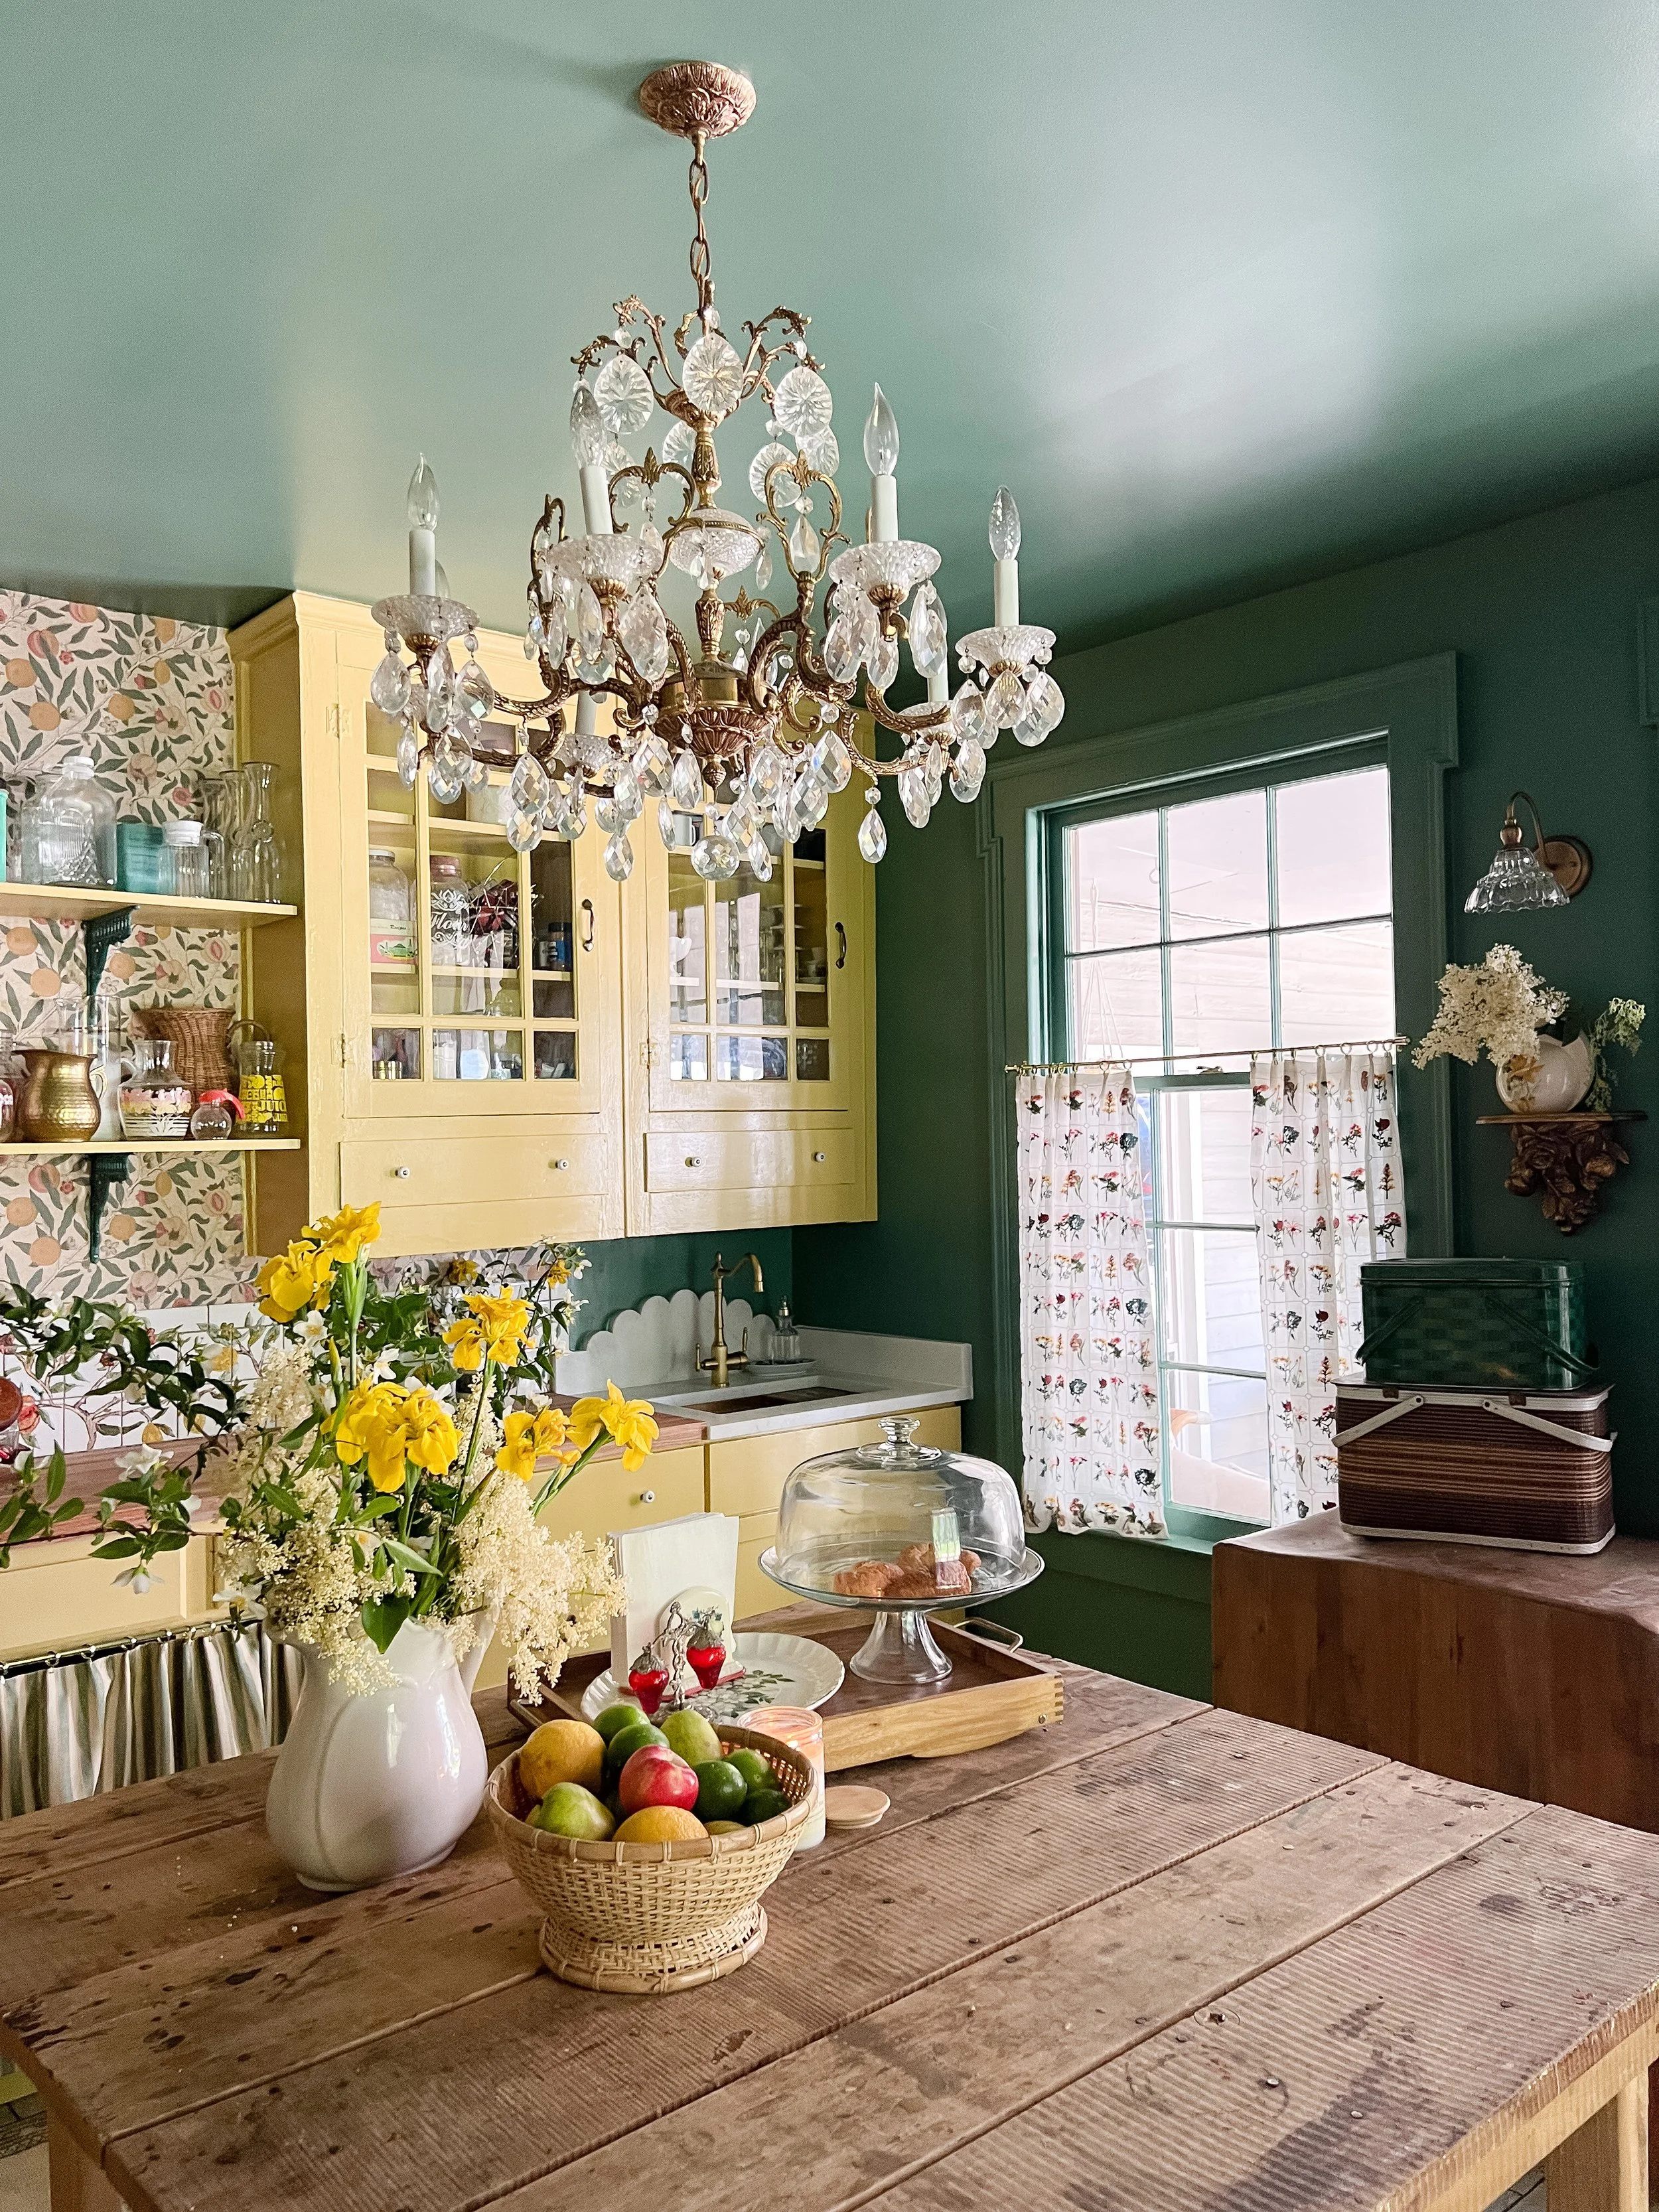
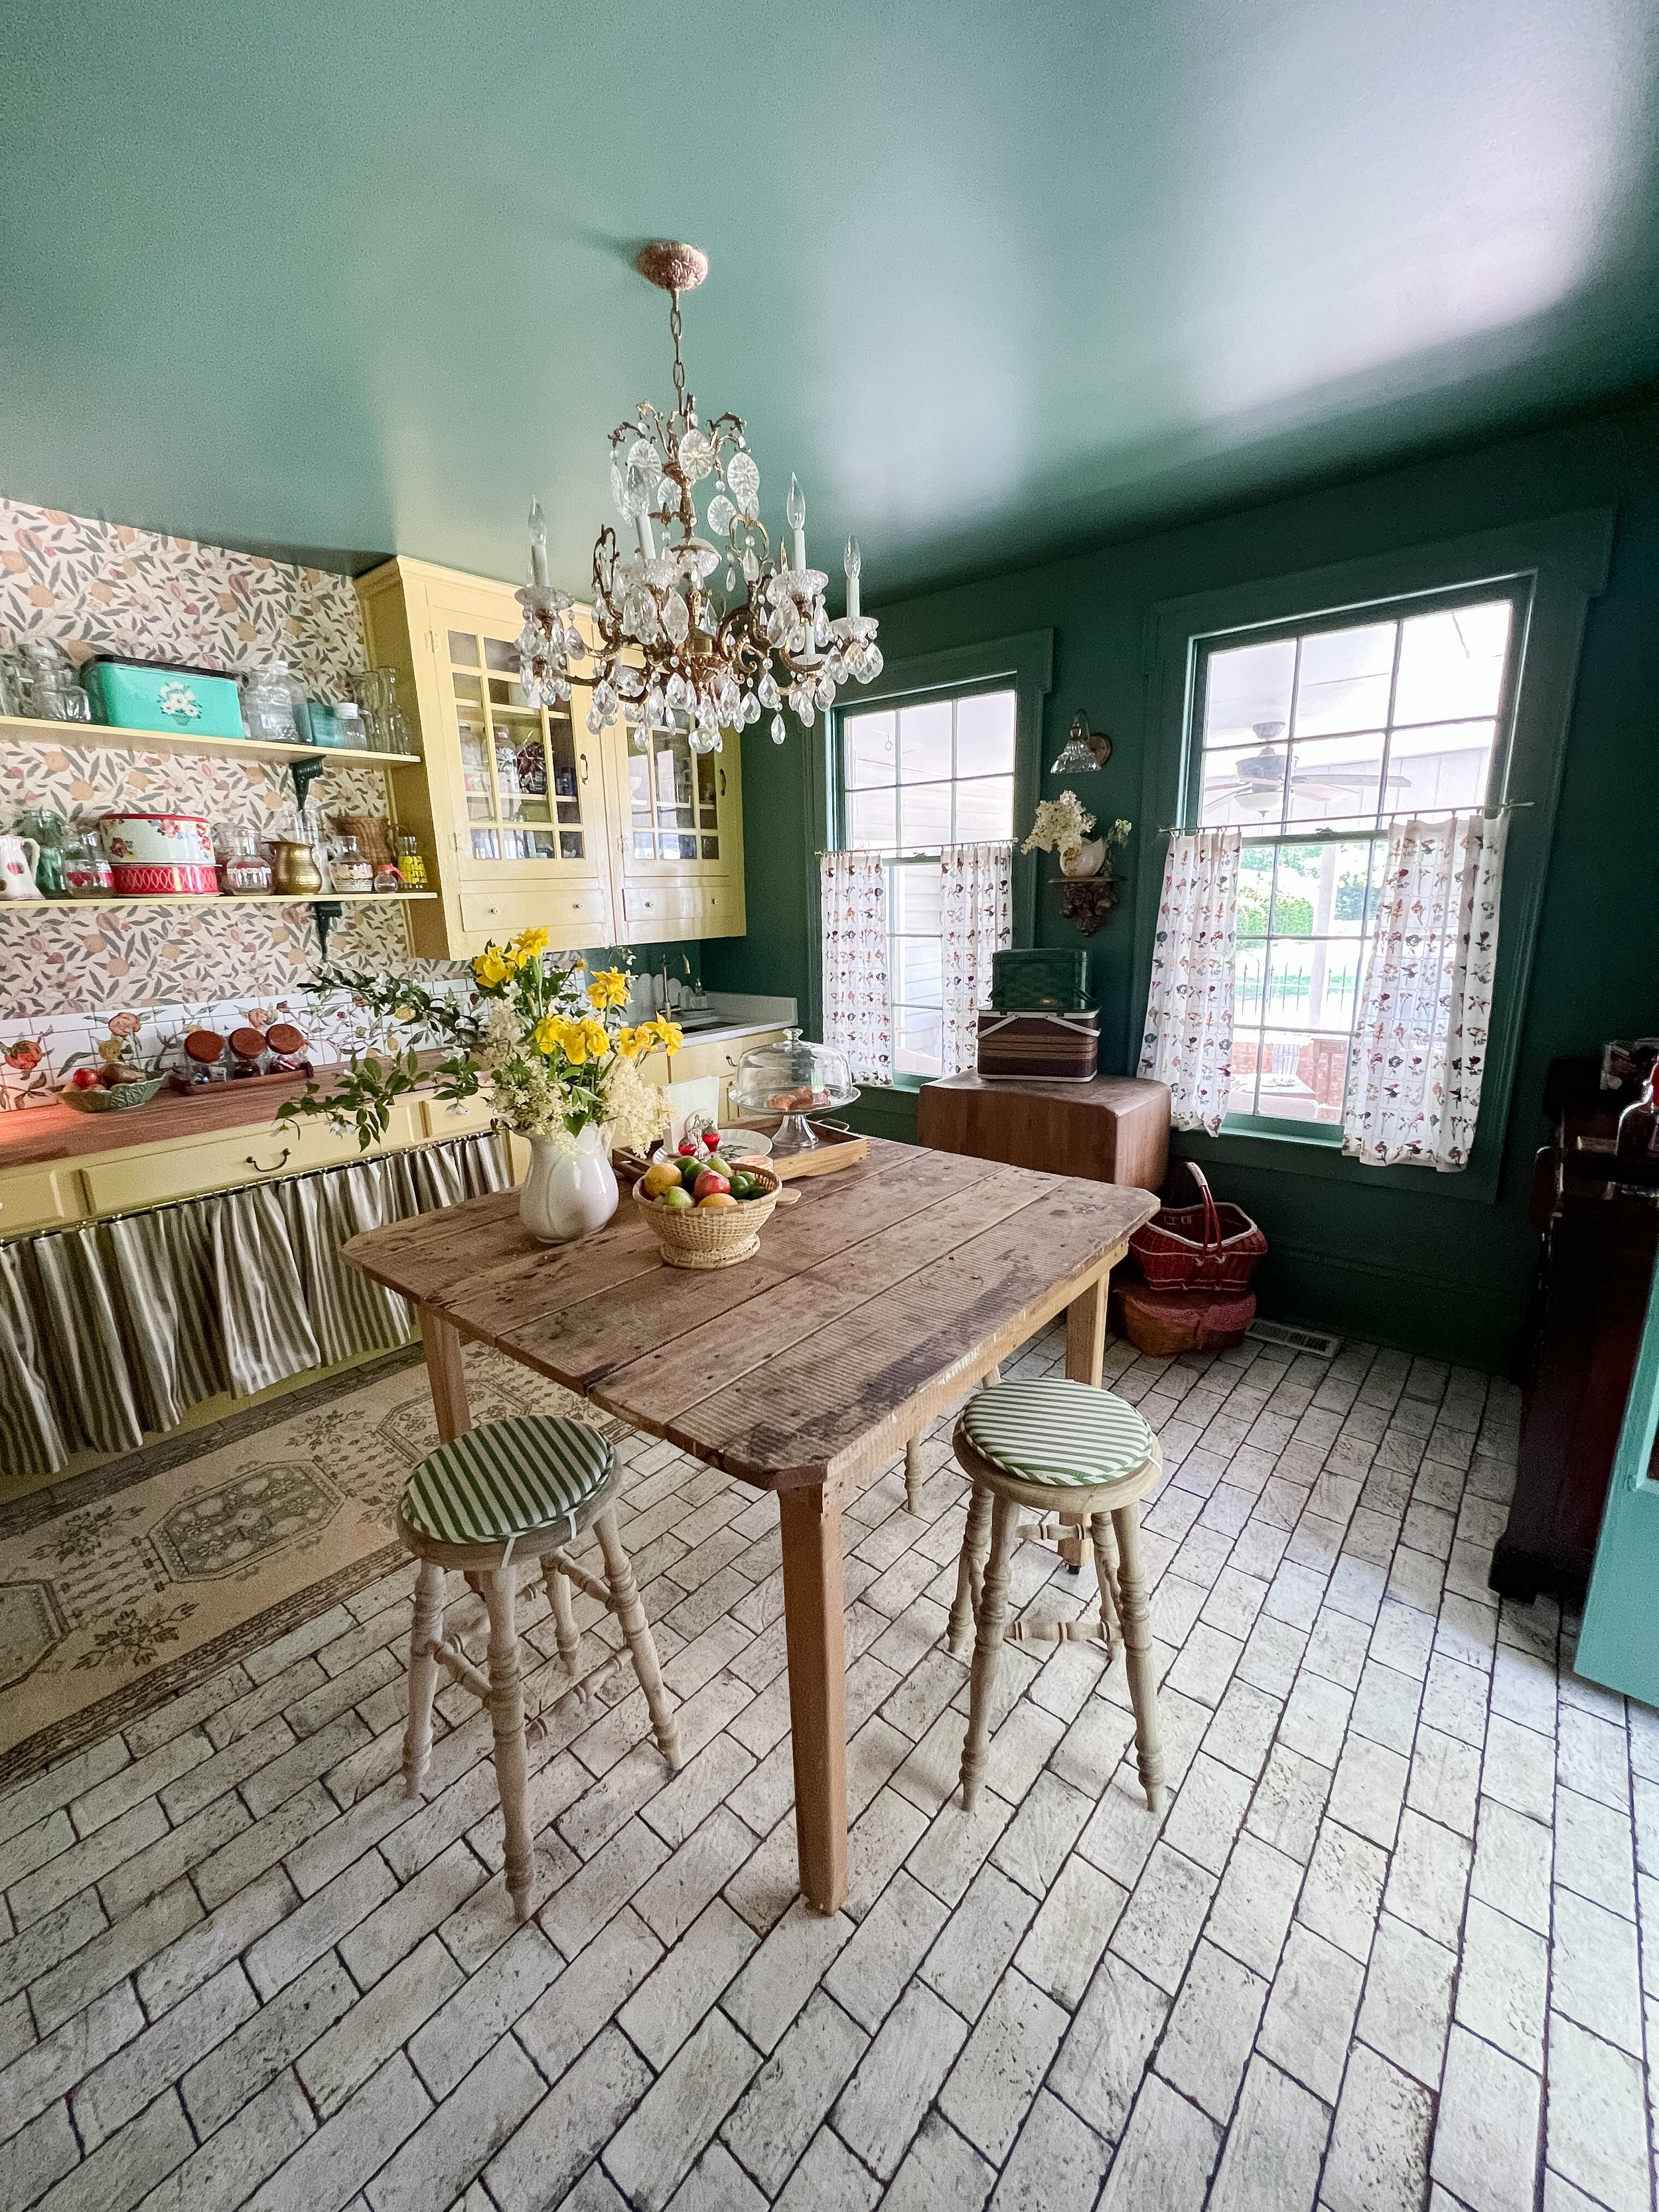
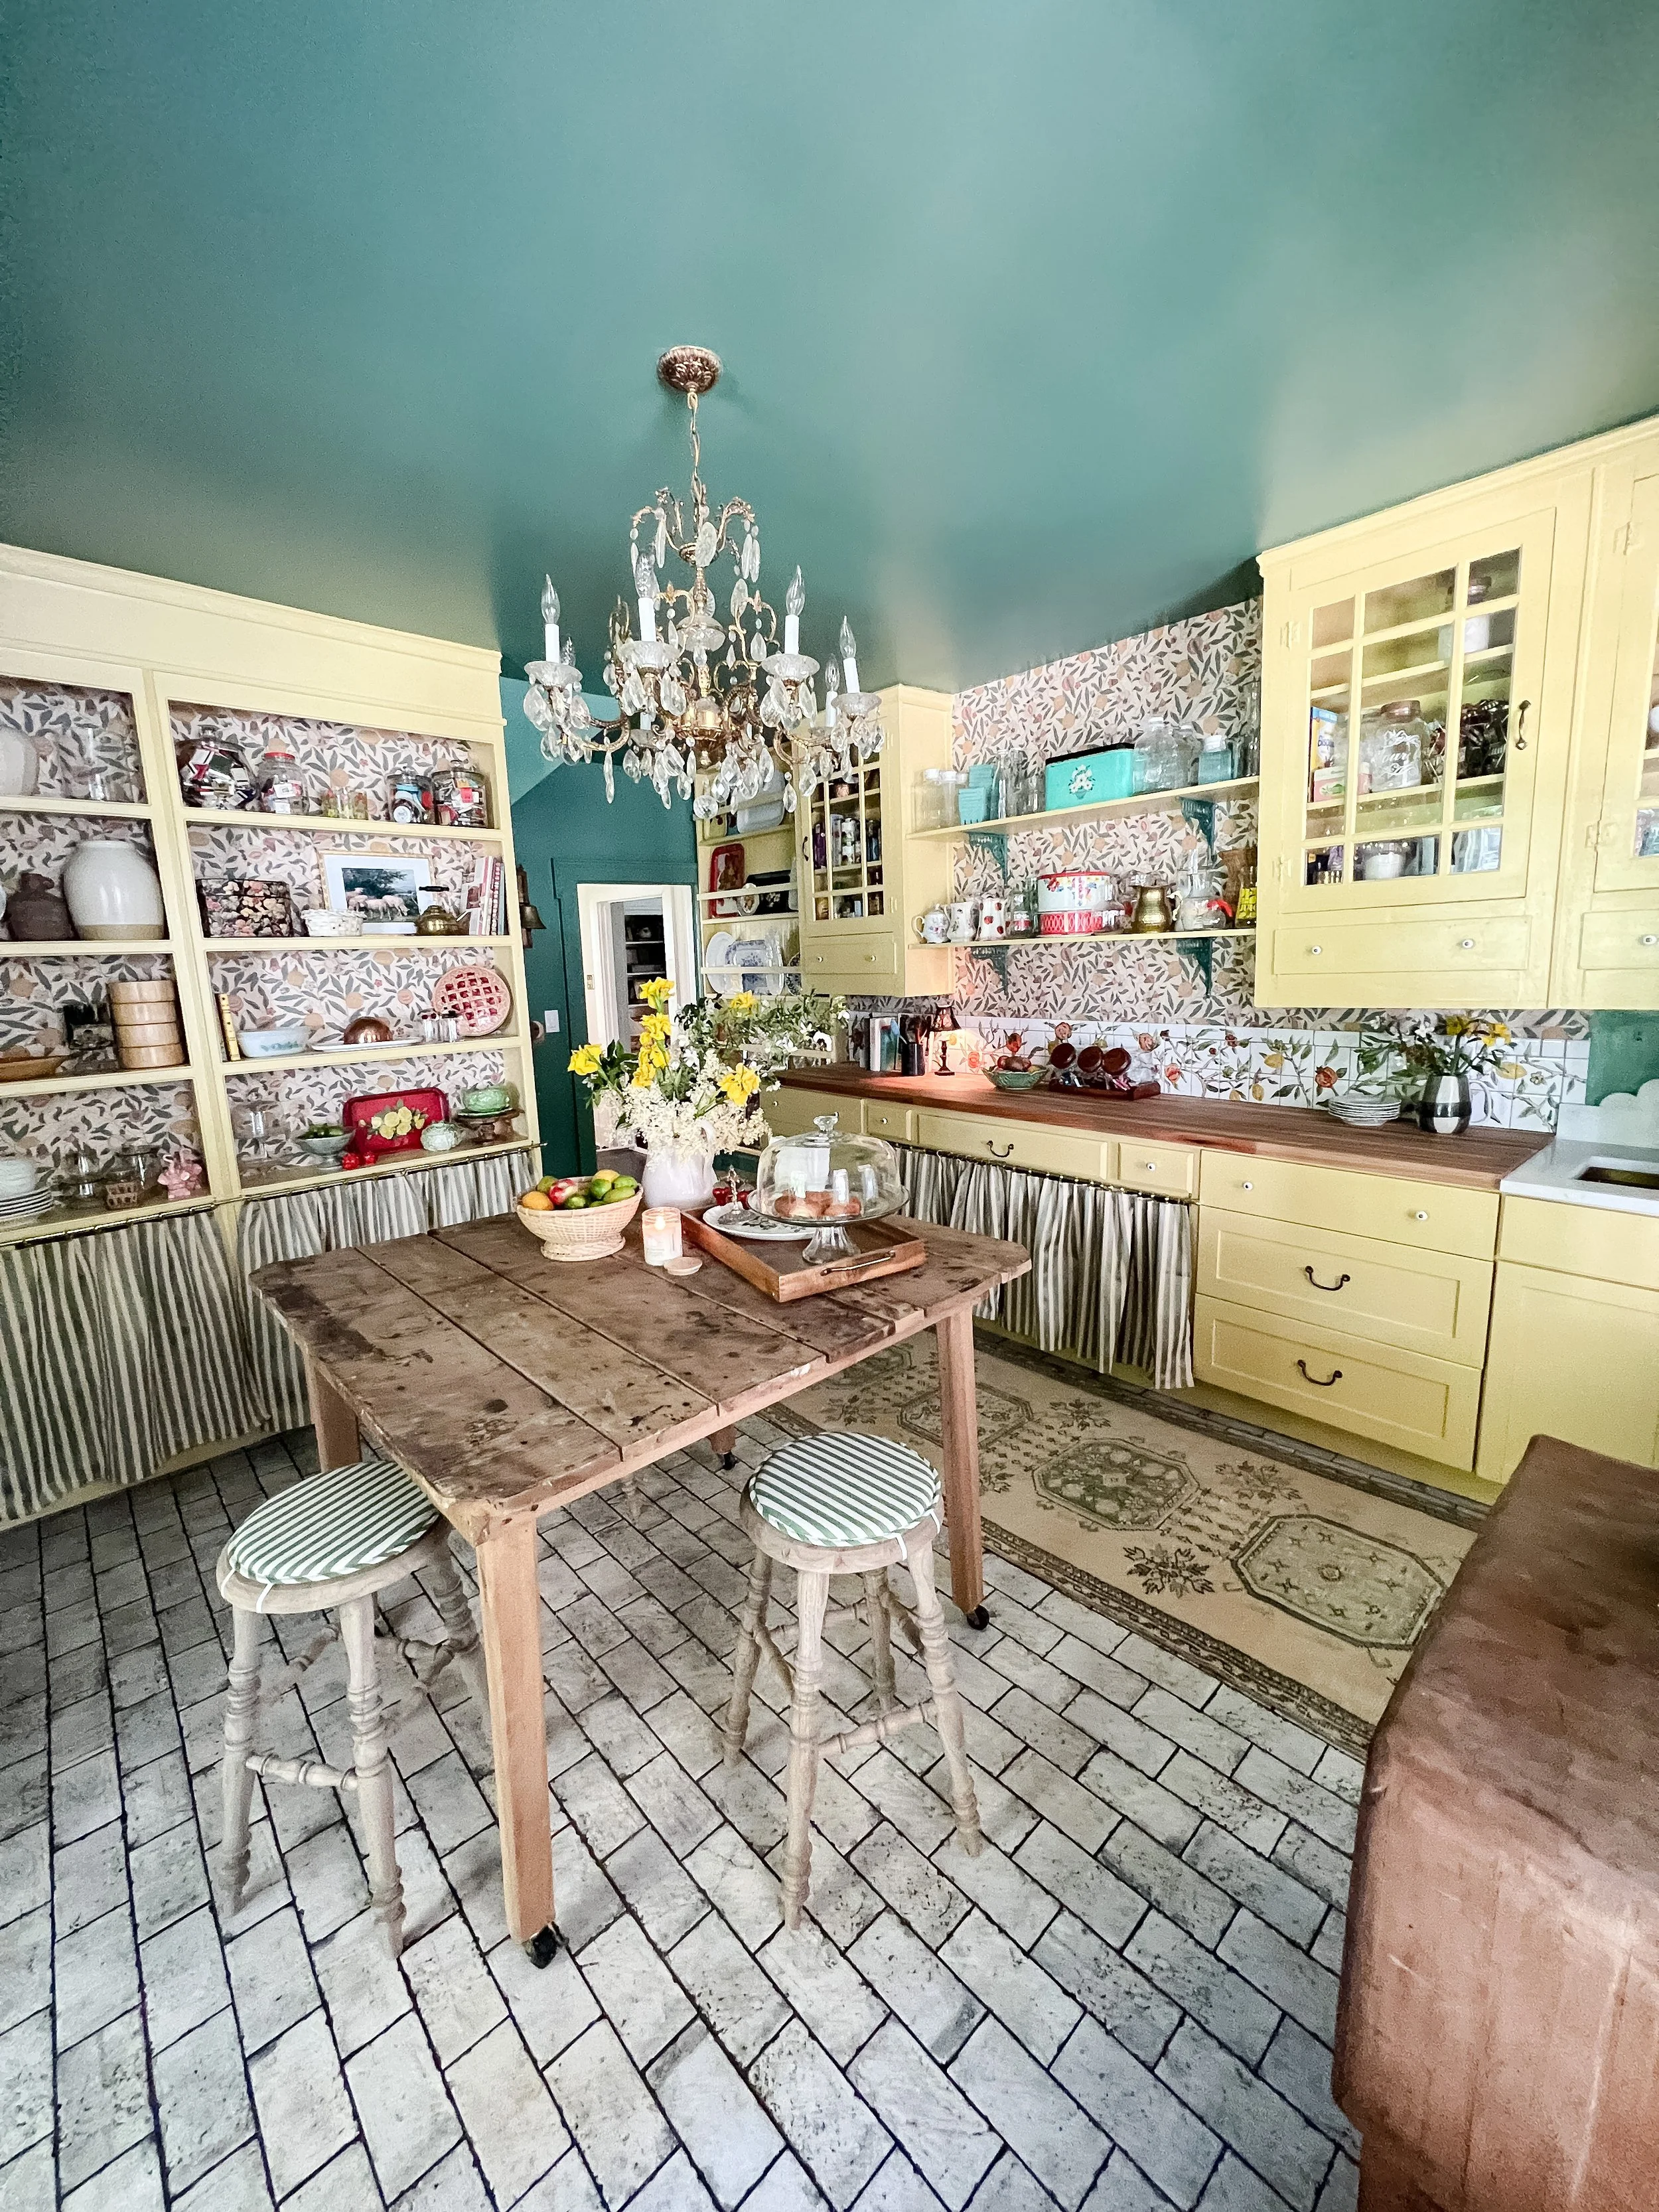
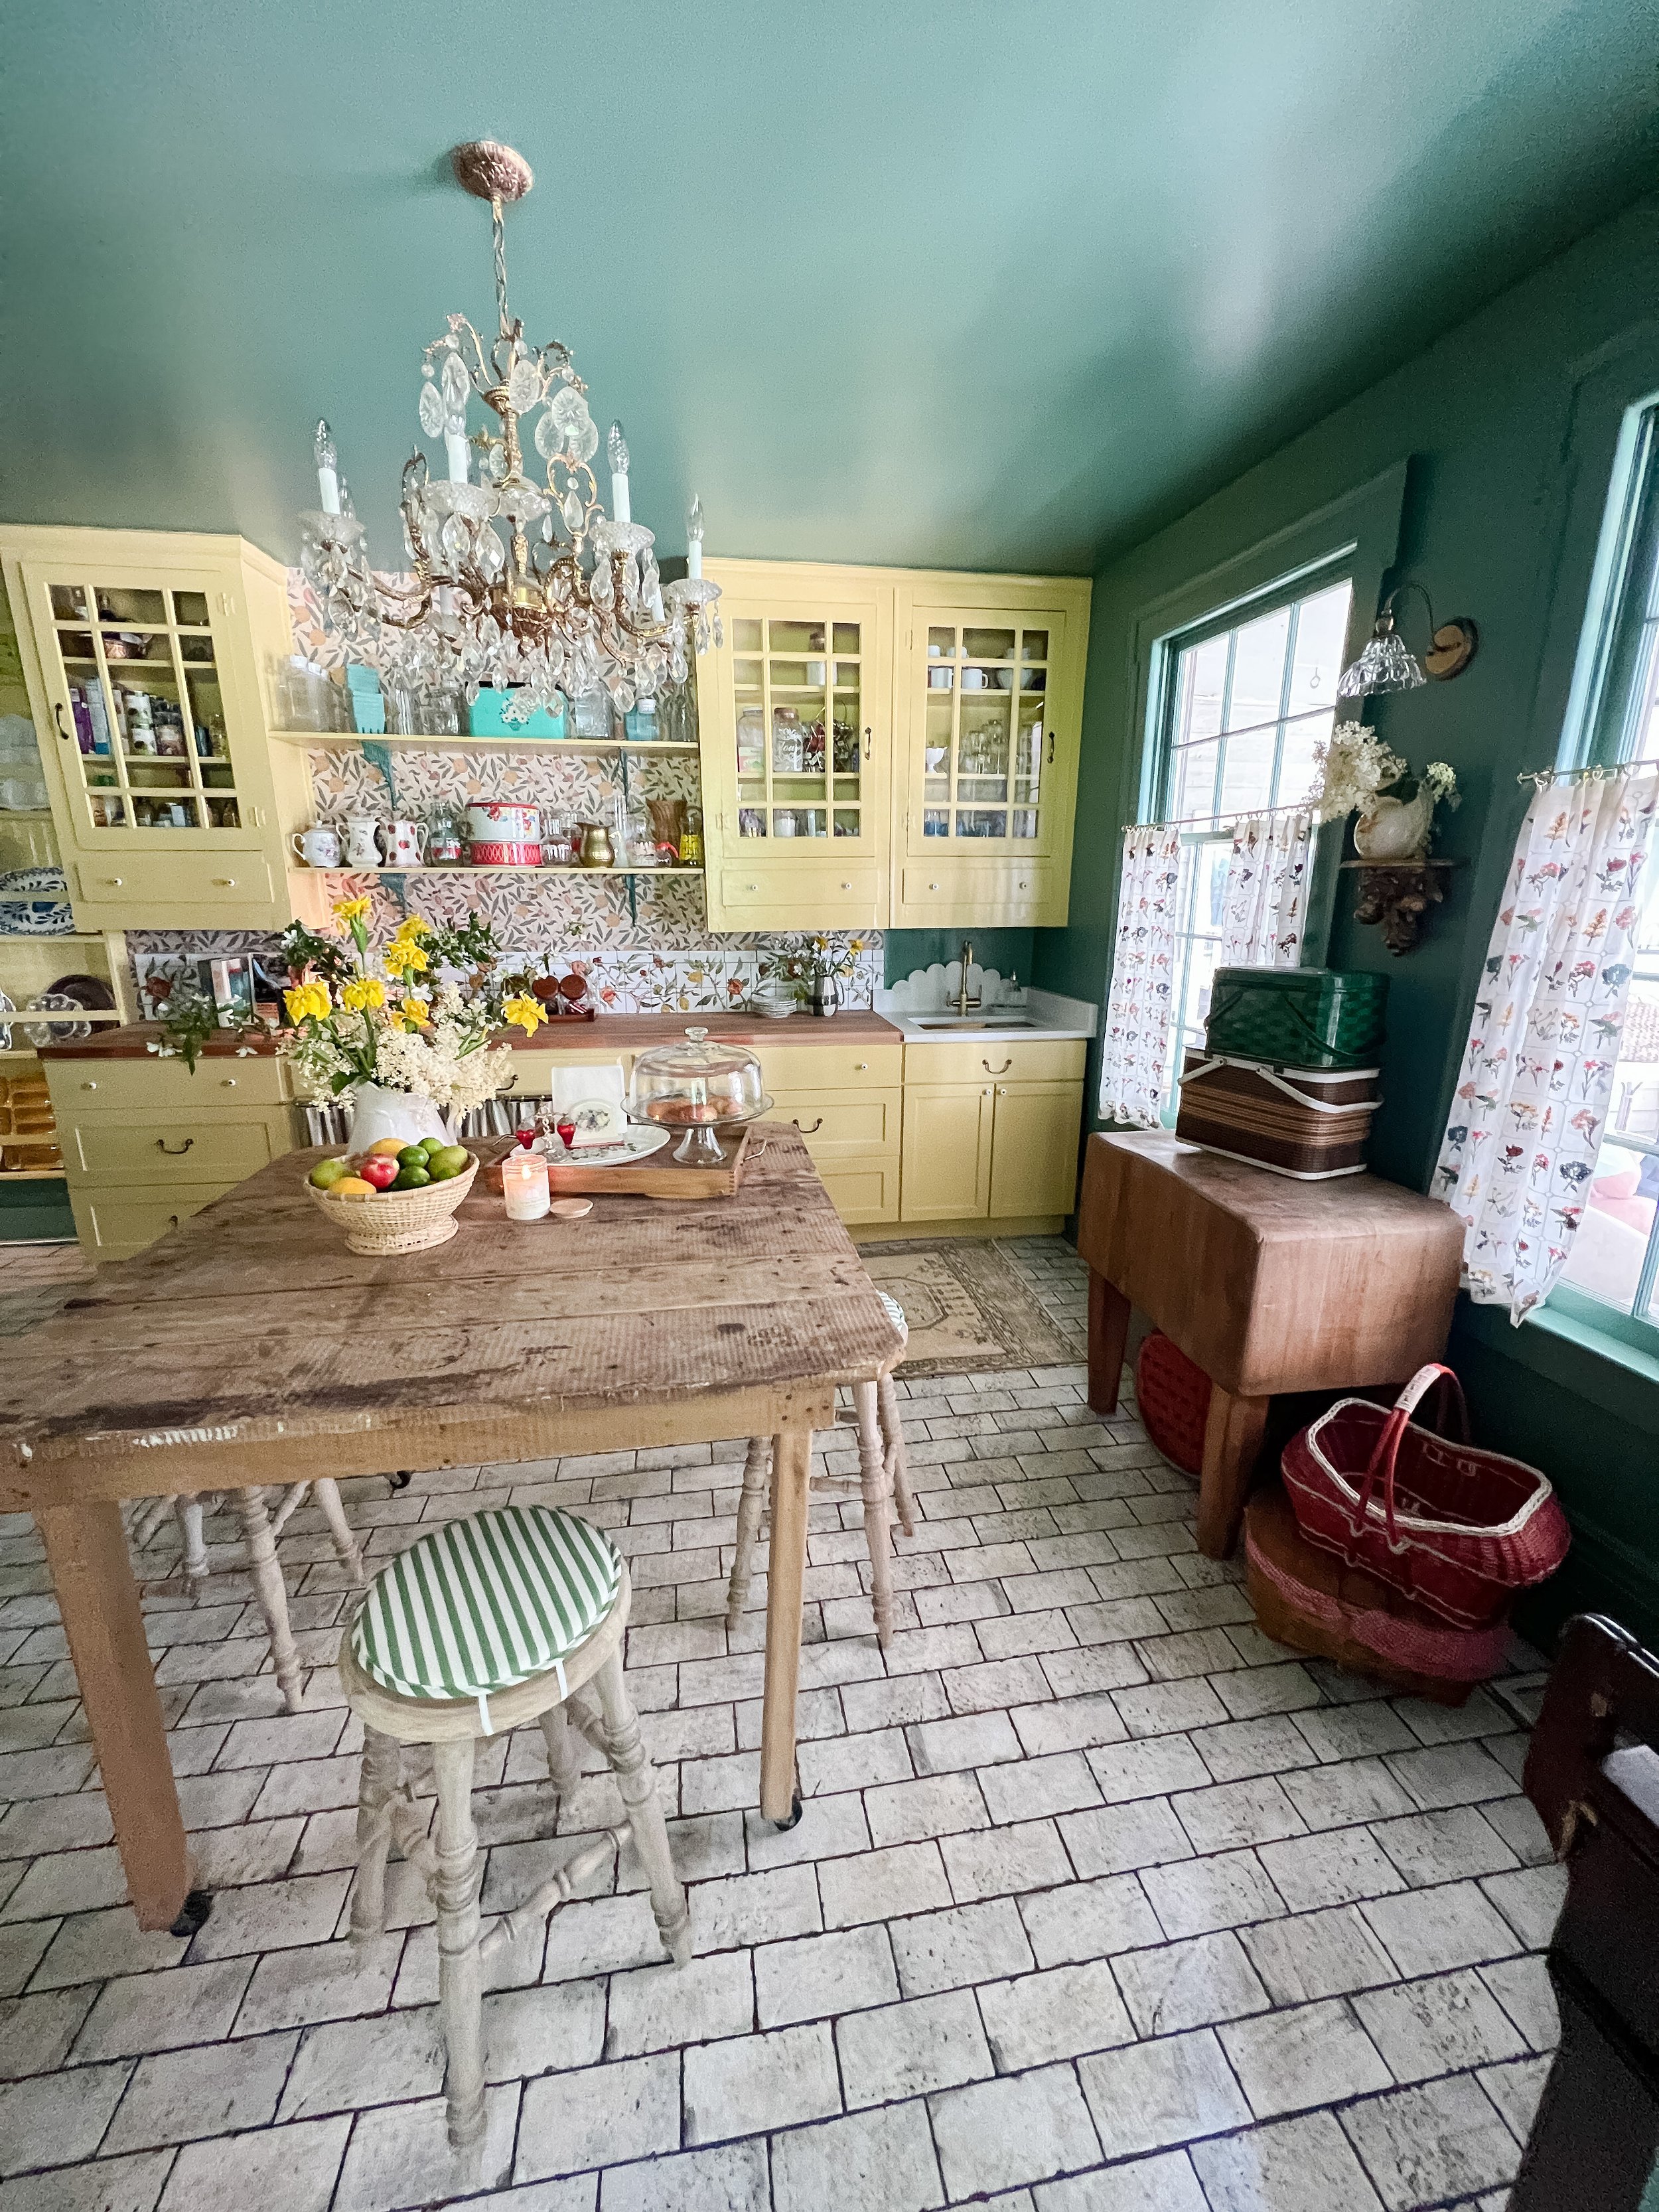
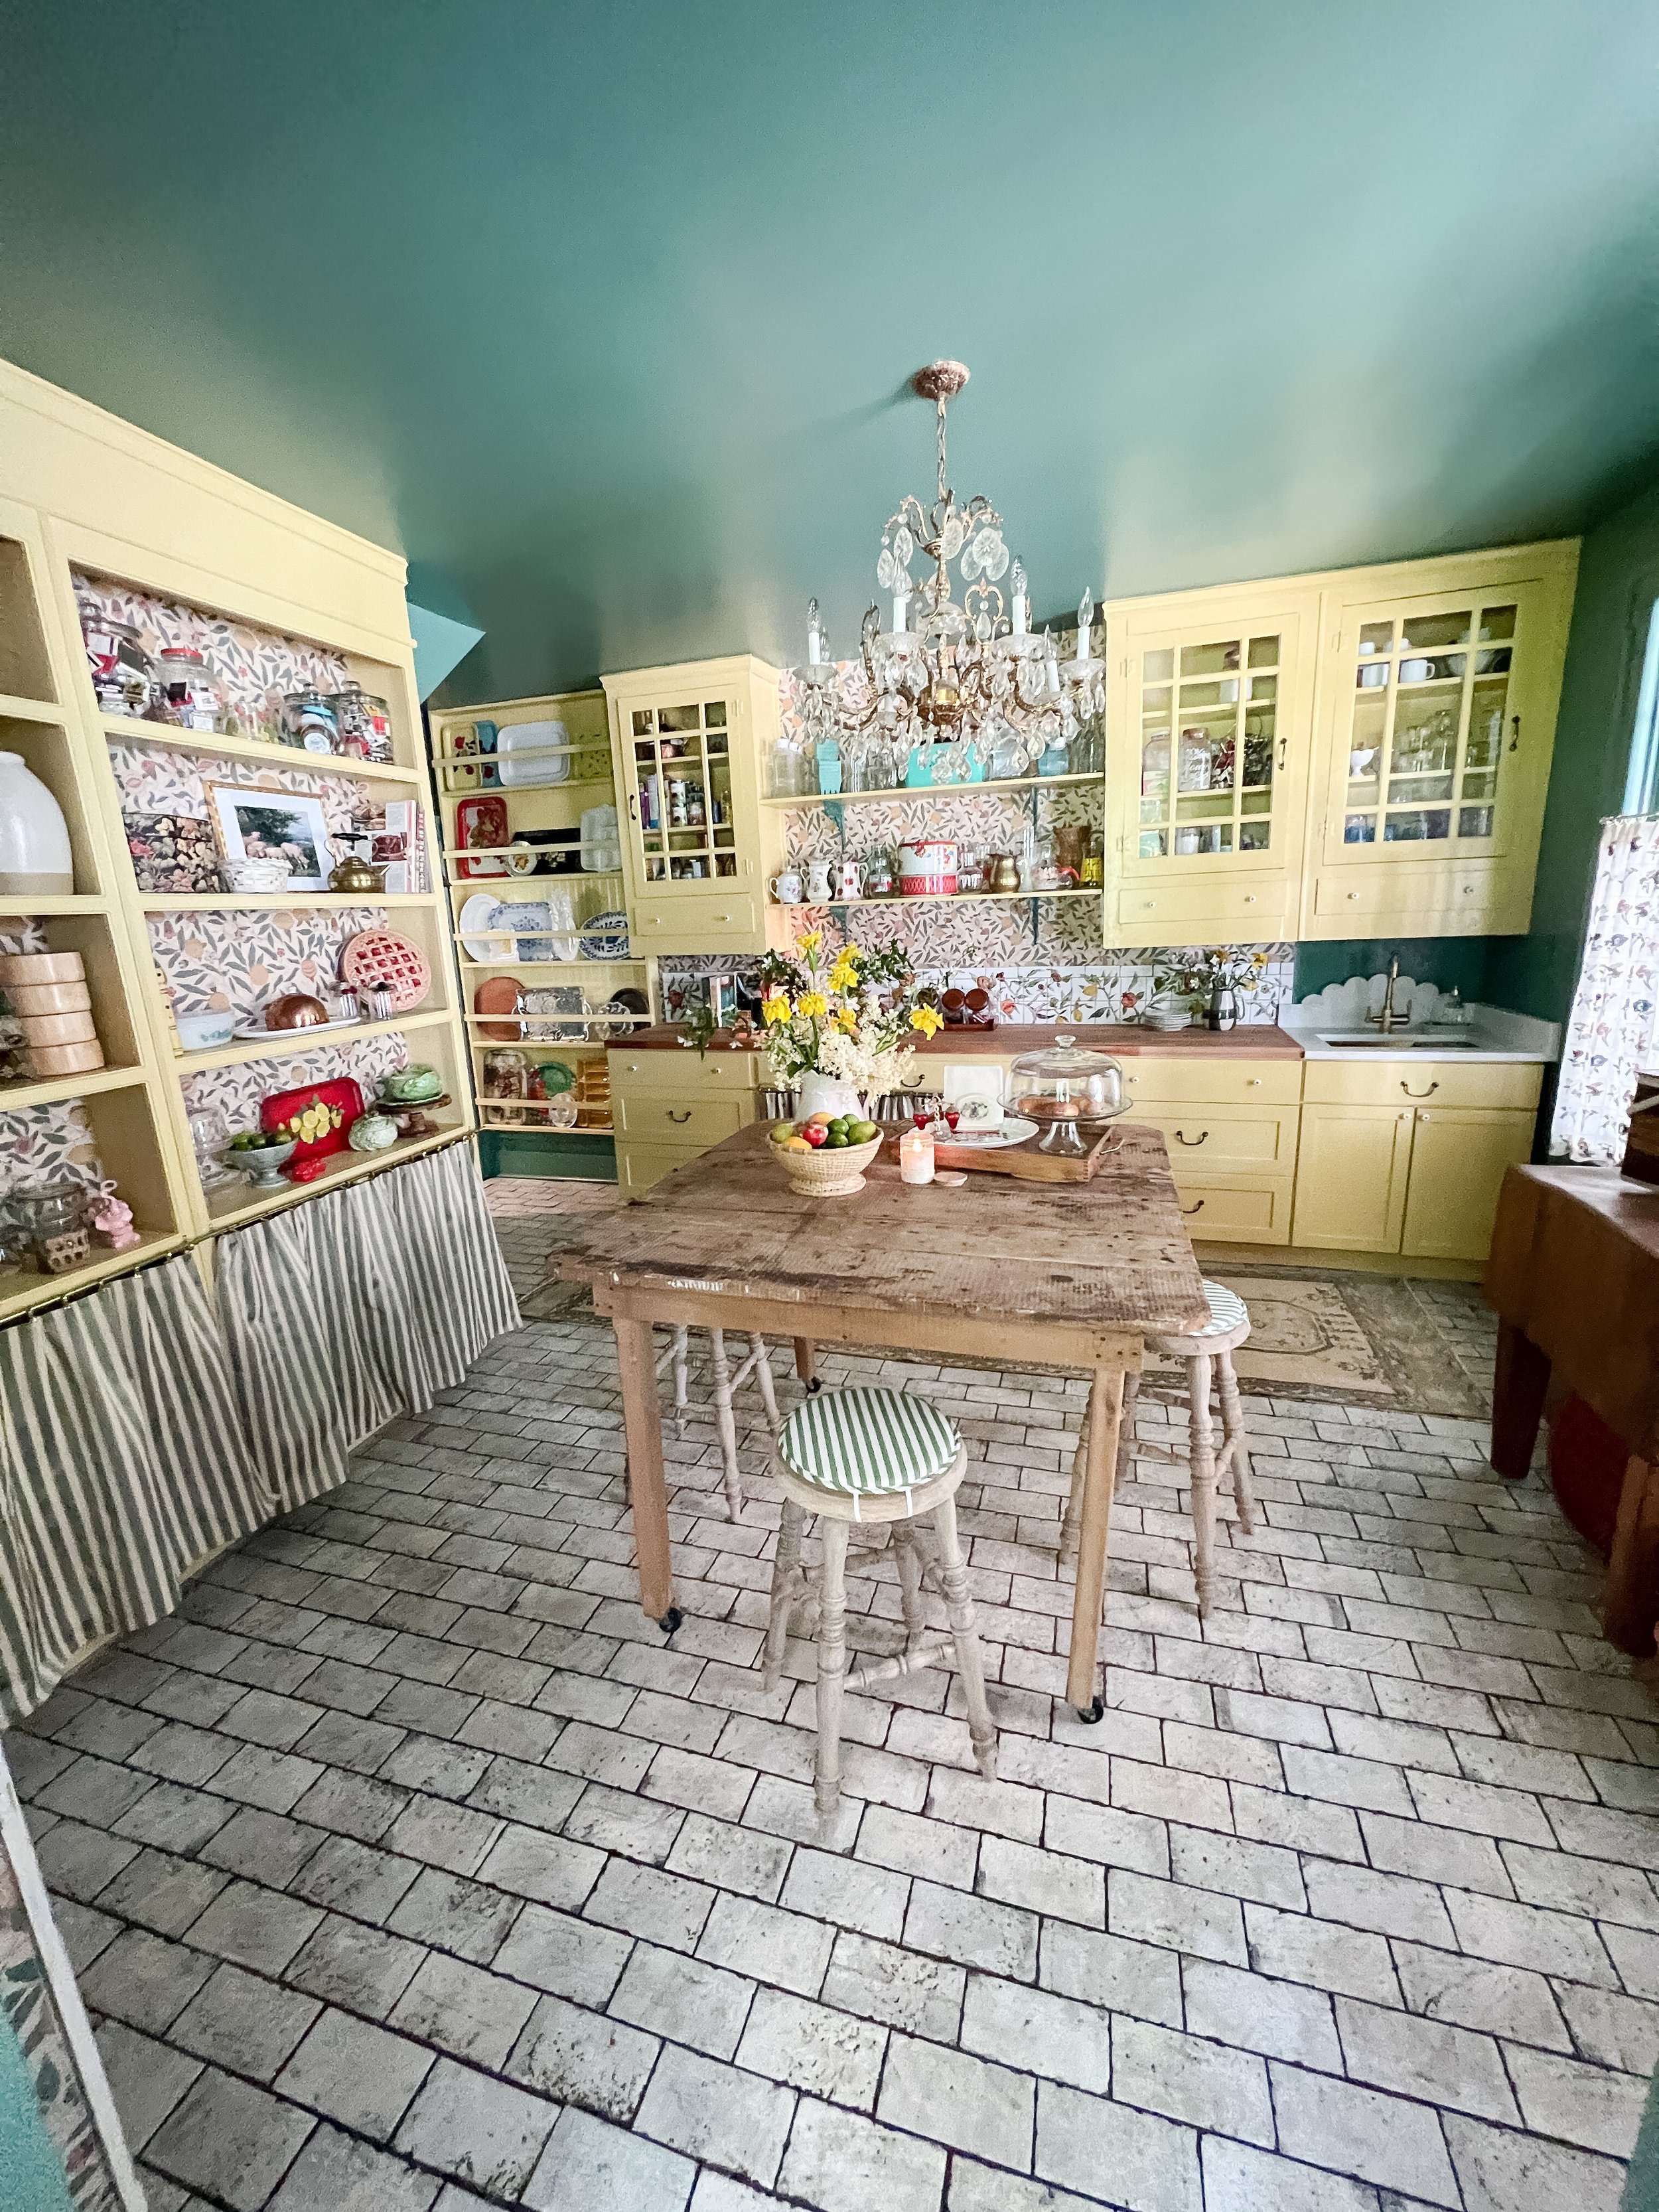
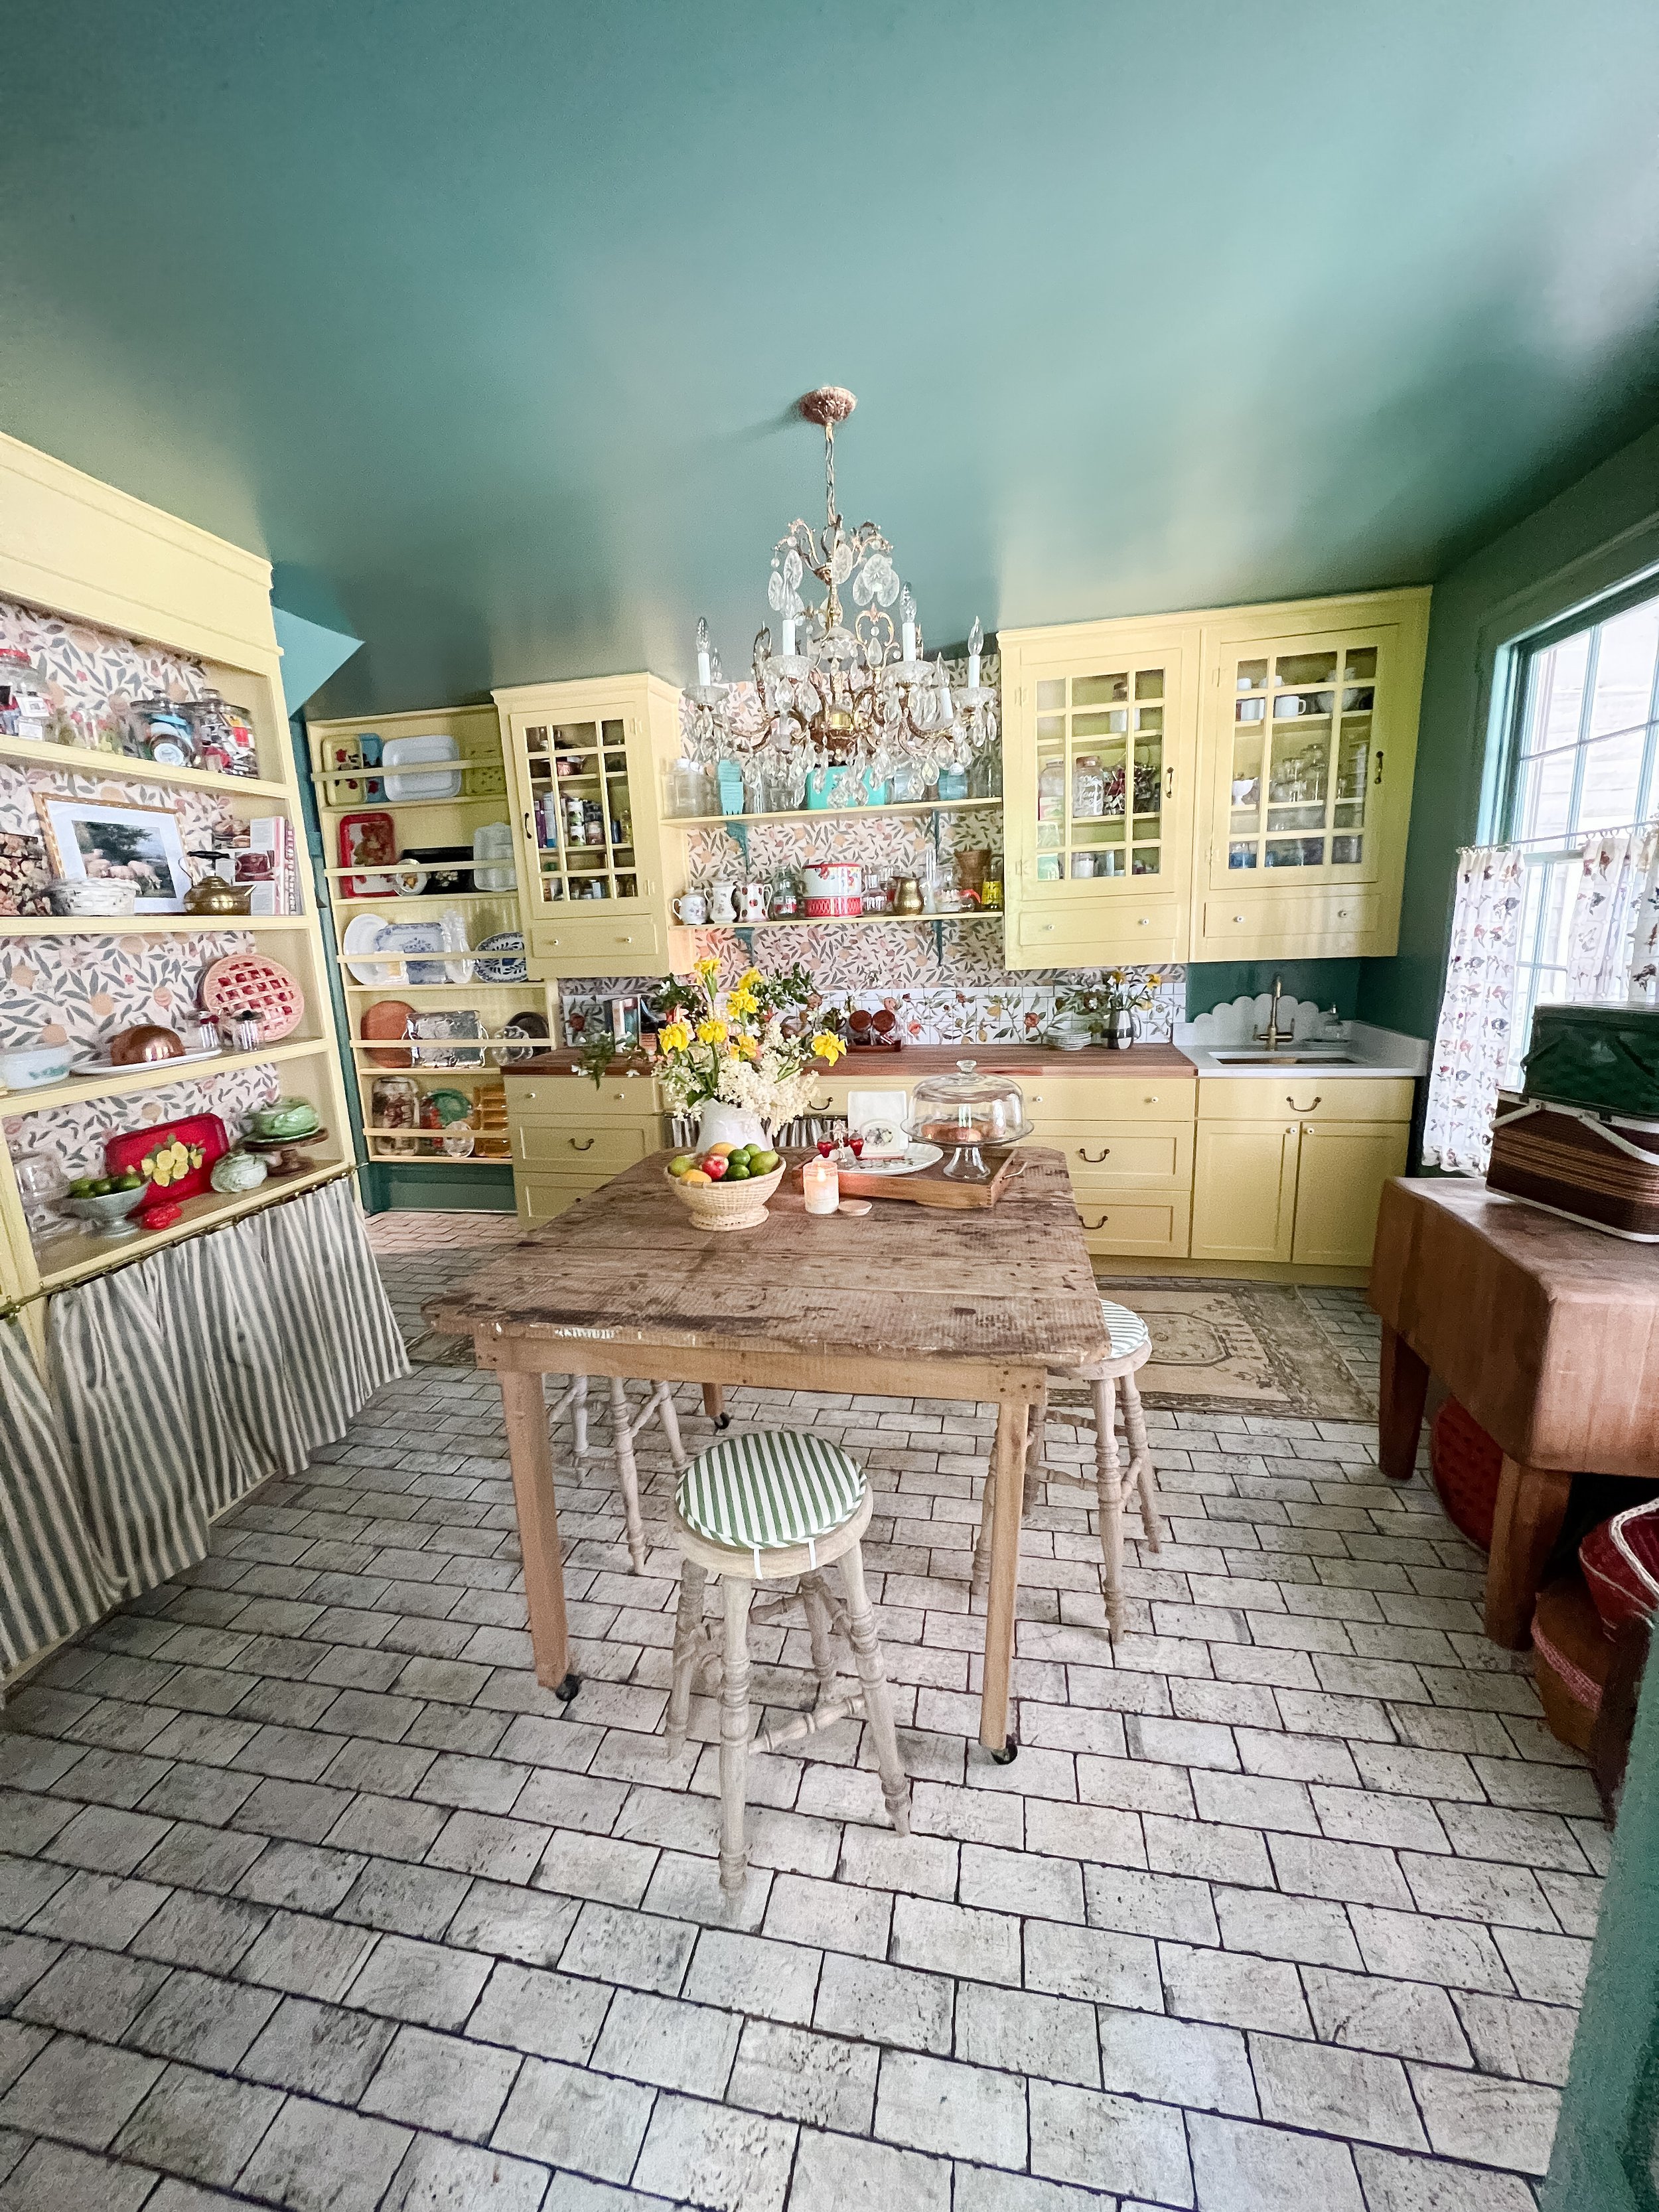
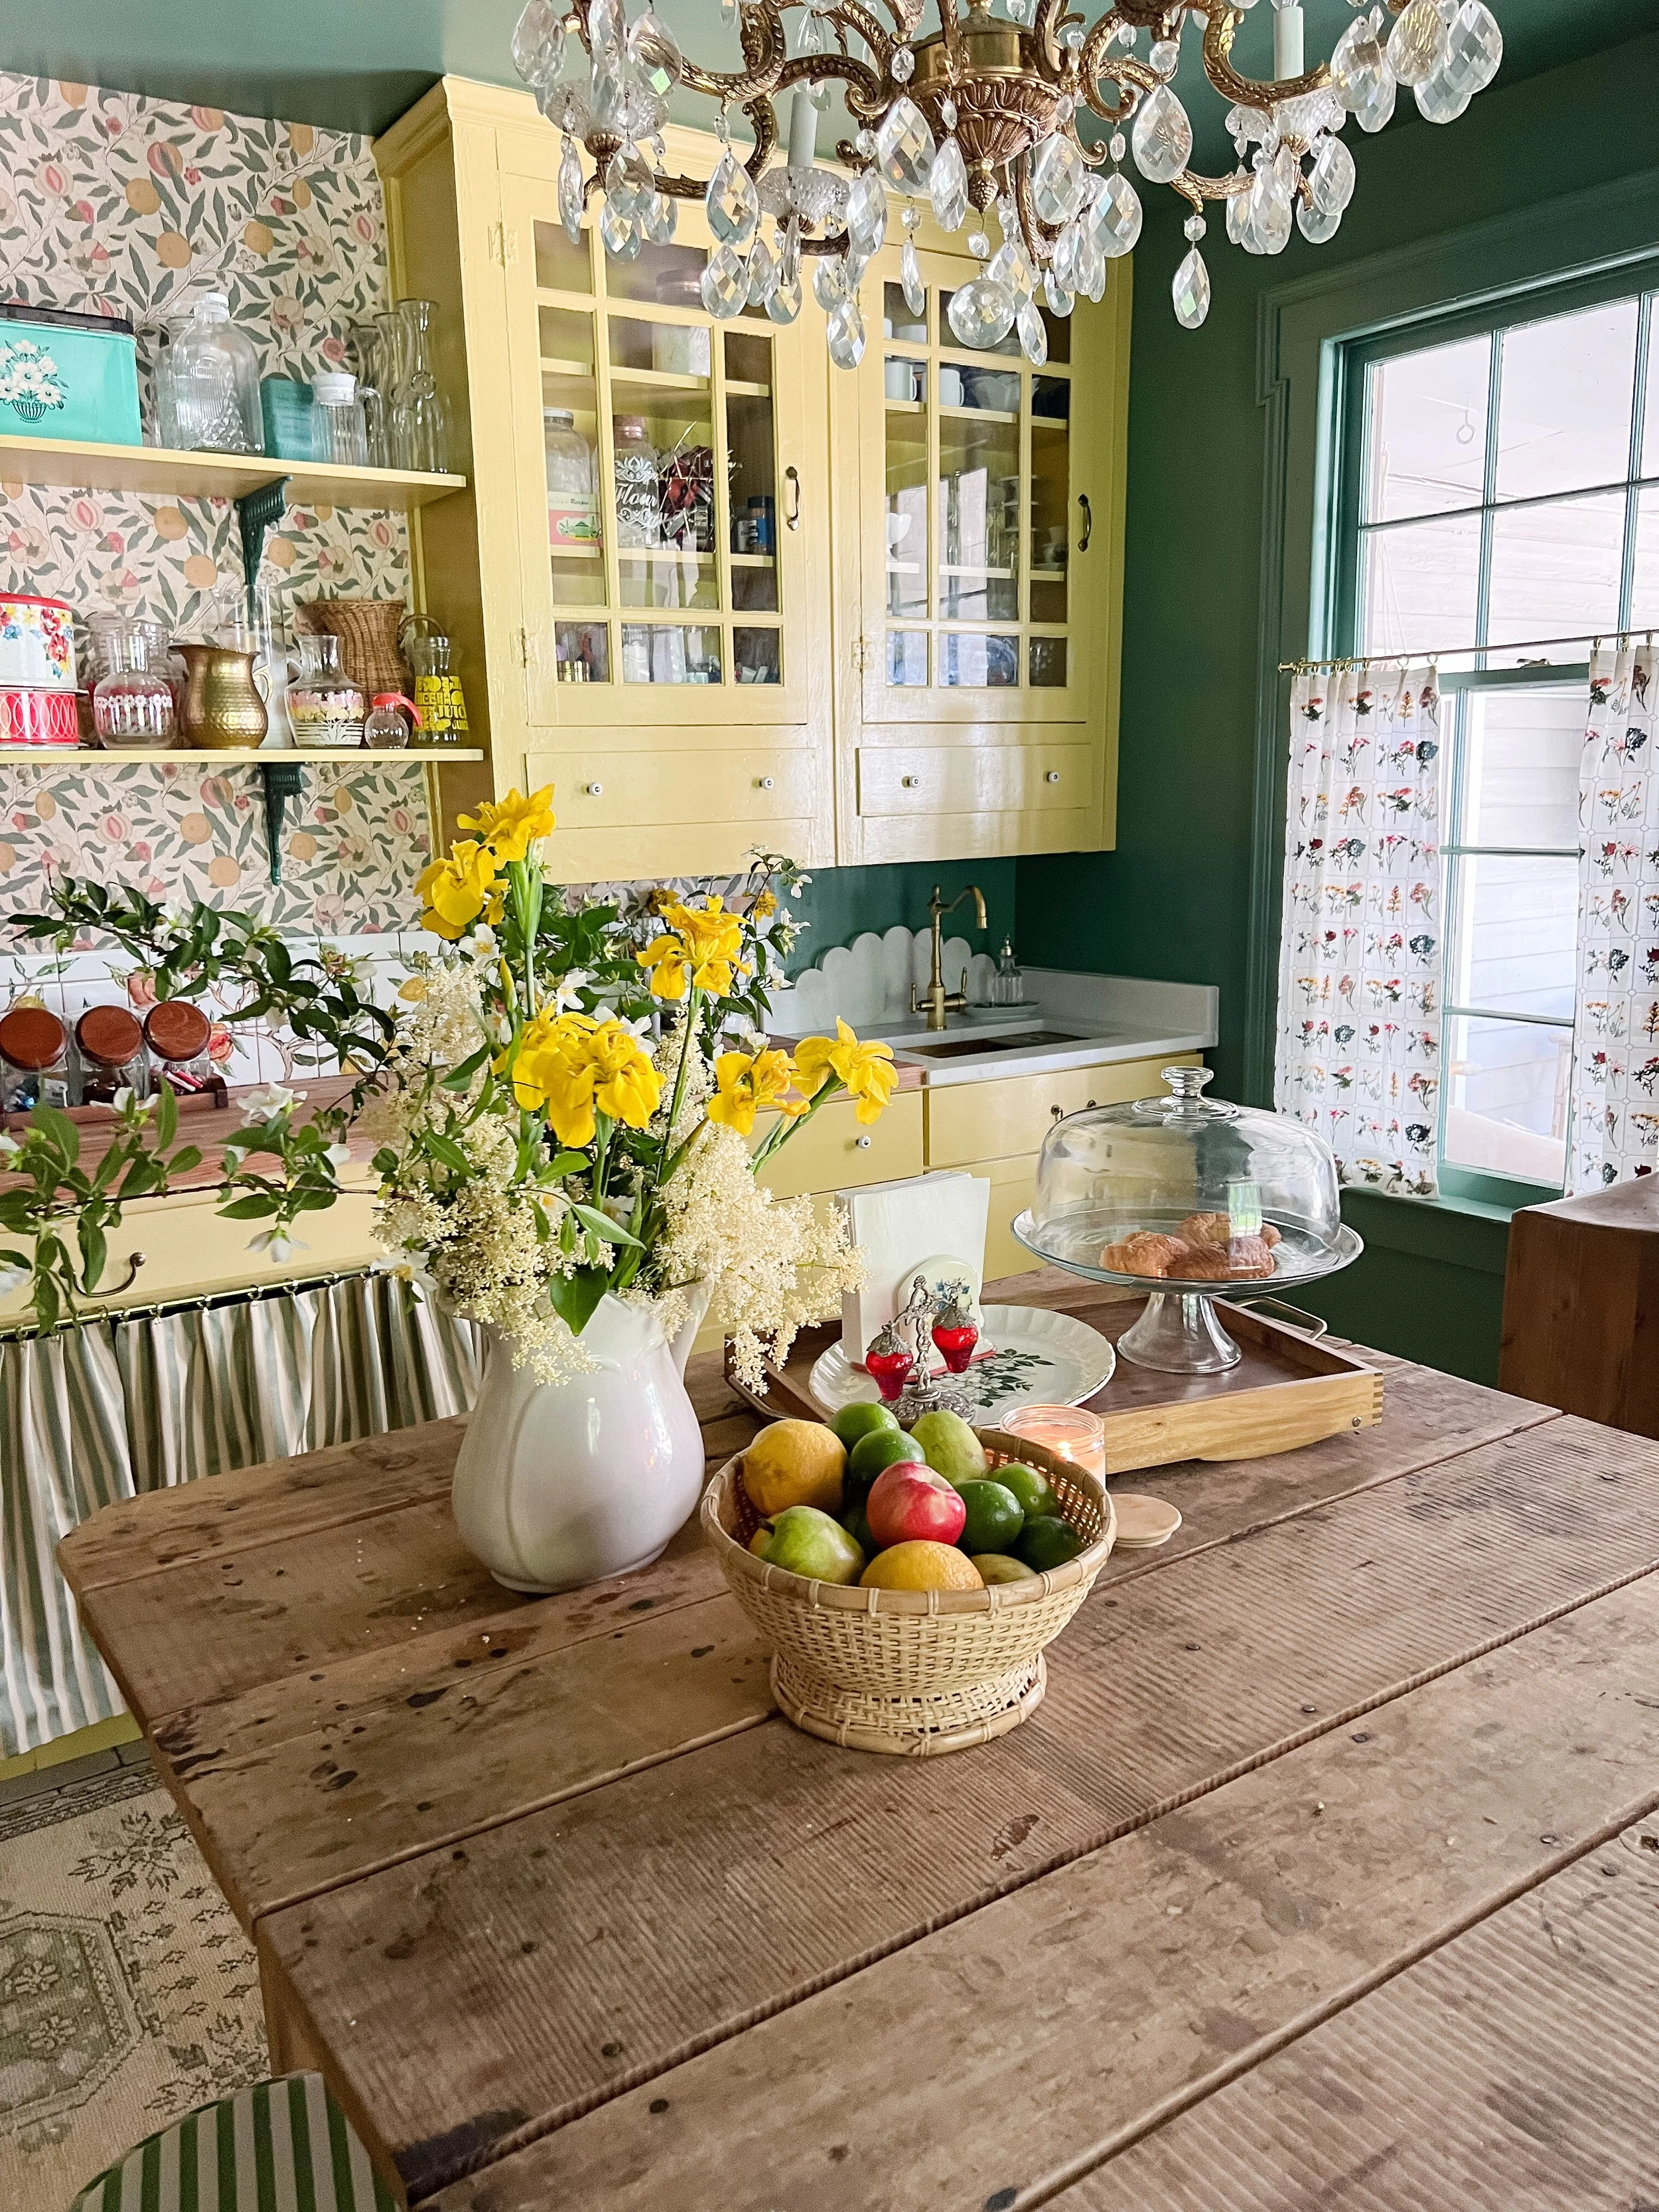
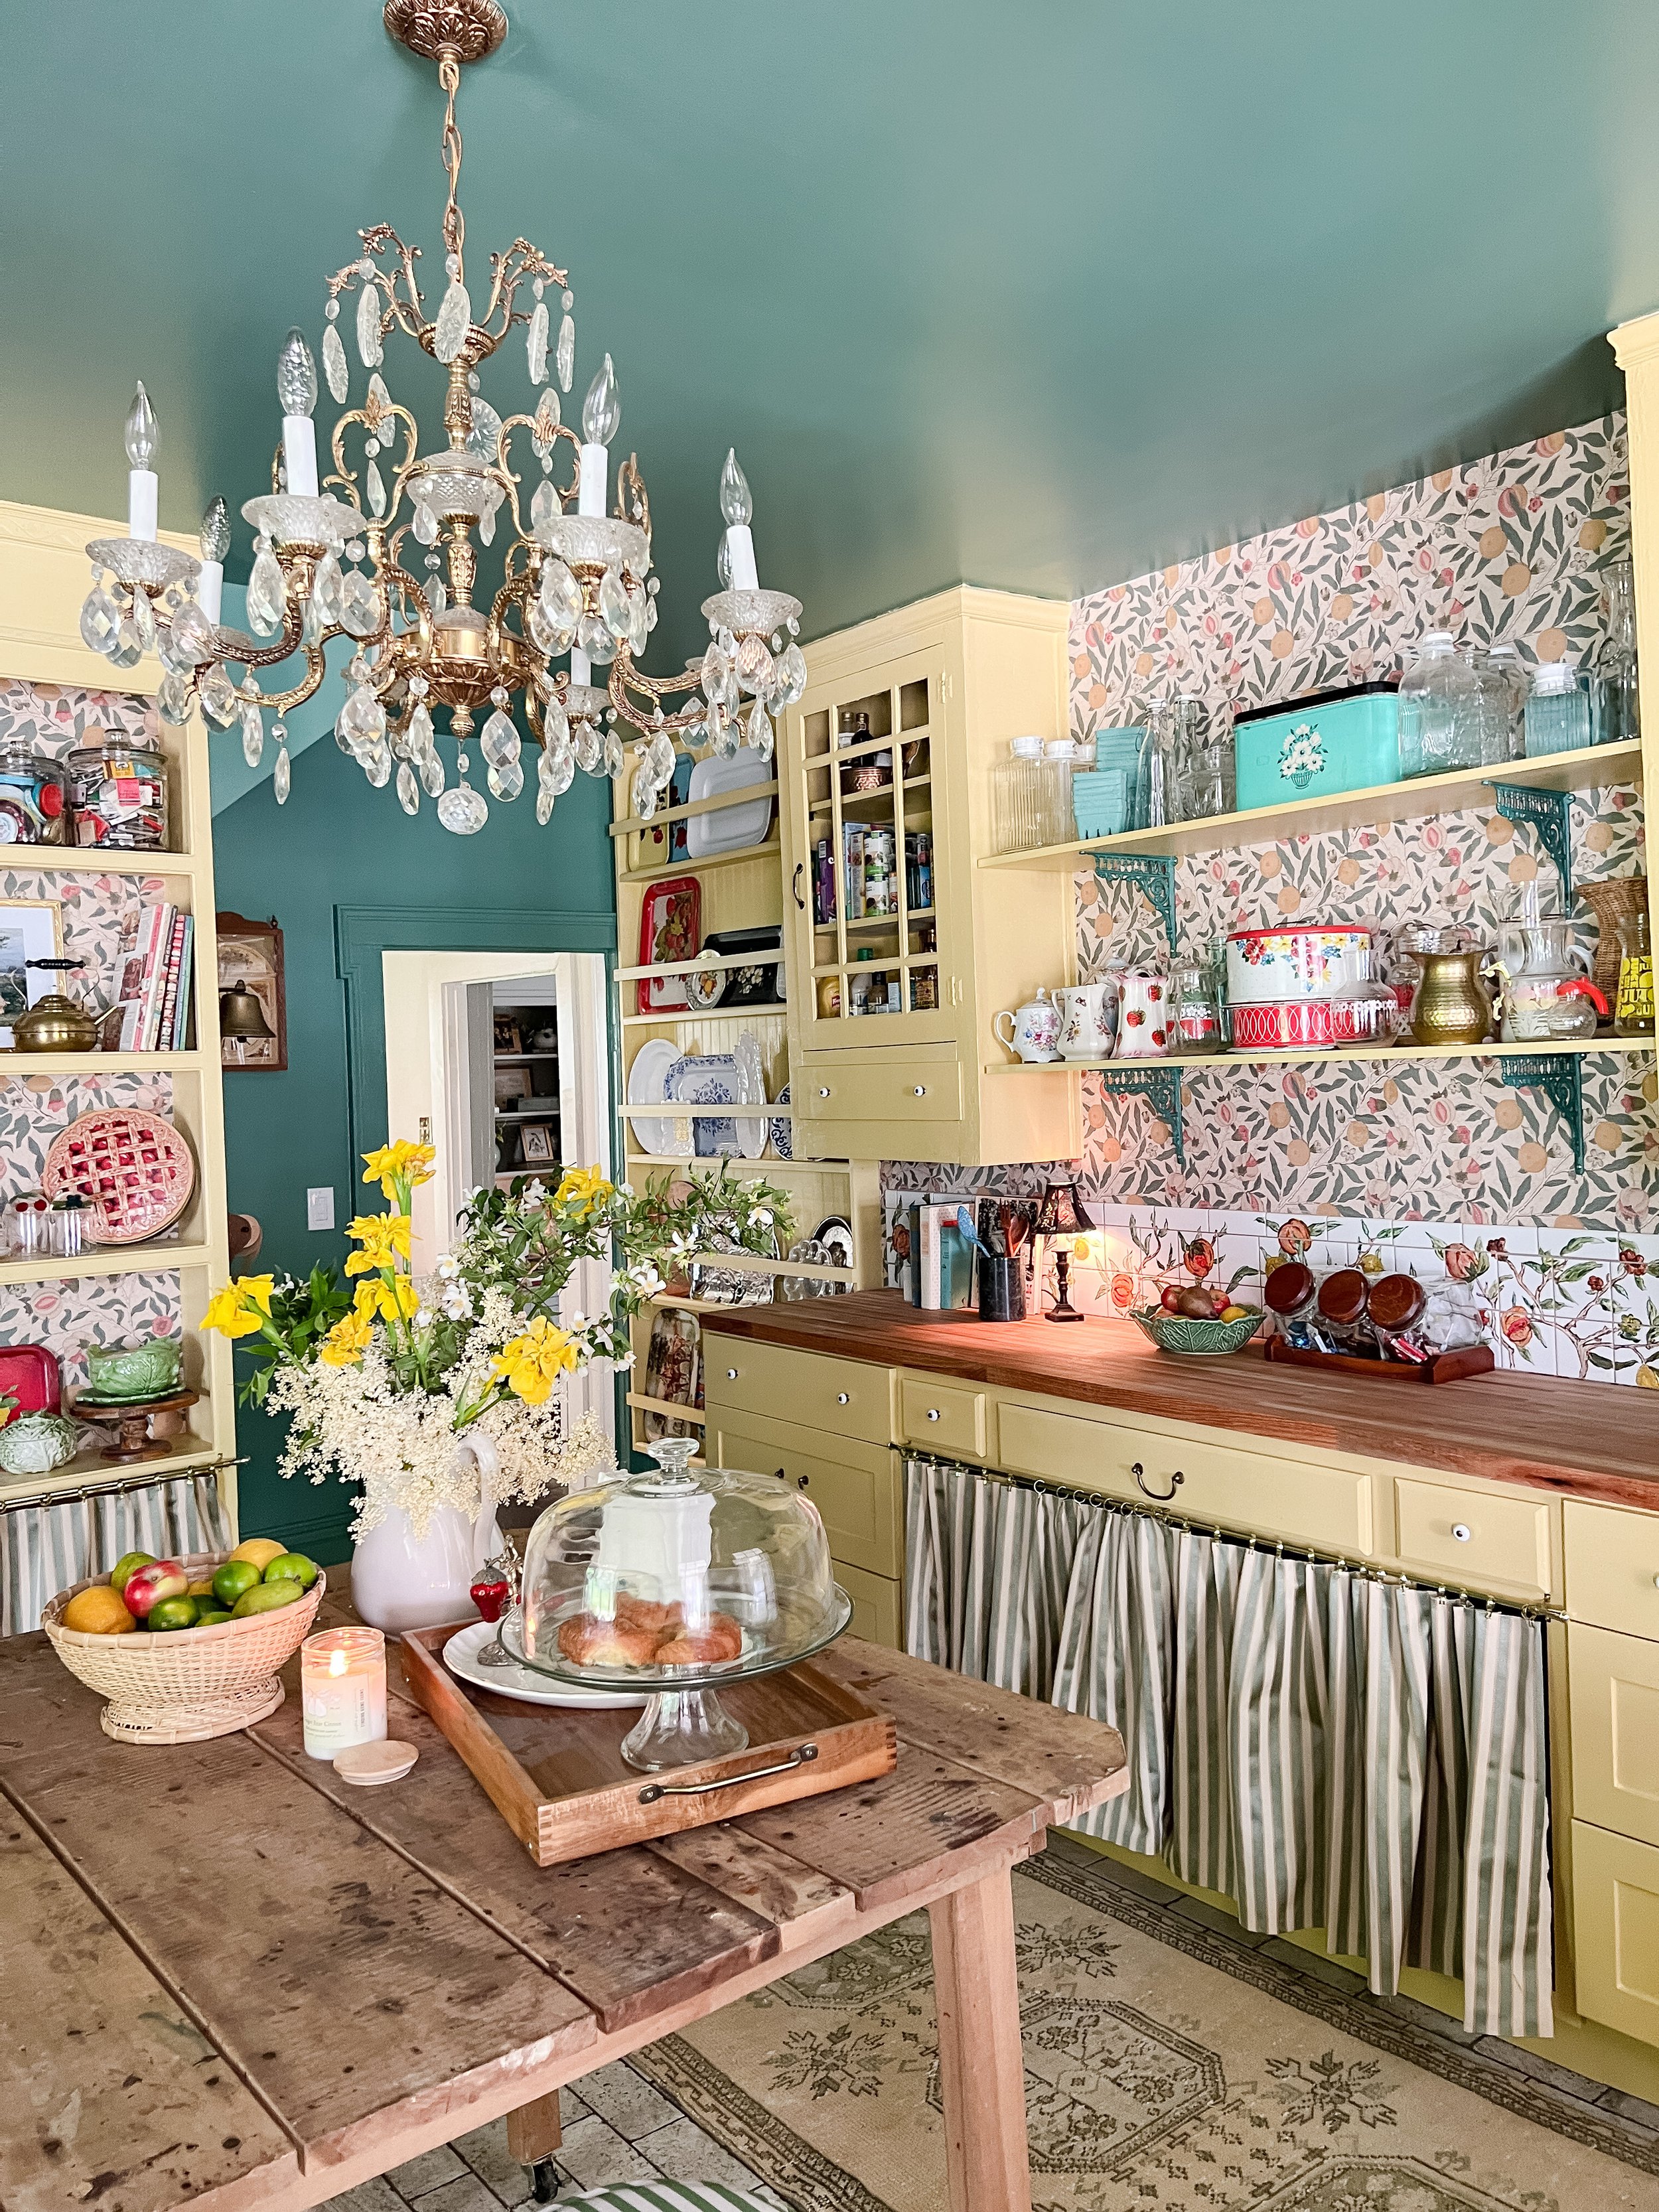
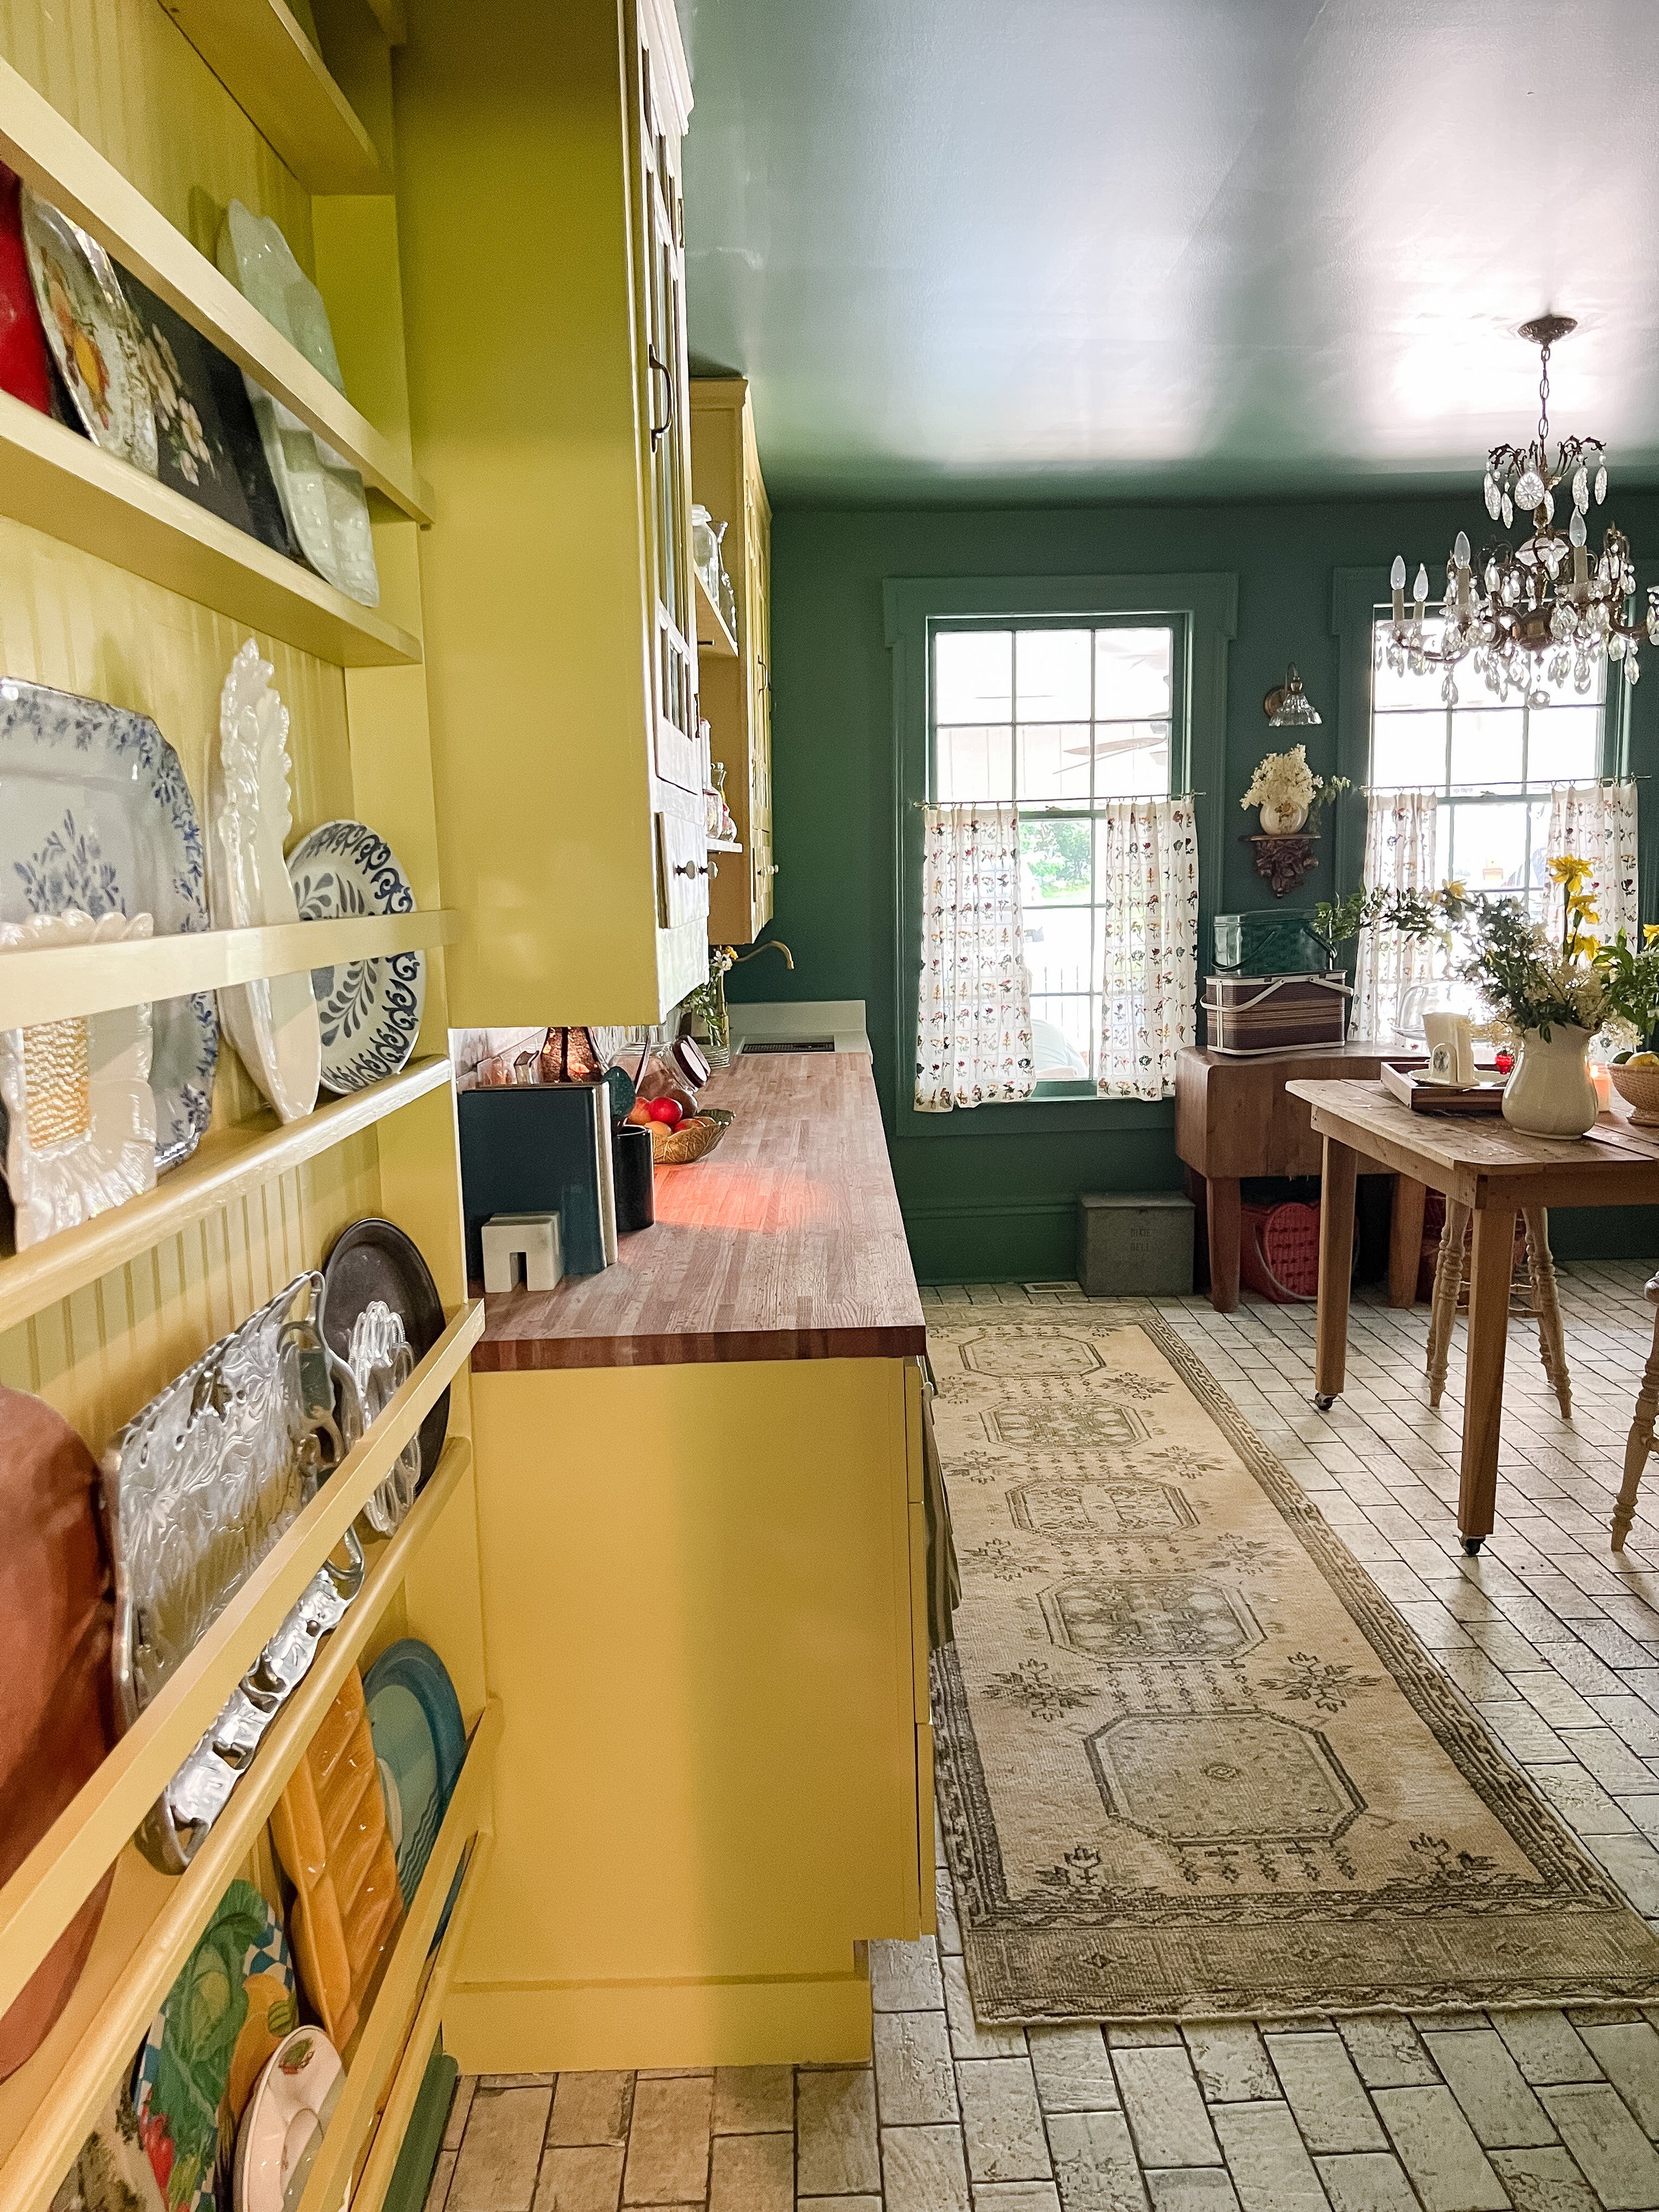
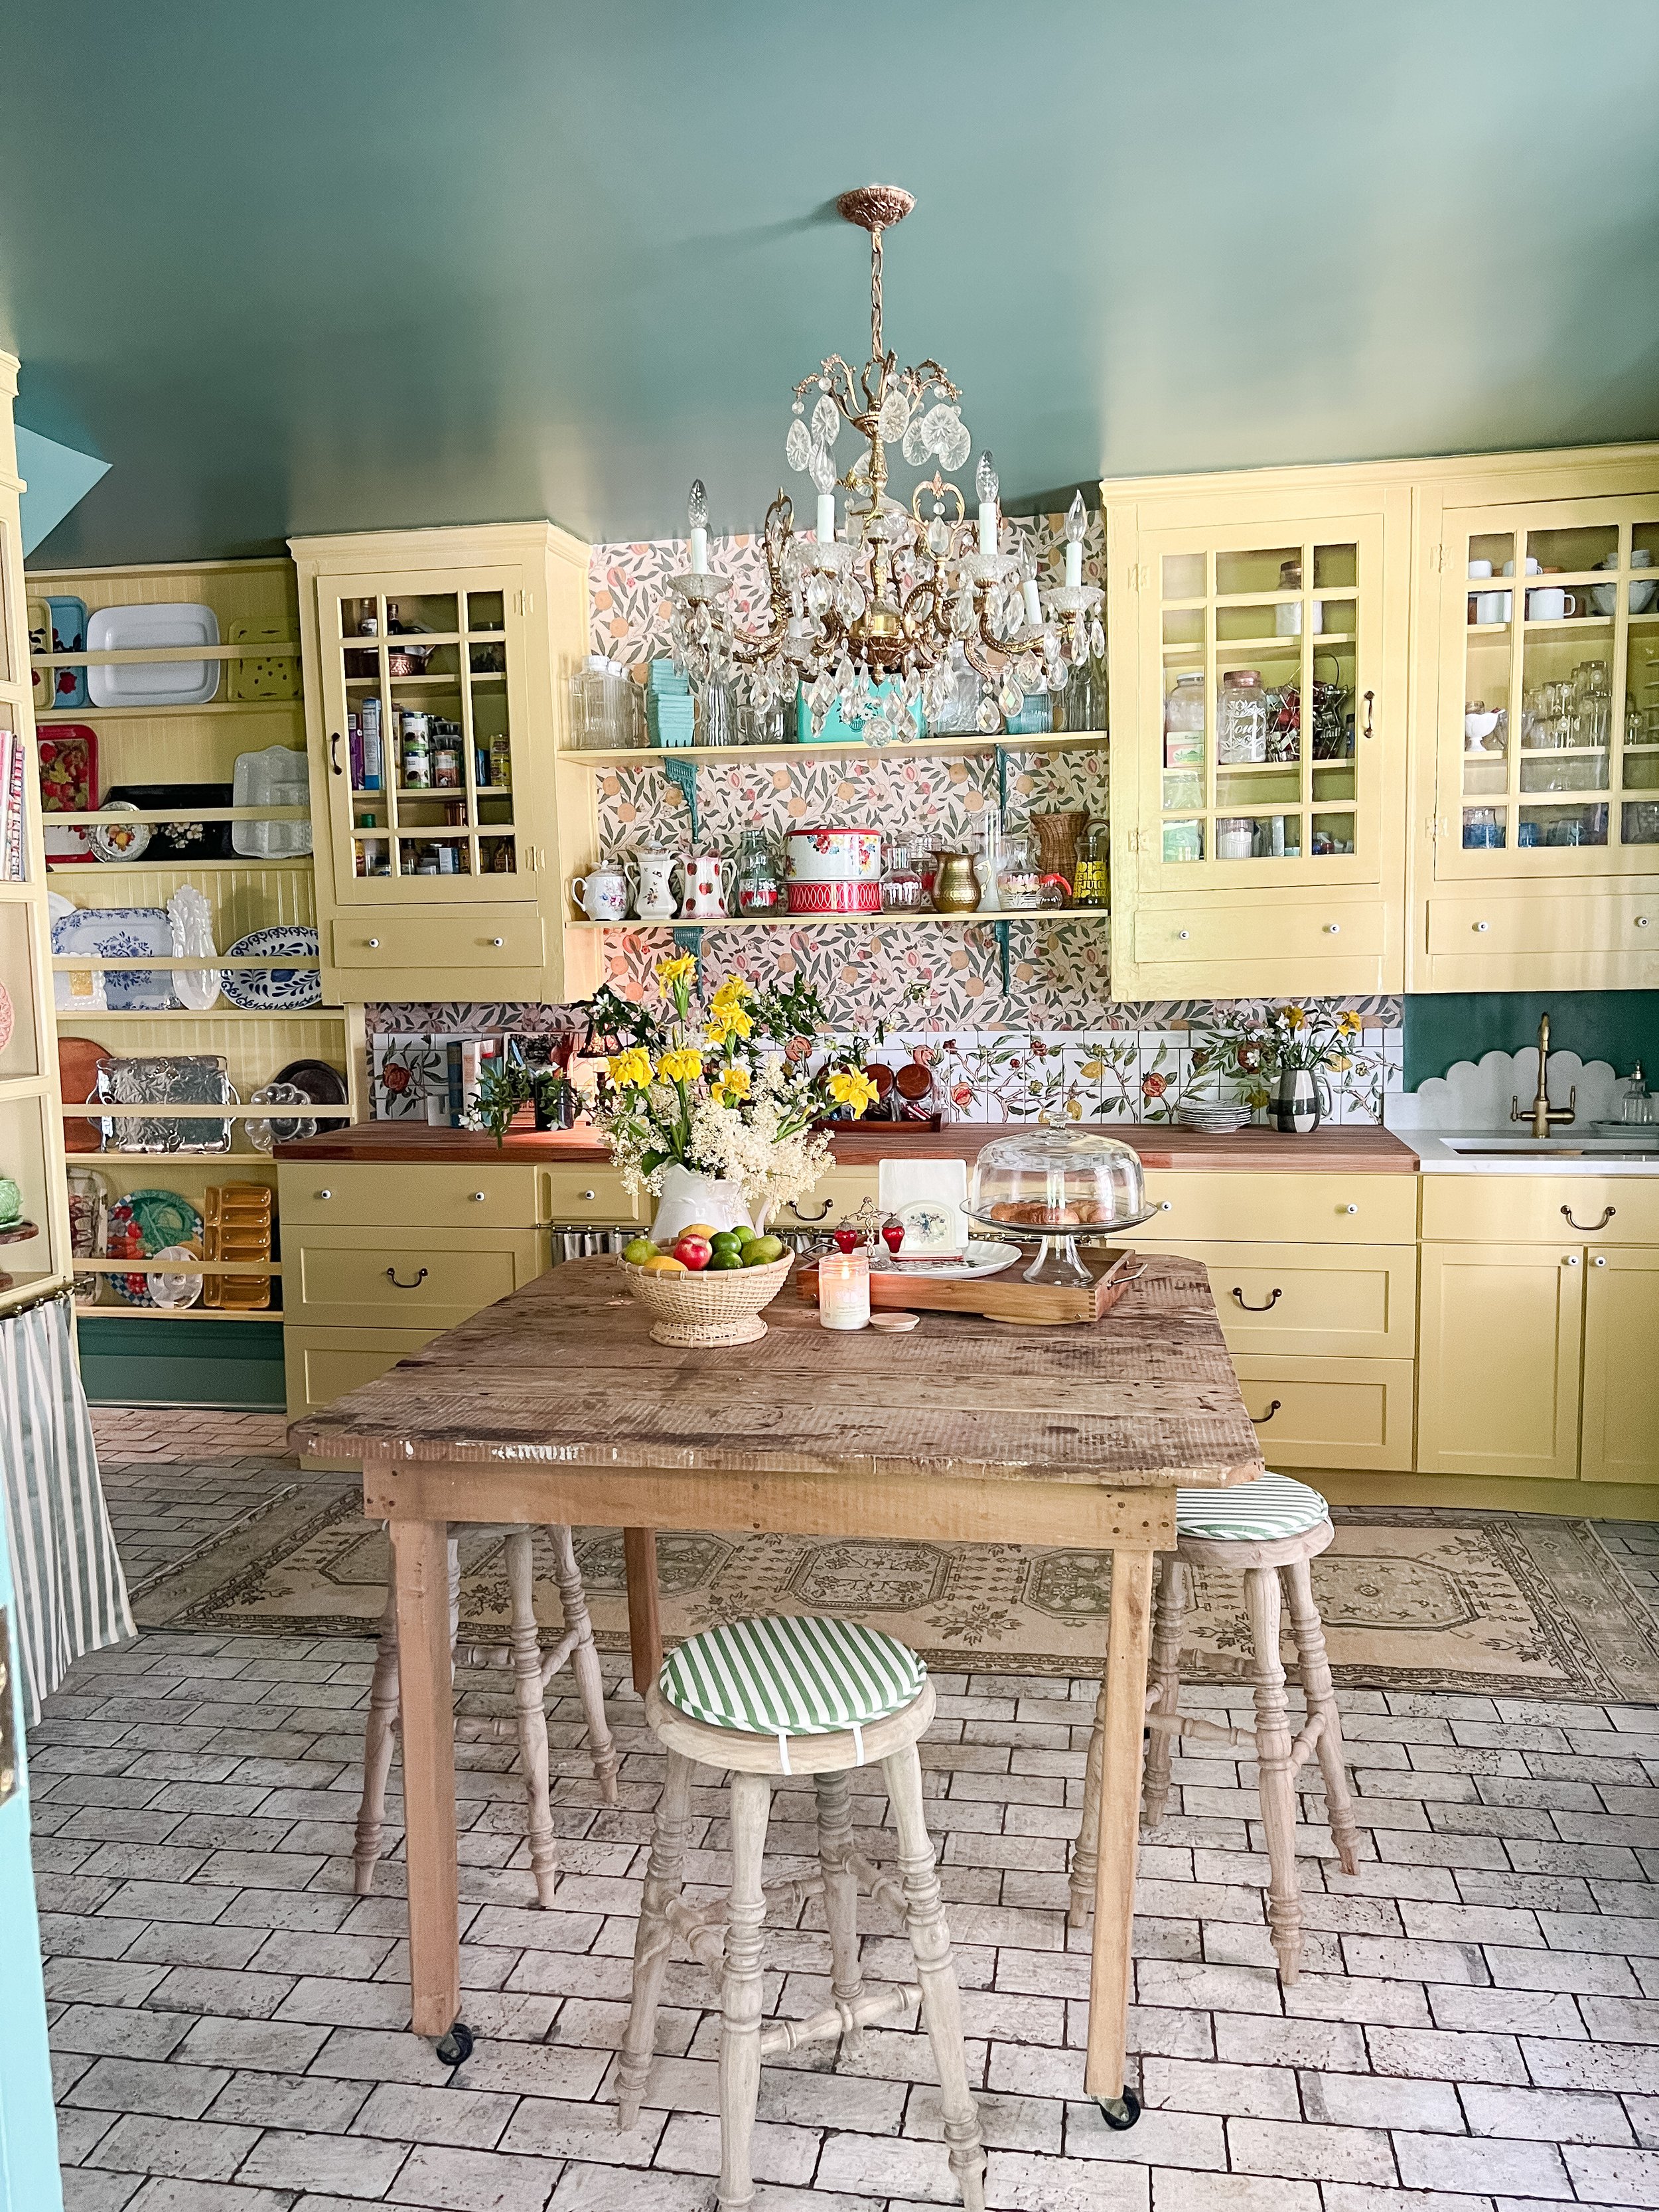
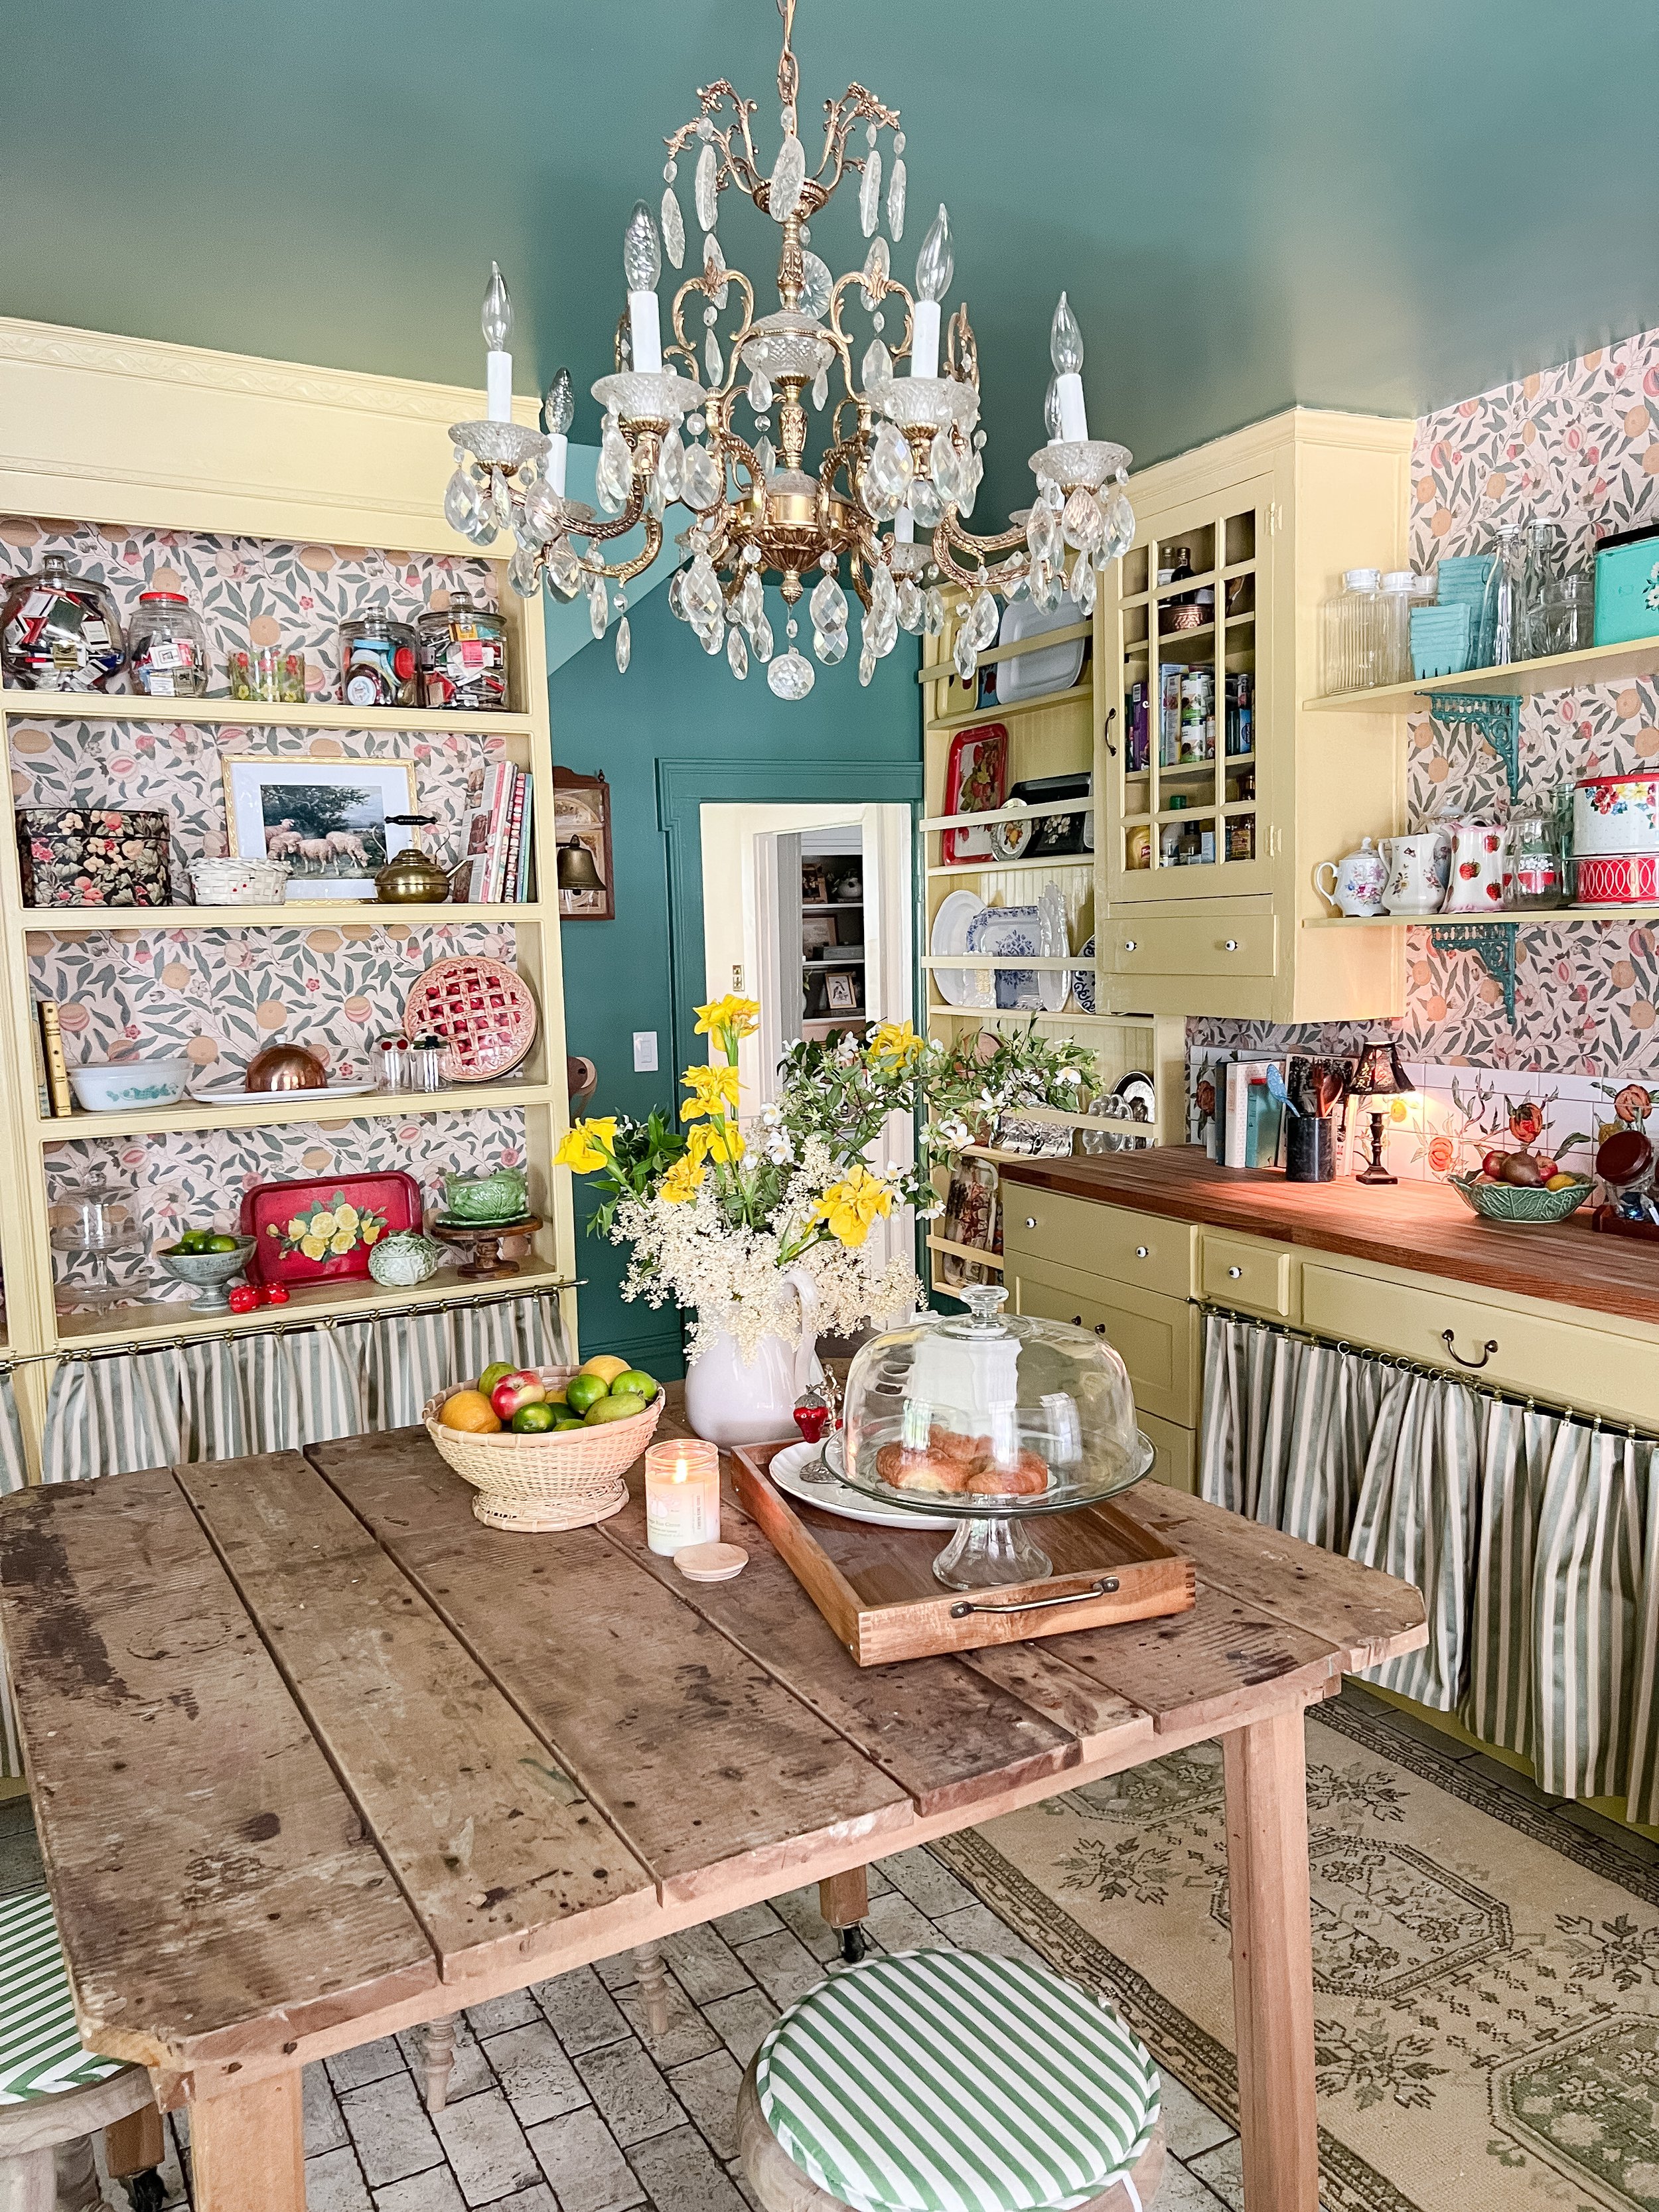
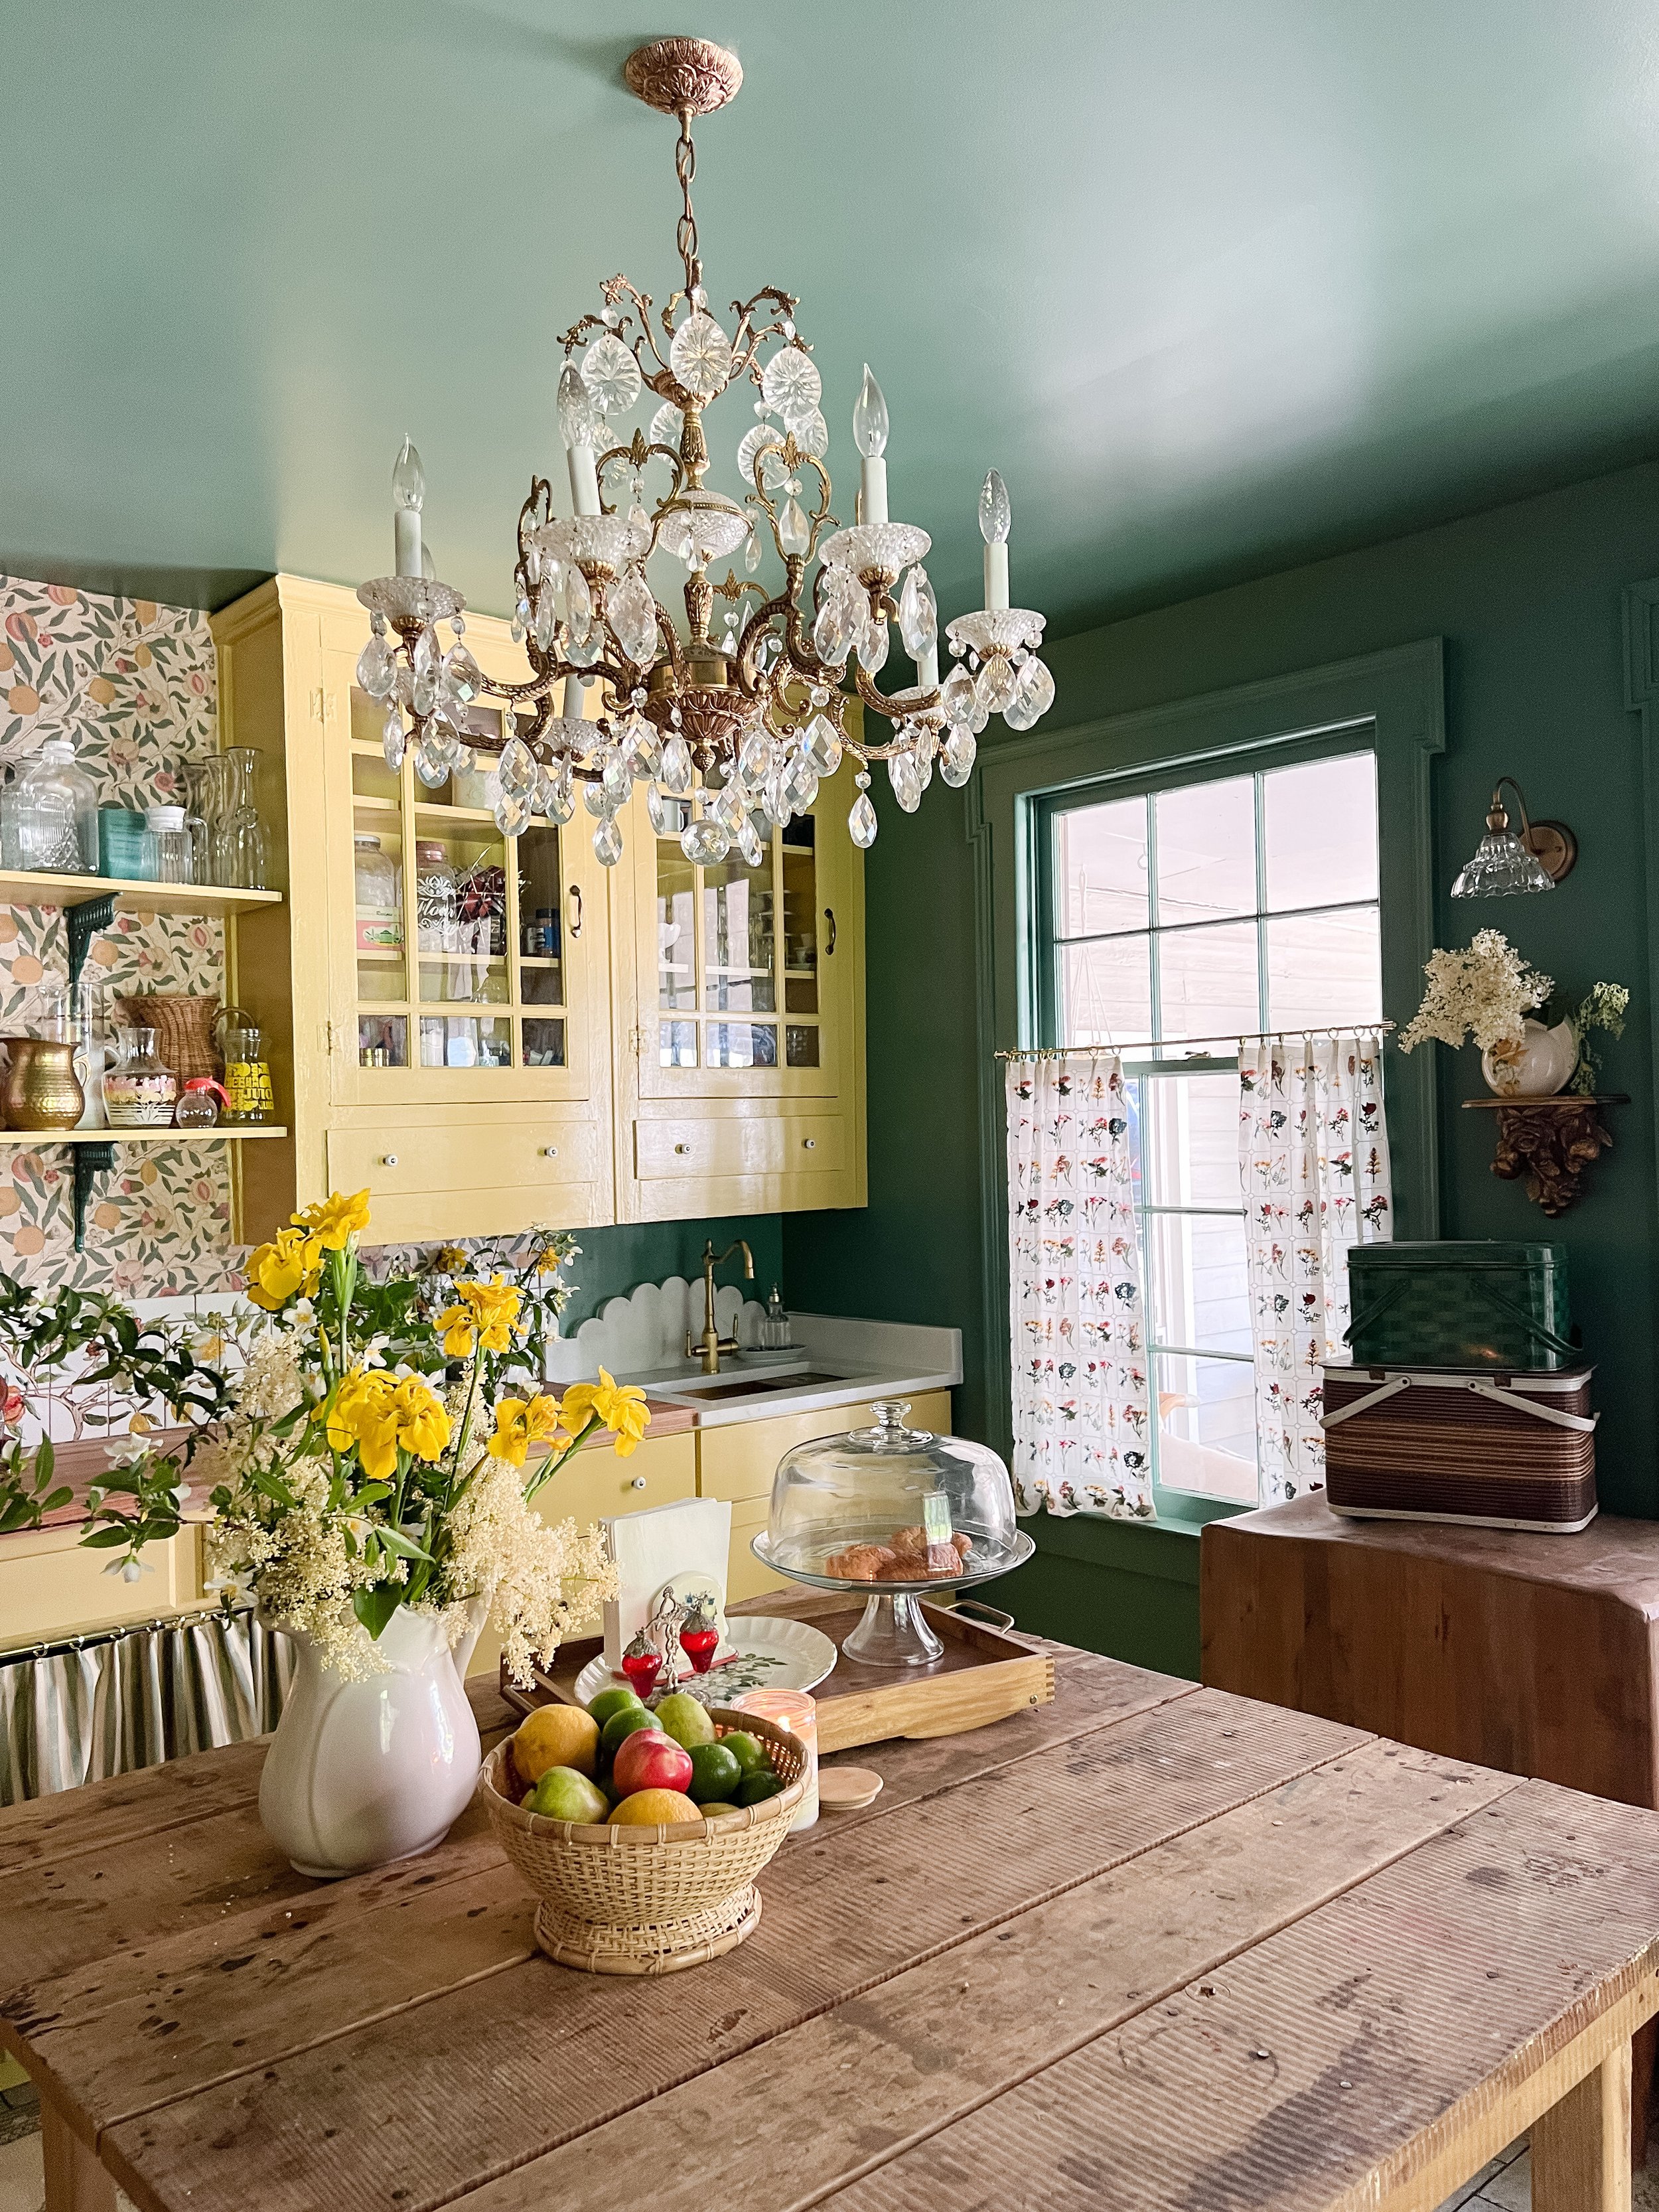
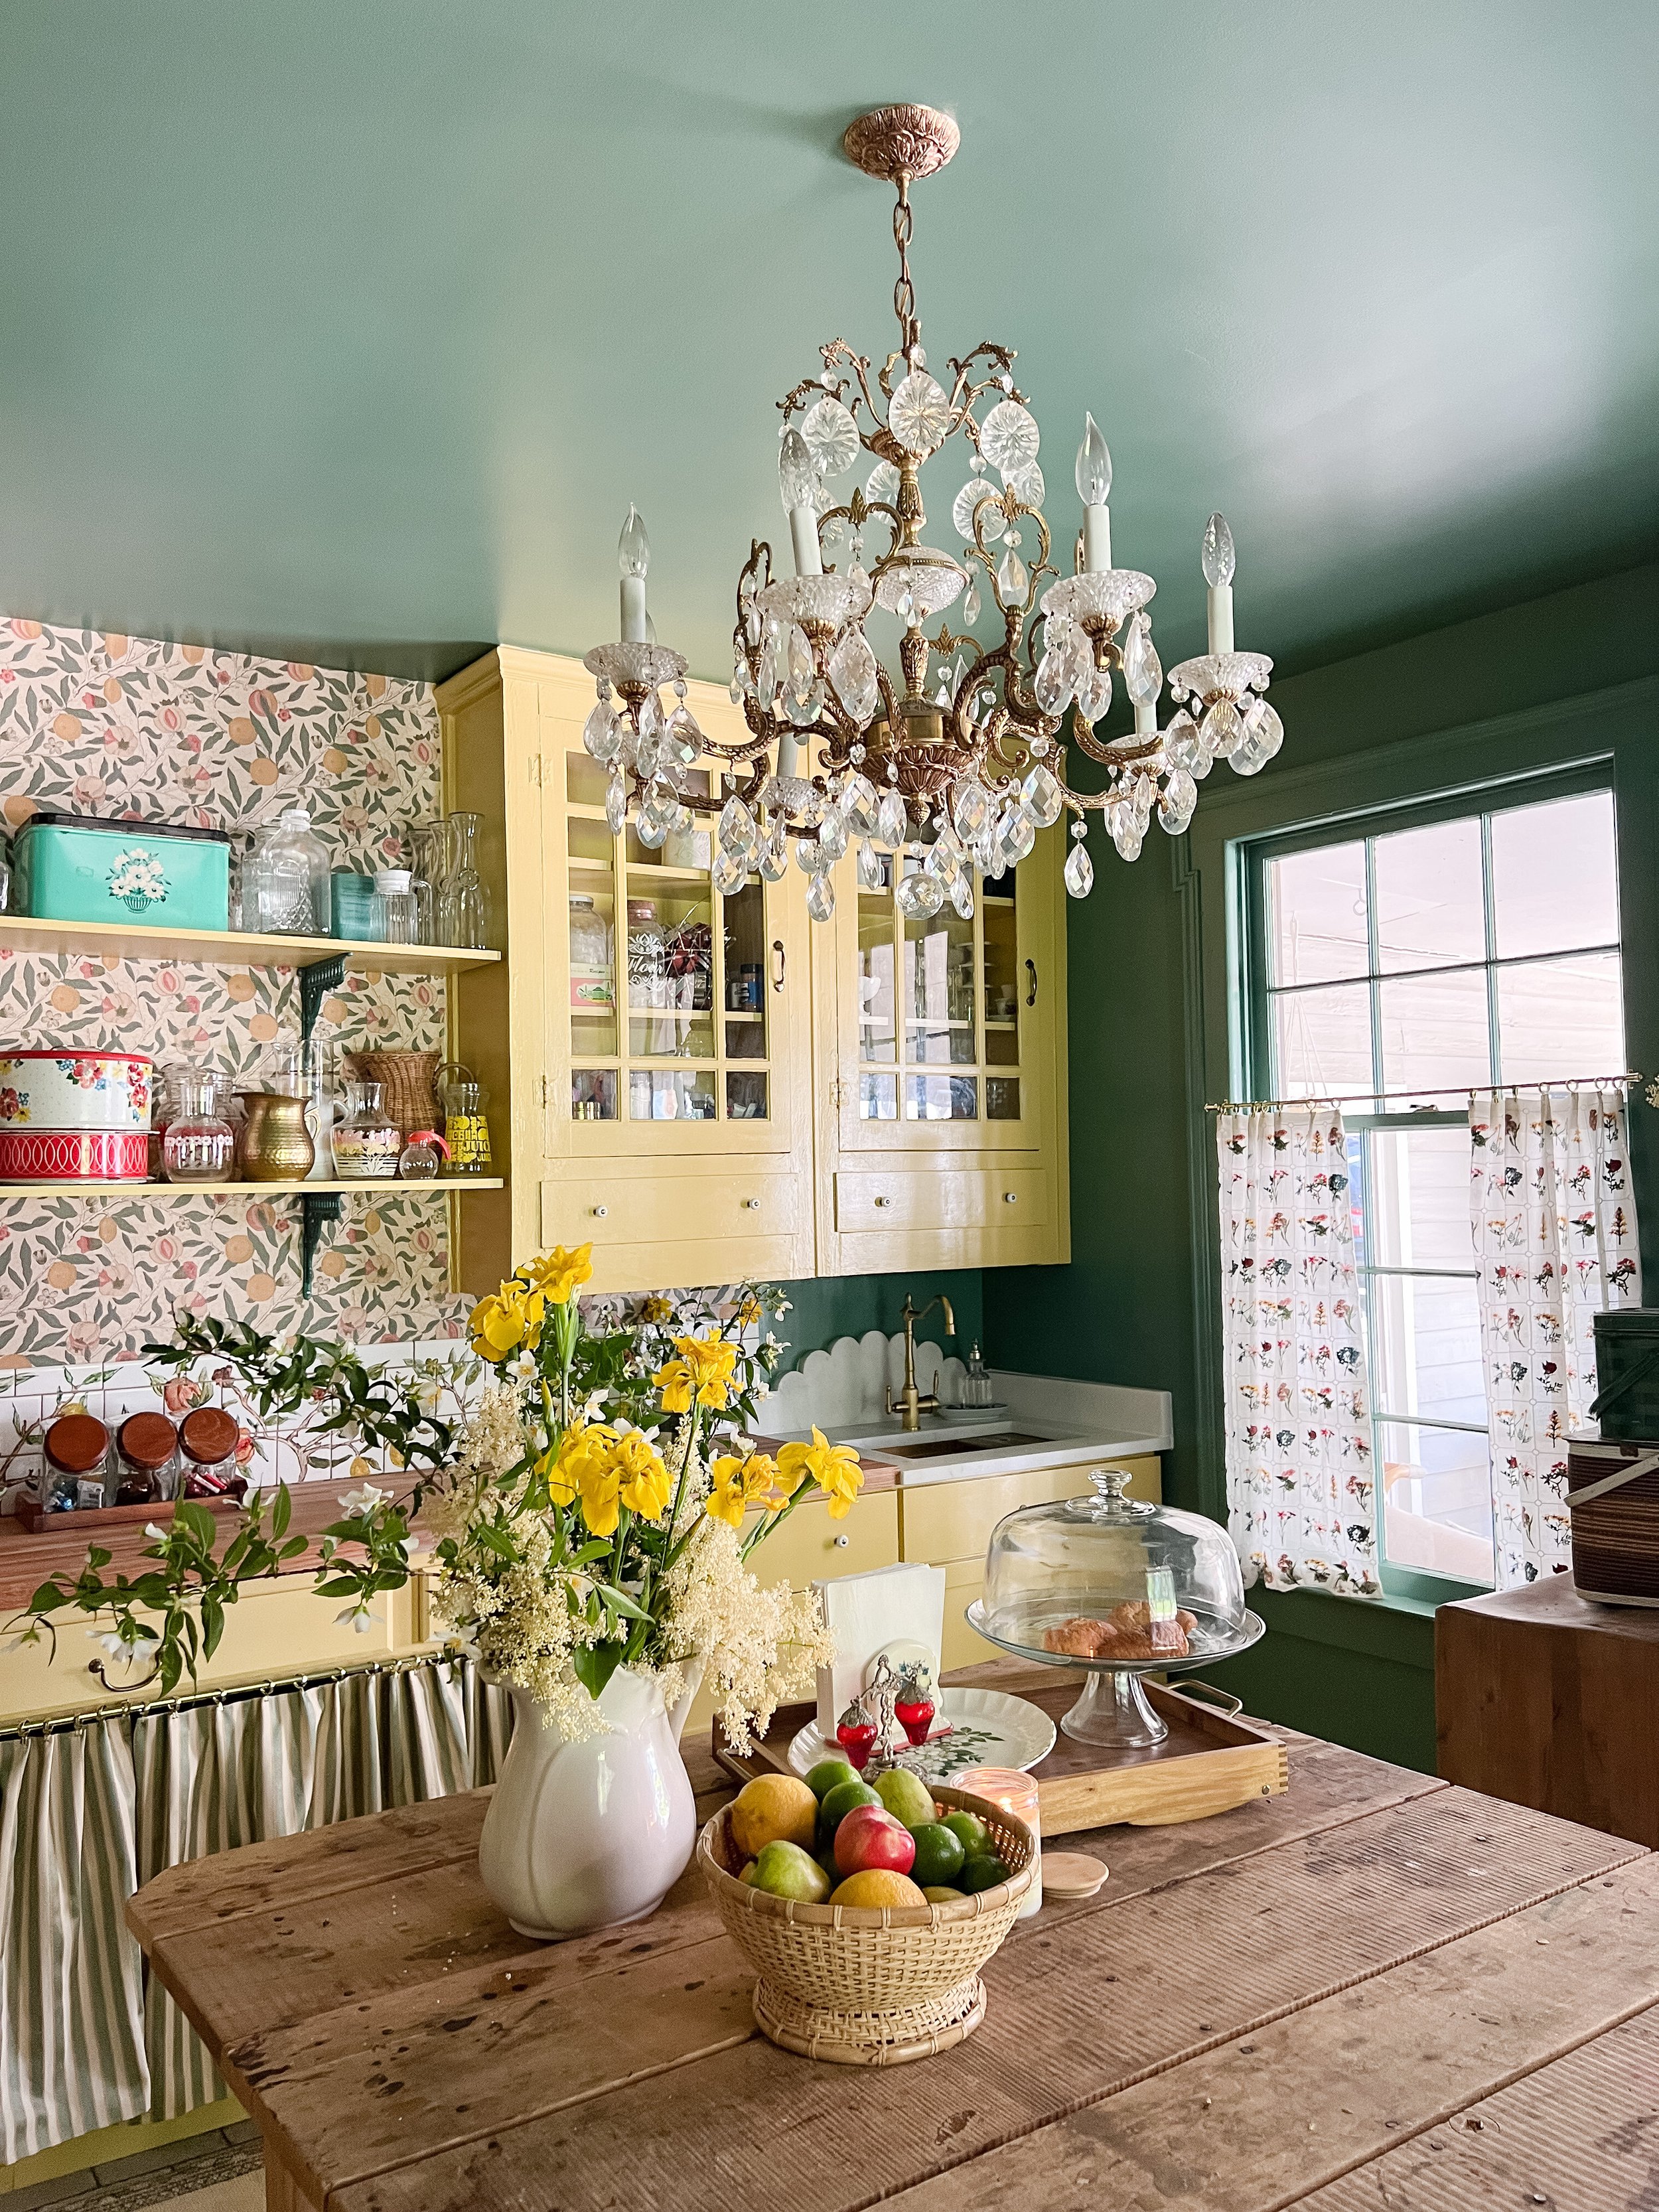
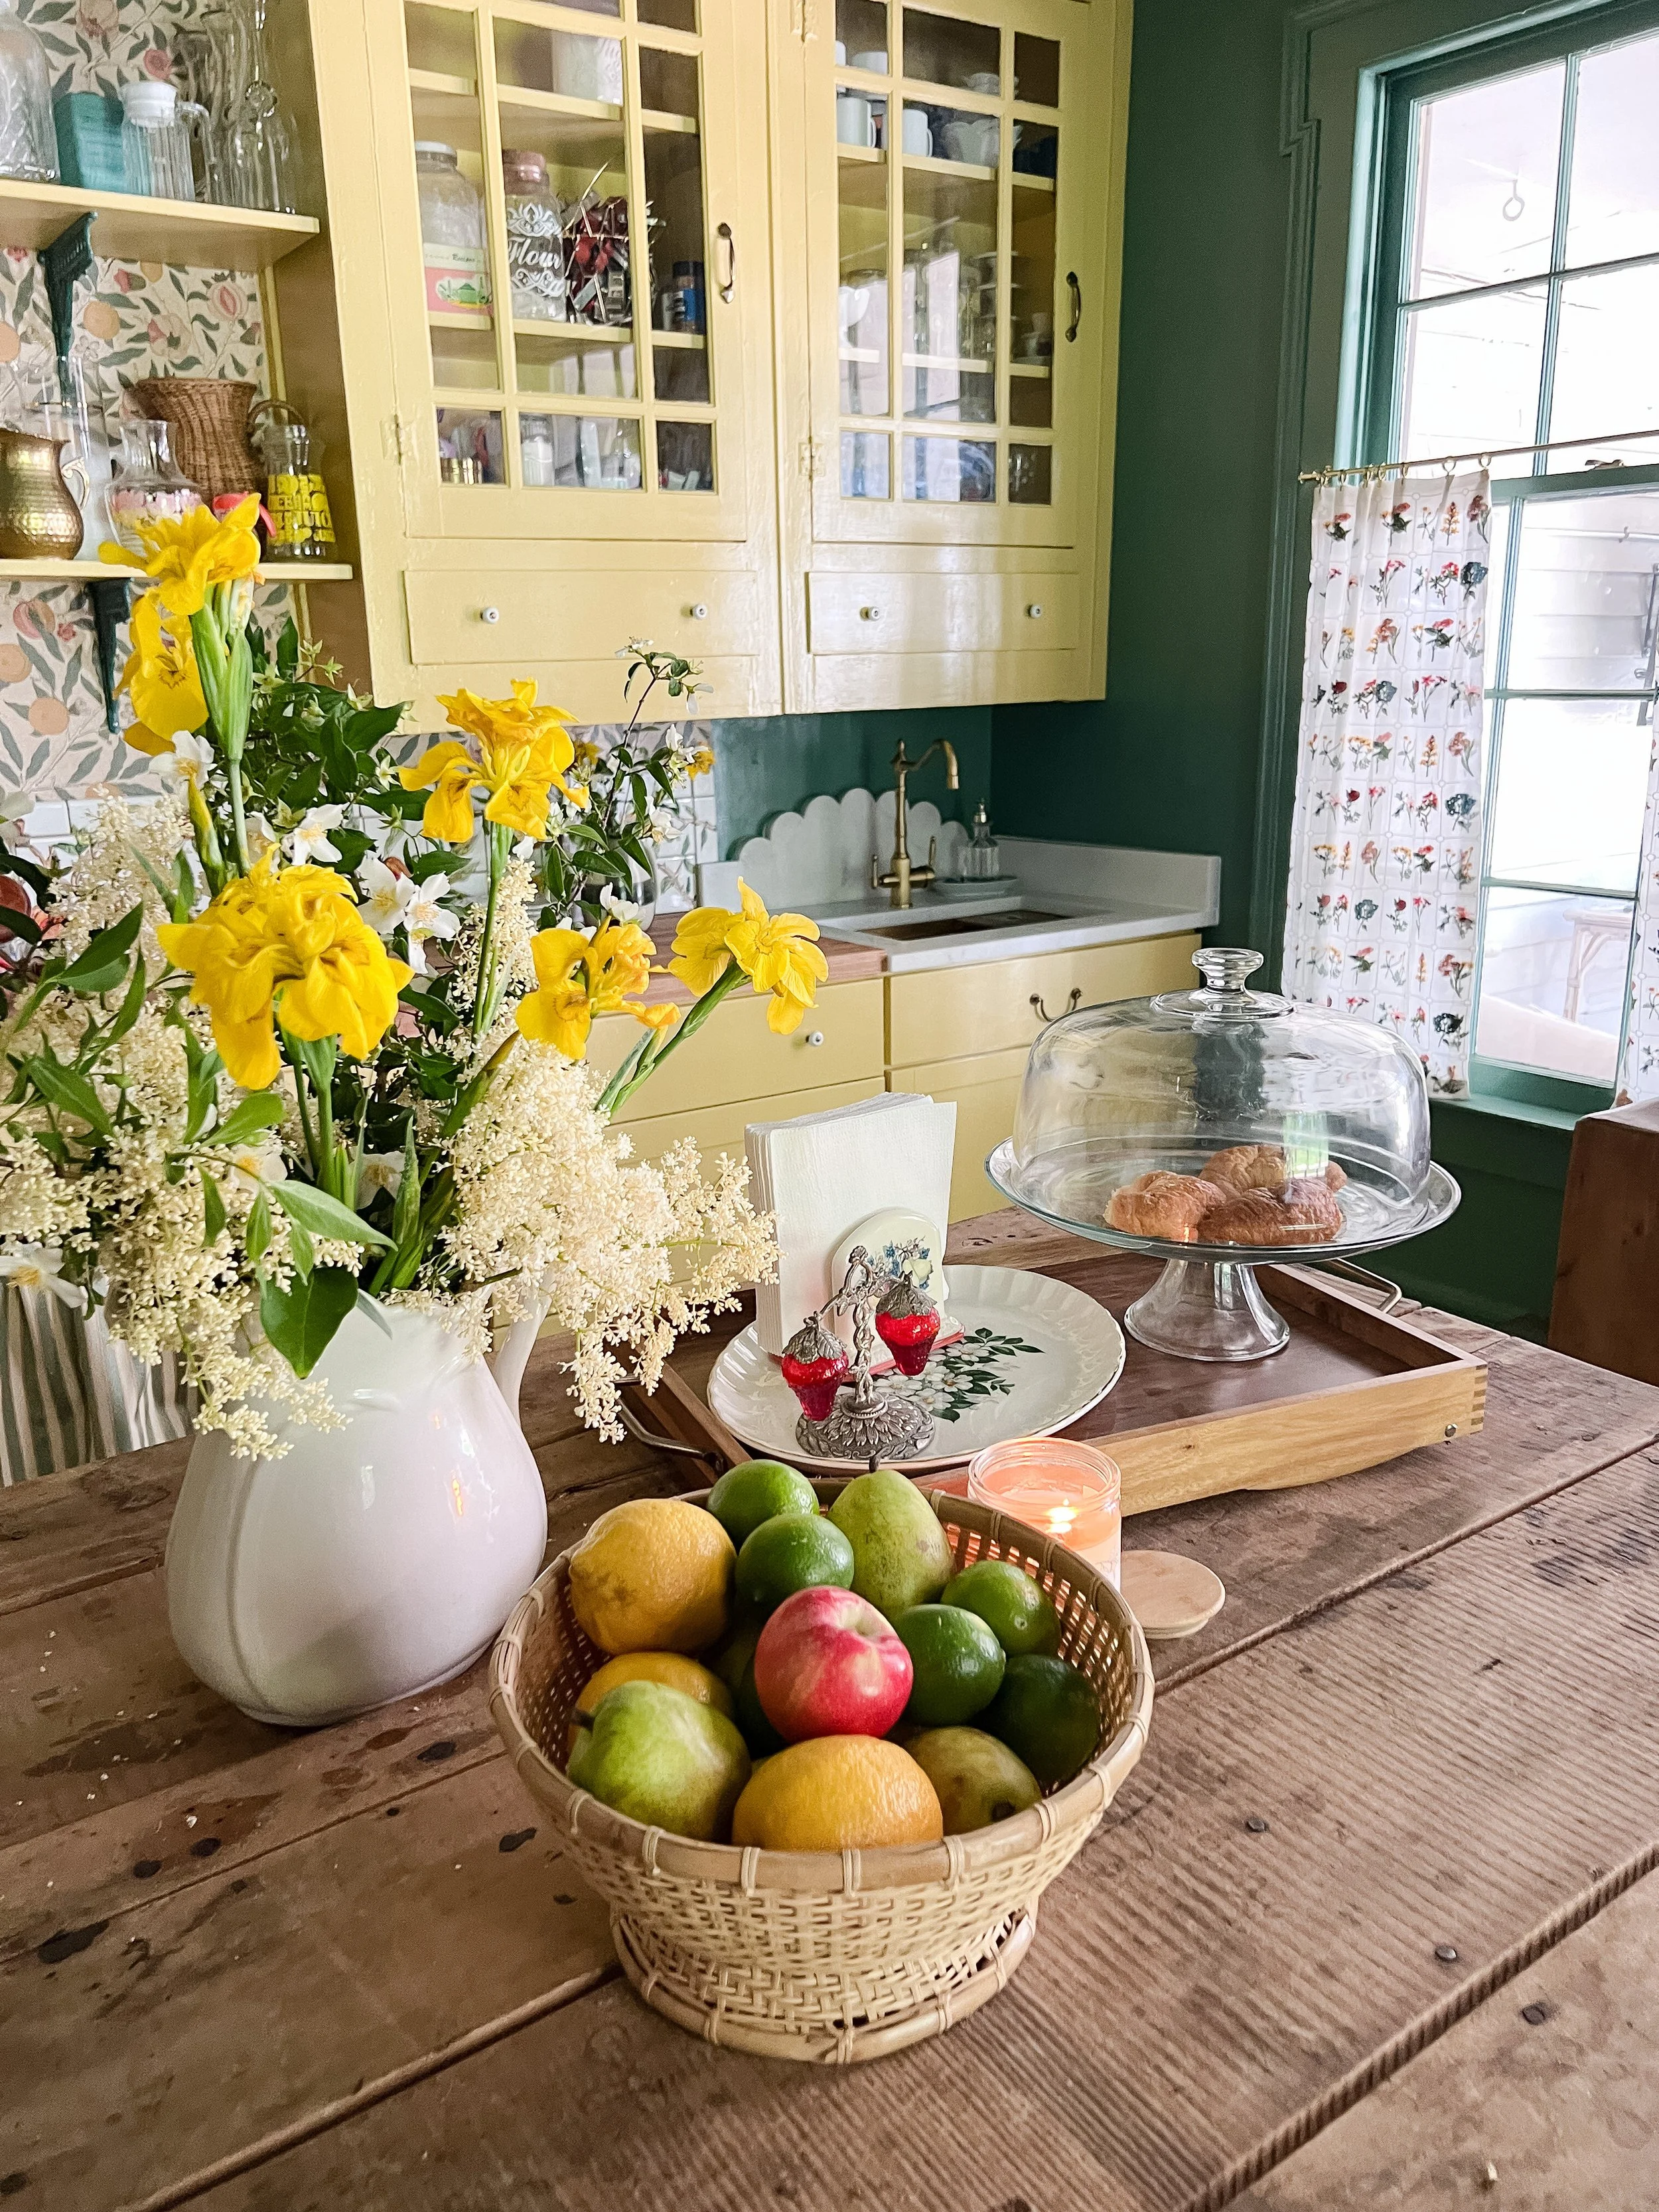
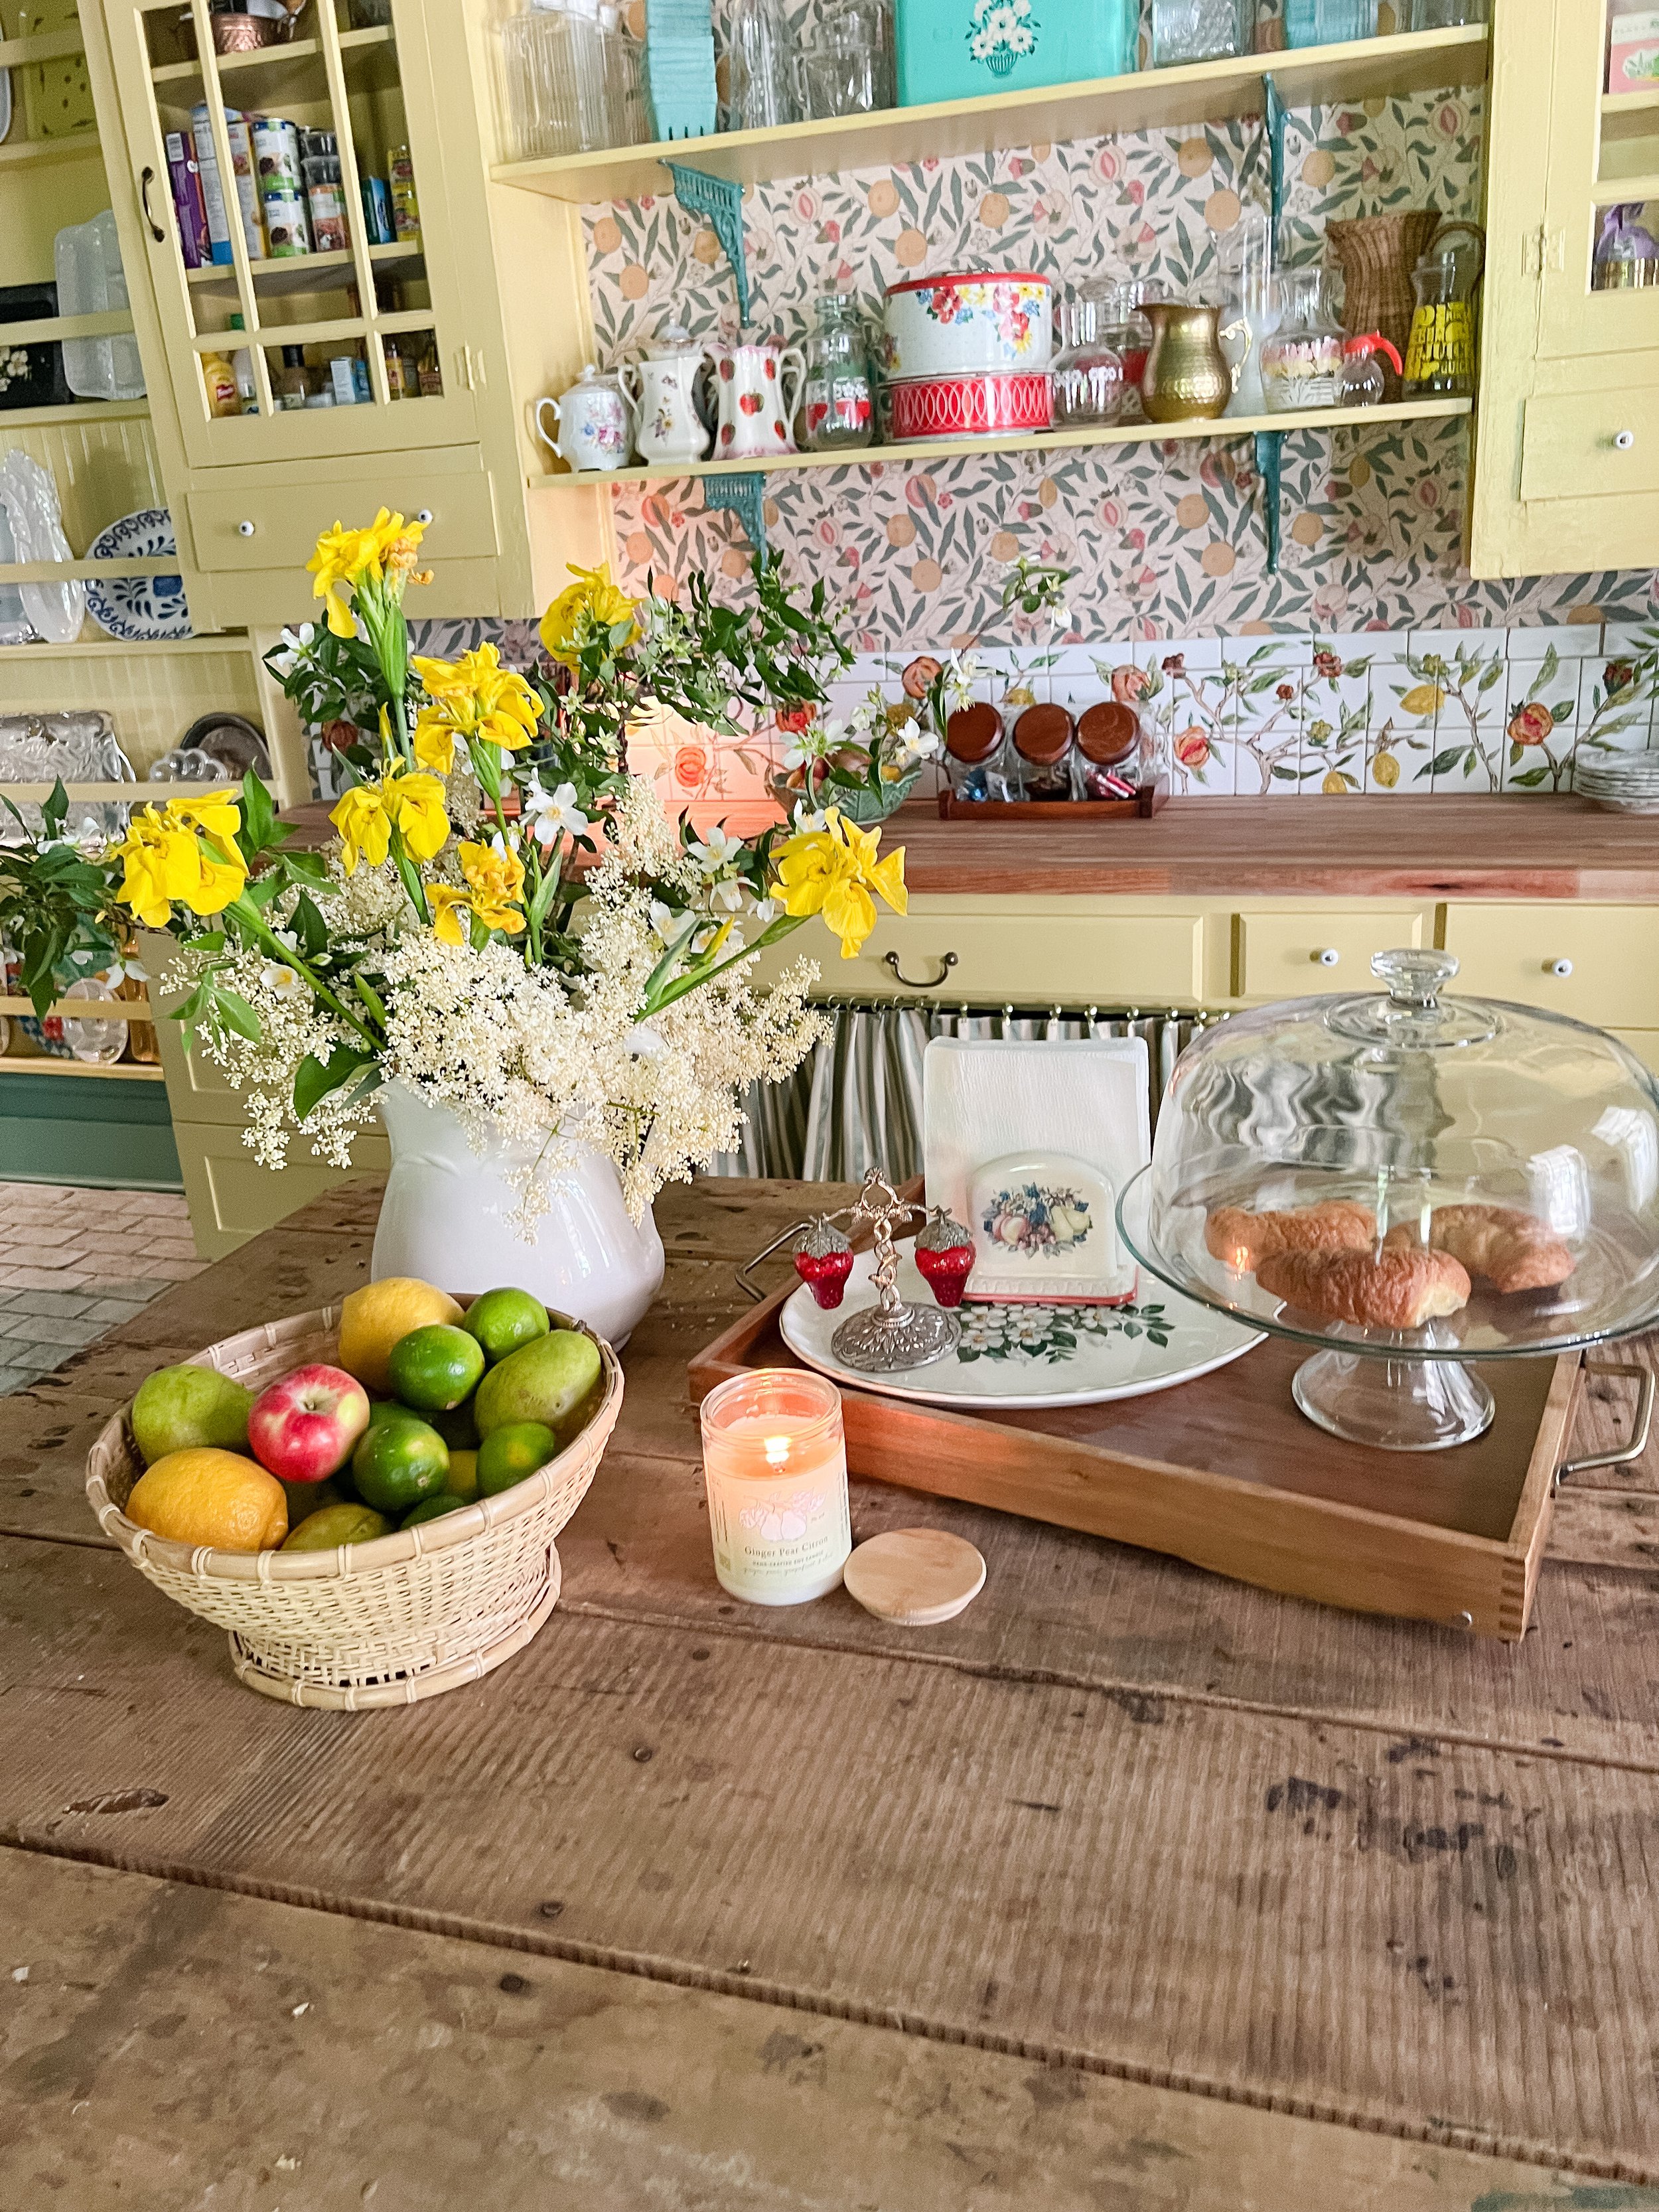
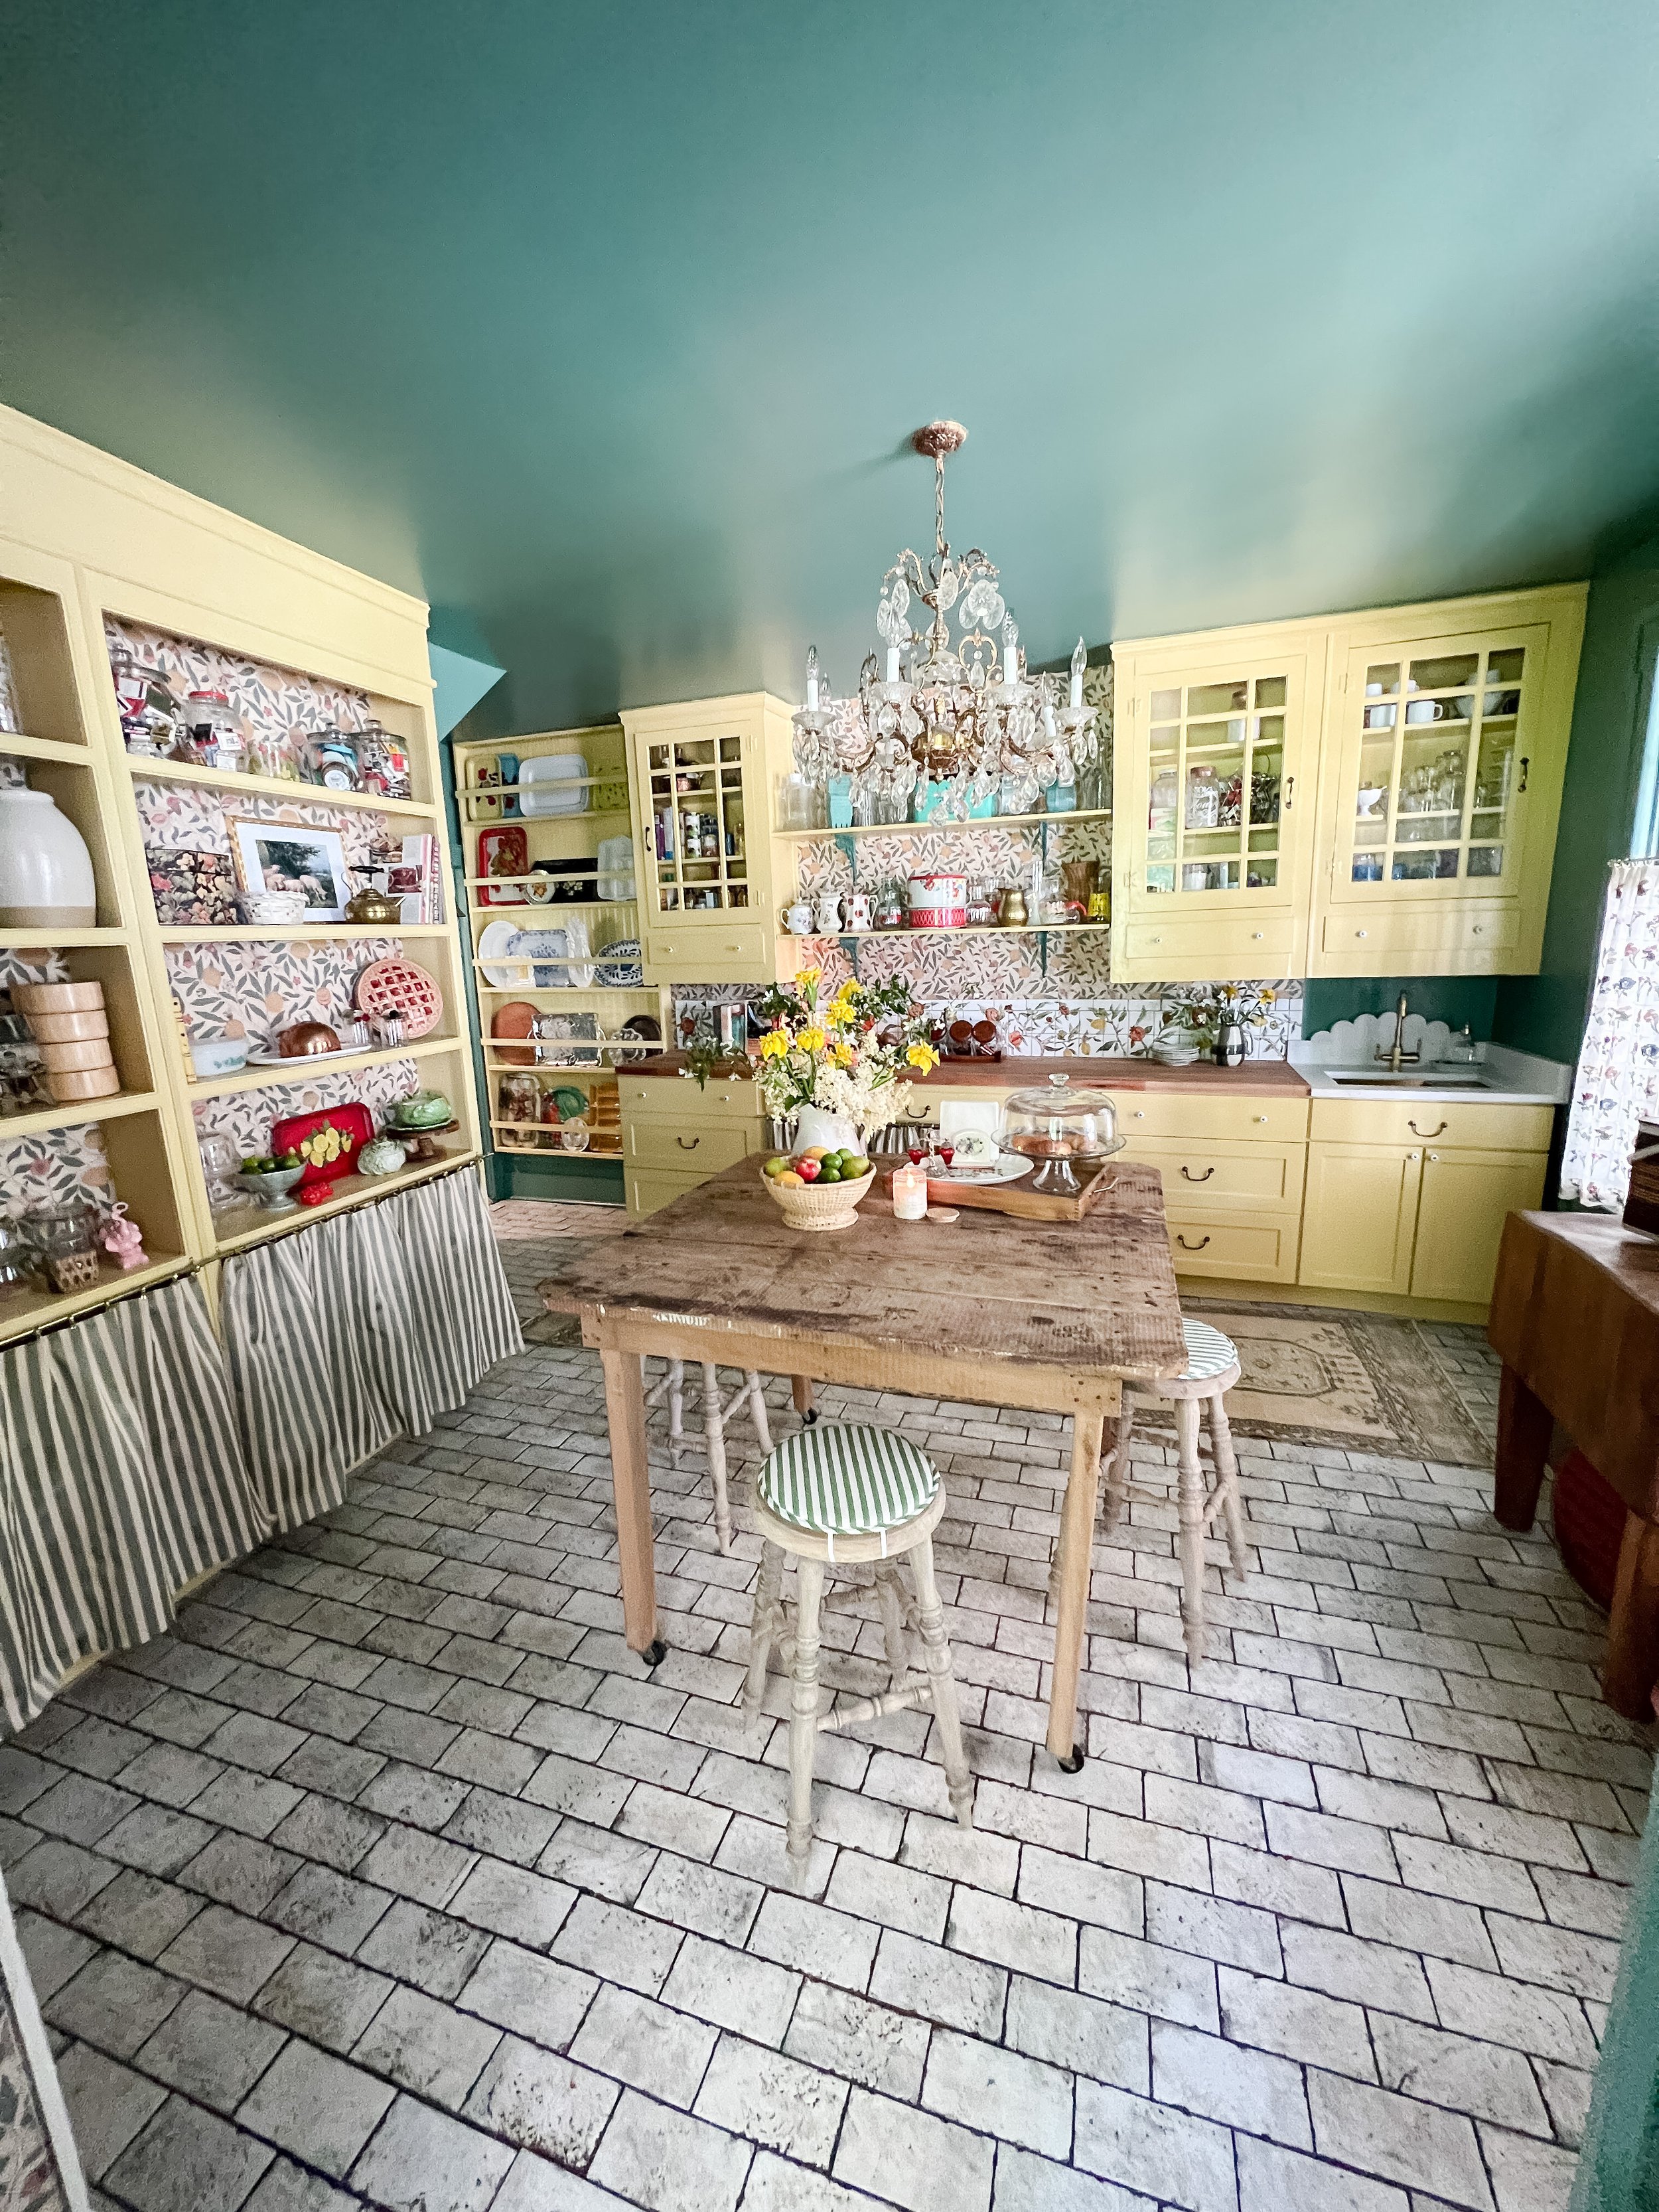
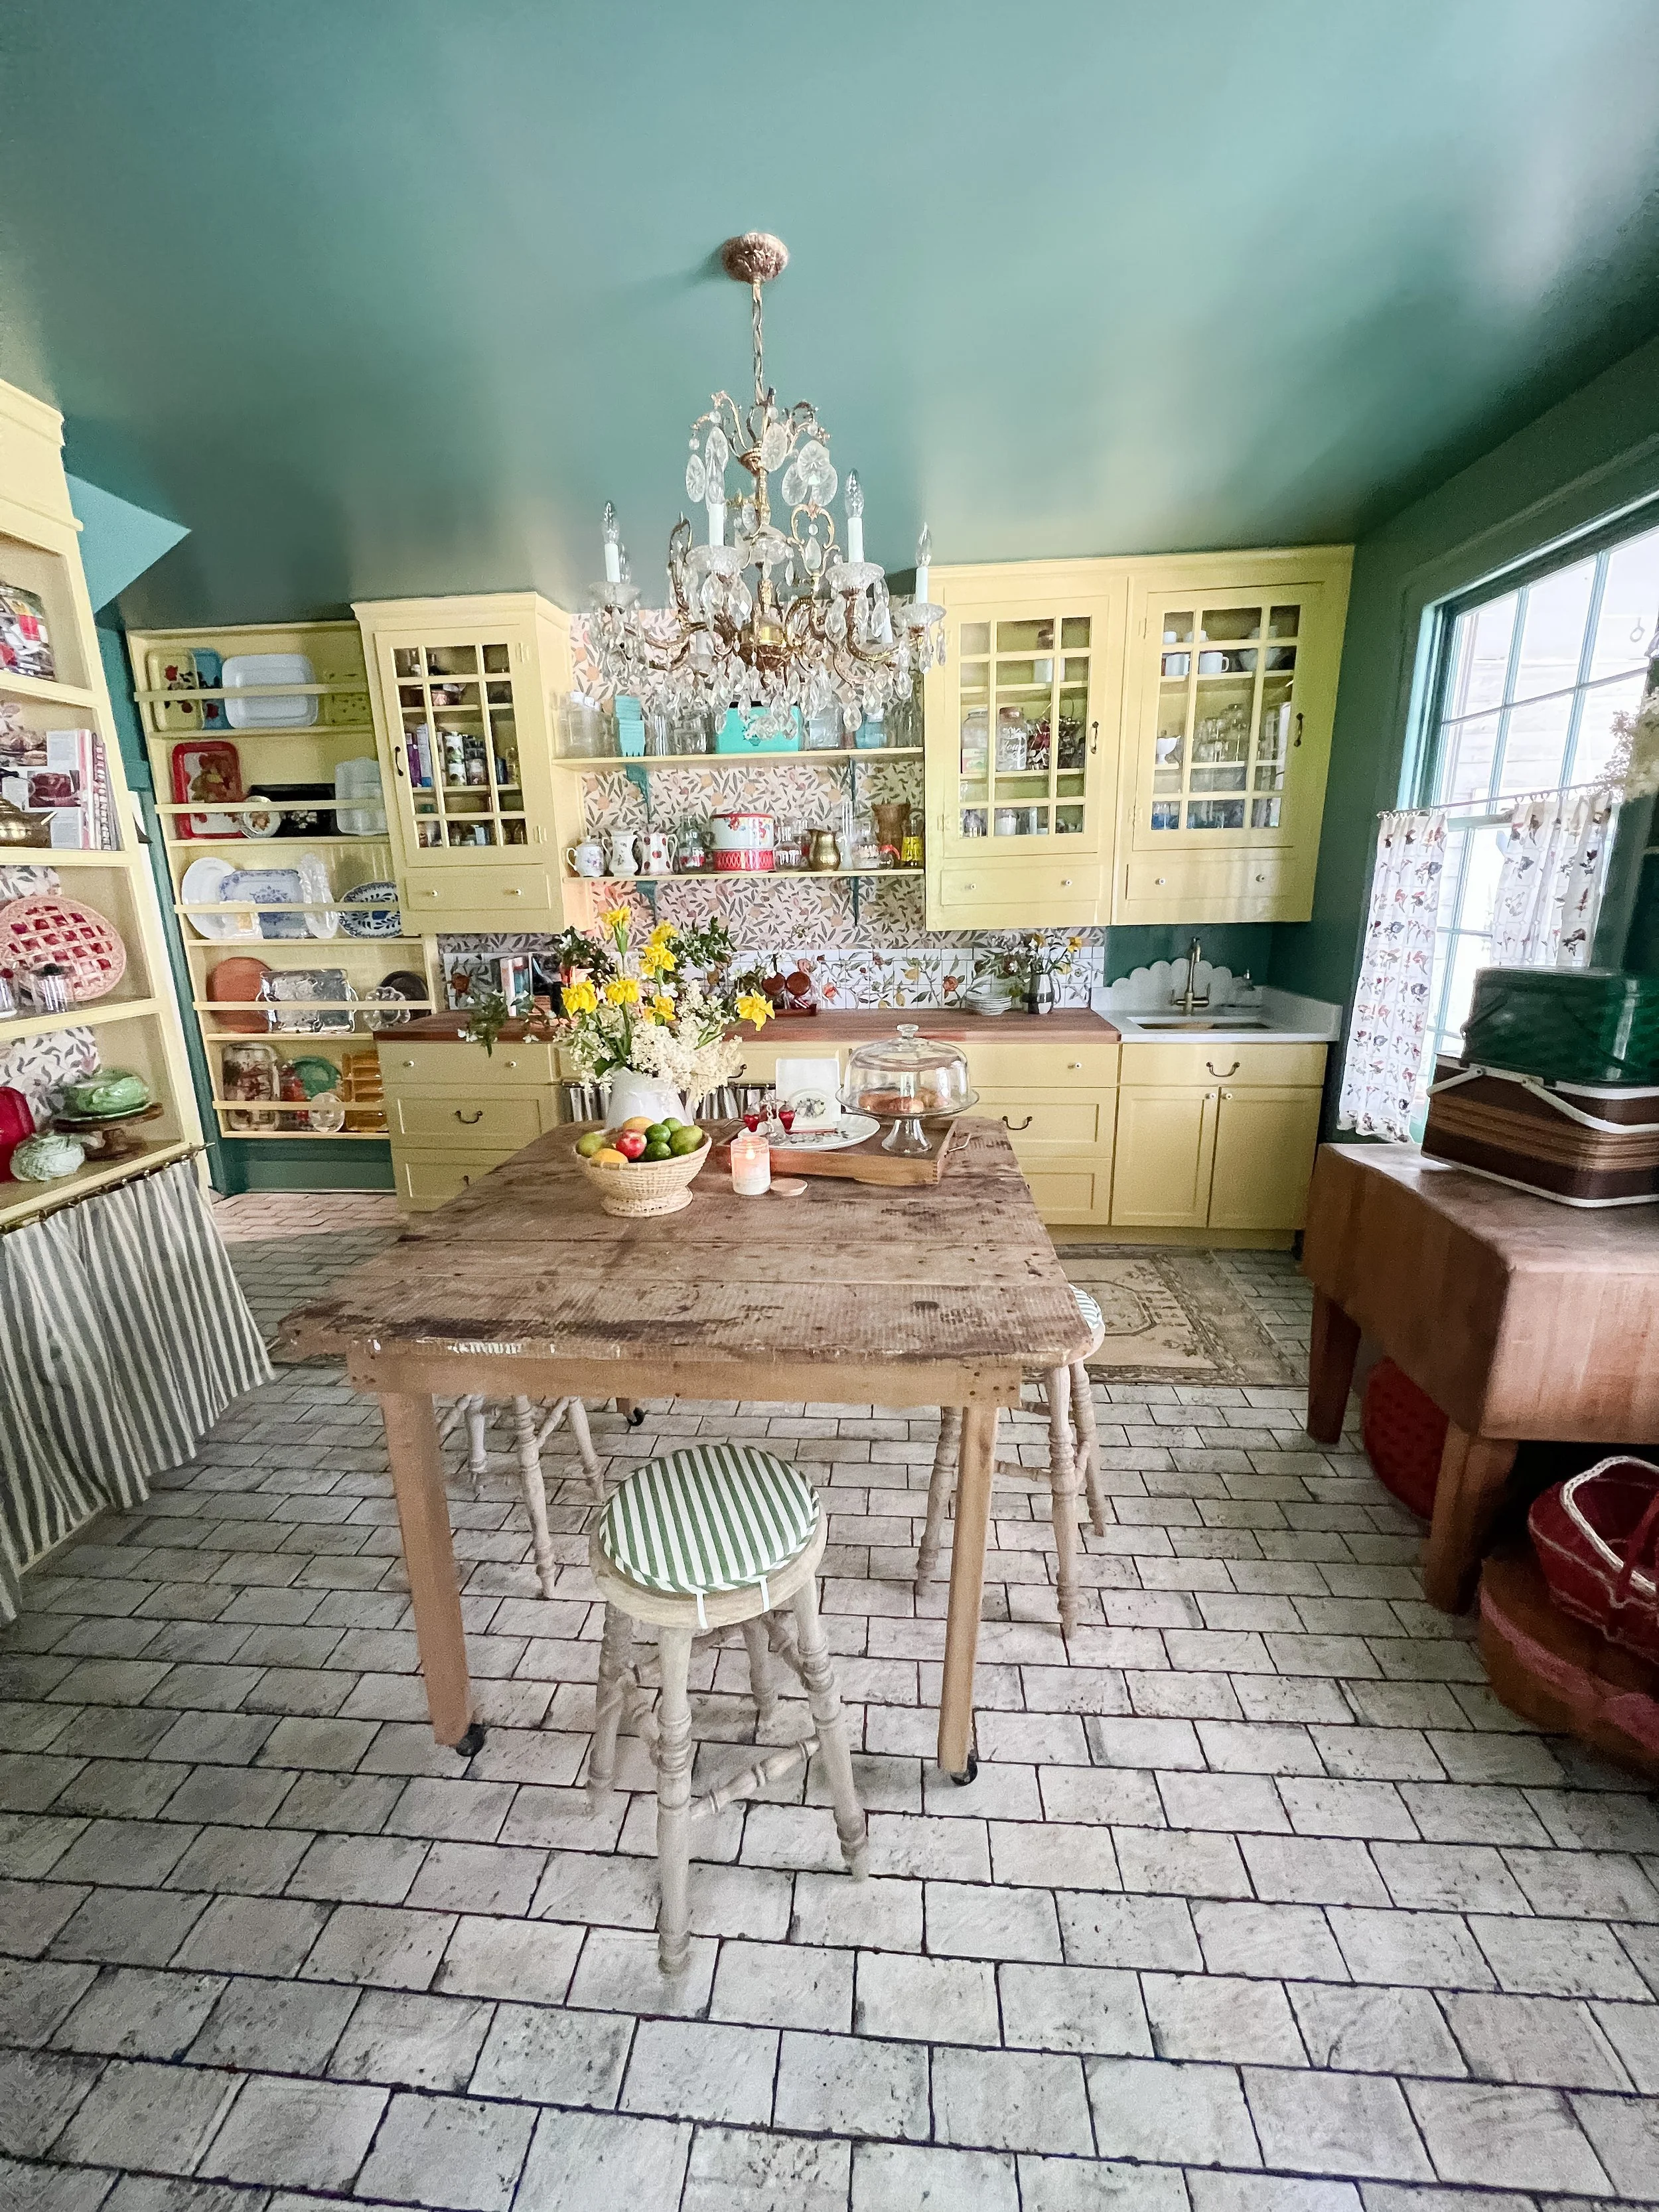
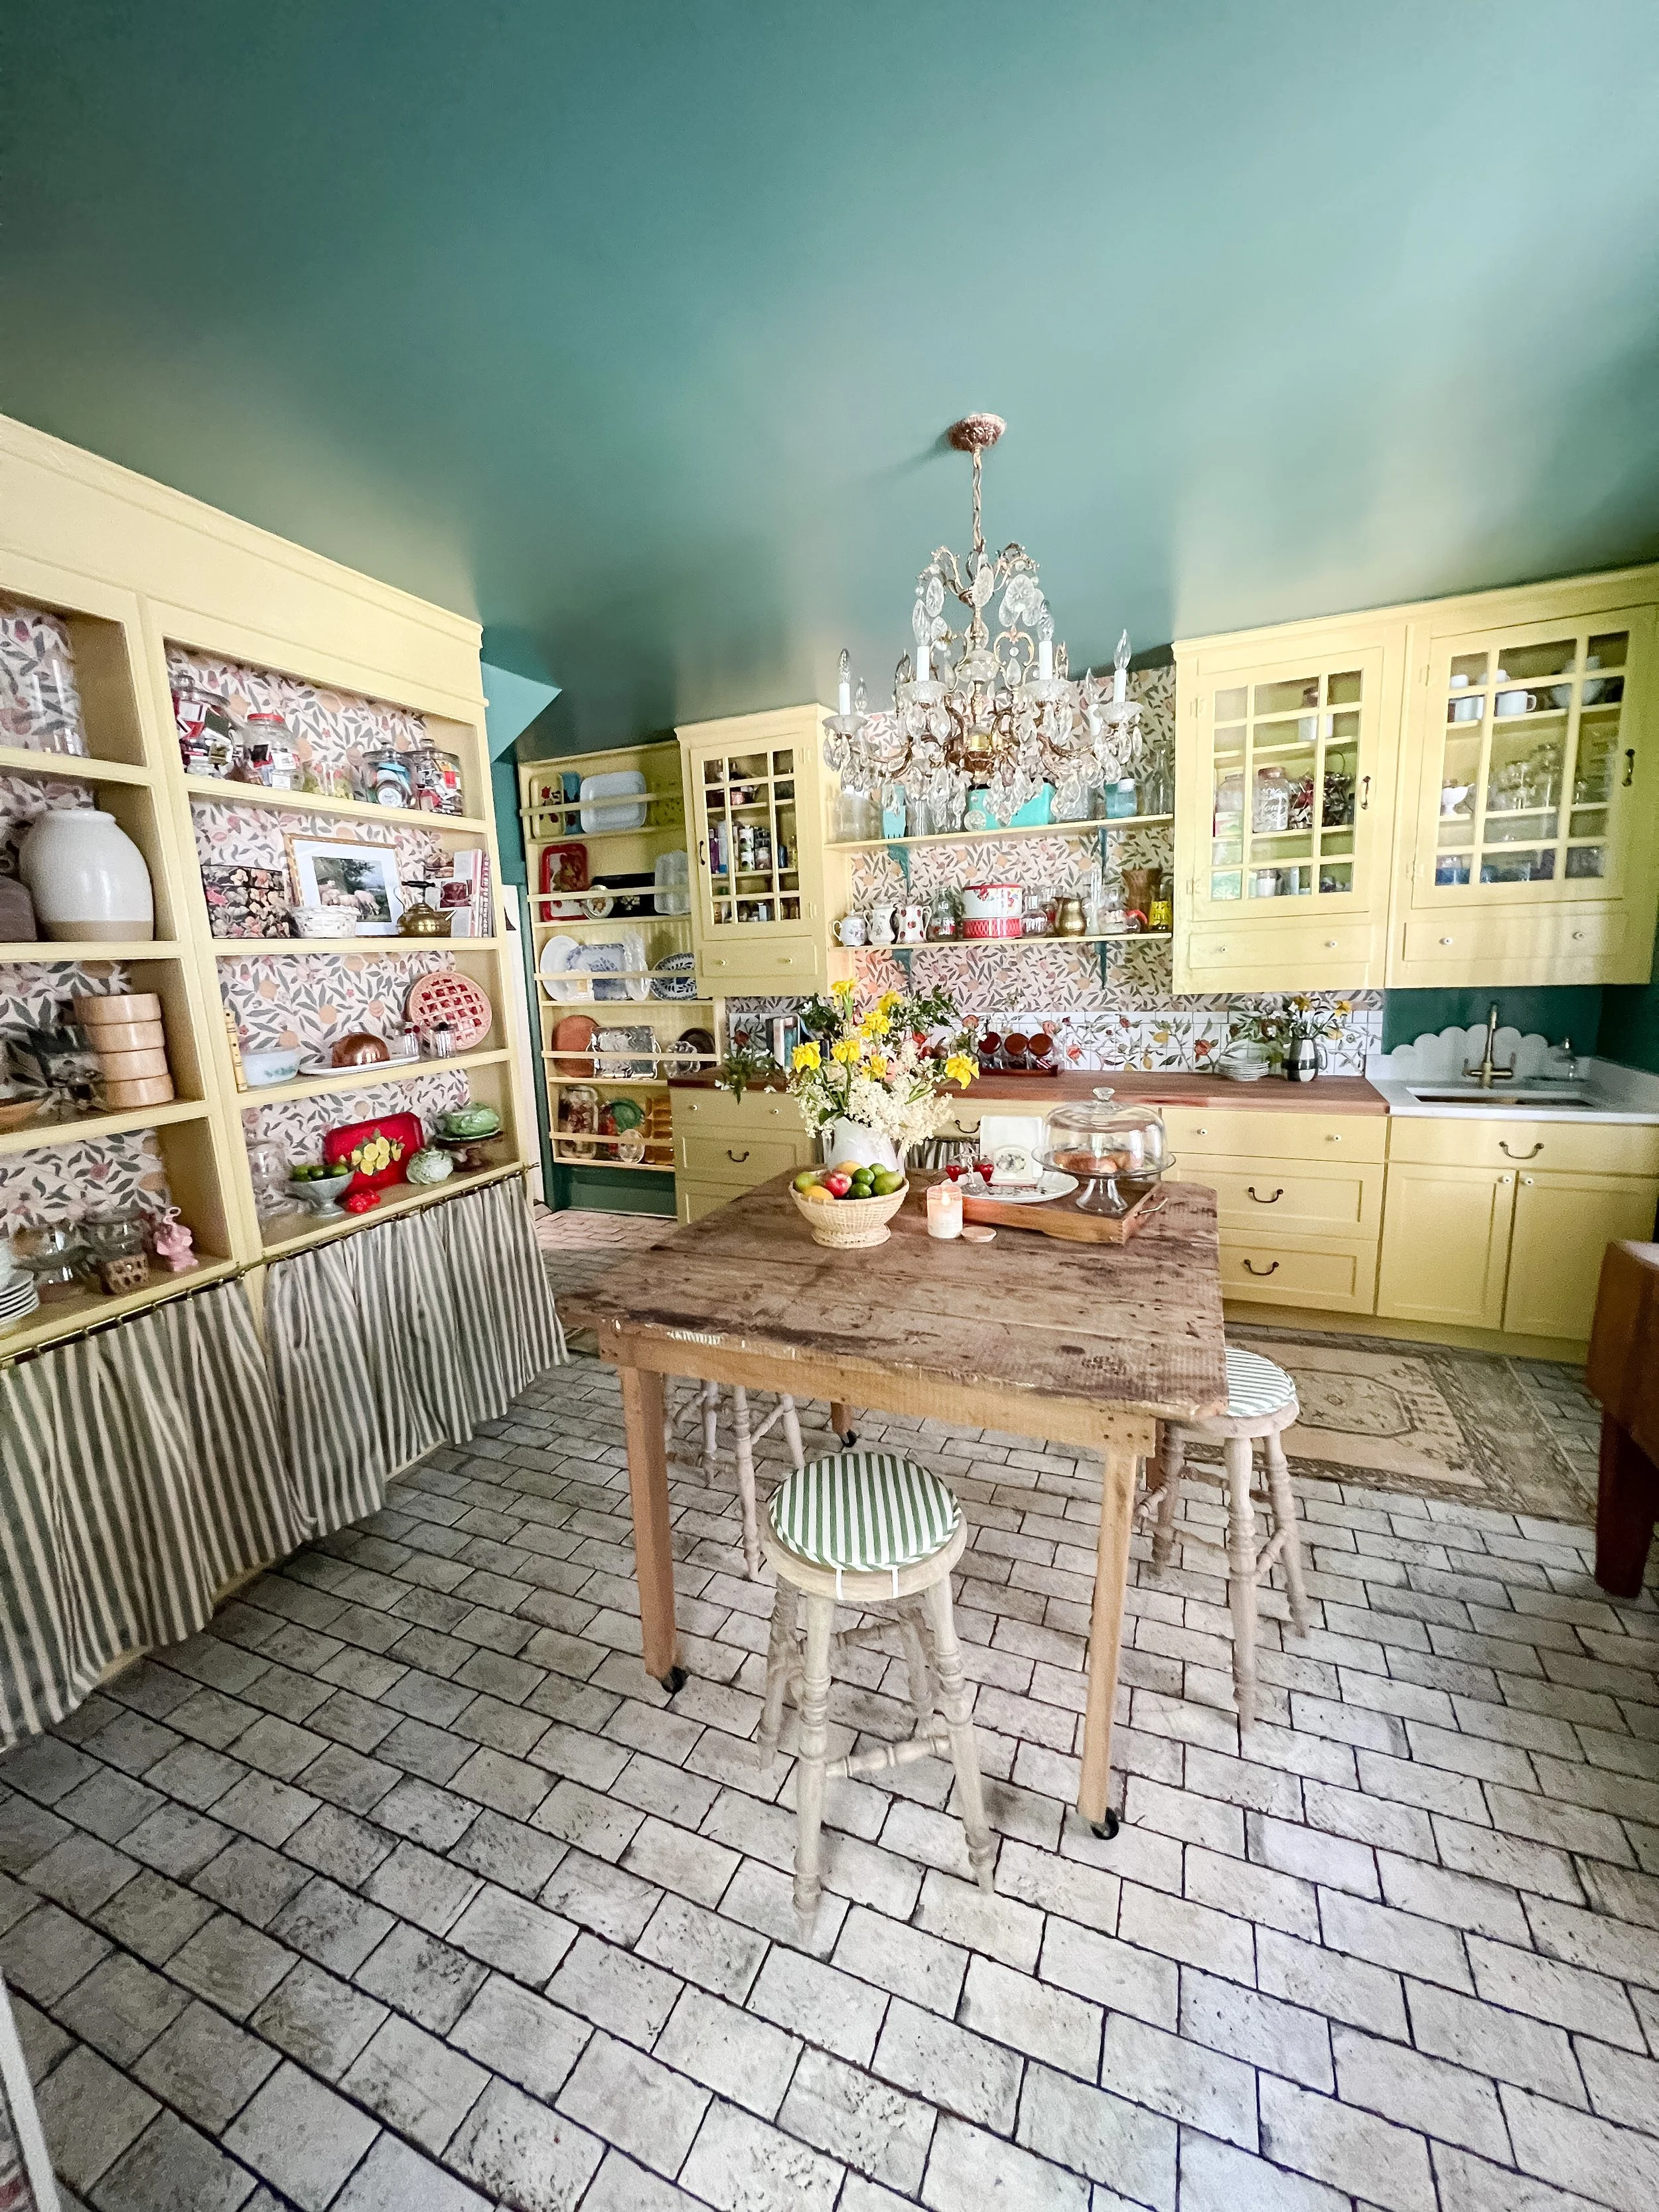
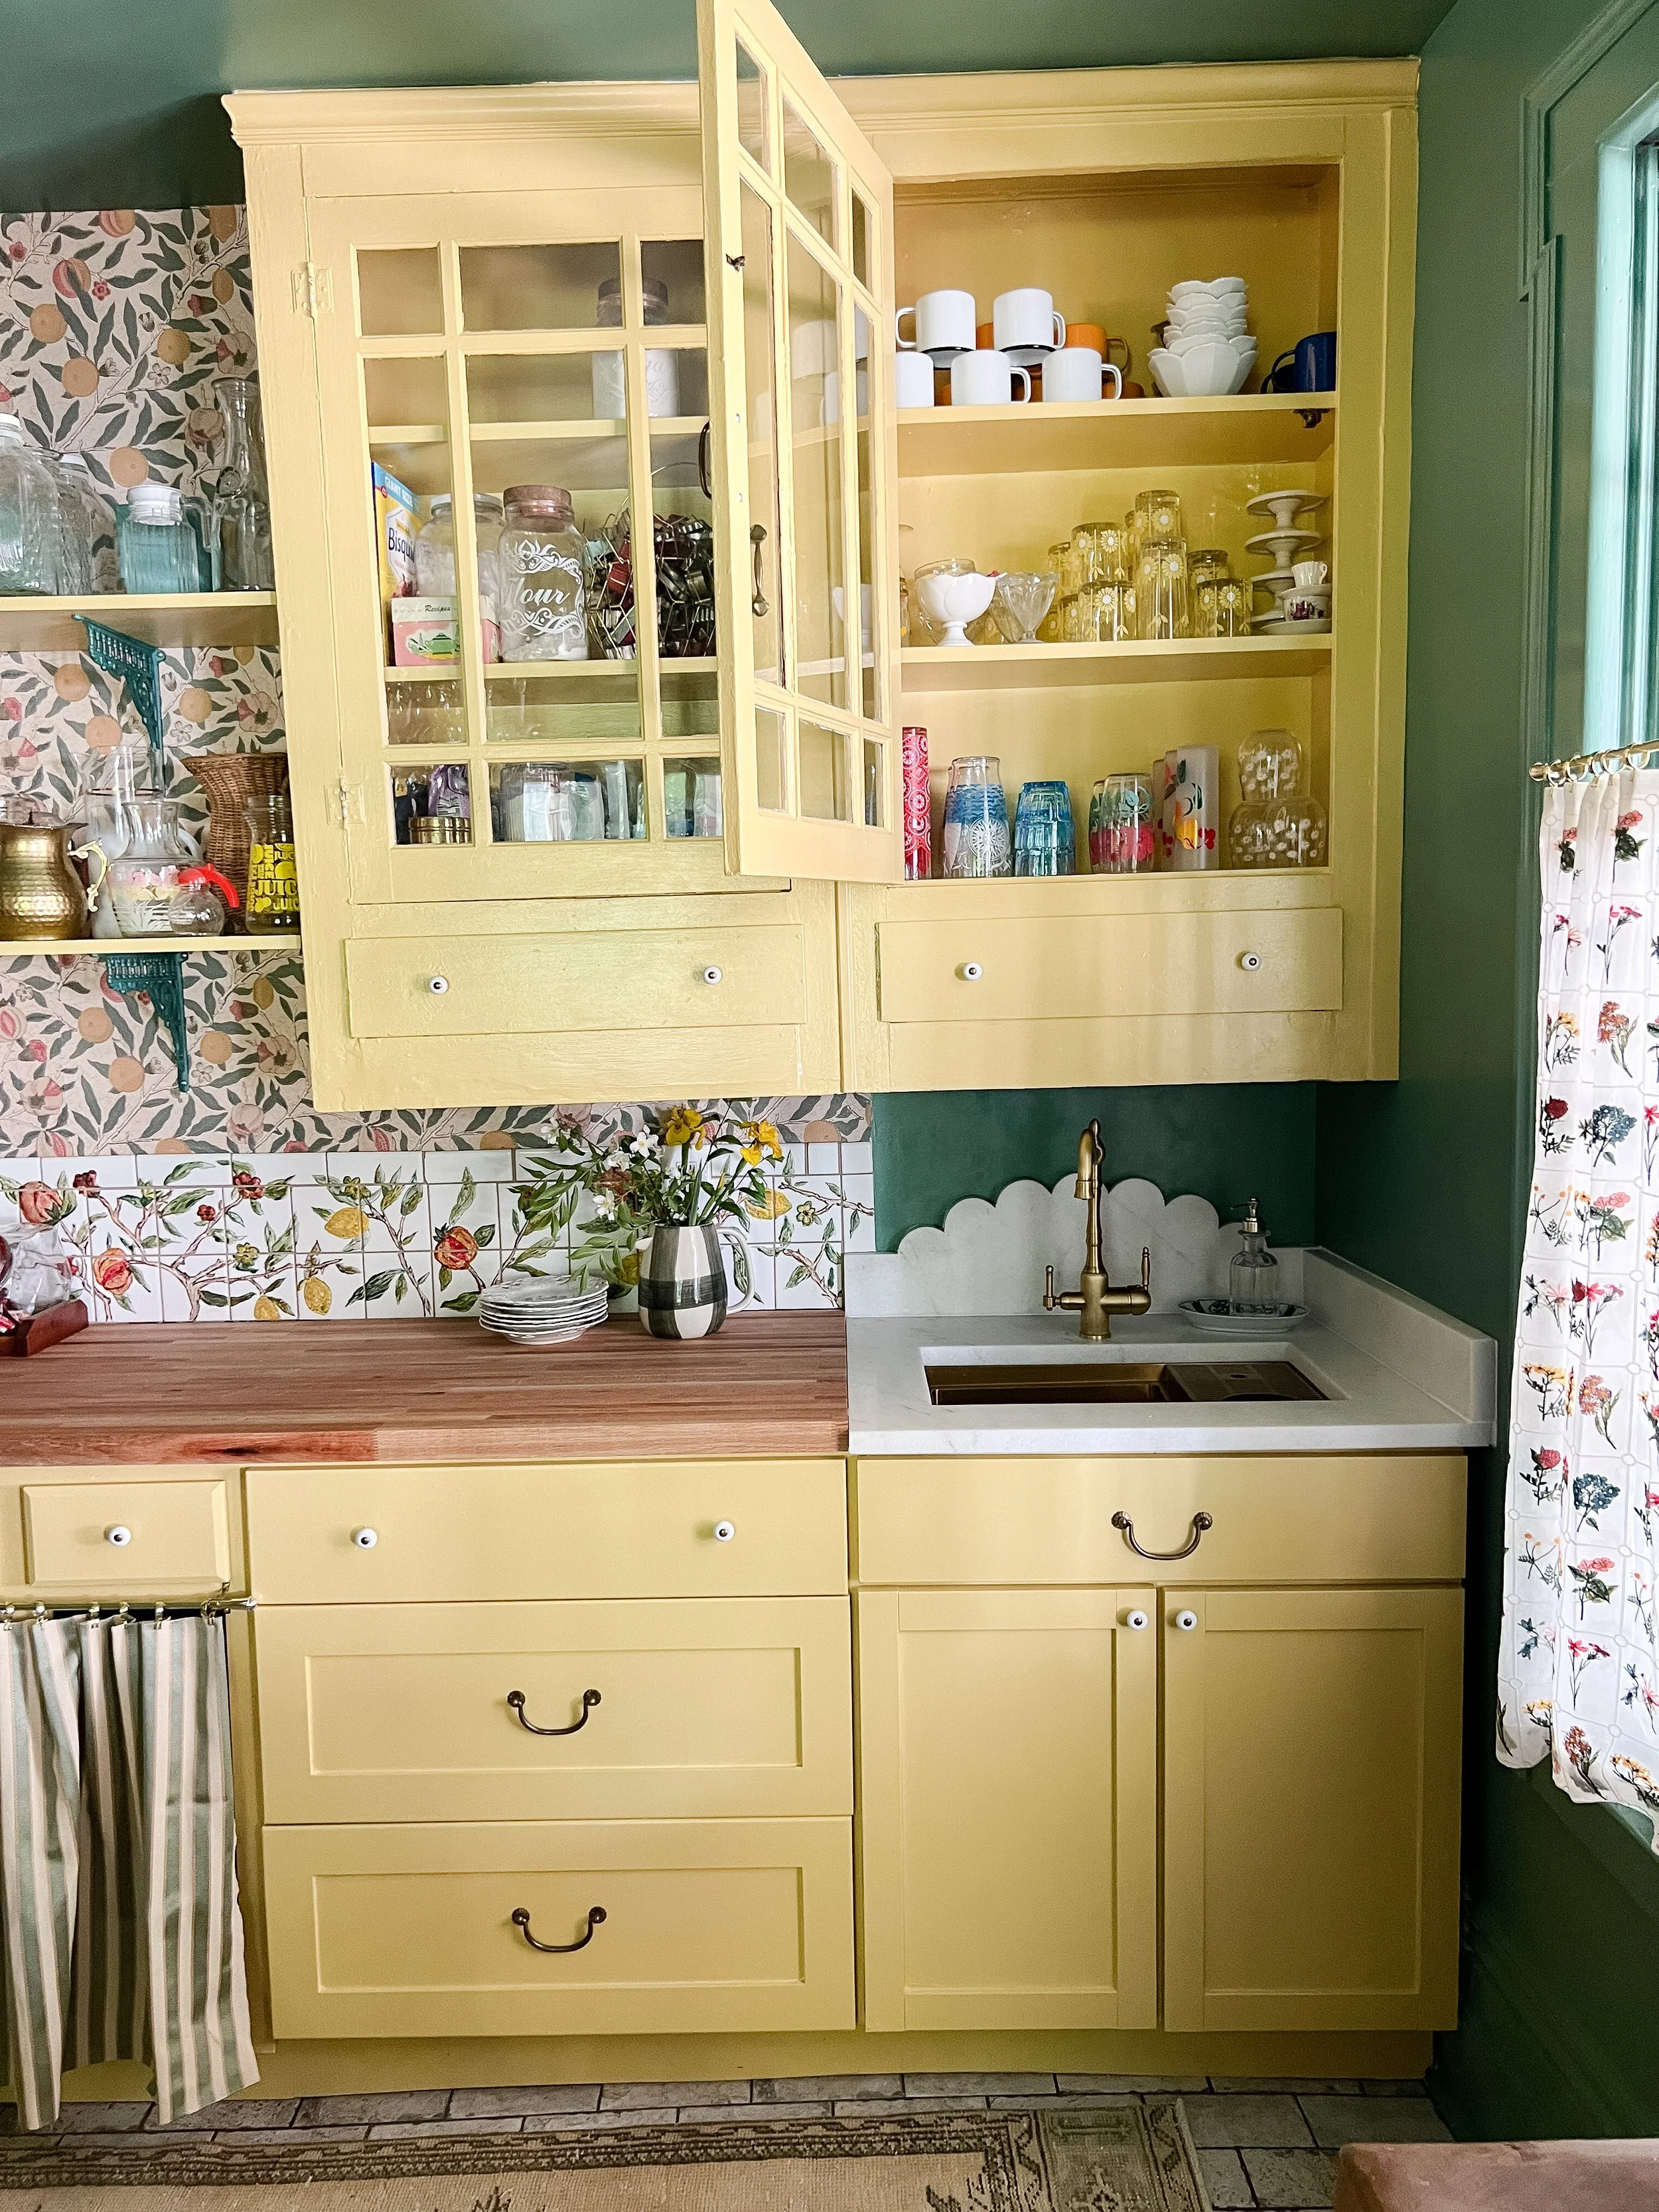
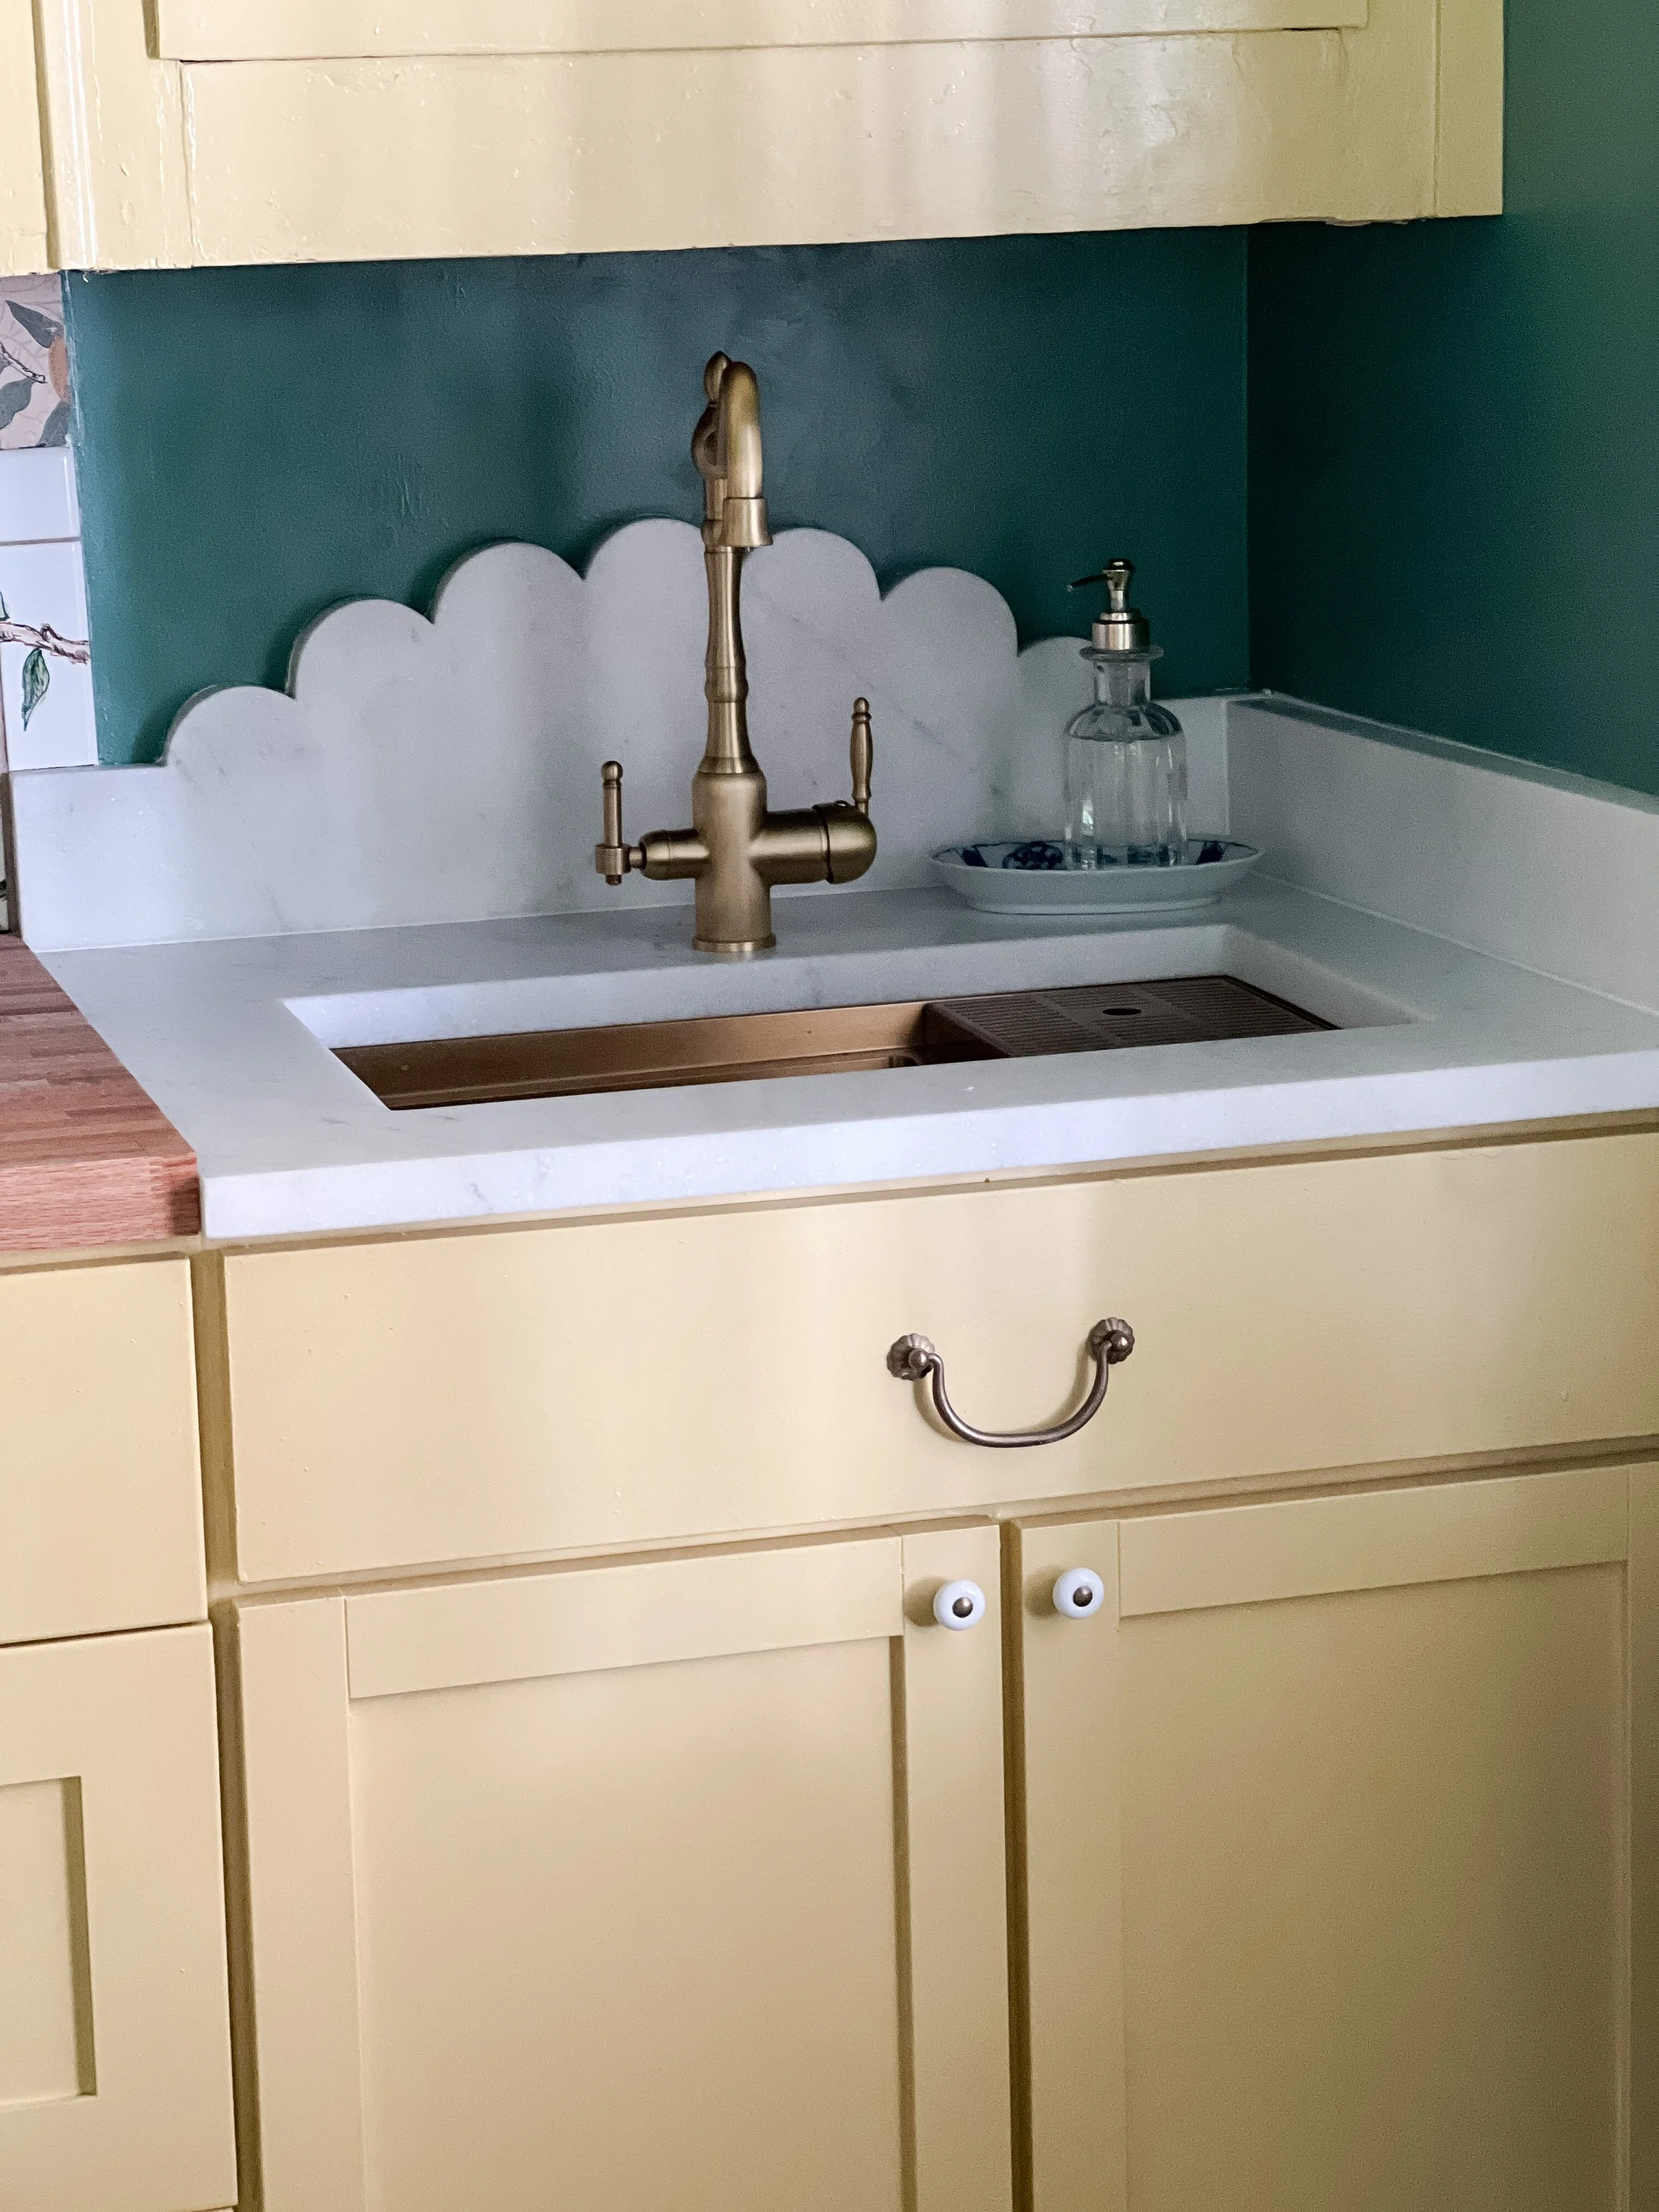
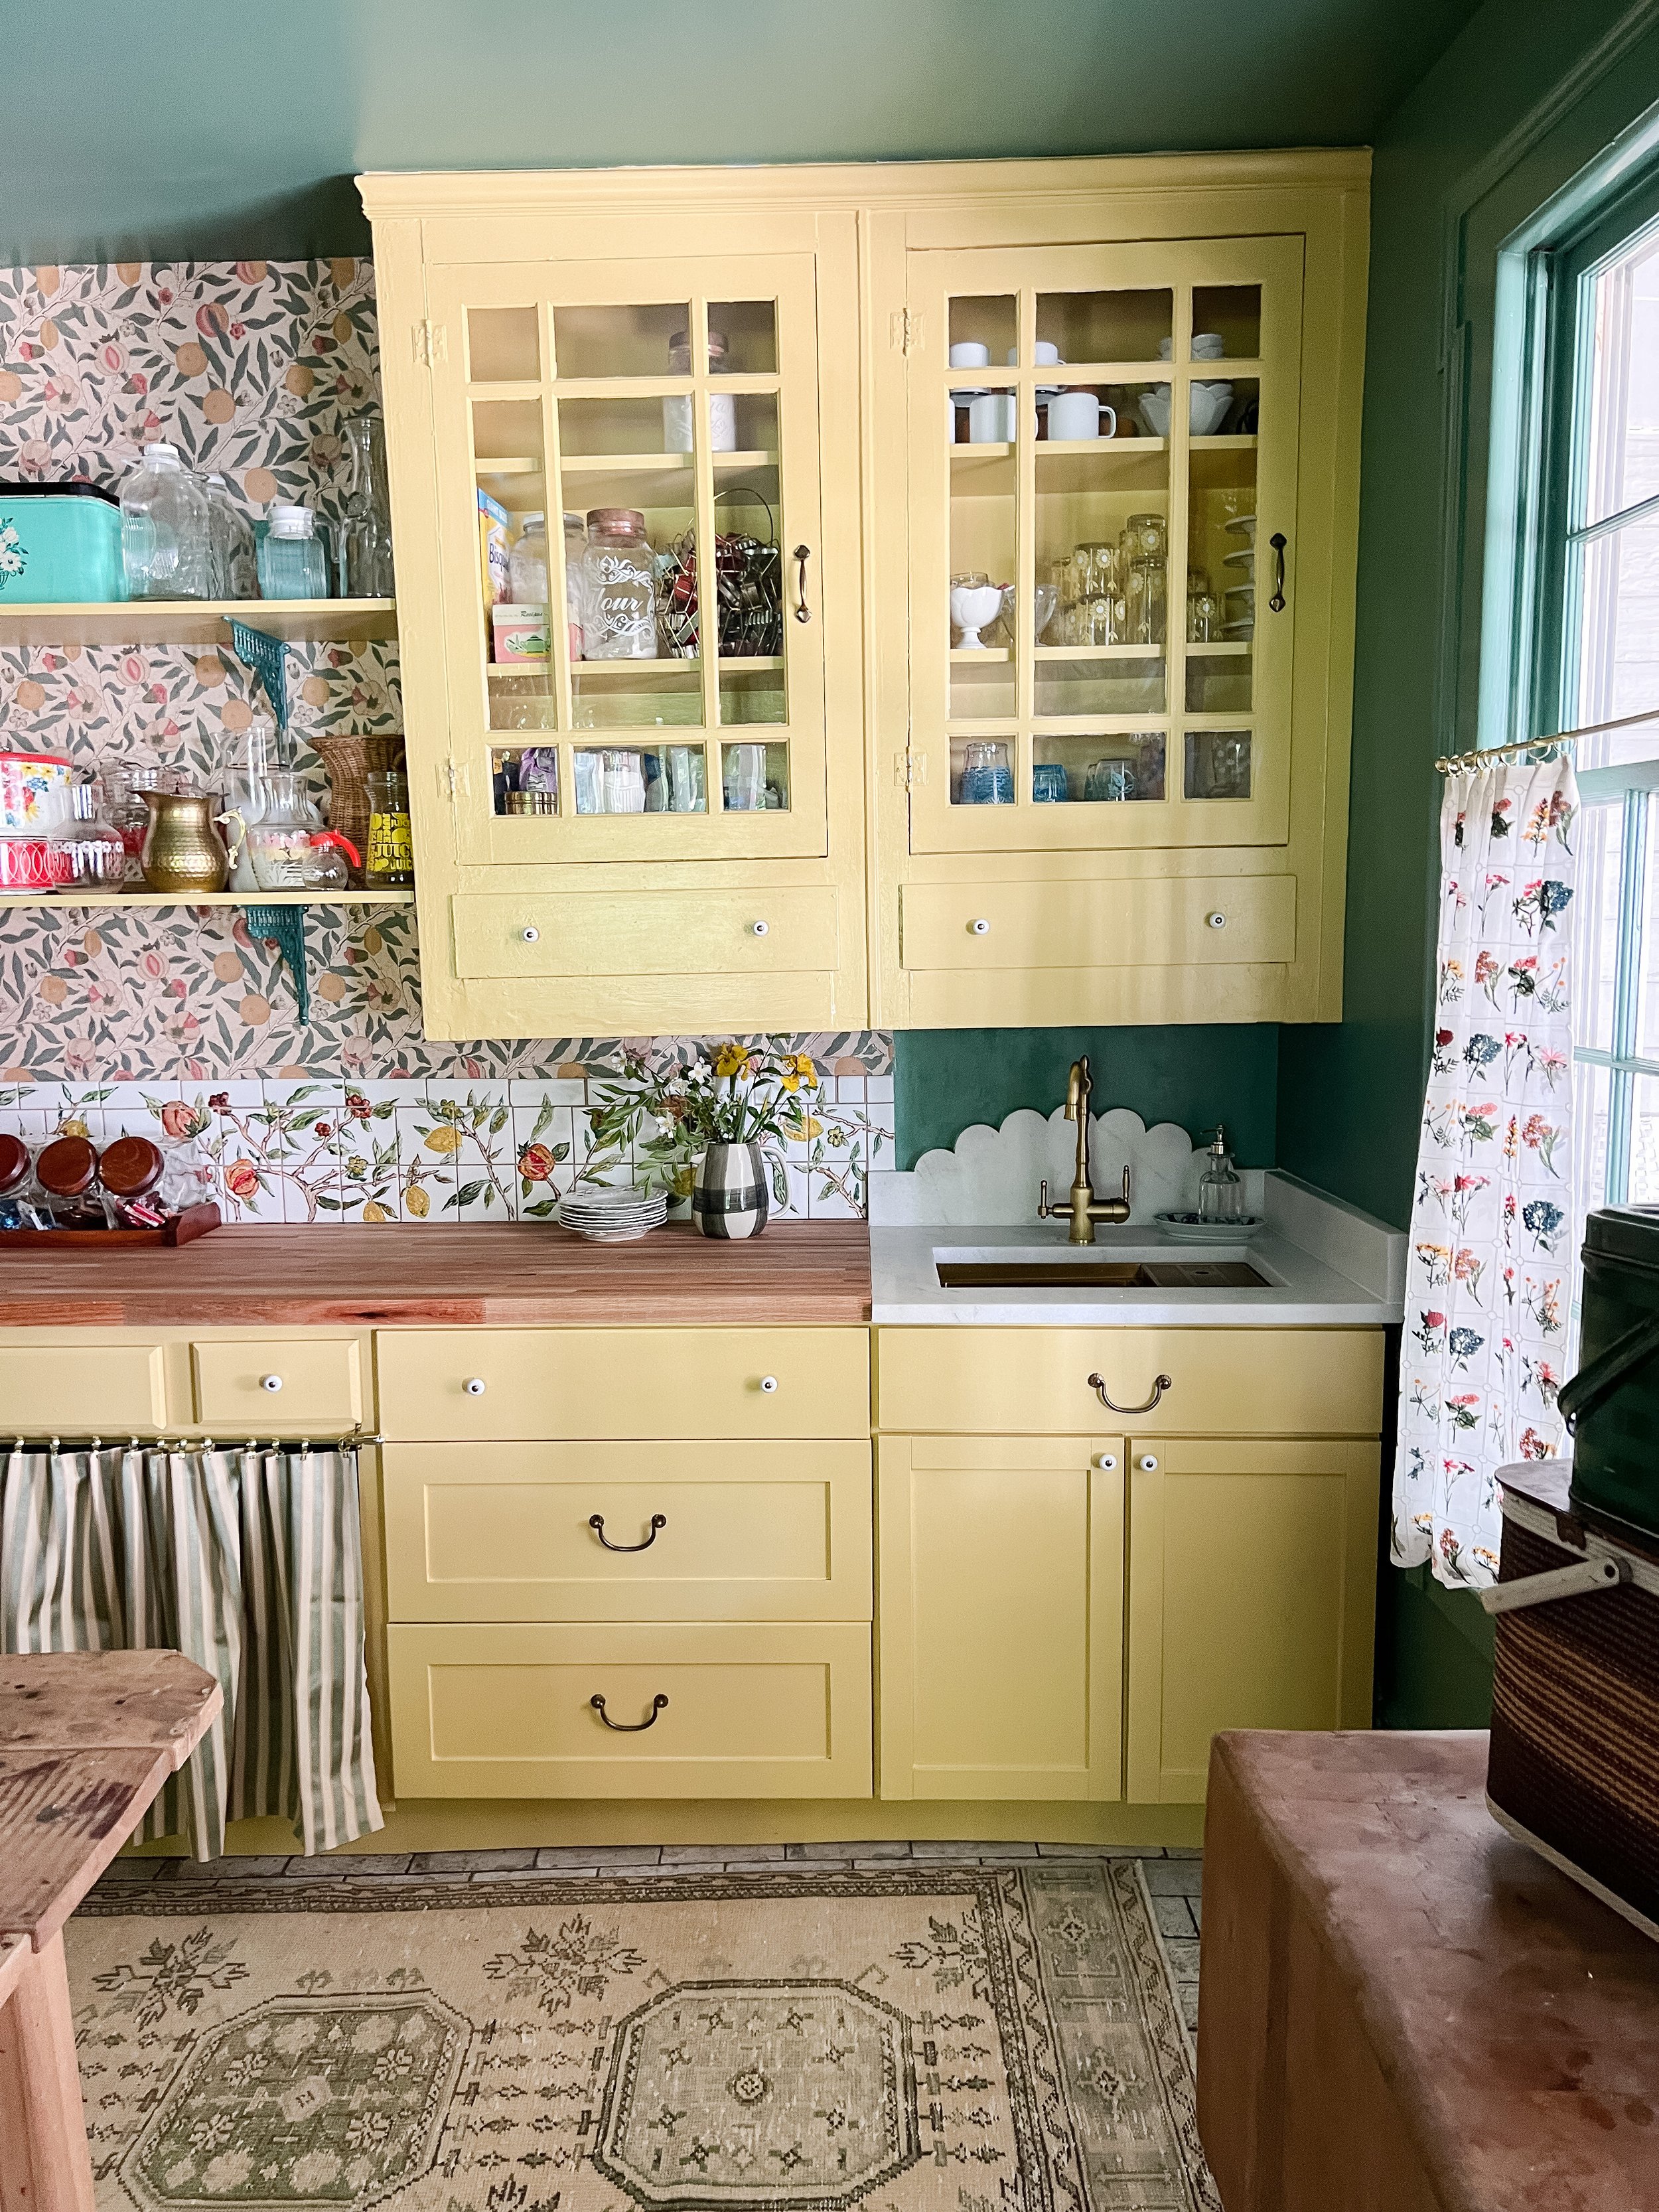
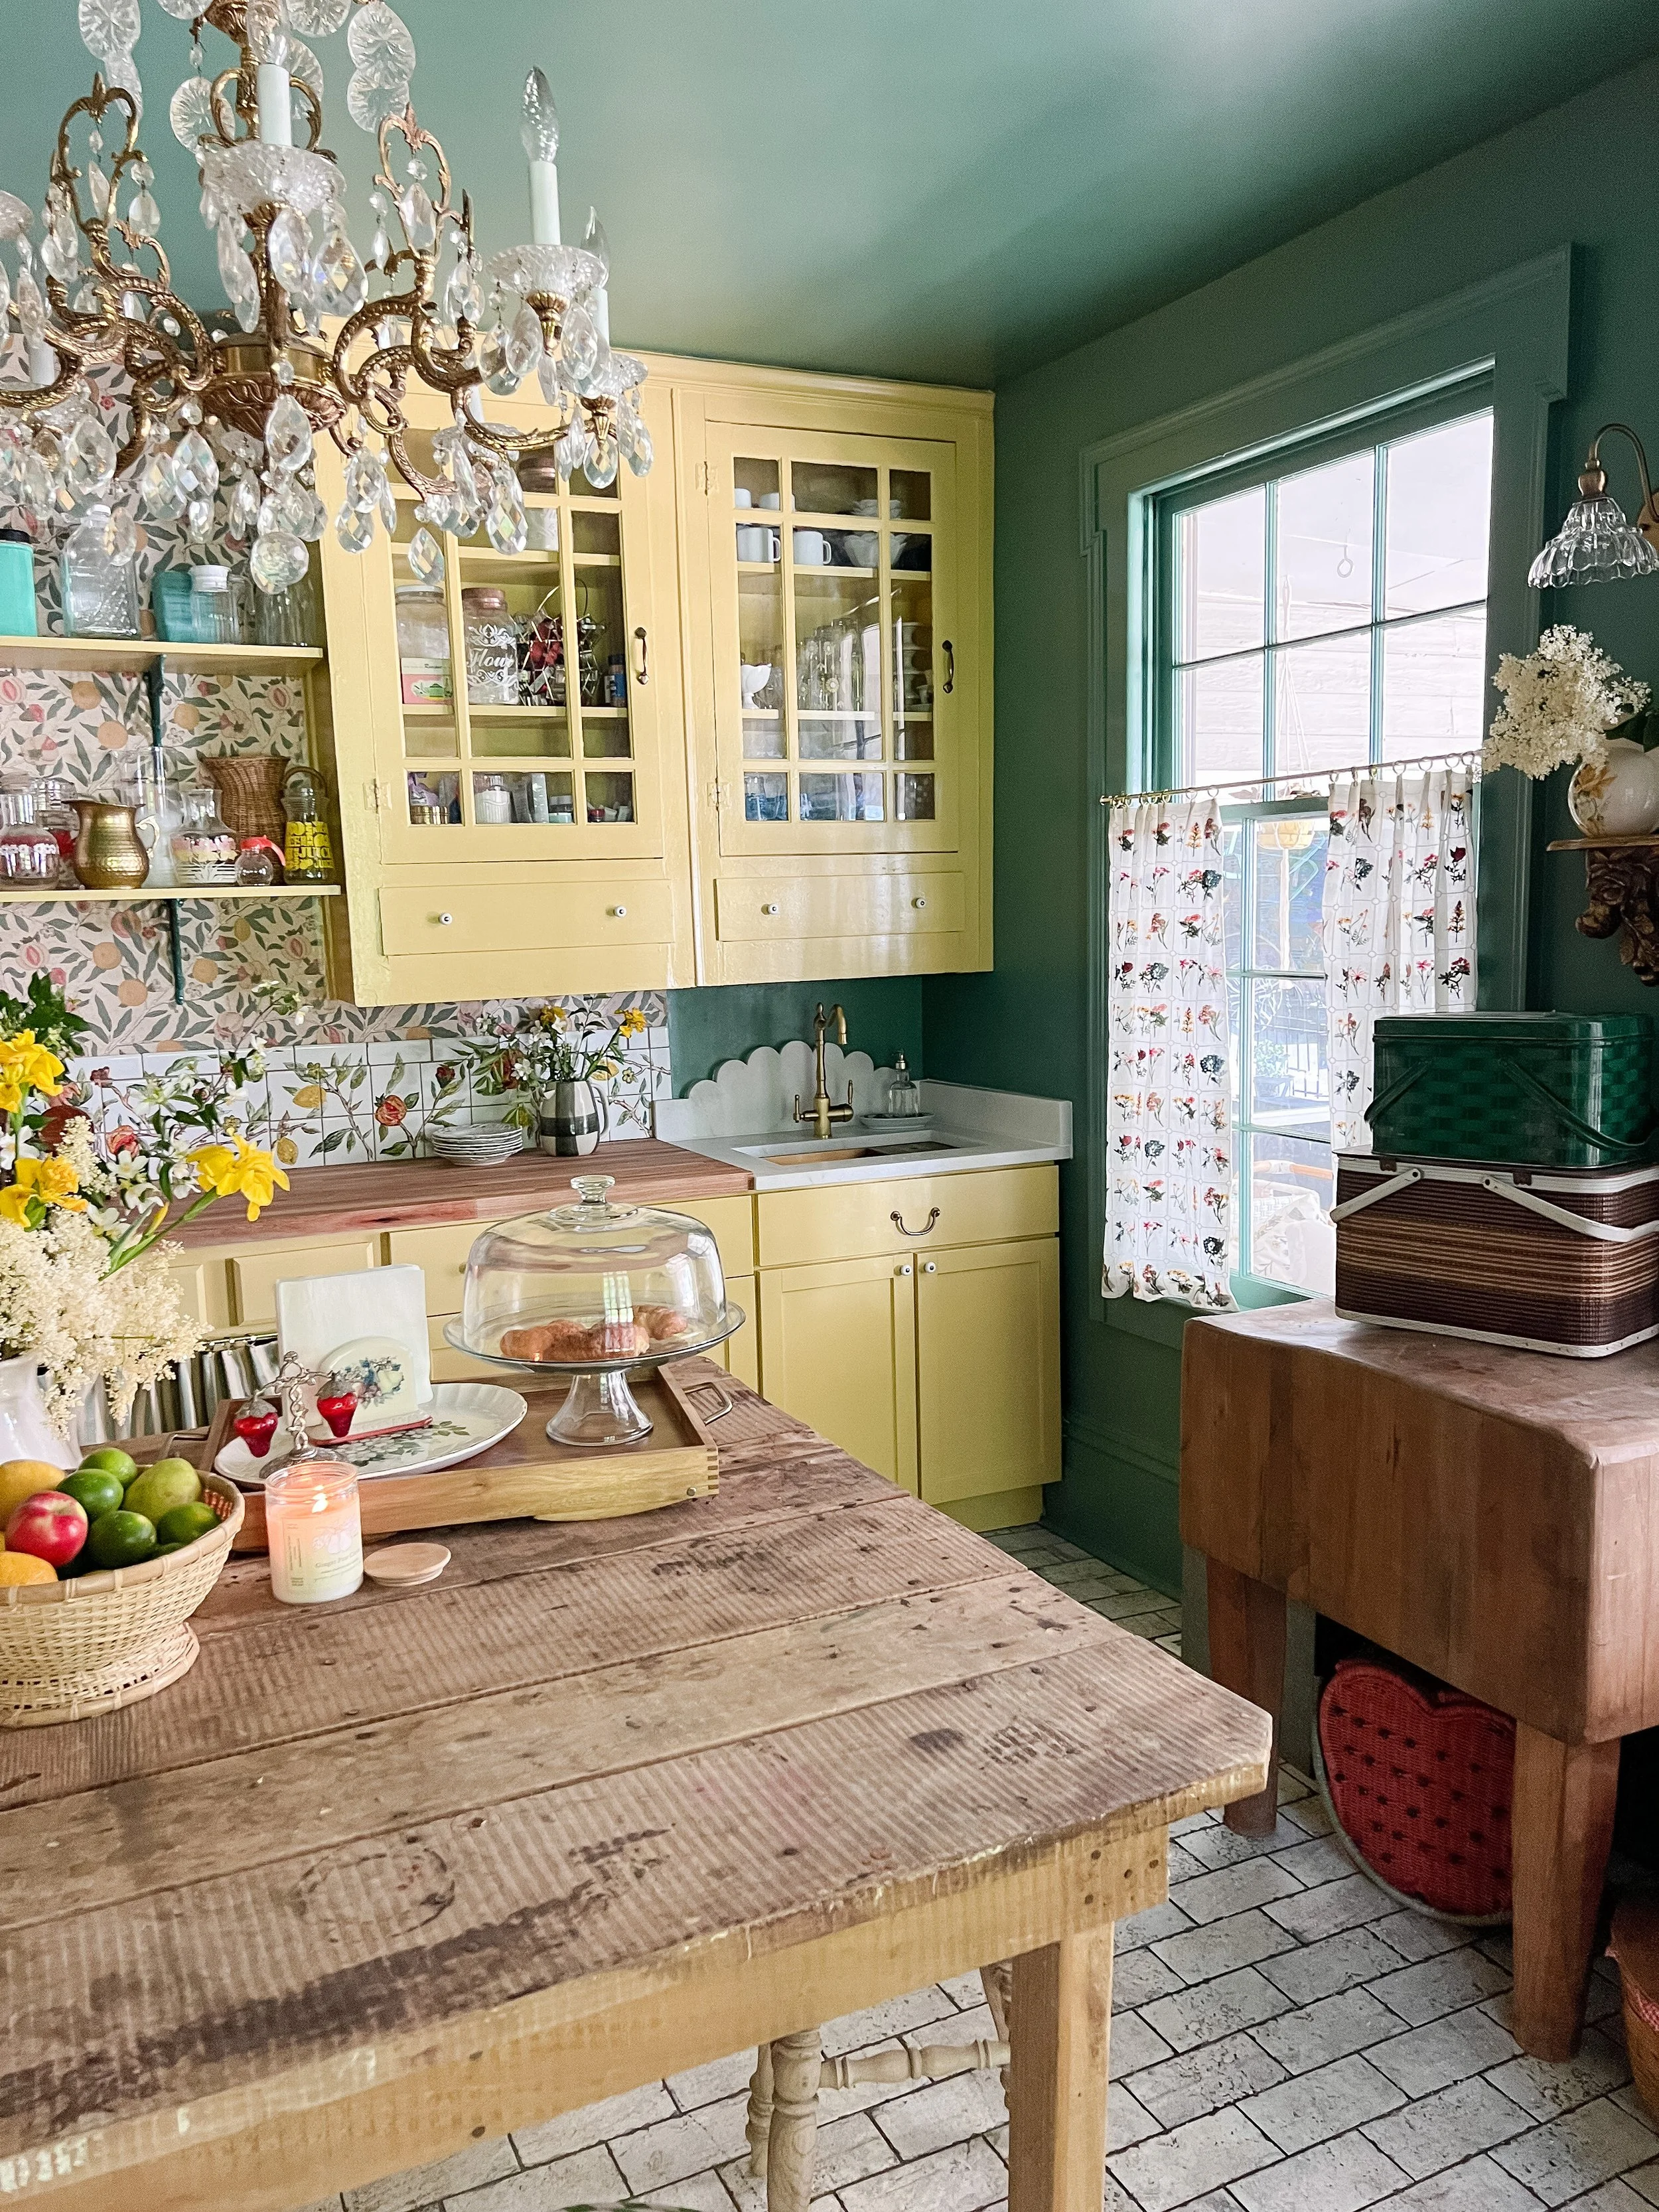
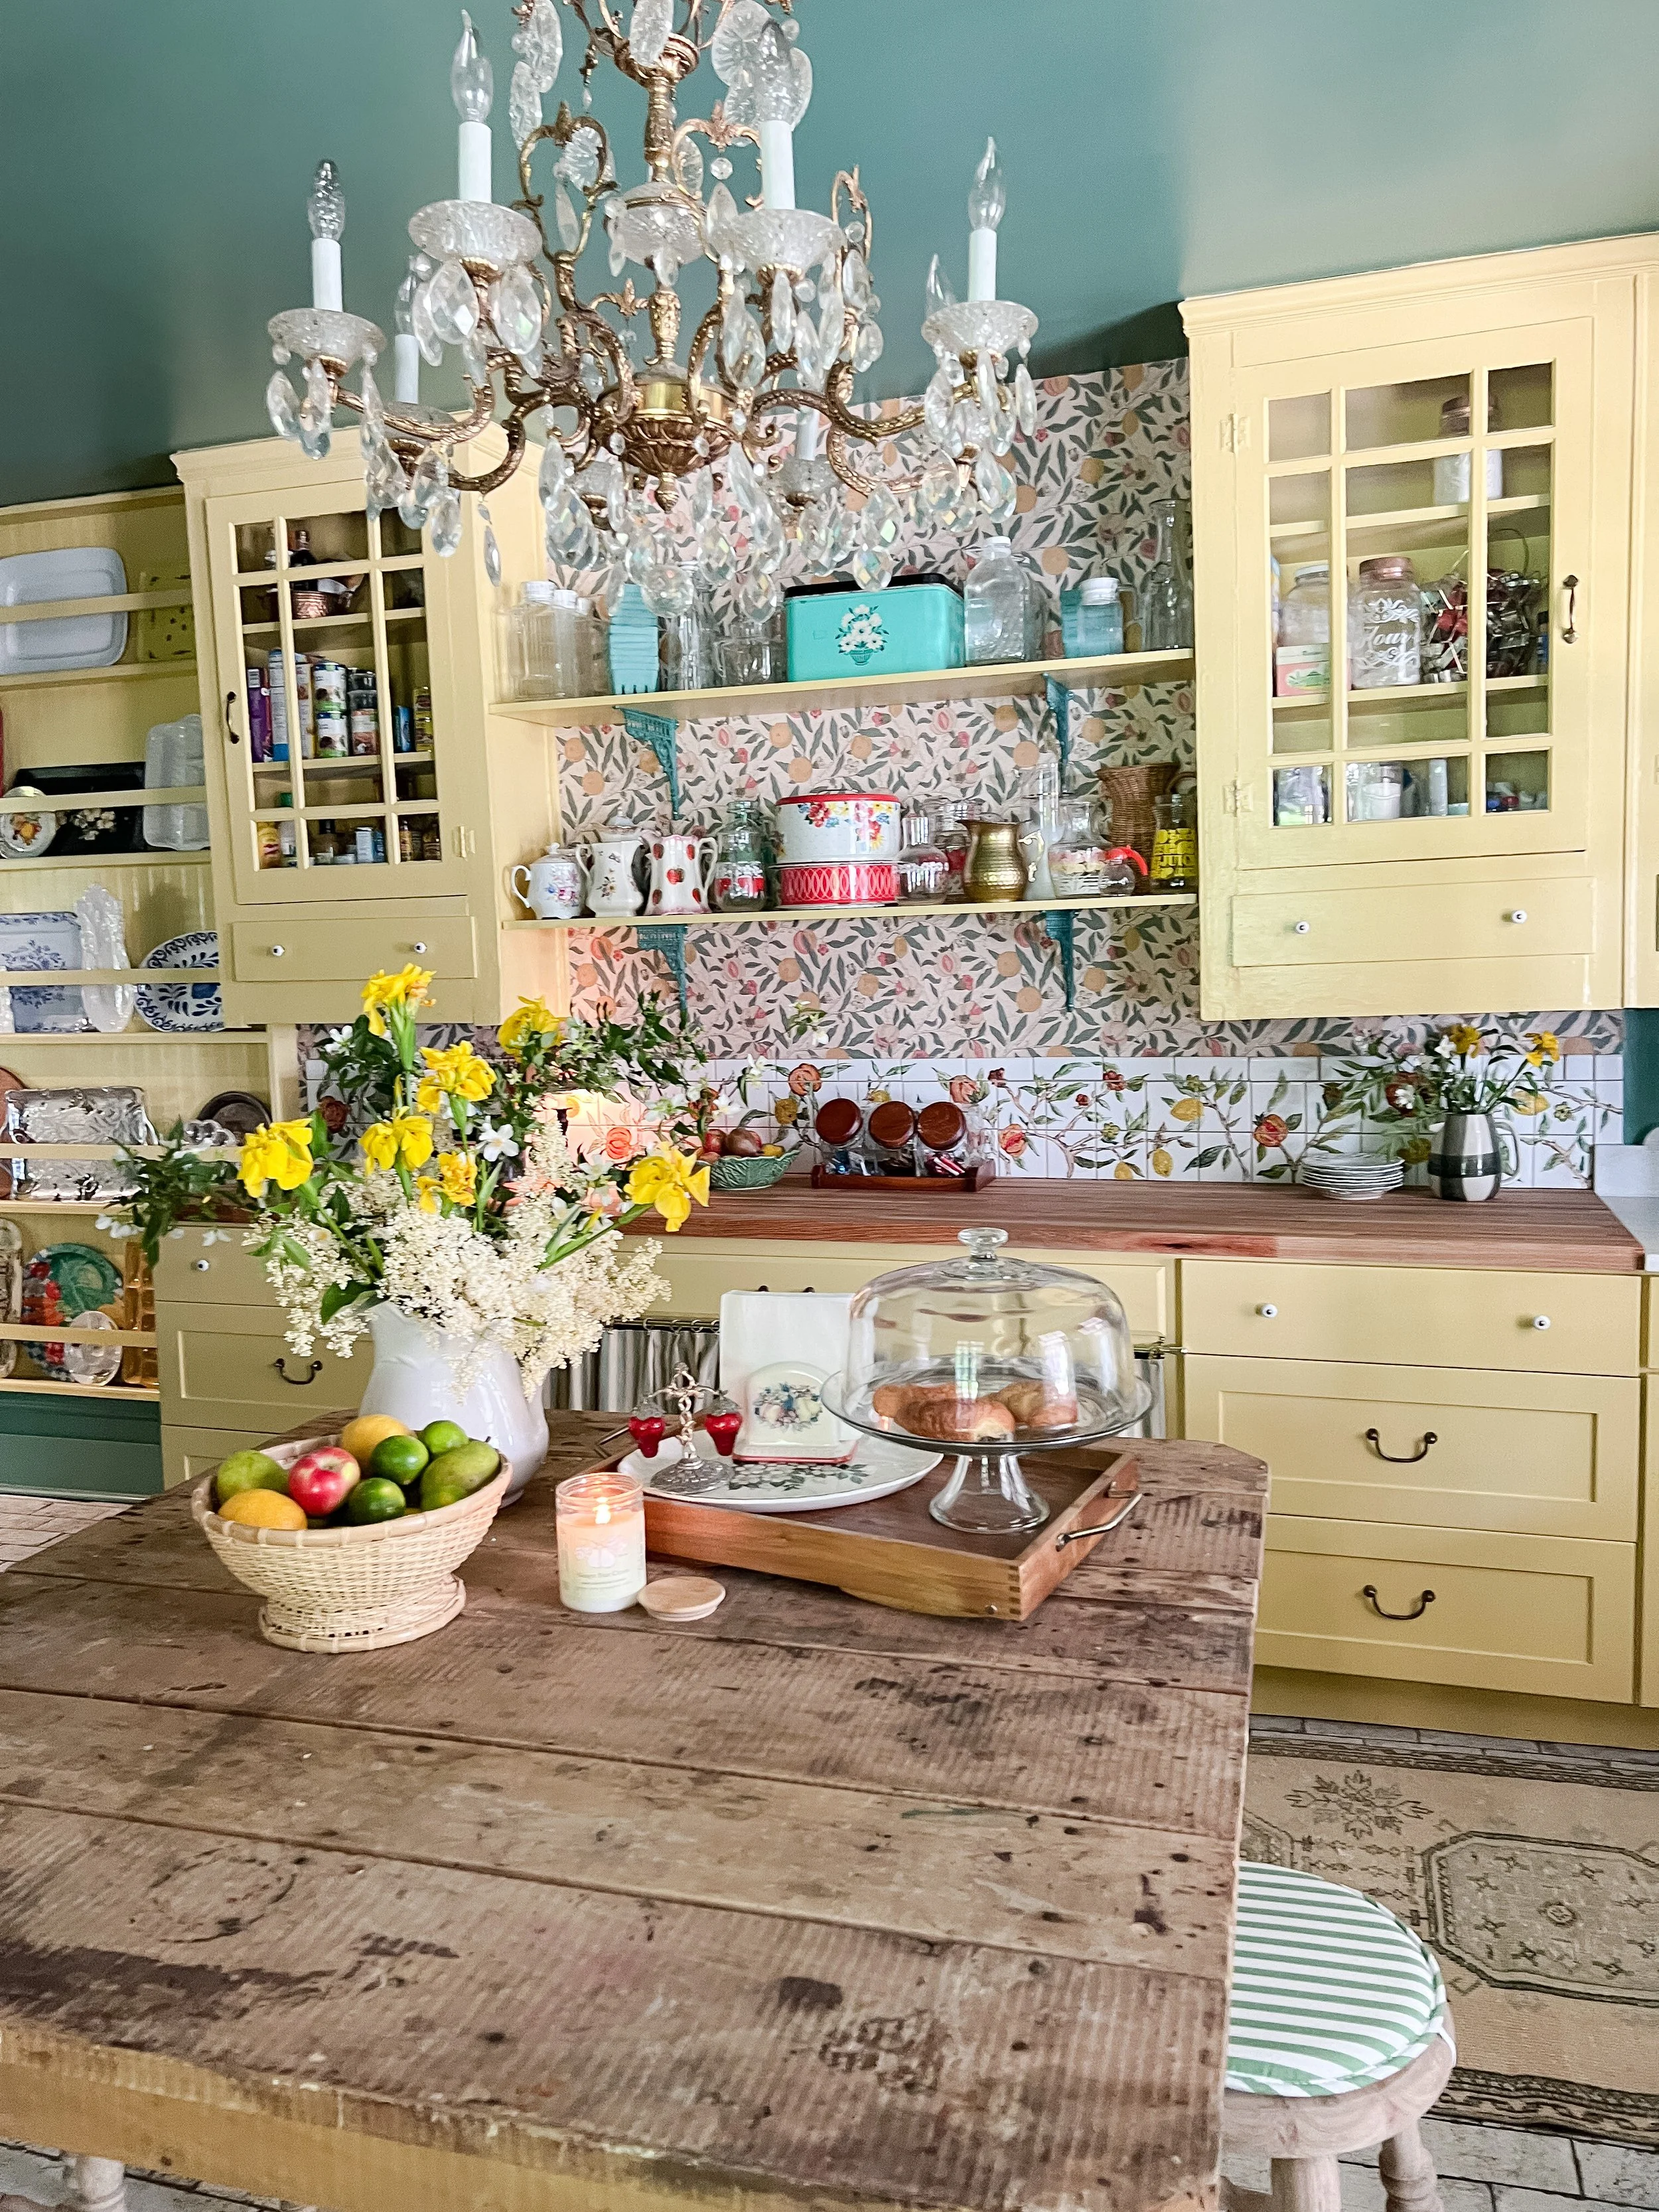
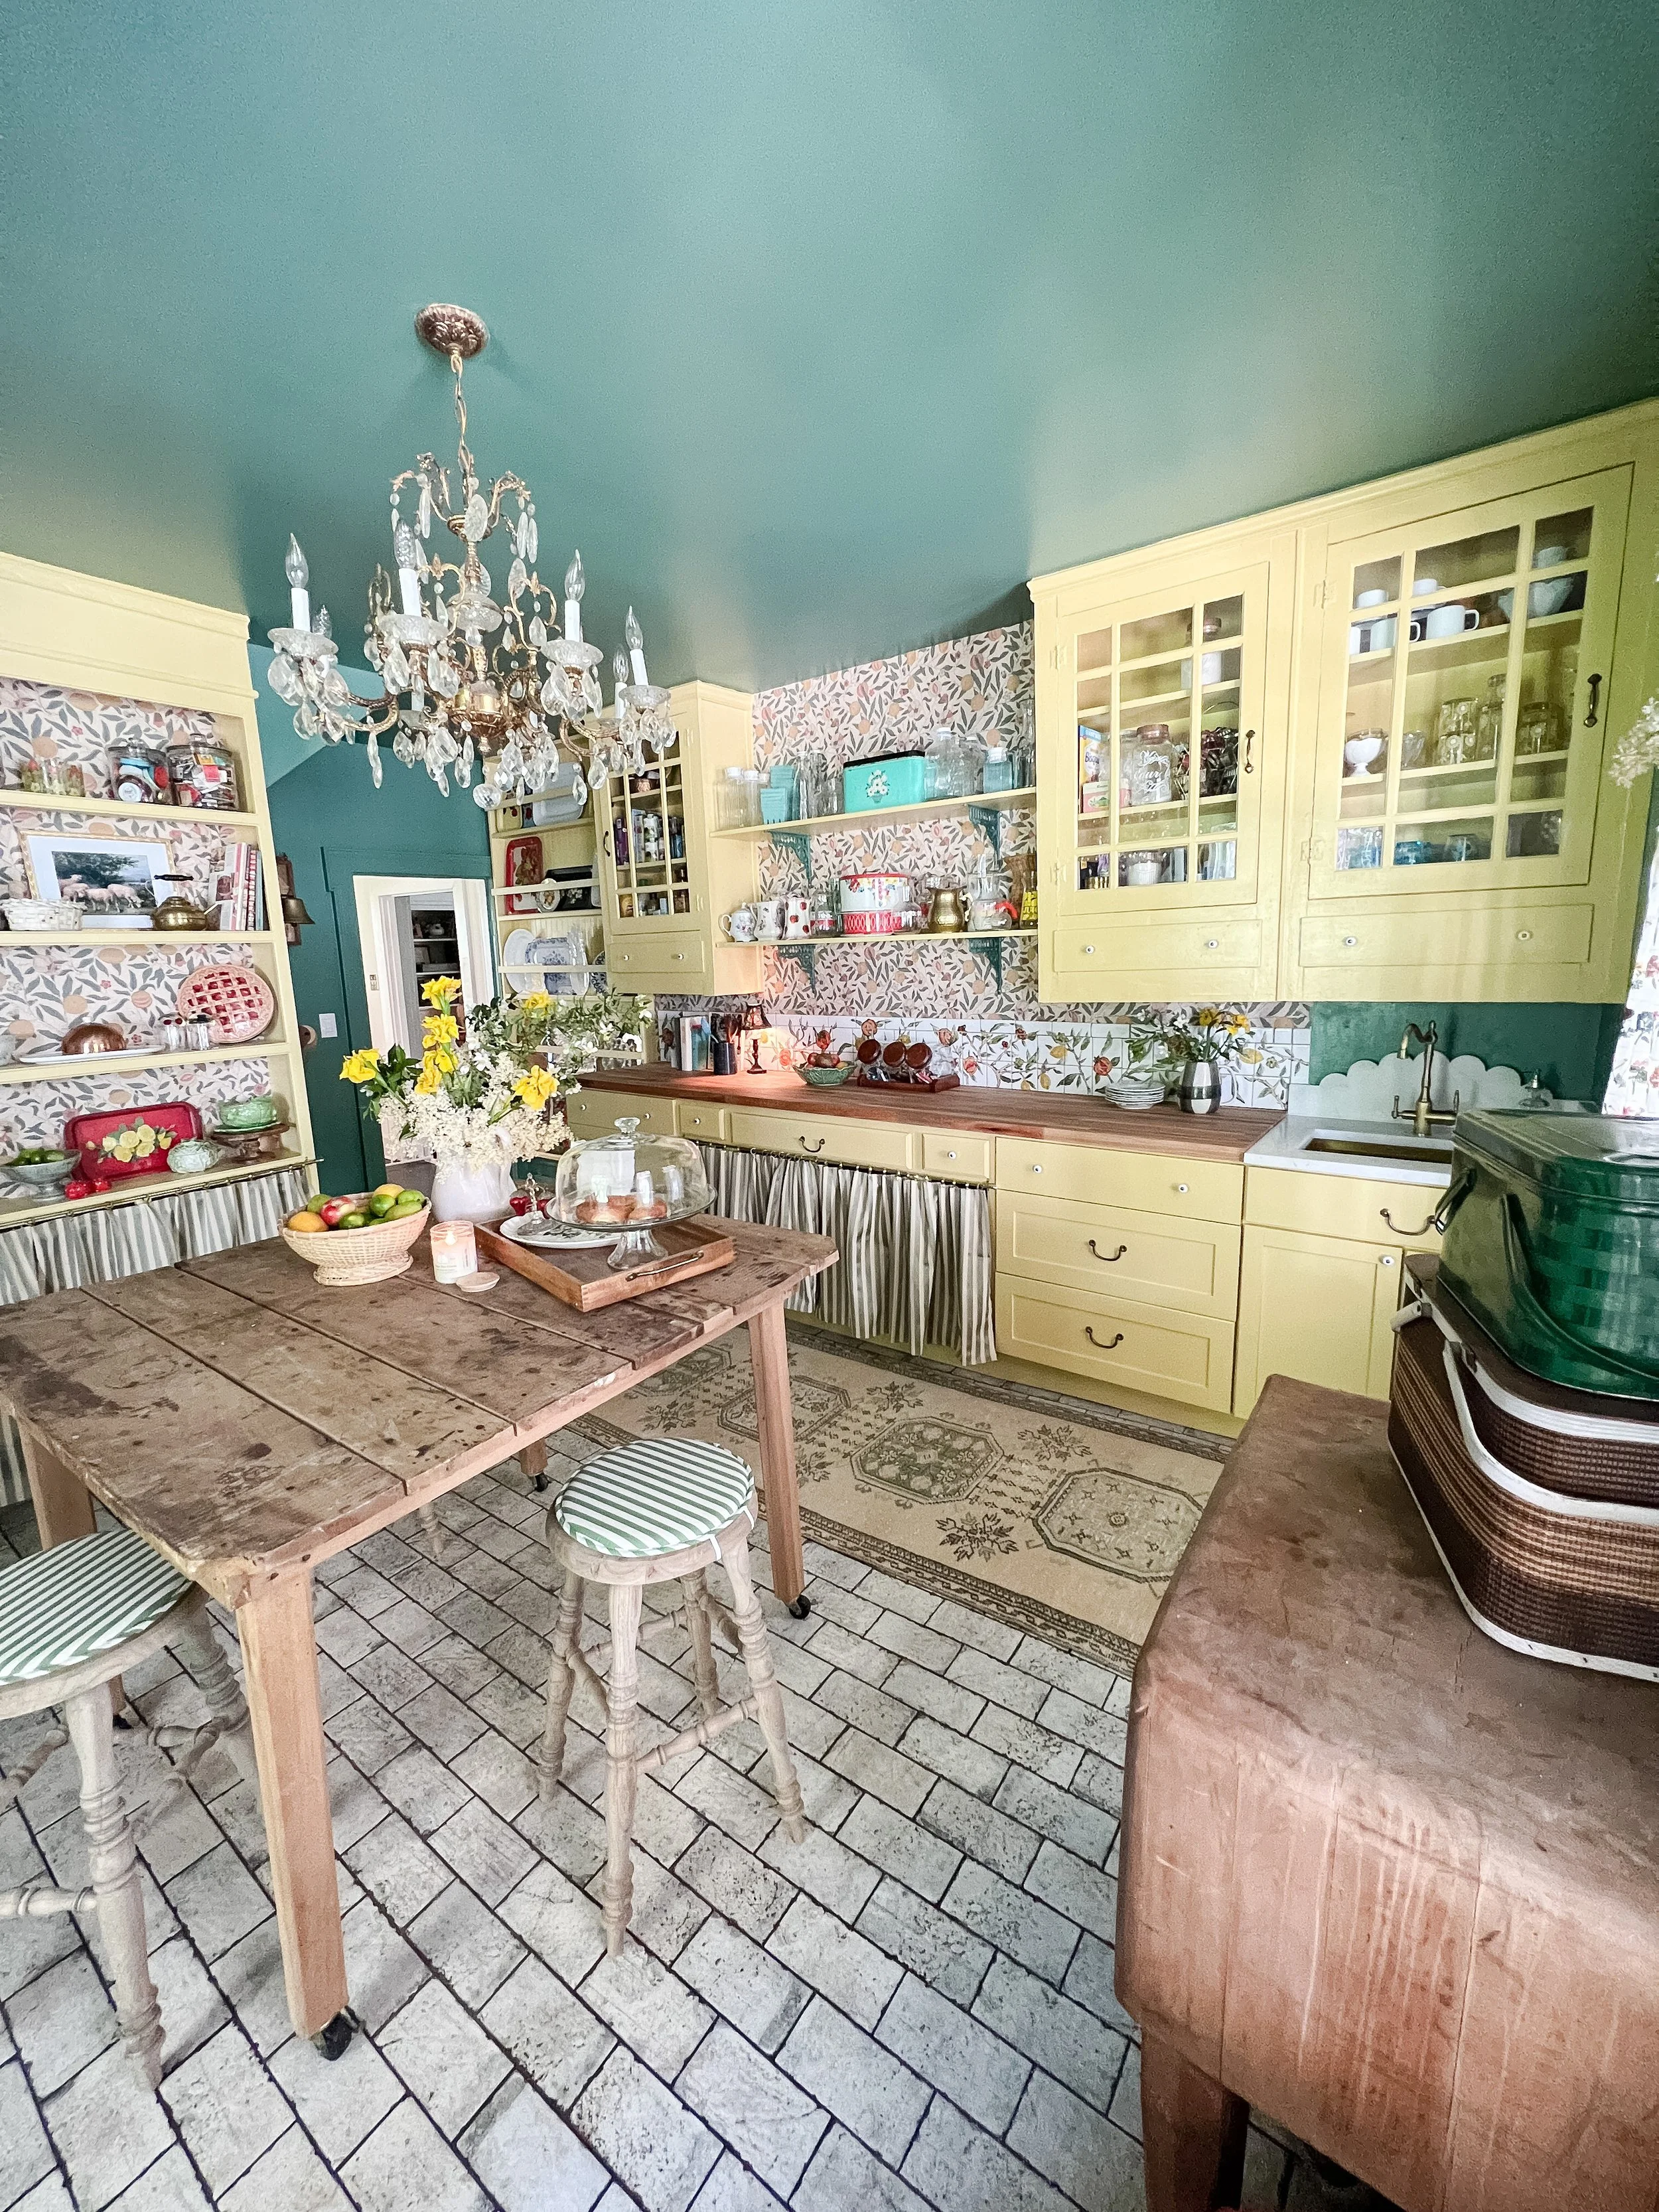
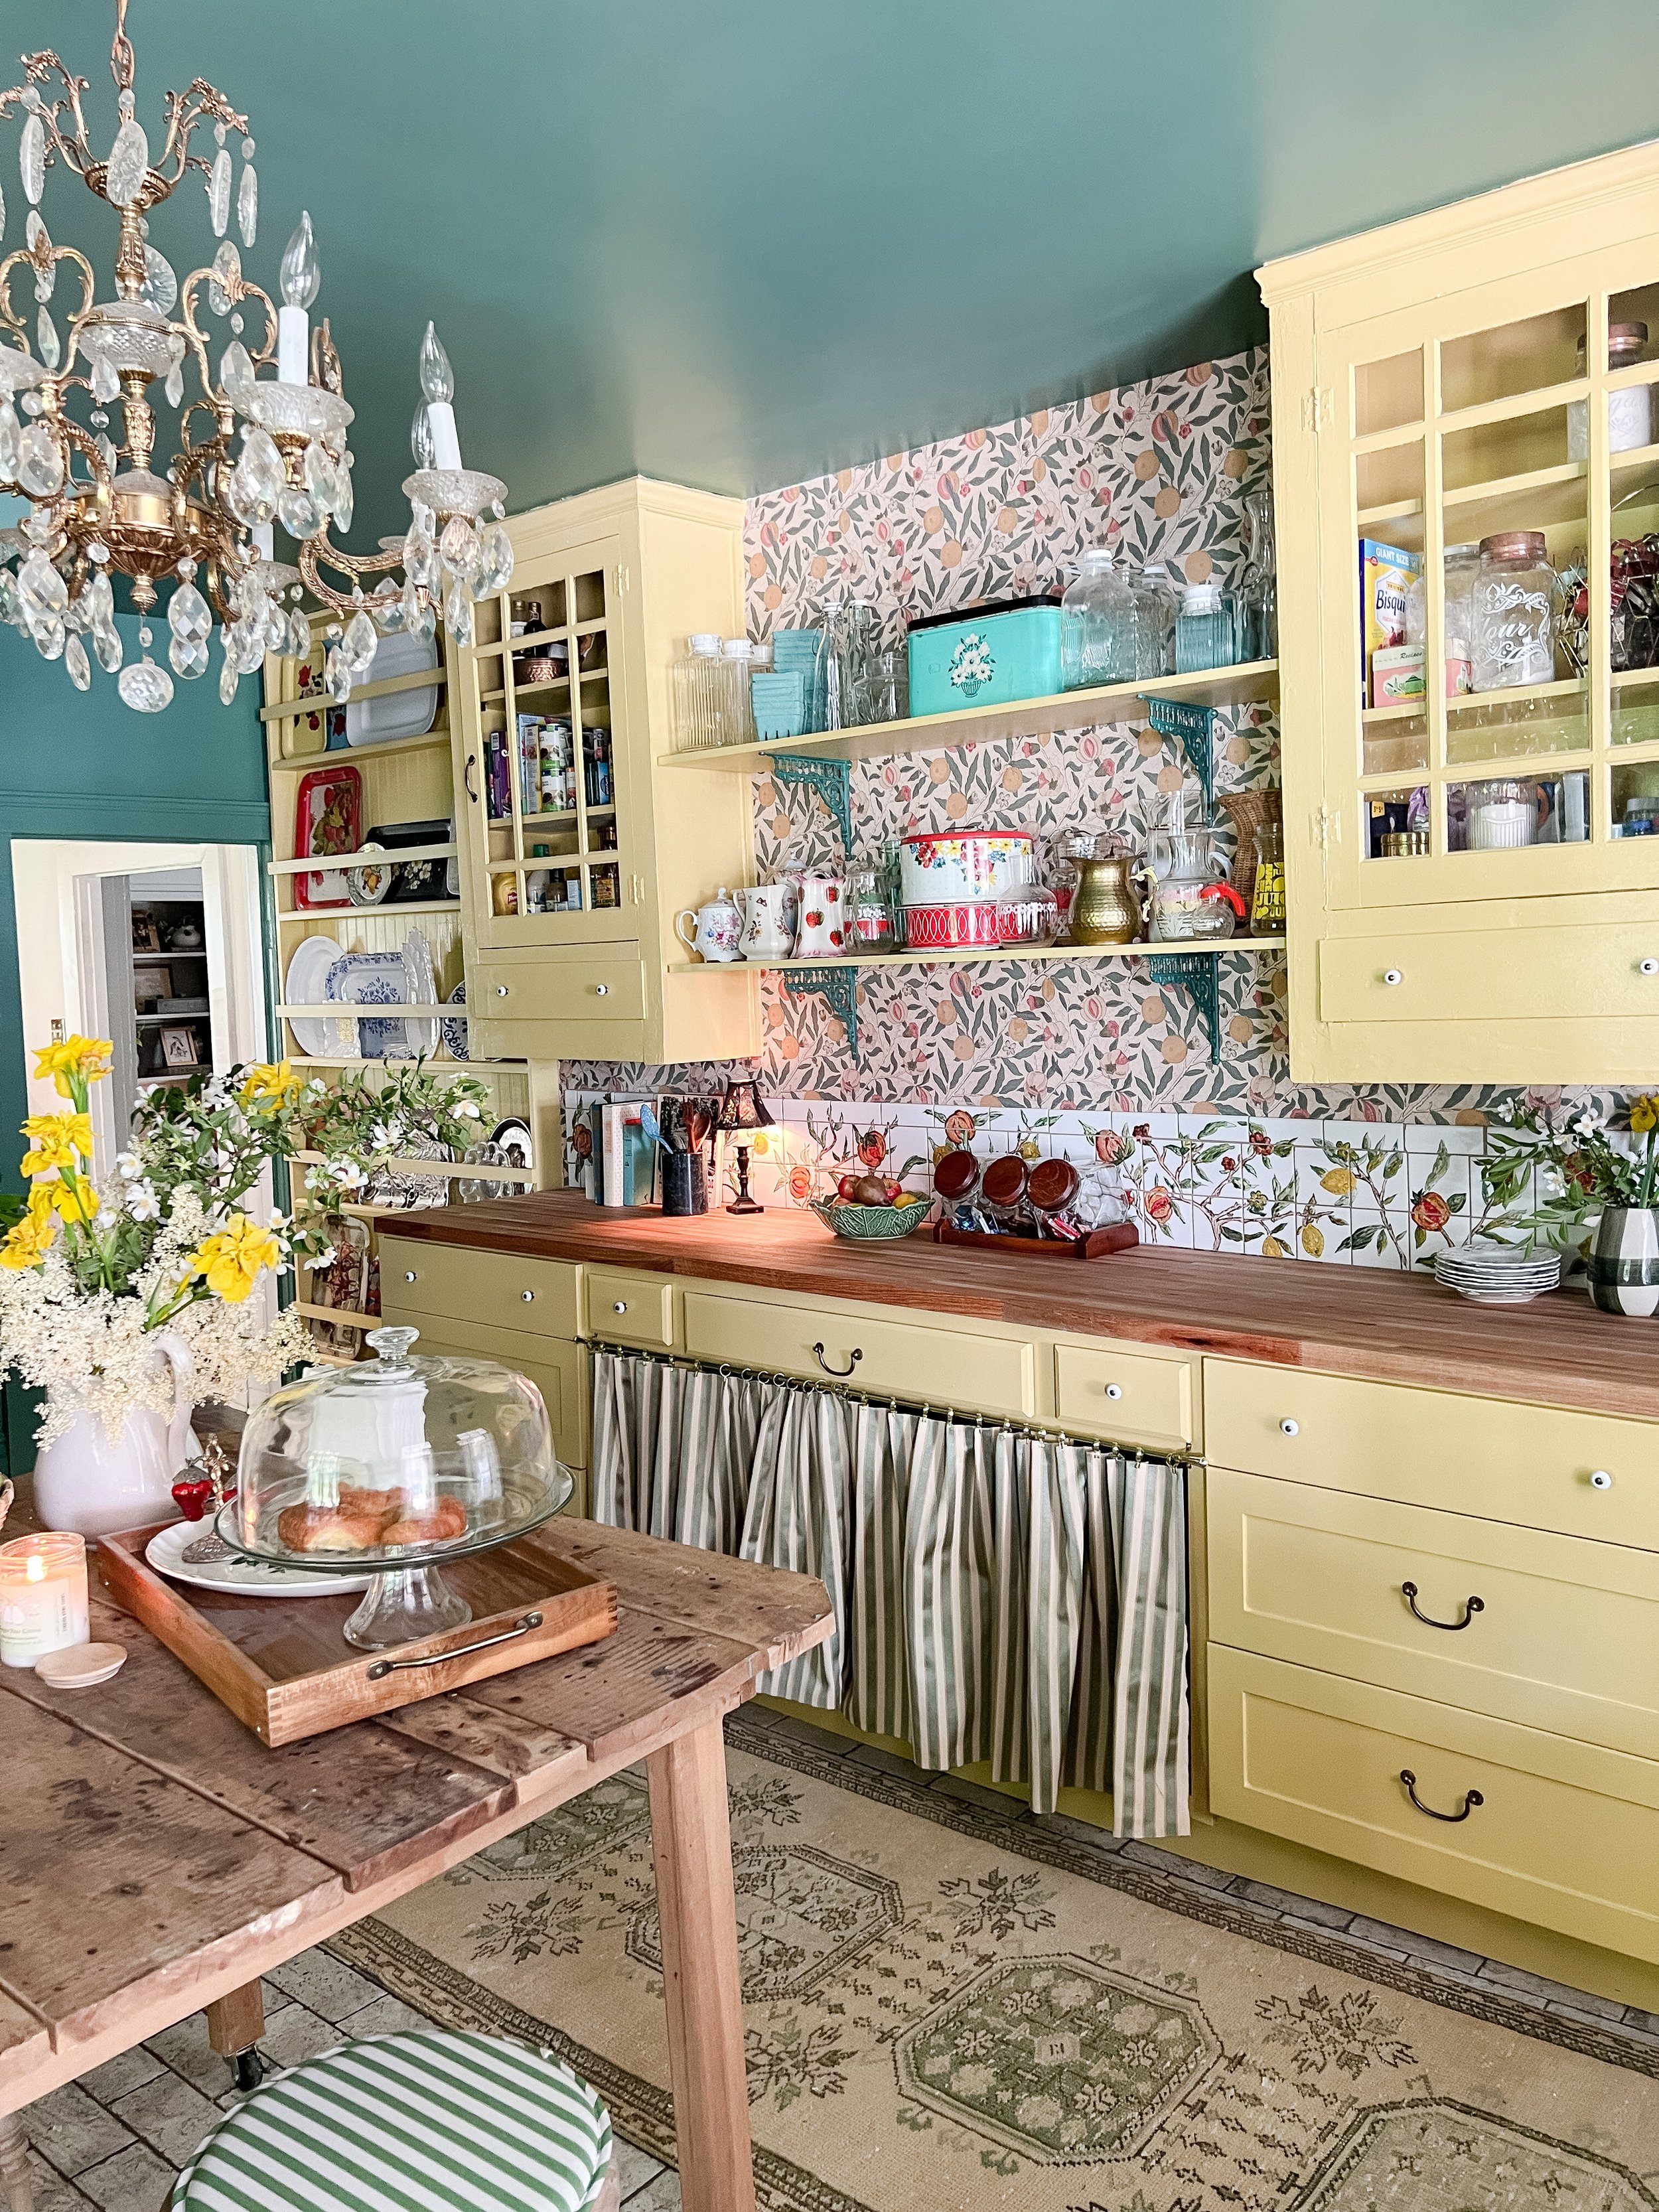
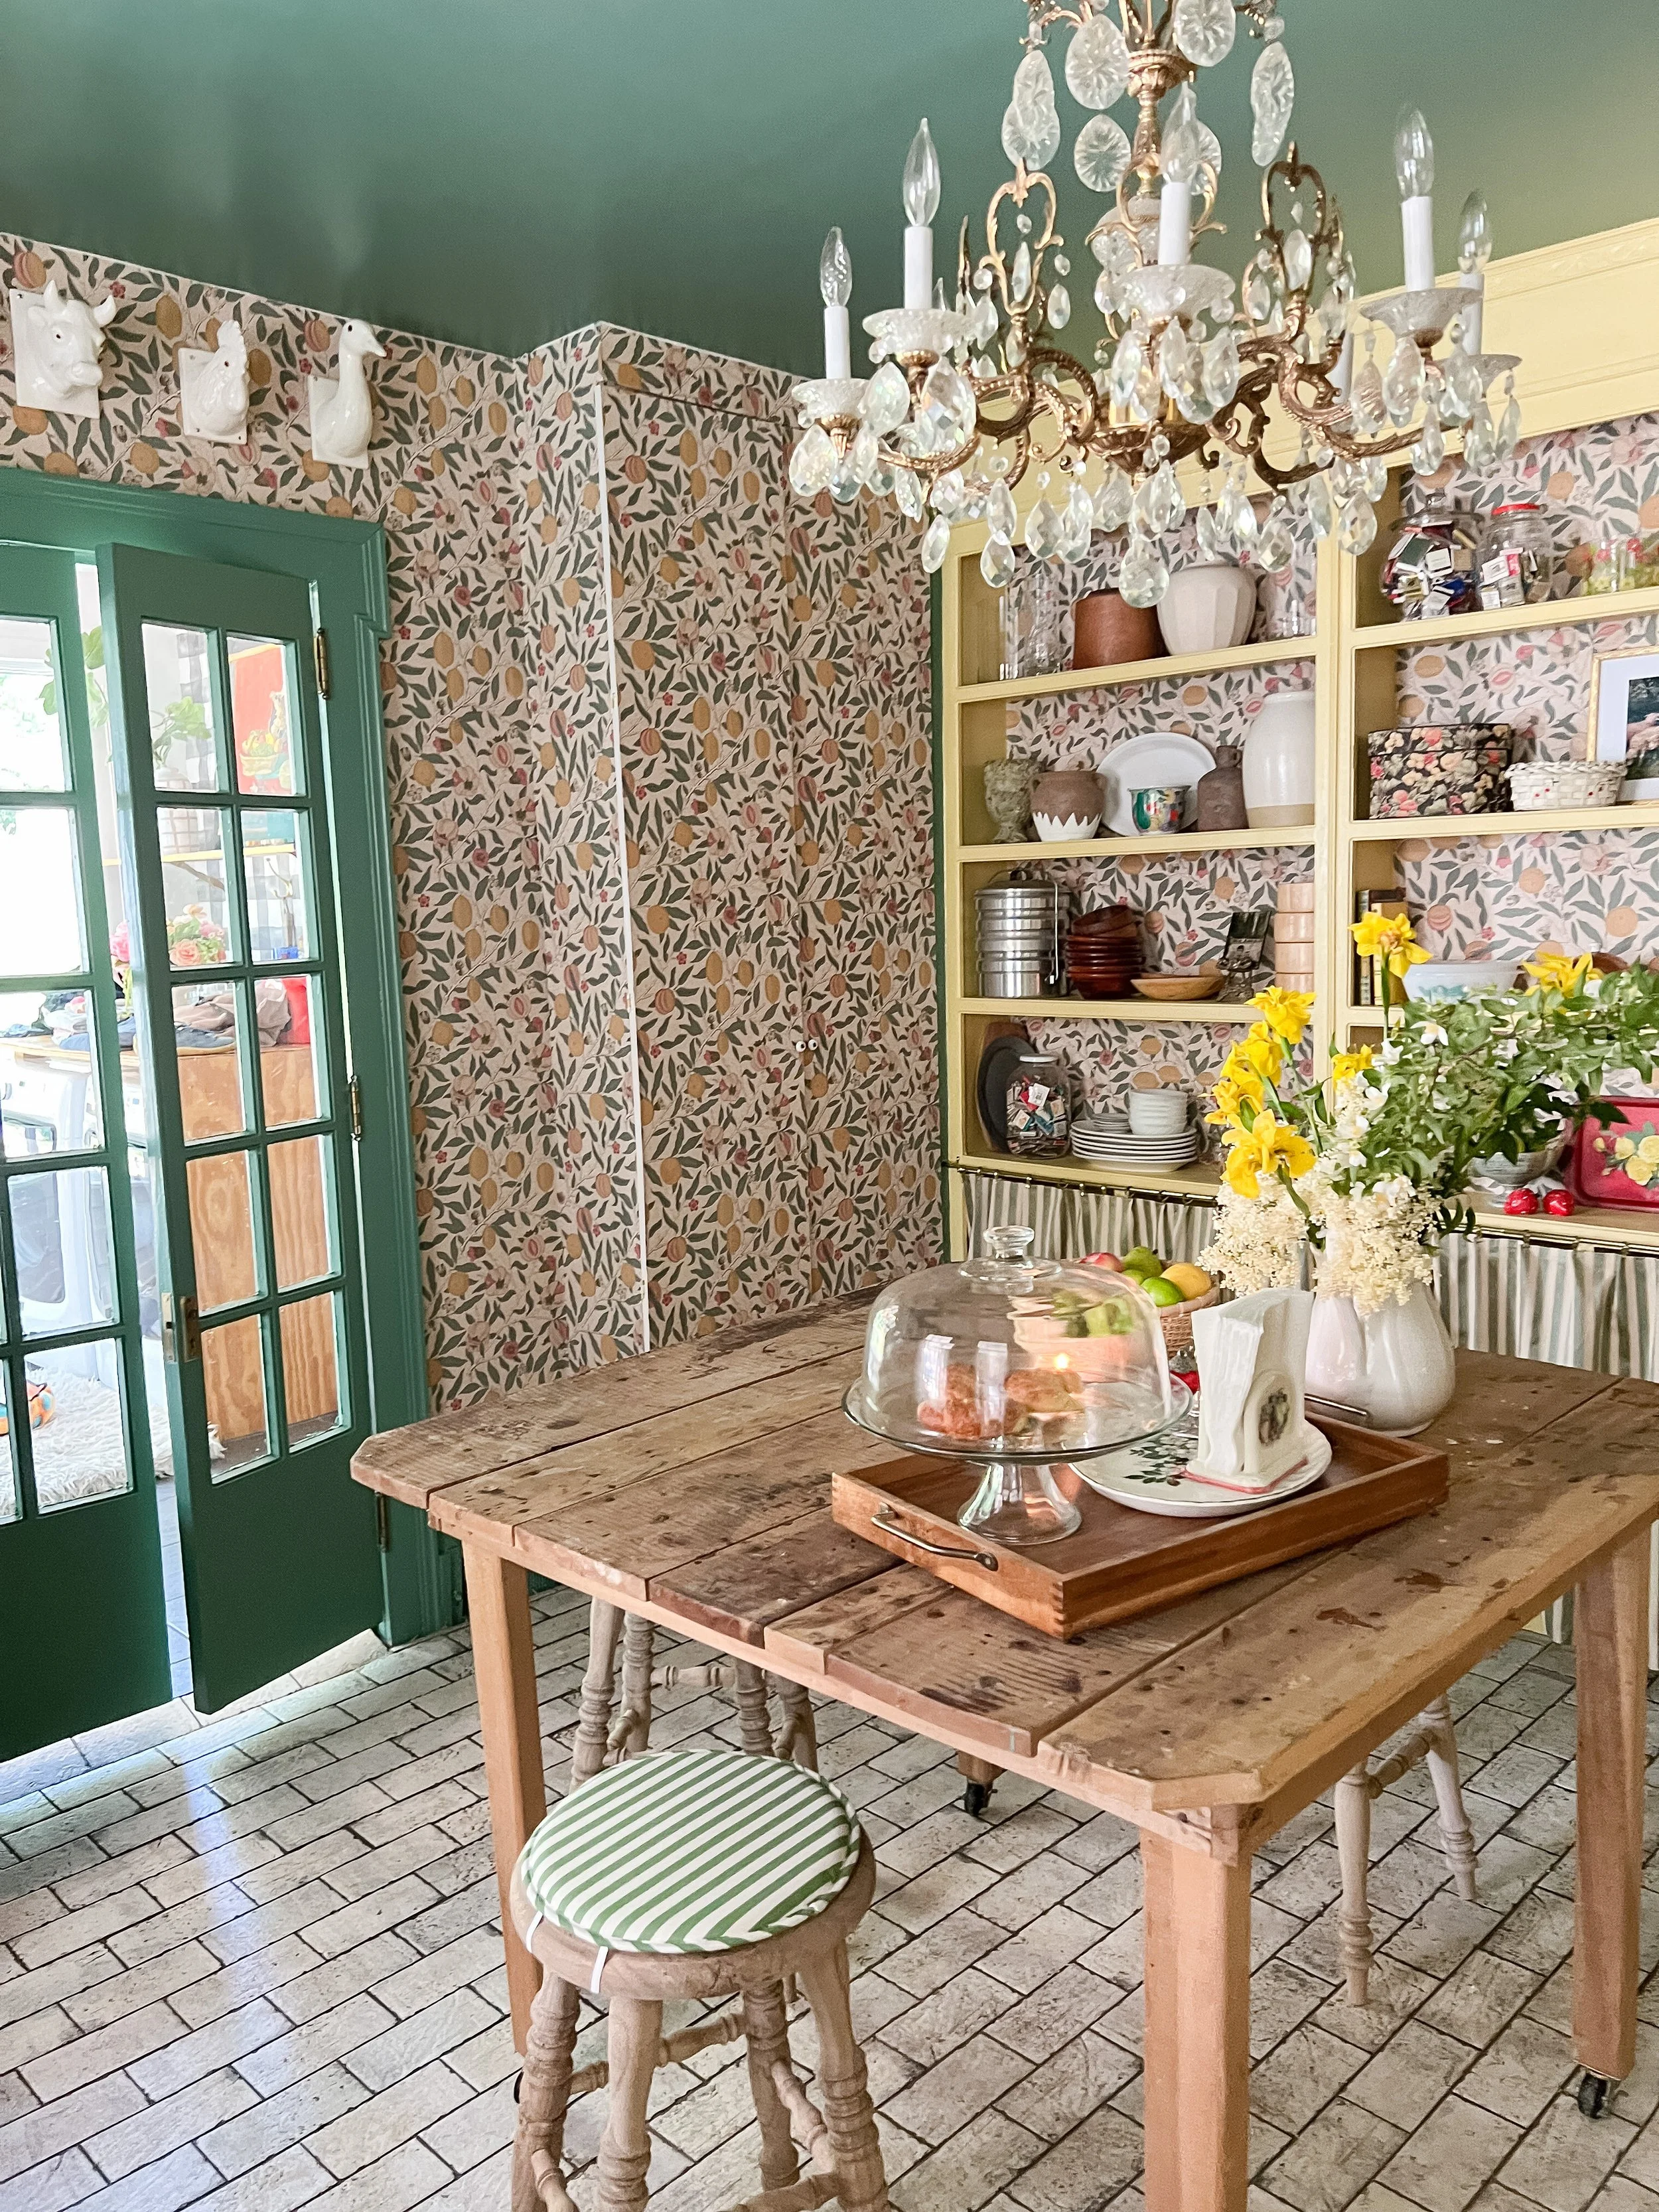
This sweet little nook is one of my favorites of the entire space! I am so glad that I decided to do the placement of the sink at the end of the cabinets rather than the middle. It allows for a long span of uninterrupted counter space and also this sweet little corner nook by the window! Having the cabinet for glassware right above the sink is ideal too!
The scalloped countertop backsplash was based off of a sketch that I drew up and I had no idea if it was actually possible to cut the scallop detail like that, but Counter Culture Plus made it happen as always! I love the whimsical detail this adds to the area and how it highlights and separates this away from the other countertop. The countertop material is marble and we were able to use a remnant for this.
The sink faucet allows us to have both regular tap water and filtered water on the same faucet! And the fancy brass sink has a built in glass rinser which is perfect for this pantry/bar set up where we will be entertaining a lot! Perhaps my favorite part of this space is the little combo of the window valance colors/florals mixed with the green wall color, yellow cabinets, and touch of scalloped marble all in one shot!


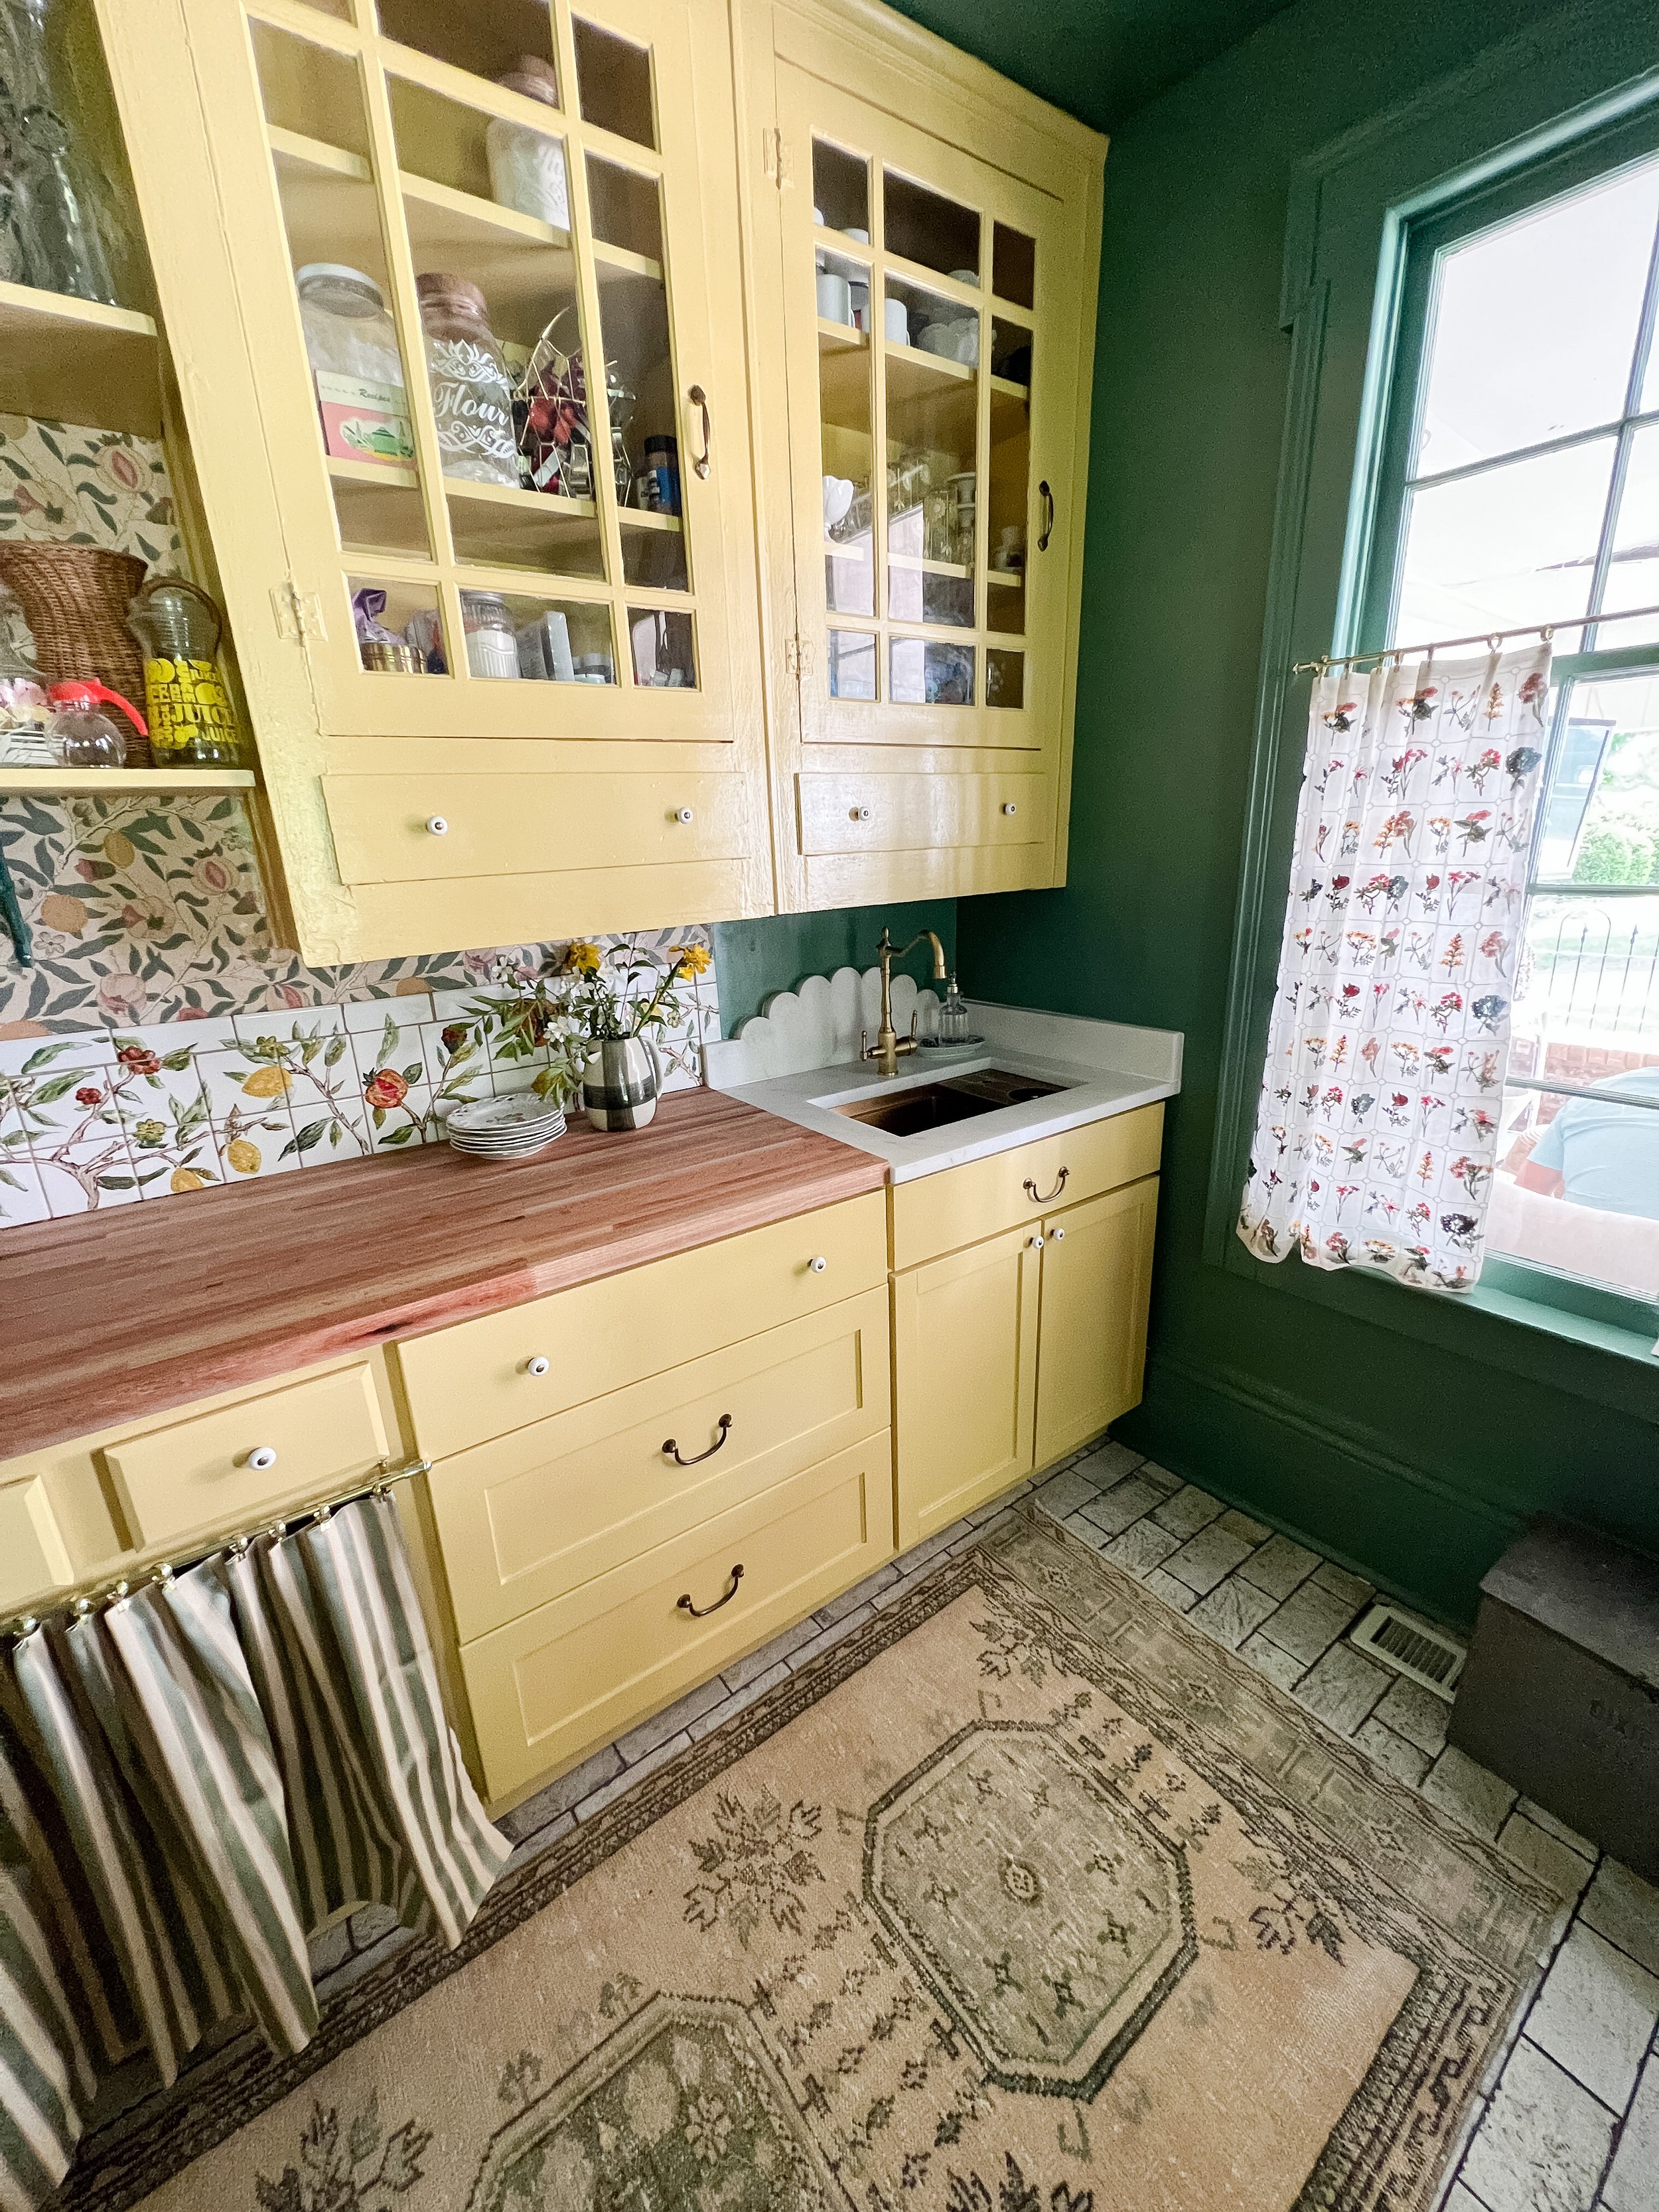


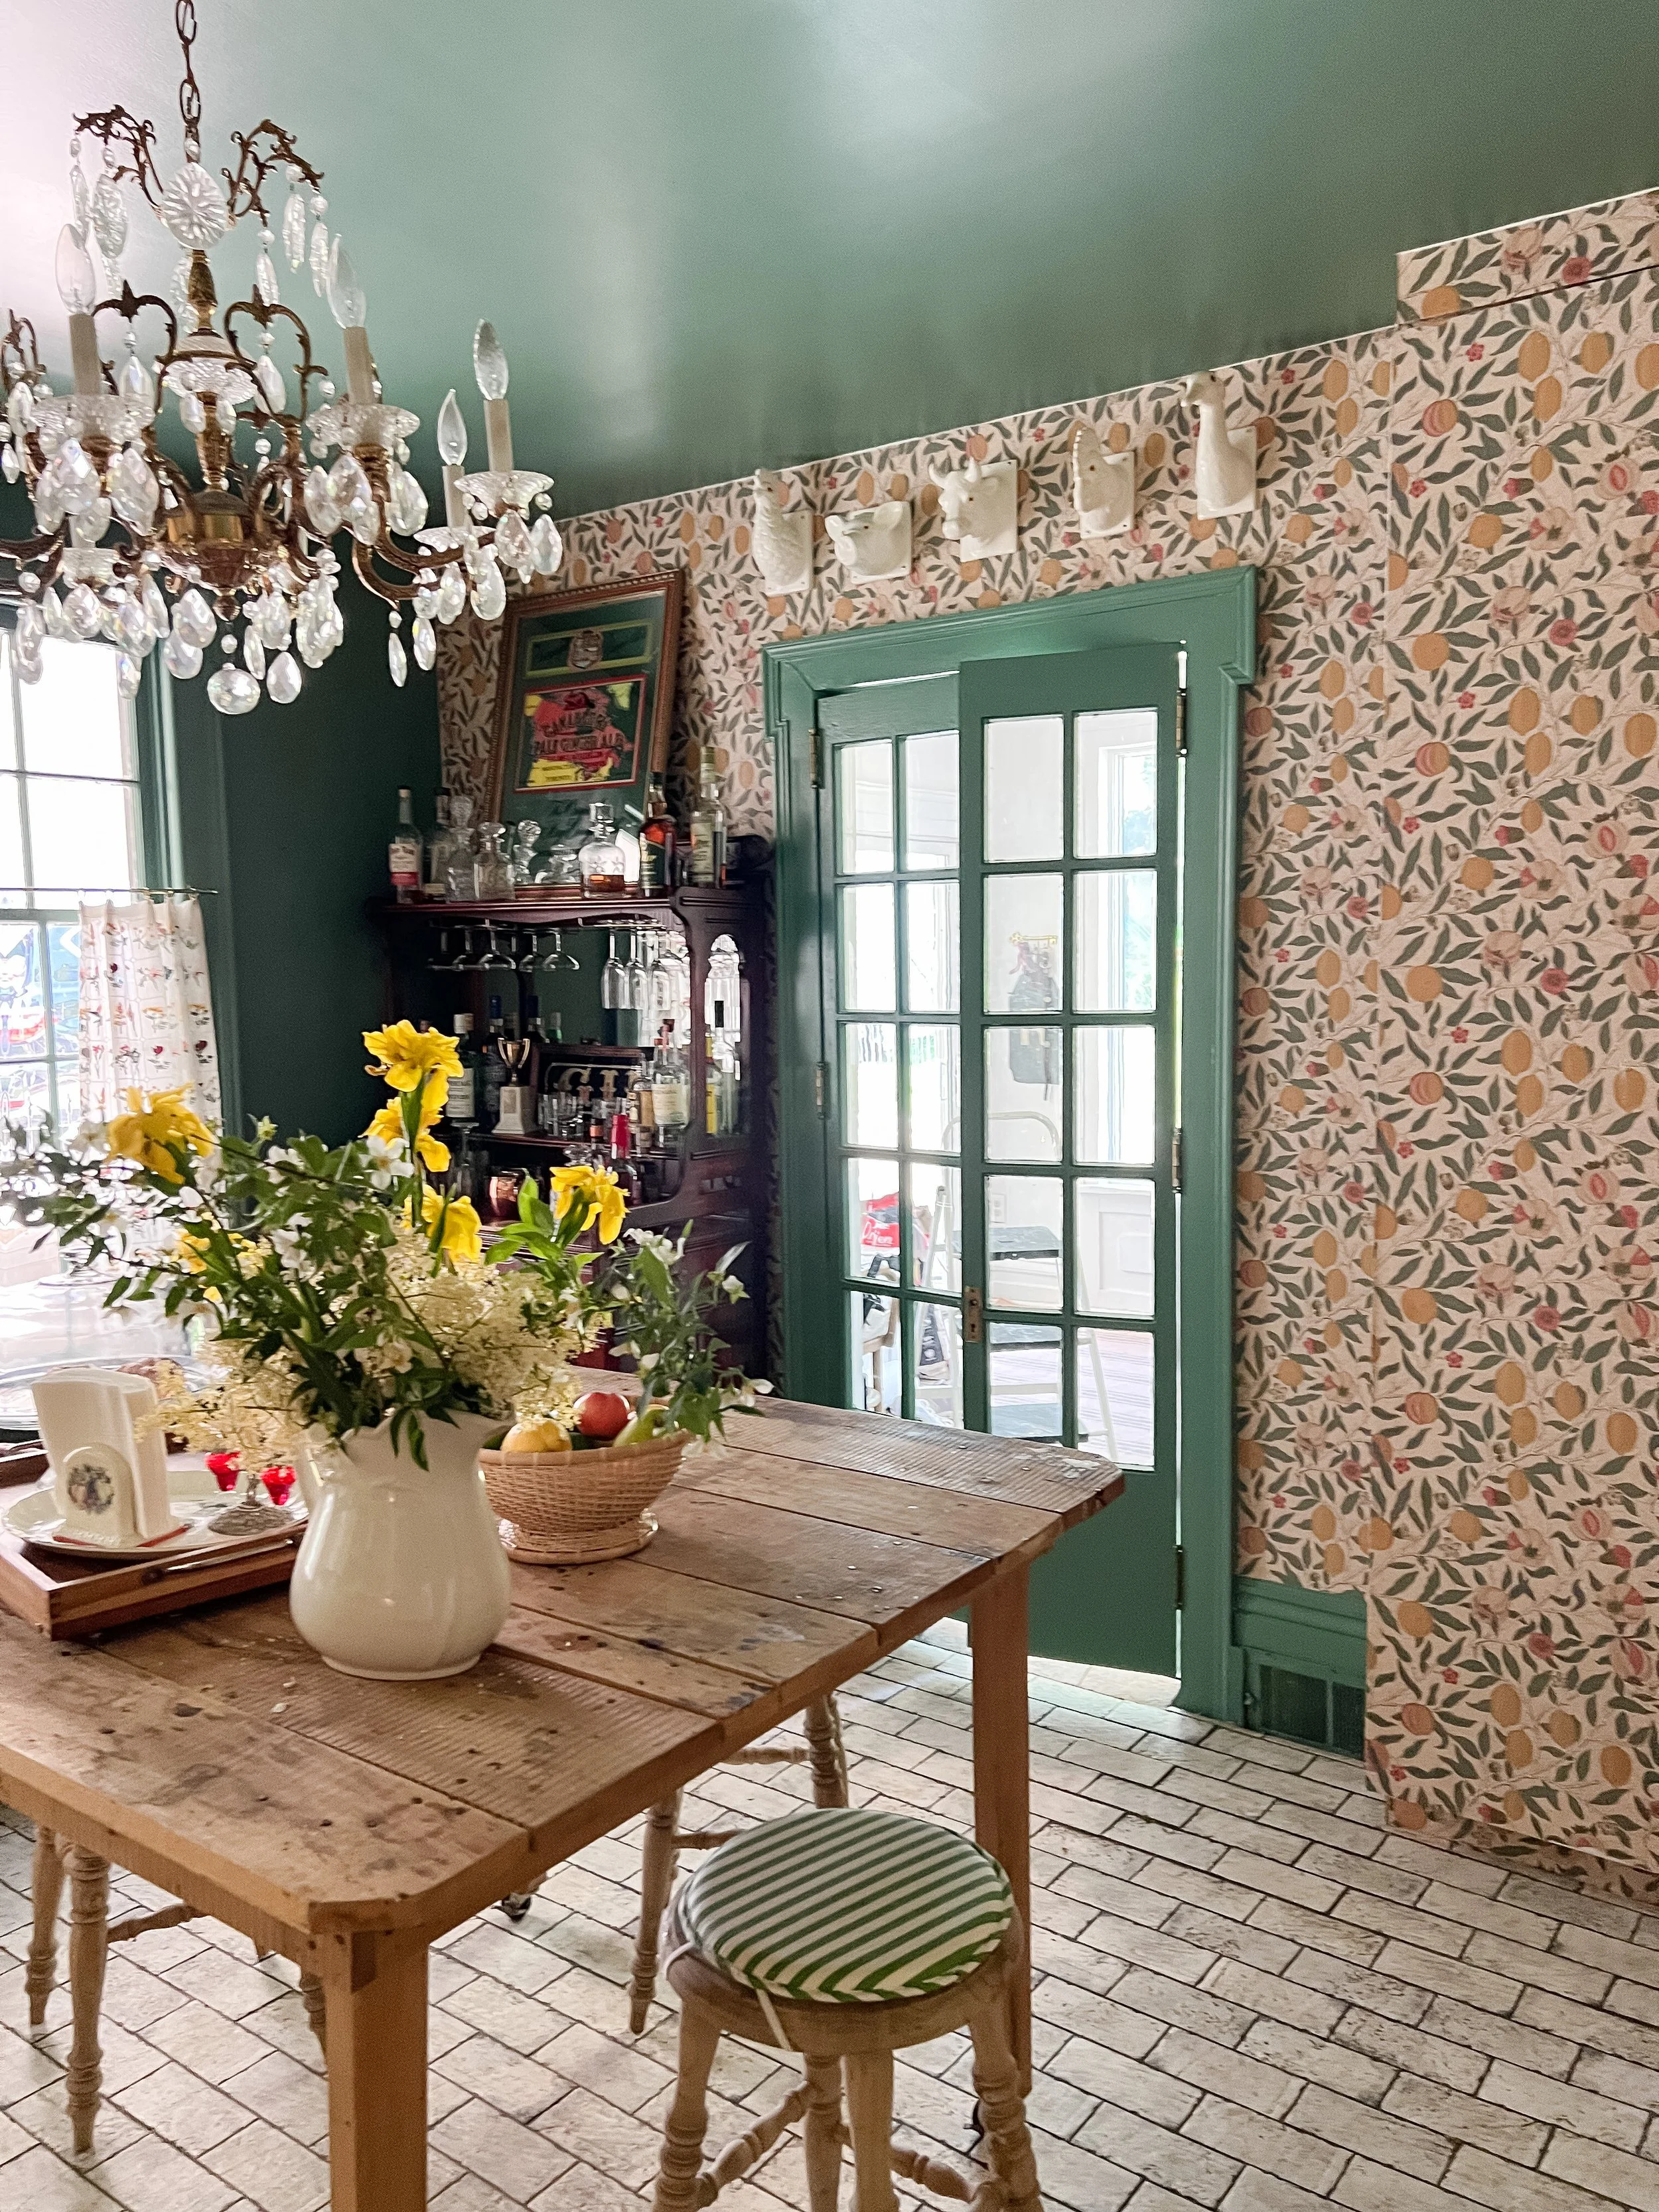
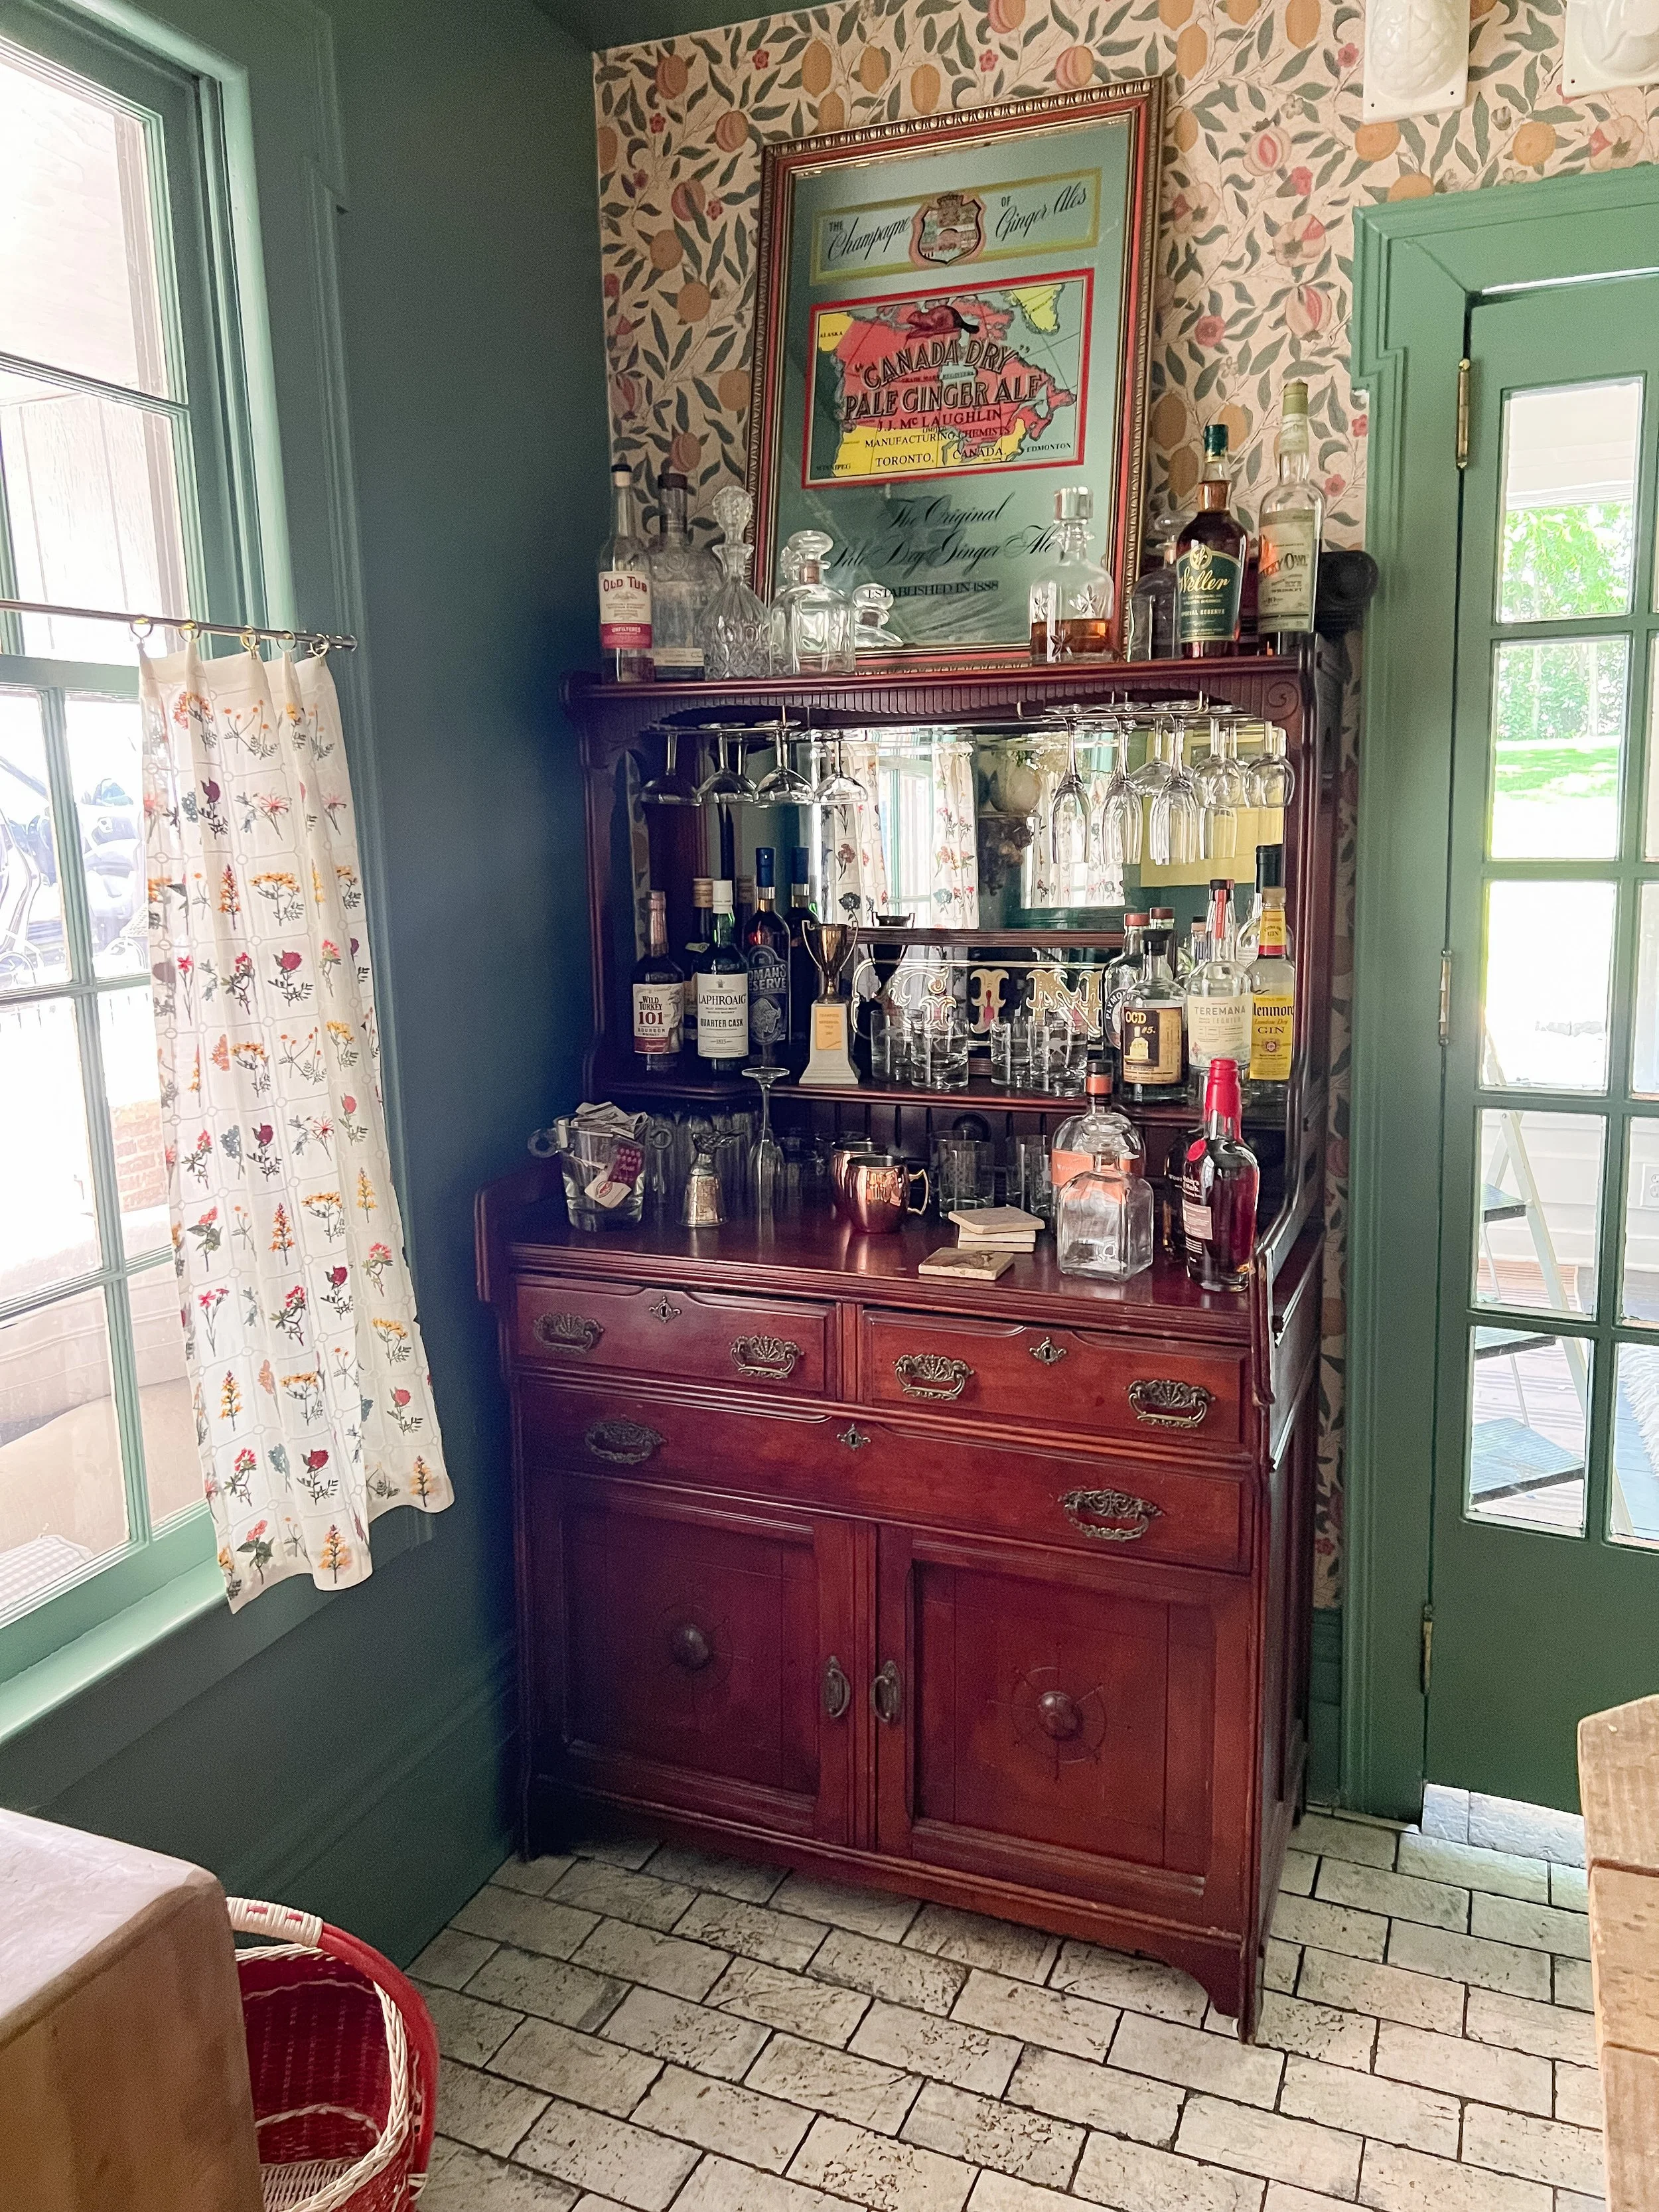
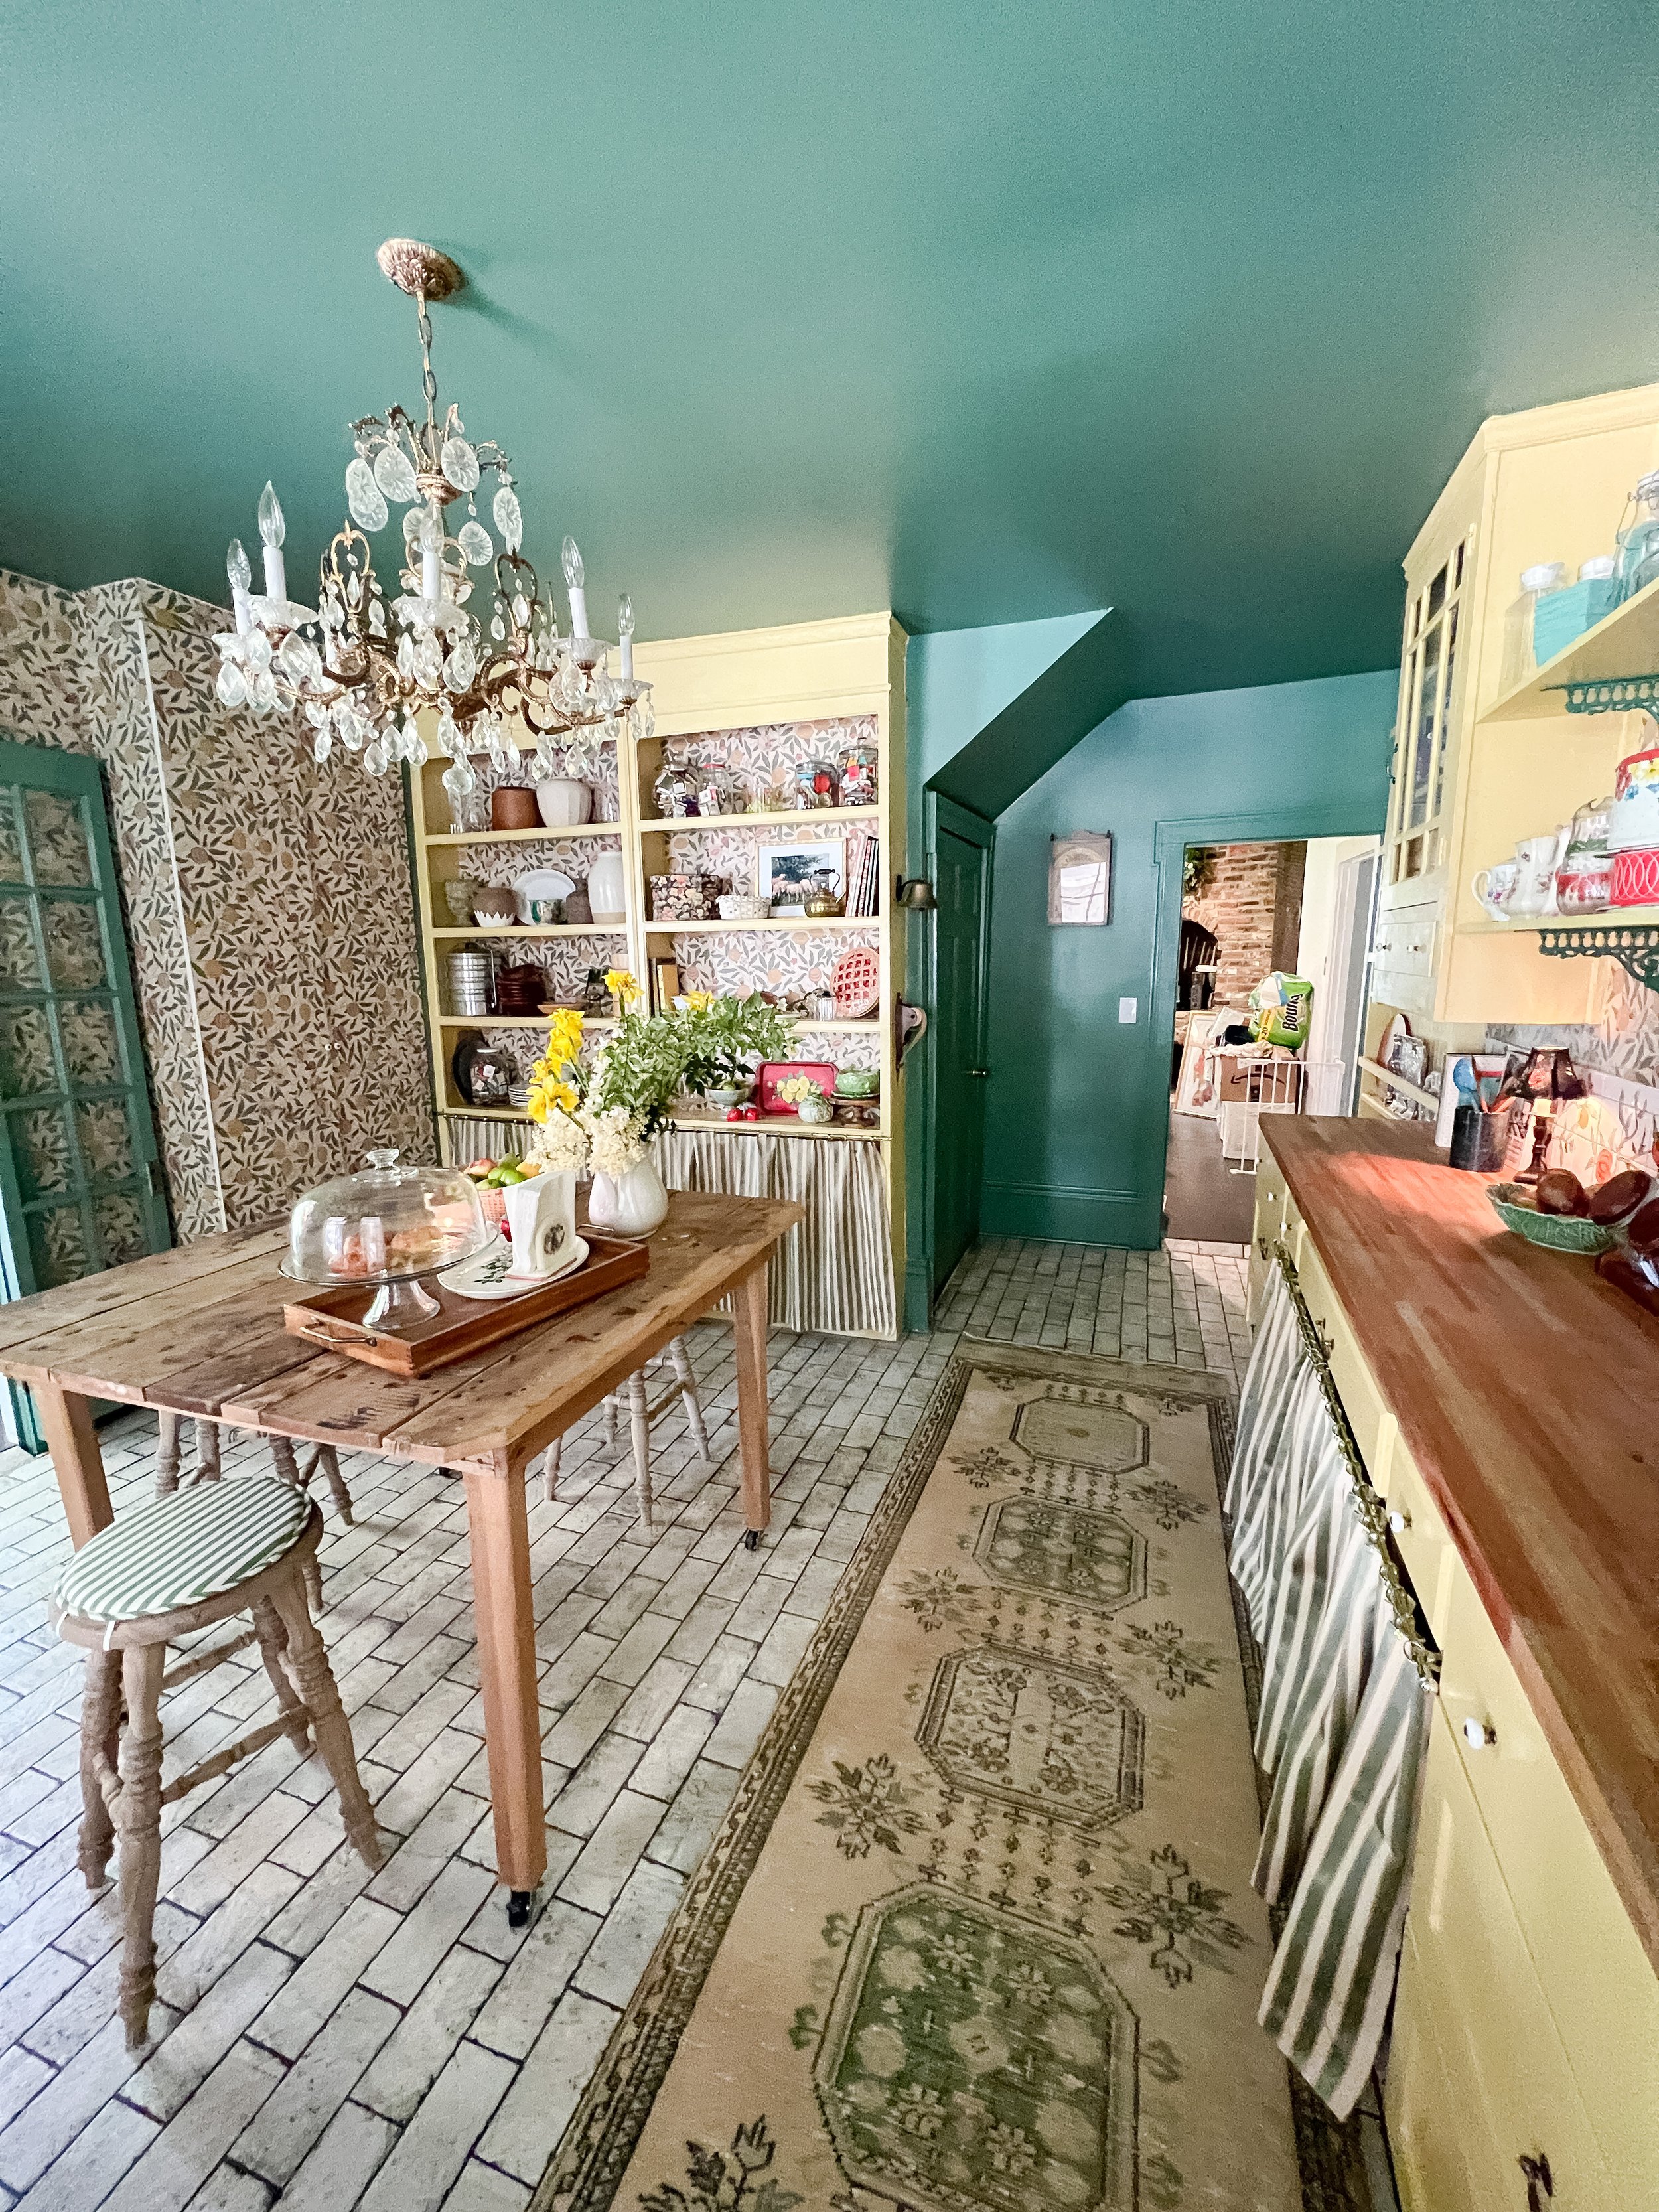
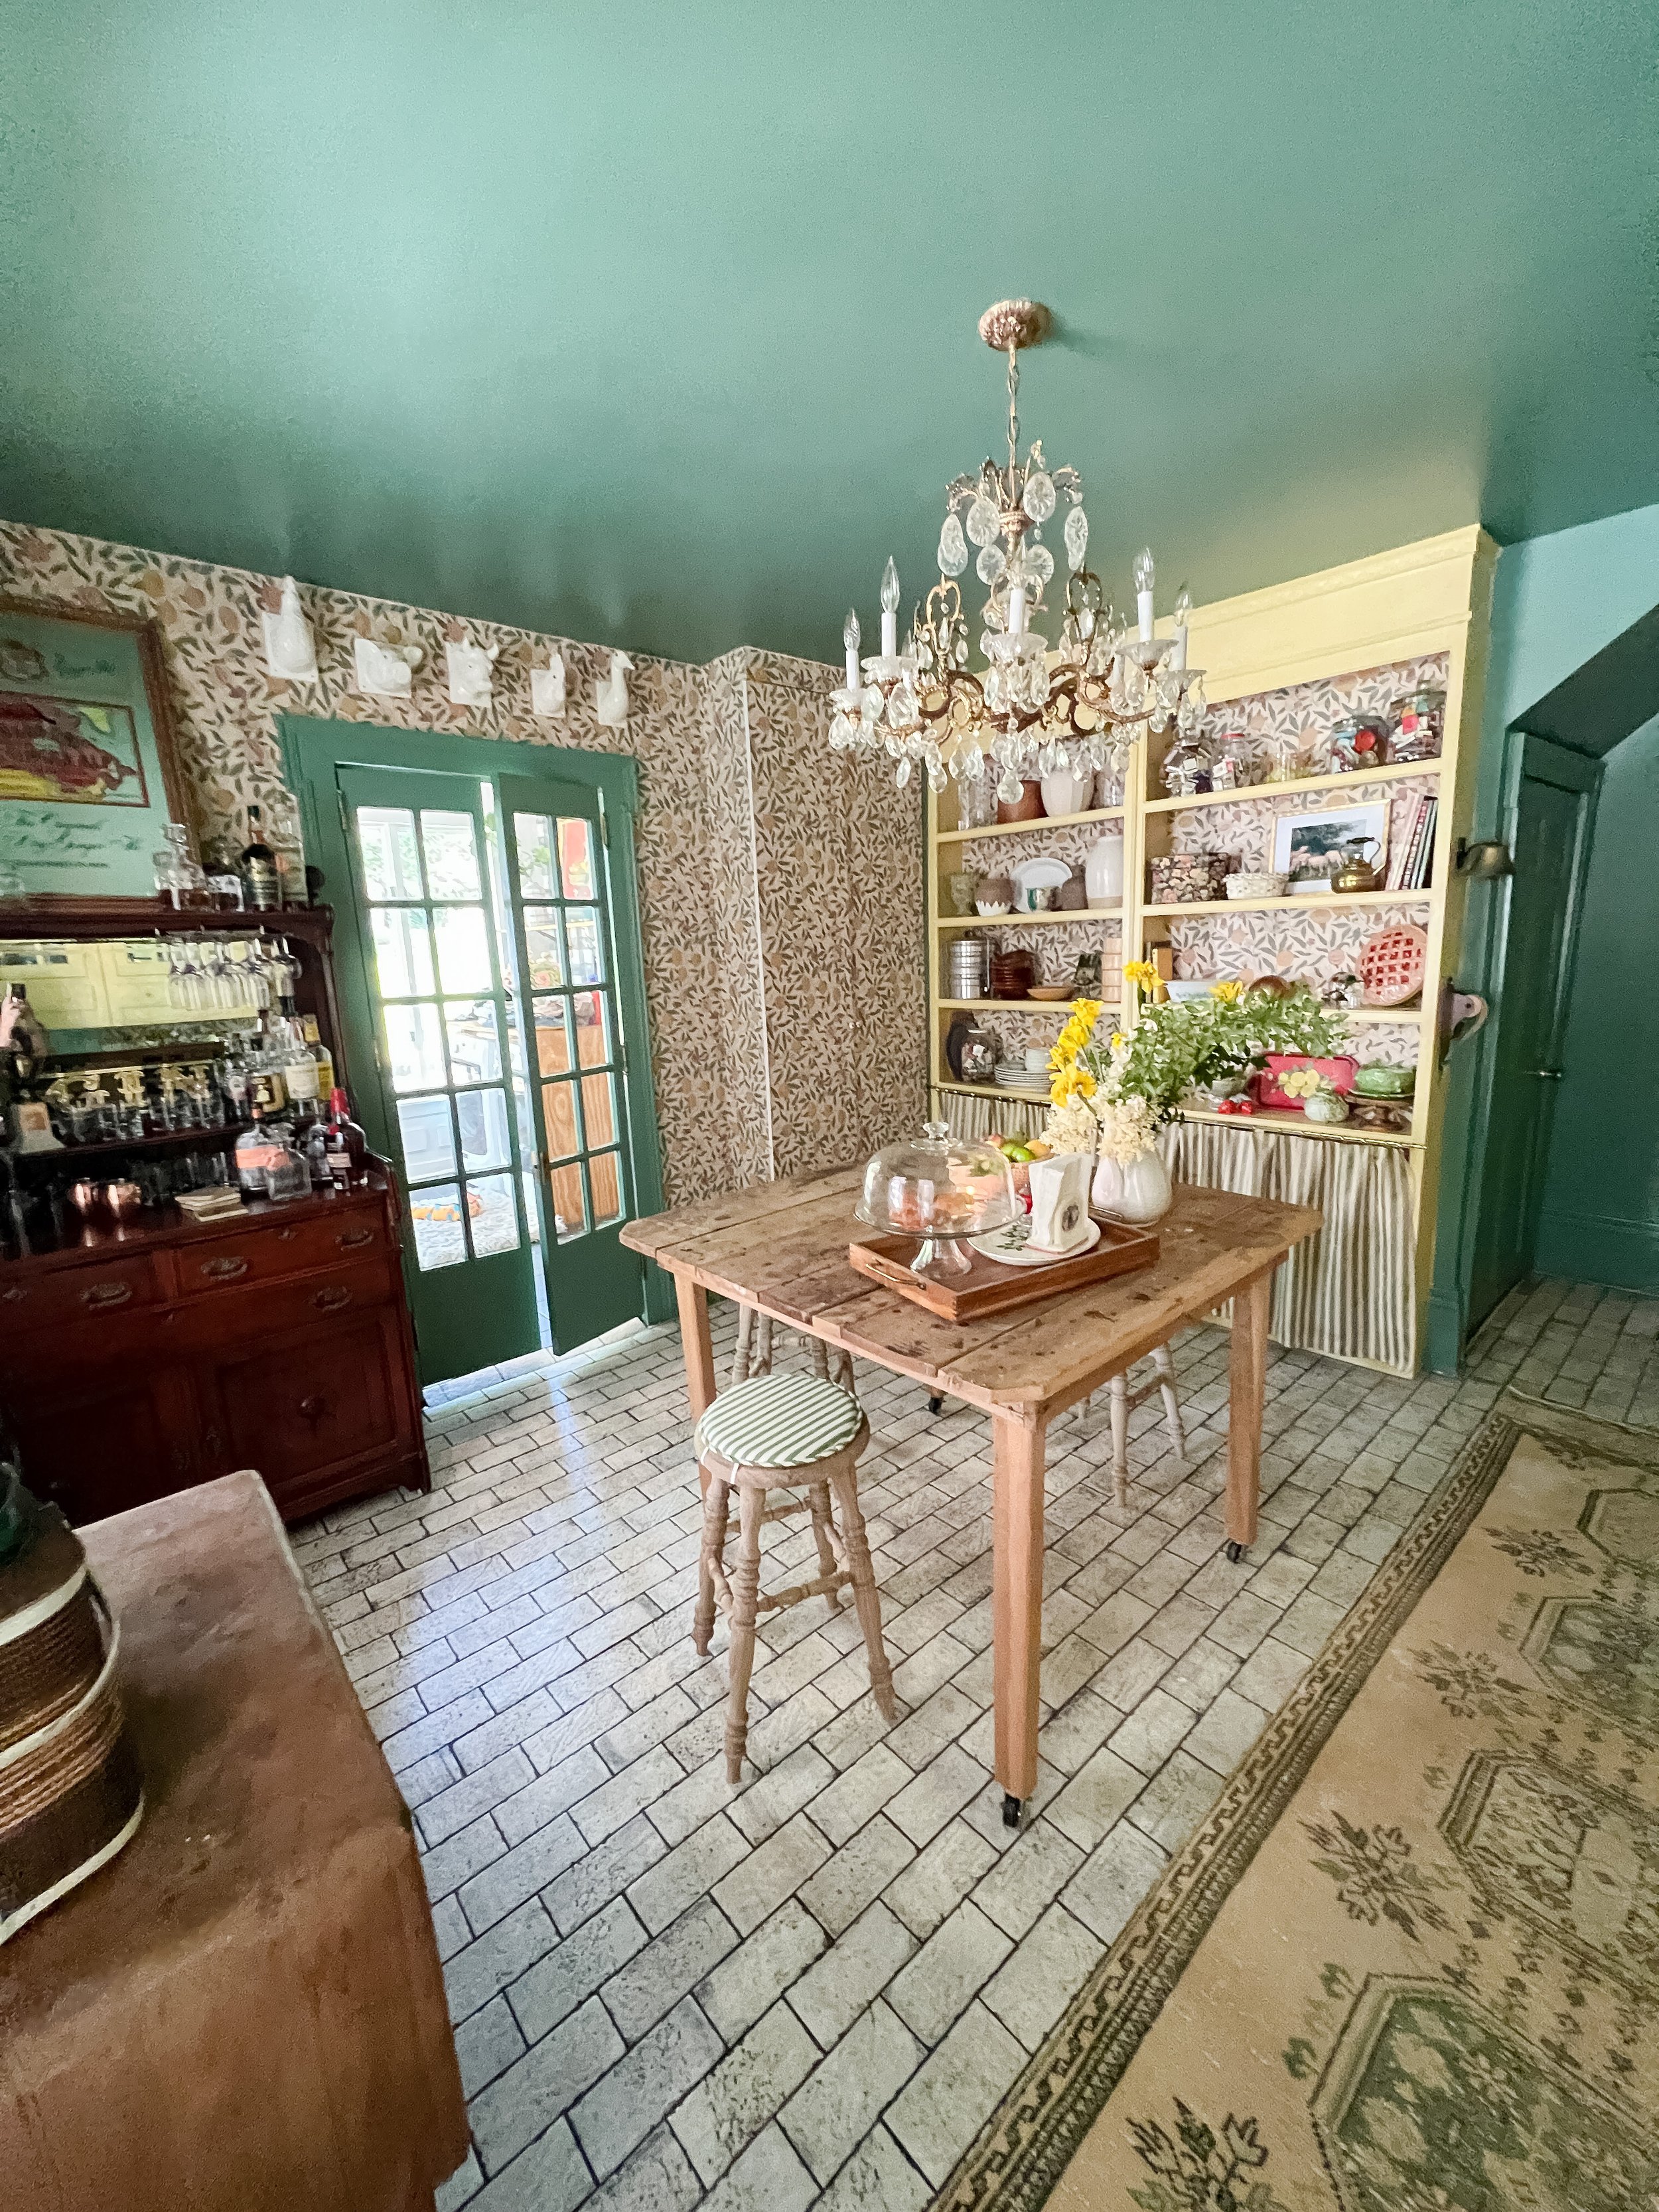
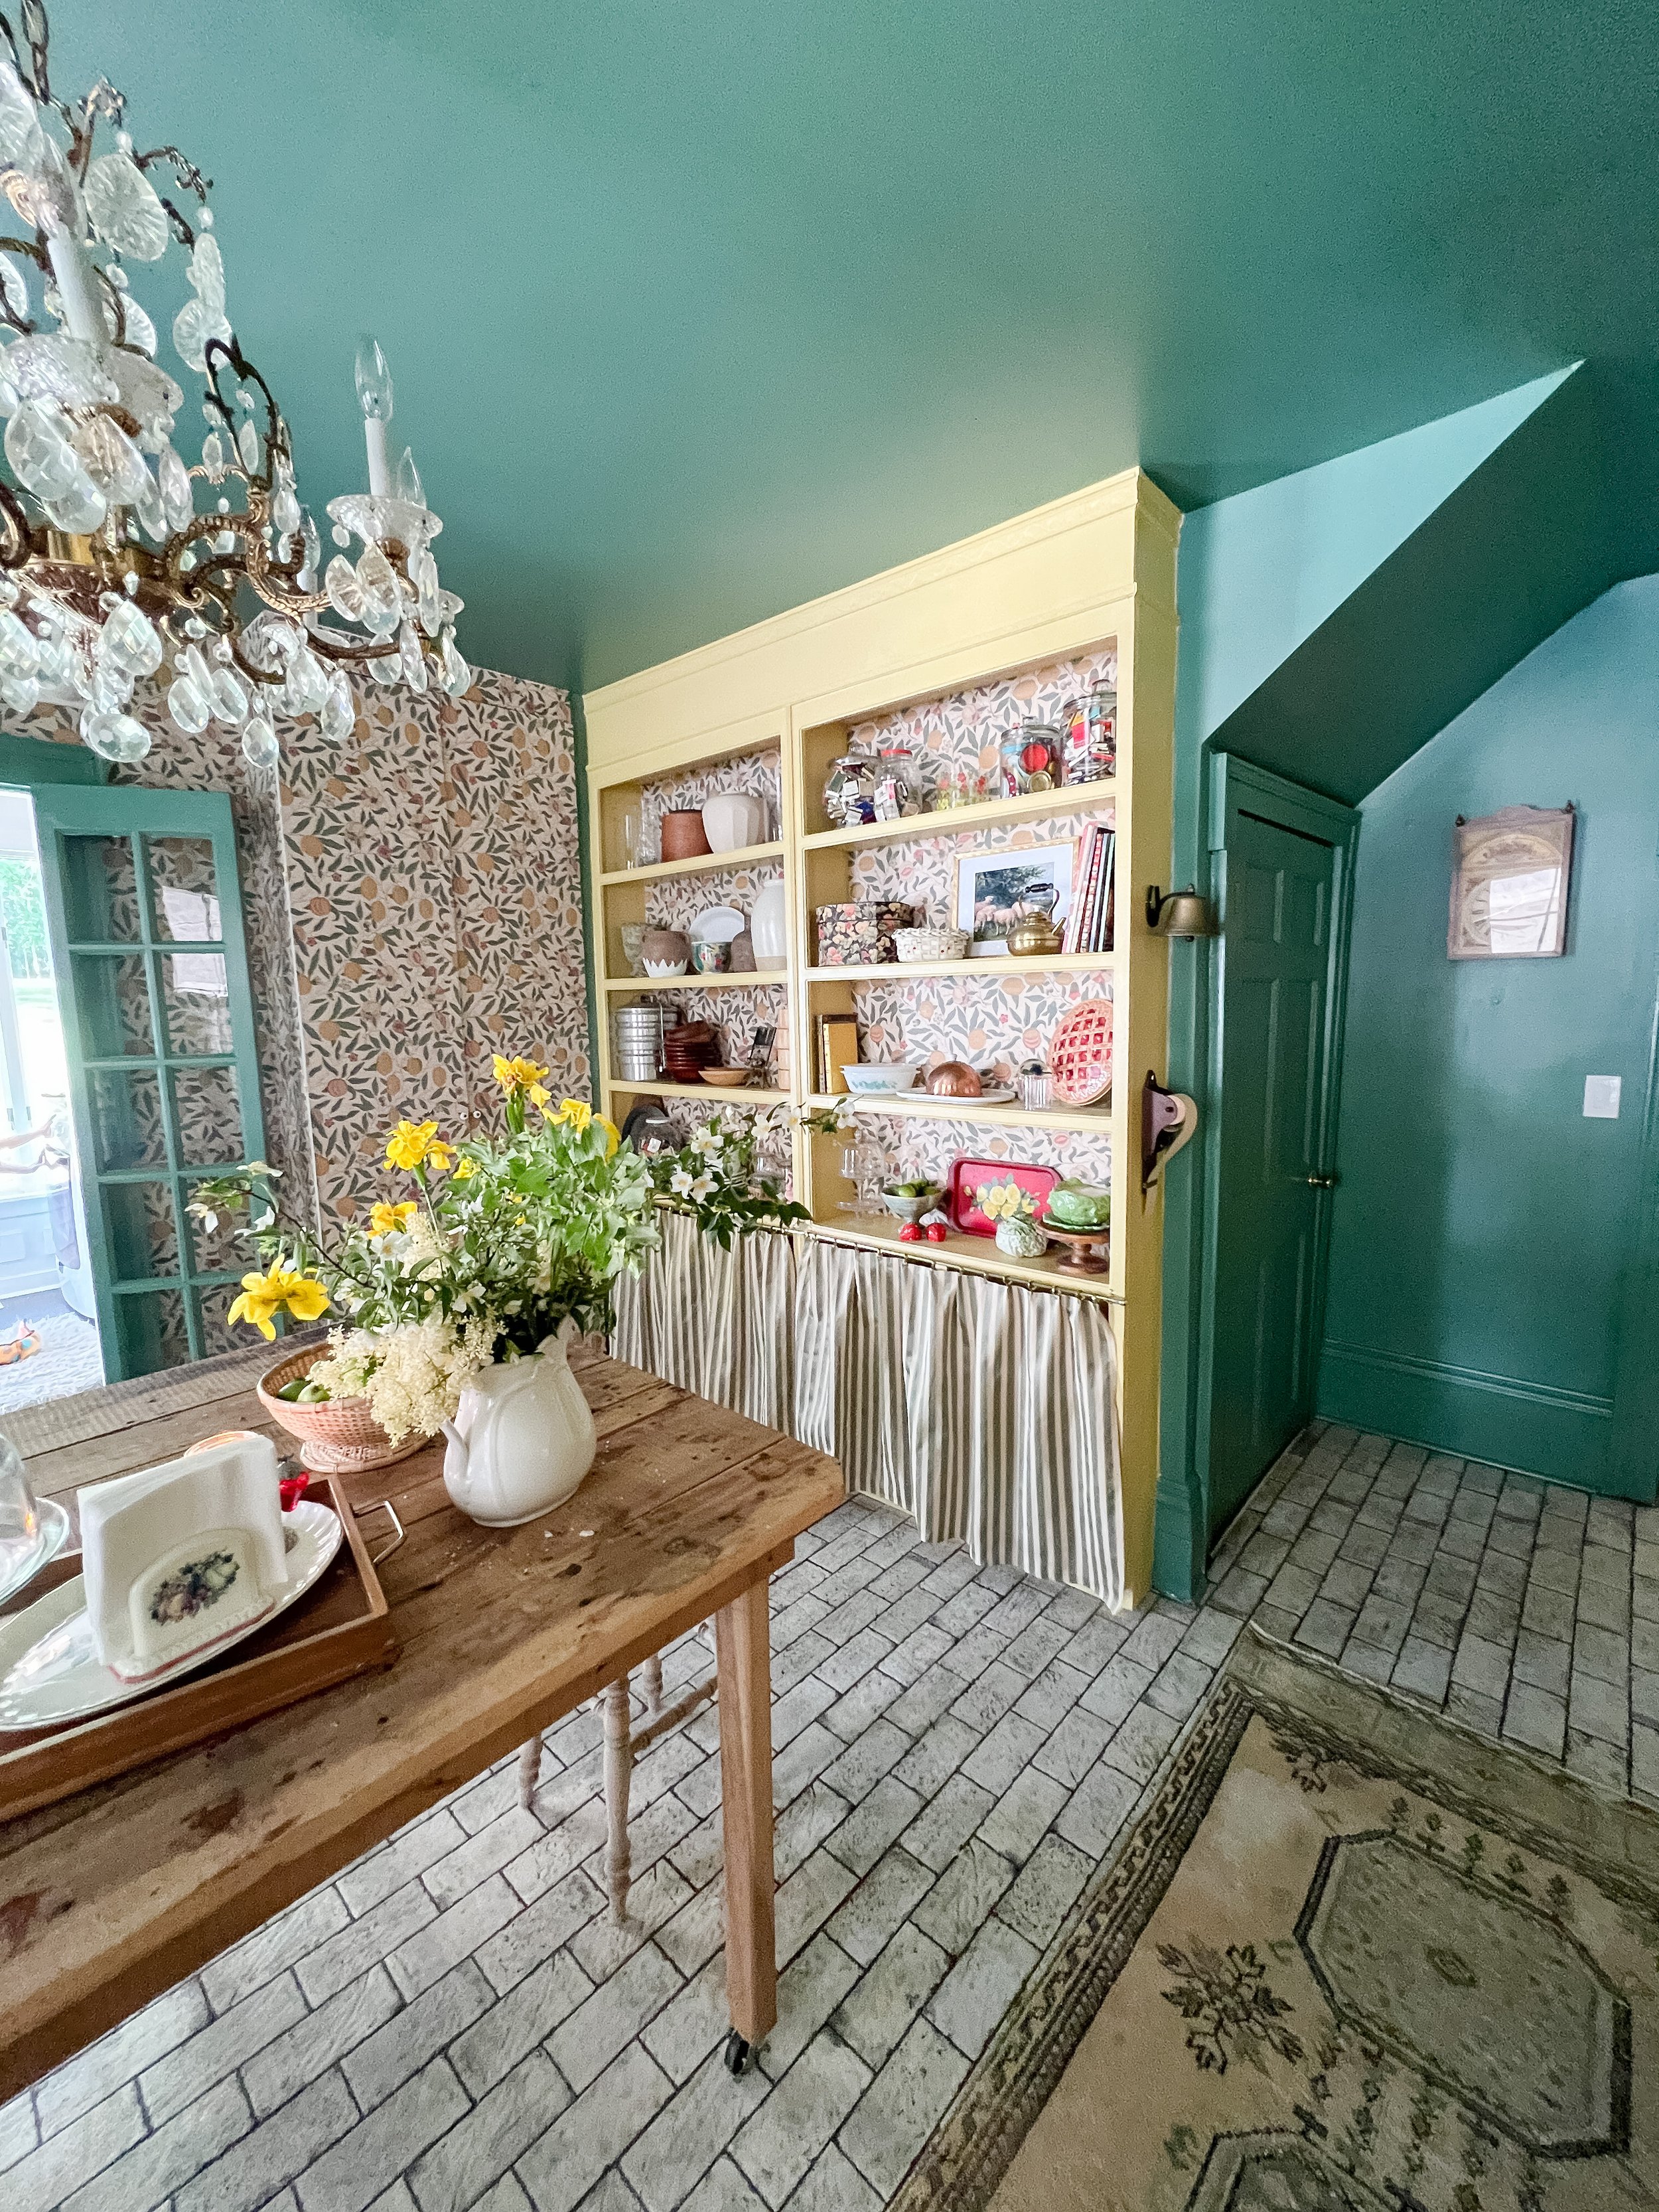
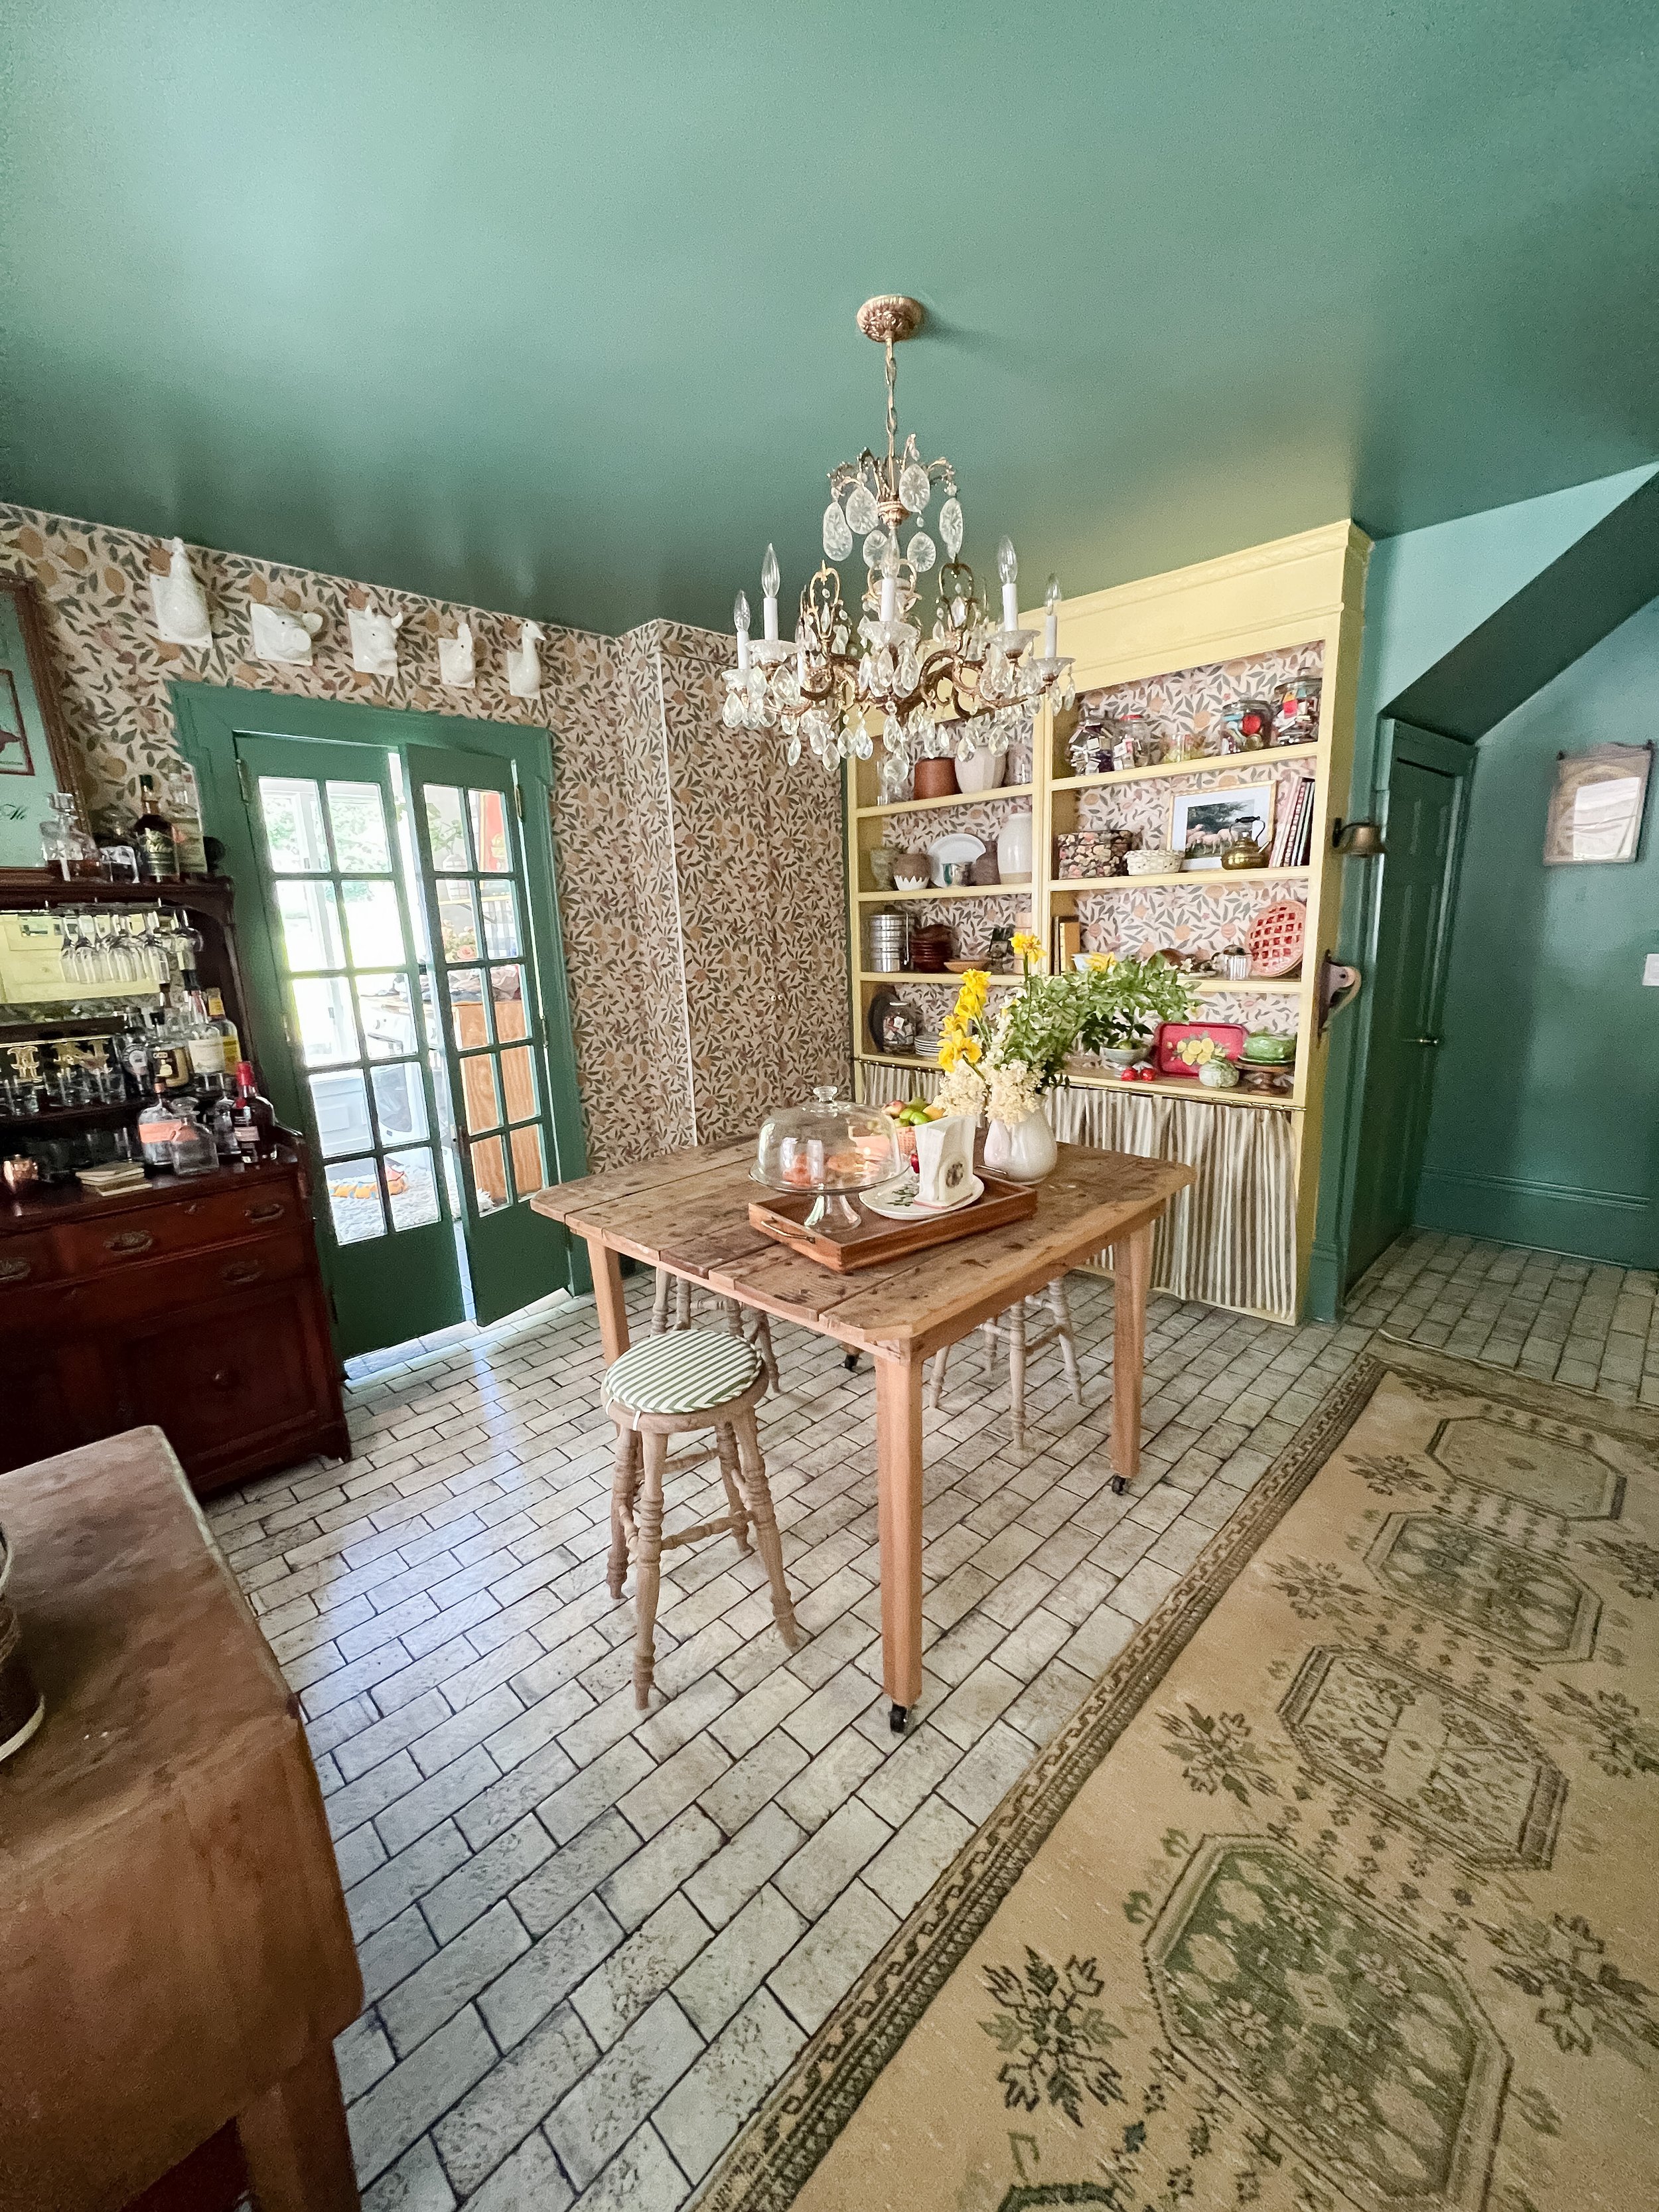
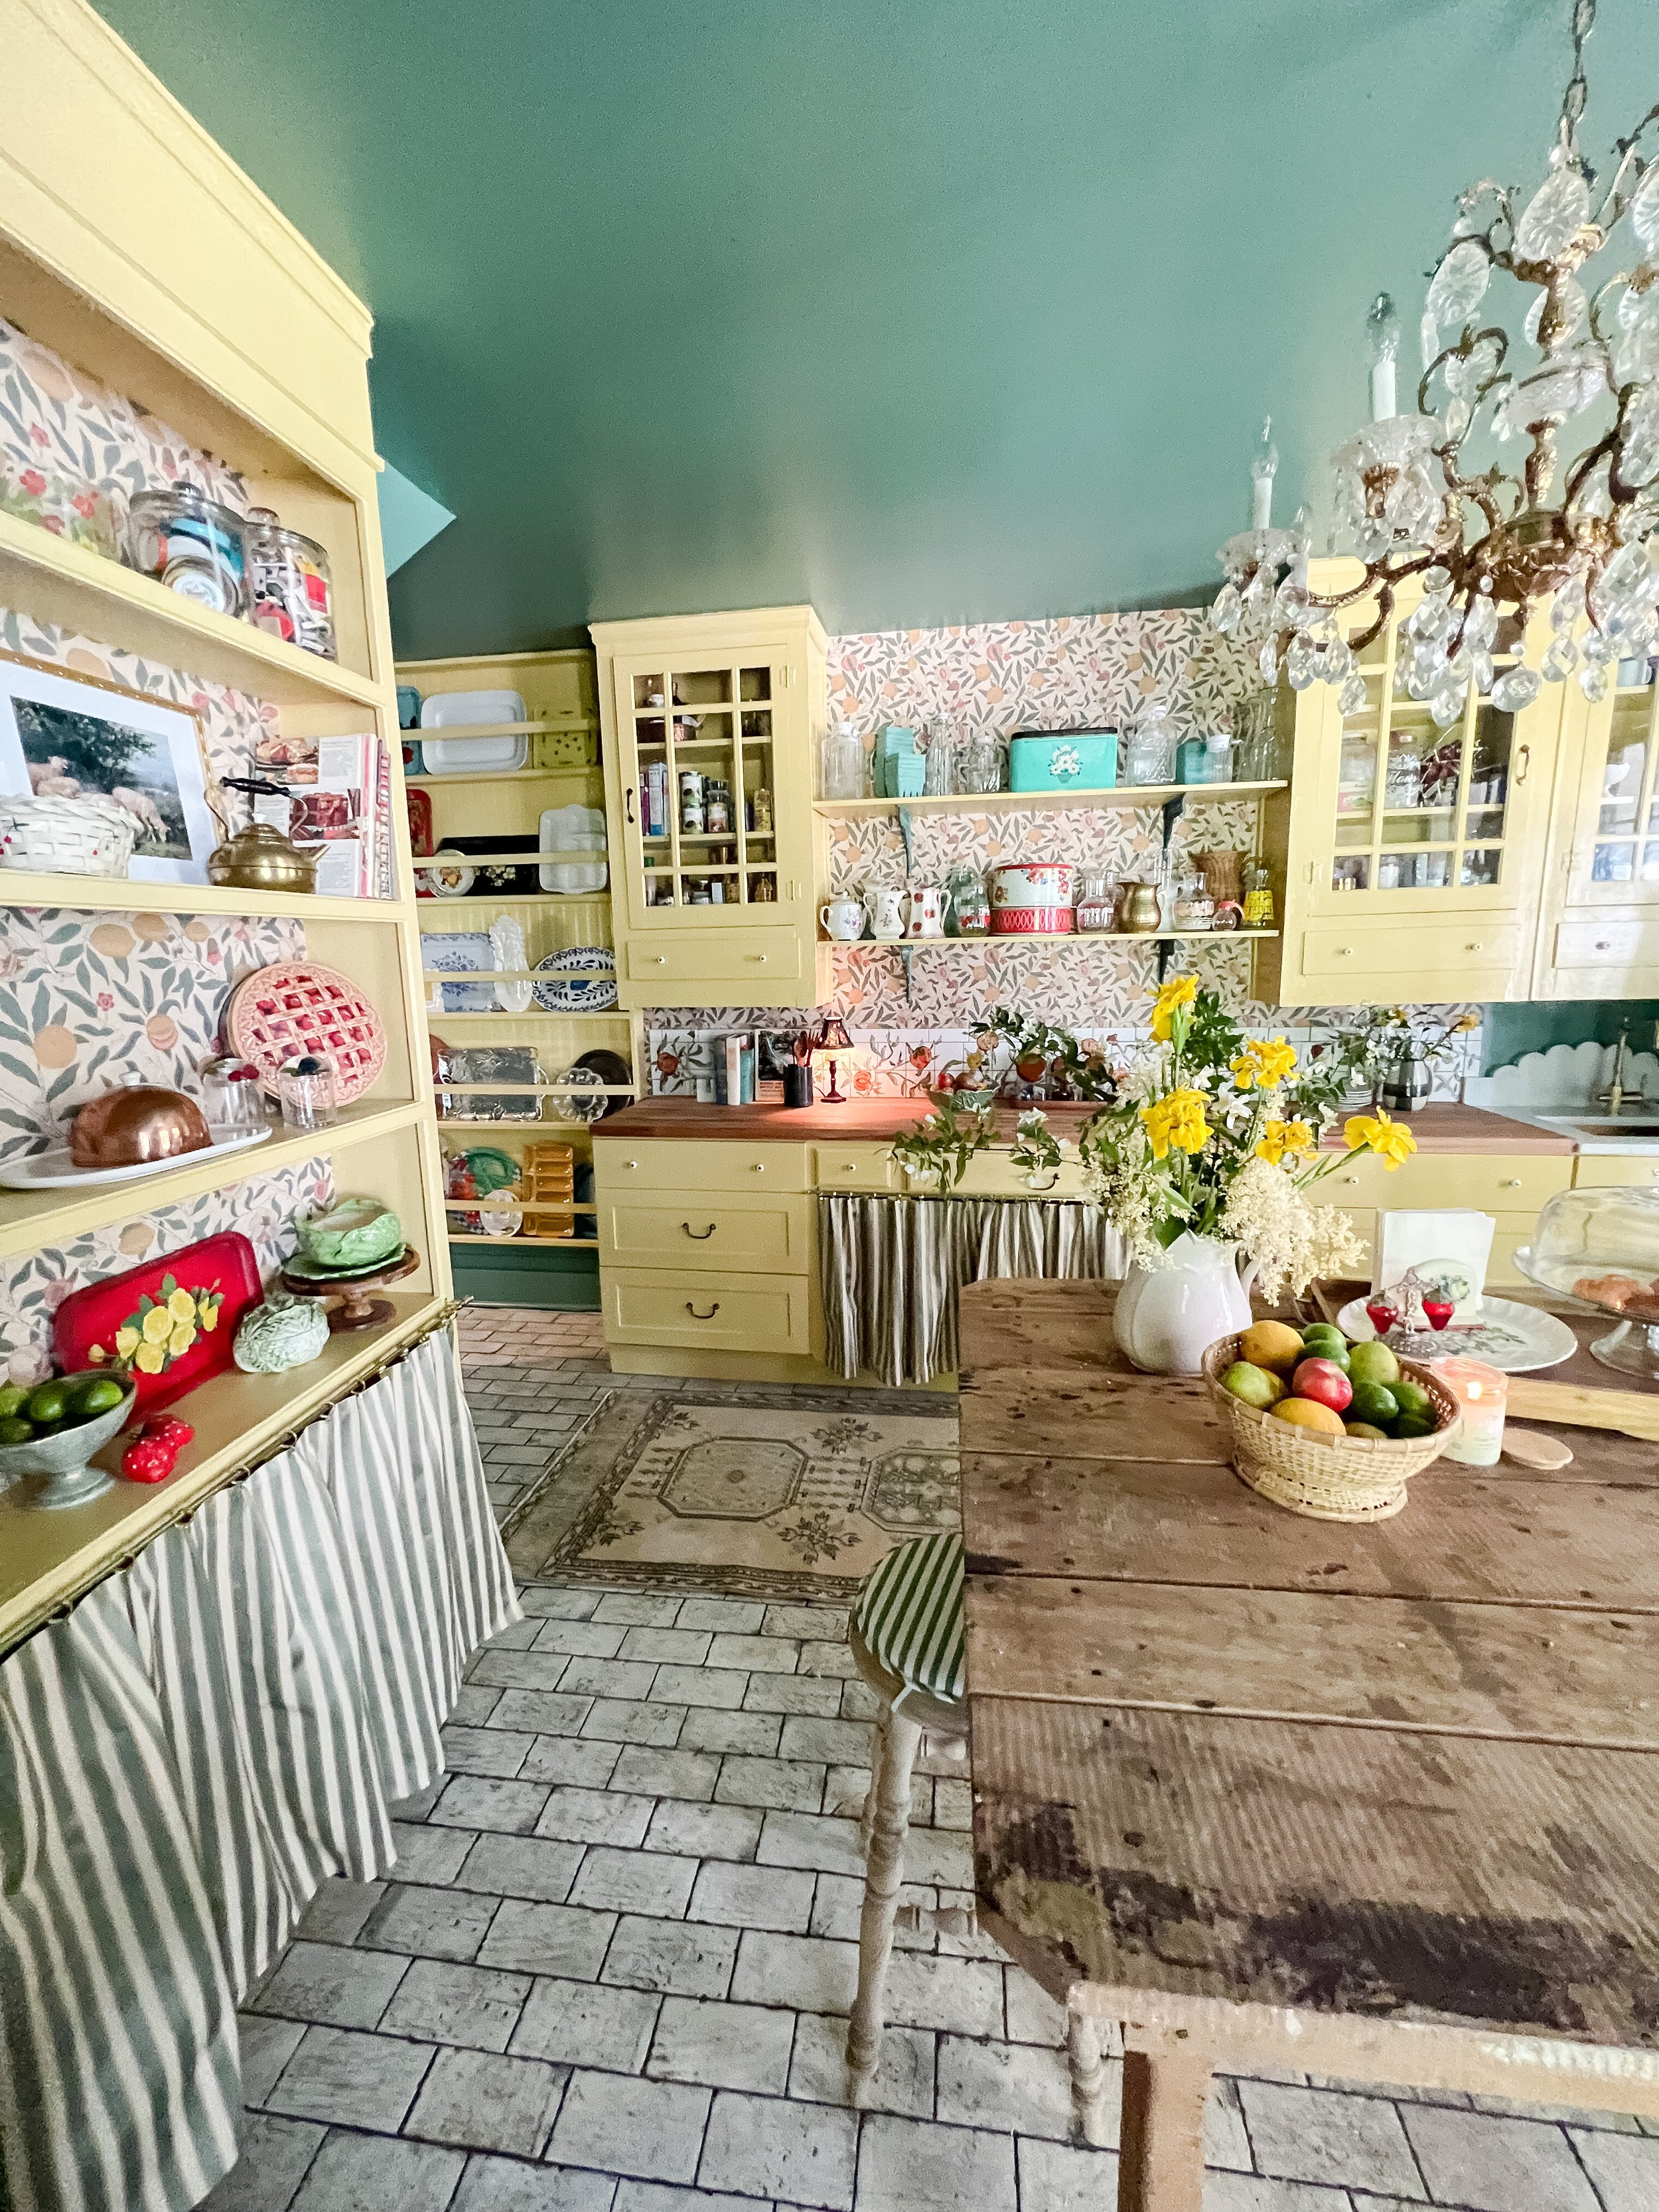
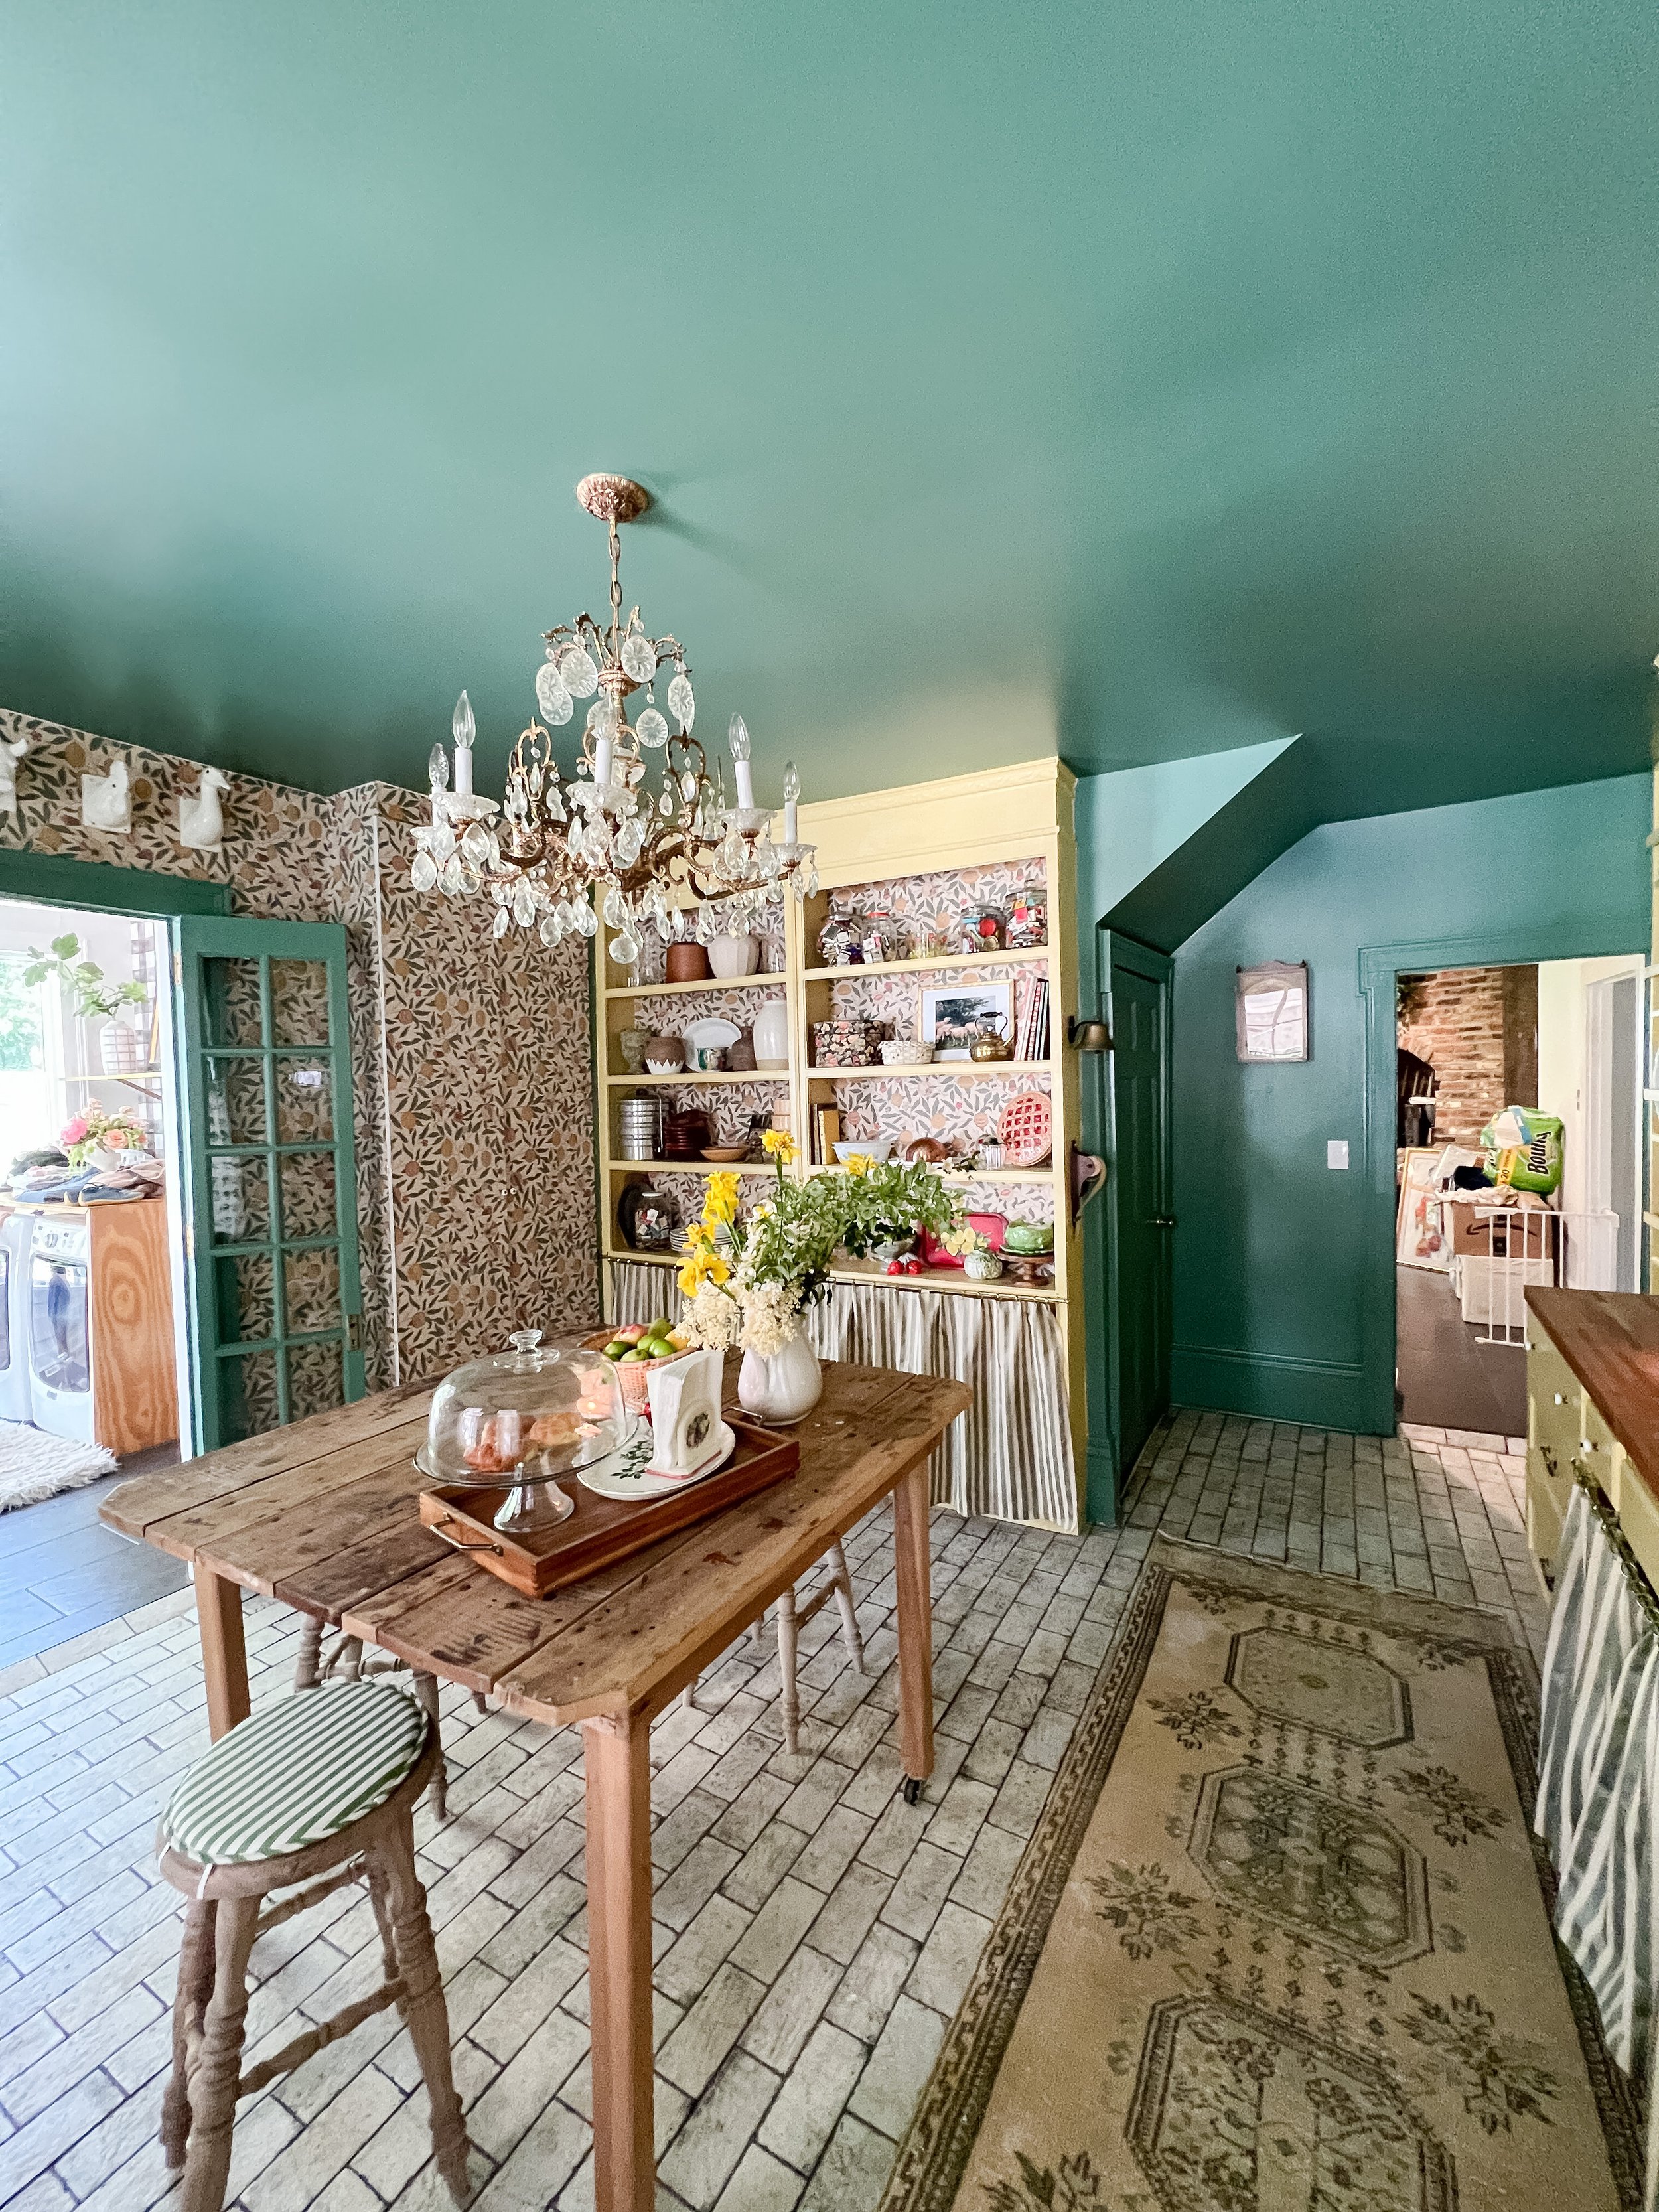
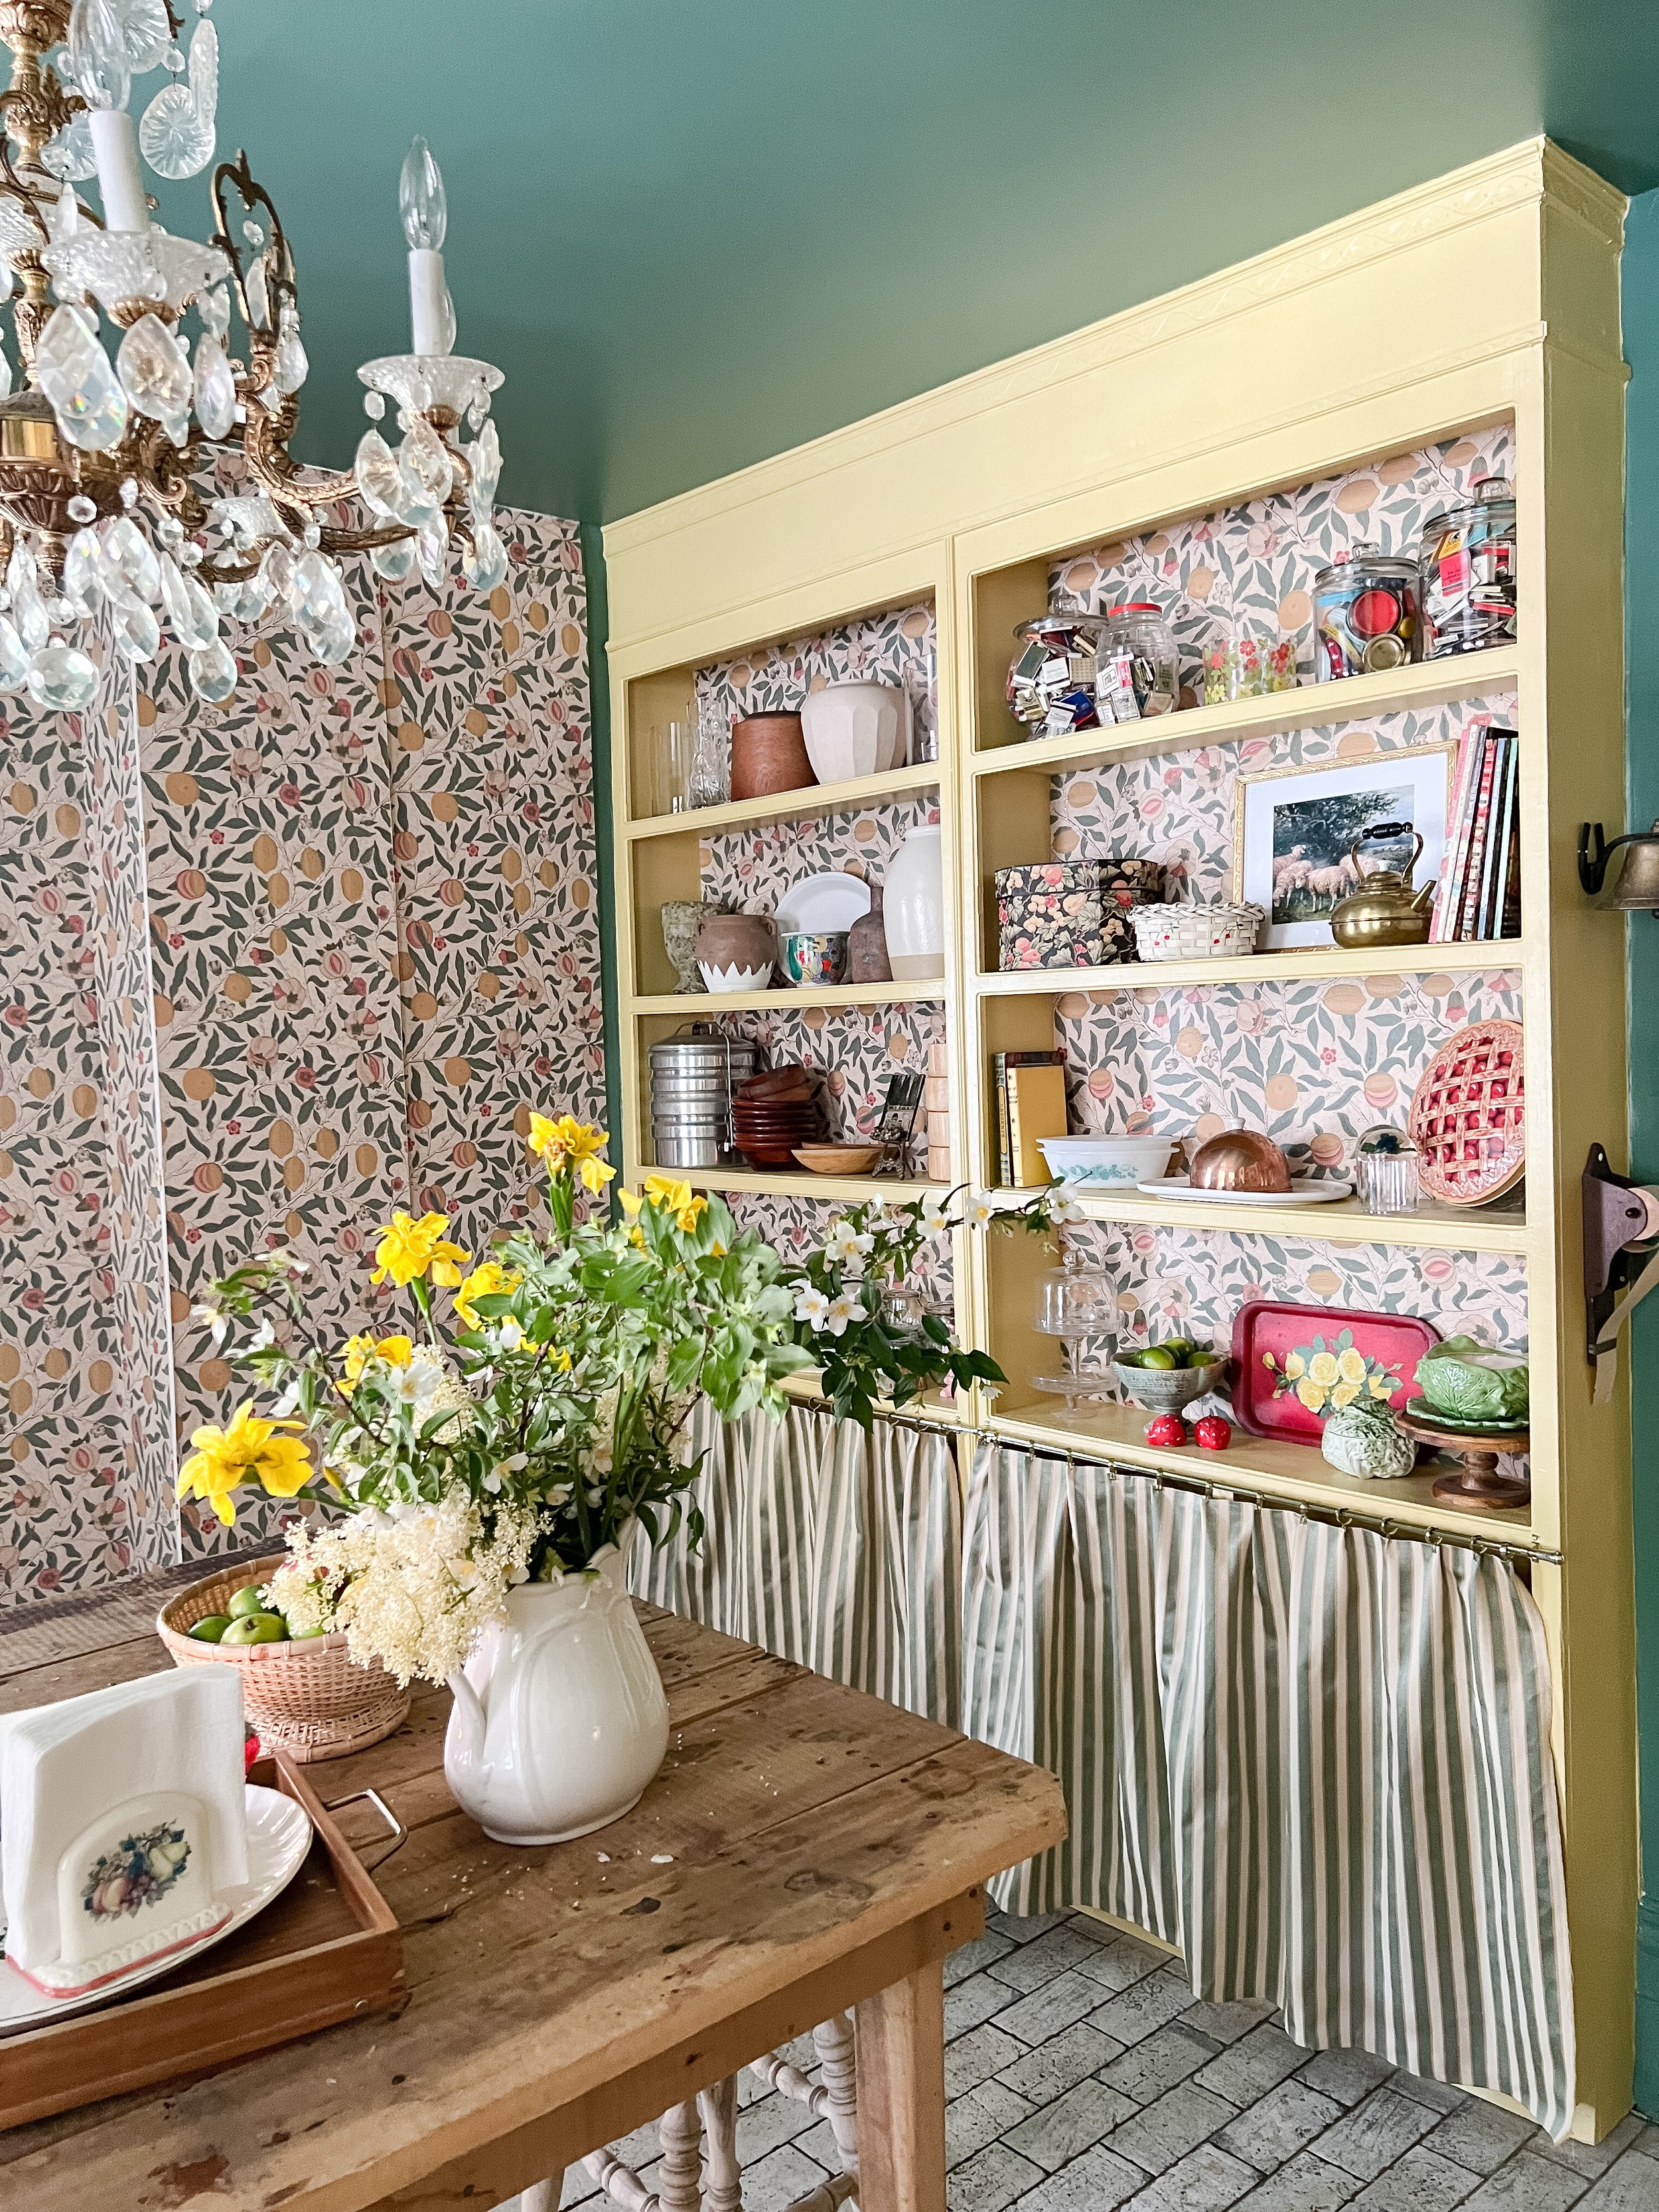
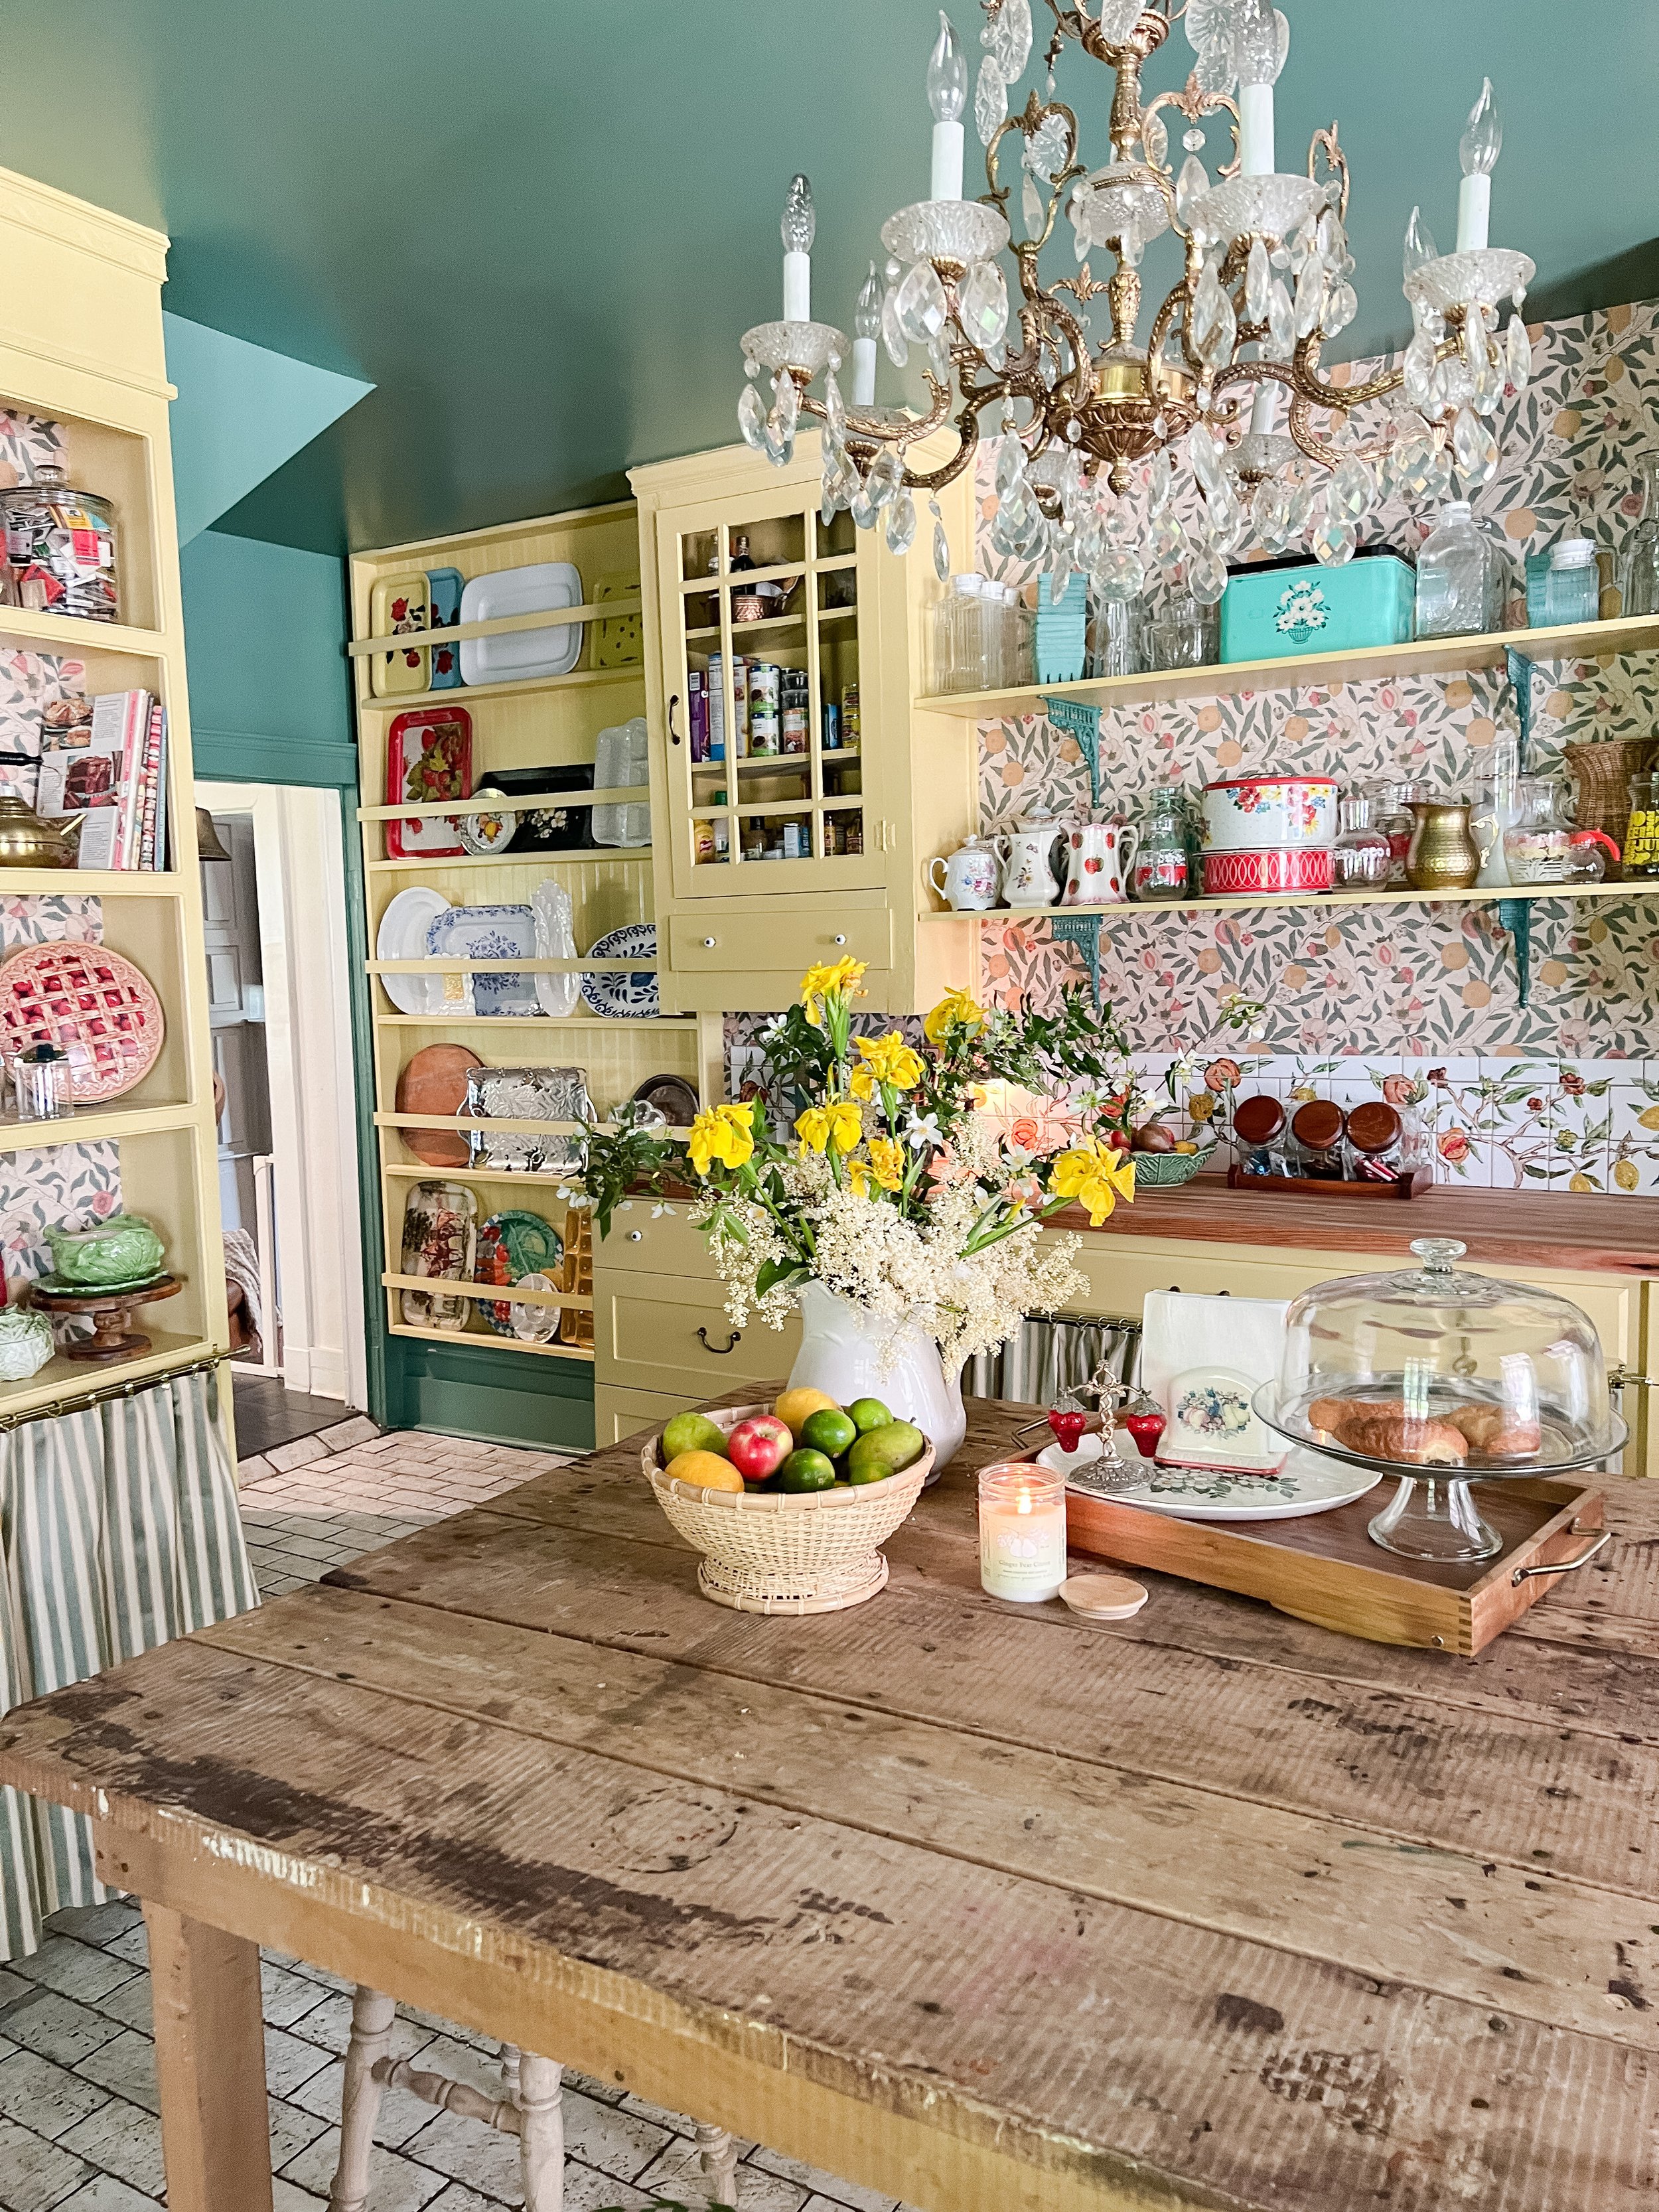
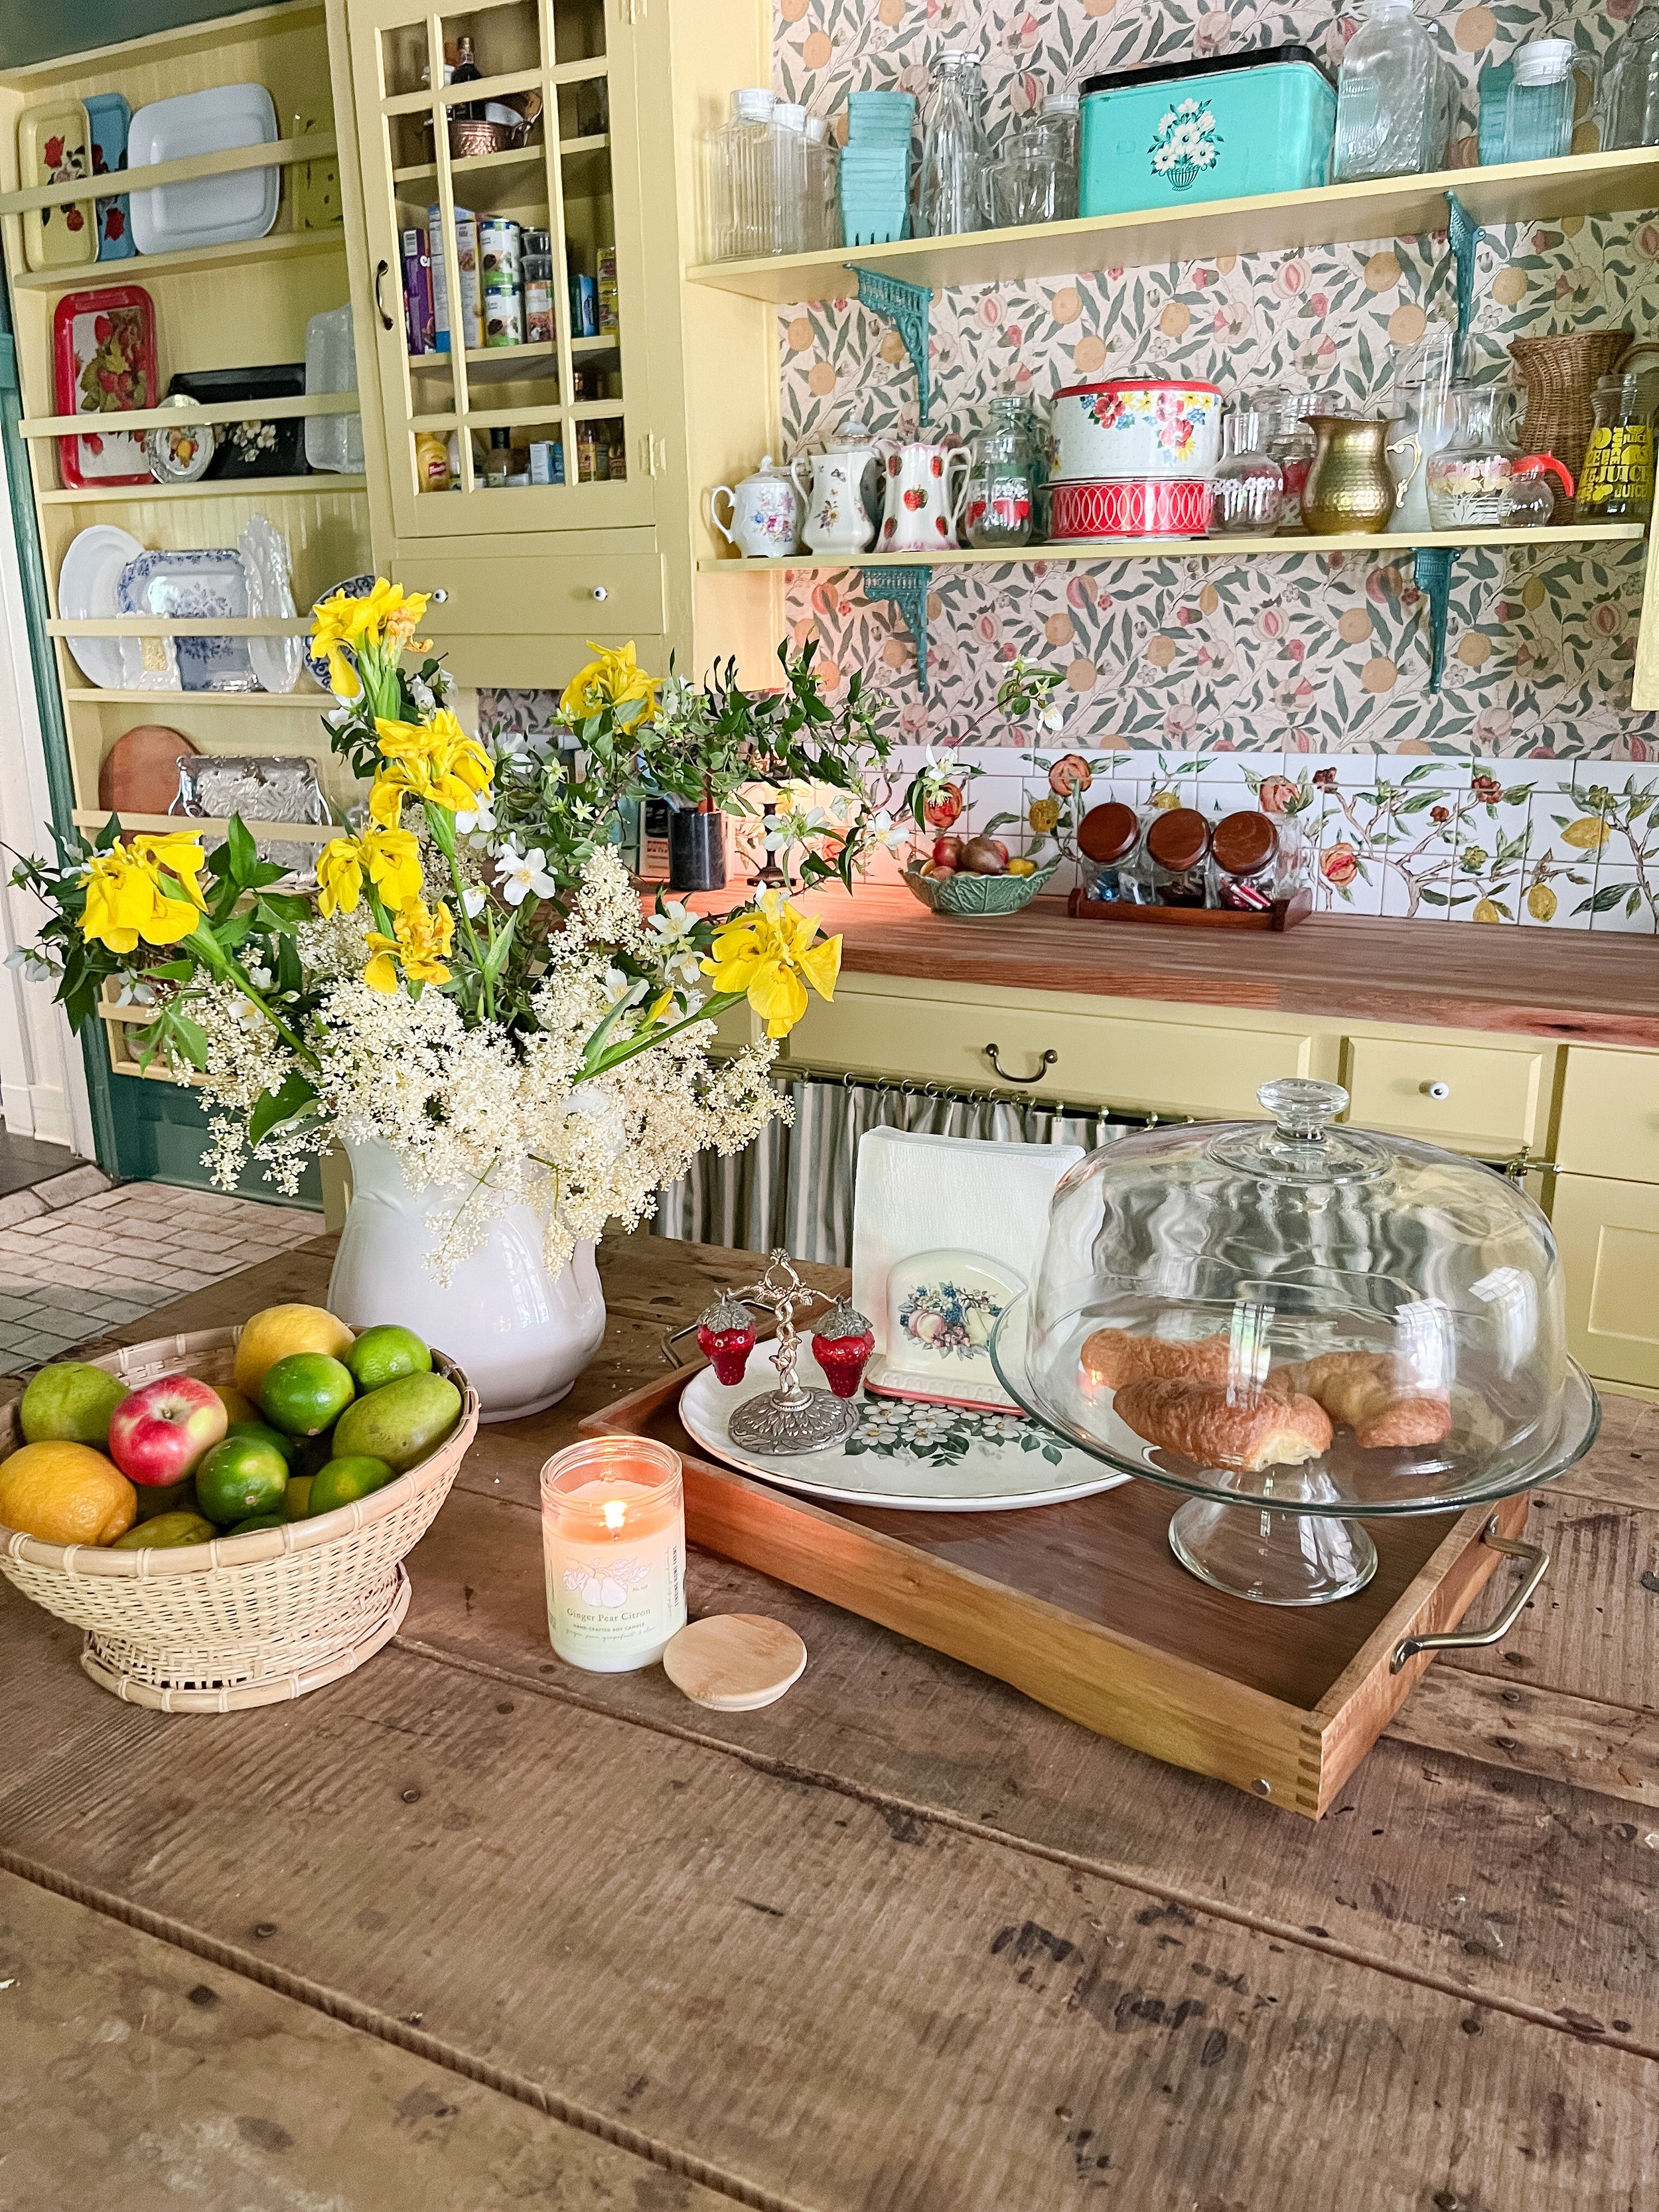
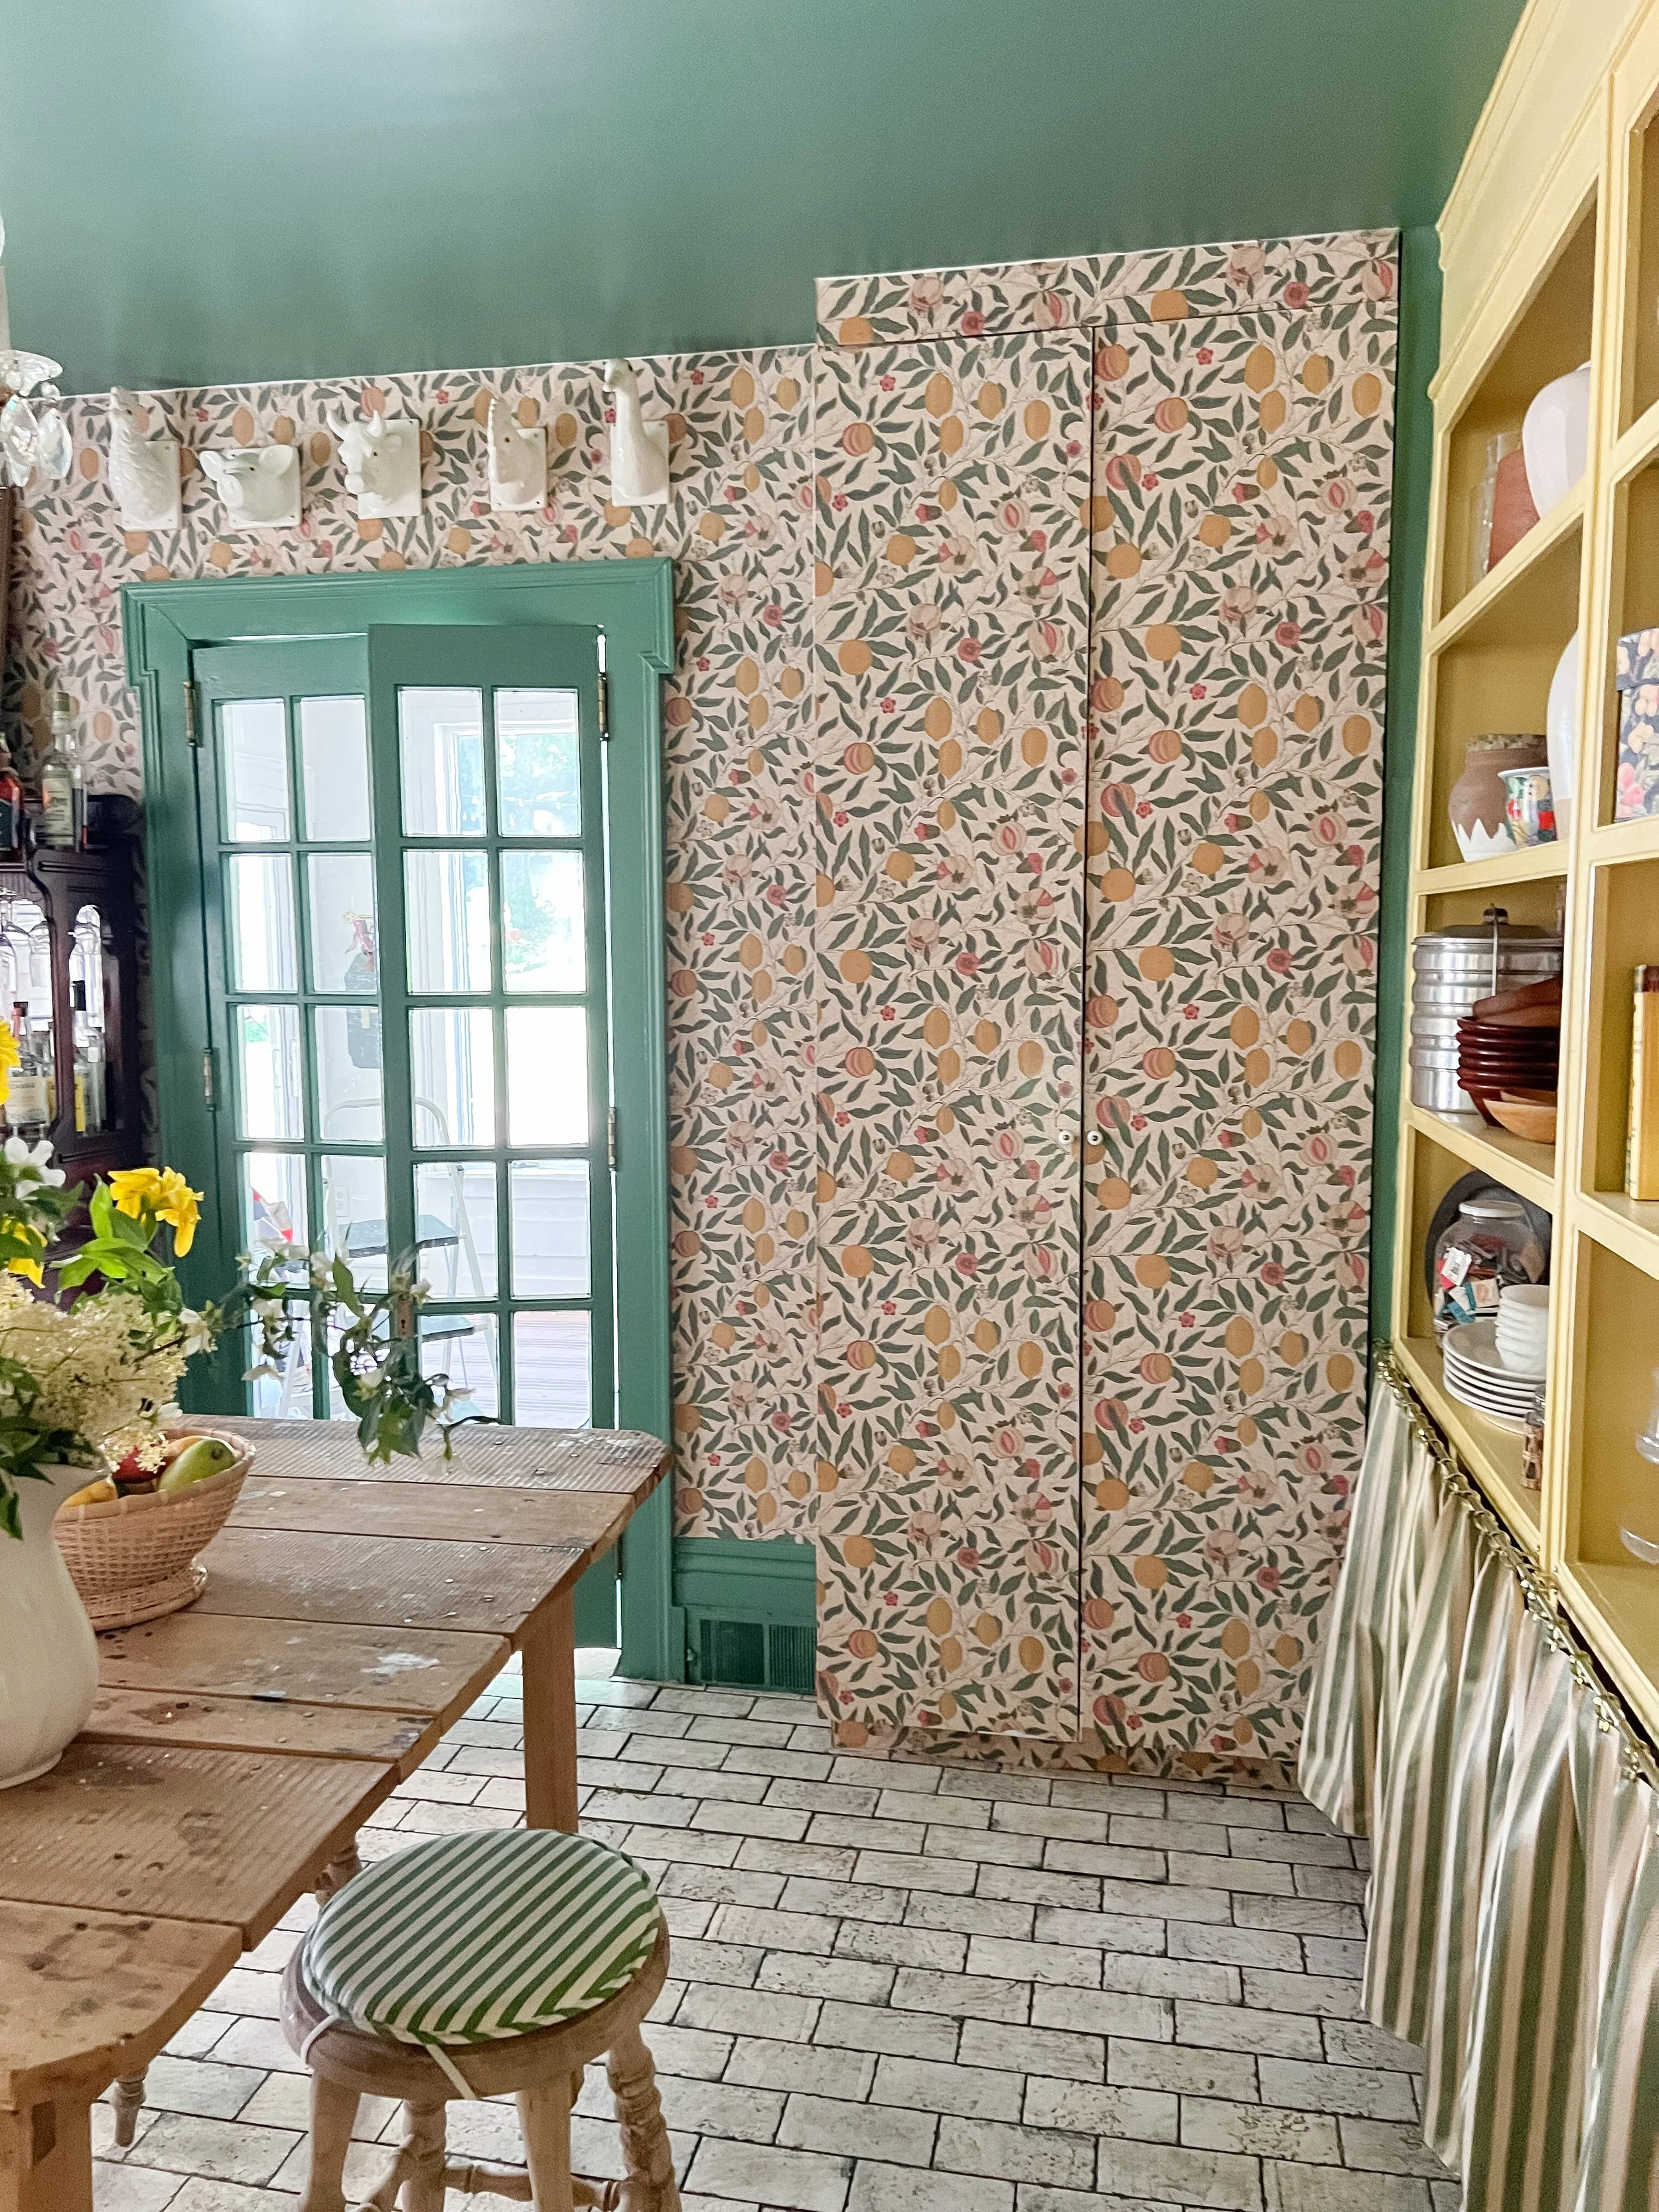
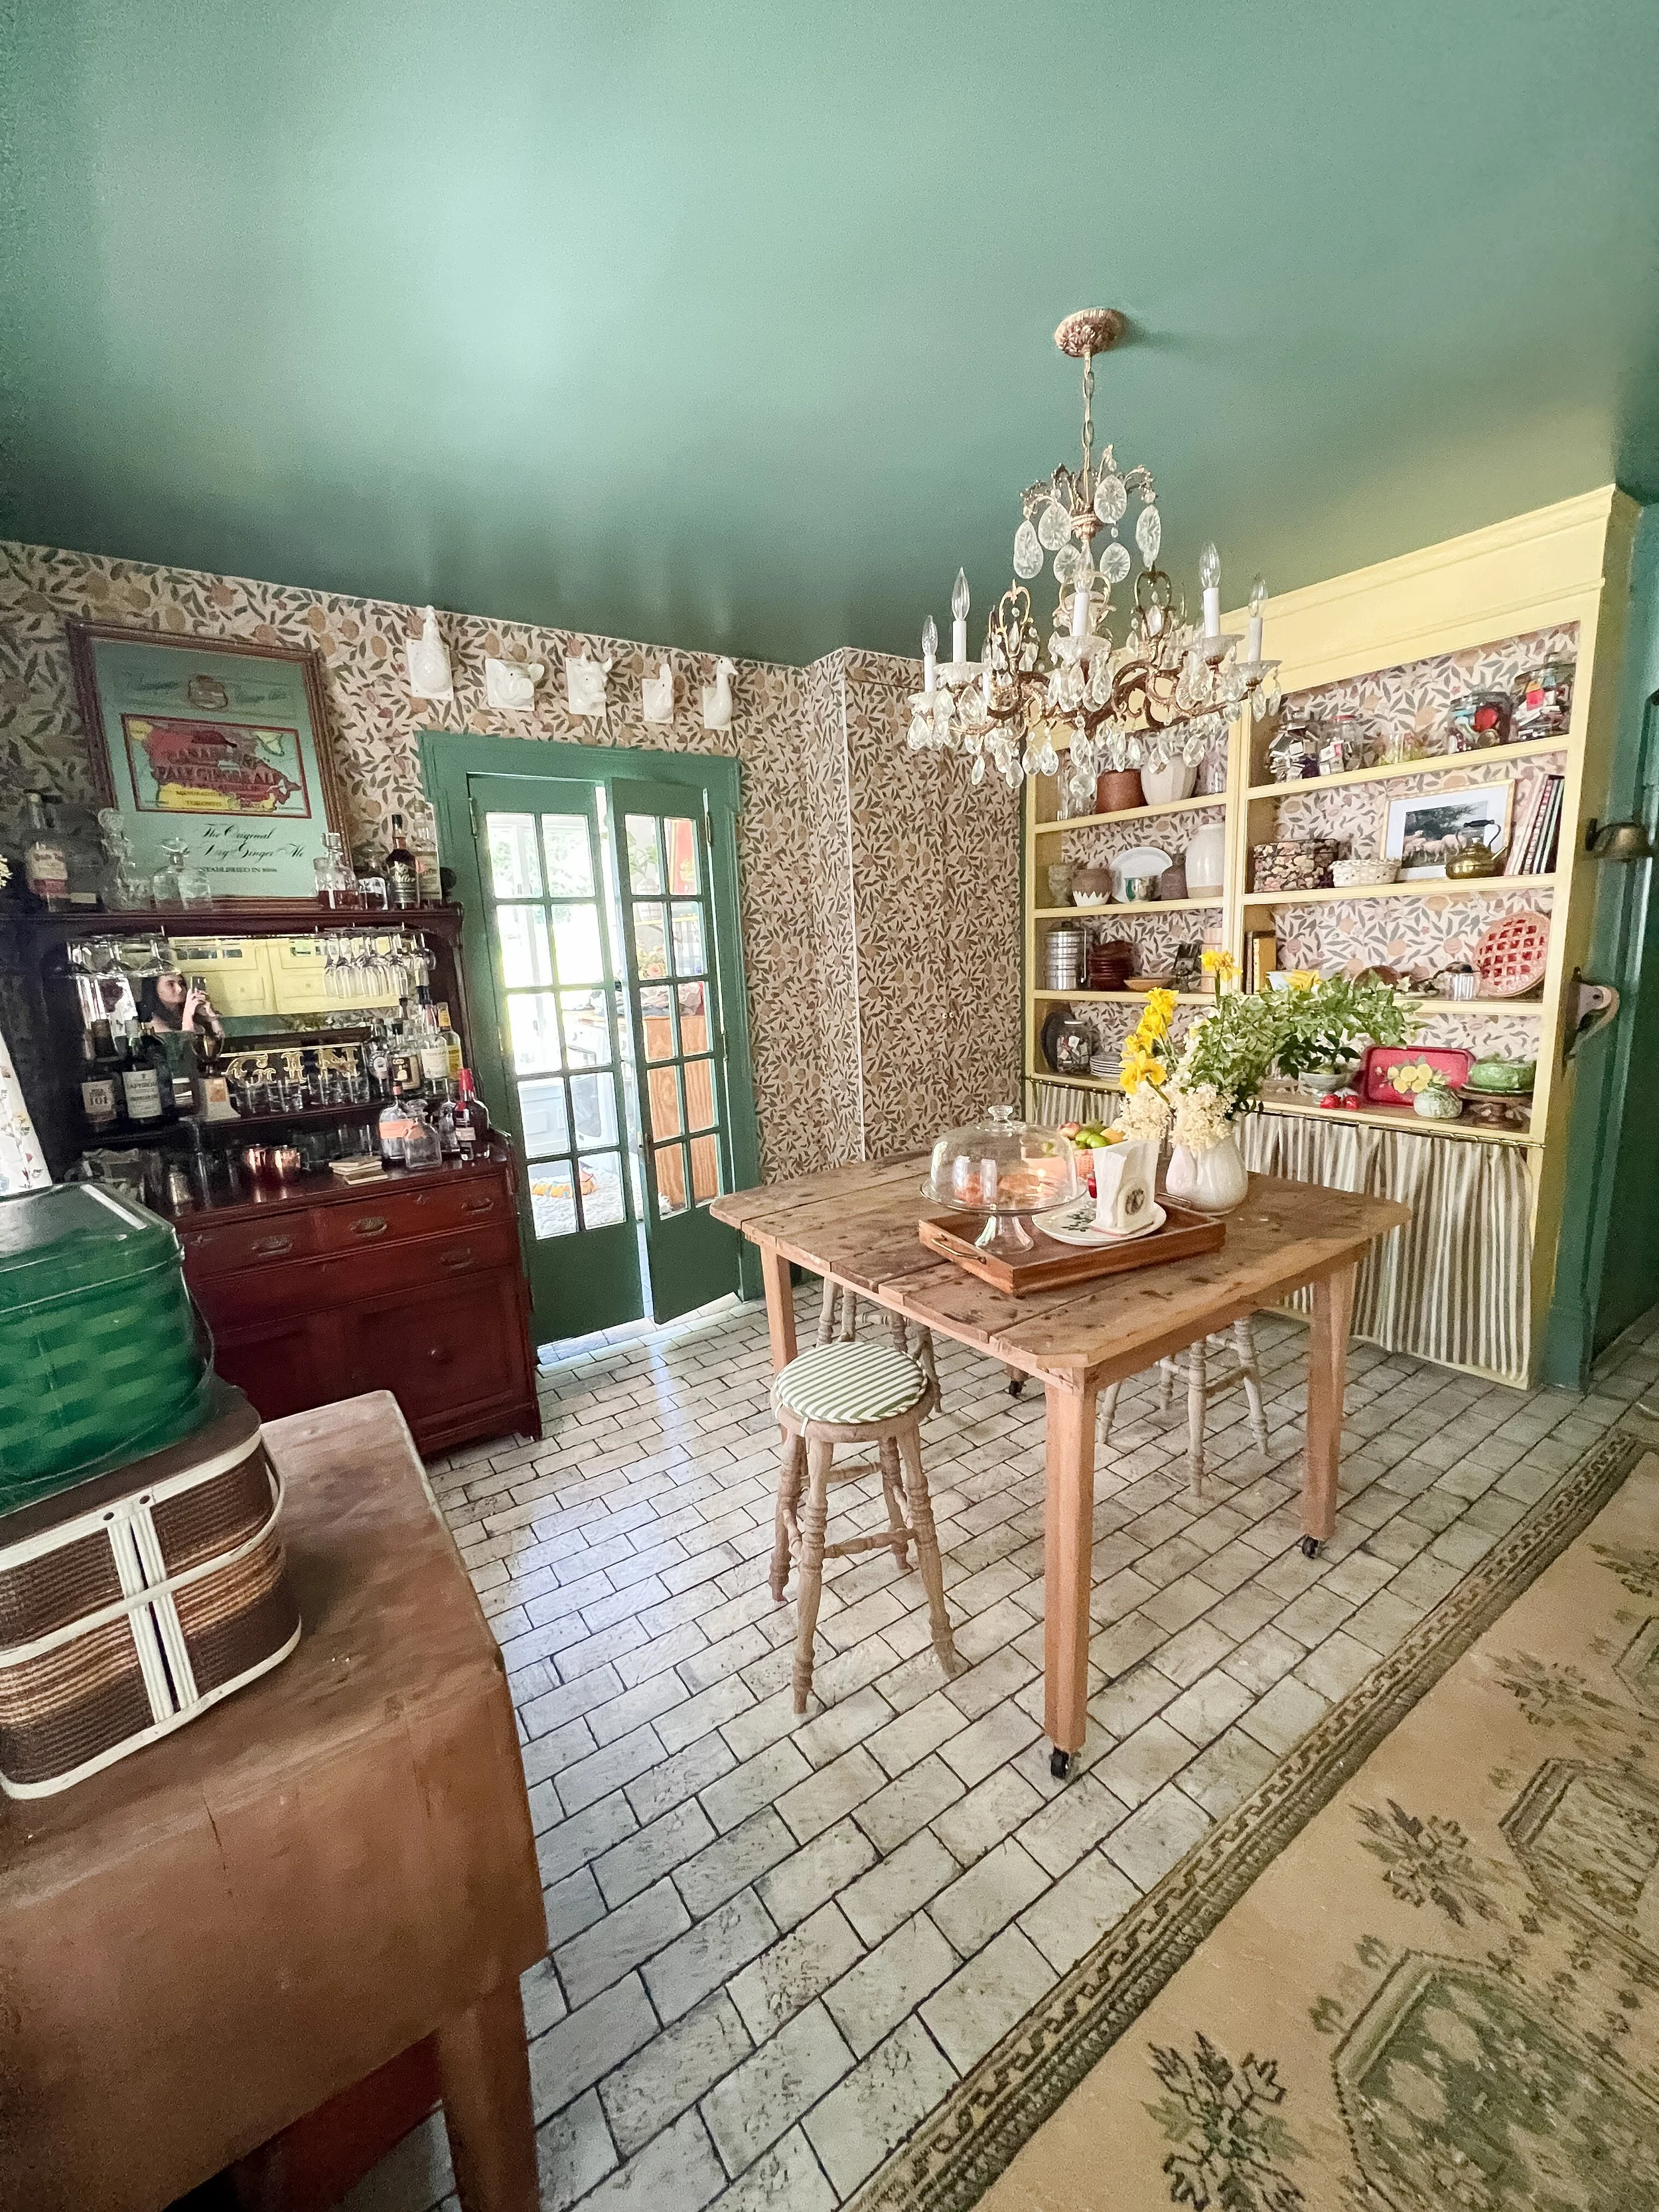
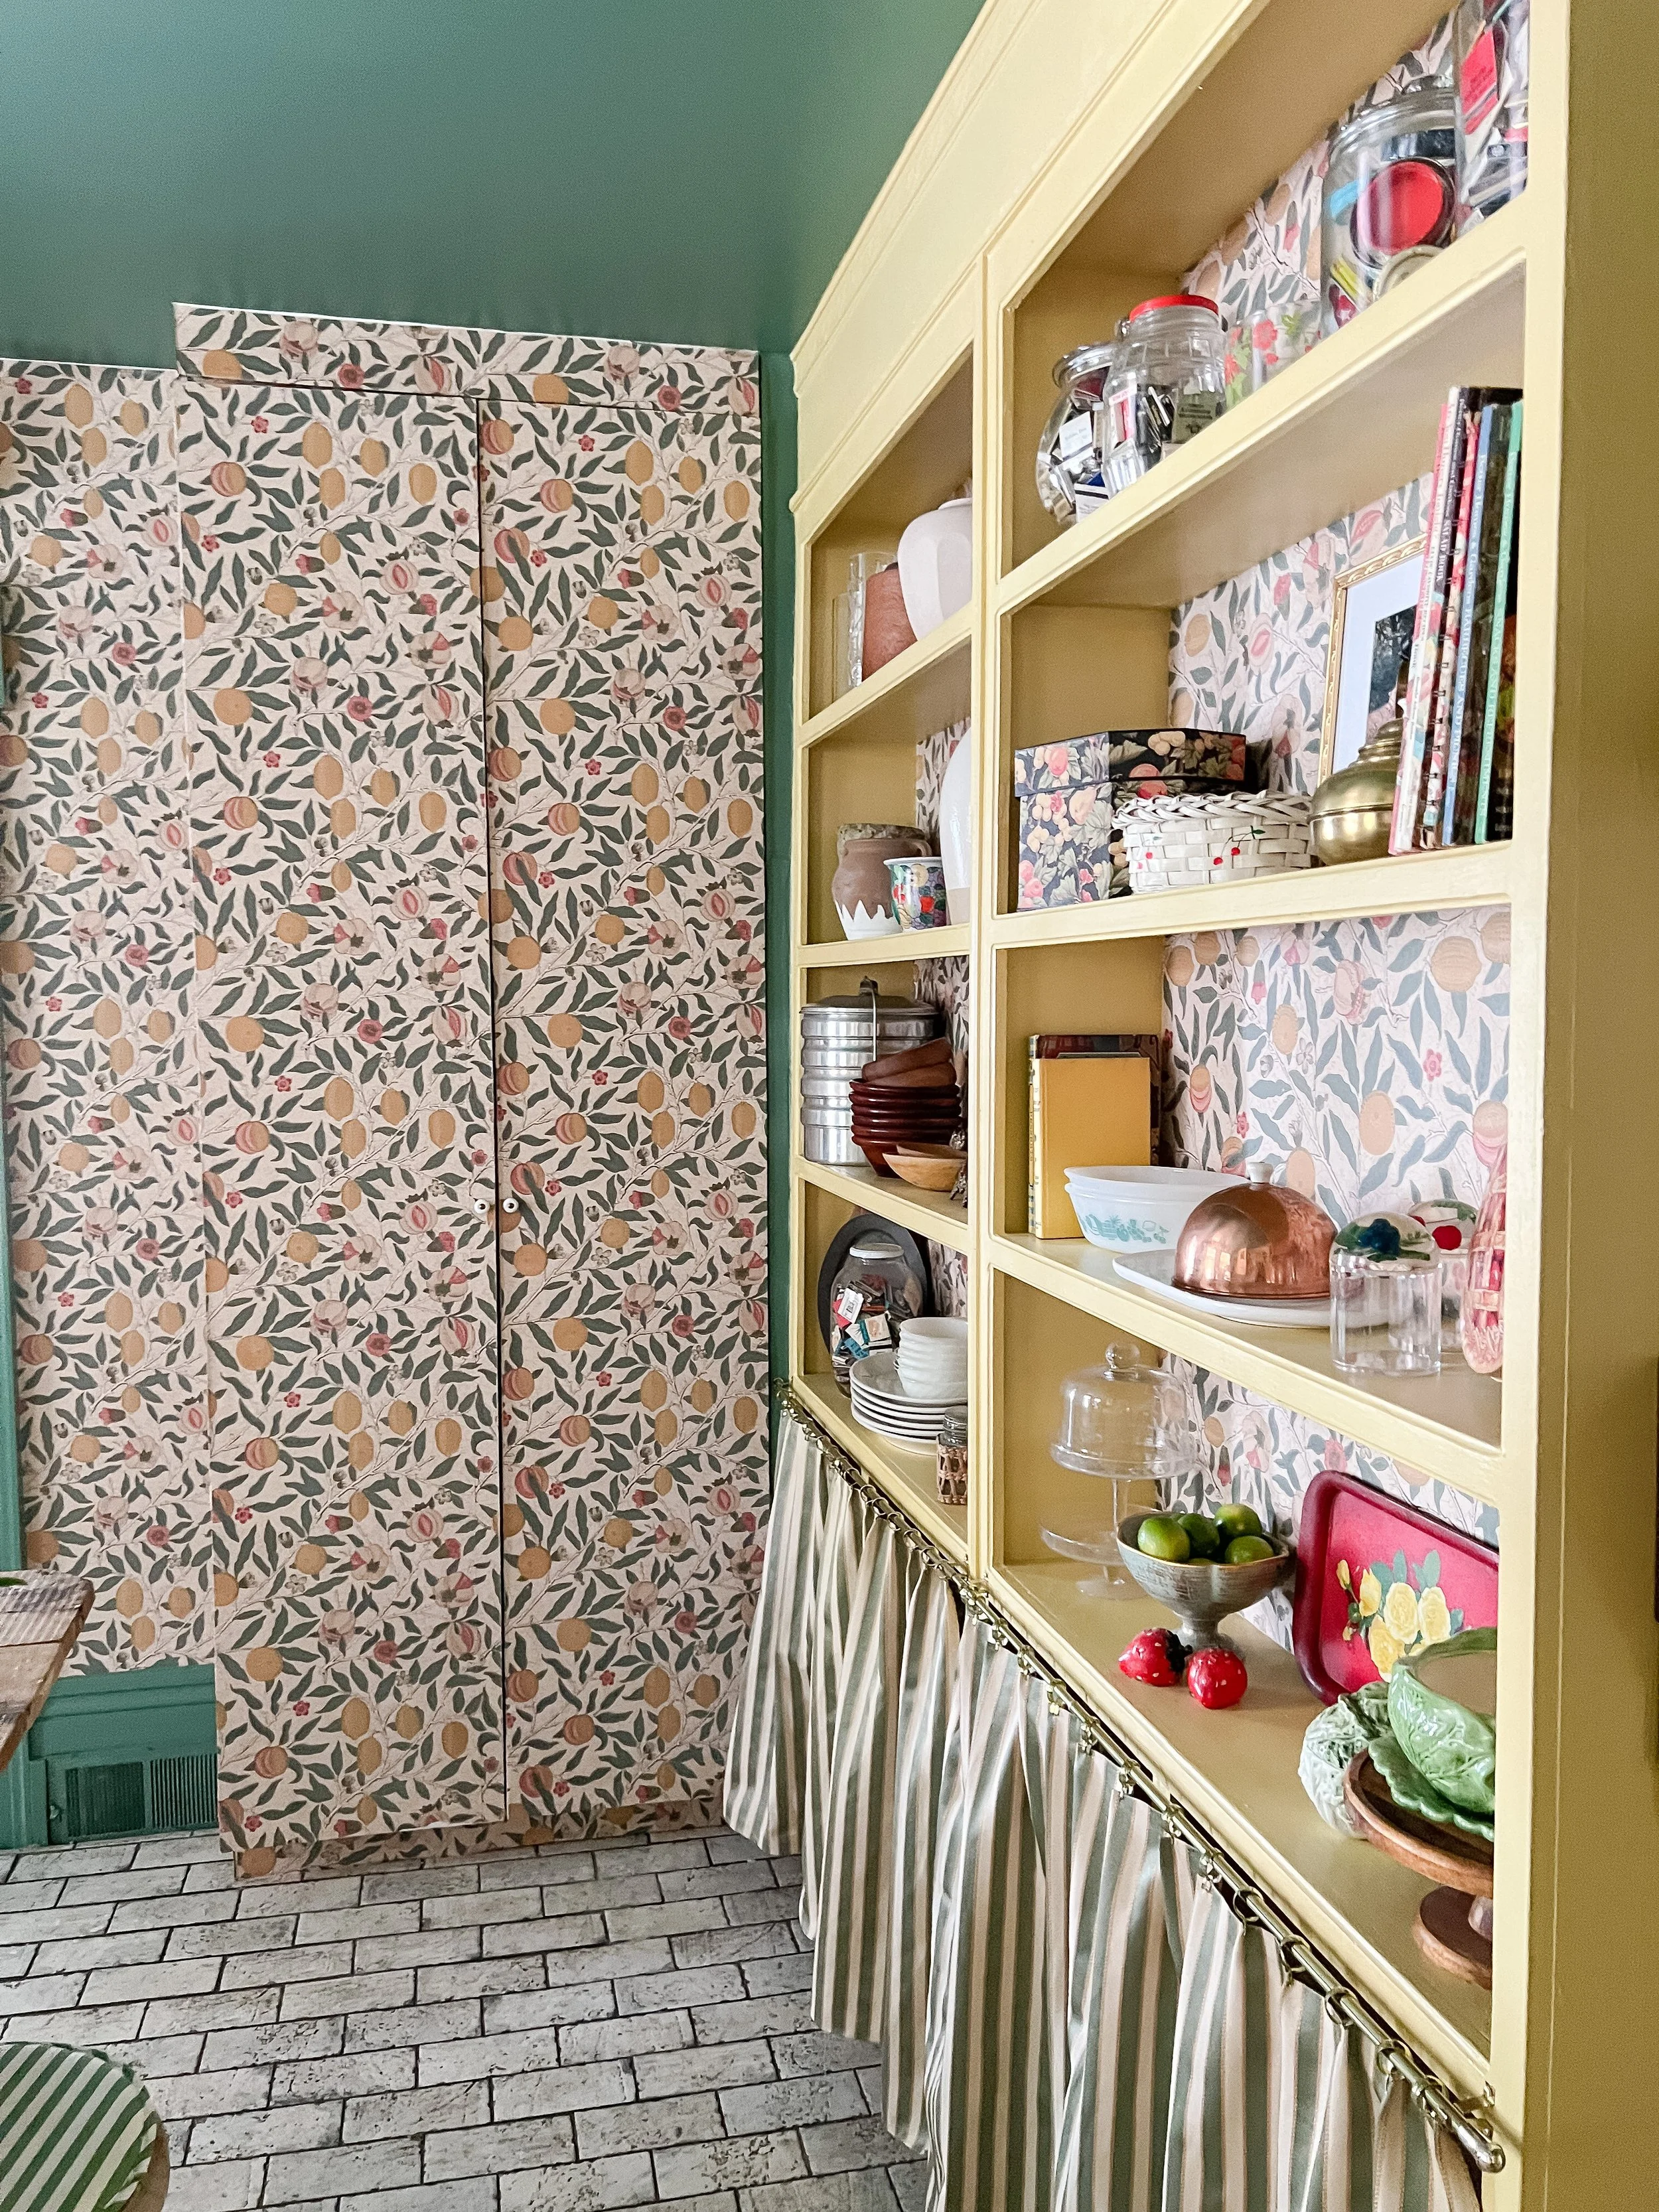
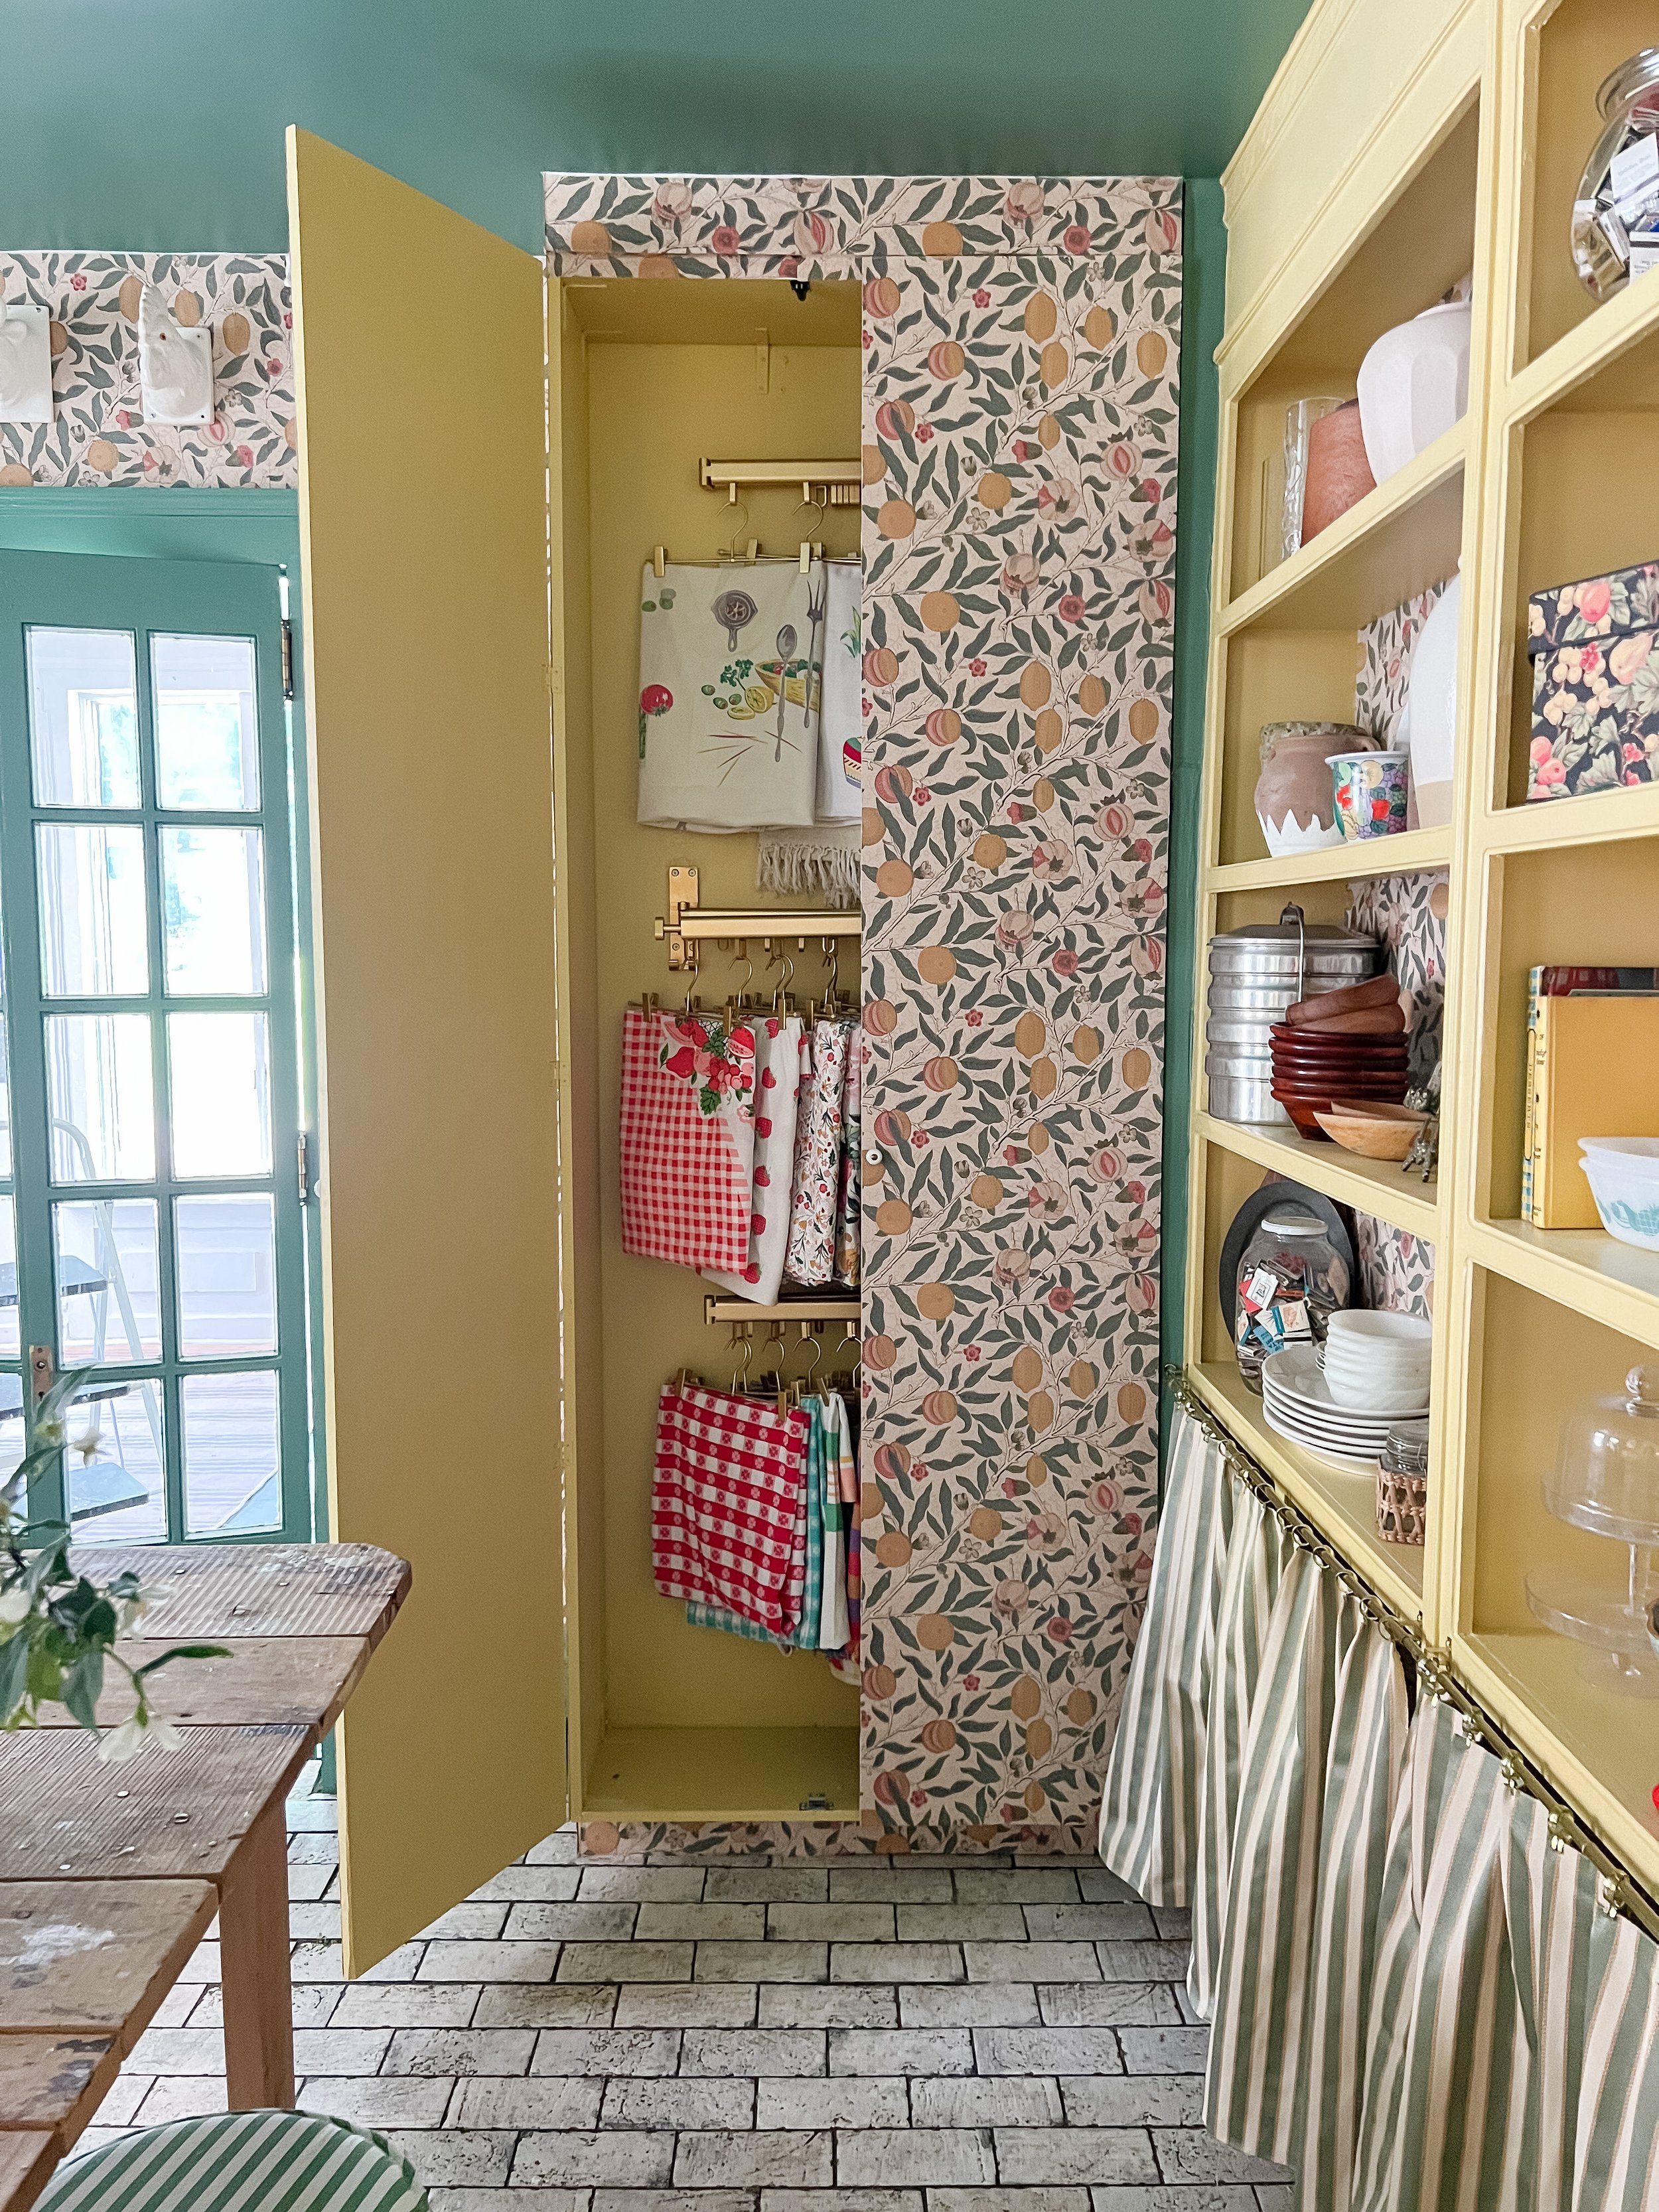
The wallpaper is a huge part of this space as well as a focal point in several areas. I finally decided on Morris + Co.’s fruit print in the beige, gold, coral colorway. This print is classic but also has a mix of traditional vintage kitchen colors that coordinate well with all of the collections and items I already had.
For the wallpaper placement I decided to do the back wall (everything that would be seen around the cabinets/back splash and then also the opposite wall and the back of the side cabinet shelves. This repeated the wallpaper enough hat is felt intentional, but also wasn’t too overwhelming. I like that the wallpaper has more aged/subtle tones of the greens, reds, and yellows that I have throughout the space, which allowed me to do more bold paint colors to mix with them, while still seamlessly coordinating together.
All the wallpapering was pretty easy (I feel like I’m a master now after wallpapering a ceiling!), but the tablecloth cabinet wallpaper was definitely the most challenging! I wanted this cabinet to really look like it was built-in and part of the wall and blend in as well as possible. I ended up just wallpapering over all the seams and doors and then razor cutting where it needed to open to get the perfect match/seams and it worked very well.

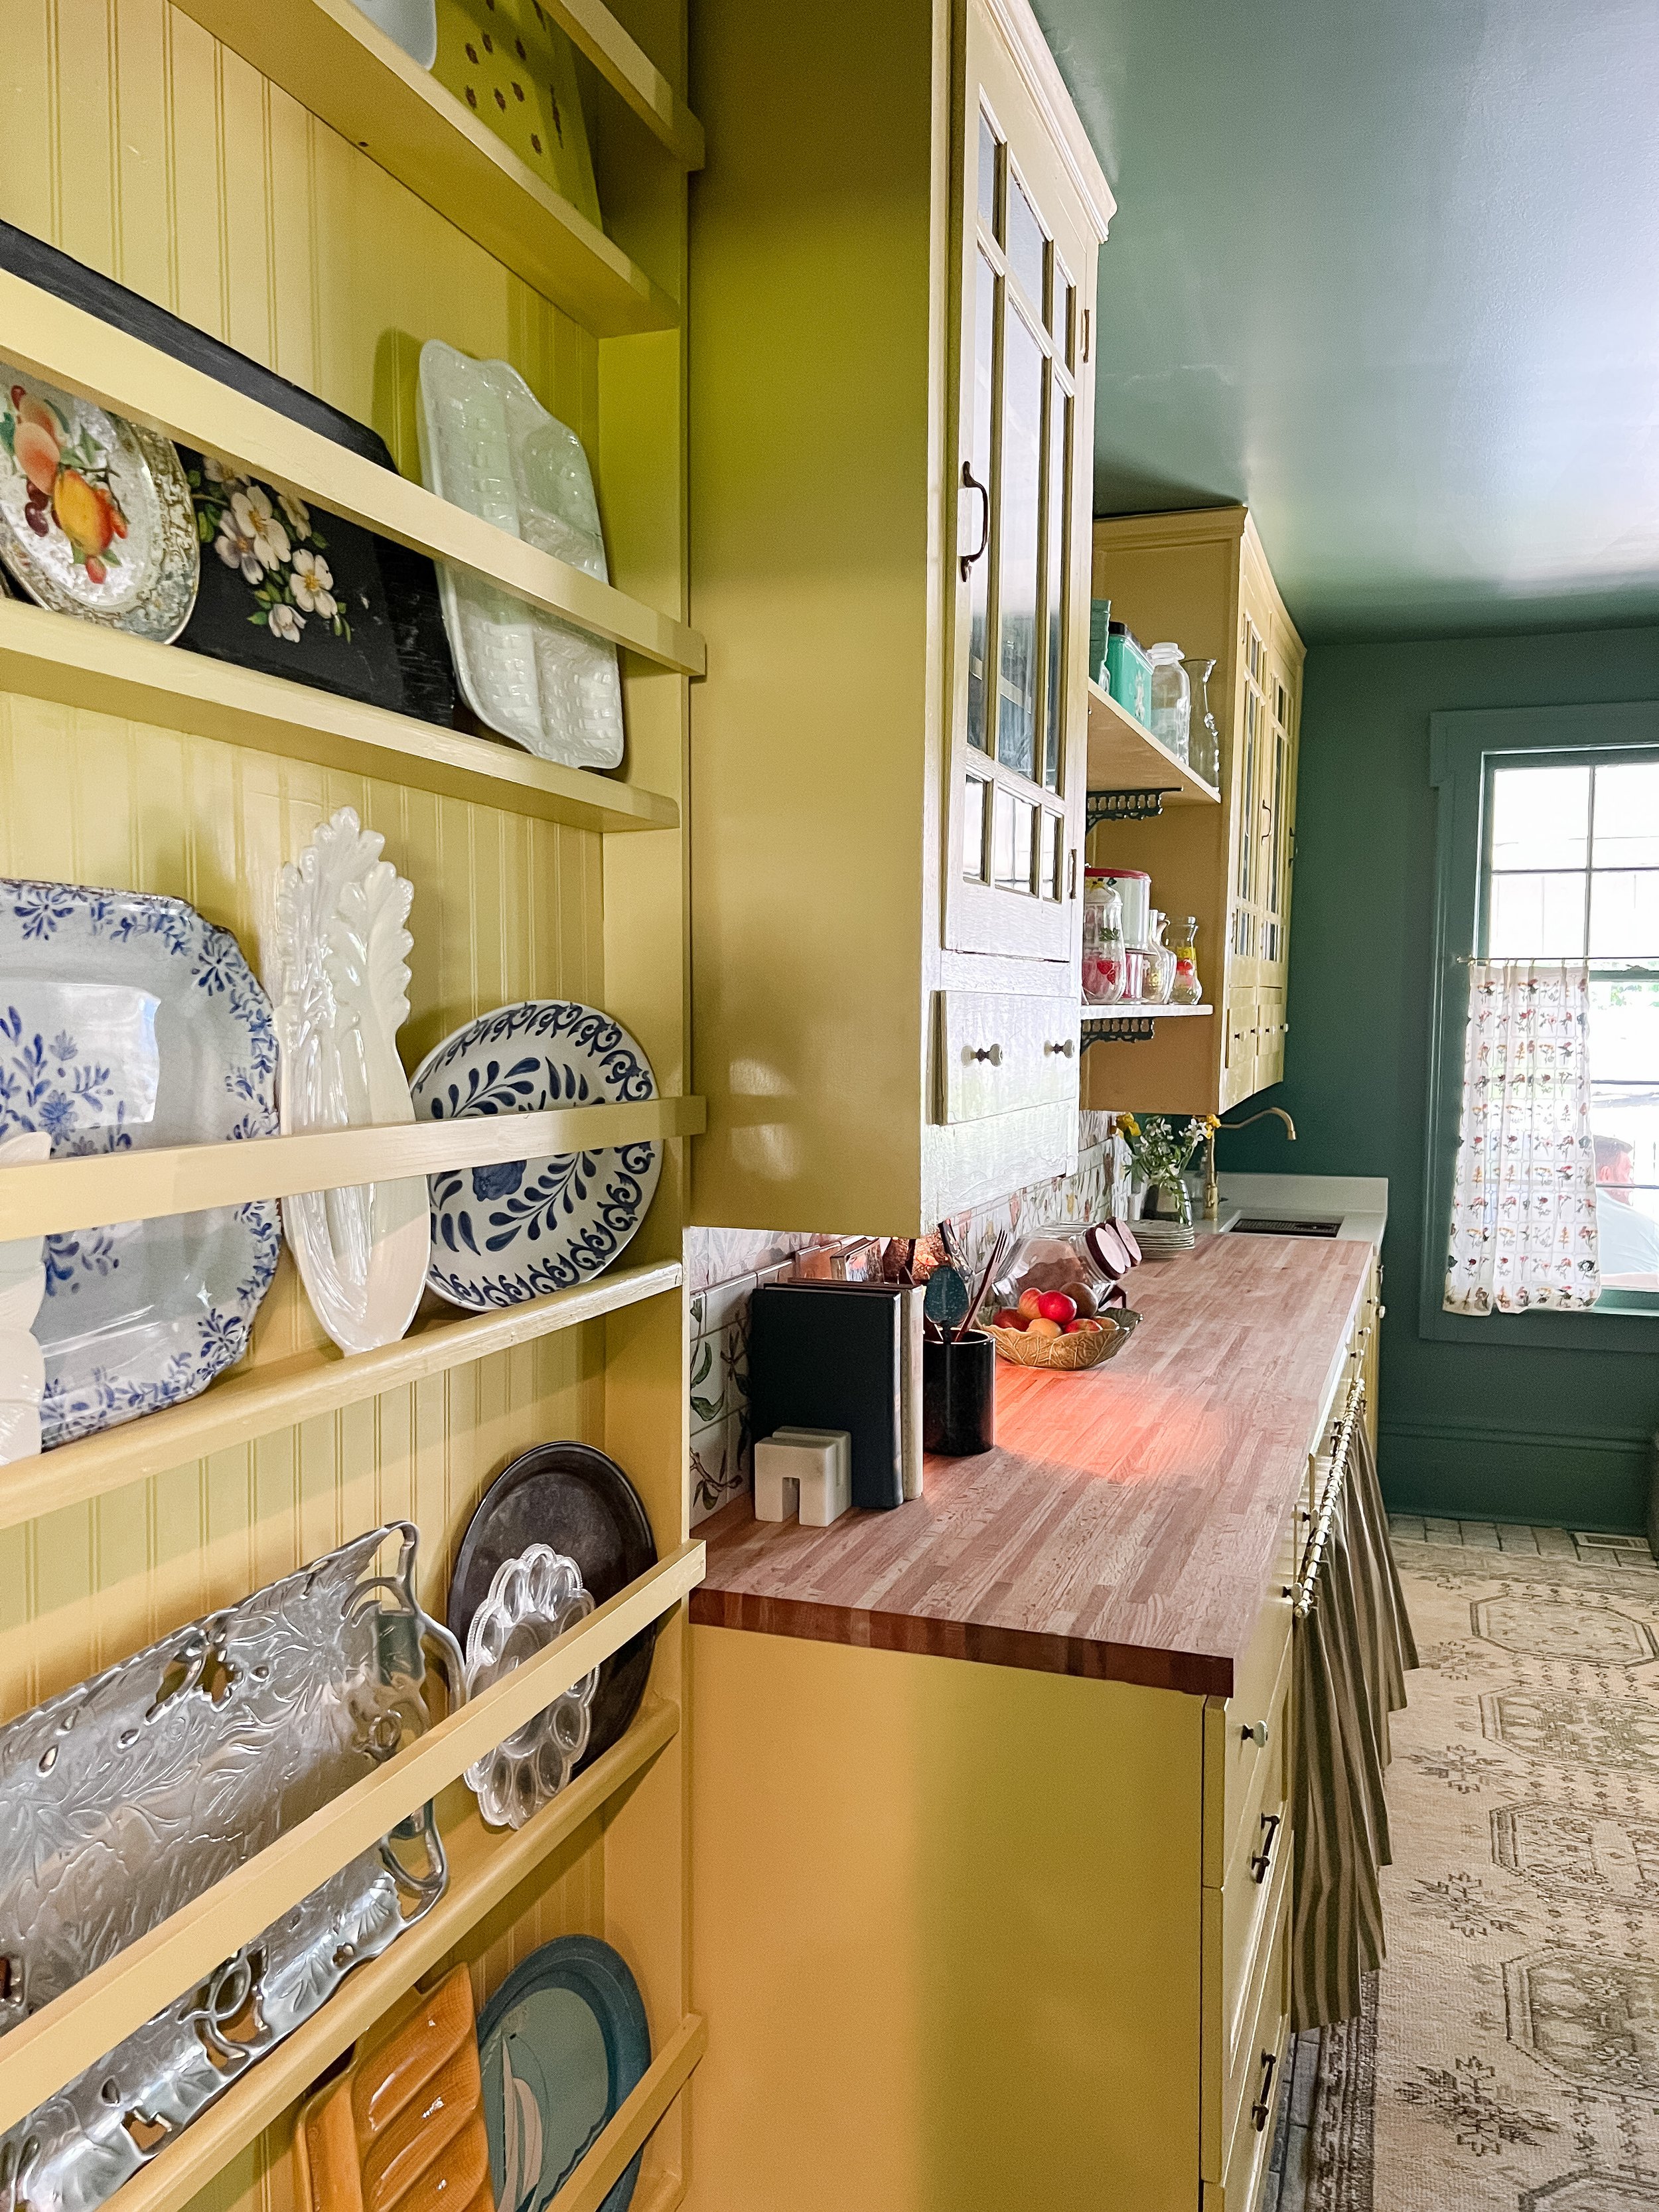
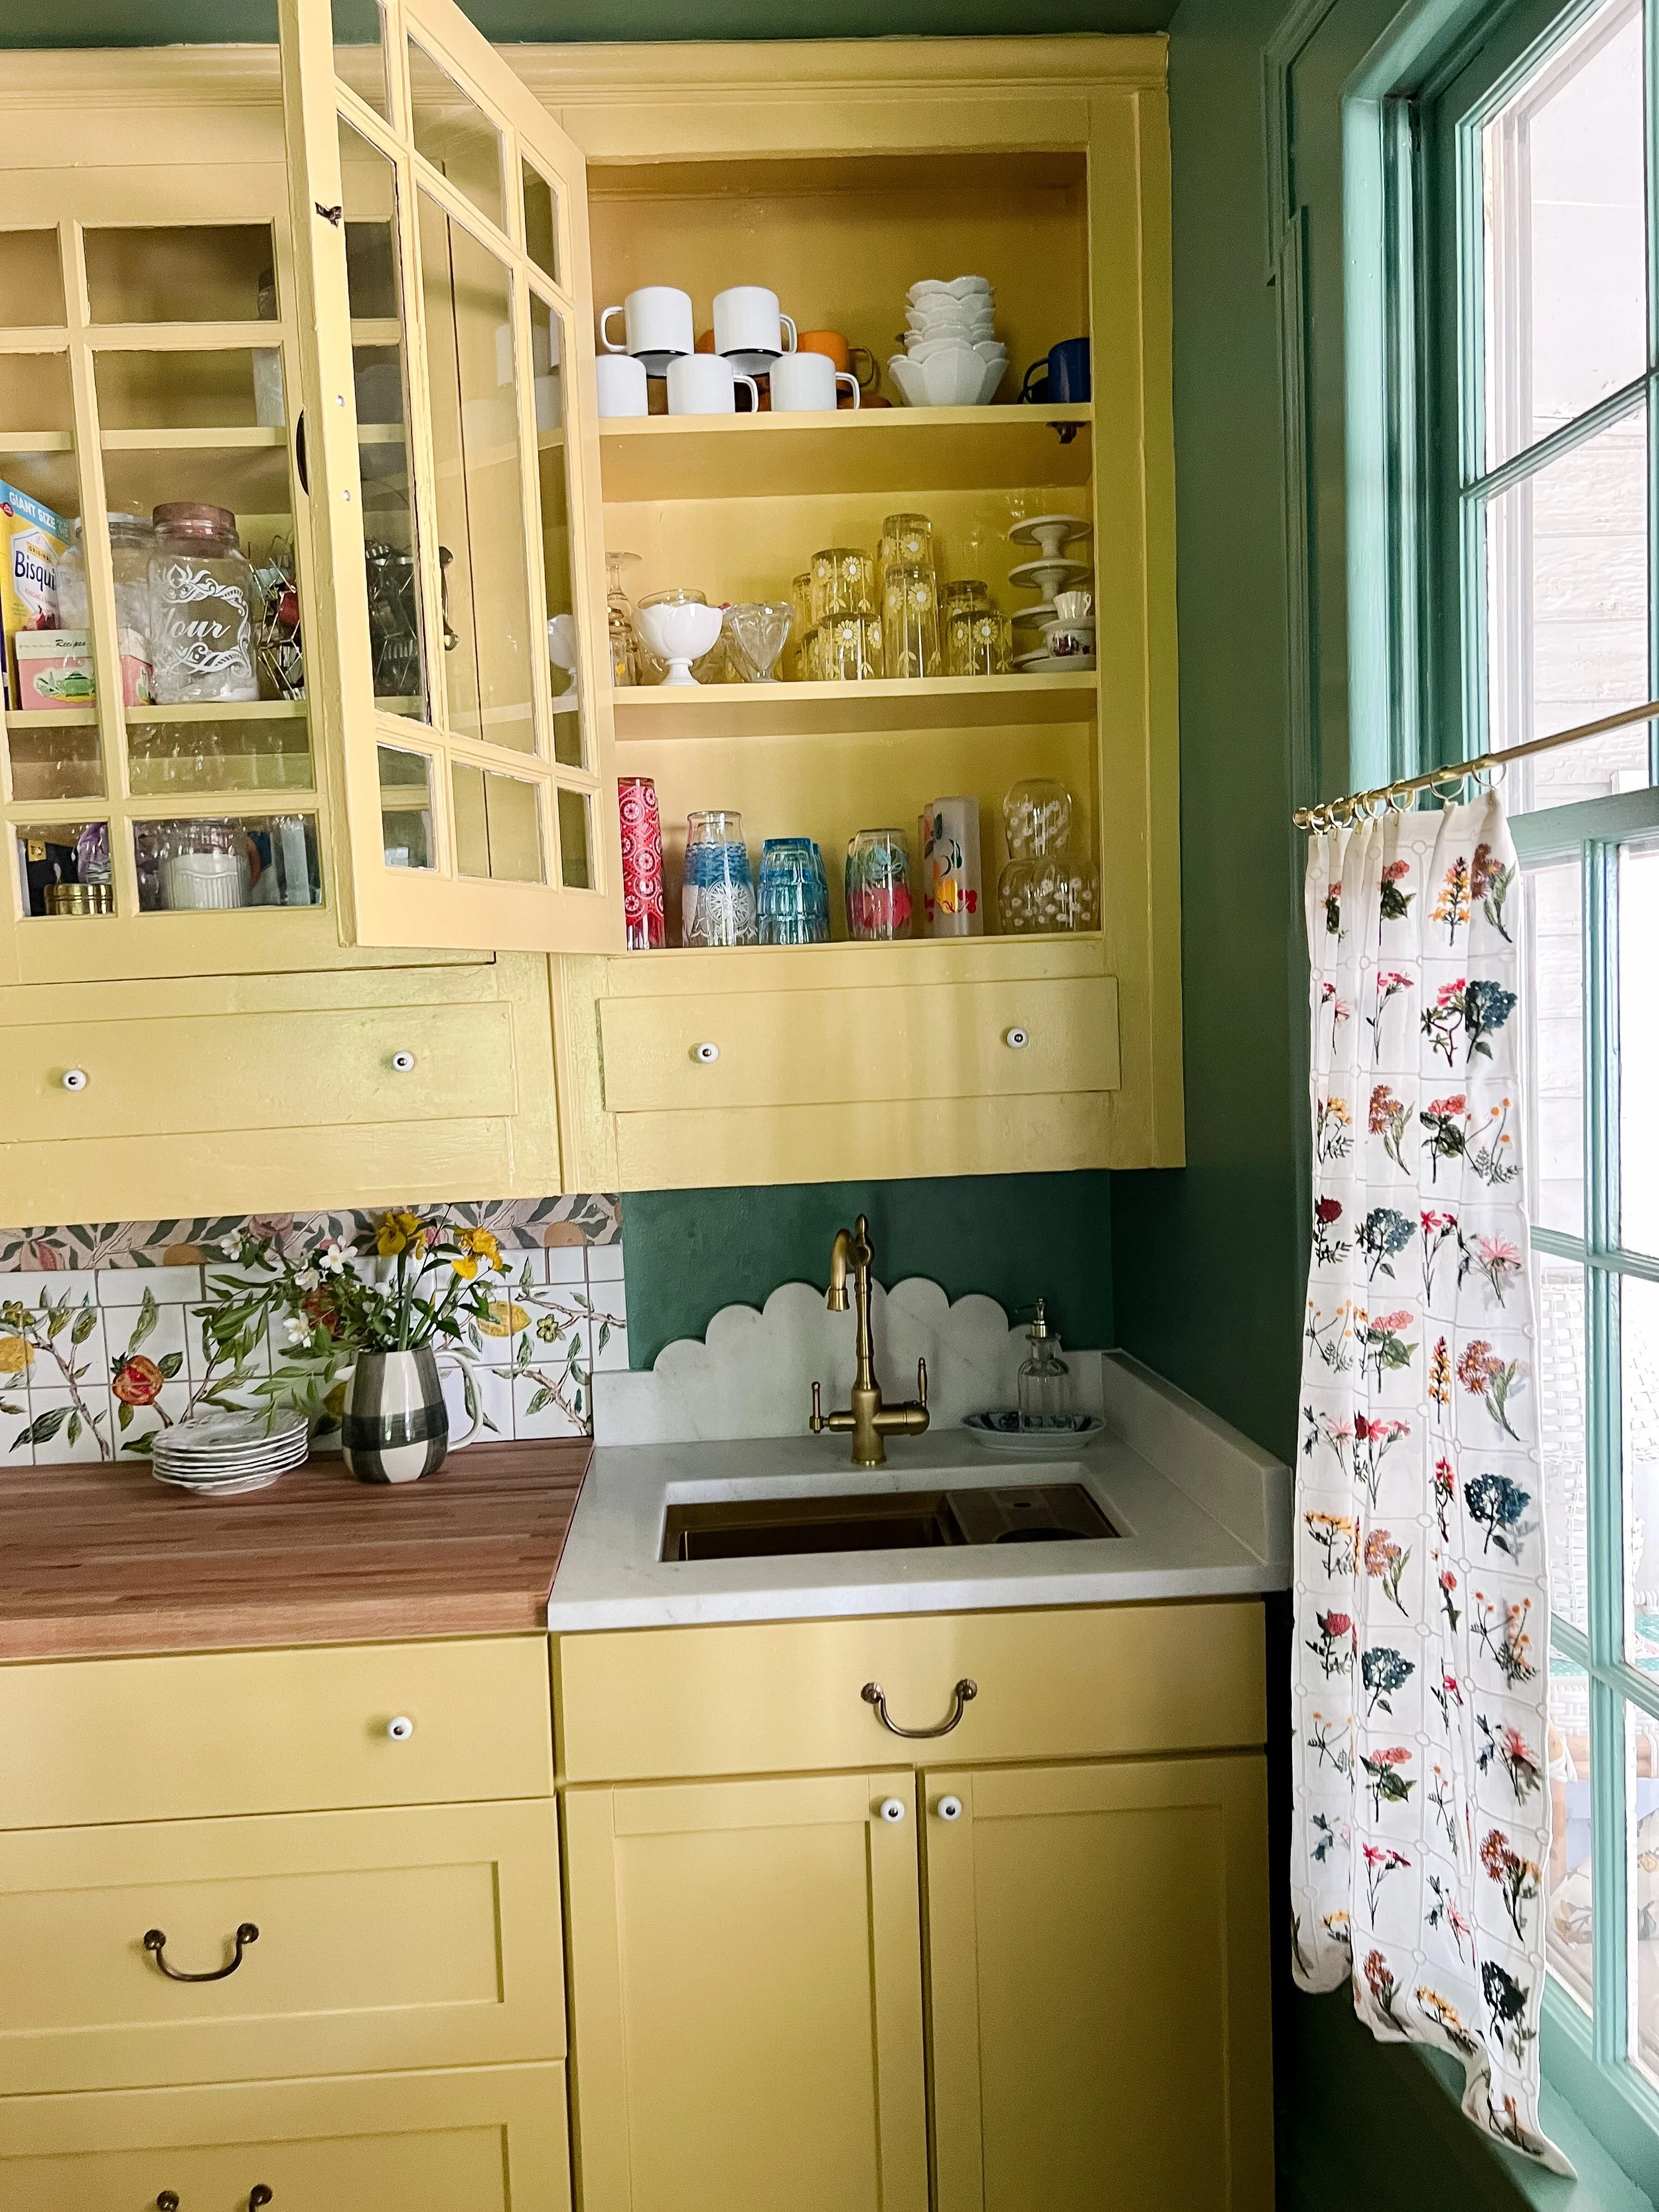
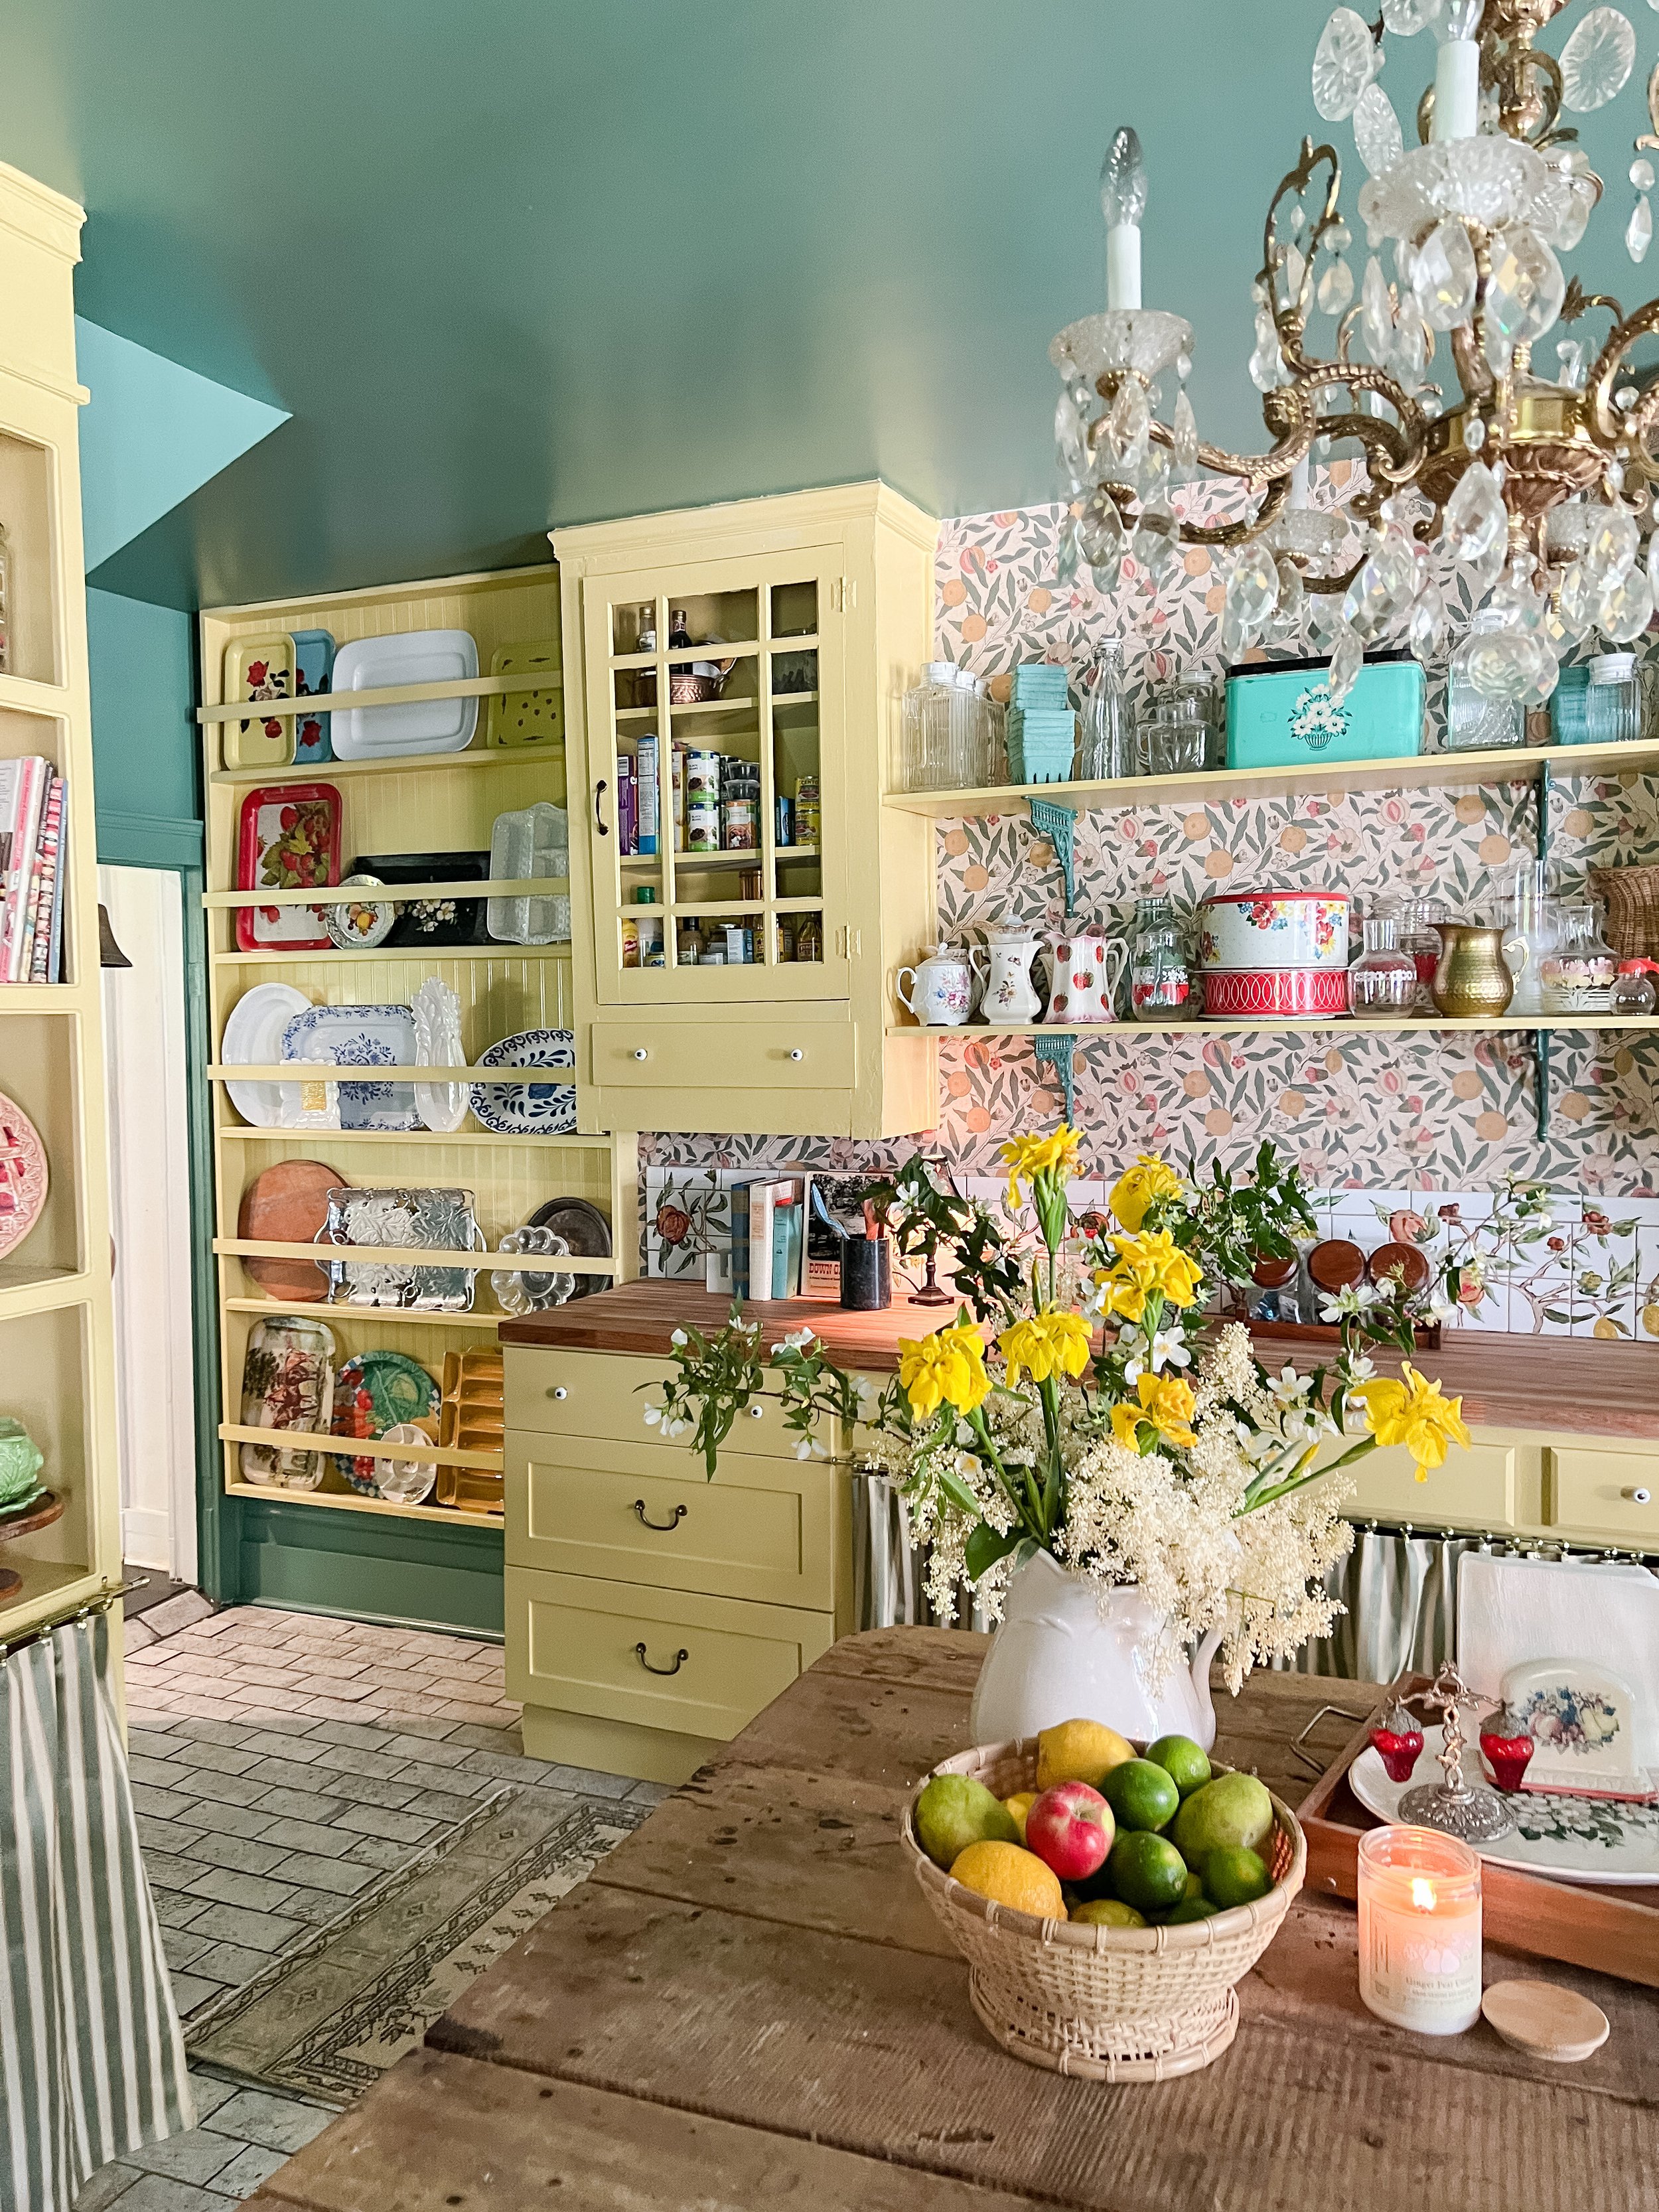
Facebook Marketplace, once again, came through for me! I found the most perfect antique glass front cabinets for this space! They were the PERFECT size - height and width - that I needed for this space to match perfectly with the lower cabinets we had installed. All lower cabinets were just in-stock cabinets I found at both Lowe’s and Home Depot and I will link below! We did have some contractors install these for us so they could all be as level as possible (definitely a challenge with our old house- lots of shimming was involved in these cabinets to make them the exact same height/depth to look uniform!).
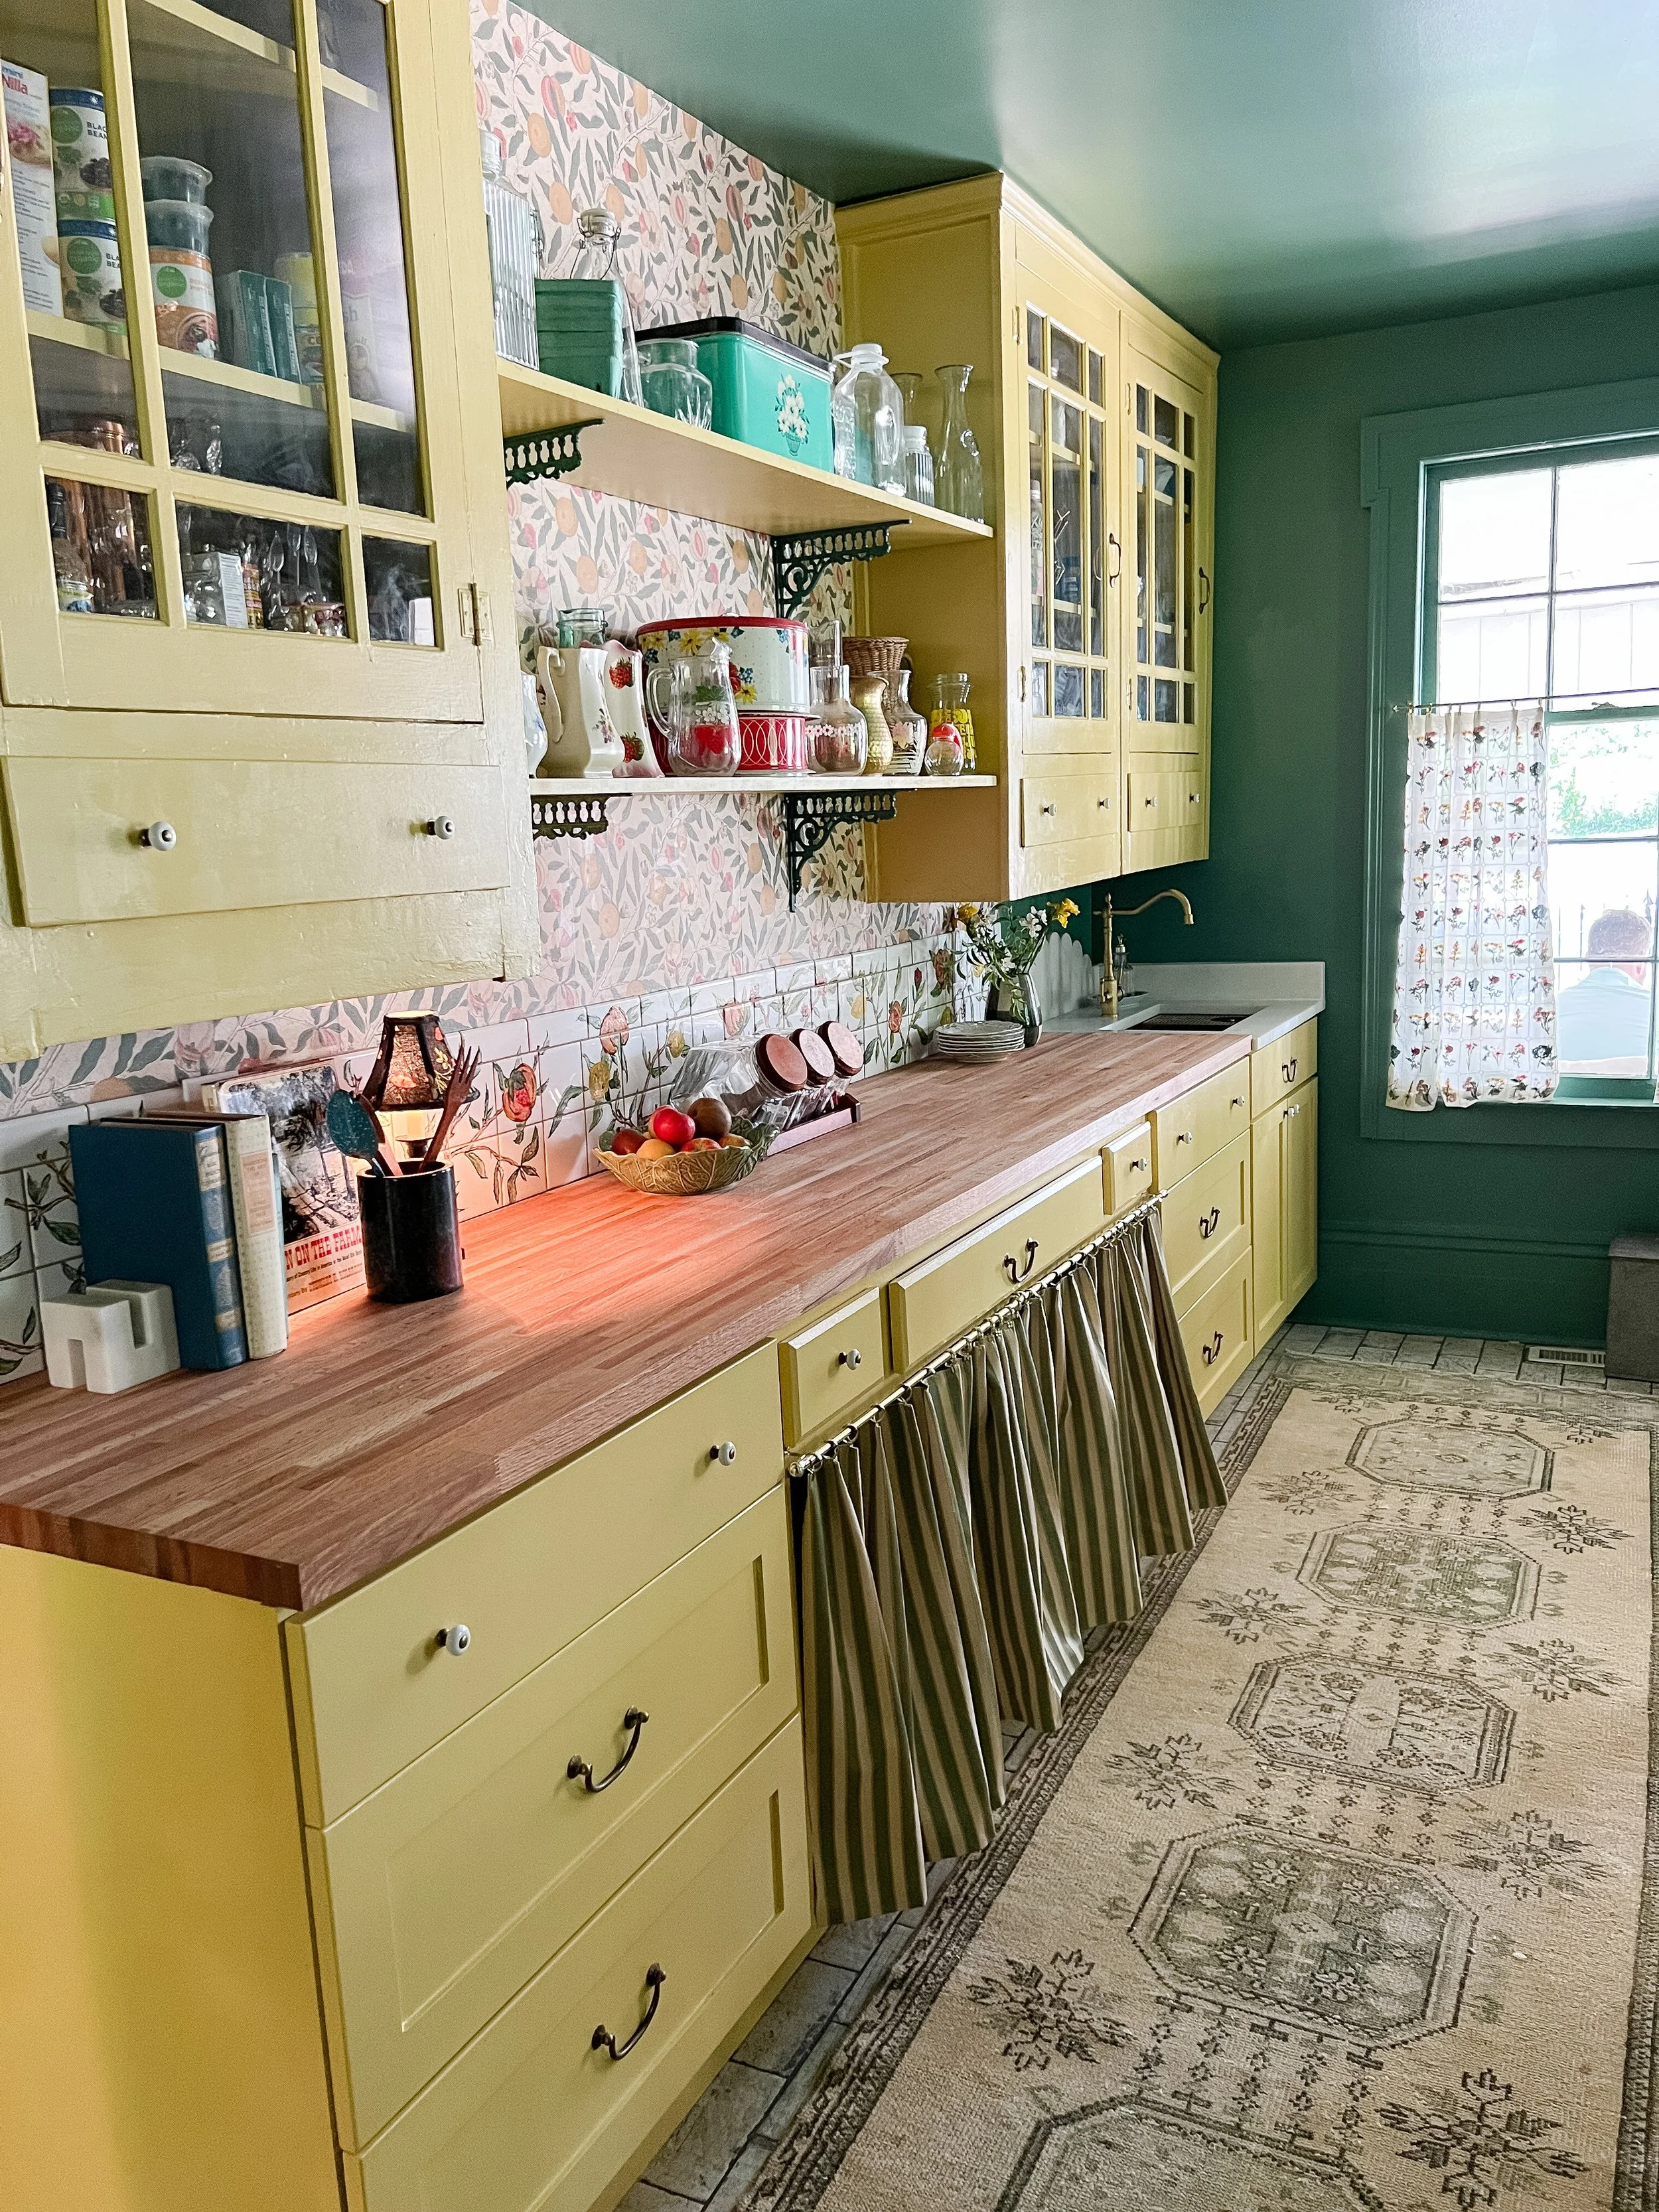
The next obstacle I faced was what color I should paint the cabinets! I went back and forth between green and yellow but ultimately decided to stay ahead of the trend and went with, Benjamin Moore Yosemite Yellow and I am SO glad I did. It definitely comes across more bold in photos but is a perfect historical, buttery looking yellow tone that really pops in the space and coordinates so well with the wallpaper and other colors in the space. To get the best of both worlds, I decided to still do green on the walls and ceiling! I chose a very classic mid-tone green (almost a Kelly Green), Hanging Vine by Valpsar, which has a very vintage look too I think.
The contractors we hired to install the cabinets also sanded down and painted all the upper cabinets as needed to make them ready for mounting and new hardware. We did have to add some new latches, do some wood filling for holes/damaged areas, and do some sanding/cutting down on the doors to make sure they open and close easily after many years of old paint and dust sitting on them. I think they turned out perfectly though and you would never know that we pieced together all these cabinets separately! I did a mix of hardware for the vintage cottage look including these knobs on top drawers, these handles on upper cabinets, and these handles on the lower cabinets. I also knew I wanted to remove some of the cabinet doors and add a cabinet curtain skirt instead in a few different areas which was very easy and adds so much charm to the cabinets- more details on that in the cabinet section below!


This was, shockingly, the easiest and smoothest DIY I took on for this project! I hand-painted all the tiles Tuesday night using a mix of porcelain paints and paint pins (you can mix them just like paint!), baked them Wednesday morning, and installed them using a Musselbound Adhesive Tile Mat Wednesday night (this project had to be done by Thursday morning, so I was definitely cutting it close, but I got it done!).
This was also my first time tackling any tiling project, but I was shocked at how smoothly it went! I followed @athomewithashley’s tutorial for painted tiles, and it worked perfectly! You can find her full tutorial here- it was very helpful to guide me, and I love following everything she does!
You can find a full blog post dedicated to this project, including my entire supply list, by clicking here!
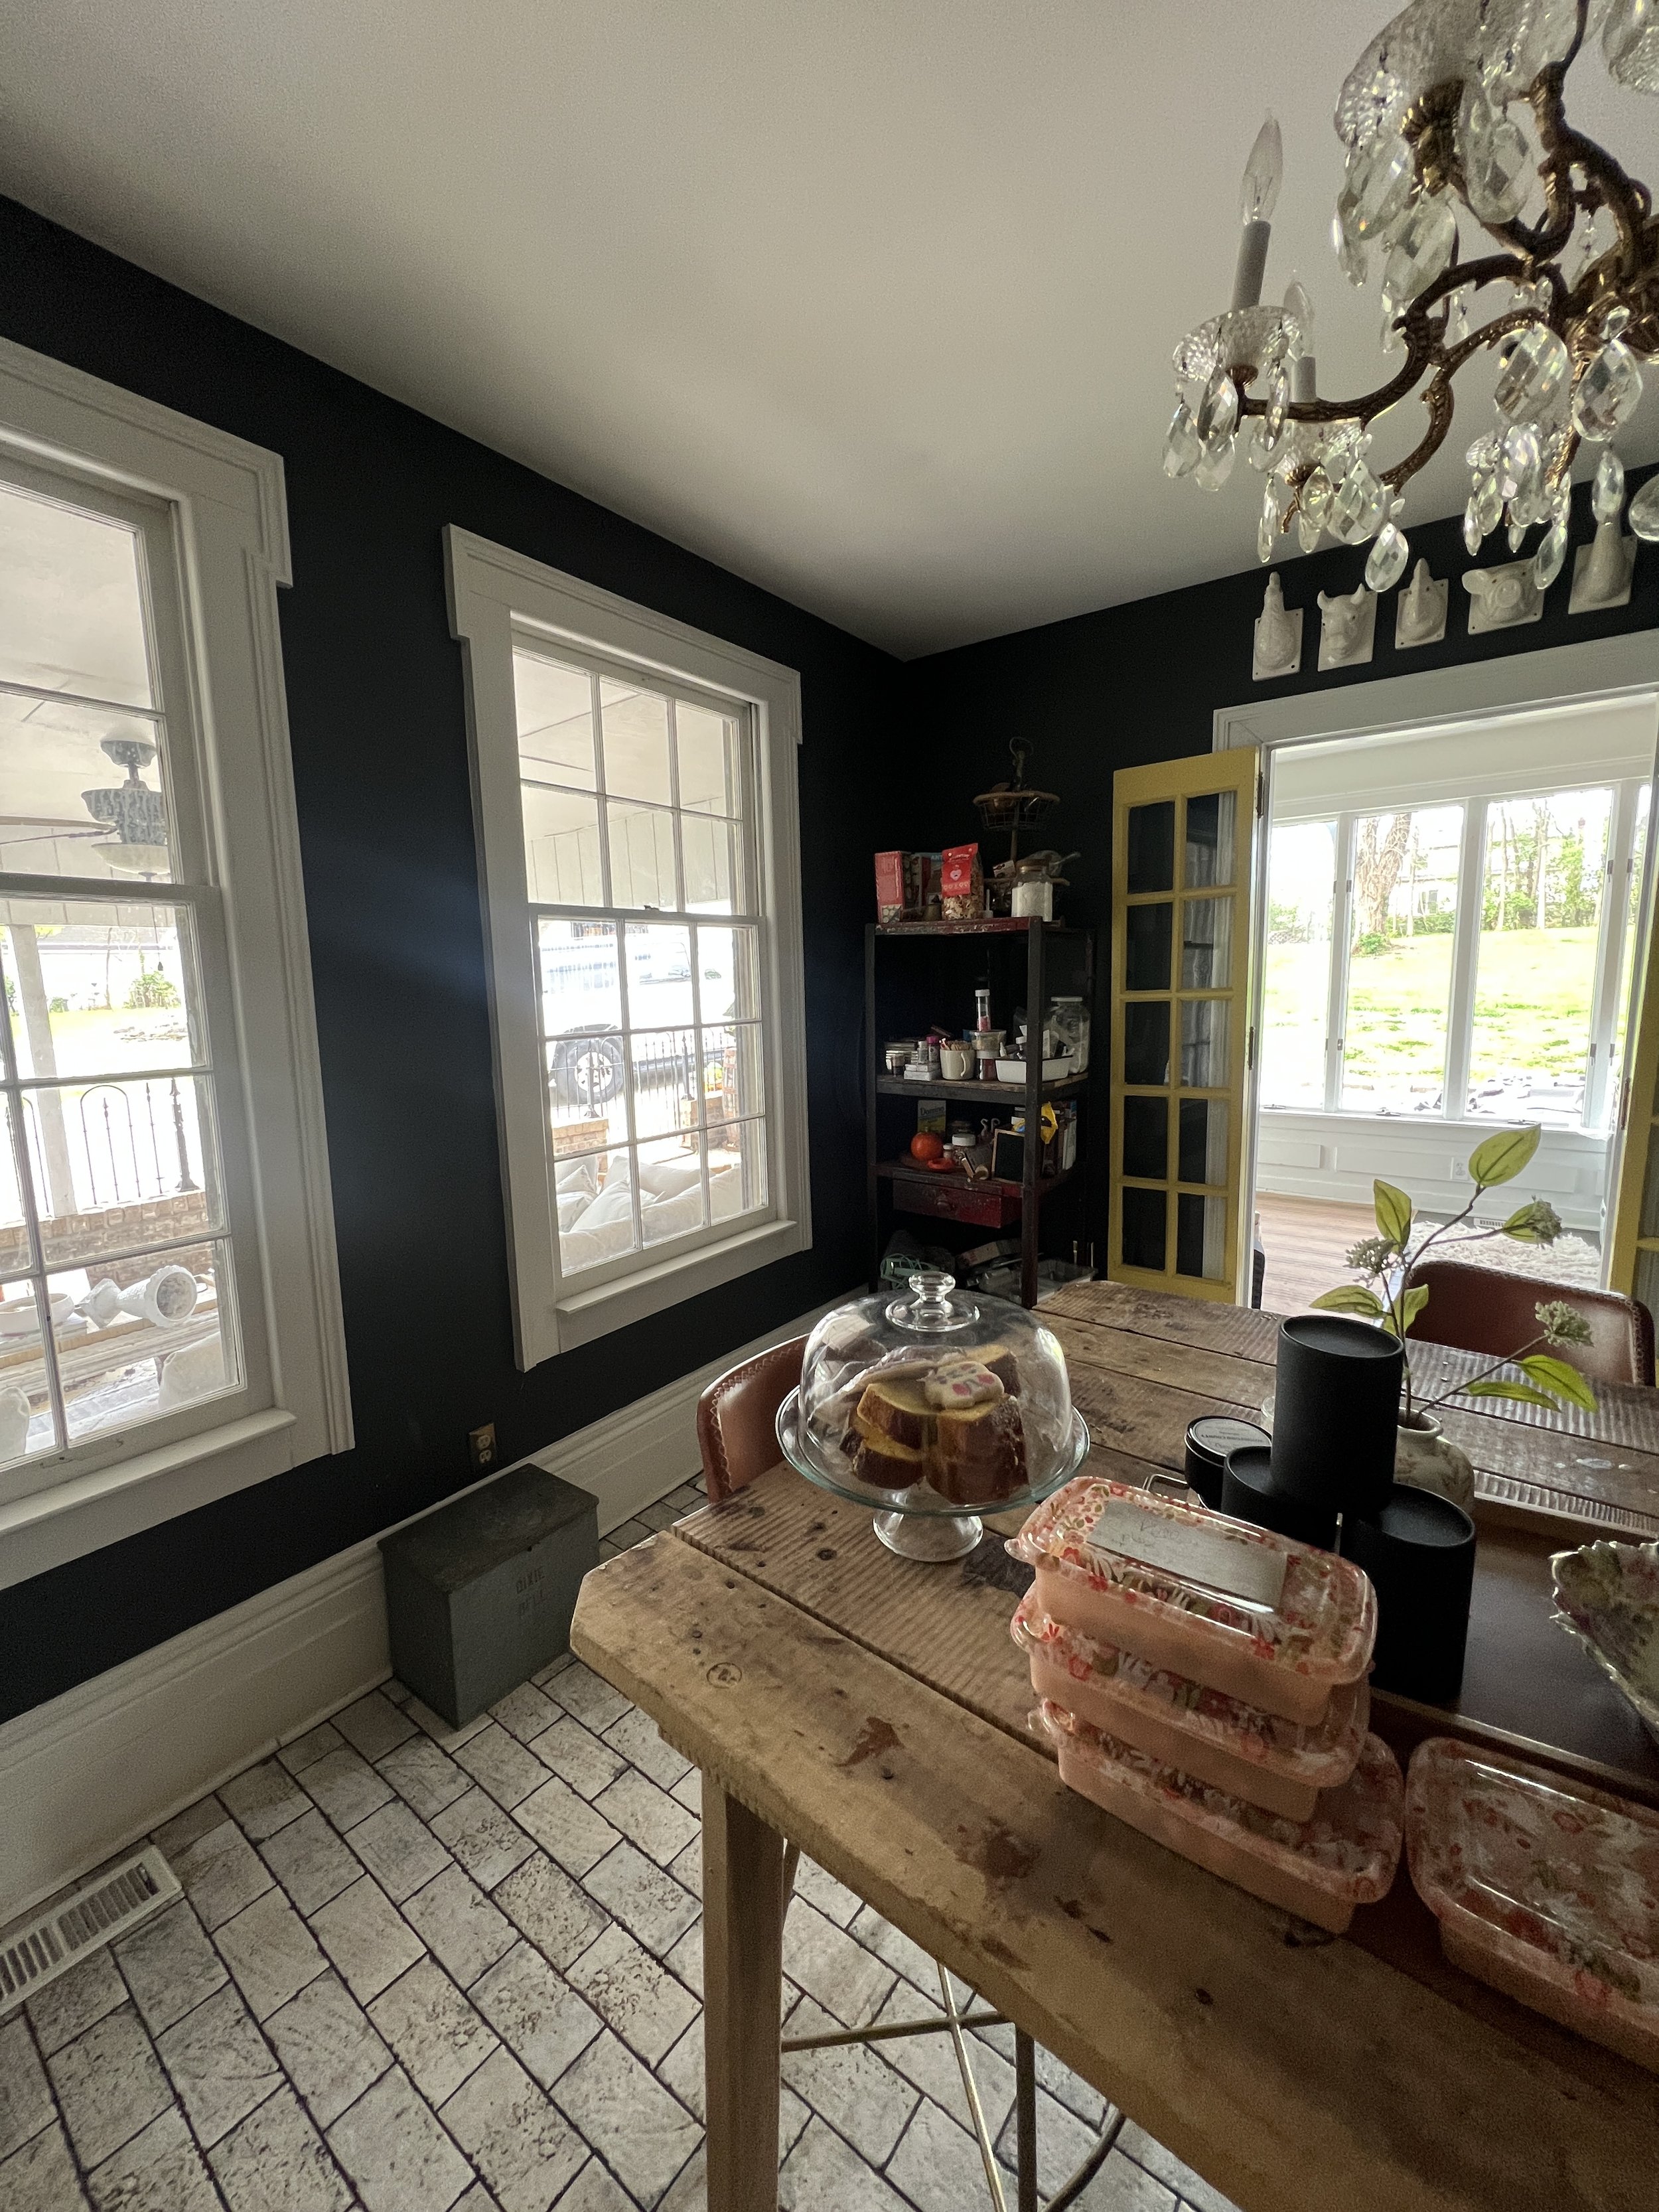
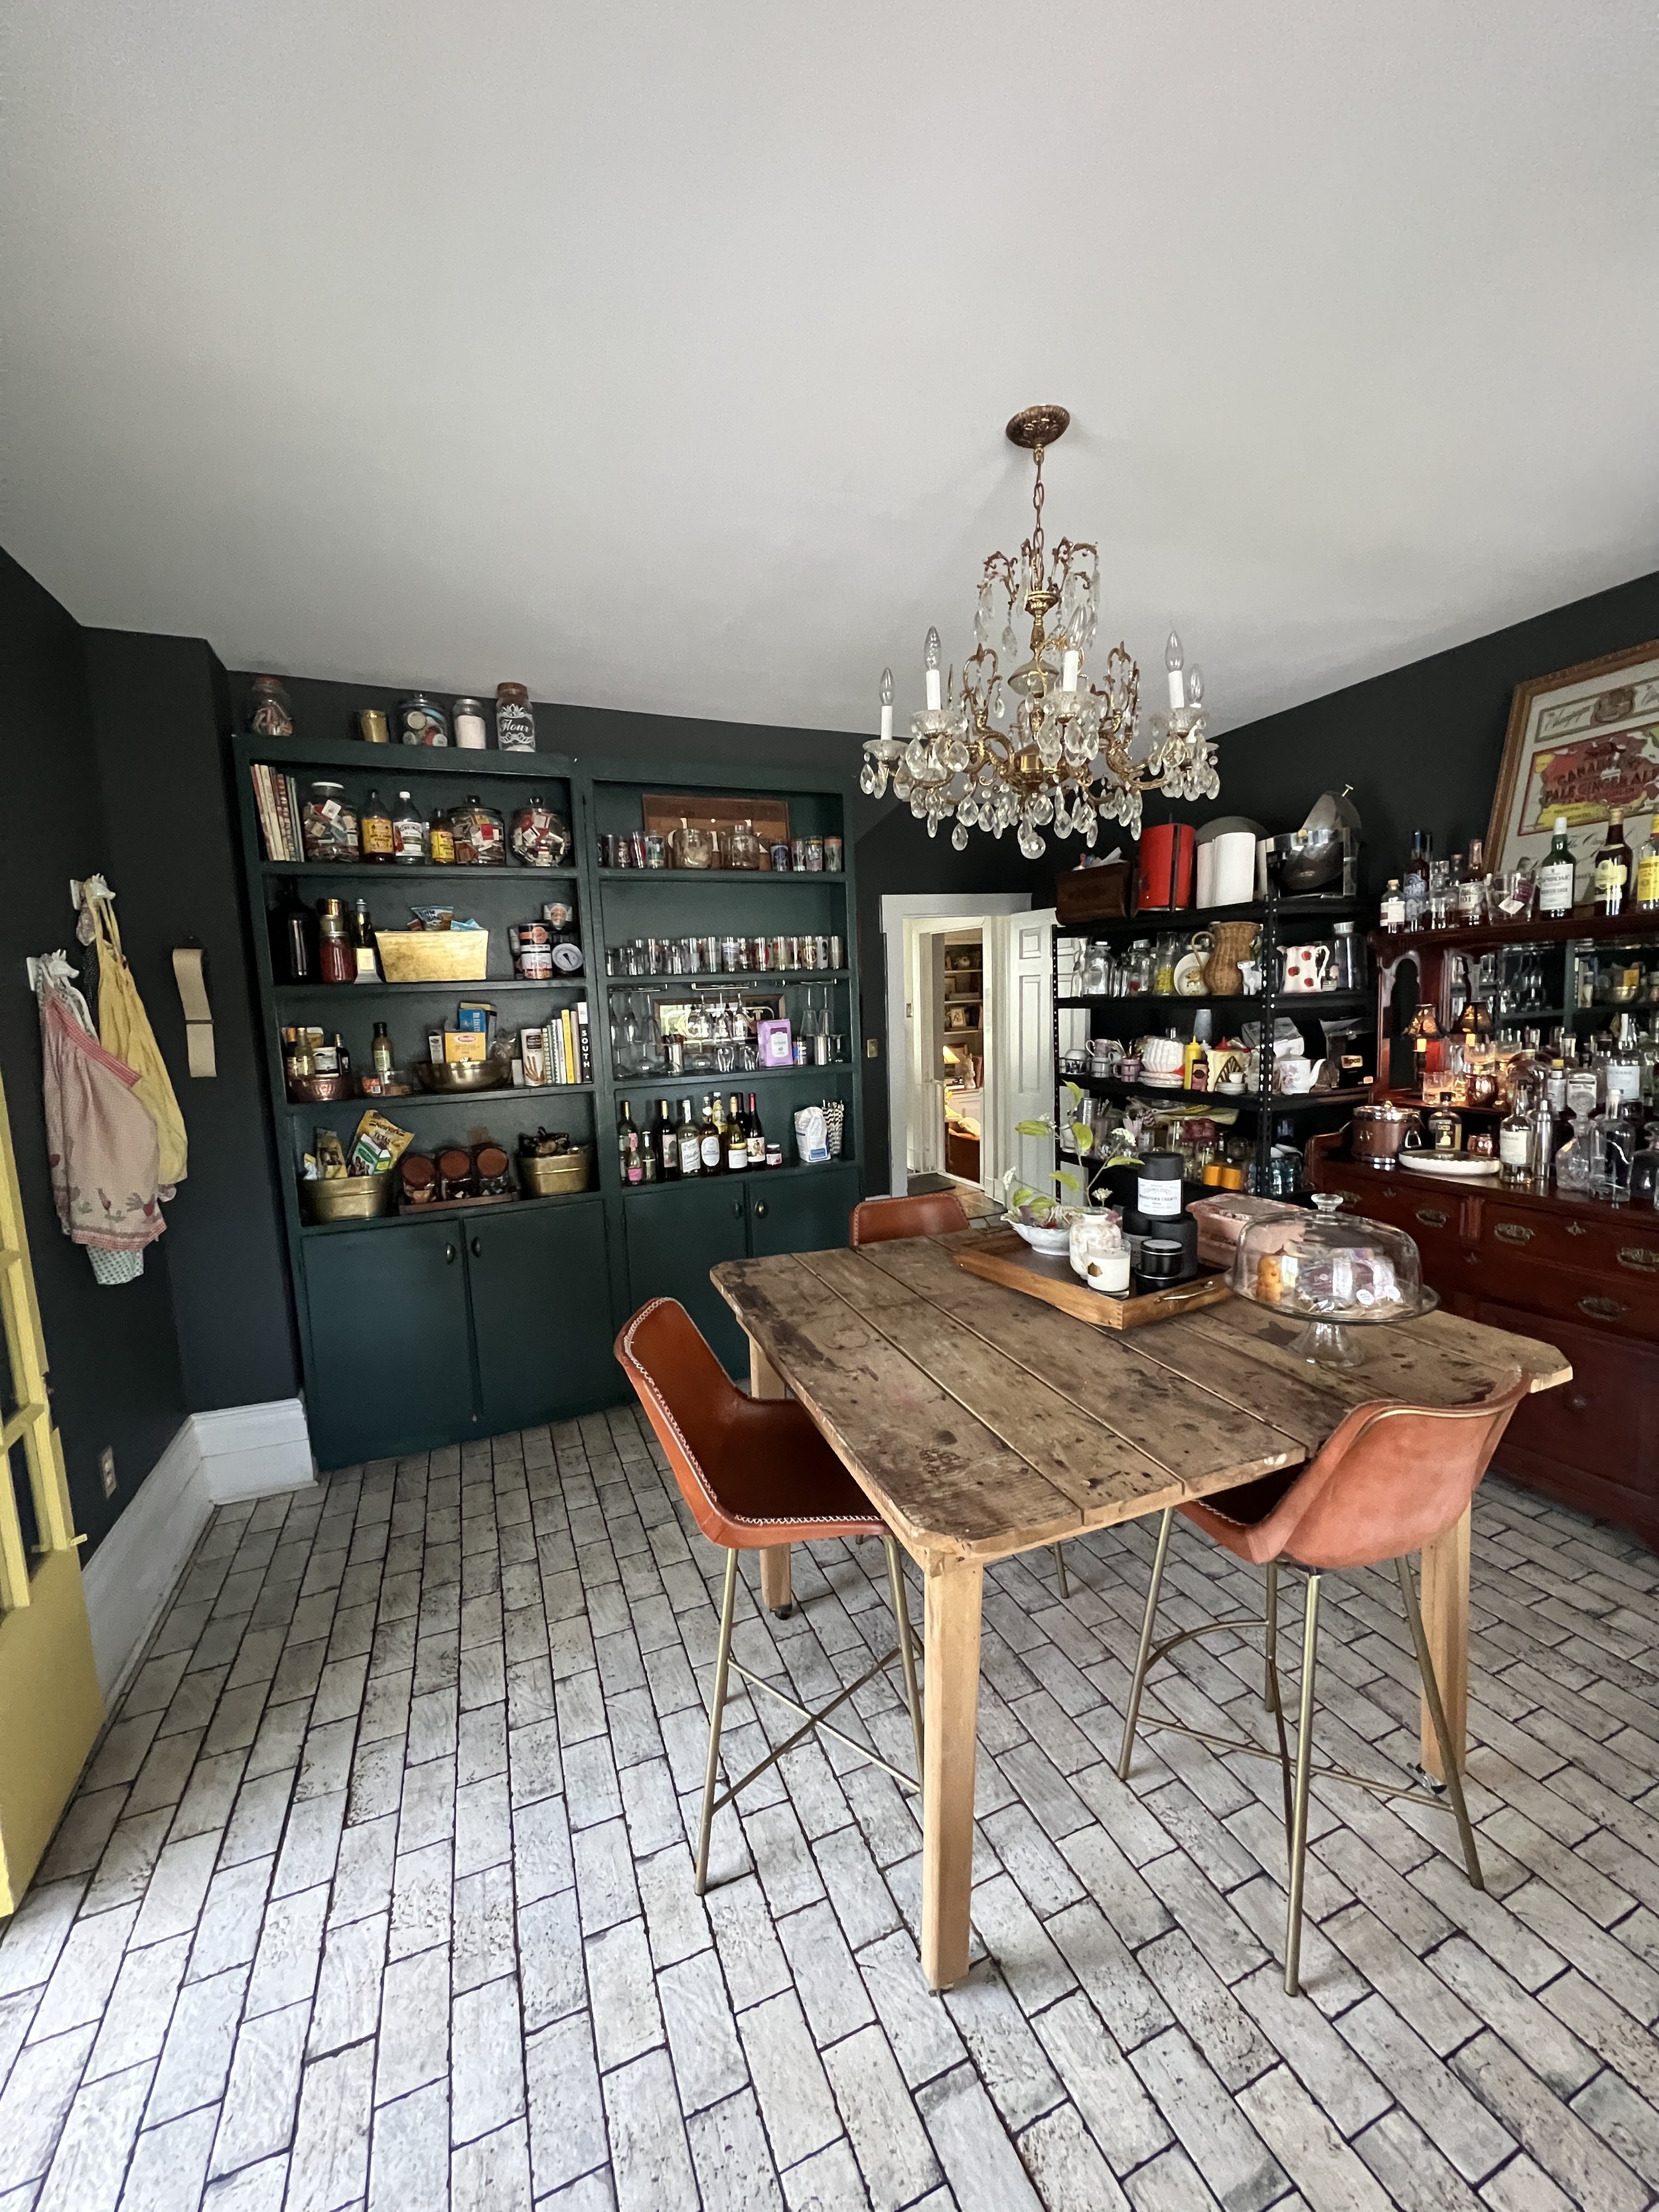
Above you can see the side cabinets before!
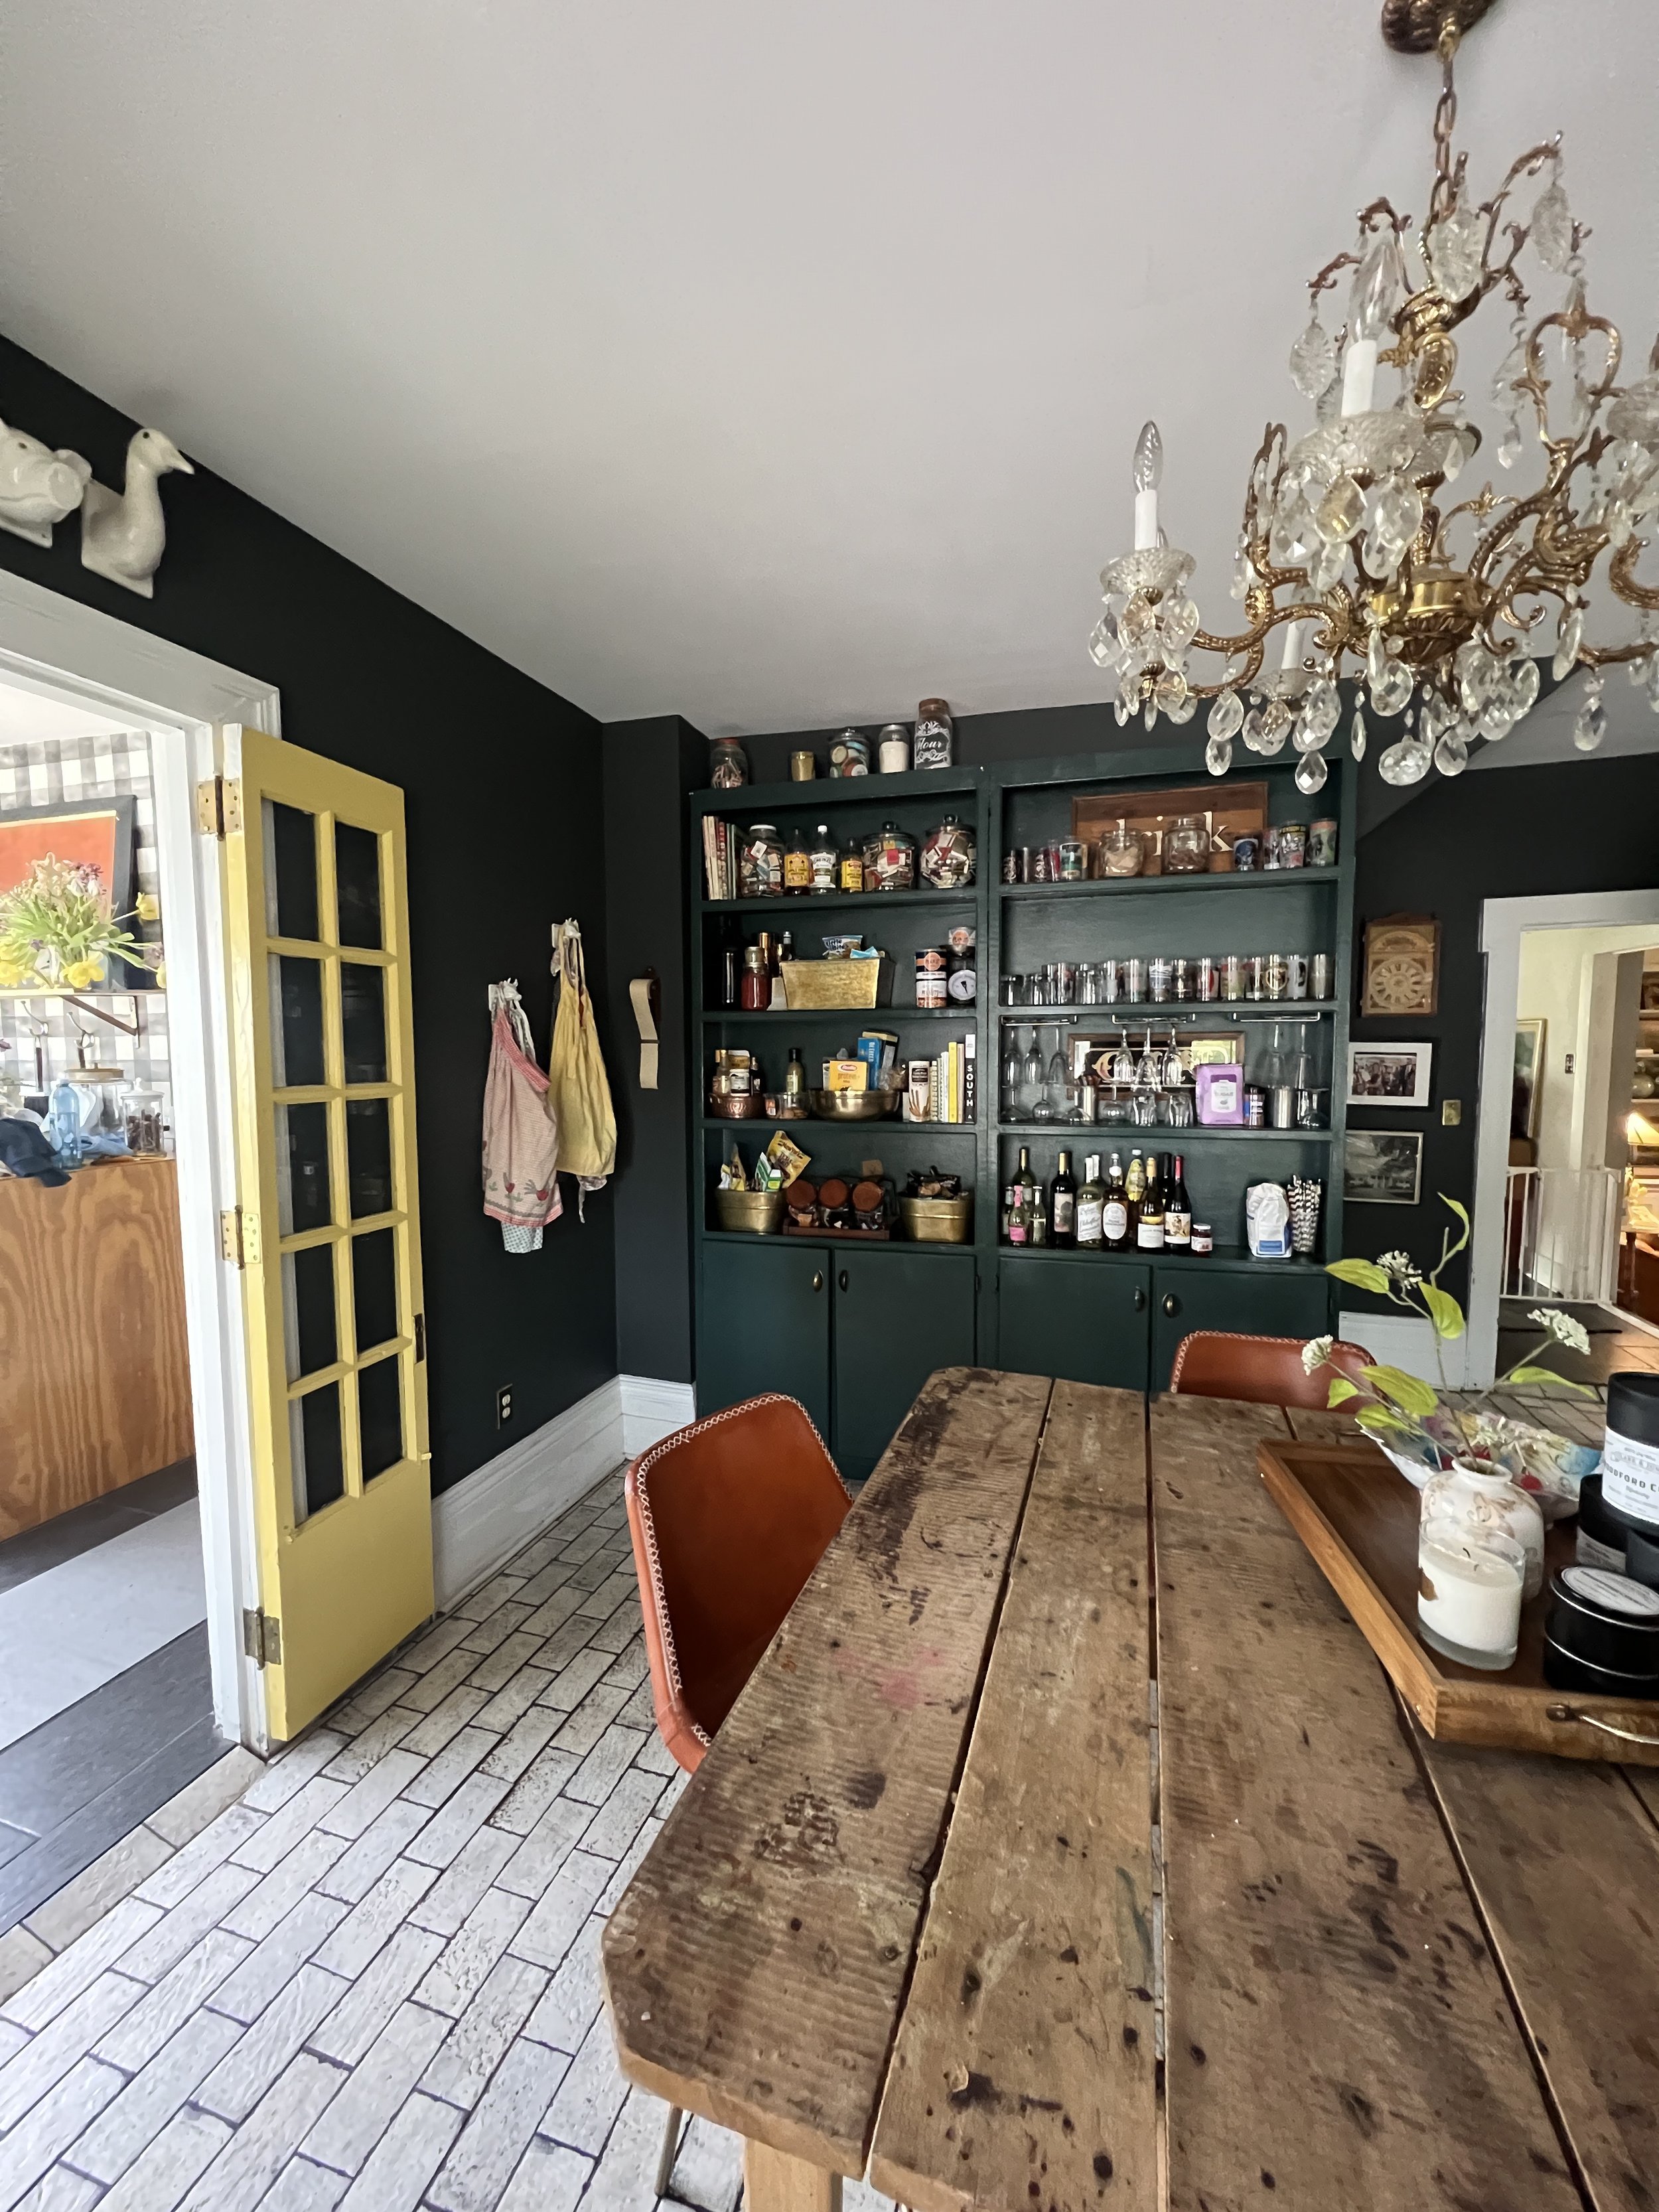
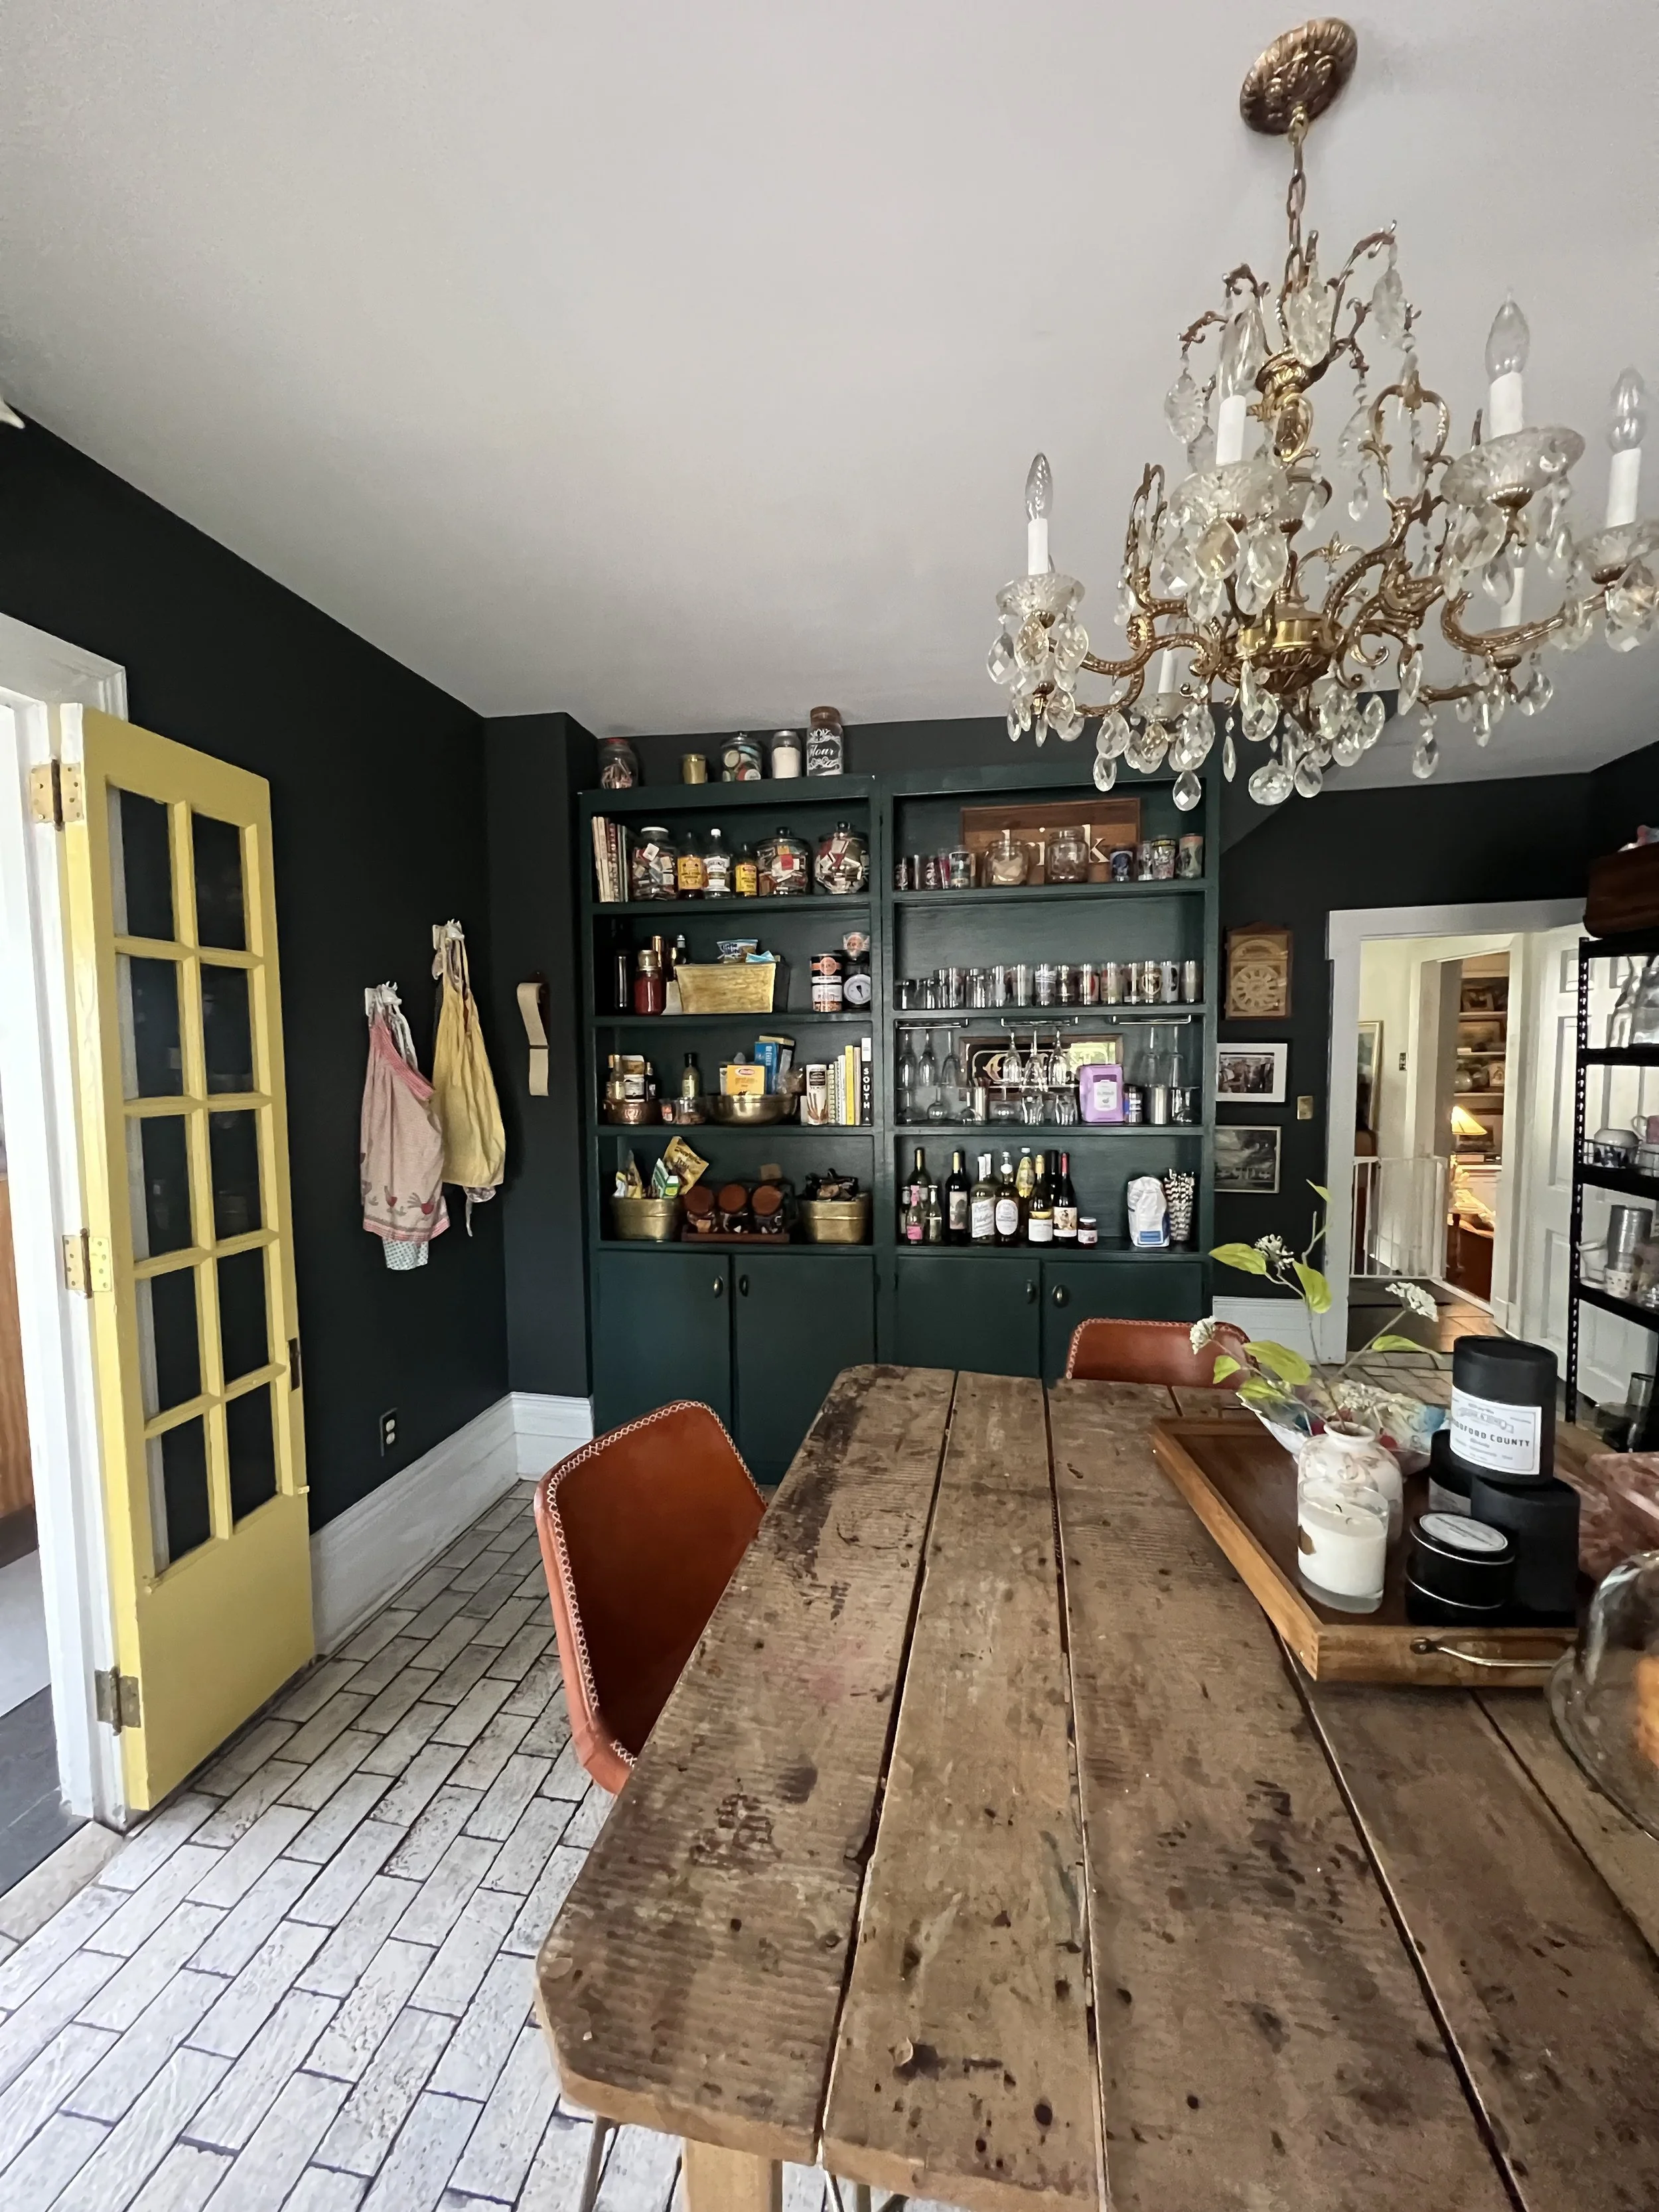
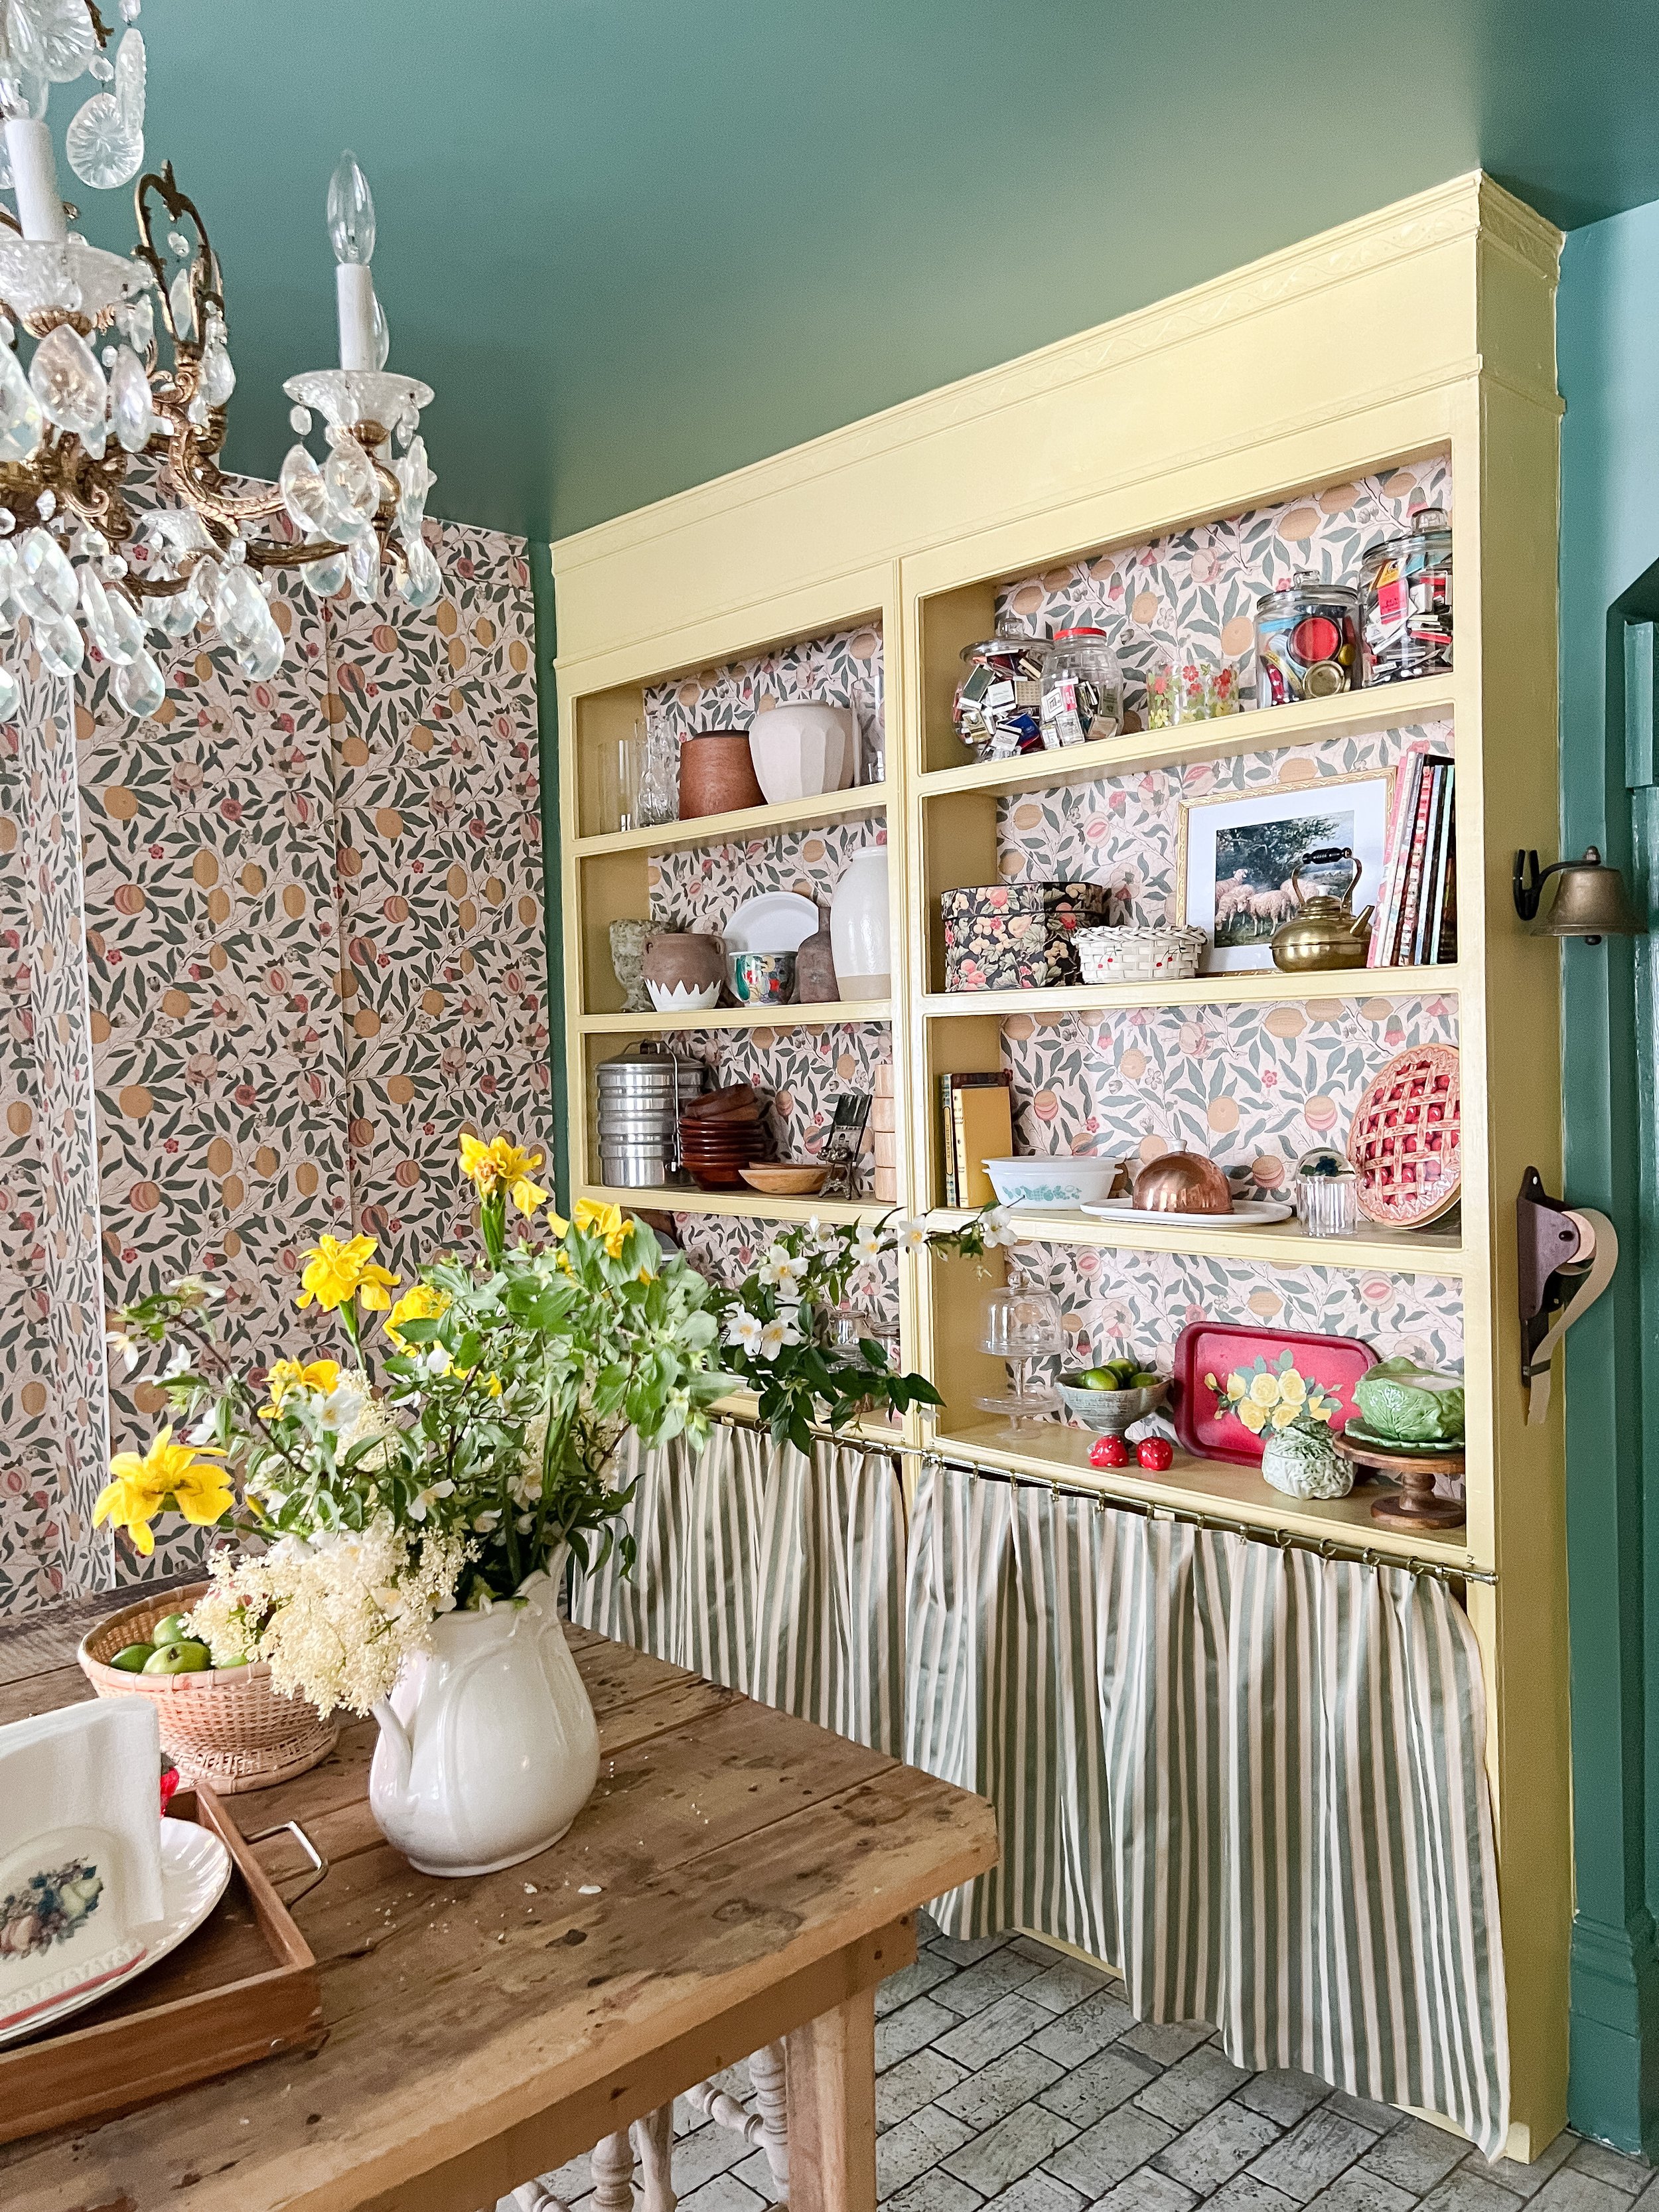
The cabinets along the side wall were a Habitat Restore find years ago and they fit this little nook of the wall so well, that I decided to keep them and revamp them! Trimming these out to the ceiling made SUCH a difference in making them look for built-in and complete. We did this by adding a 1x8x8 board to the top and then adding the decorative trim to all the seams/edges to finish it out (even around the side too!). We caulked all seams for a finished look and then we painted them the same color as the other cabinets and wallpapered the back of the shelves. Now they really look “built-in” from all angles!
I also removed the bottom doors on the cabinets and did a matching curtain skirt to the back cabinets- which helps tie everything together! These offer such a great mix of both open and closed storage and are great for my servingware, vases, tupperwares, etc.!


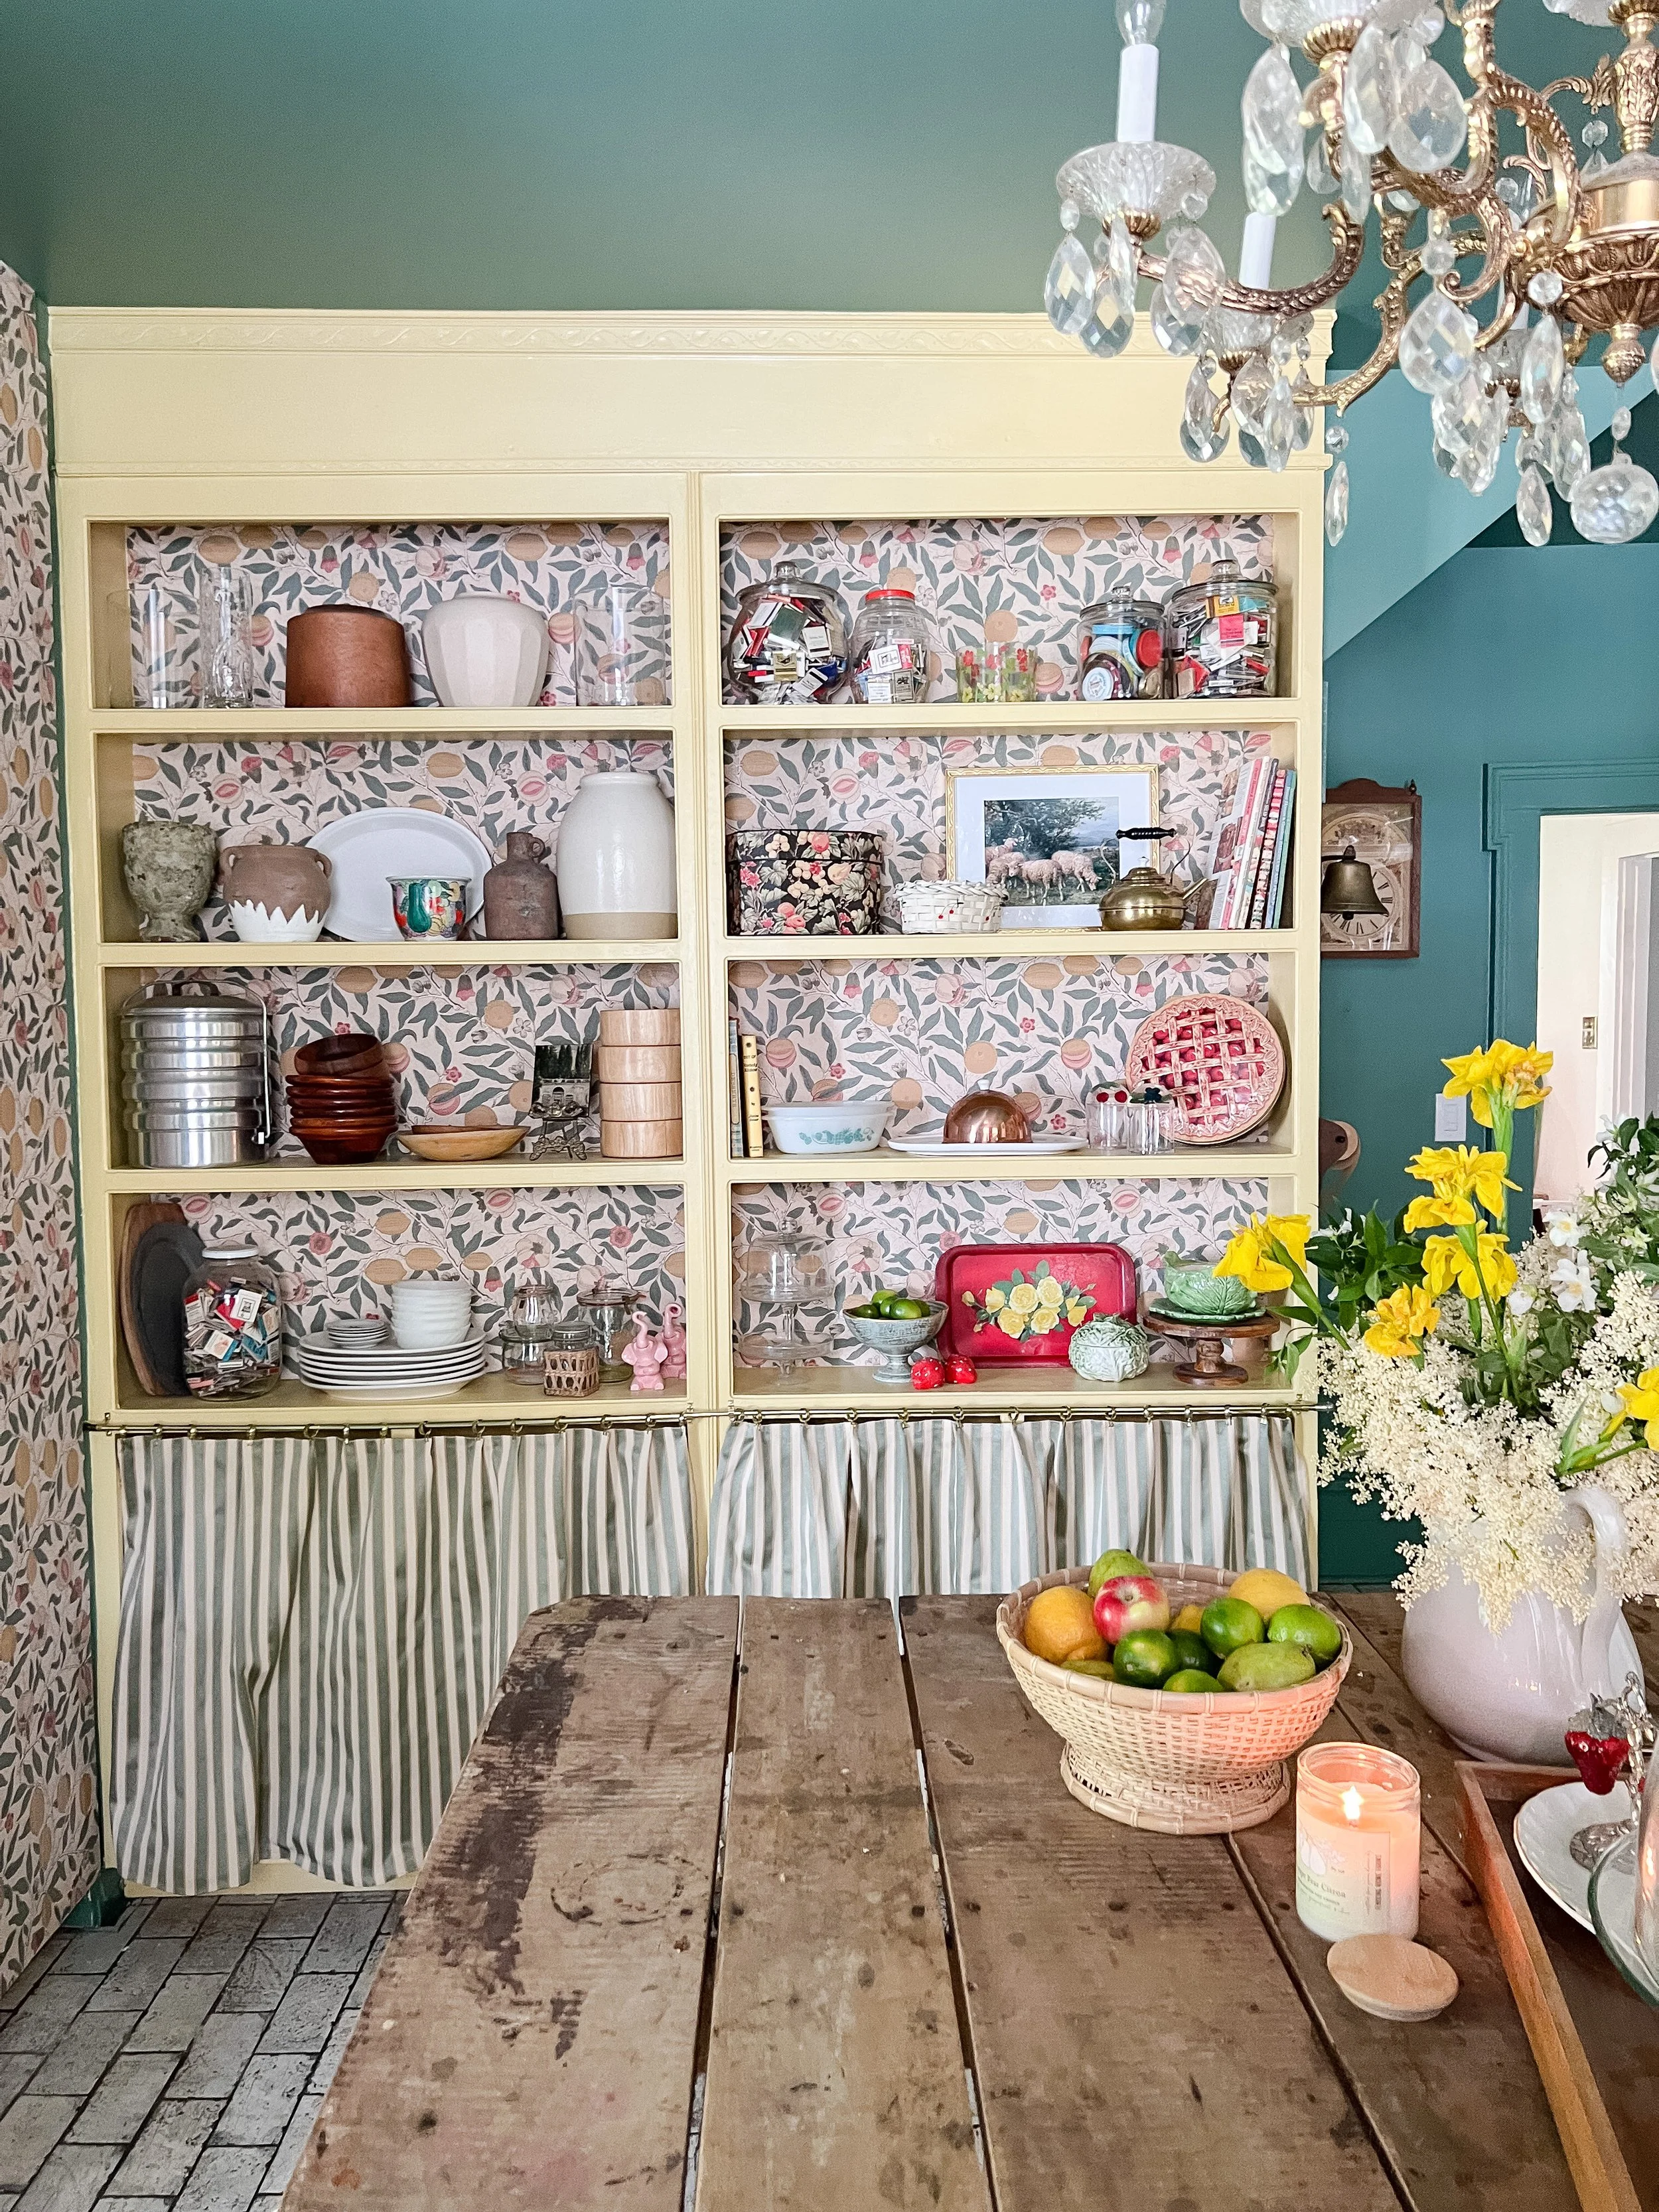

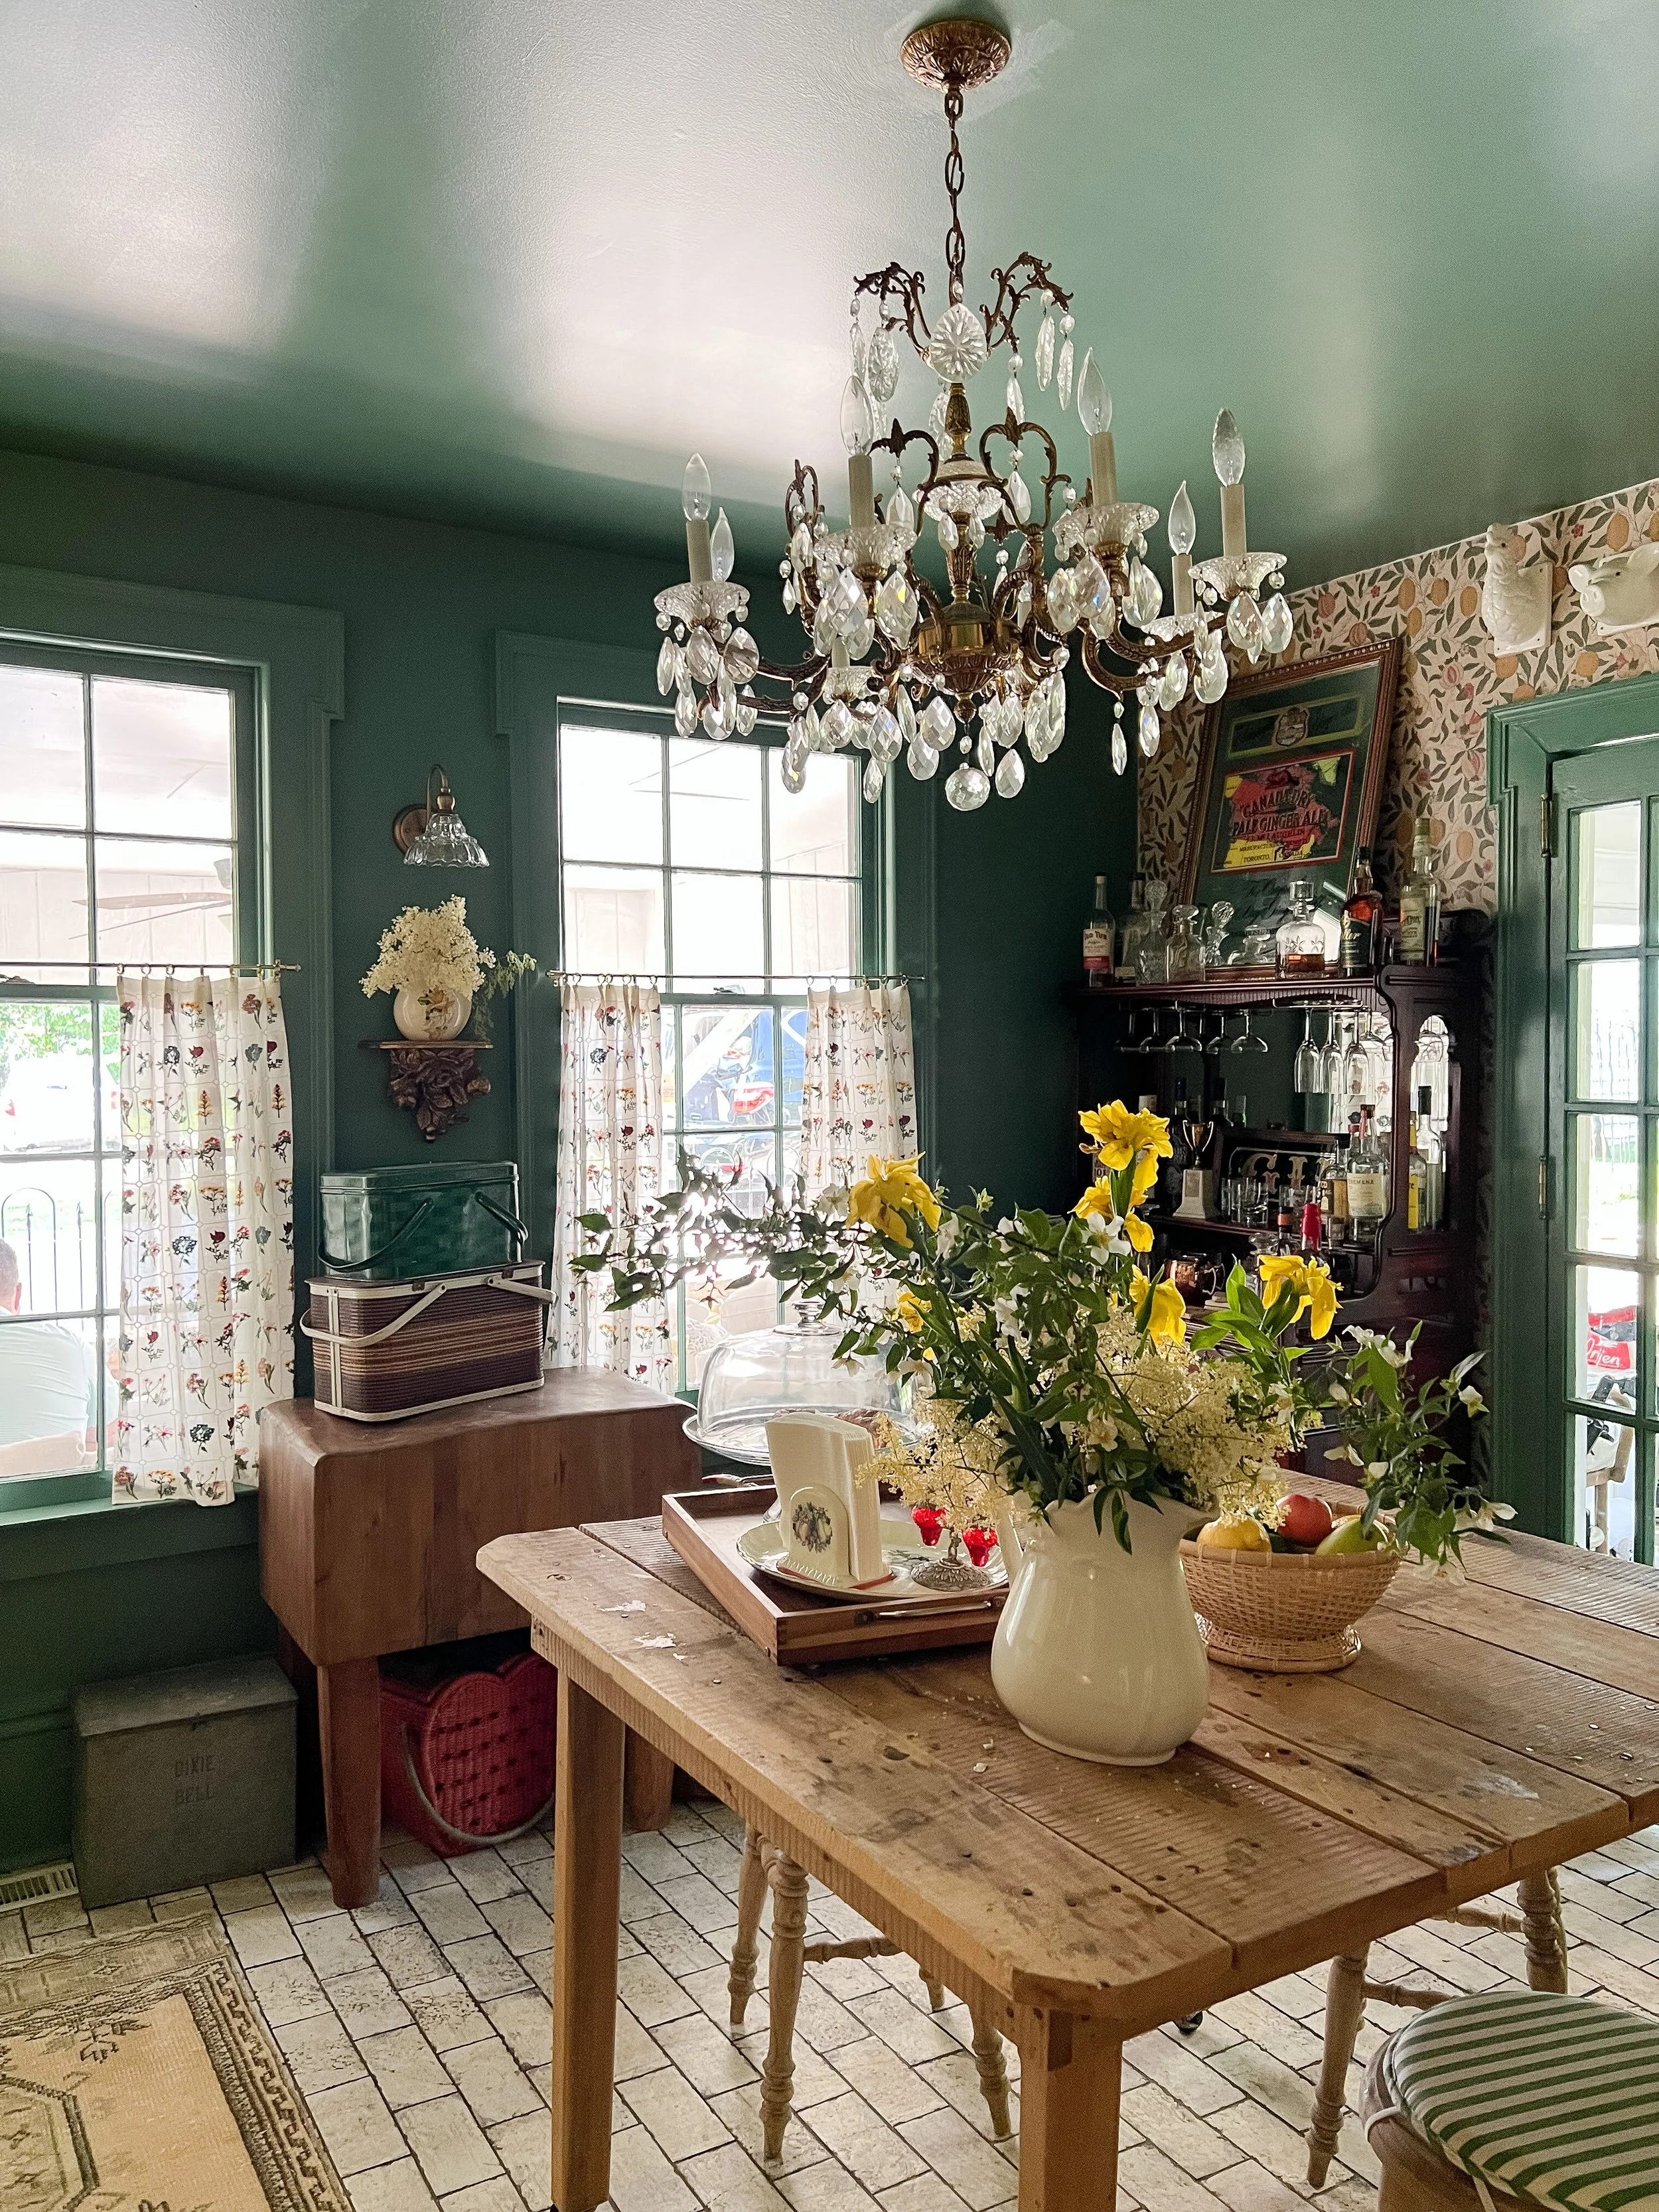
It’s no secret that I have become obsessed with cafe curtains and now have them in many rooms of my home (I also DIY’d some for my bathroom makeover last year here). I love the look of skirted cabinets and definitely wanted to incorporate that in the design in a couple areas from the beginning. Making these is actually the same exact process as making a window cafe curtain and I used the same rods and hardware.
I also made window cafe curtains in a different fabric that is SO cute and has the best colors and print. I was initially worried that it would be a little overkill with all the competing prints but I think since there is a good distance between them, it works! The little window curtains make me so happy every time I look at them and I especially love the entire little window area with the sconce and vintage shelf we added above the butcher block! I will link the cafe curtain rods, clips, and fabrics I used below!
The process for making these is SO easy because all you need to make is a solid rectangle of fabric and then the curtain clips automatically do the pleating and the rest! I actually used hem tape and an iron as opposed to sewing and it made it even easier! I simply measured and cut the size I needed, allowing an extra couple of inches on all sides for hemming. Then I used the hem tape to finish all 4 edges, ironed from the opposite side, then attached to the rod with the clips, evenly spacing and creating a pleat with the pinch clips.
Shop striped cabinet fabric here
Shop window fabric here
Shop cafe curtain rods (smaller size) here
Shop cafe curtain rods (larger size) here
Shop cafe curtain clips

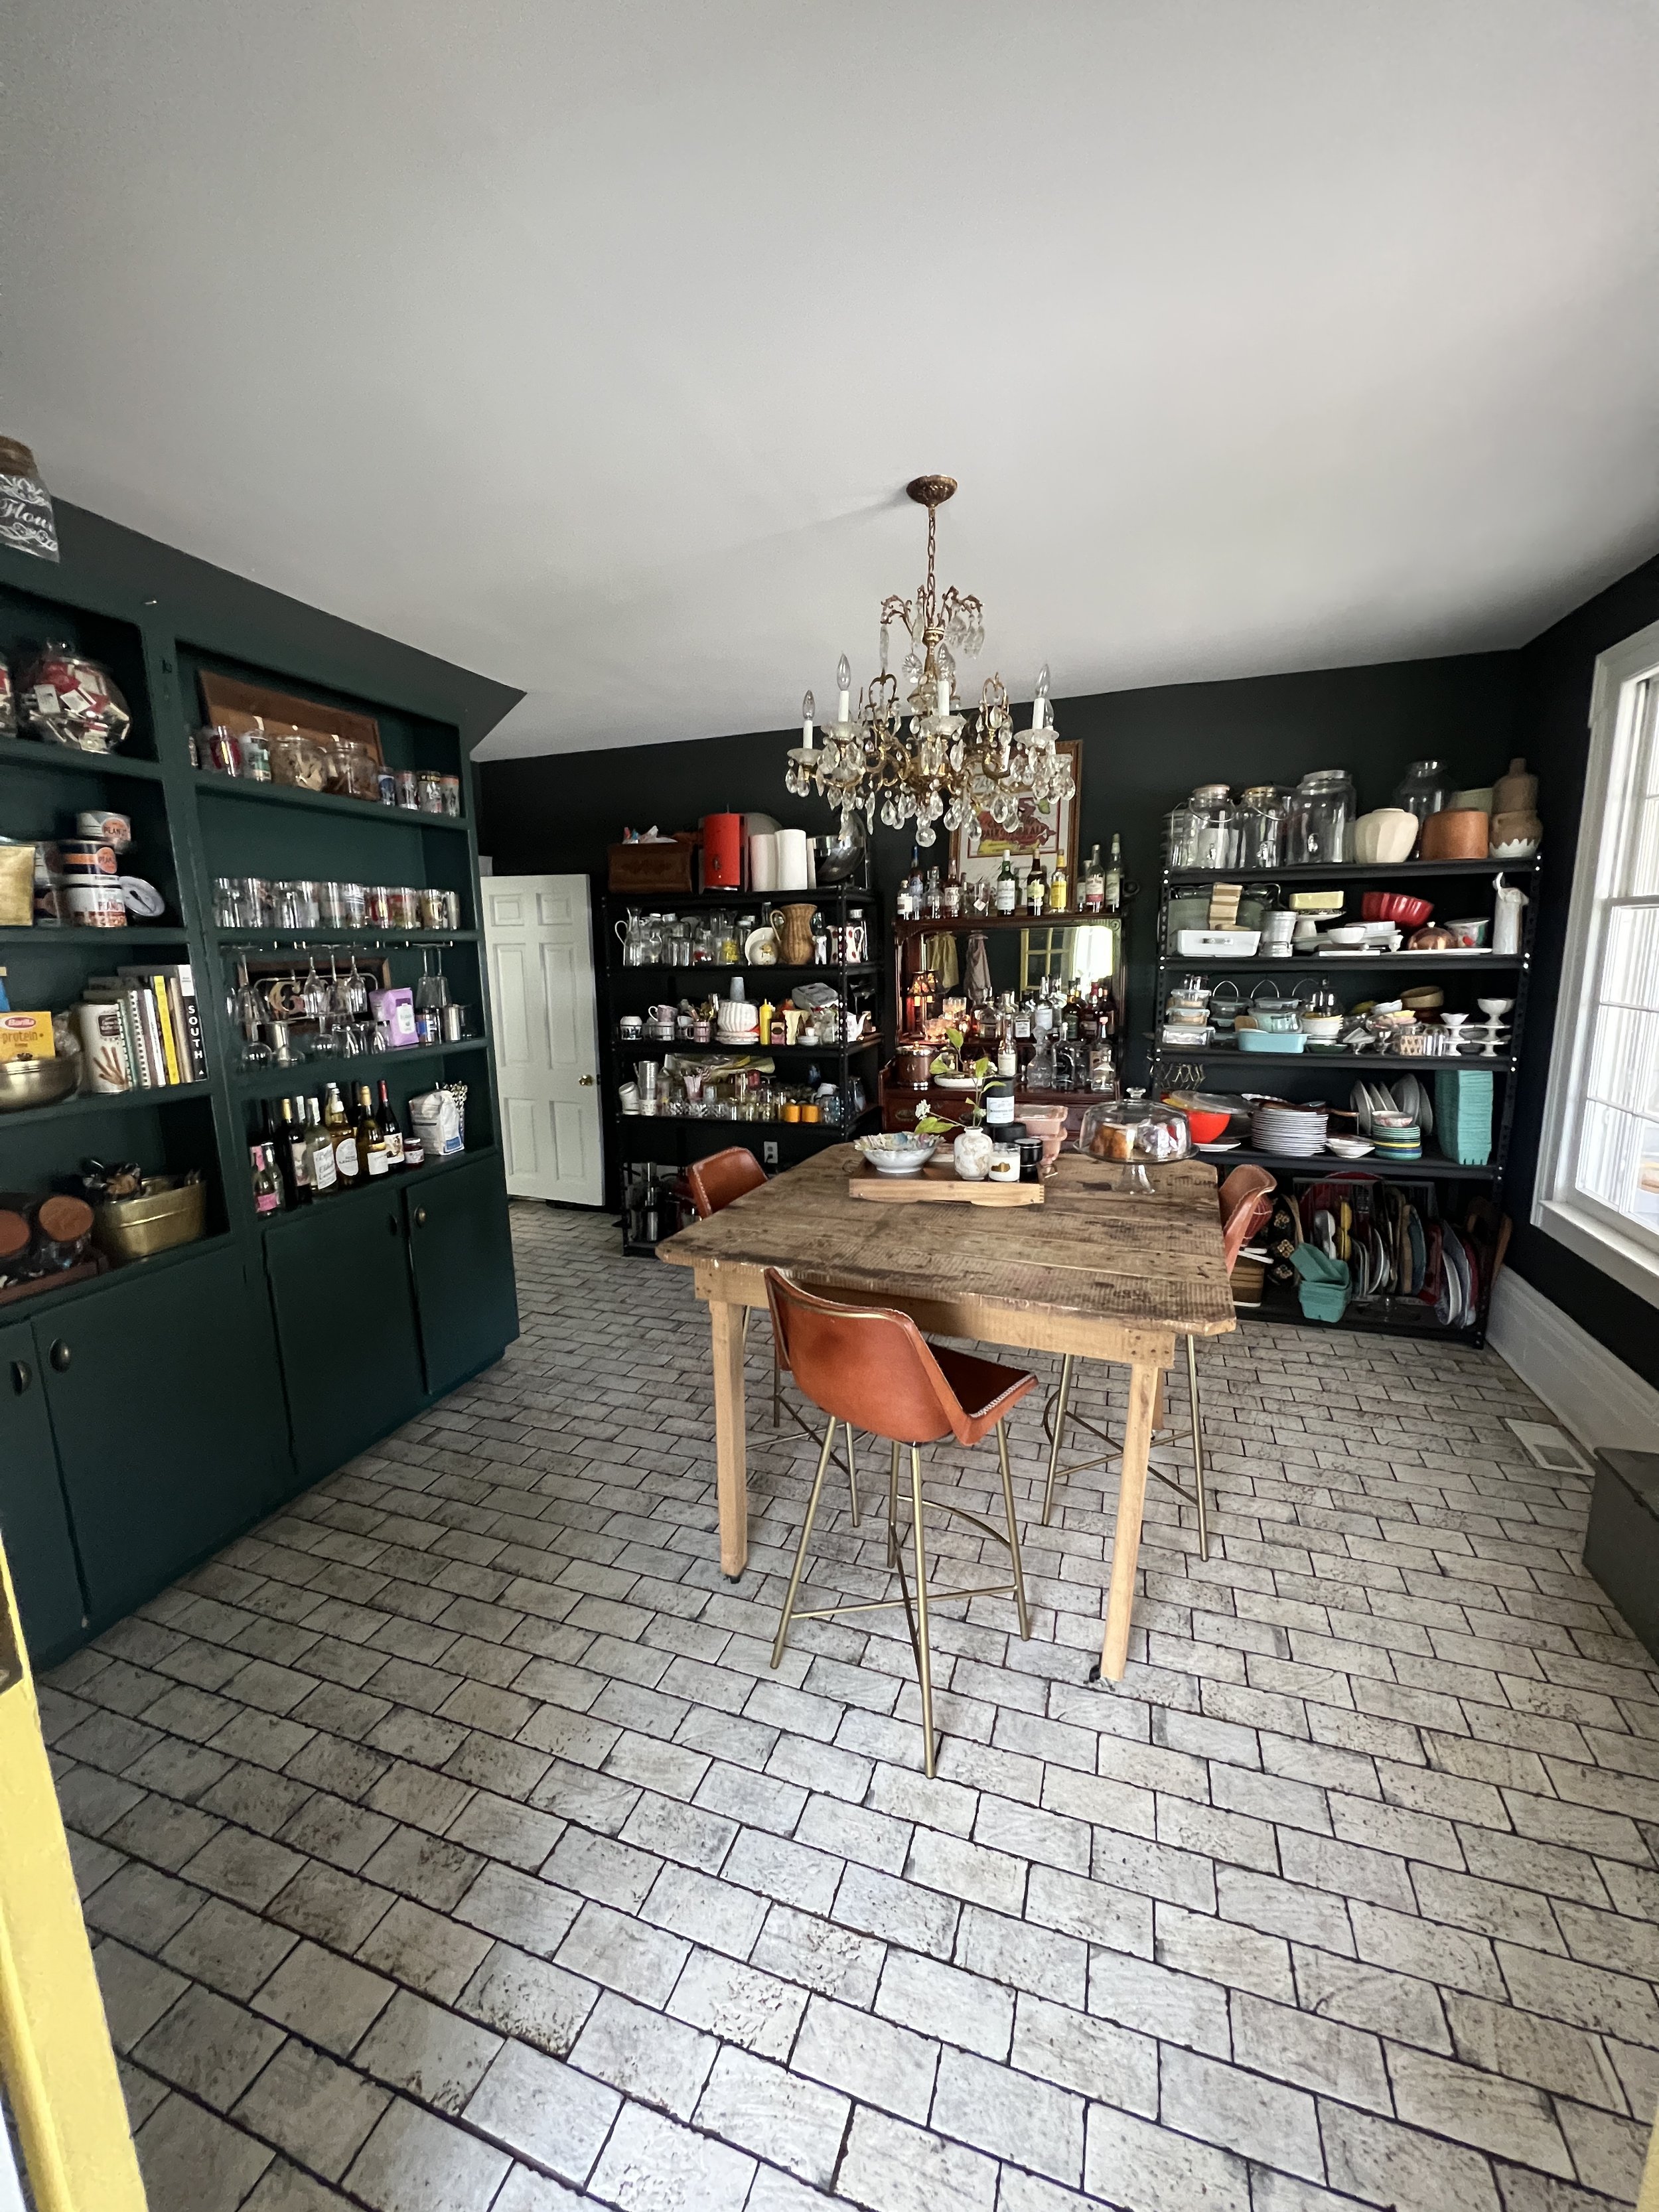
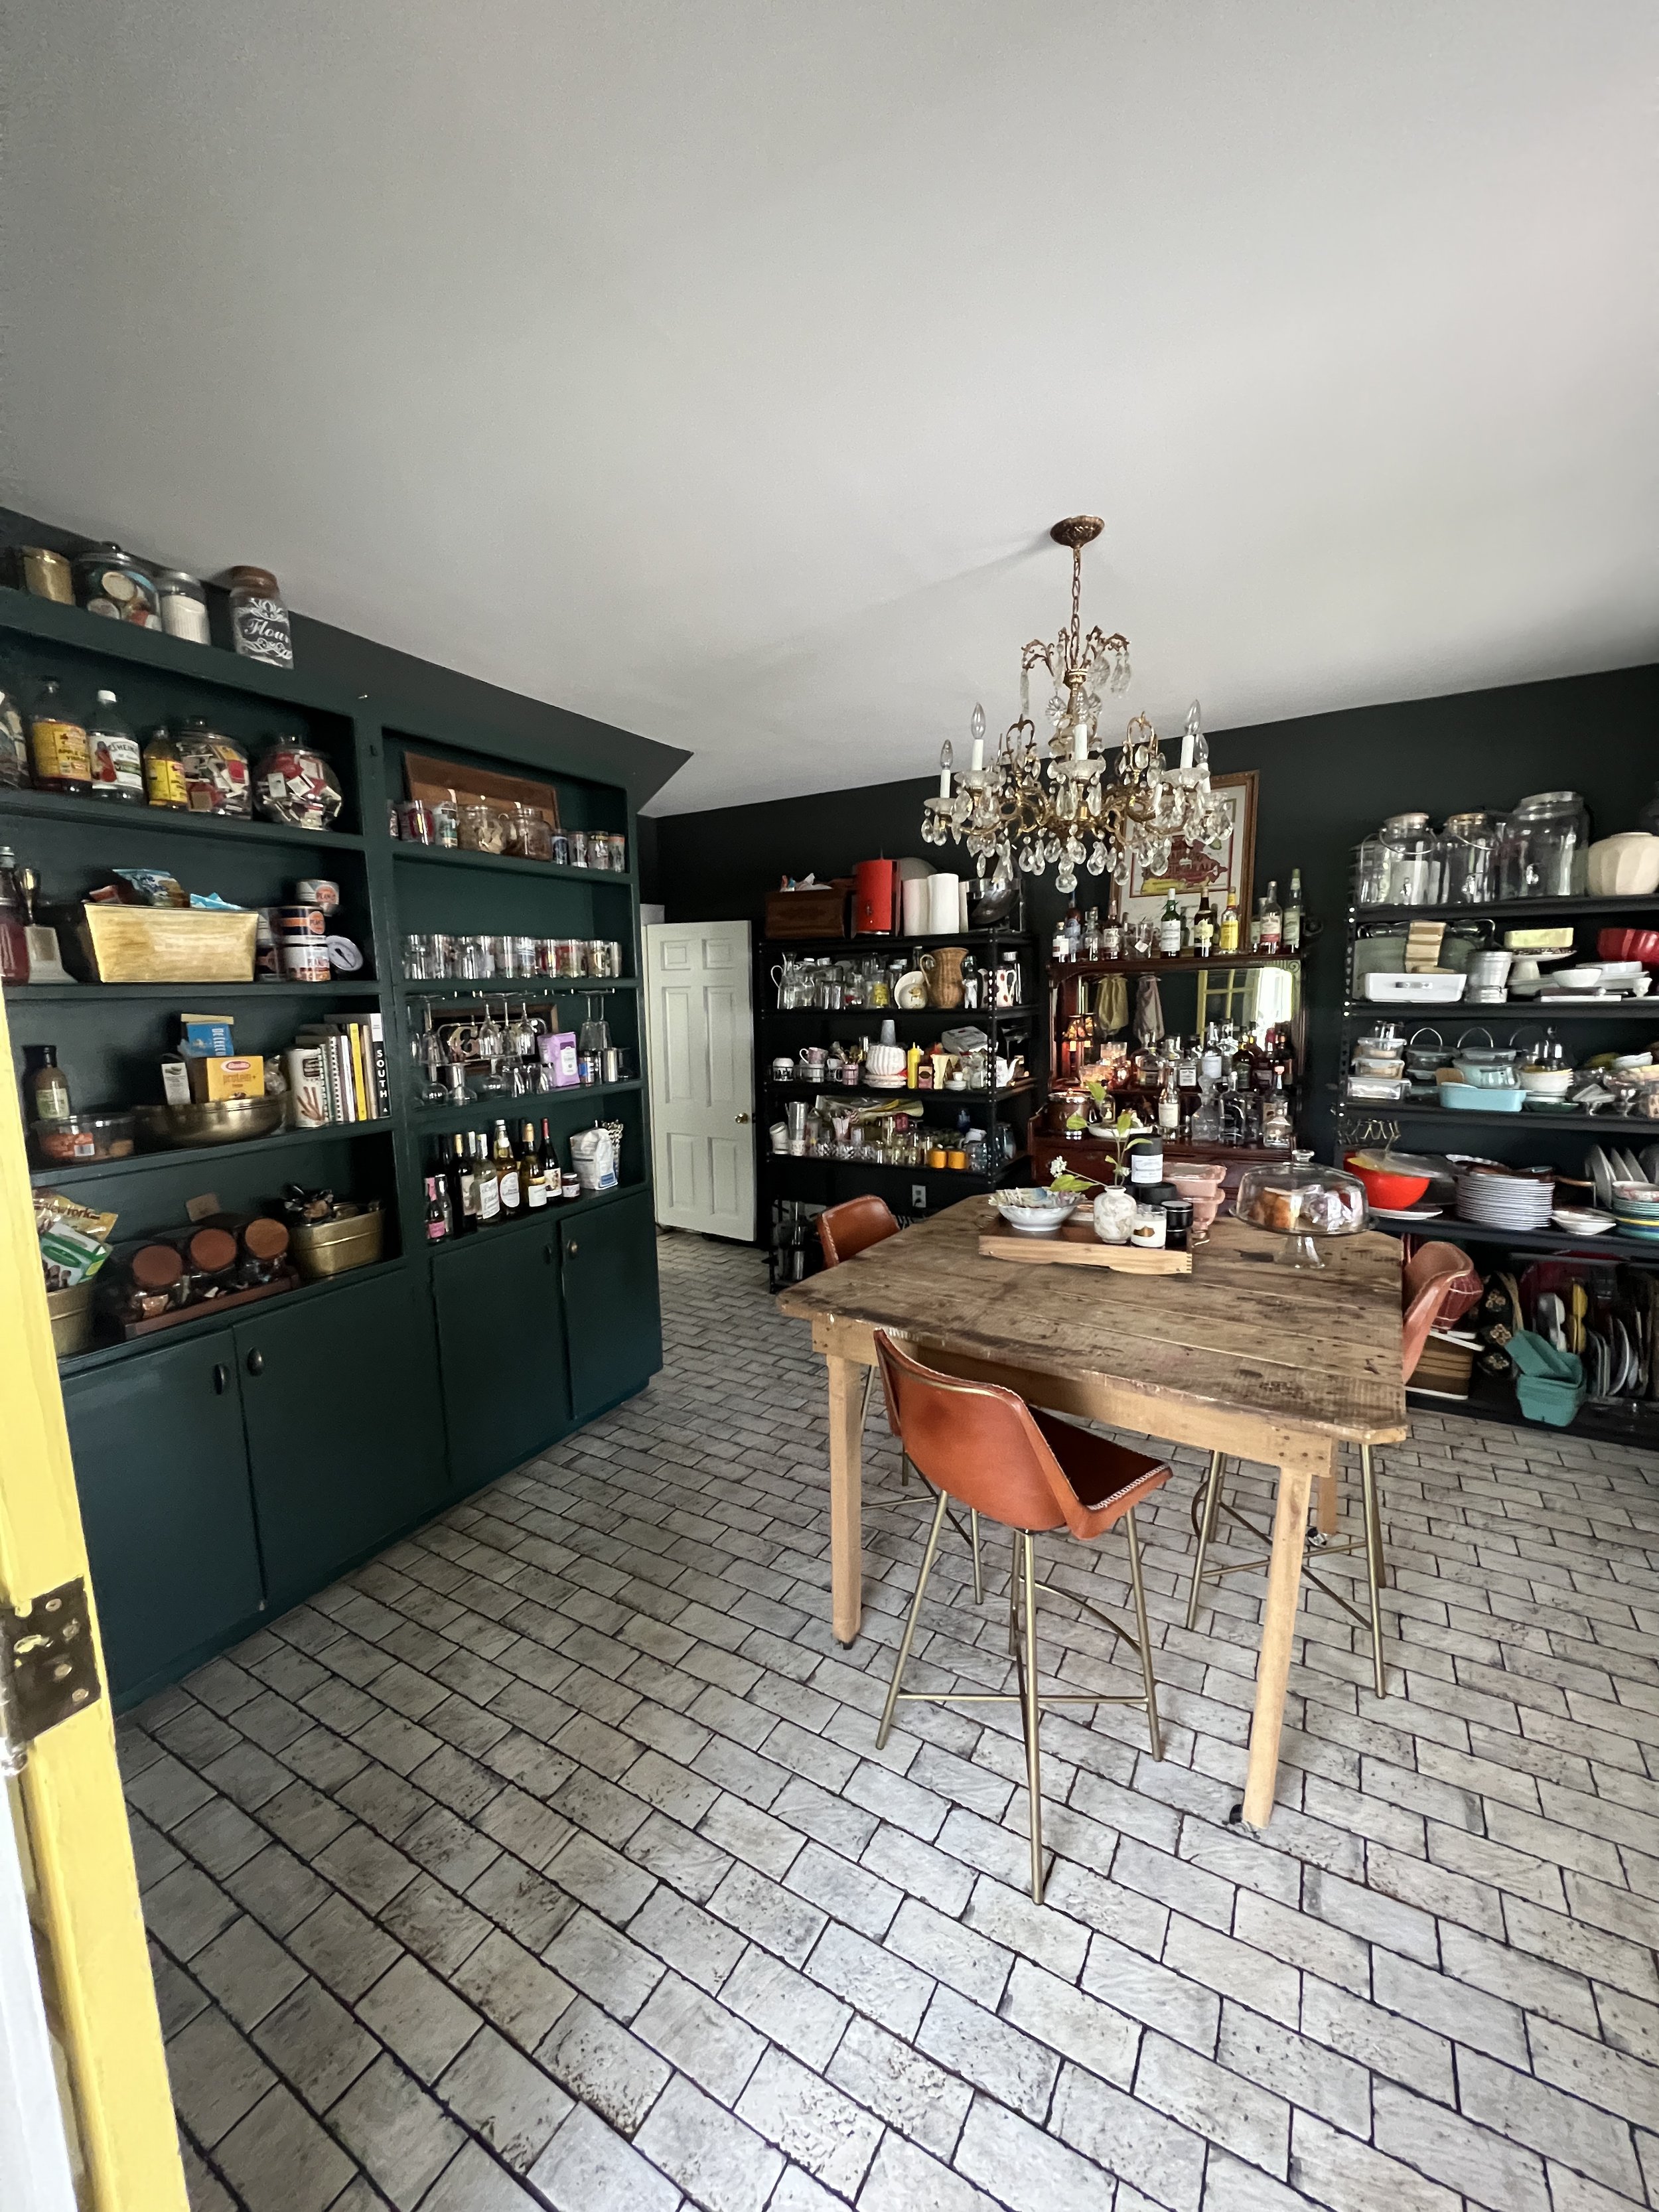
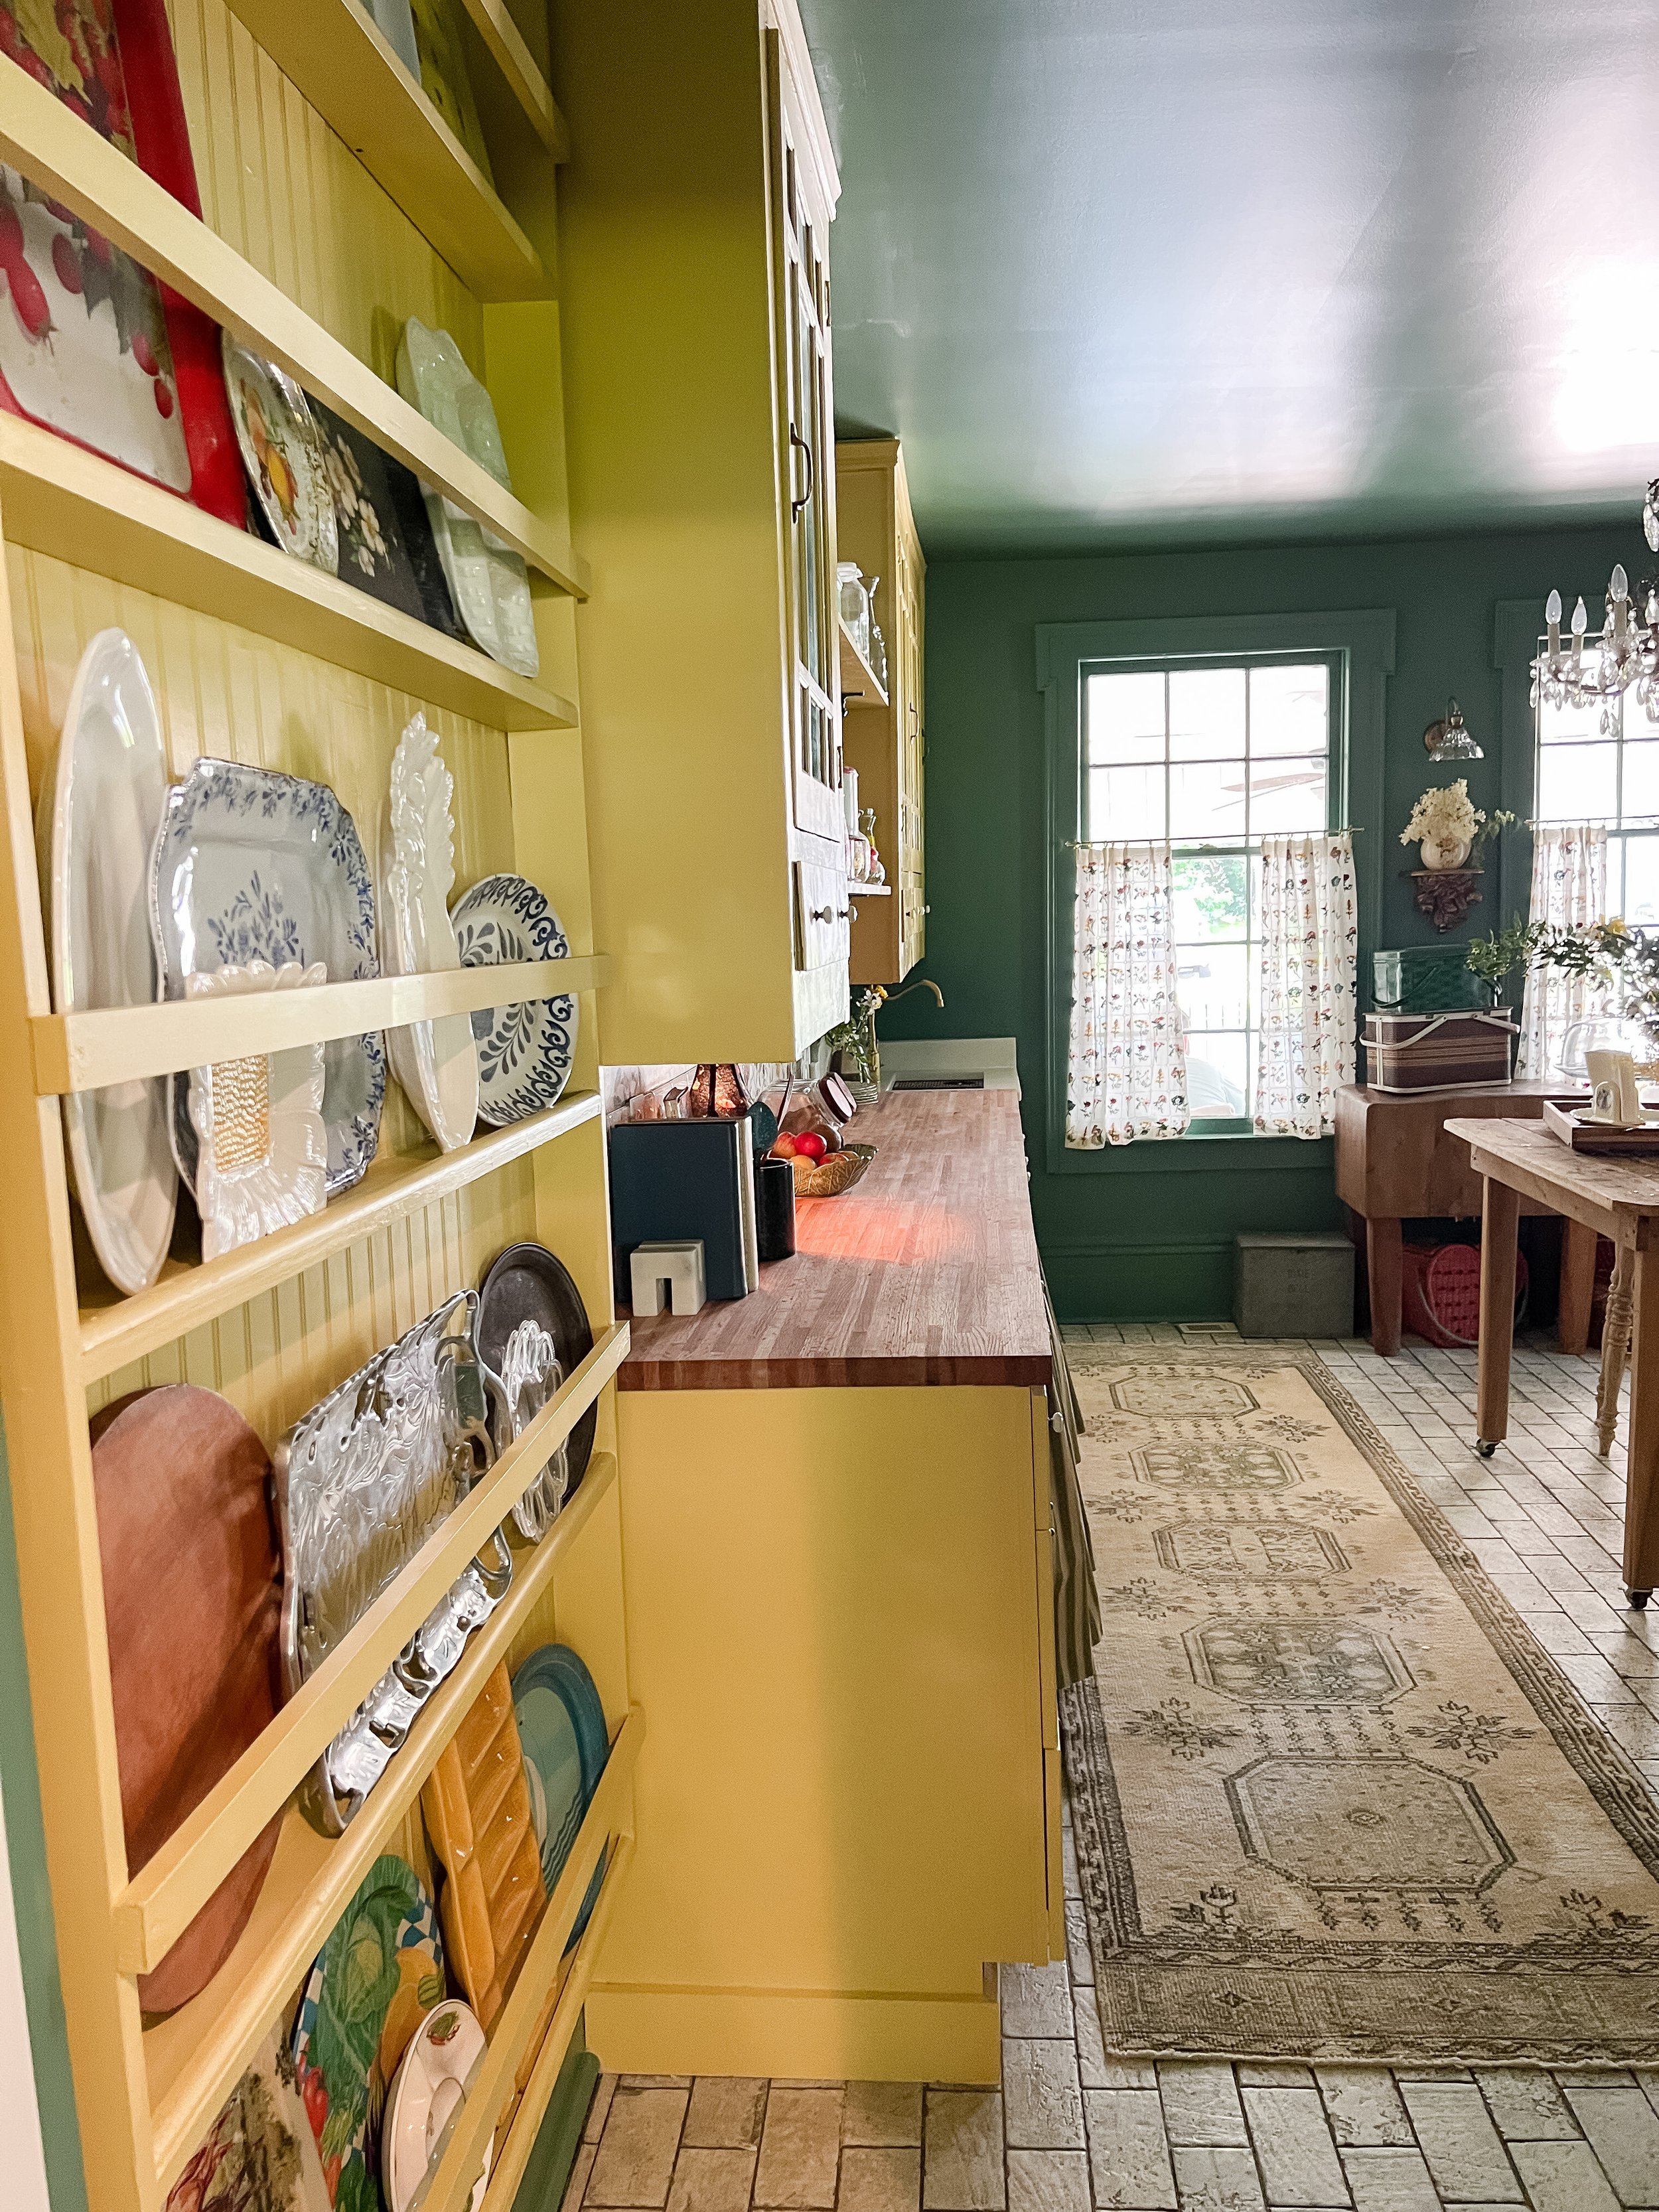
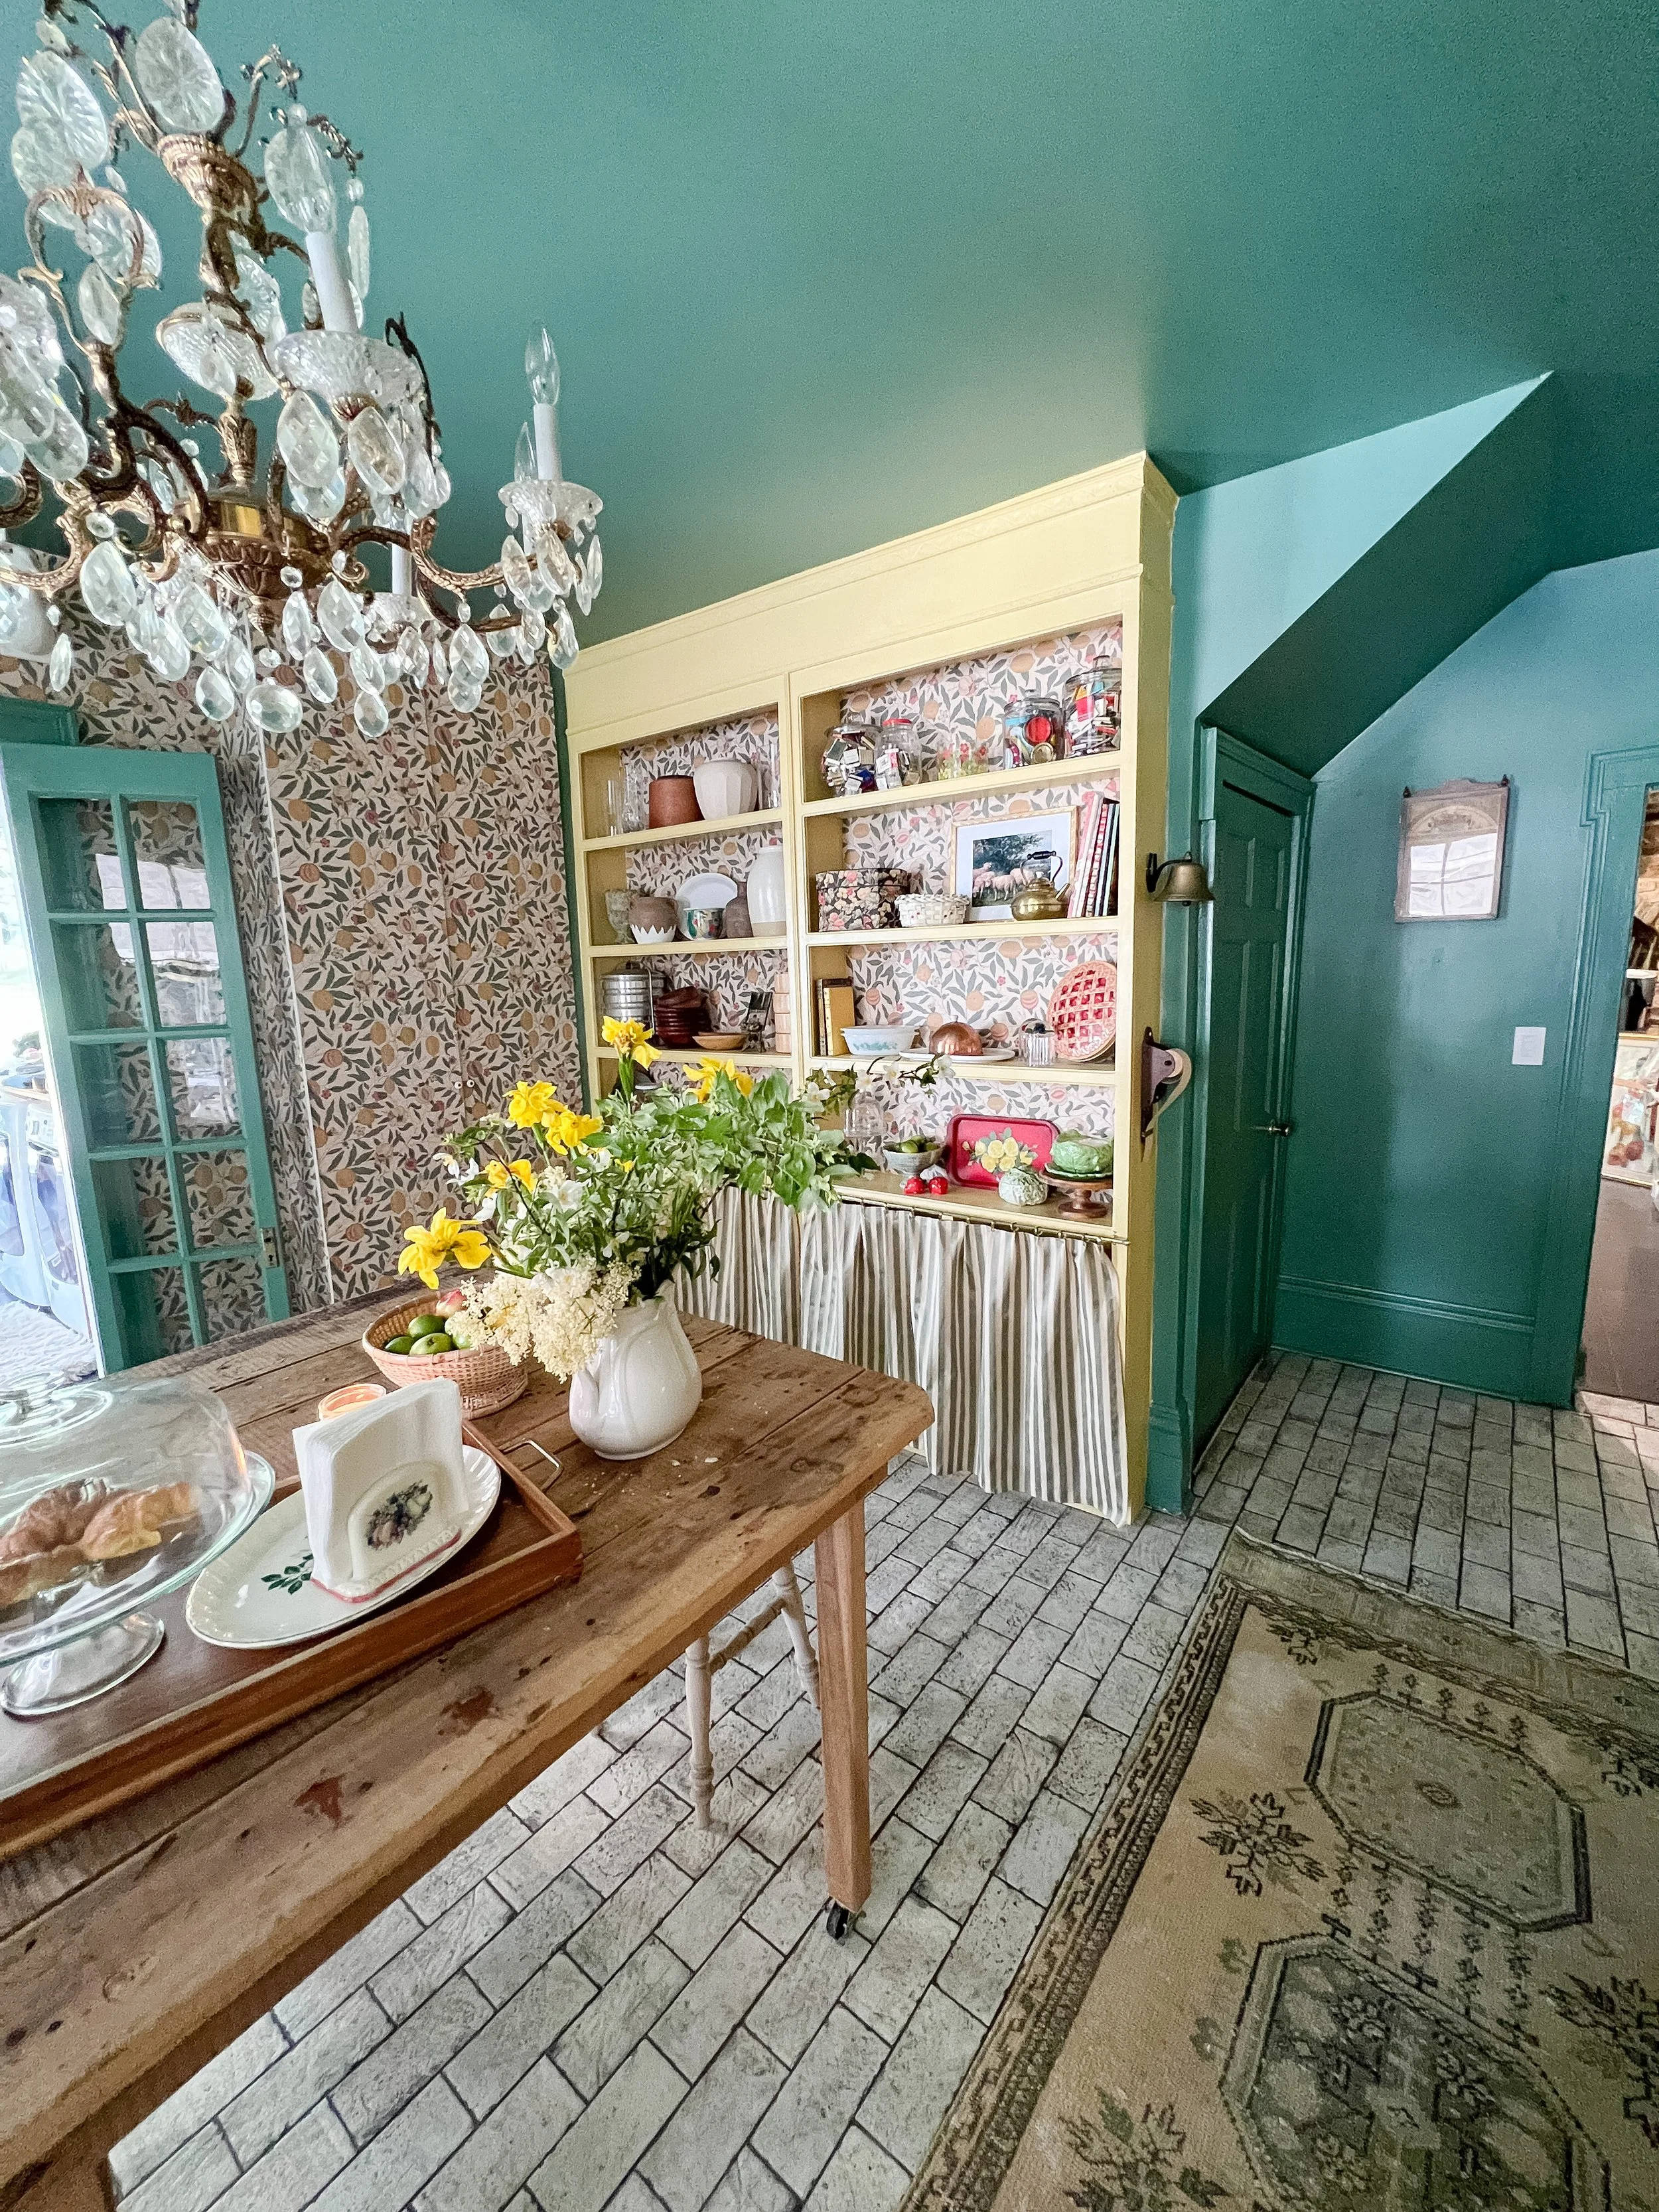
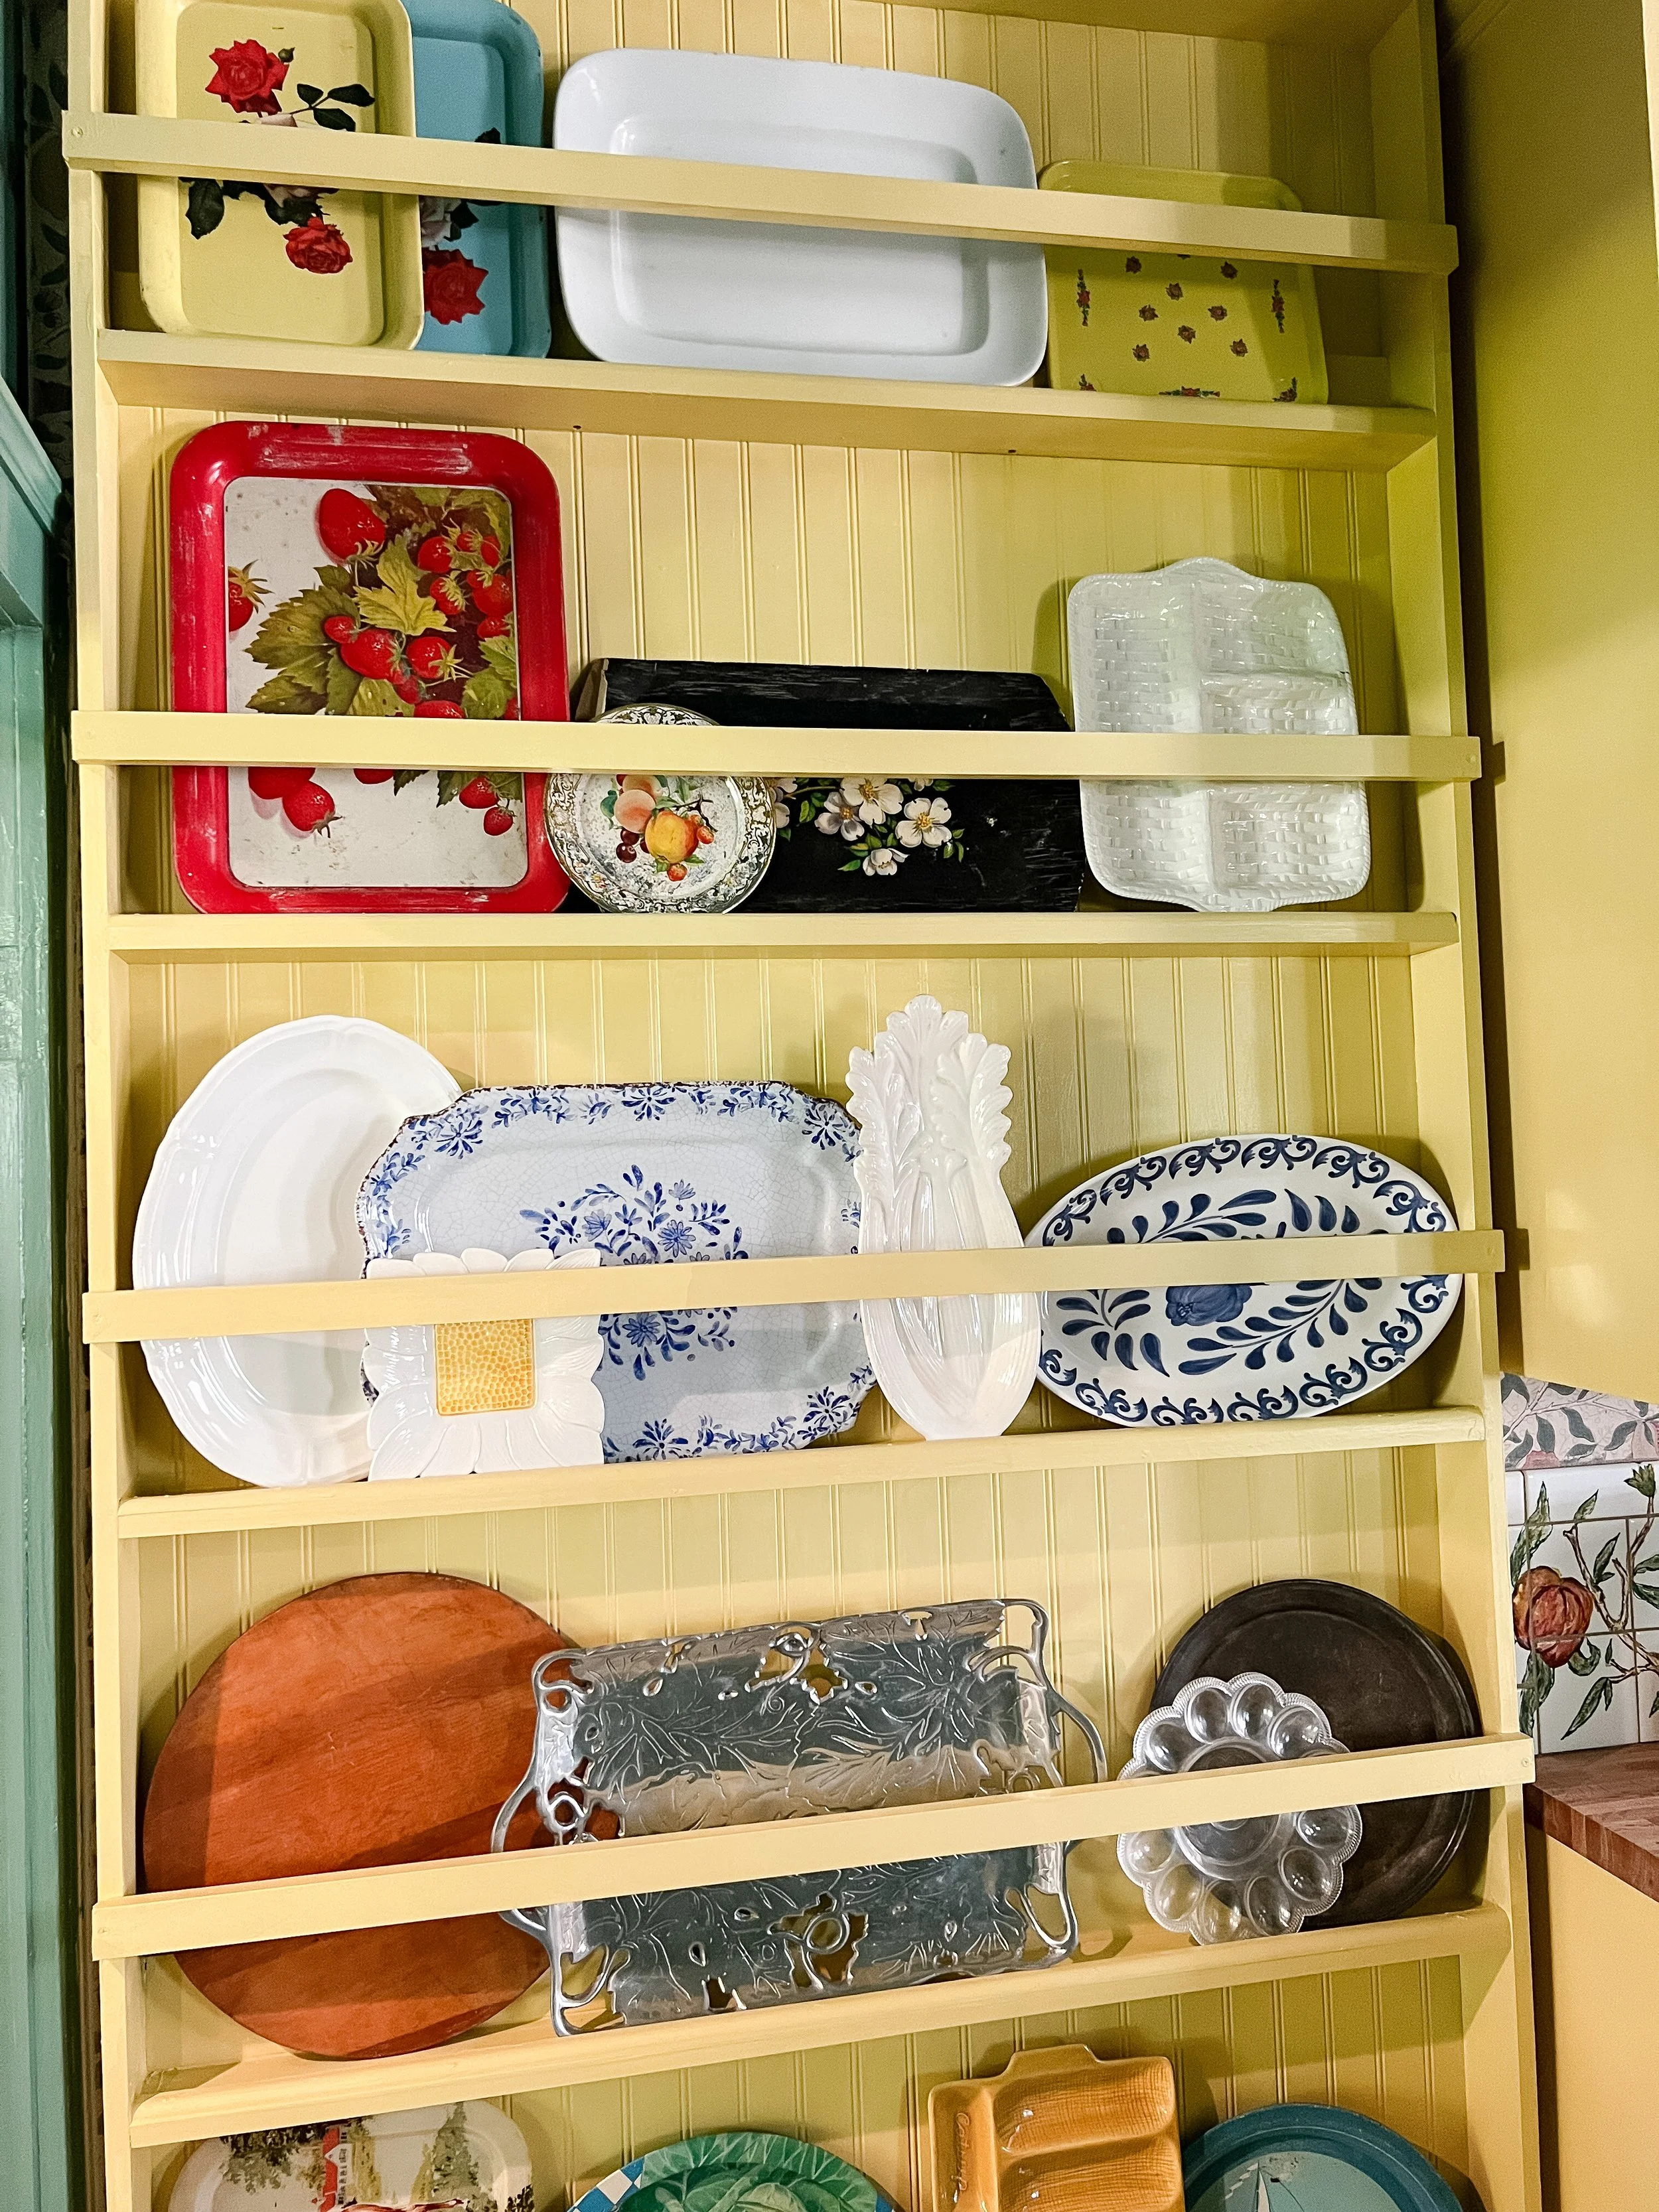
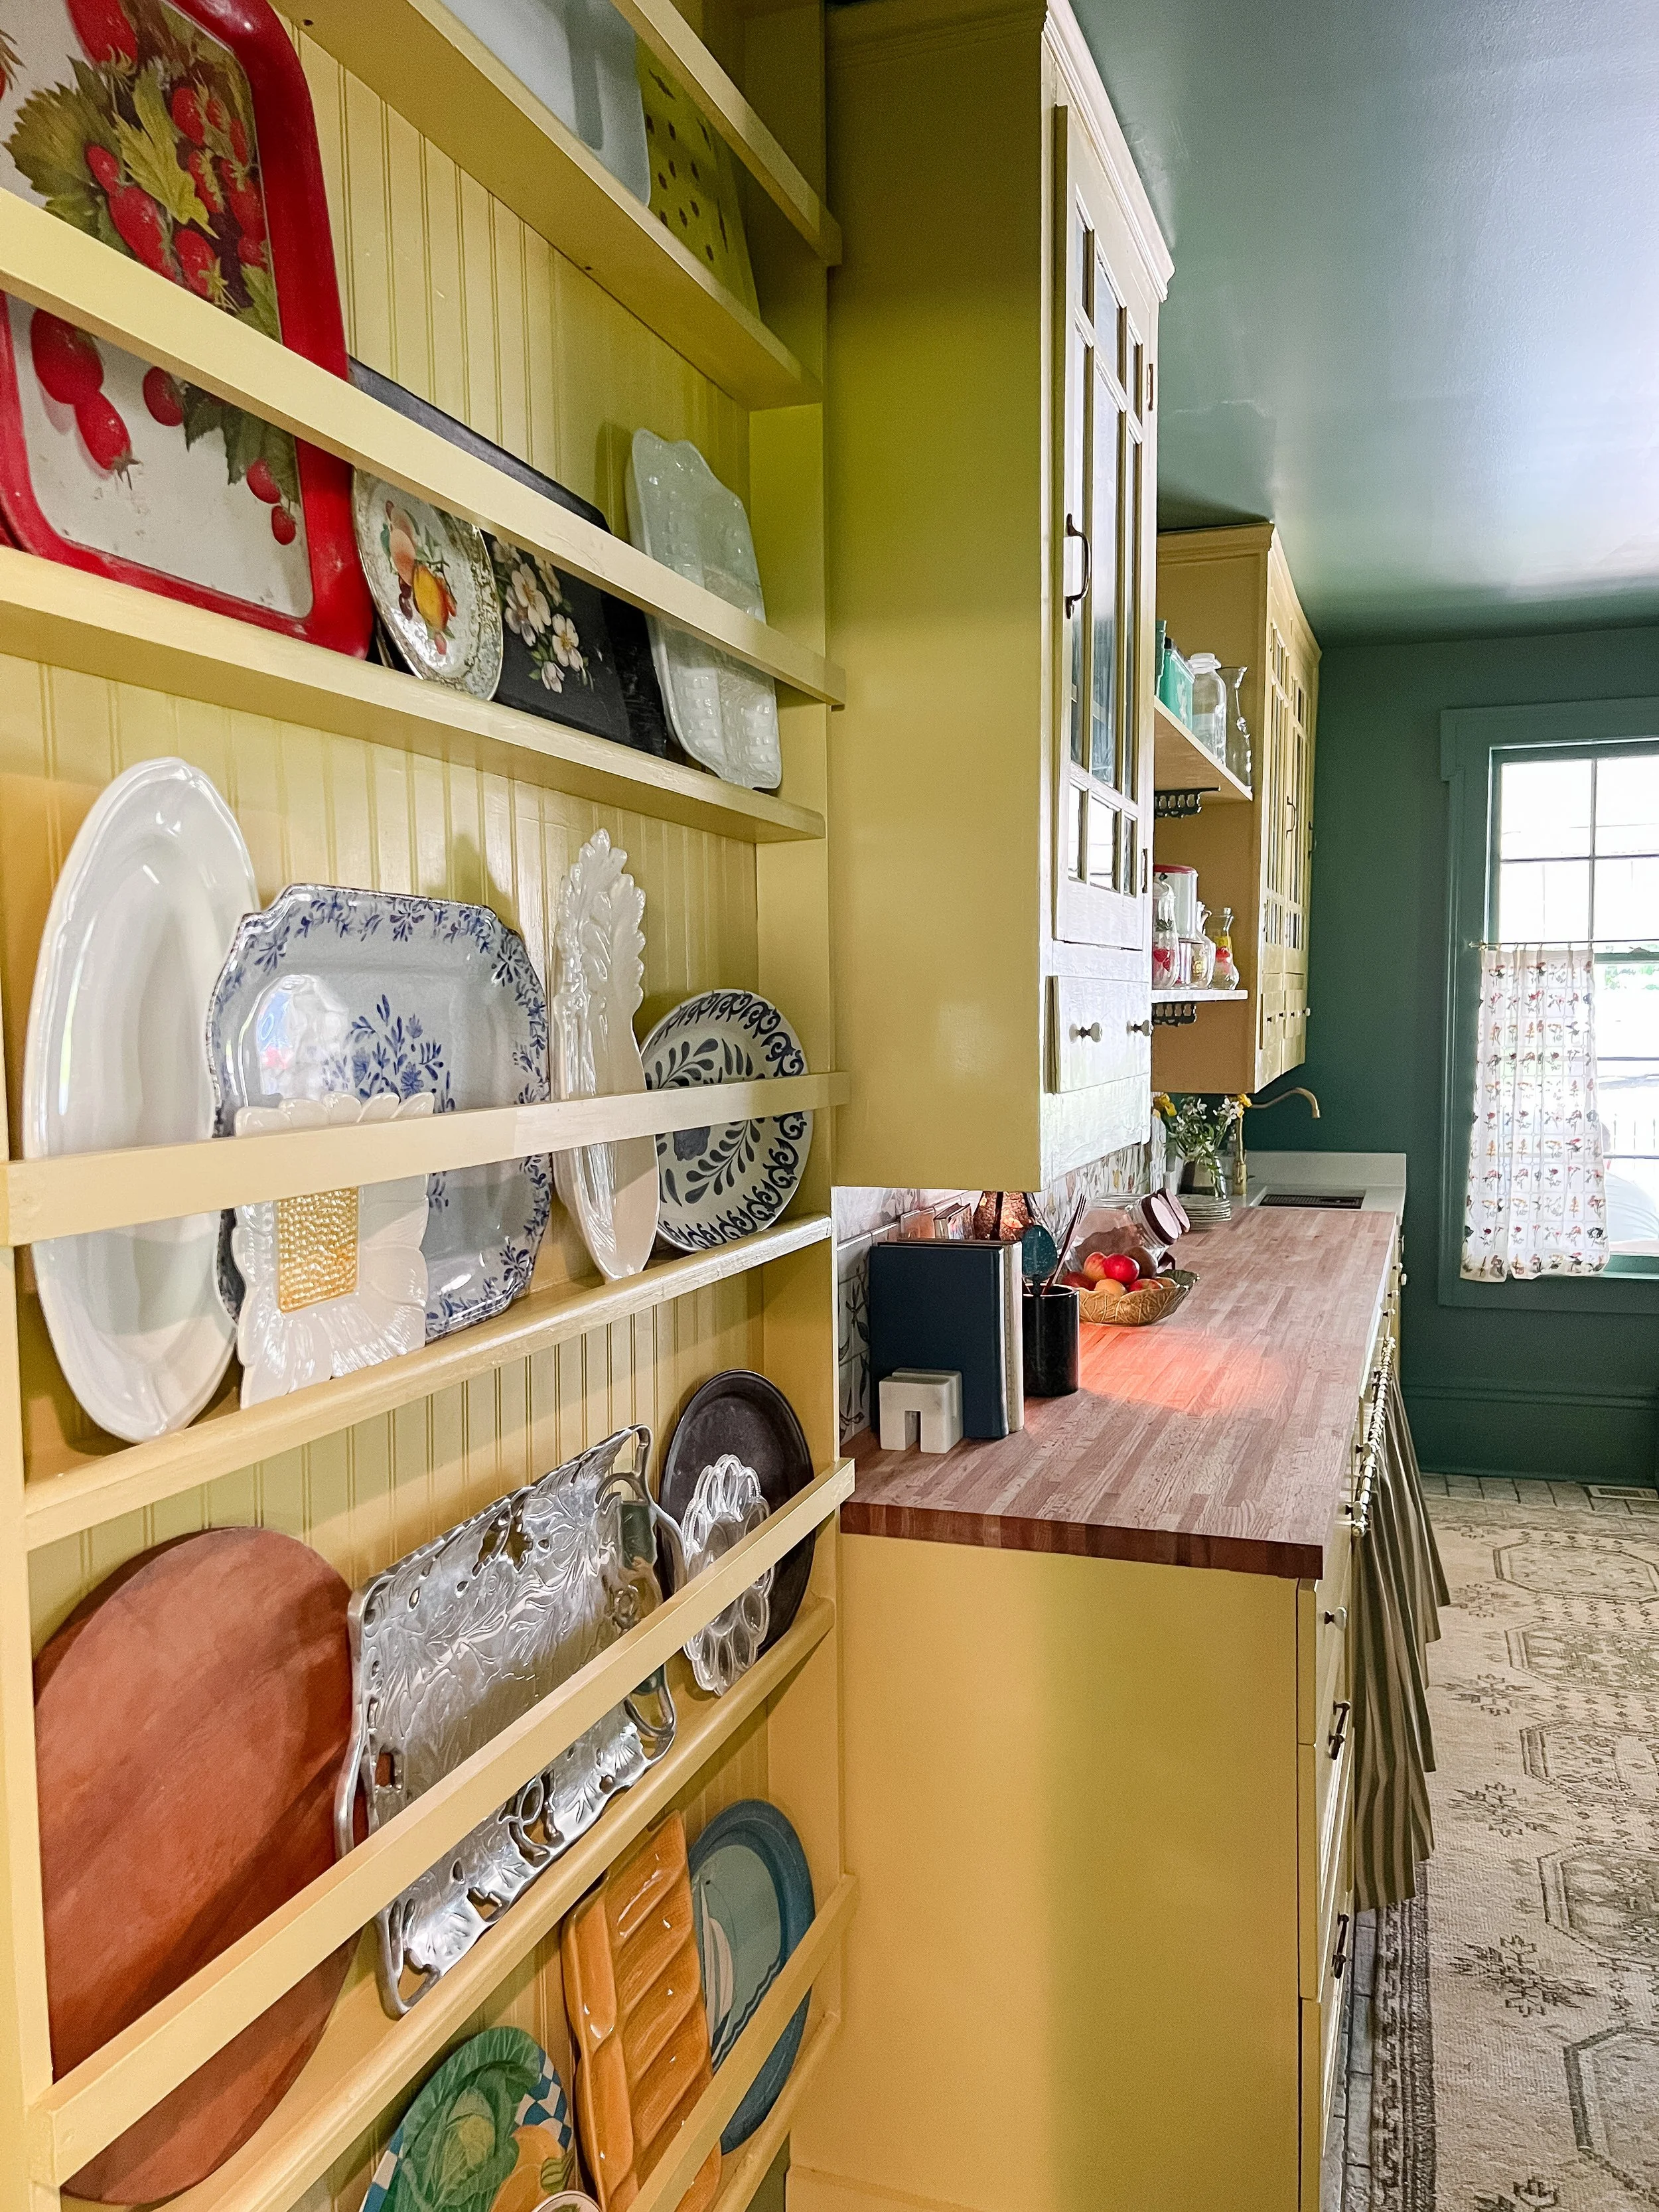
All along I had planned to incorporate a large custom plate / platter rack somewhere in the space and since I needed to allow ample space from the end of the cabinets to the doorway for walking room, this seemed like the perfect spot for something low profile like a plate rack.
I showed my husband Alex exactly what I was wanting and that I wanted it to fill the space to the left of the cabinets as much as possible. As to not block the space at all, we needed to make the plate rack pretty shallow- the exact depth of the doorway frame which was about 3-4 inches. He was able to build exactly what I was picturing fairly easily with primed wood boards from Lowe’s and a beadboard backing (also from Lowe’s). He basically made a large rectangle the size of the opening we had, then added the cross bars, and finally the beadboard backing to stabilize everything. We then caulked and filled the holes and then painted the entire thing the same color as the cabinets.
Even with the shallow depth, the rack has just the right amount of room for all my trays and plates and really was the perfect solution for this space that would’ve been wasted otherwise. I love the height it adds to the space as well going all the way to the ceiling!


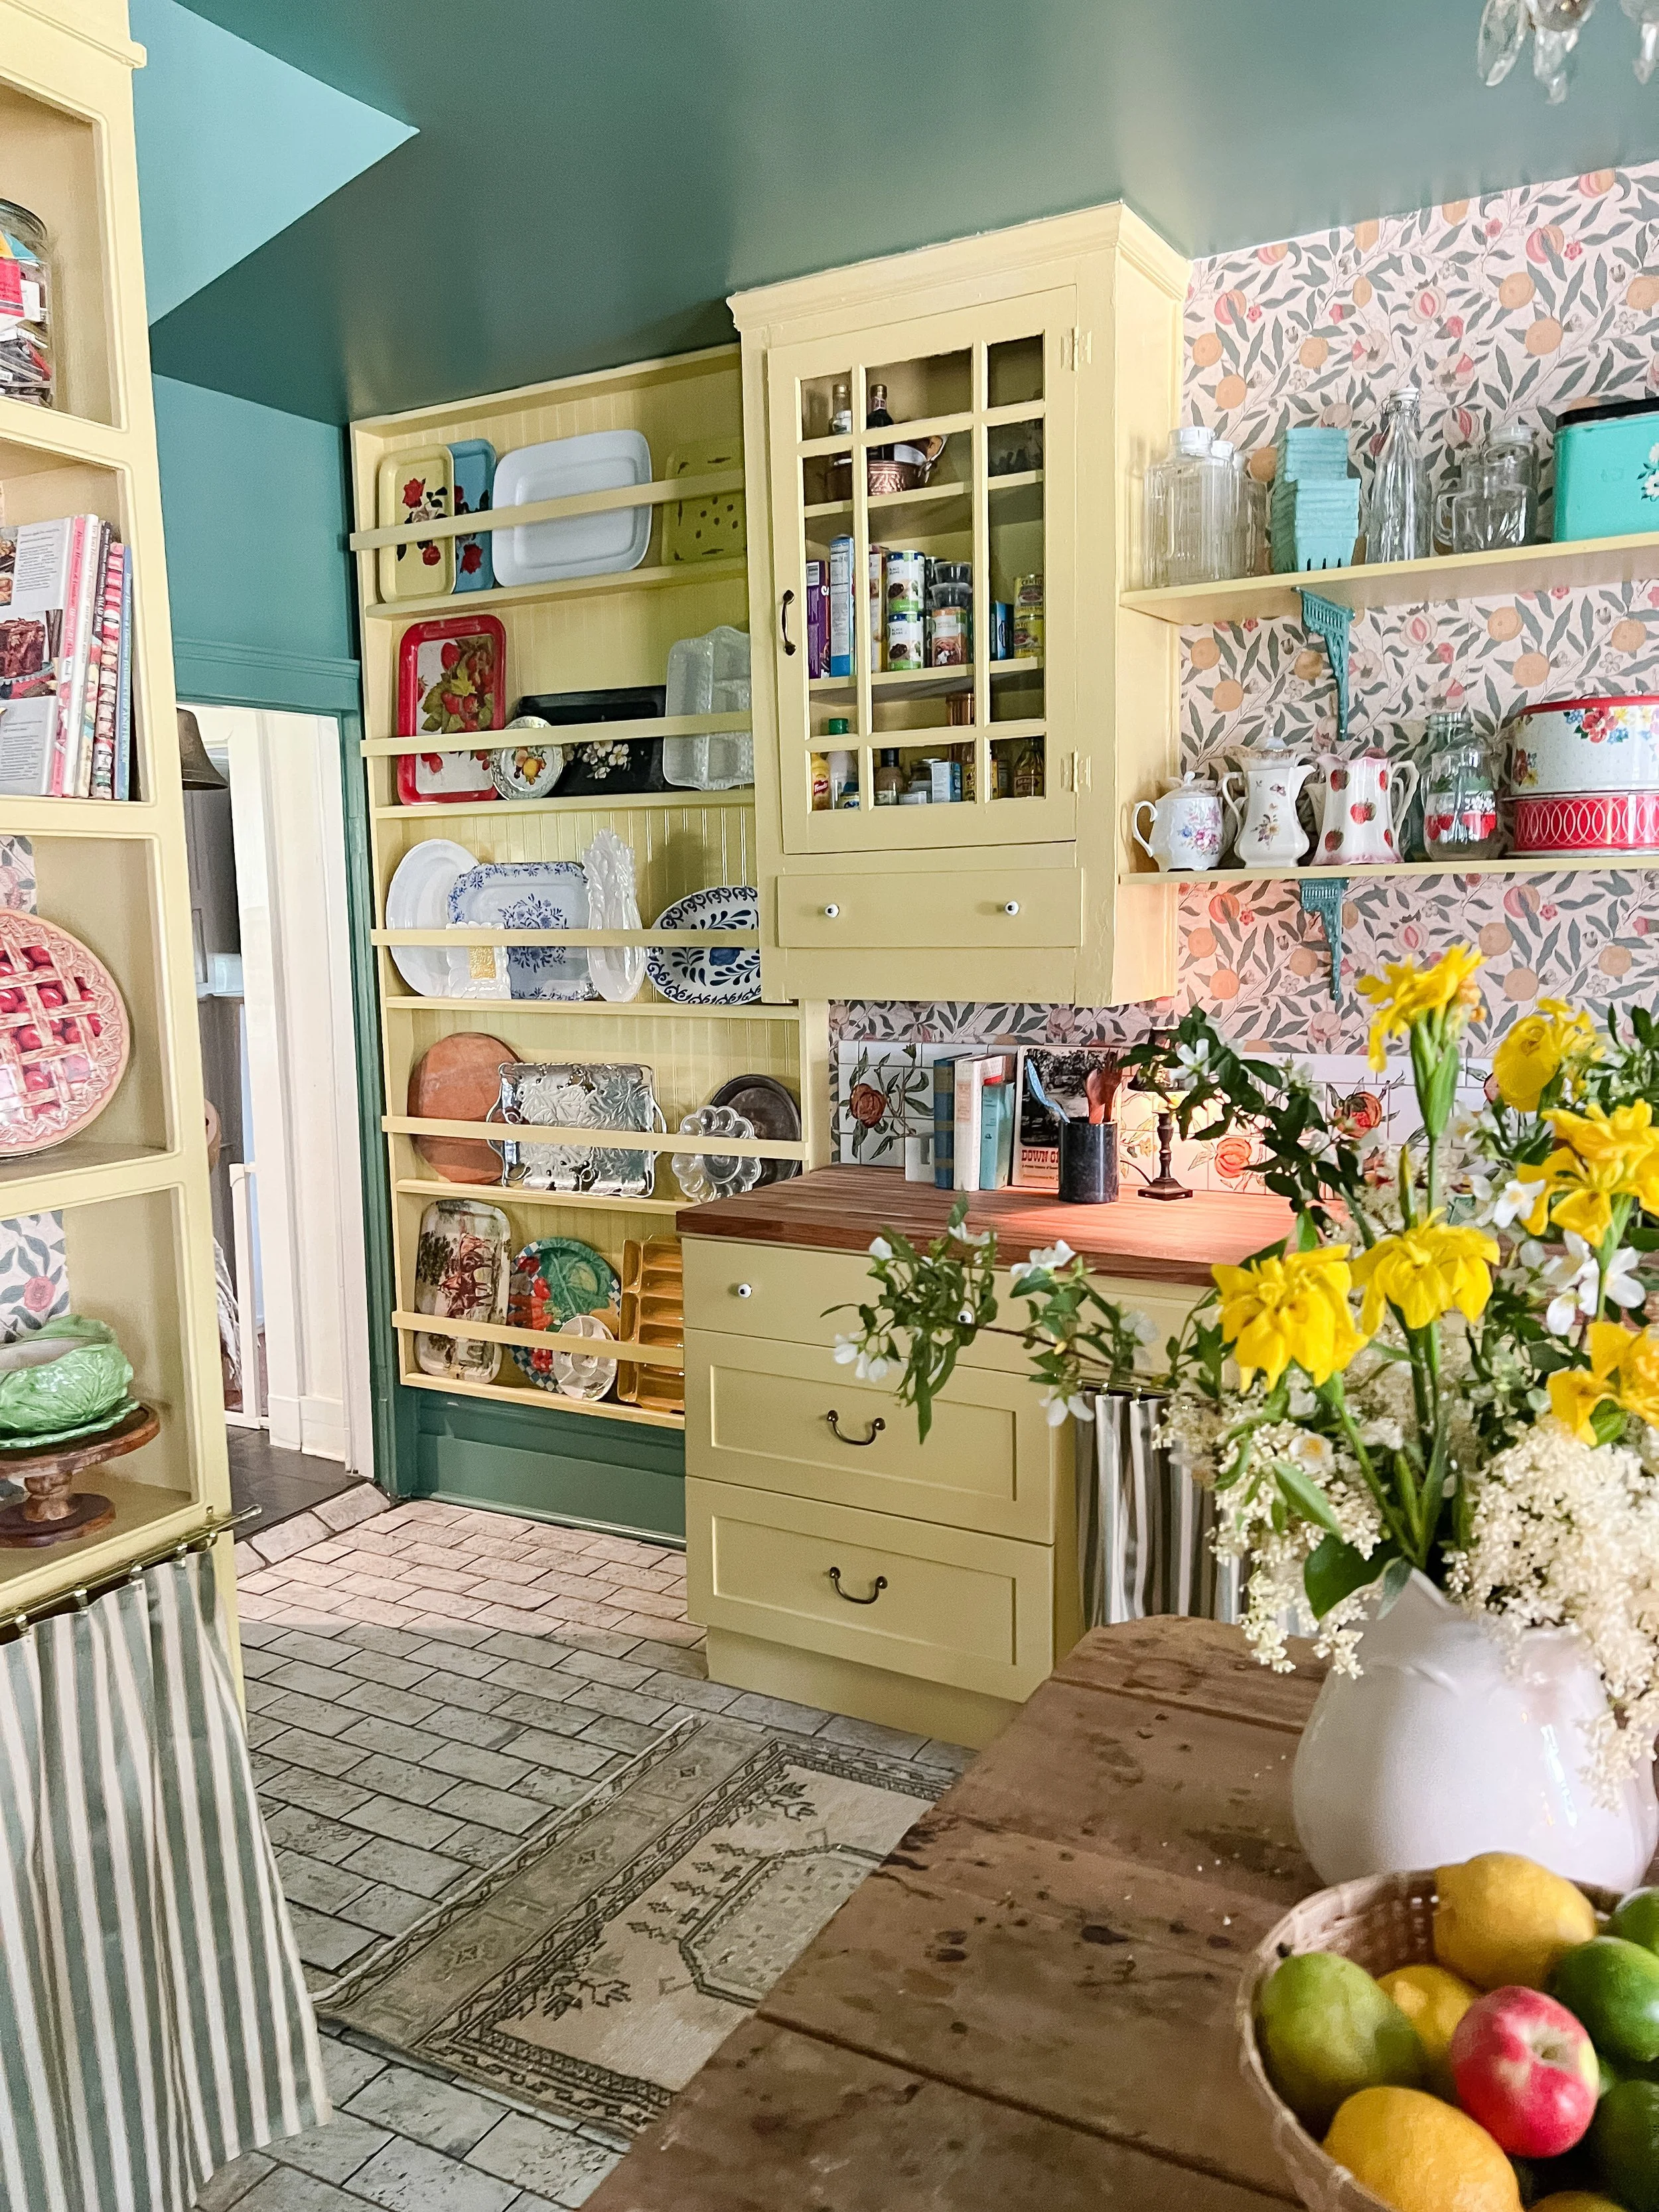

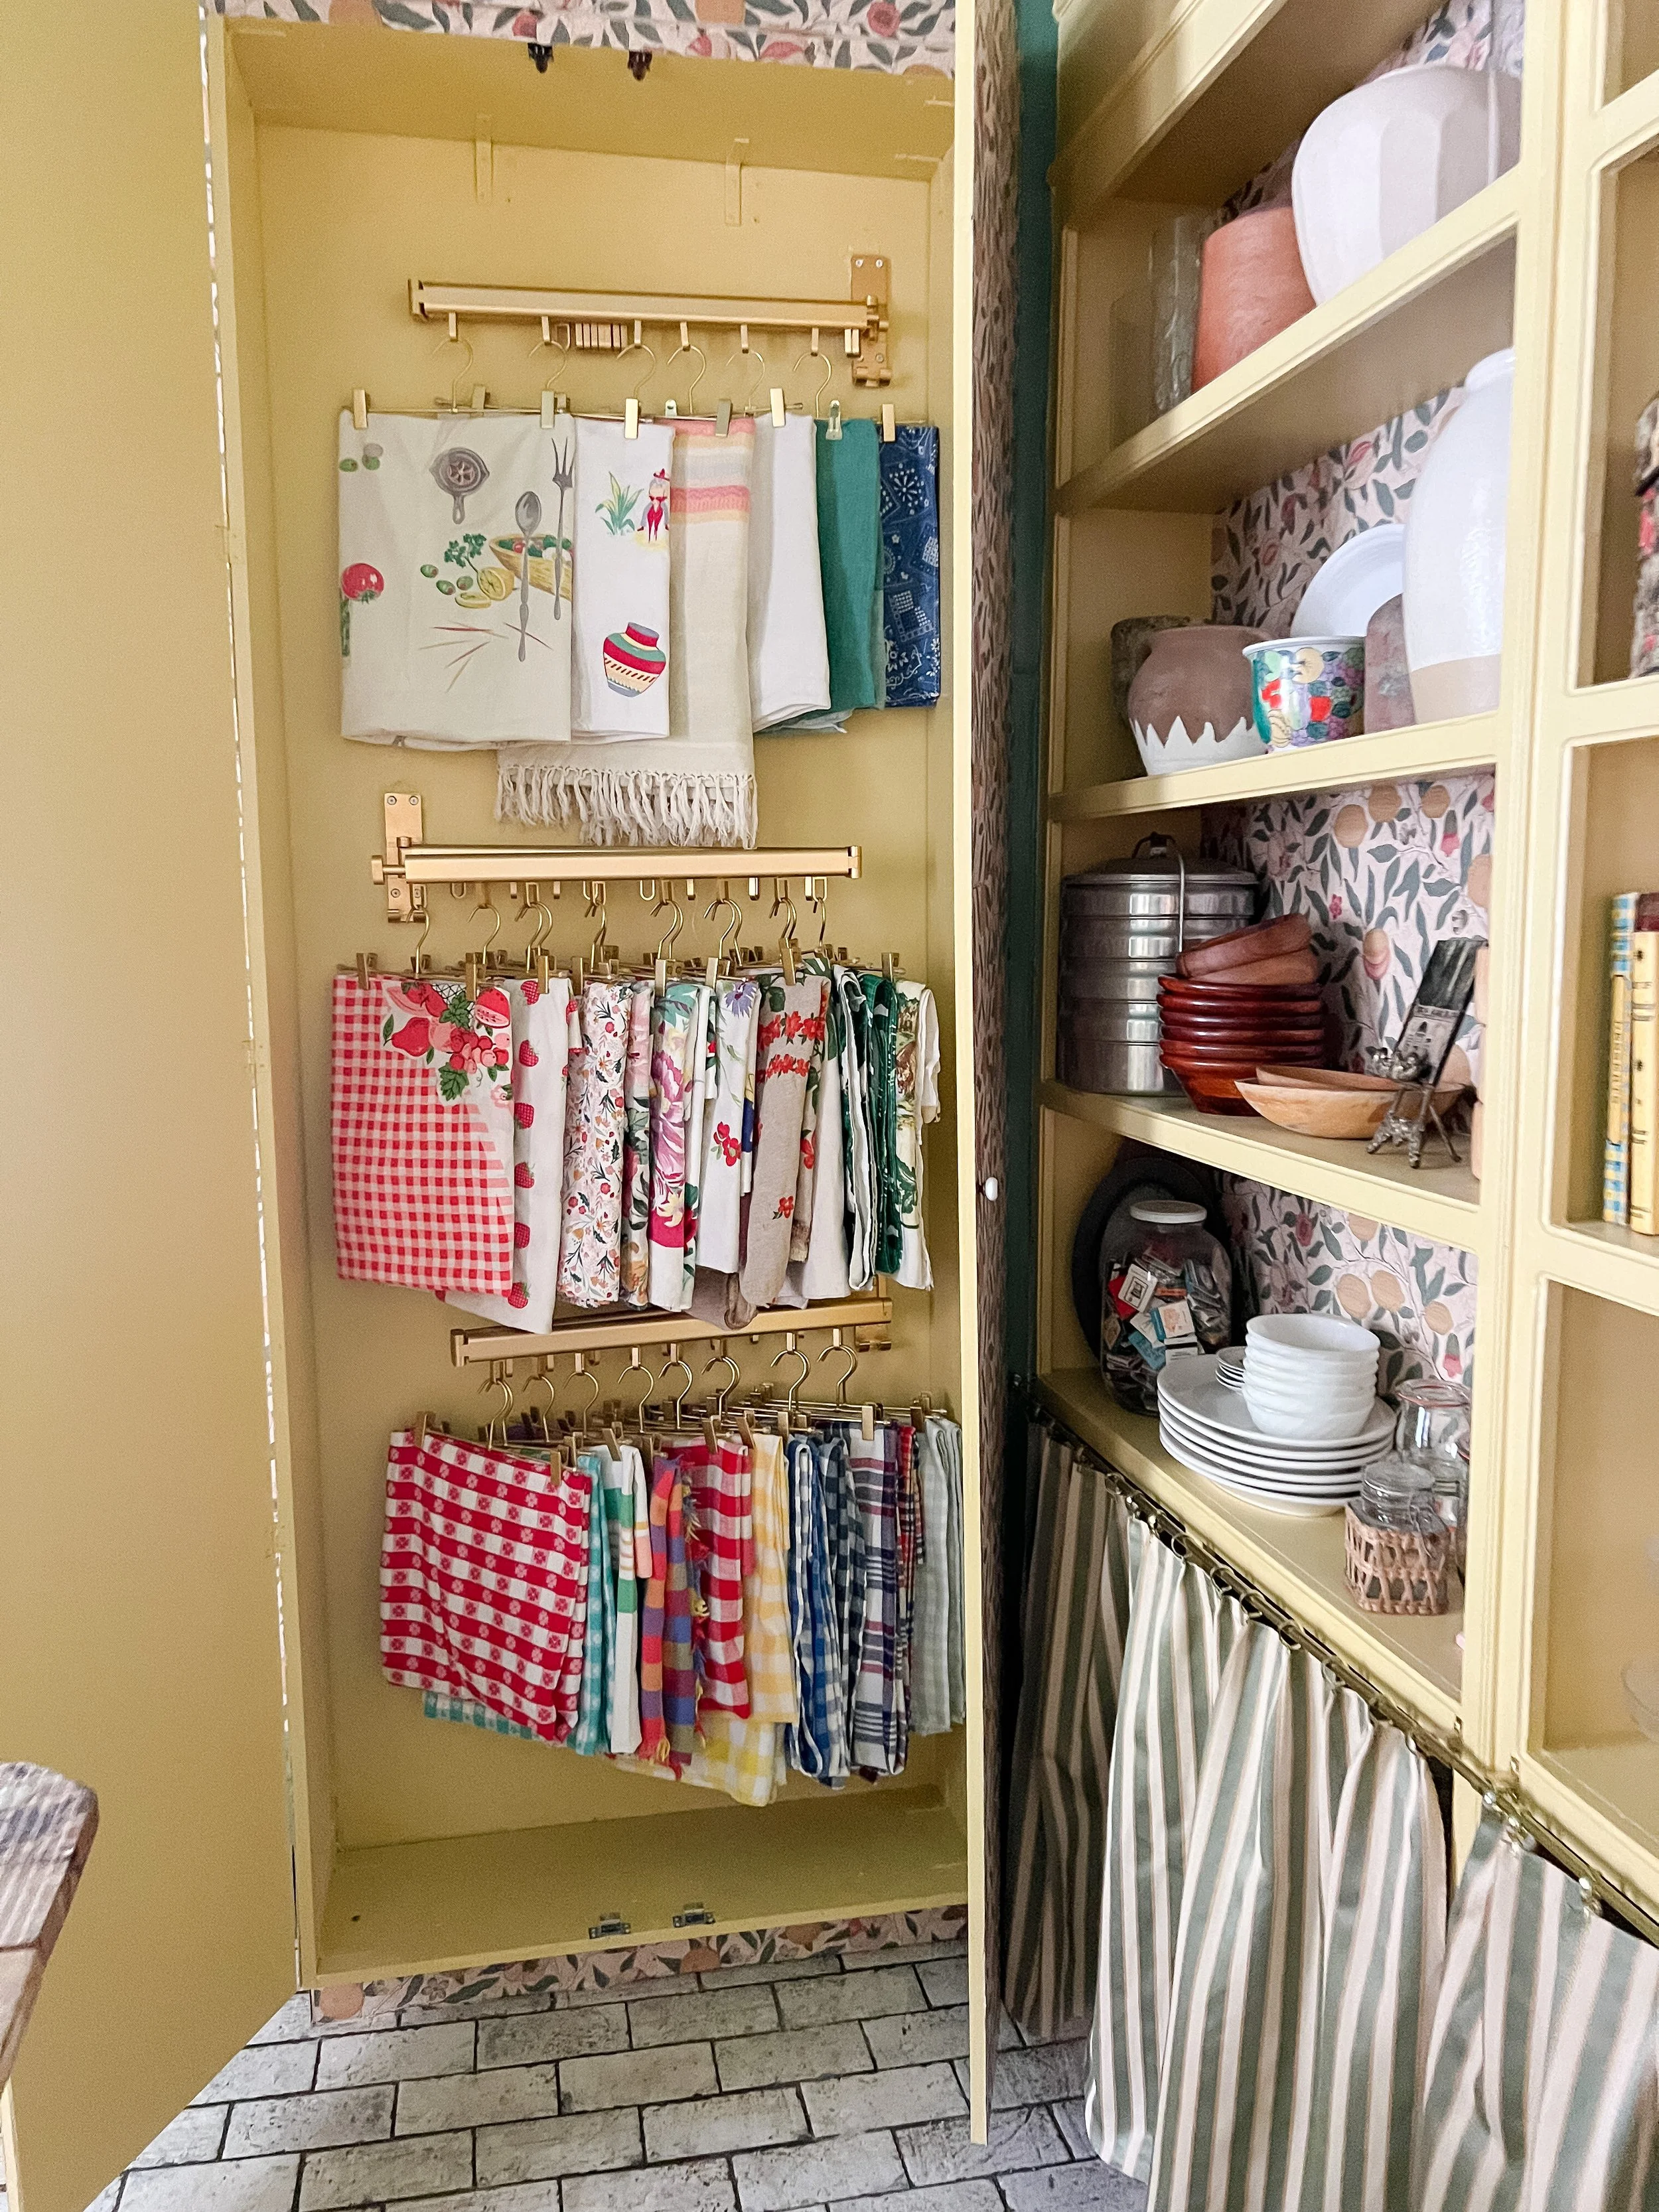
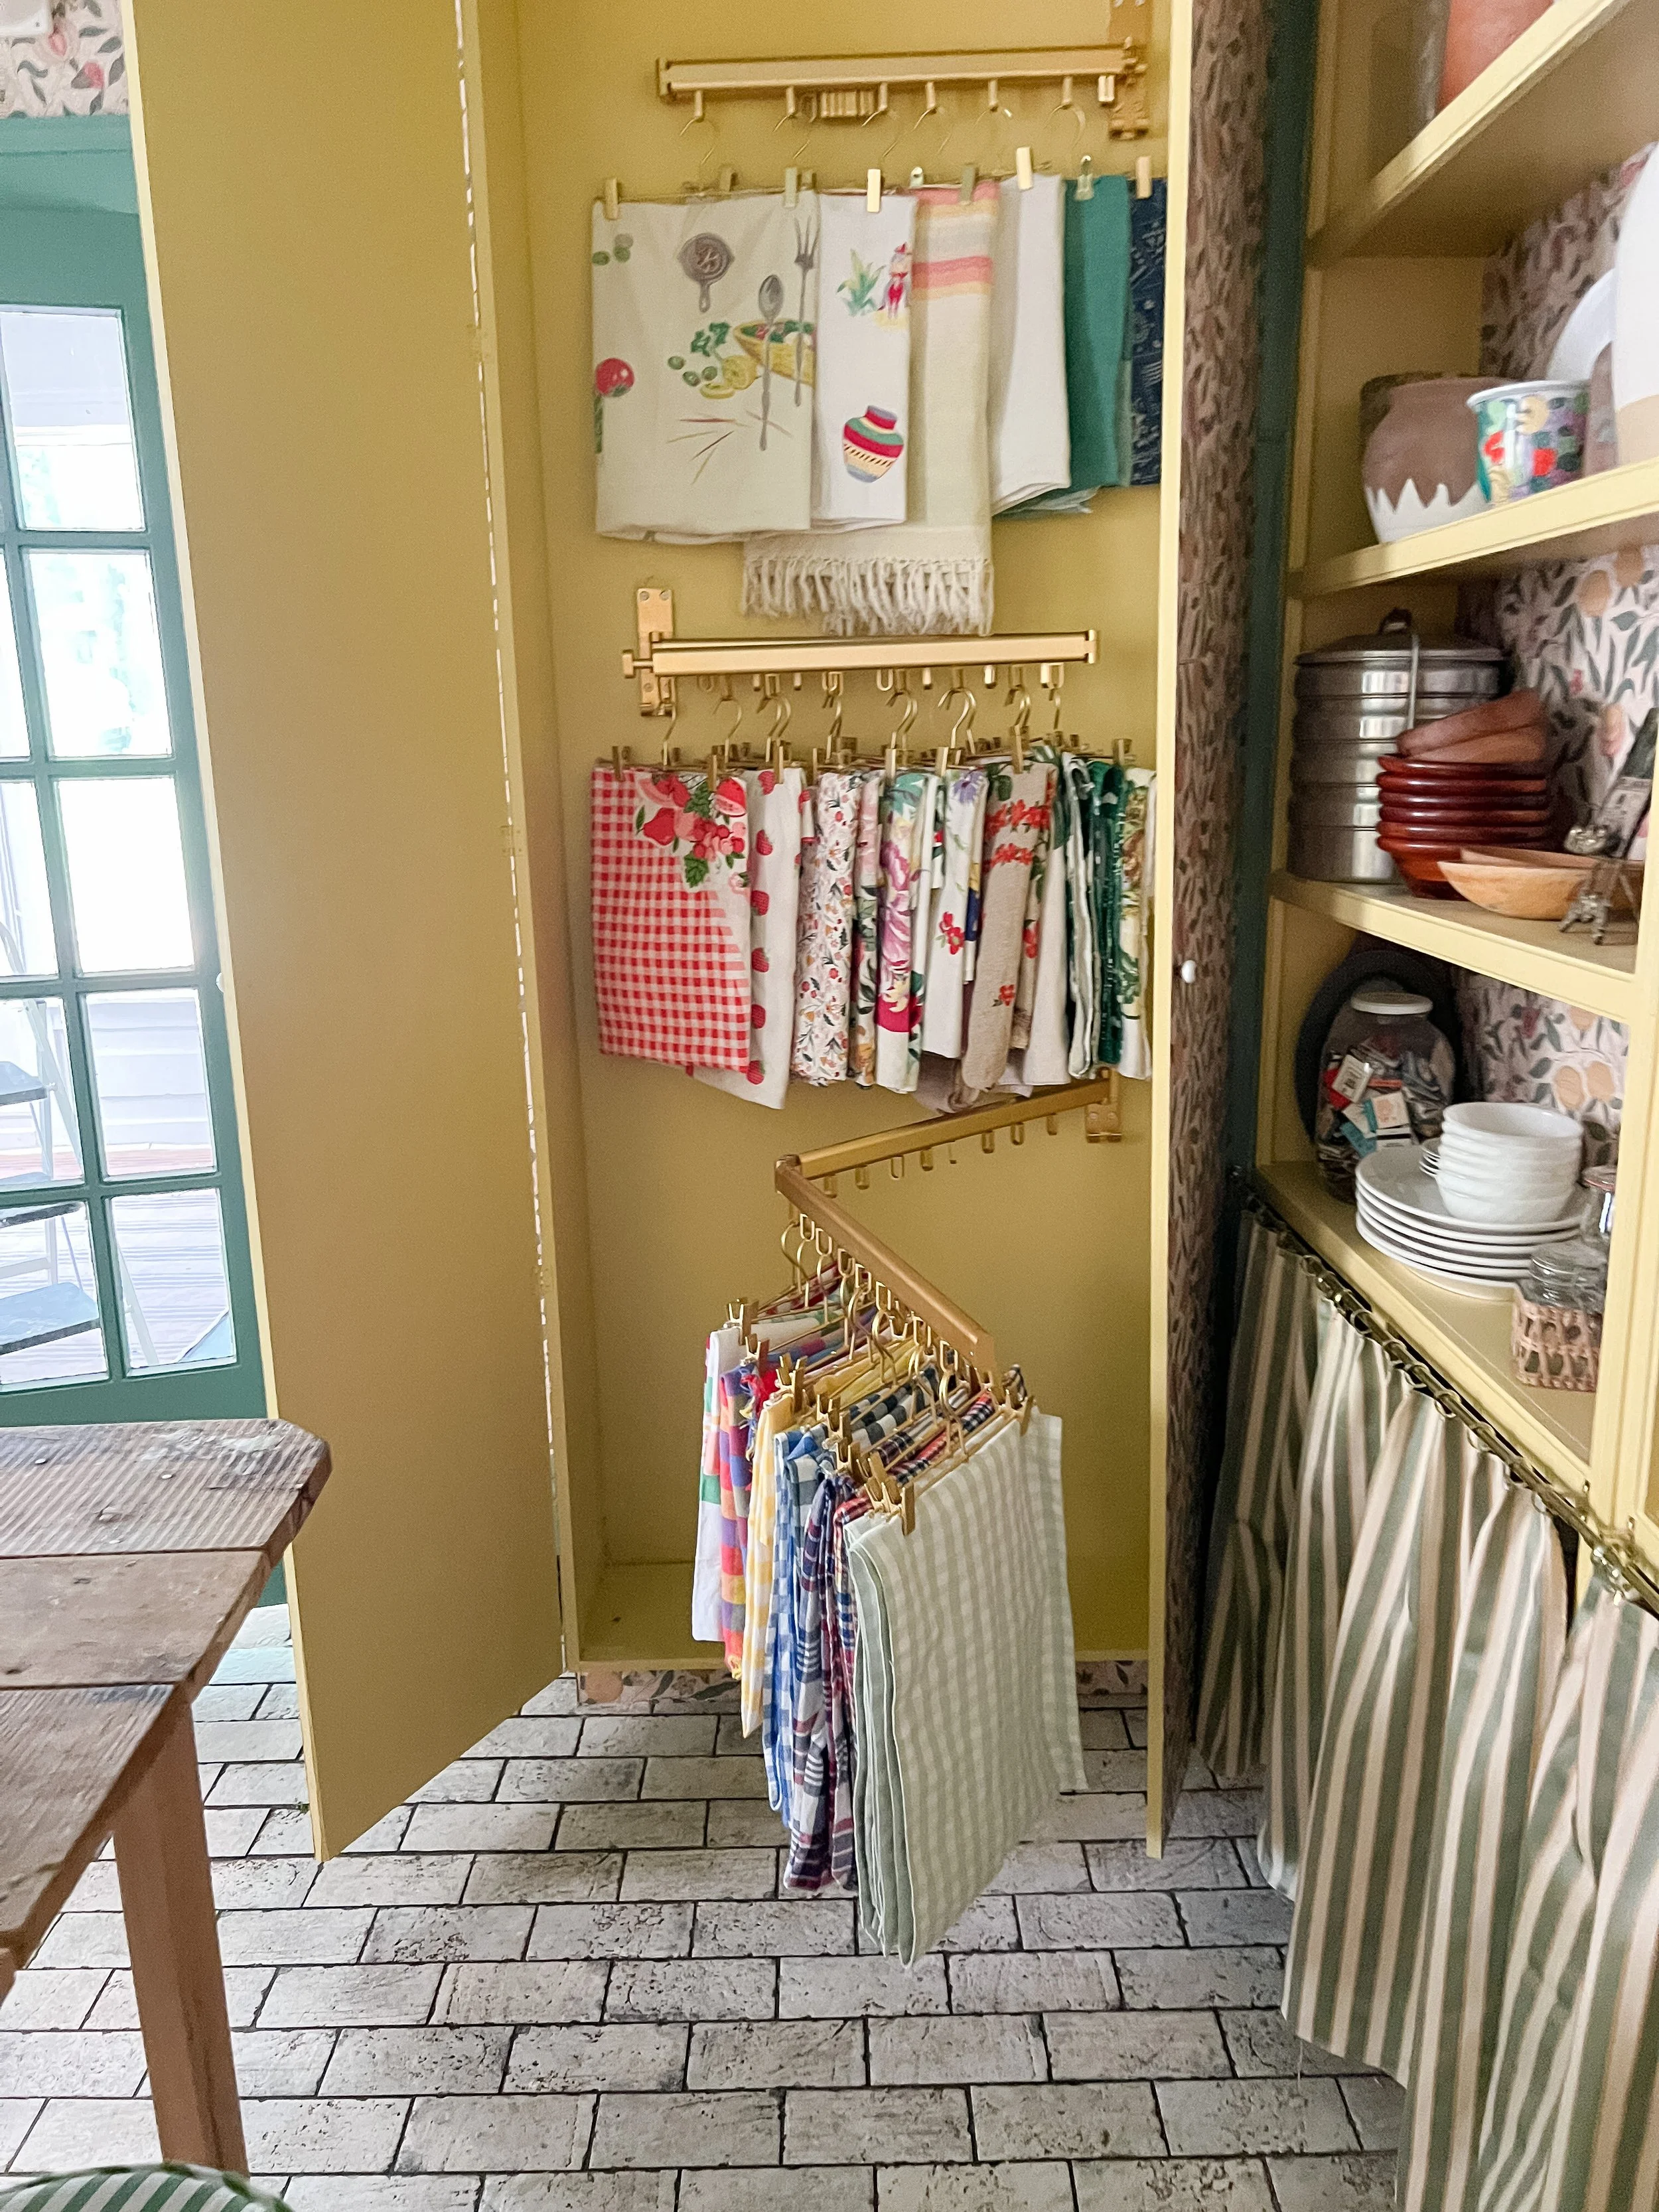
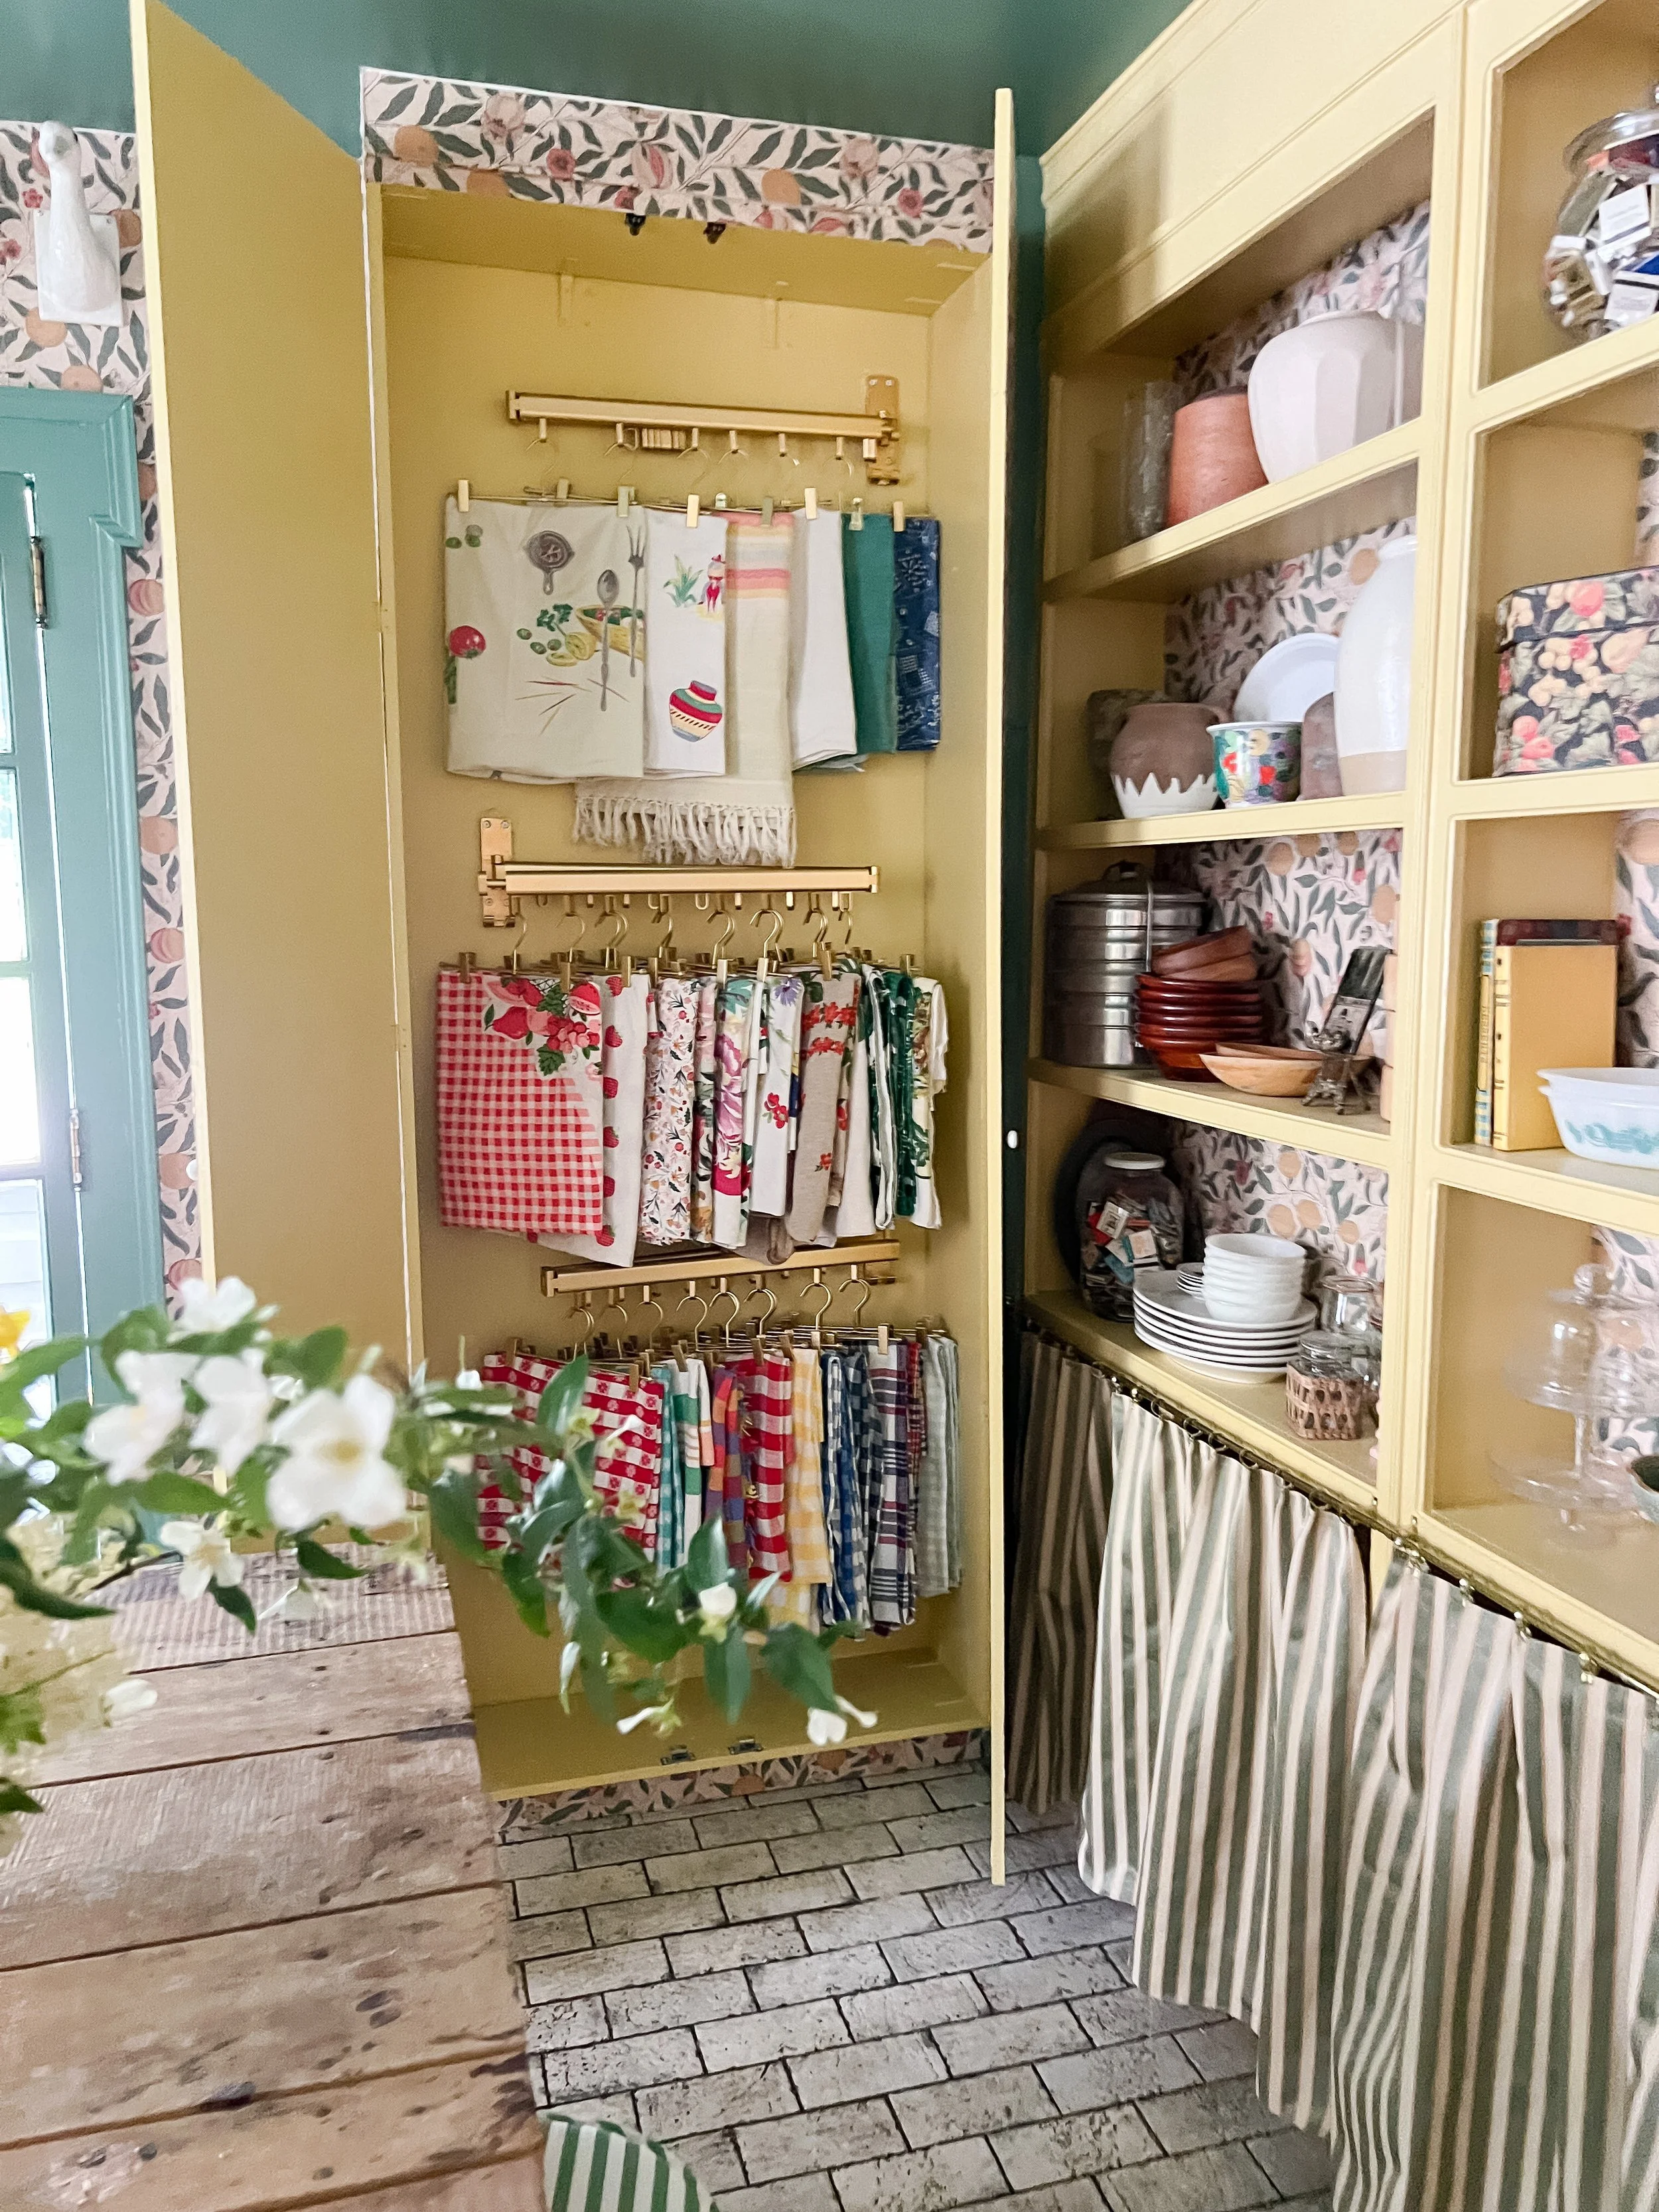
Tablelcoth and kitchen linen storage was at the top of my list of needs for this space but I also had to figure out a way to make it work within the walls and spaces I had left to fill. This area to the right of the entrance to the room was still empty and seems like a perfect place to add something for tablecloth and linen storage. I decided I would like a closet-like cupboard that again filled the entire space floor to ceiling as much as possible so I could have plenty of room inside. Again, Alex helped me build this and we put it together in the most basic way we could figure out. We basically built a rectangular box with a platform on the bottom and then added the doors and hinges to the front. To attach it to the wall we used several L-brackets throughout to support and stabilize it. We ended up painting everything inside the cabinet color so it all blended in and looked finished. We used magnet latches at the top and bottom to keep the doors closed when shut as well.
The only catch was because of the shallow depth (12 inches max), I could not just do a traditional clothing rod with hangers which would’ve been too large to fit sideways in the space. I ordered and looked at a lot of options that would fit inside and these retractable laundry clothing rods seemed to fit the most hangers in the smallest space, and I also liked the idea that I could pull them out to sort through and see the items better. It ended up fitting all my tabelcloths easily and I have lots of room to spare. I can see everything clearly too and unlike before, I won’t have to worry about folding and stacking these which constantly got messy and unorganized.
For the outside of the cabinet, I wallpapered the entire thing to give it the illusion that it was built-in and part of the wall as opposed to a very obvious cabinet. I also used two more of the knobs from the cabinets on the back wall for handles- these are small and subtle and not super noticeable.


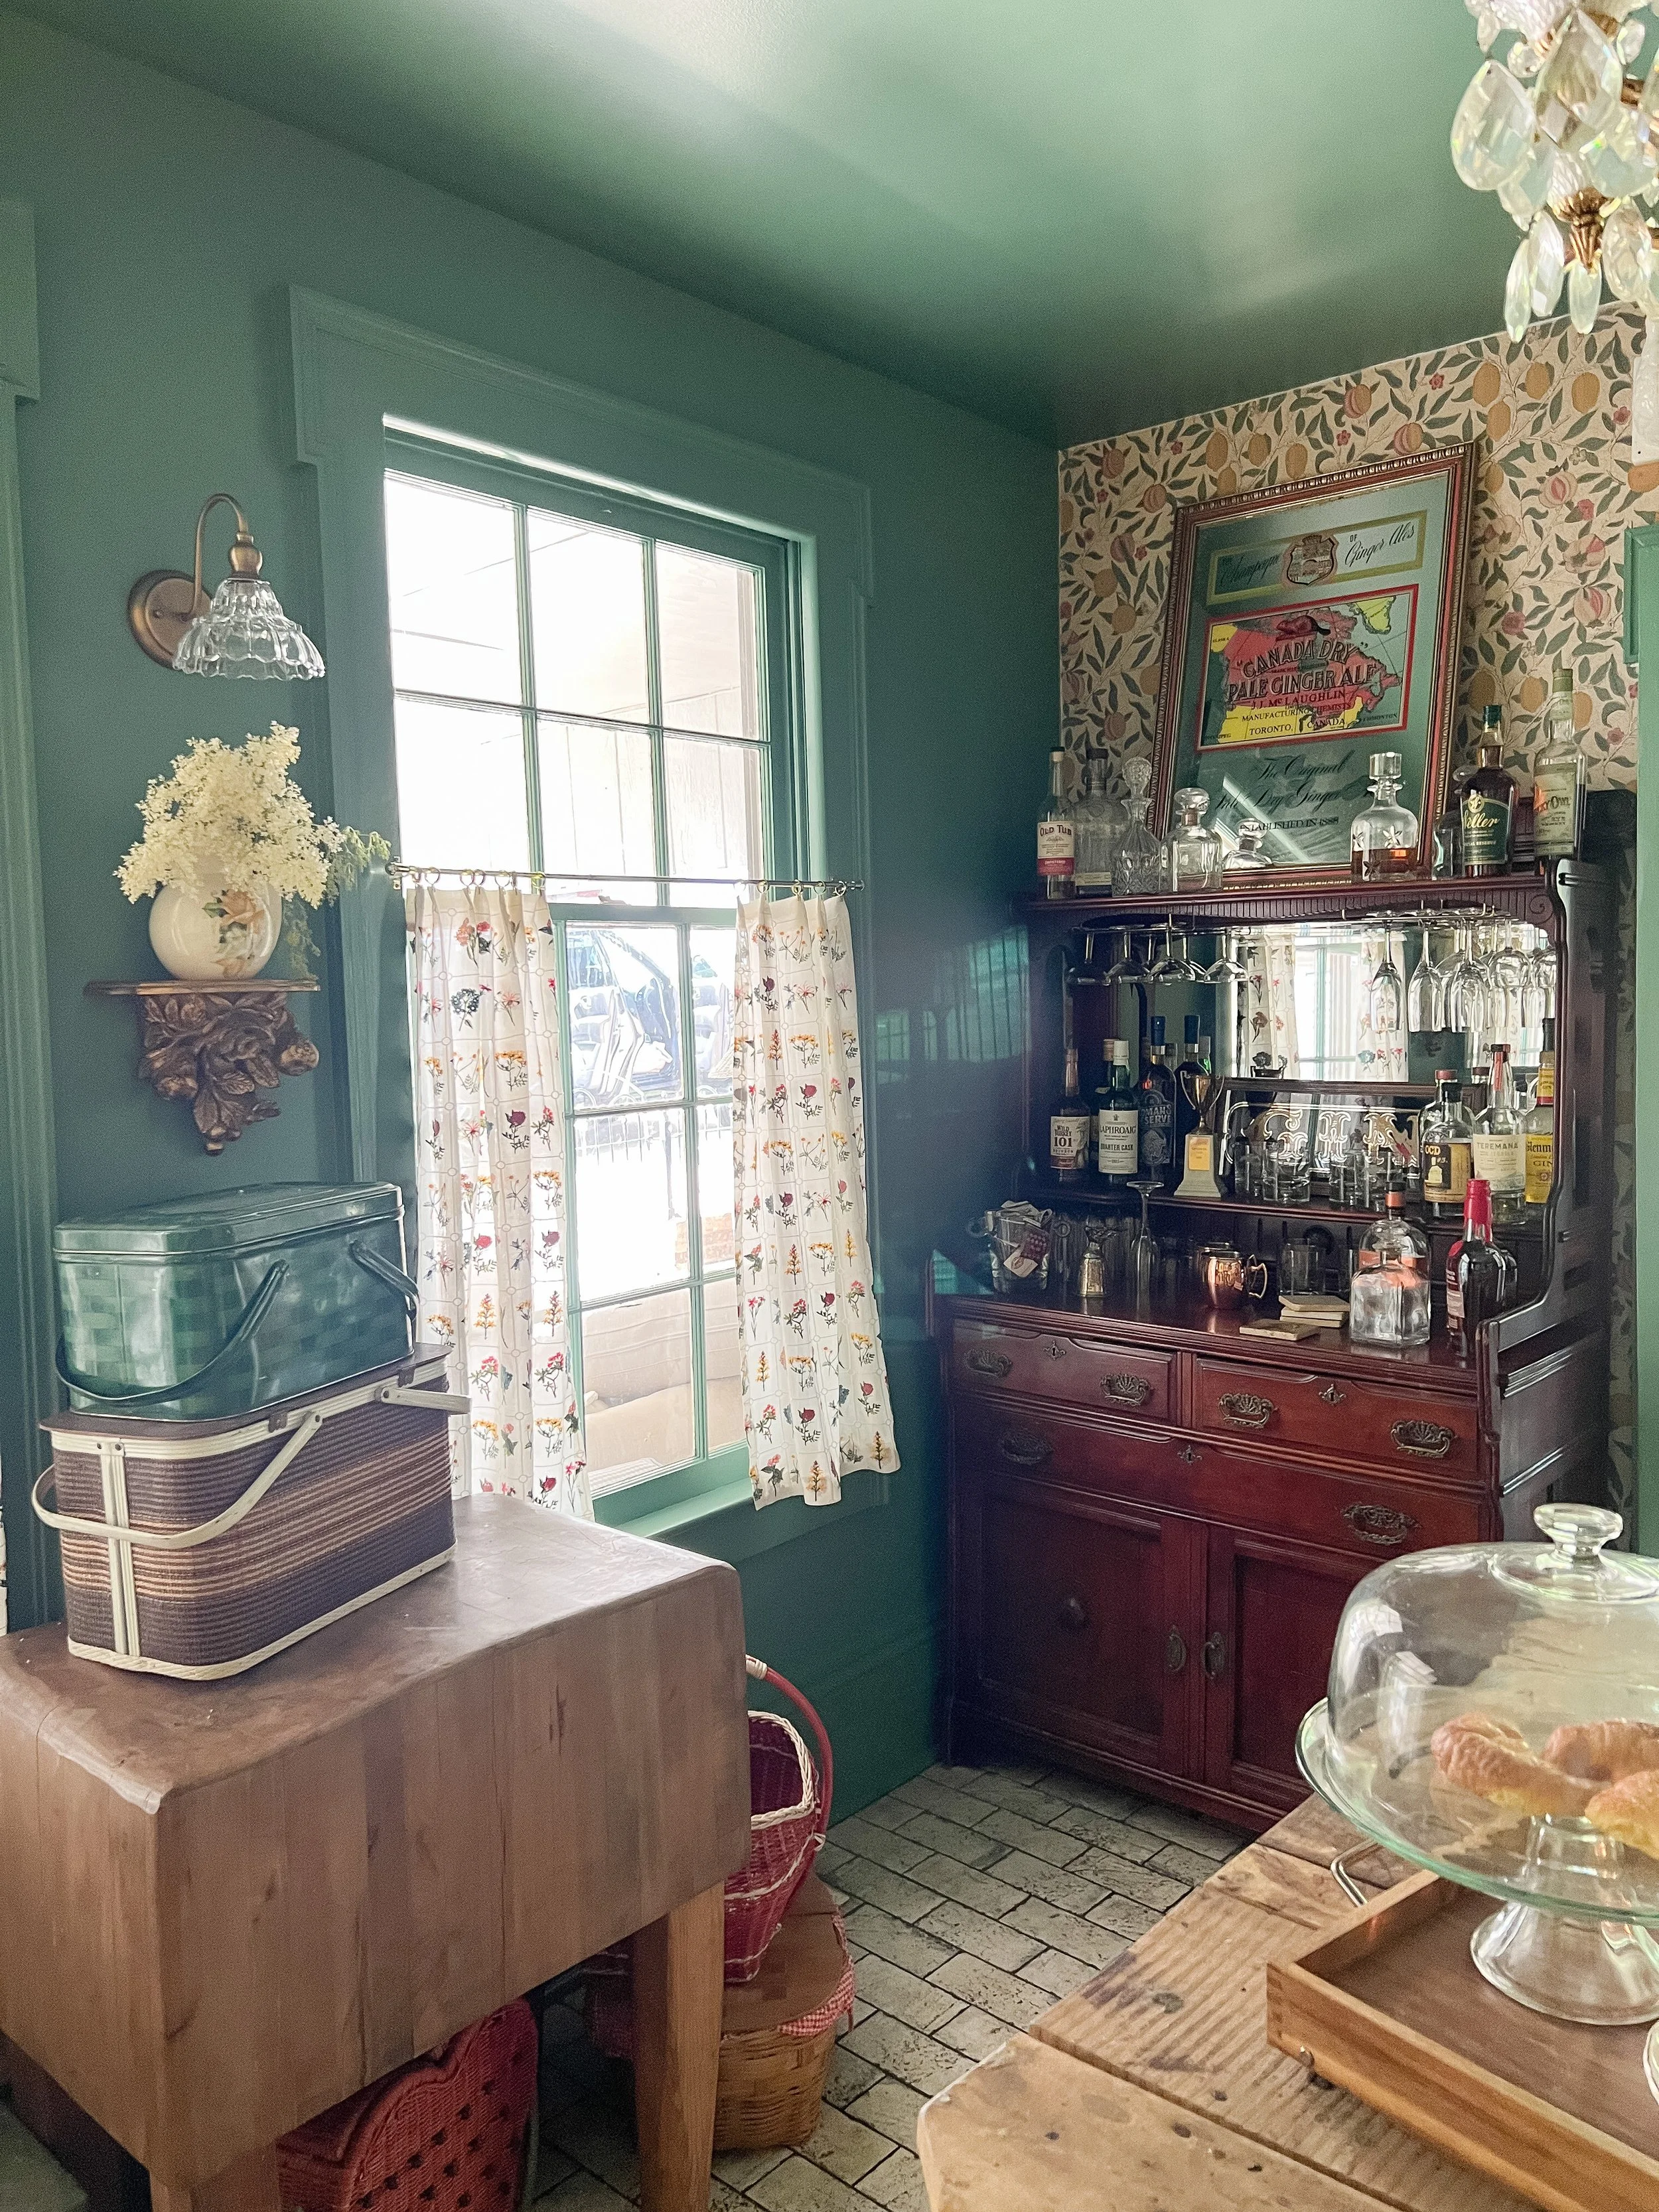
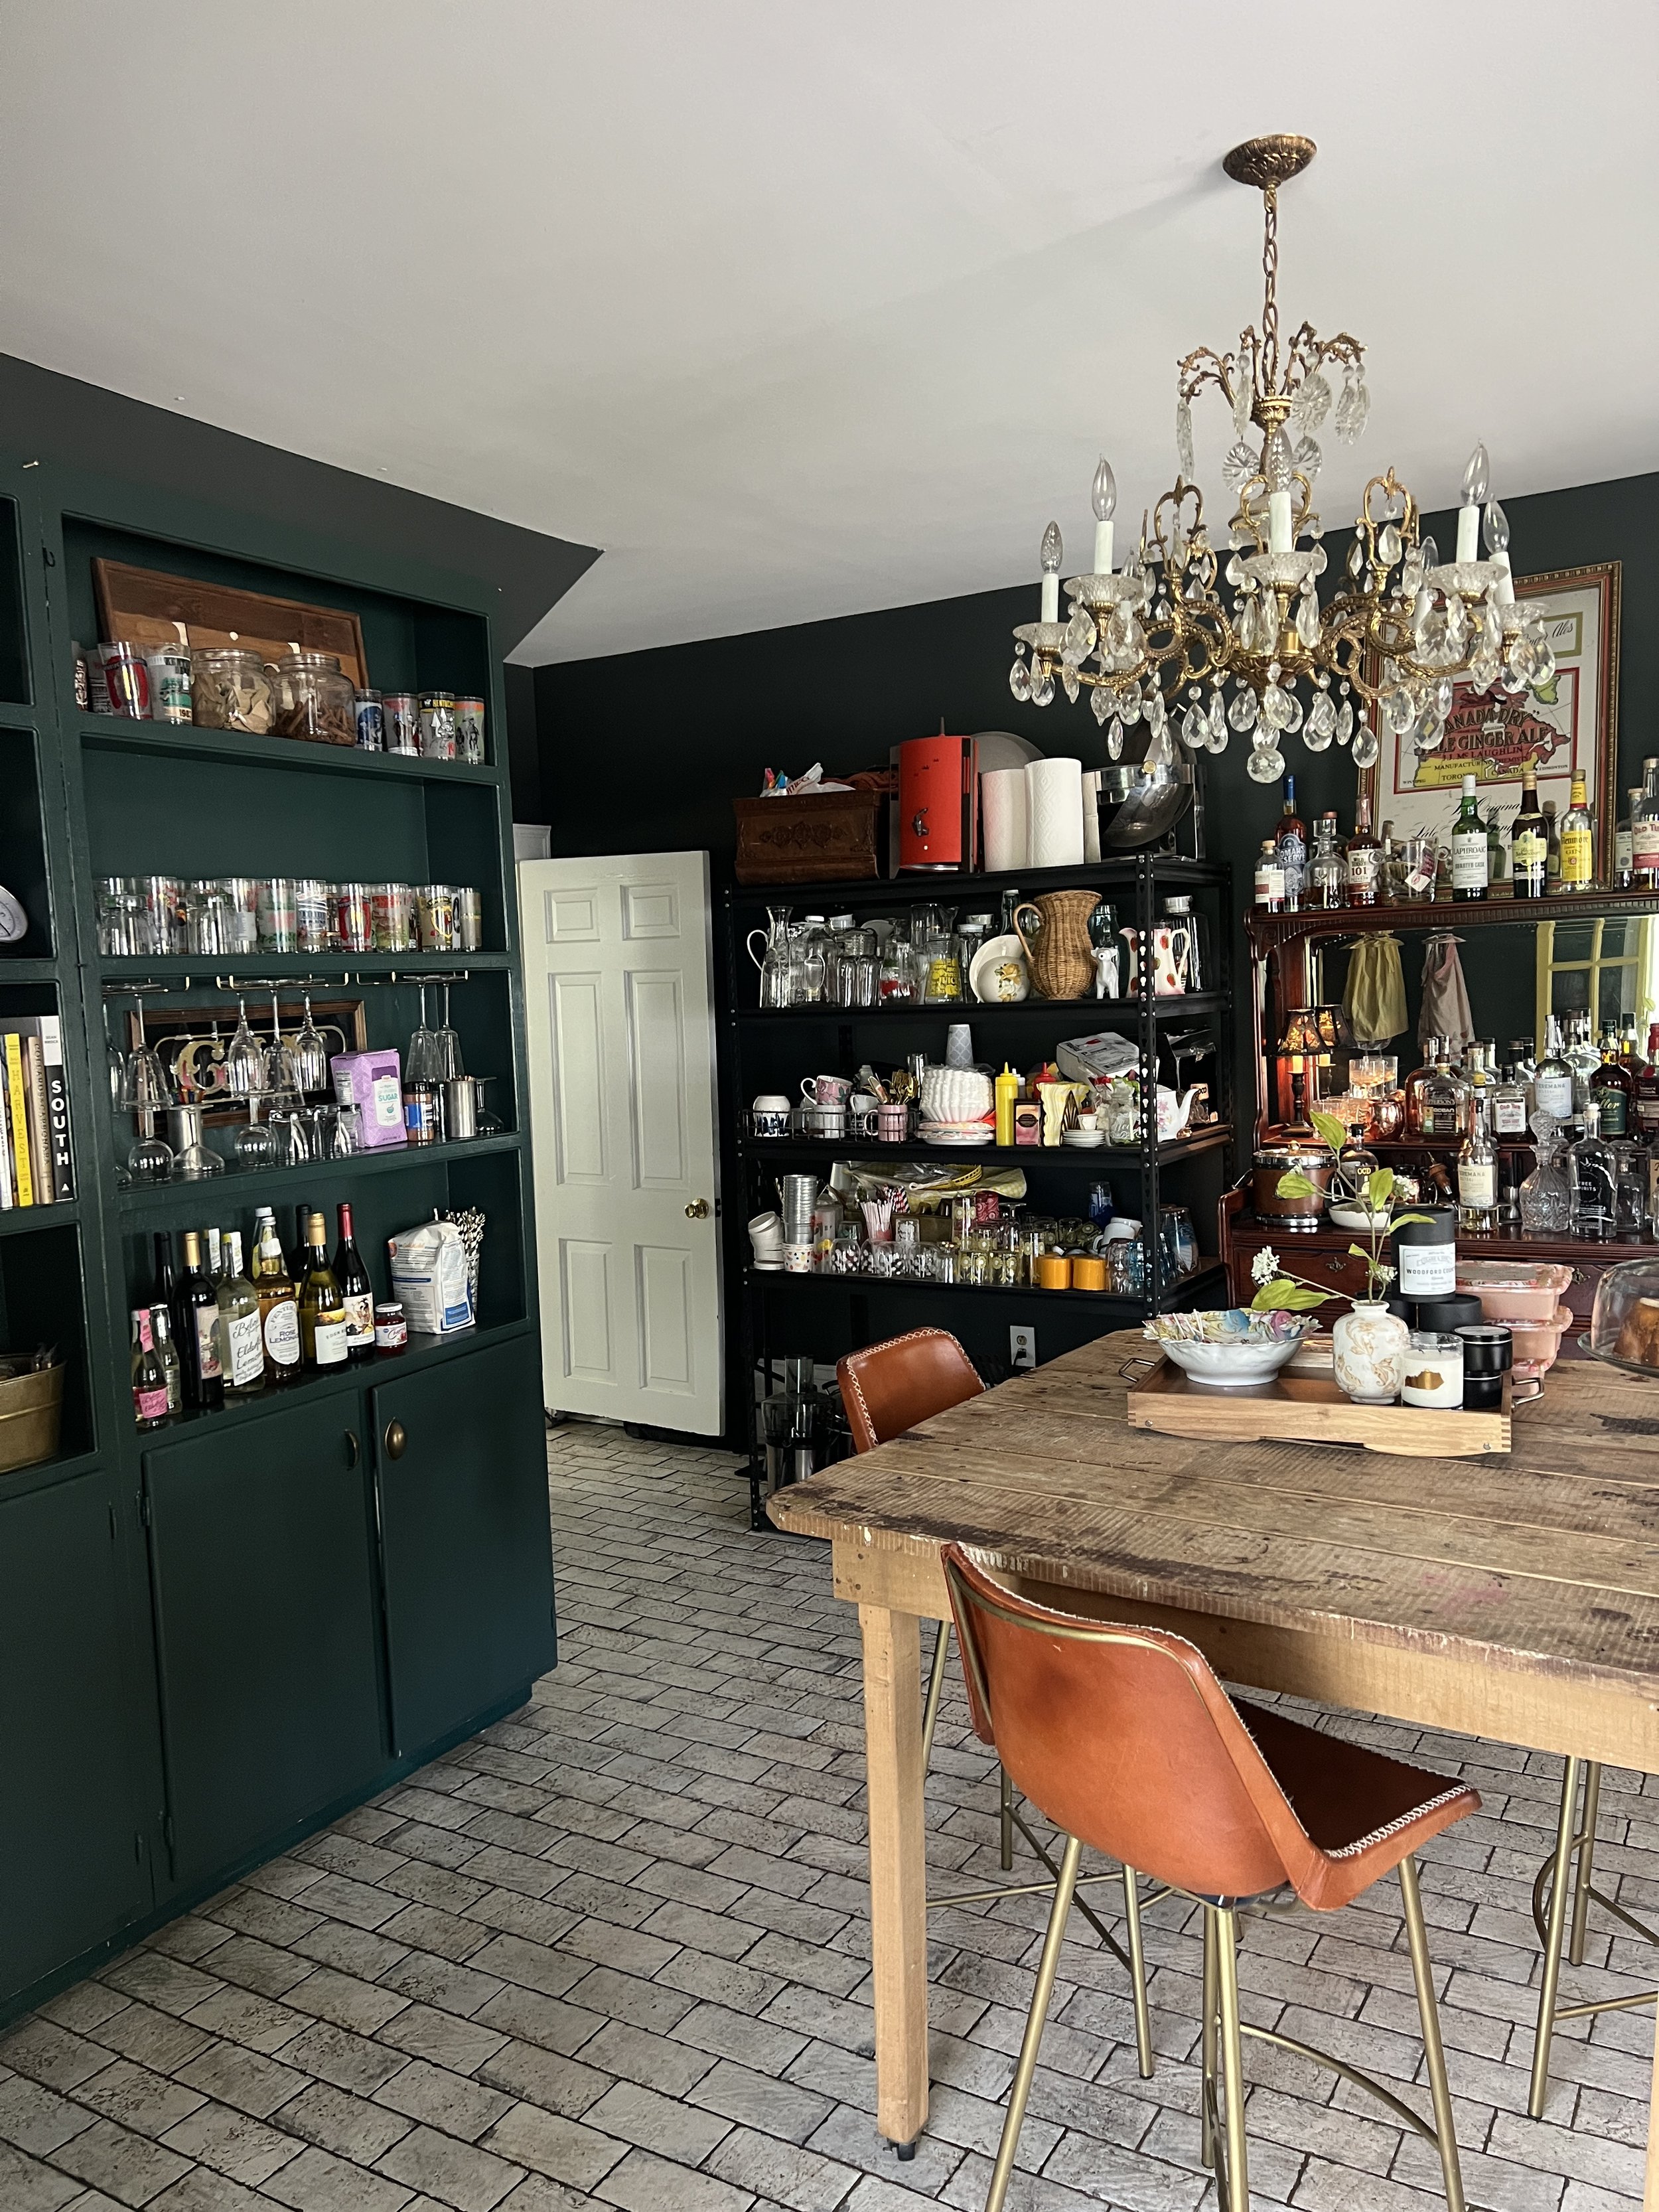
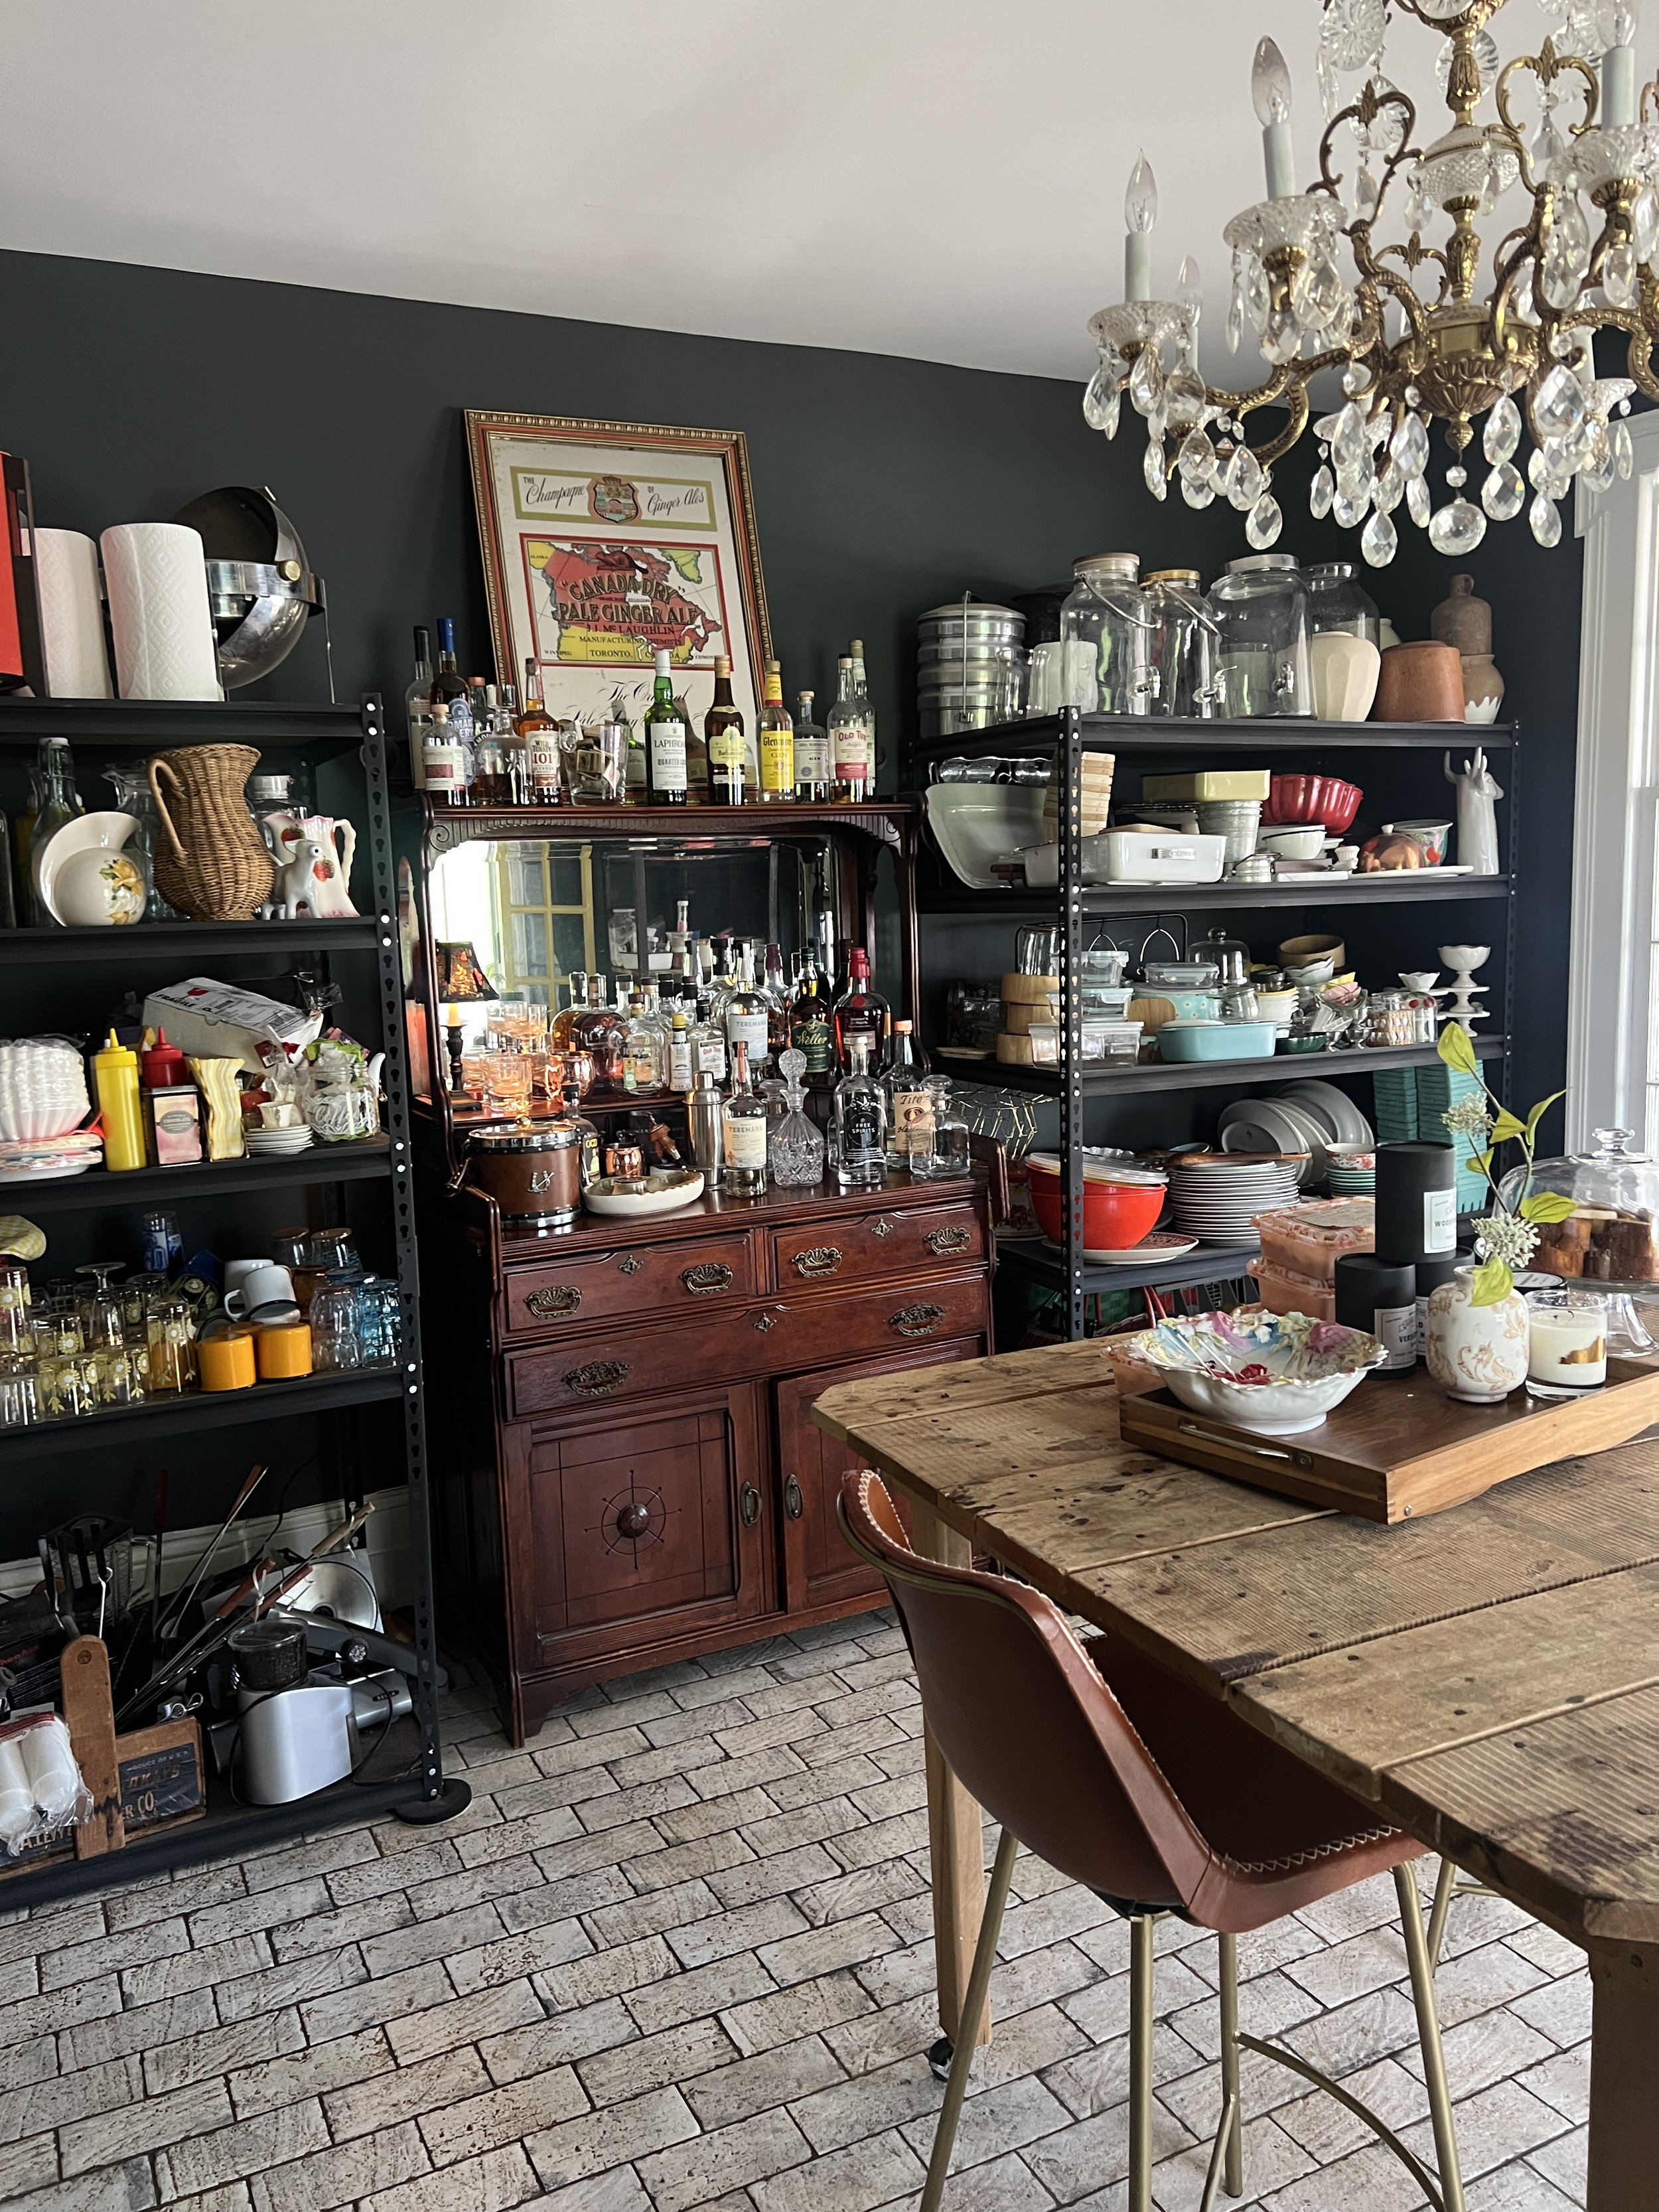
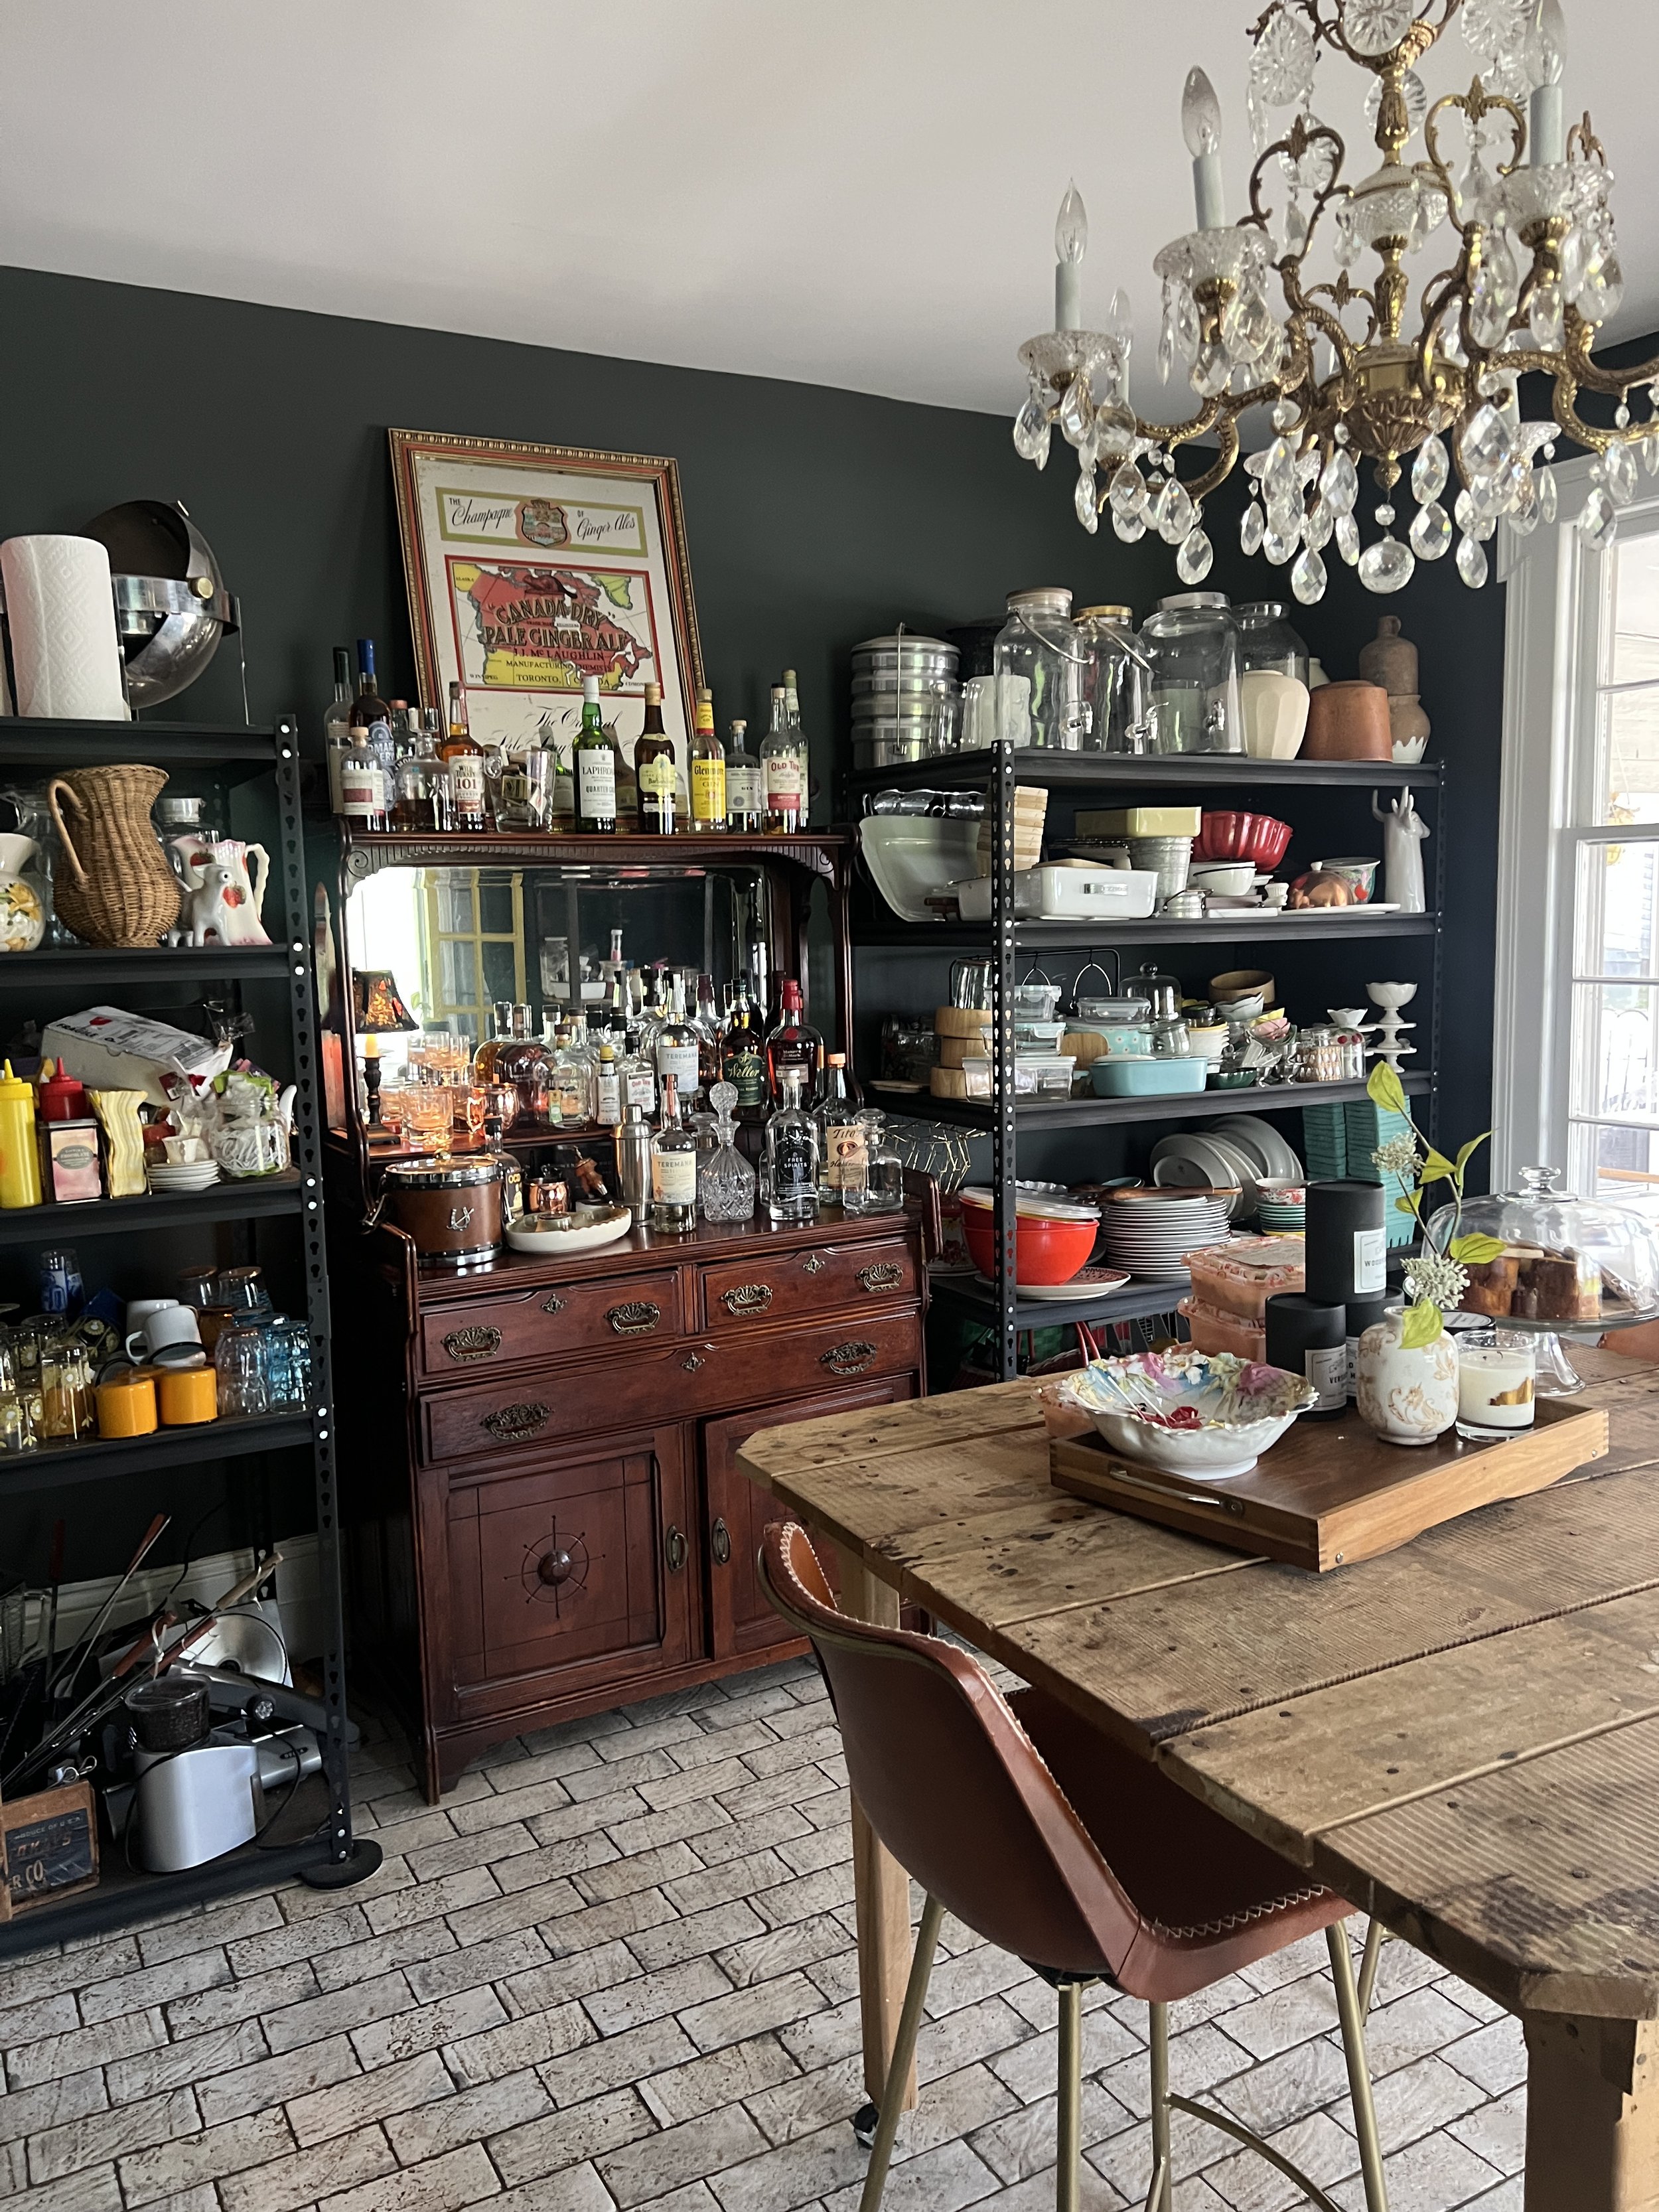
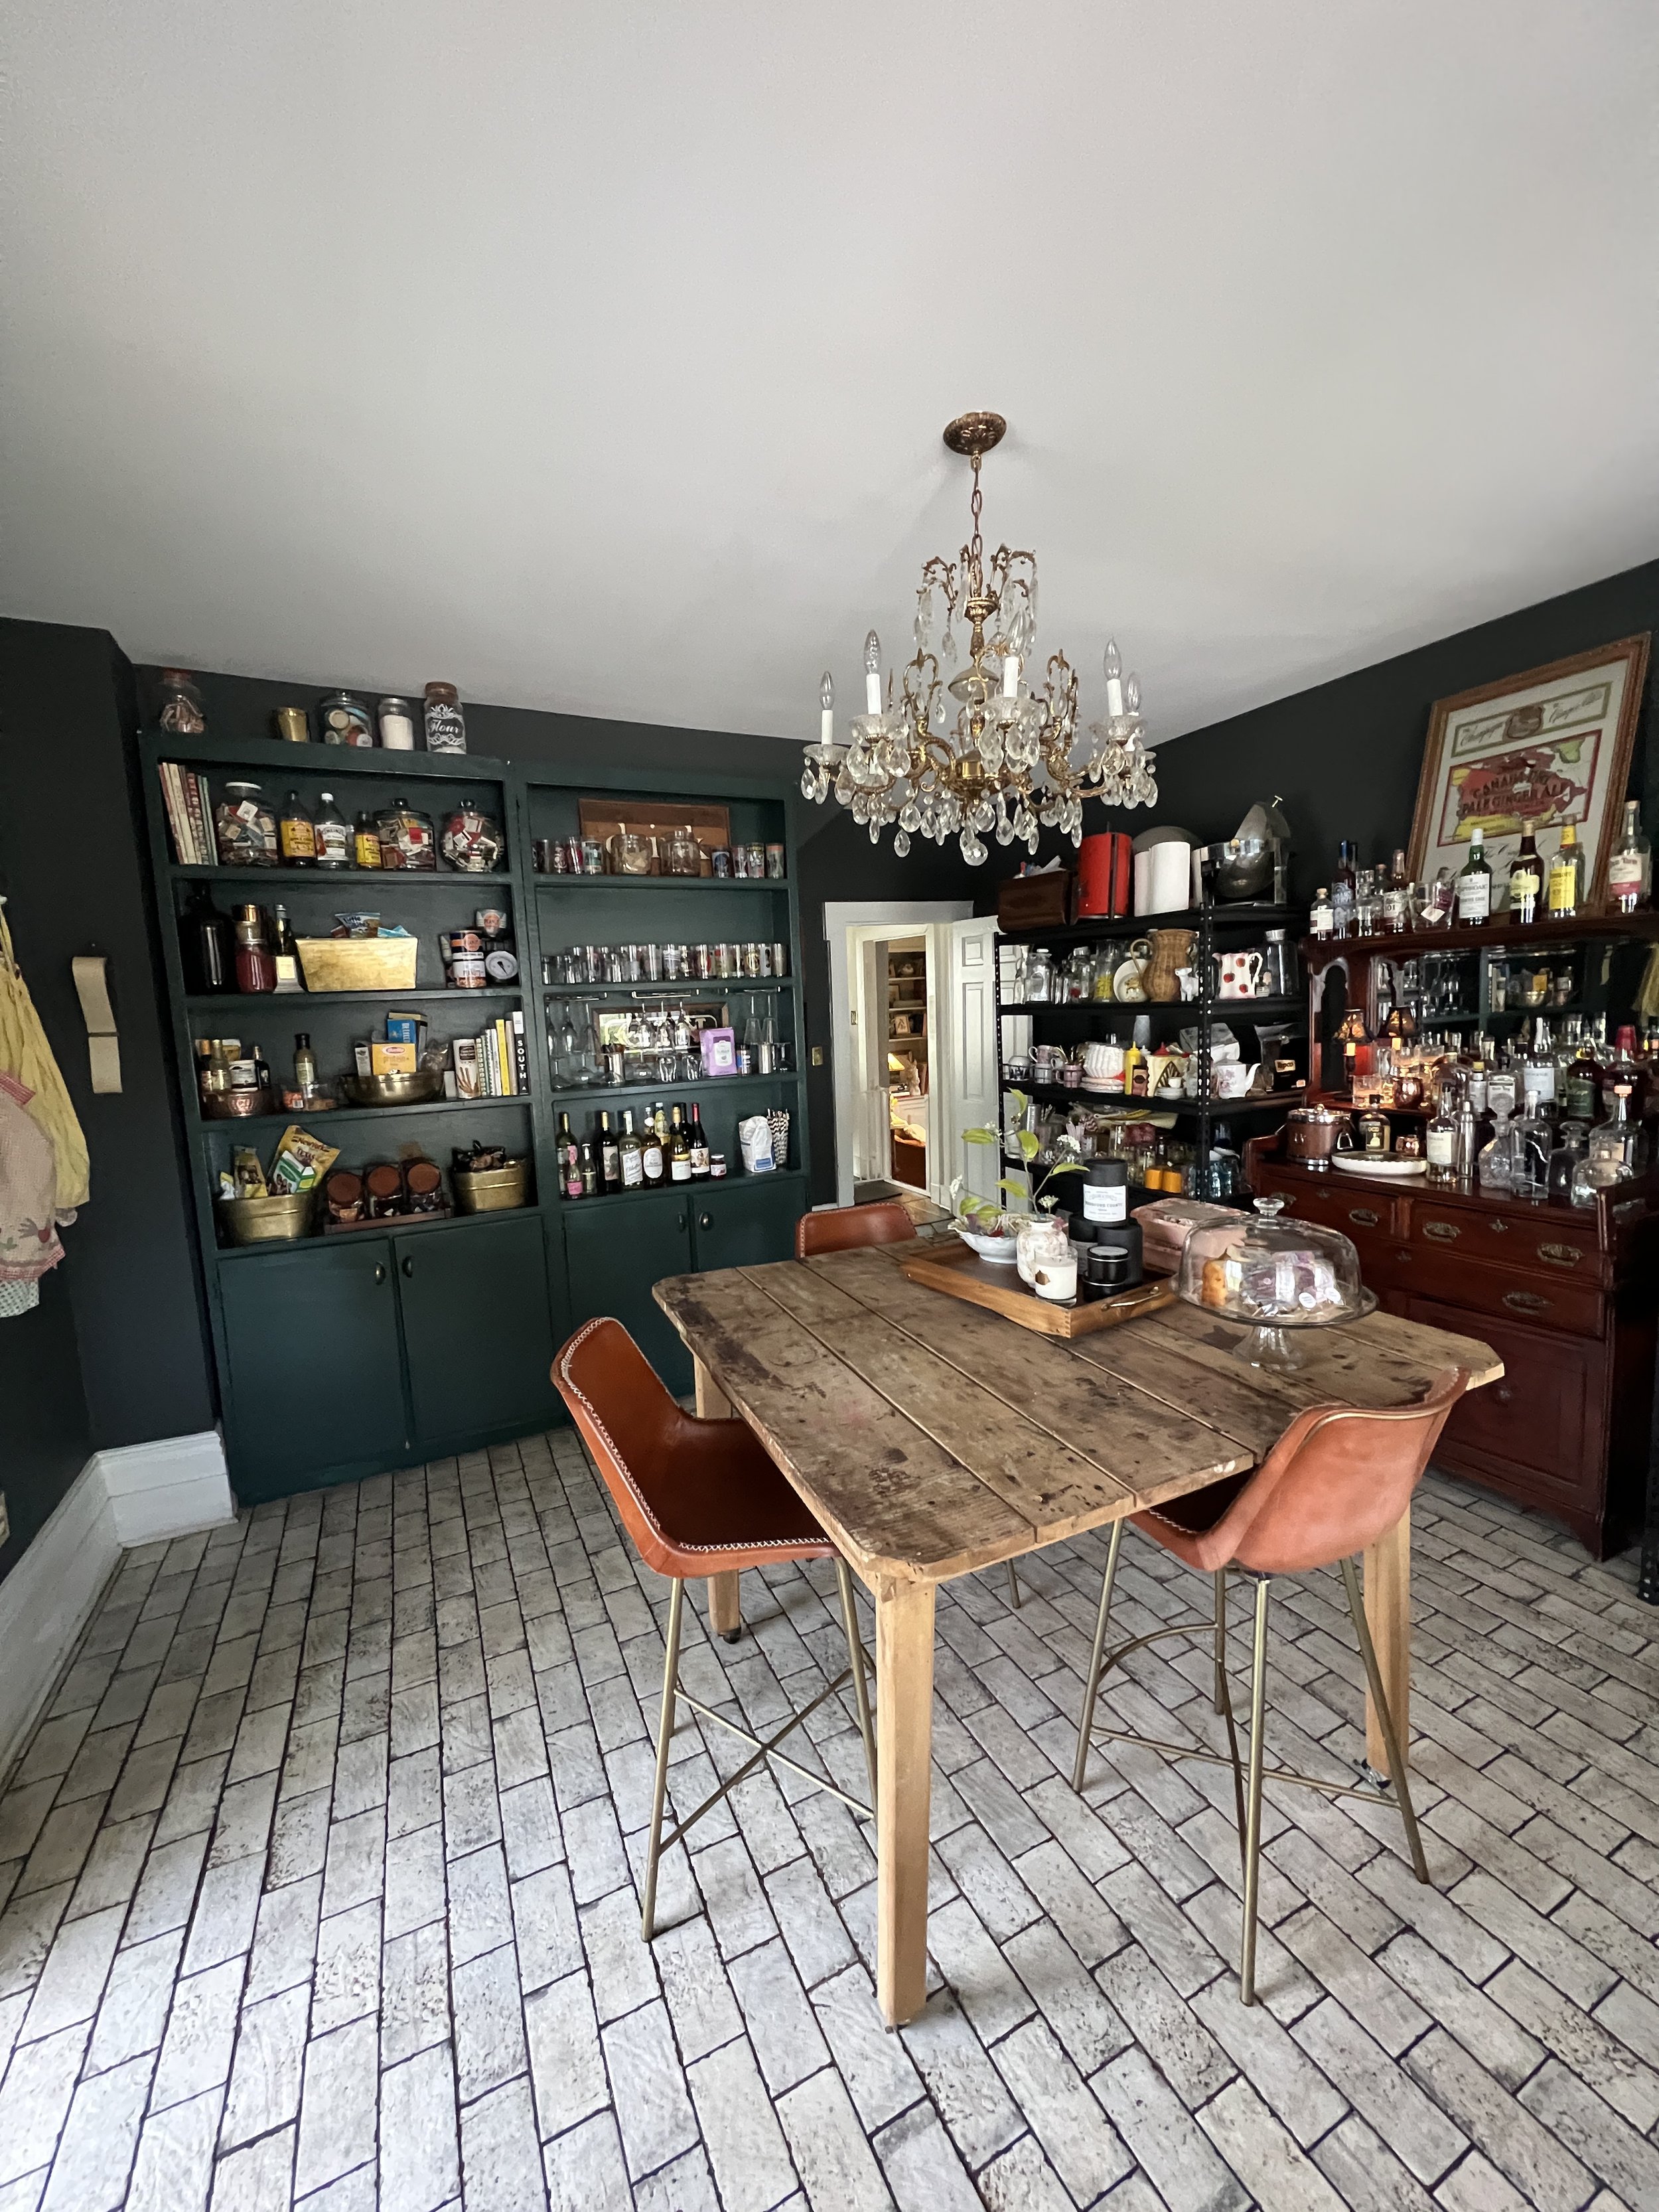
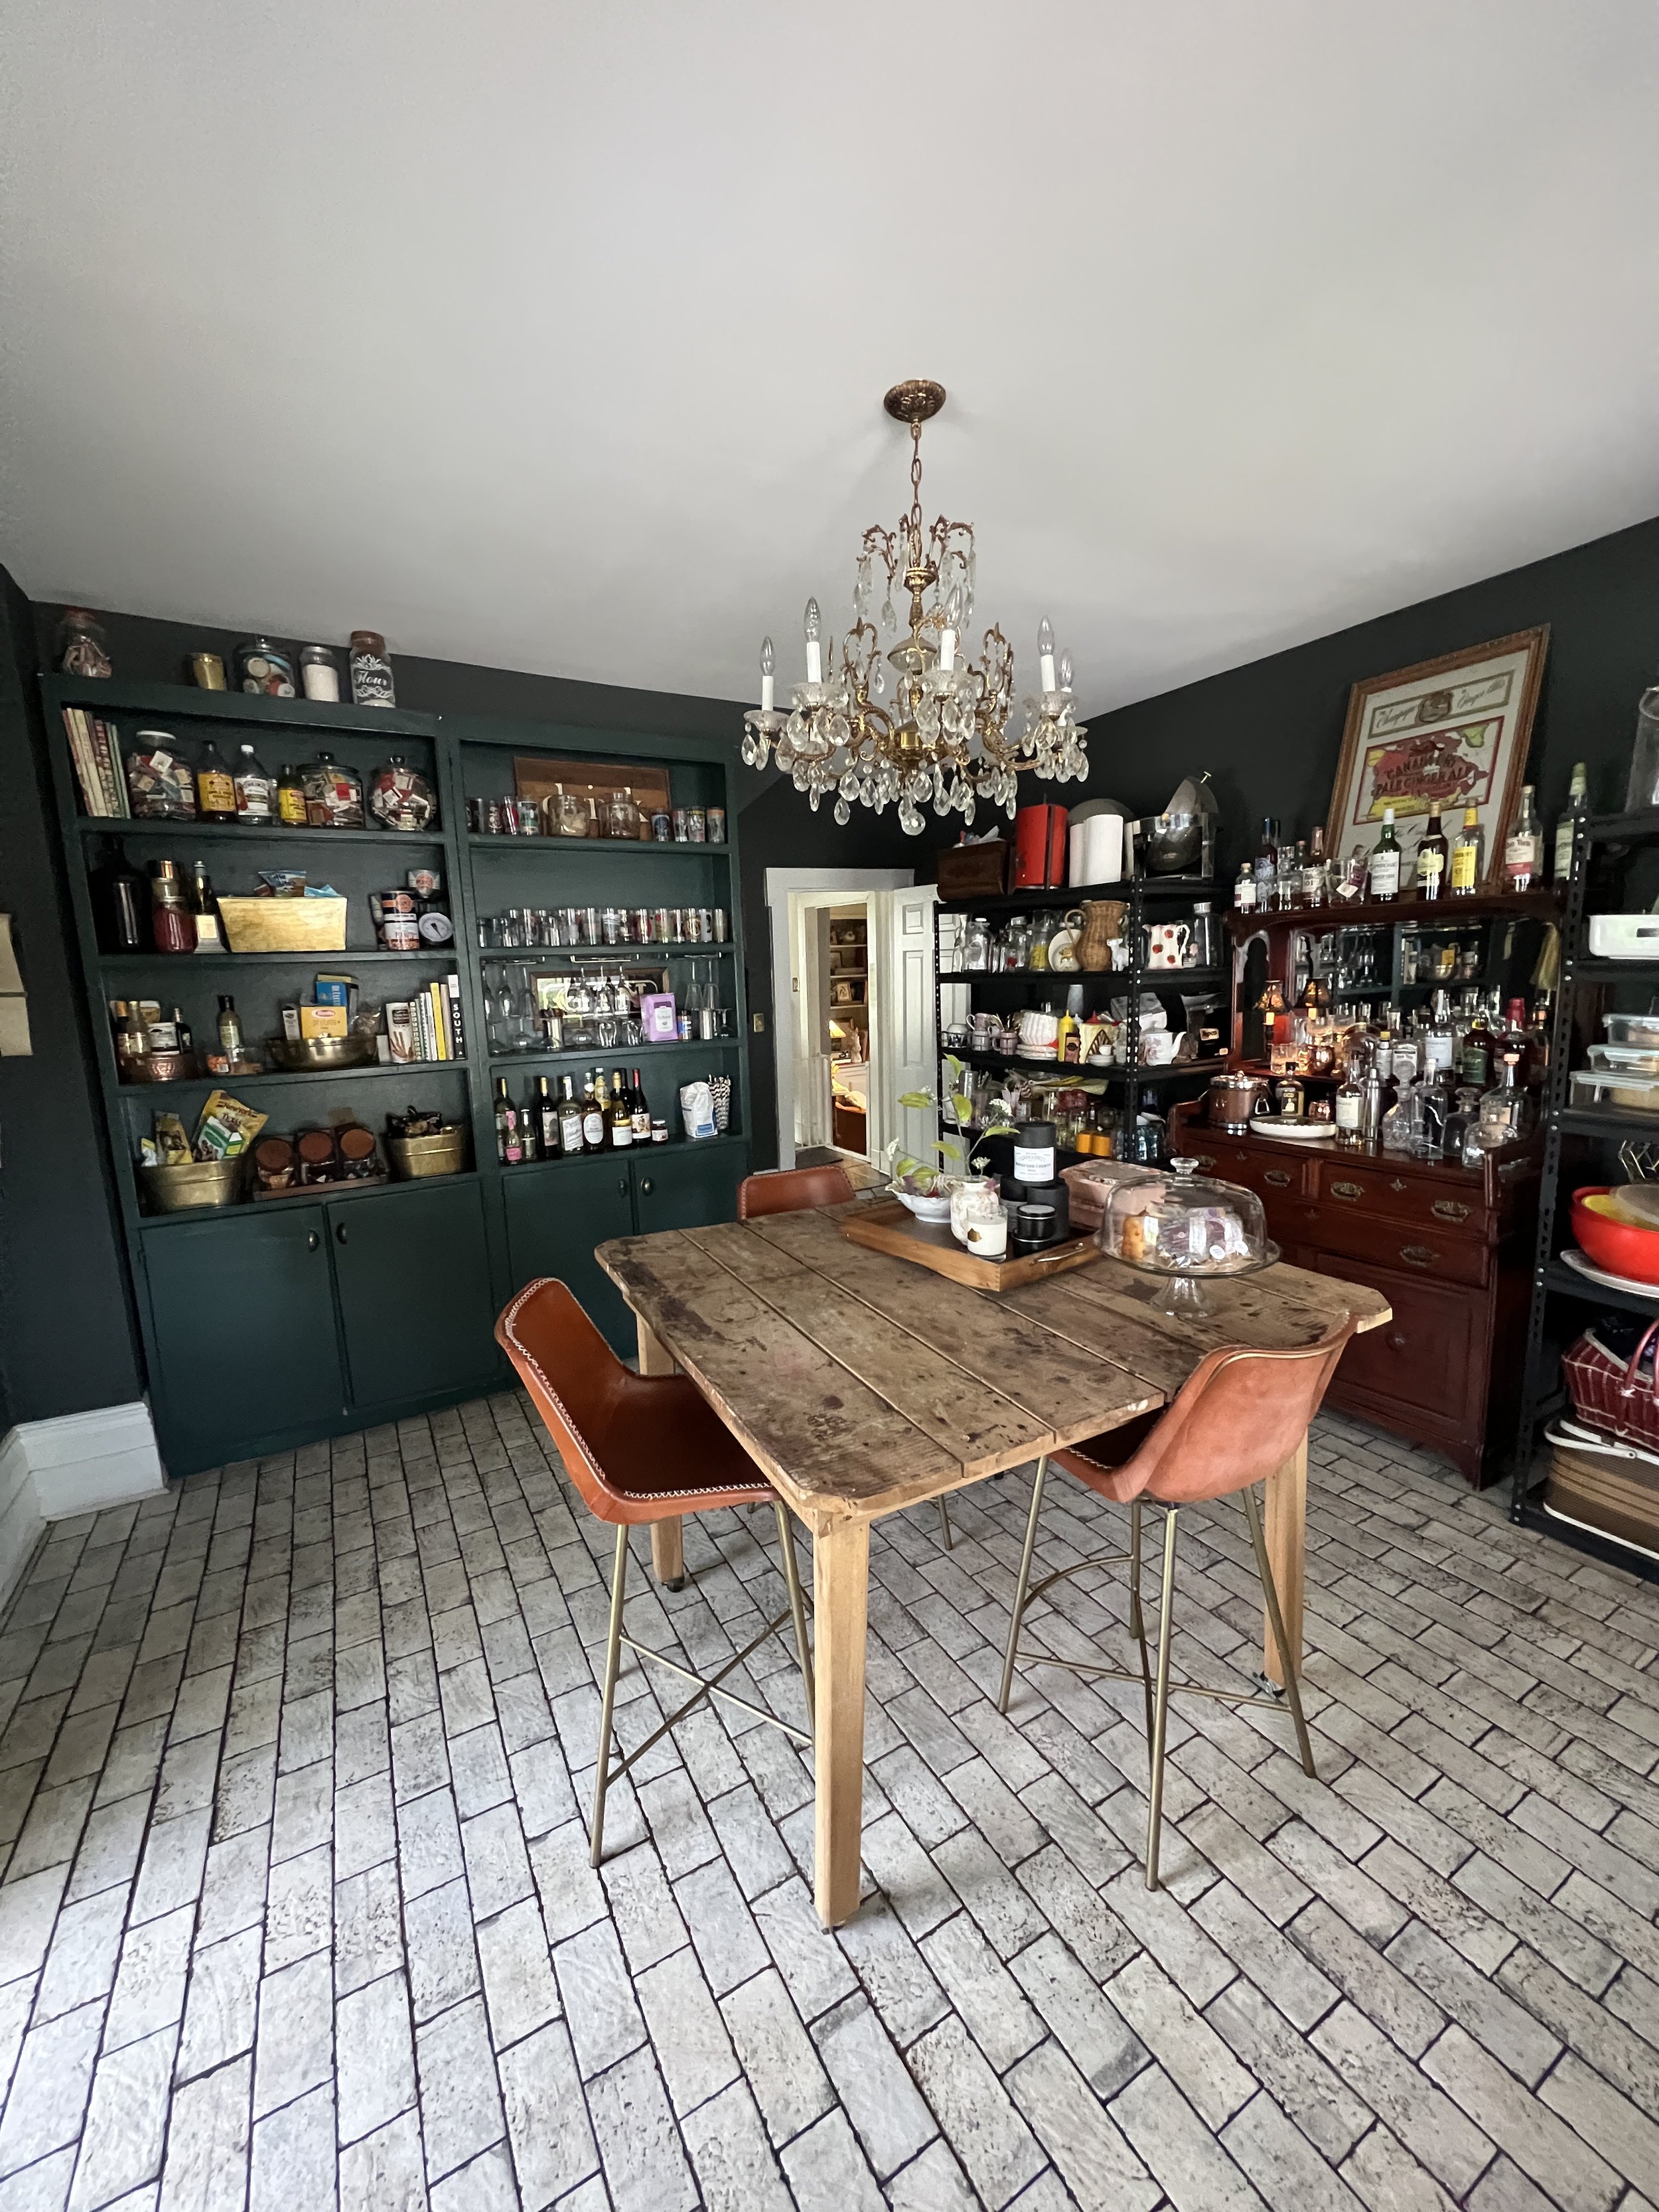
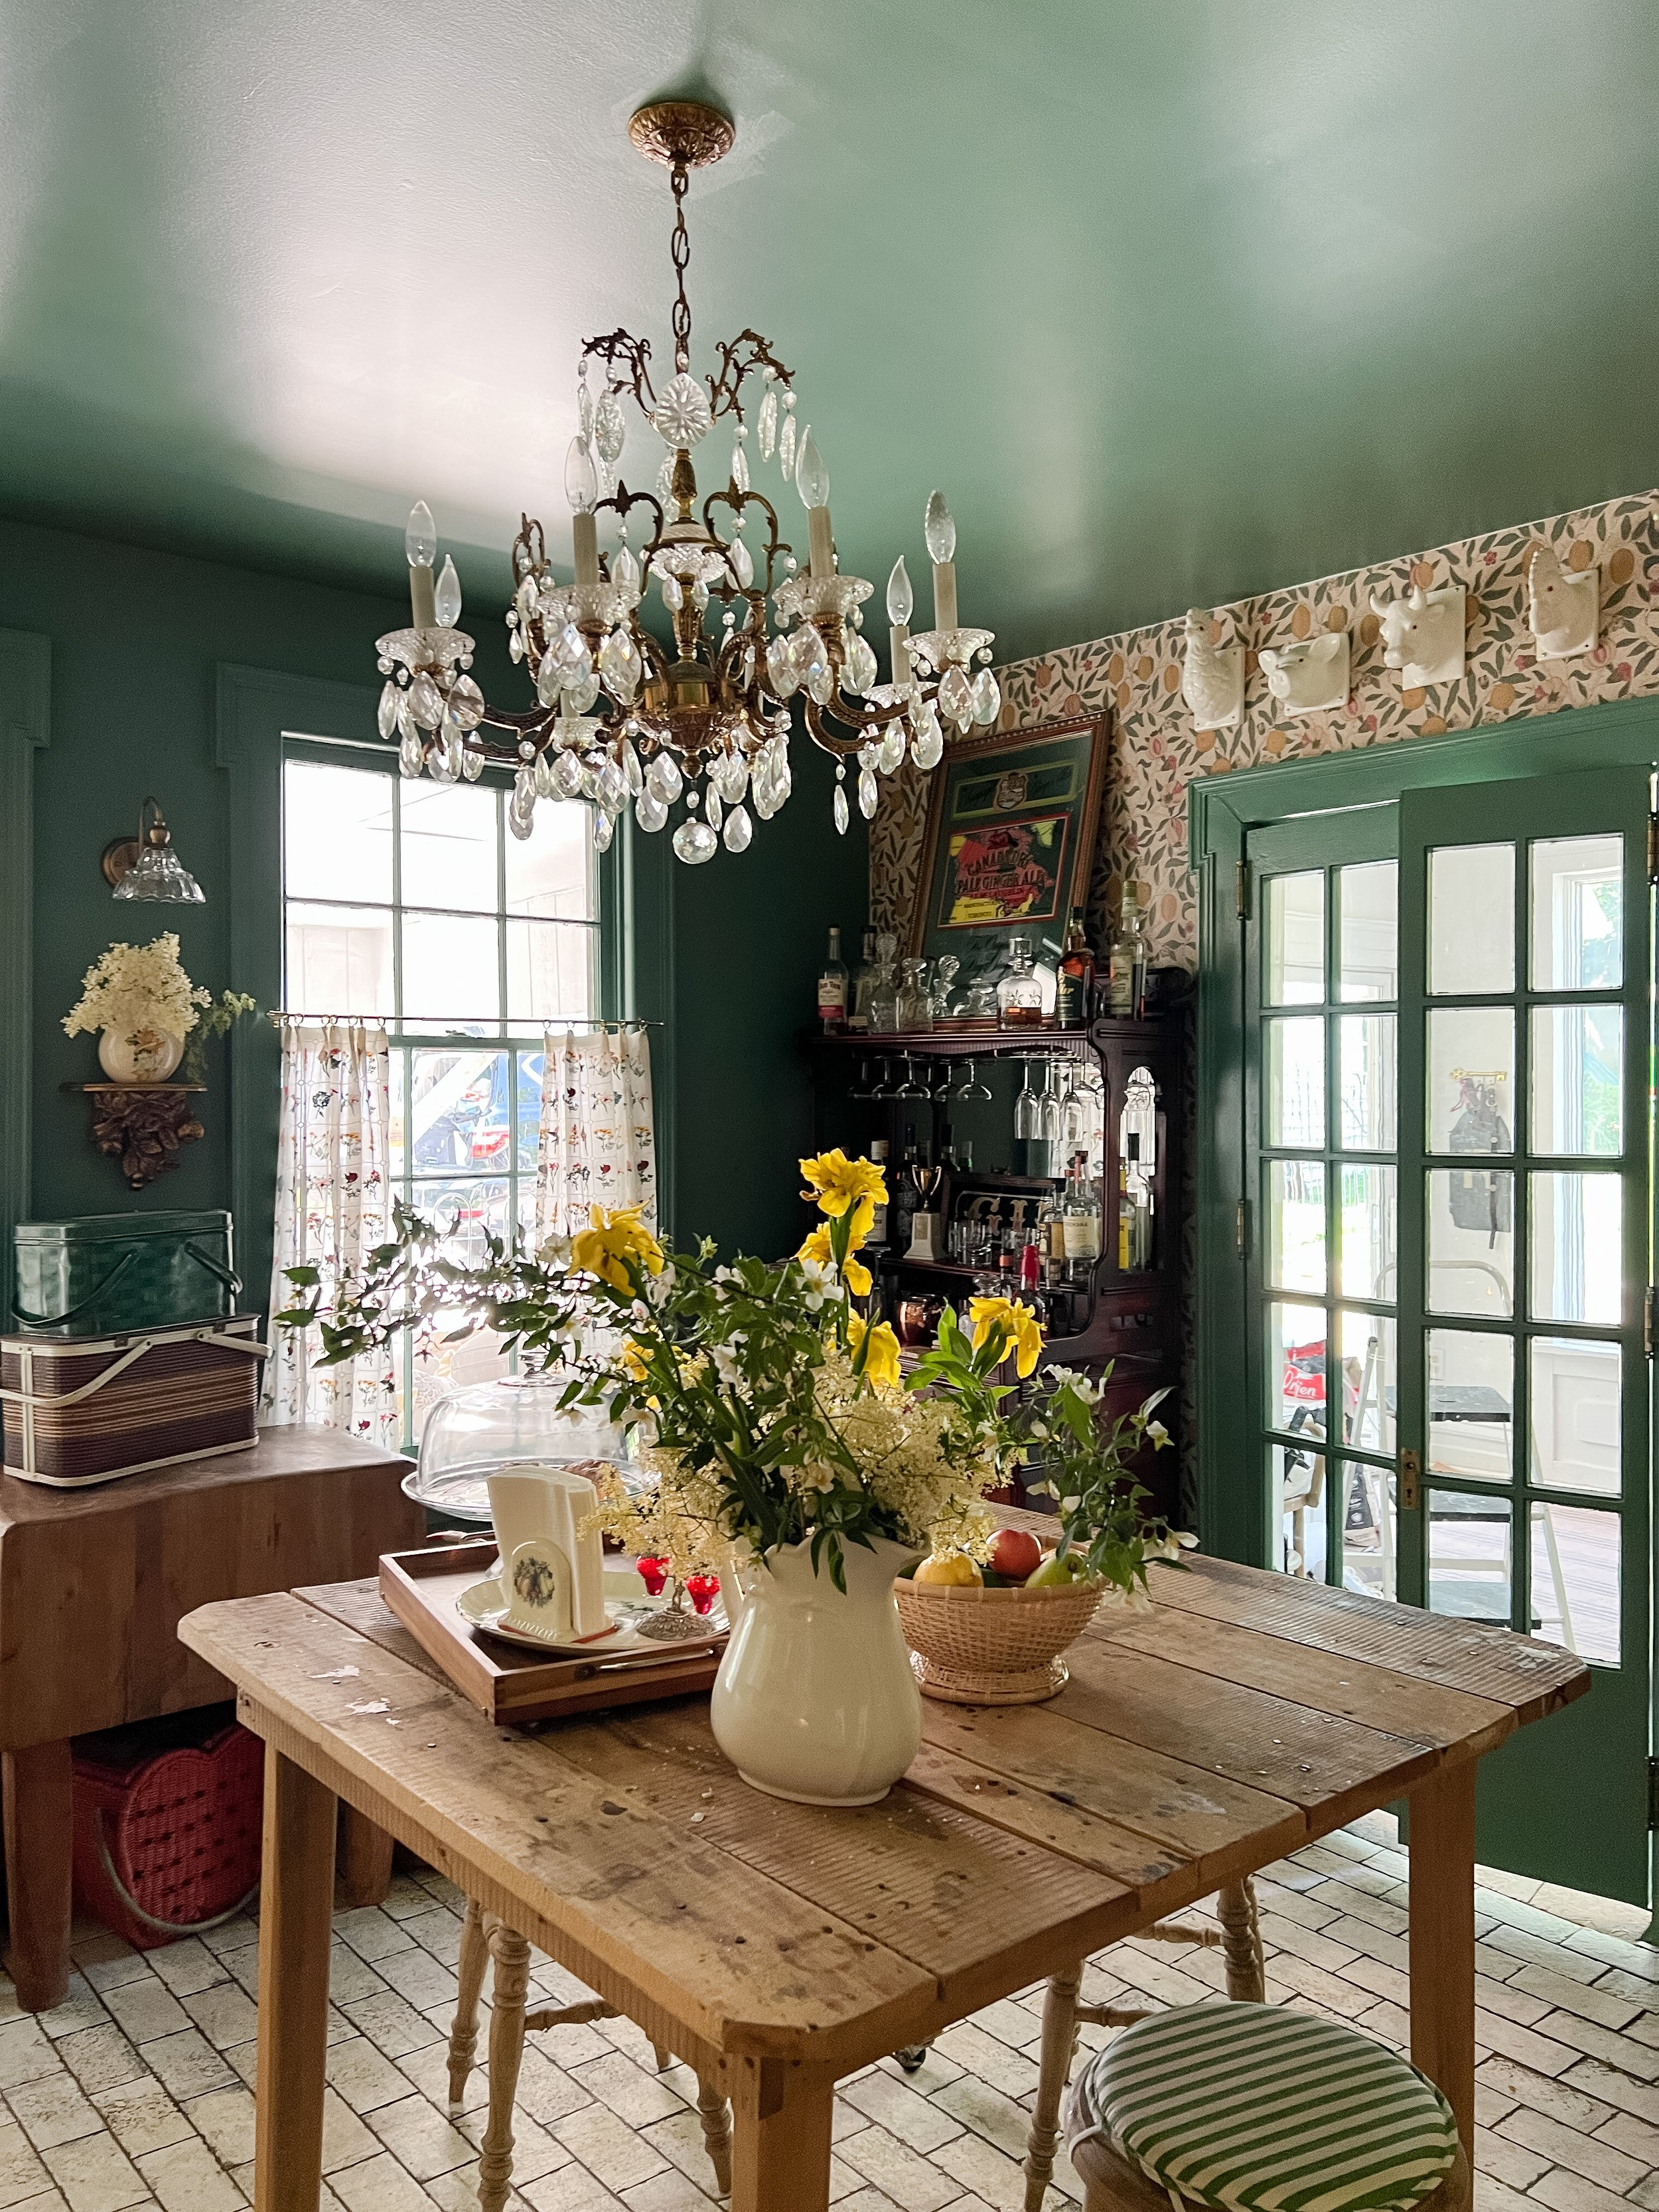
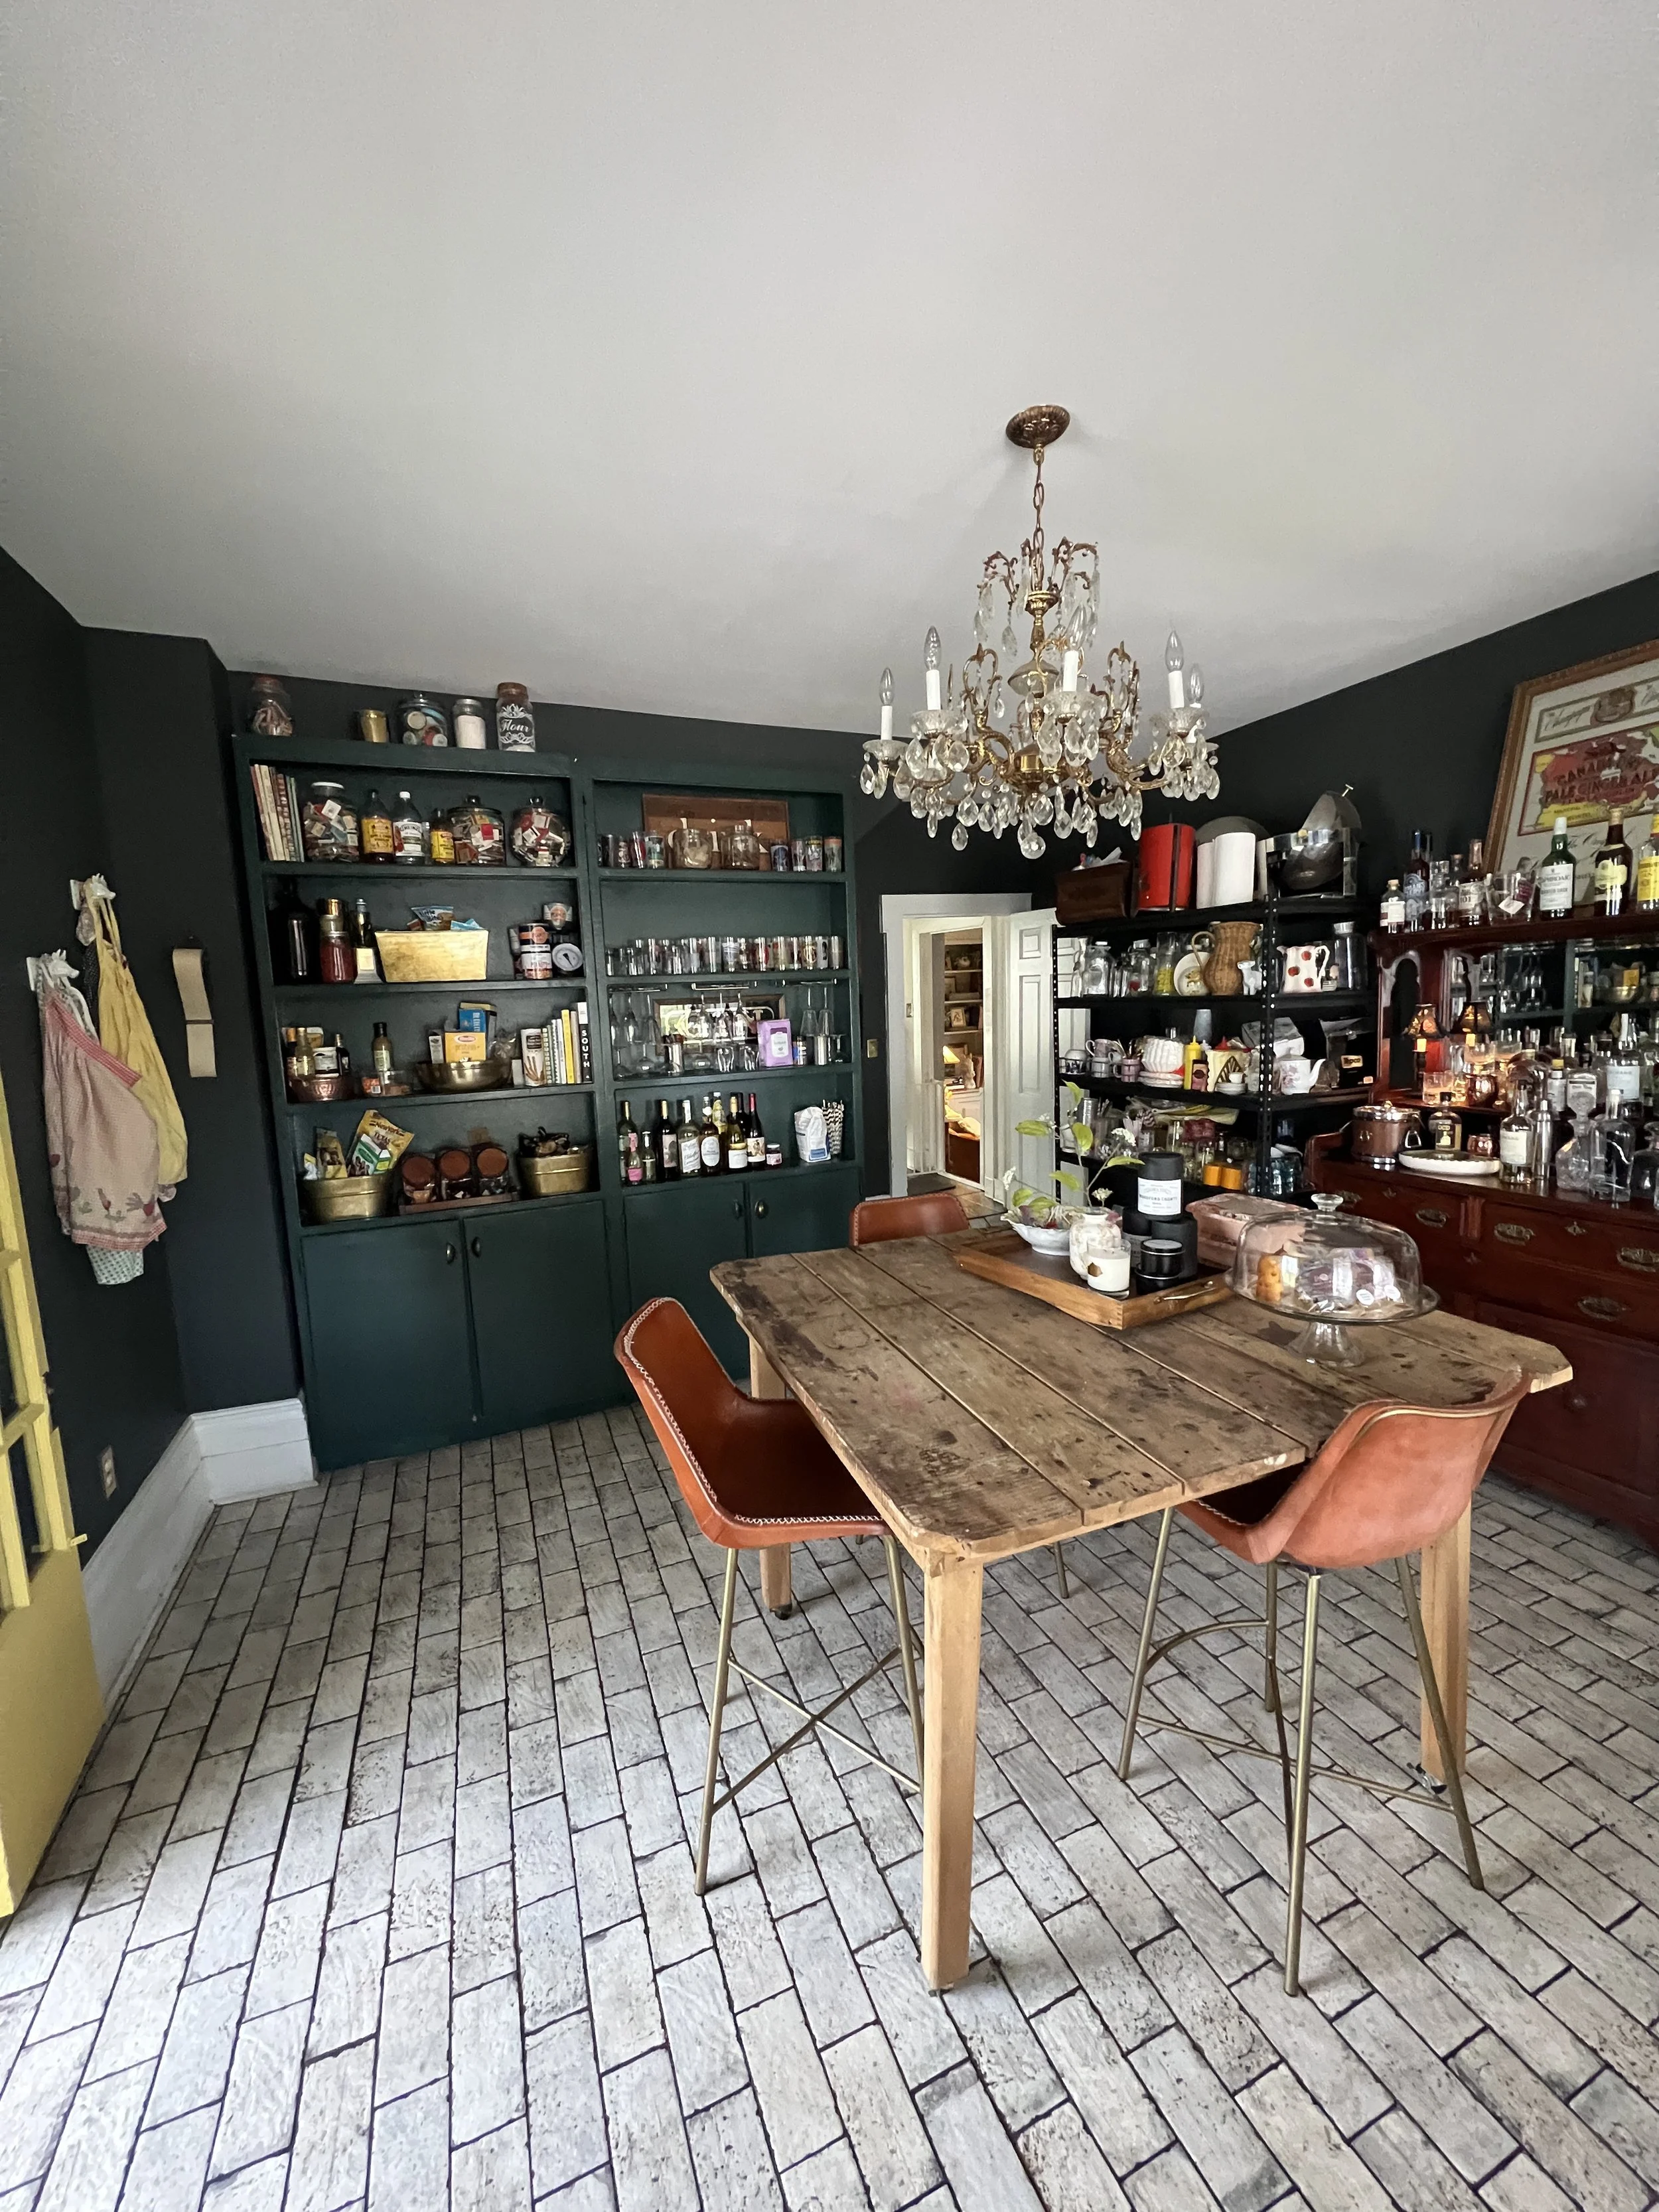
In the front left corner of the room, we created a designated bar area using an antique furniture piece we already had in this space. This piece provides a ton of storage and is also set up perfectly for bar ware so we decided to keep it in the space for that use. It also fit perfectly in this corner so that was another plus! I added the brass glass holders we originally had on the side cabinets on this as well to hold the longer stemmed glasses underneath the top shelf.