How to Assemble a Giant Charcuterie Grazing Table
I have been dying to do a giant table-size charcuterie spread forever and earlier this summer, I finally got the opportunity while helping one of my client’s with her daughter’s graduation open house. This charcuterie was classic and summery with lots of fruit and bright colors! You can really customize the ingredients to whatever you like or have available. I’ve listed all the ingredients I used below and instructions for putting your own giant table-sized charcuterie together. This truly is the easiest way to feed a crowd and entertain beautifully without having to really cook a thing!
Find all the ingredients and instructions below!
xoxo
Emily

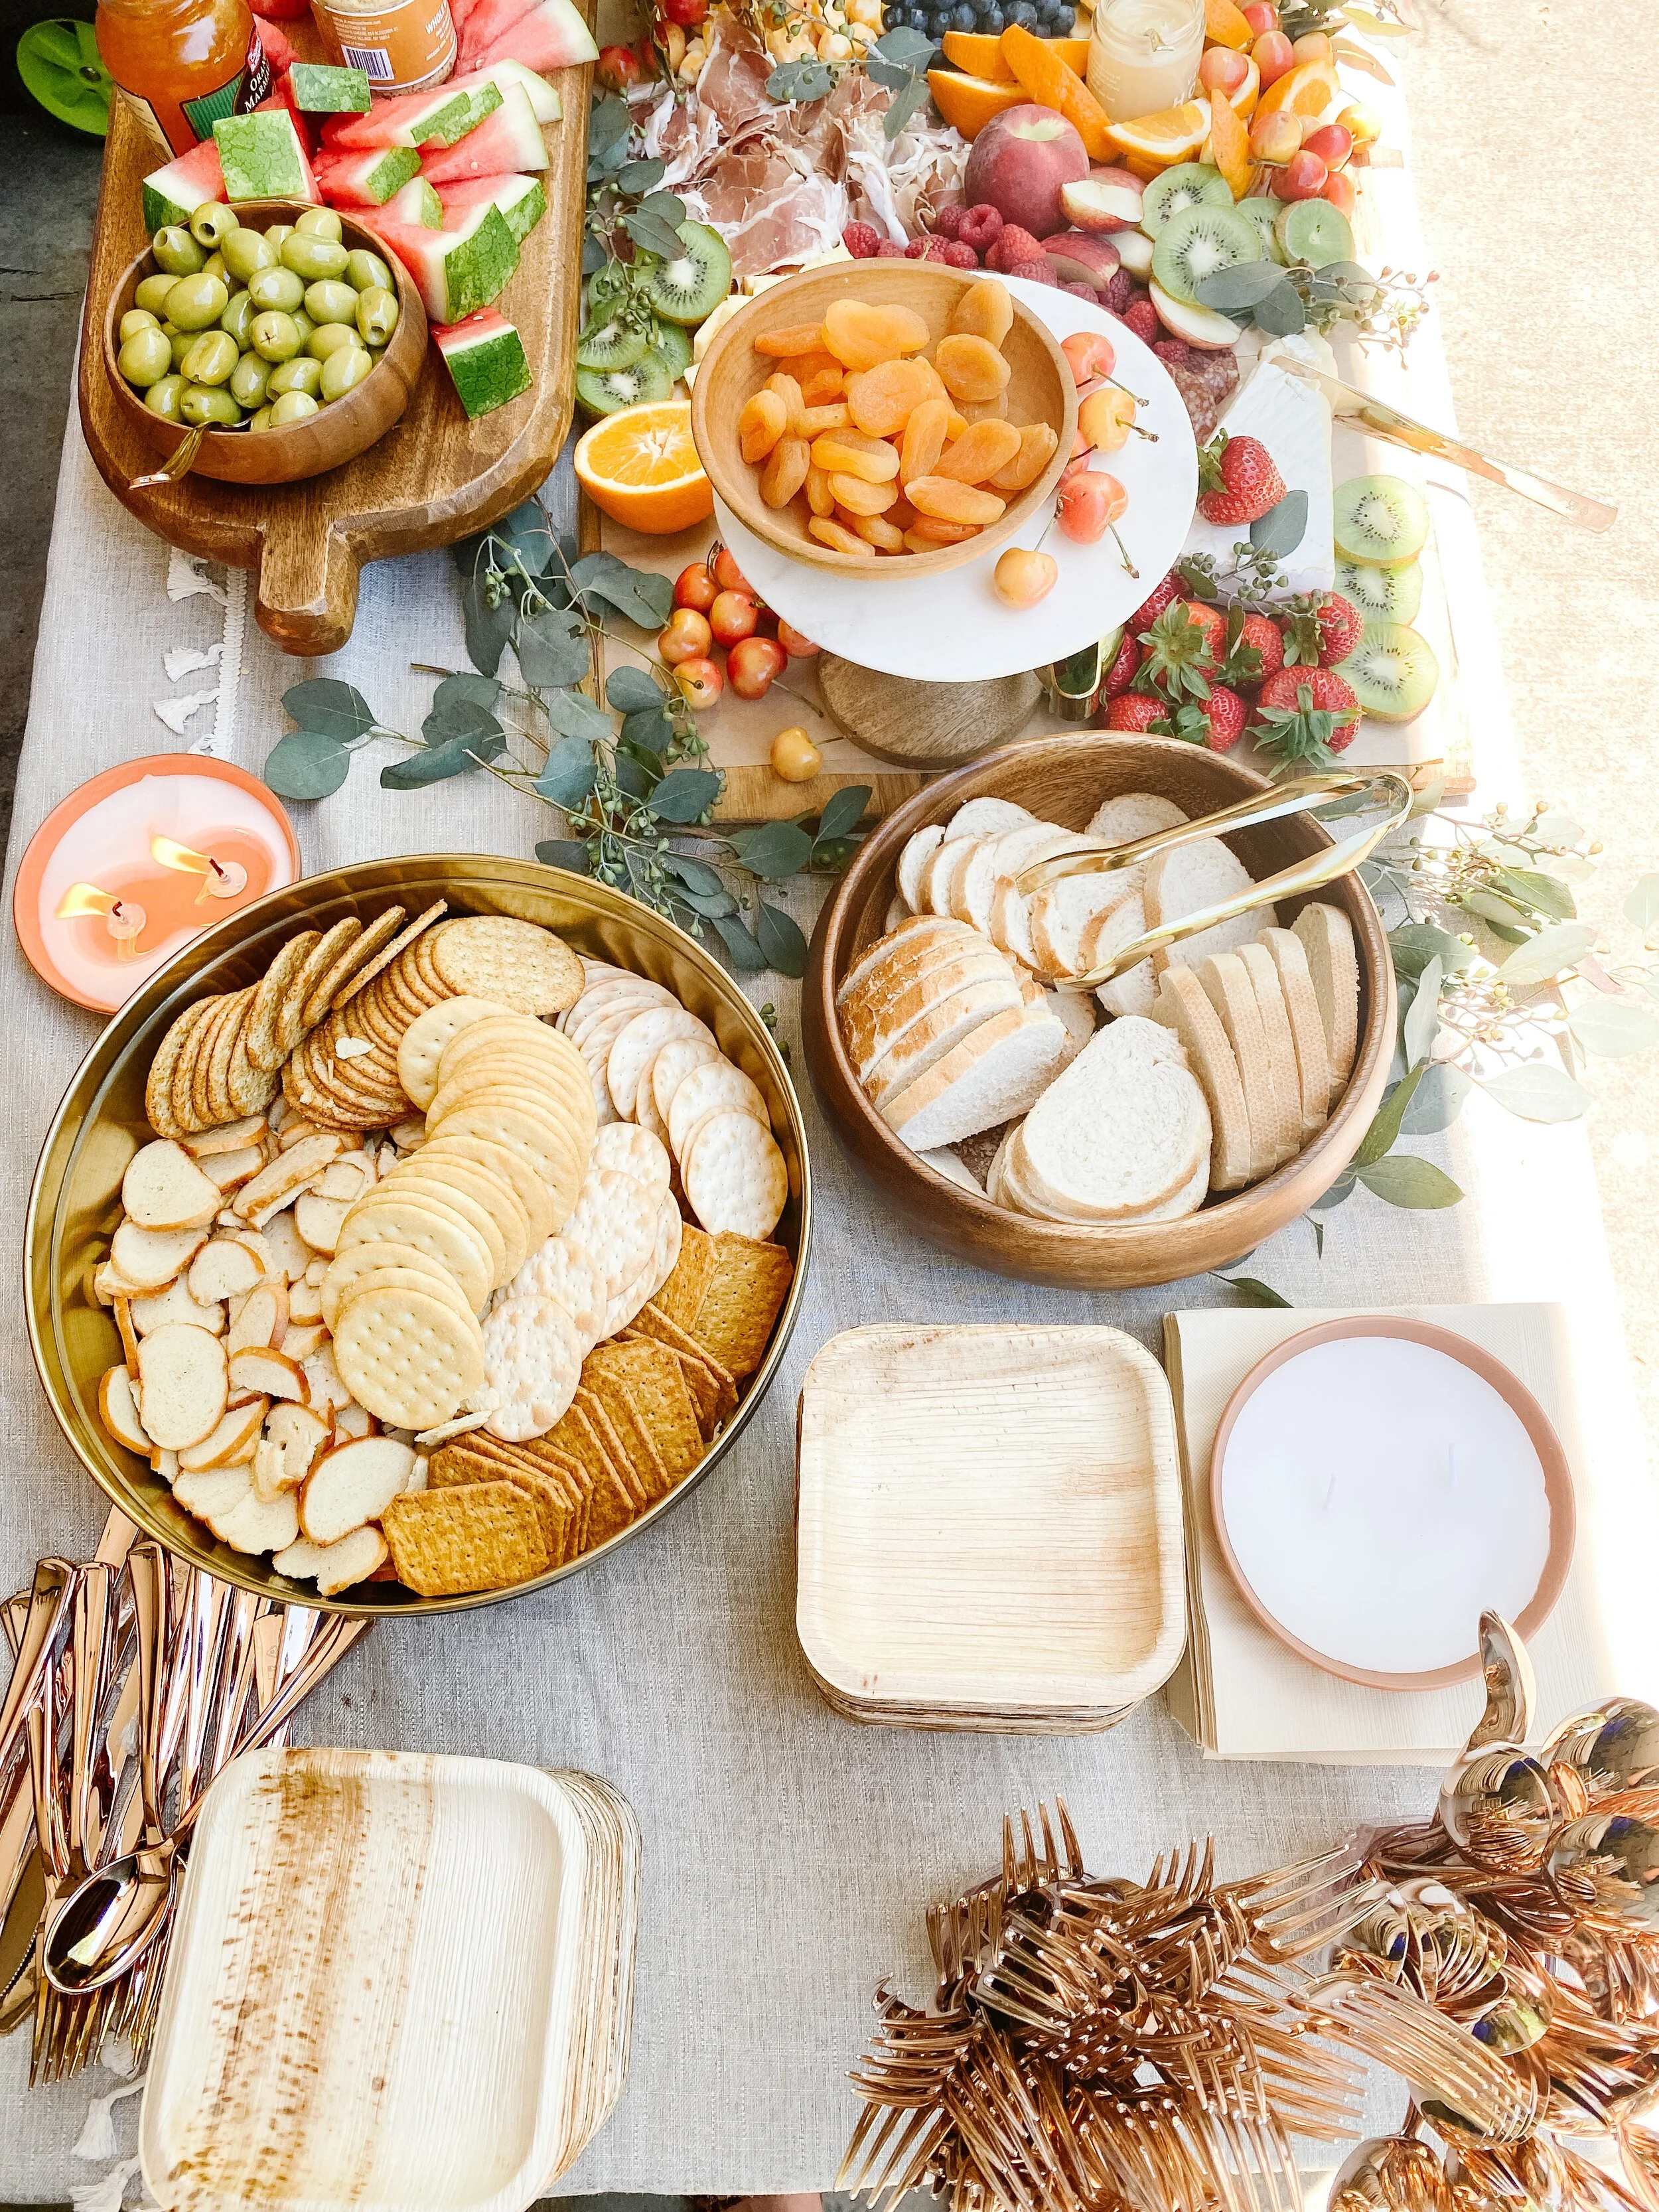
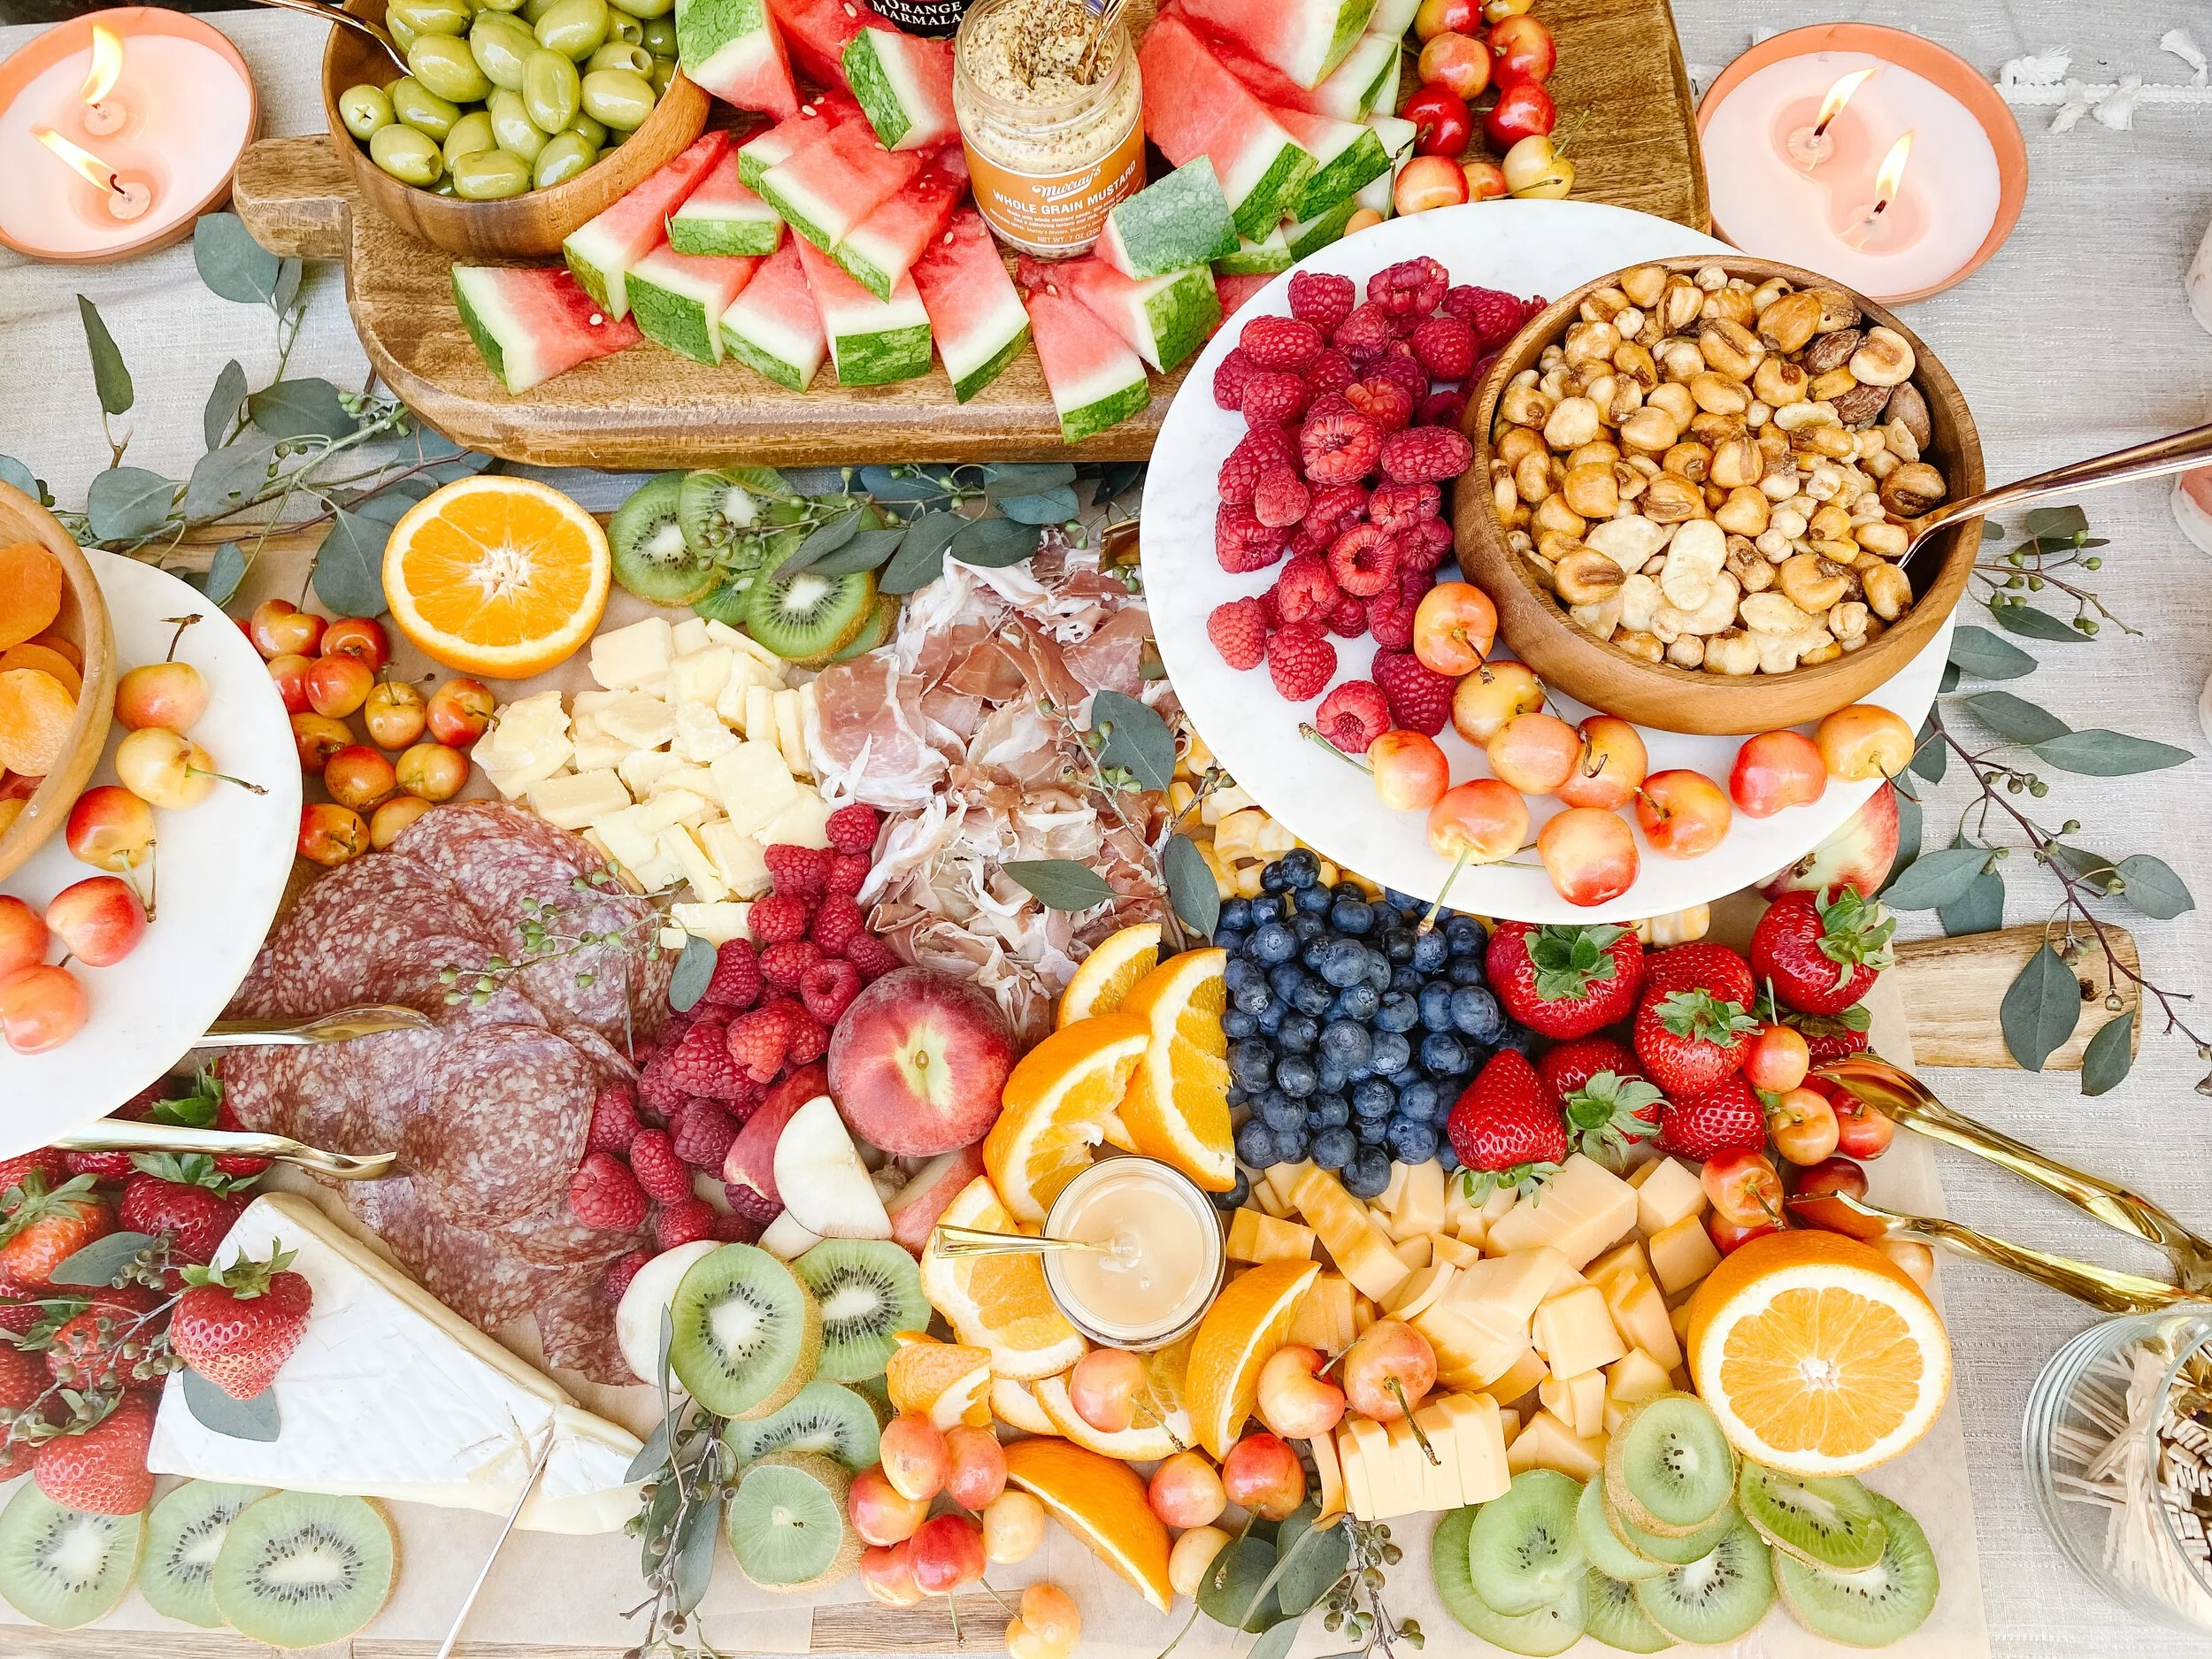
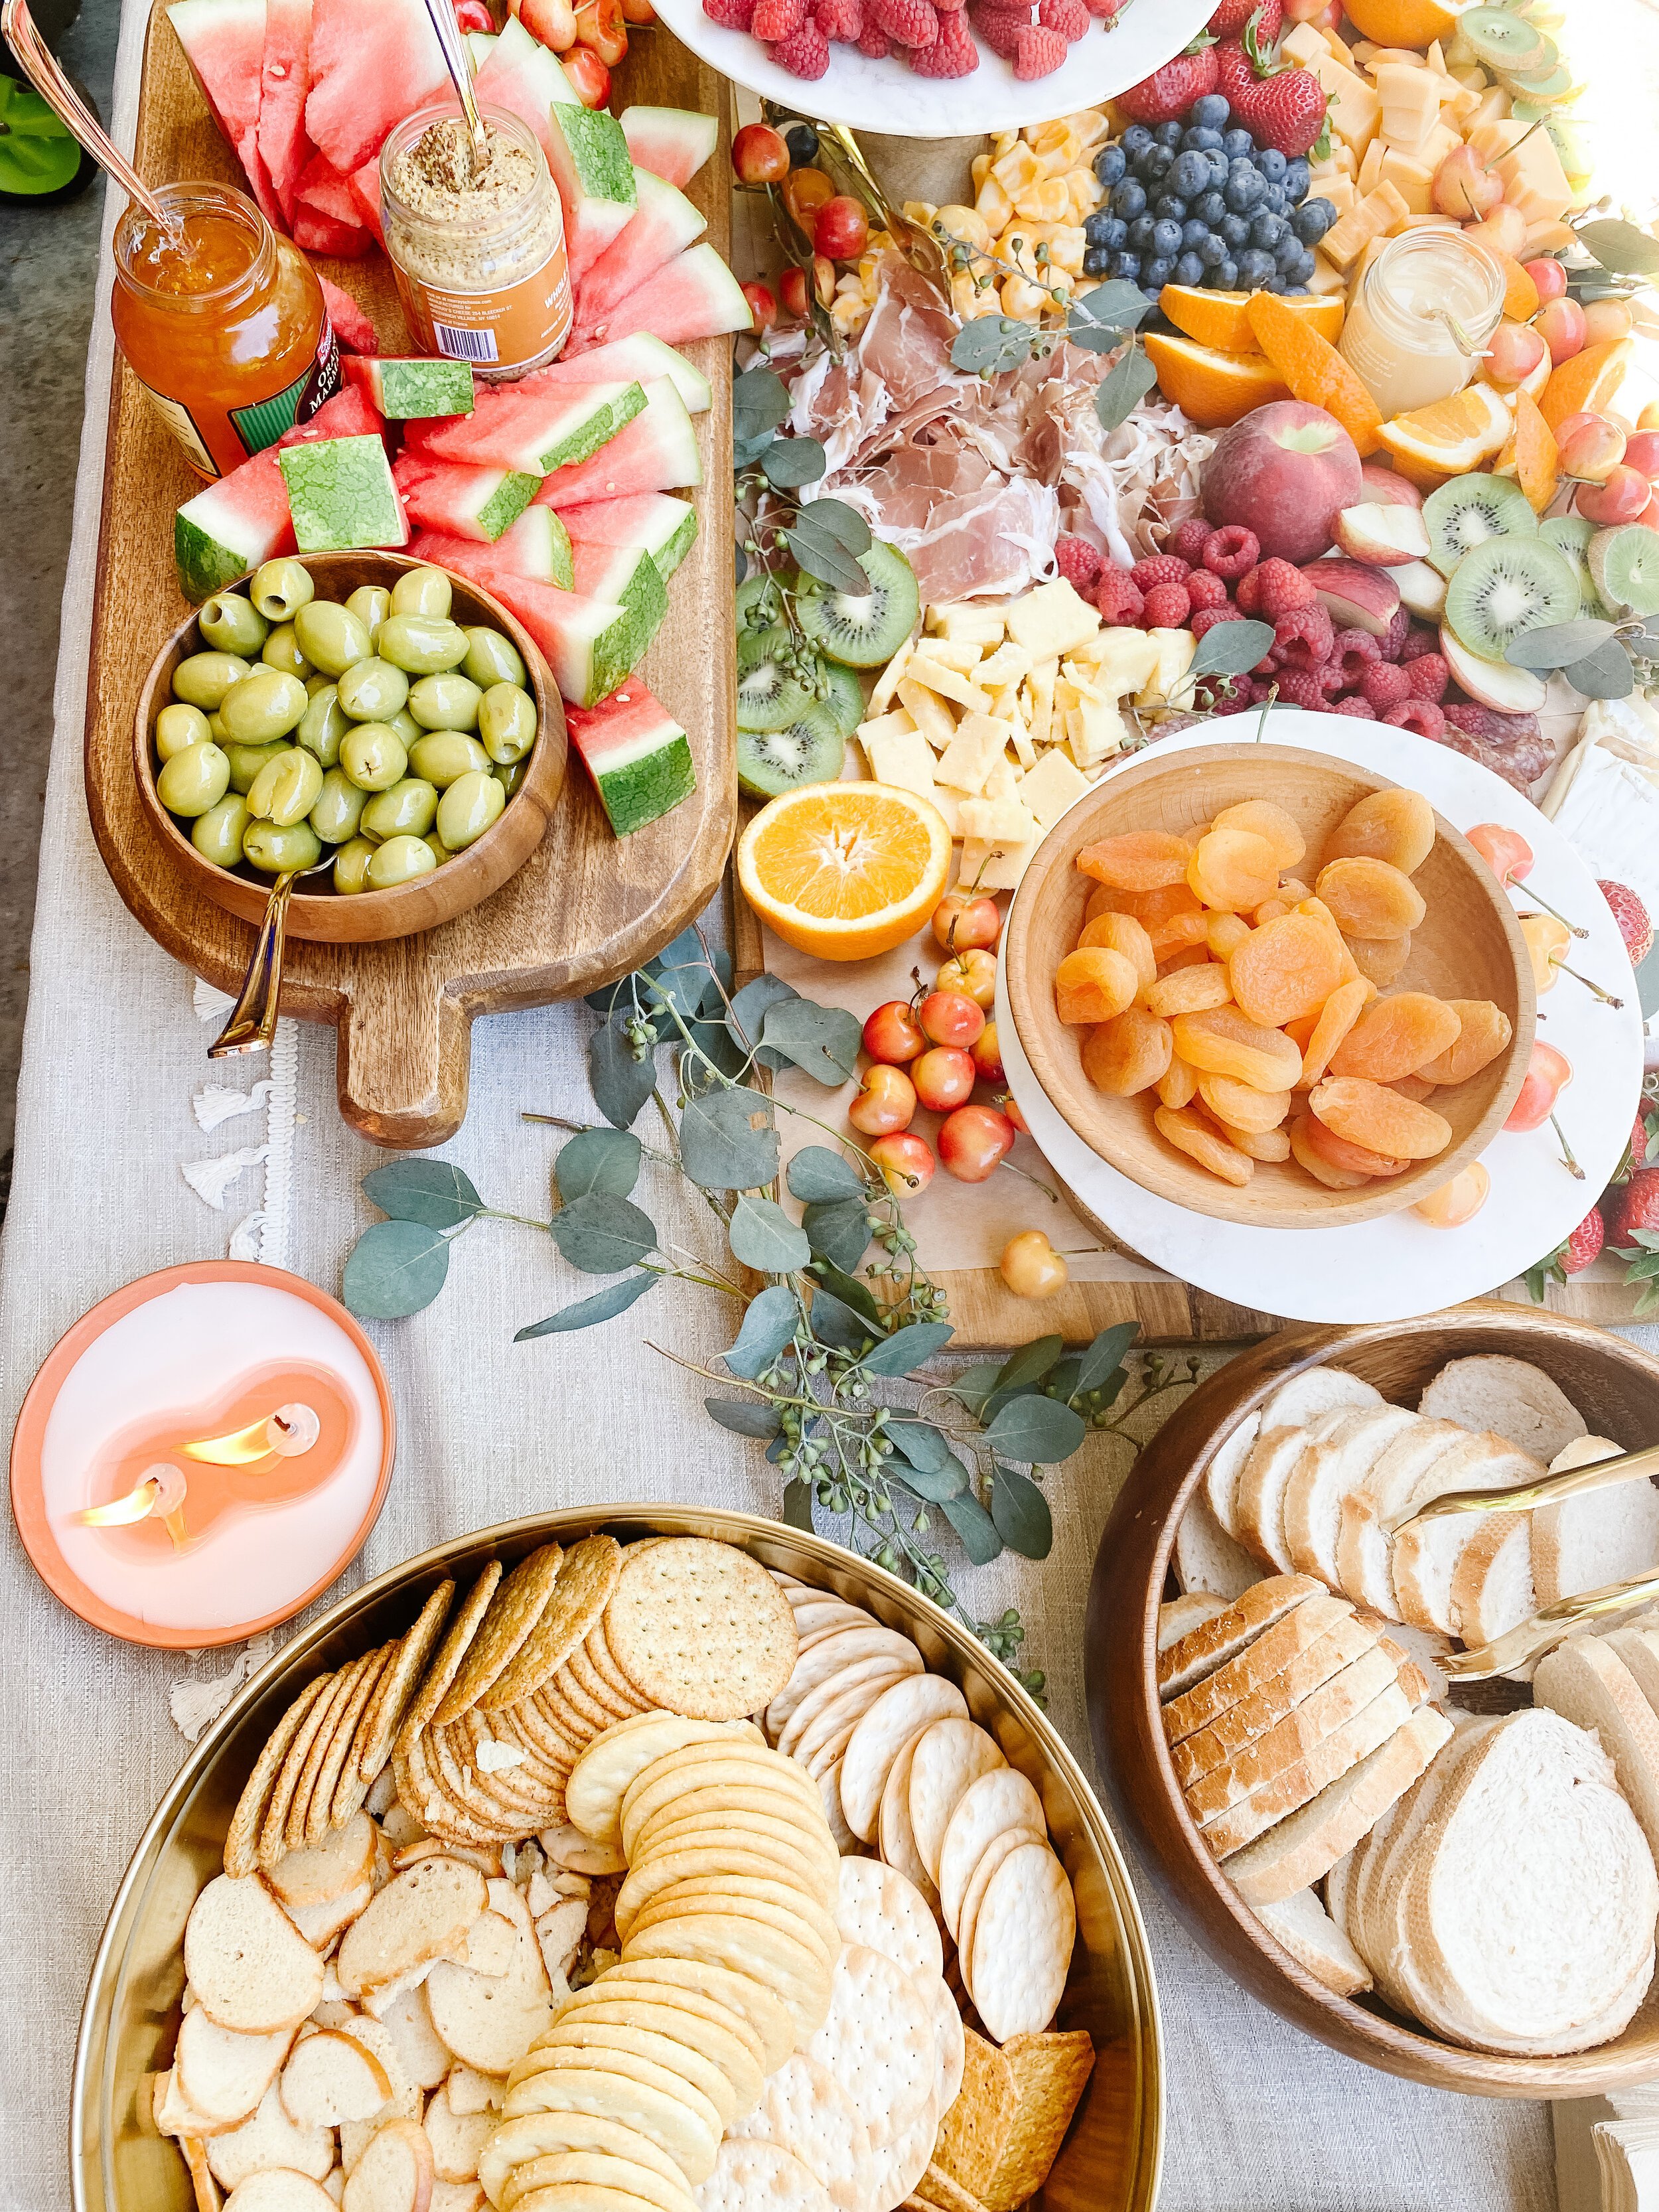
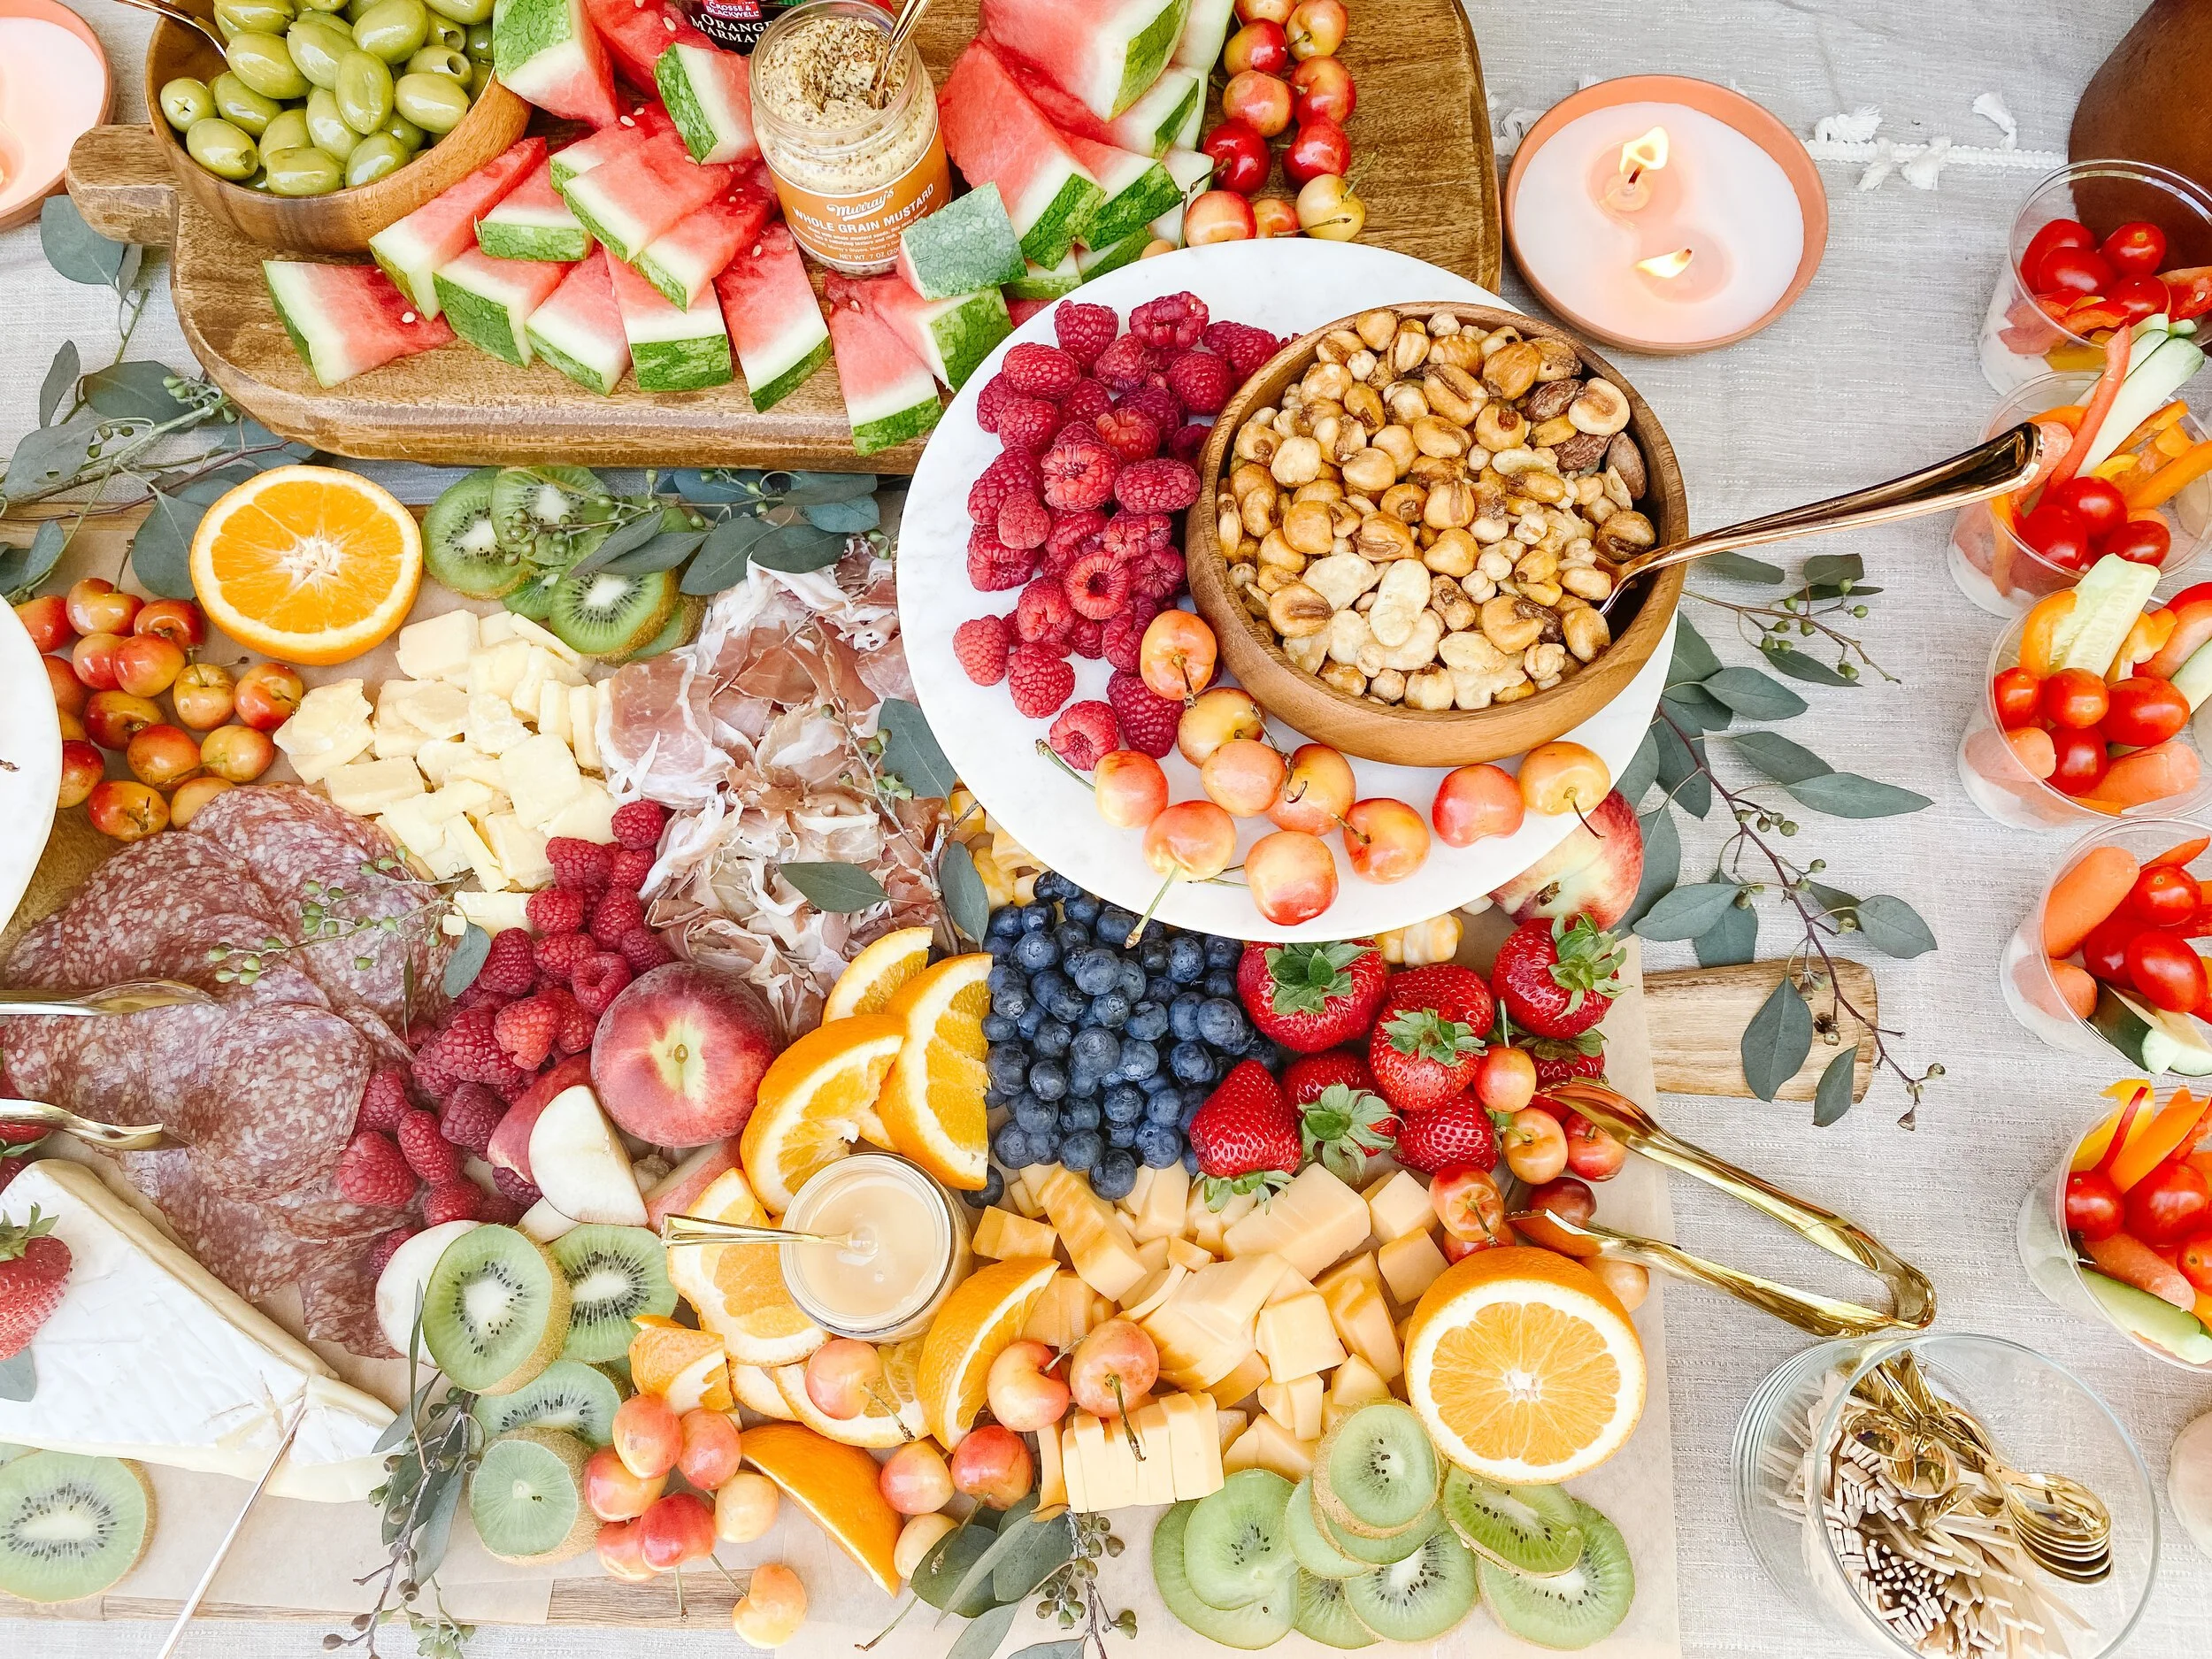
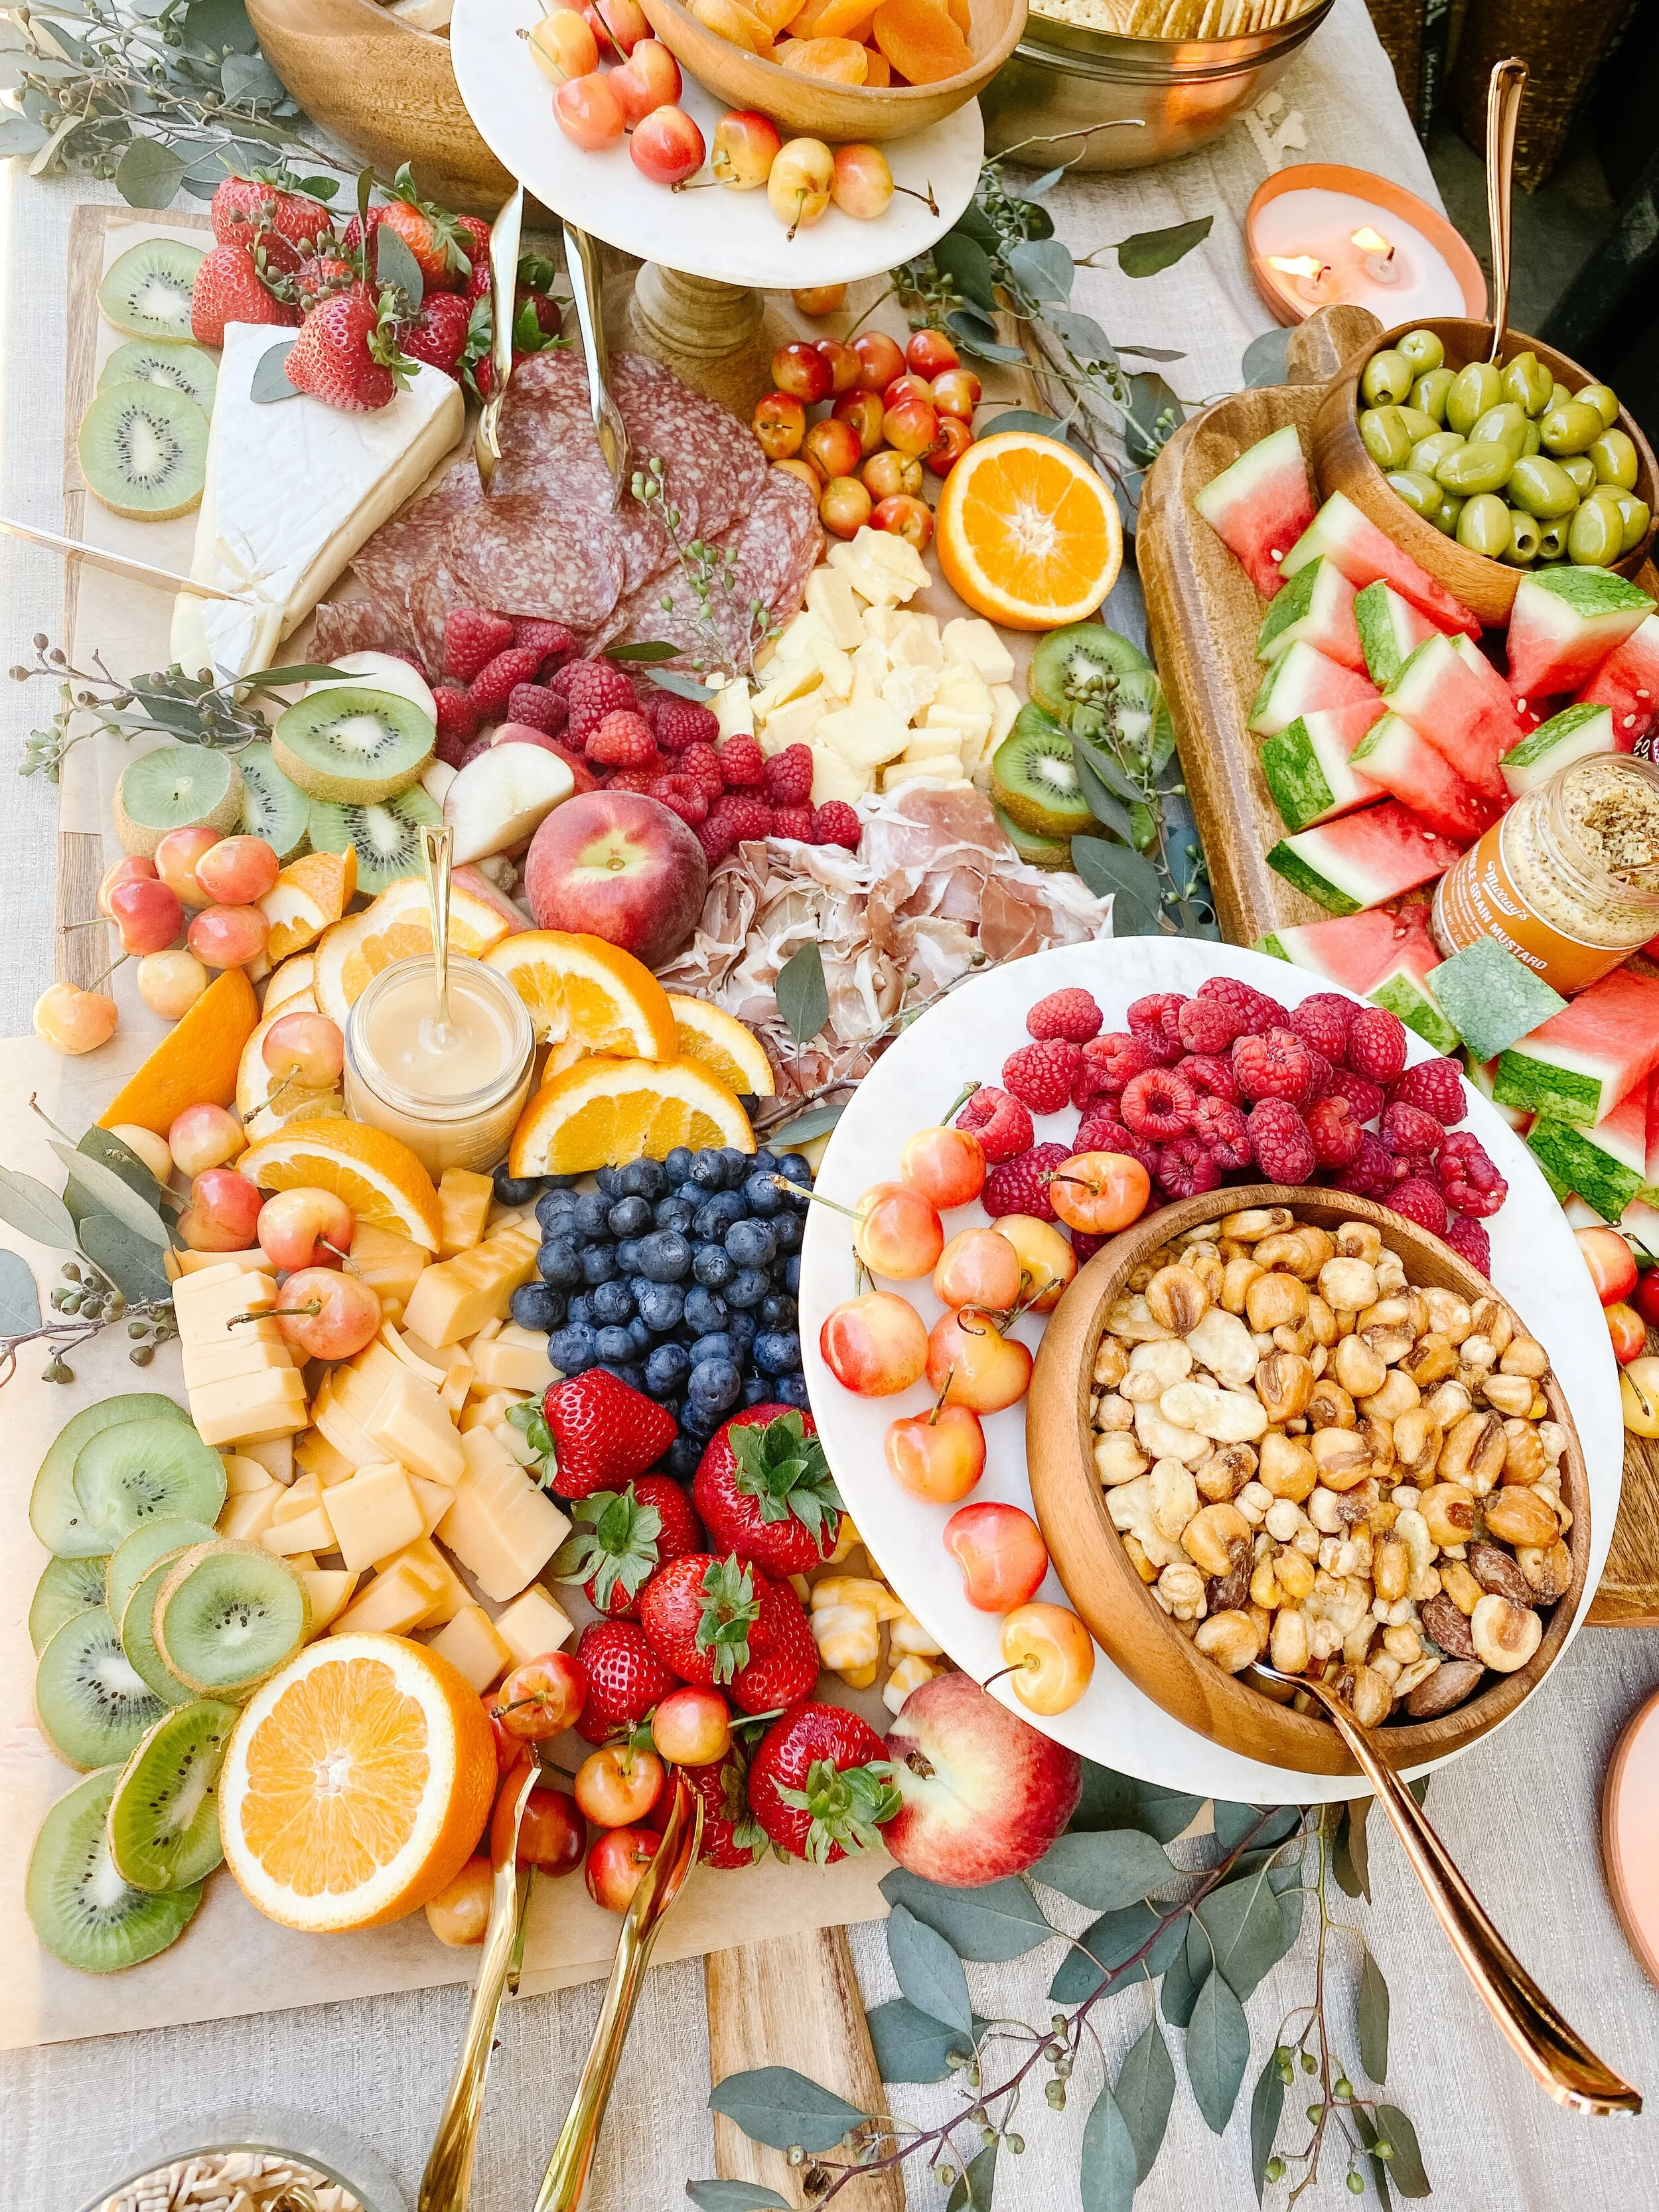
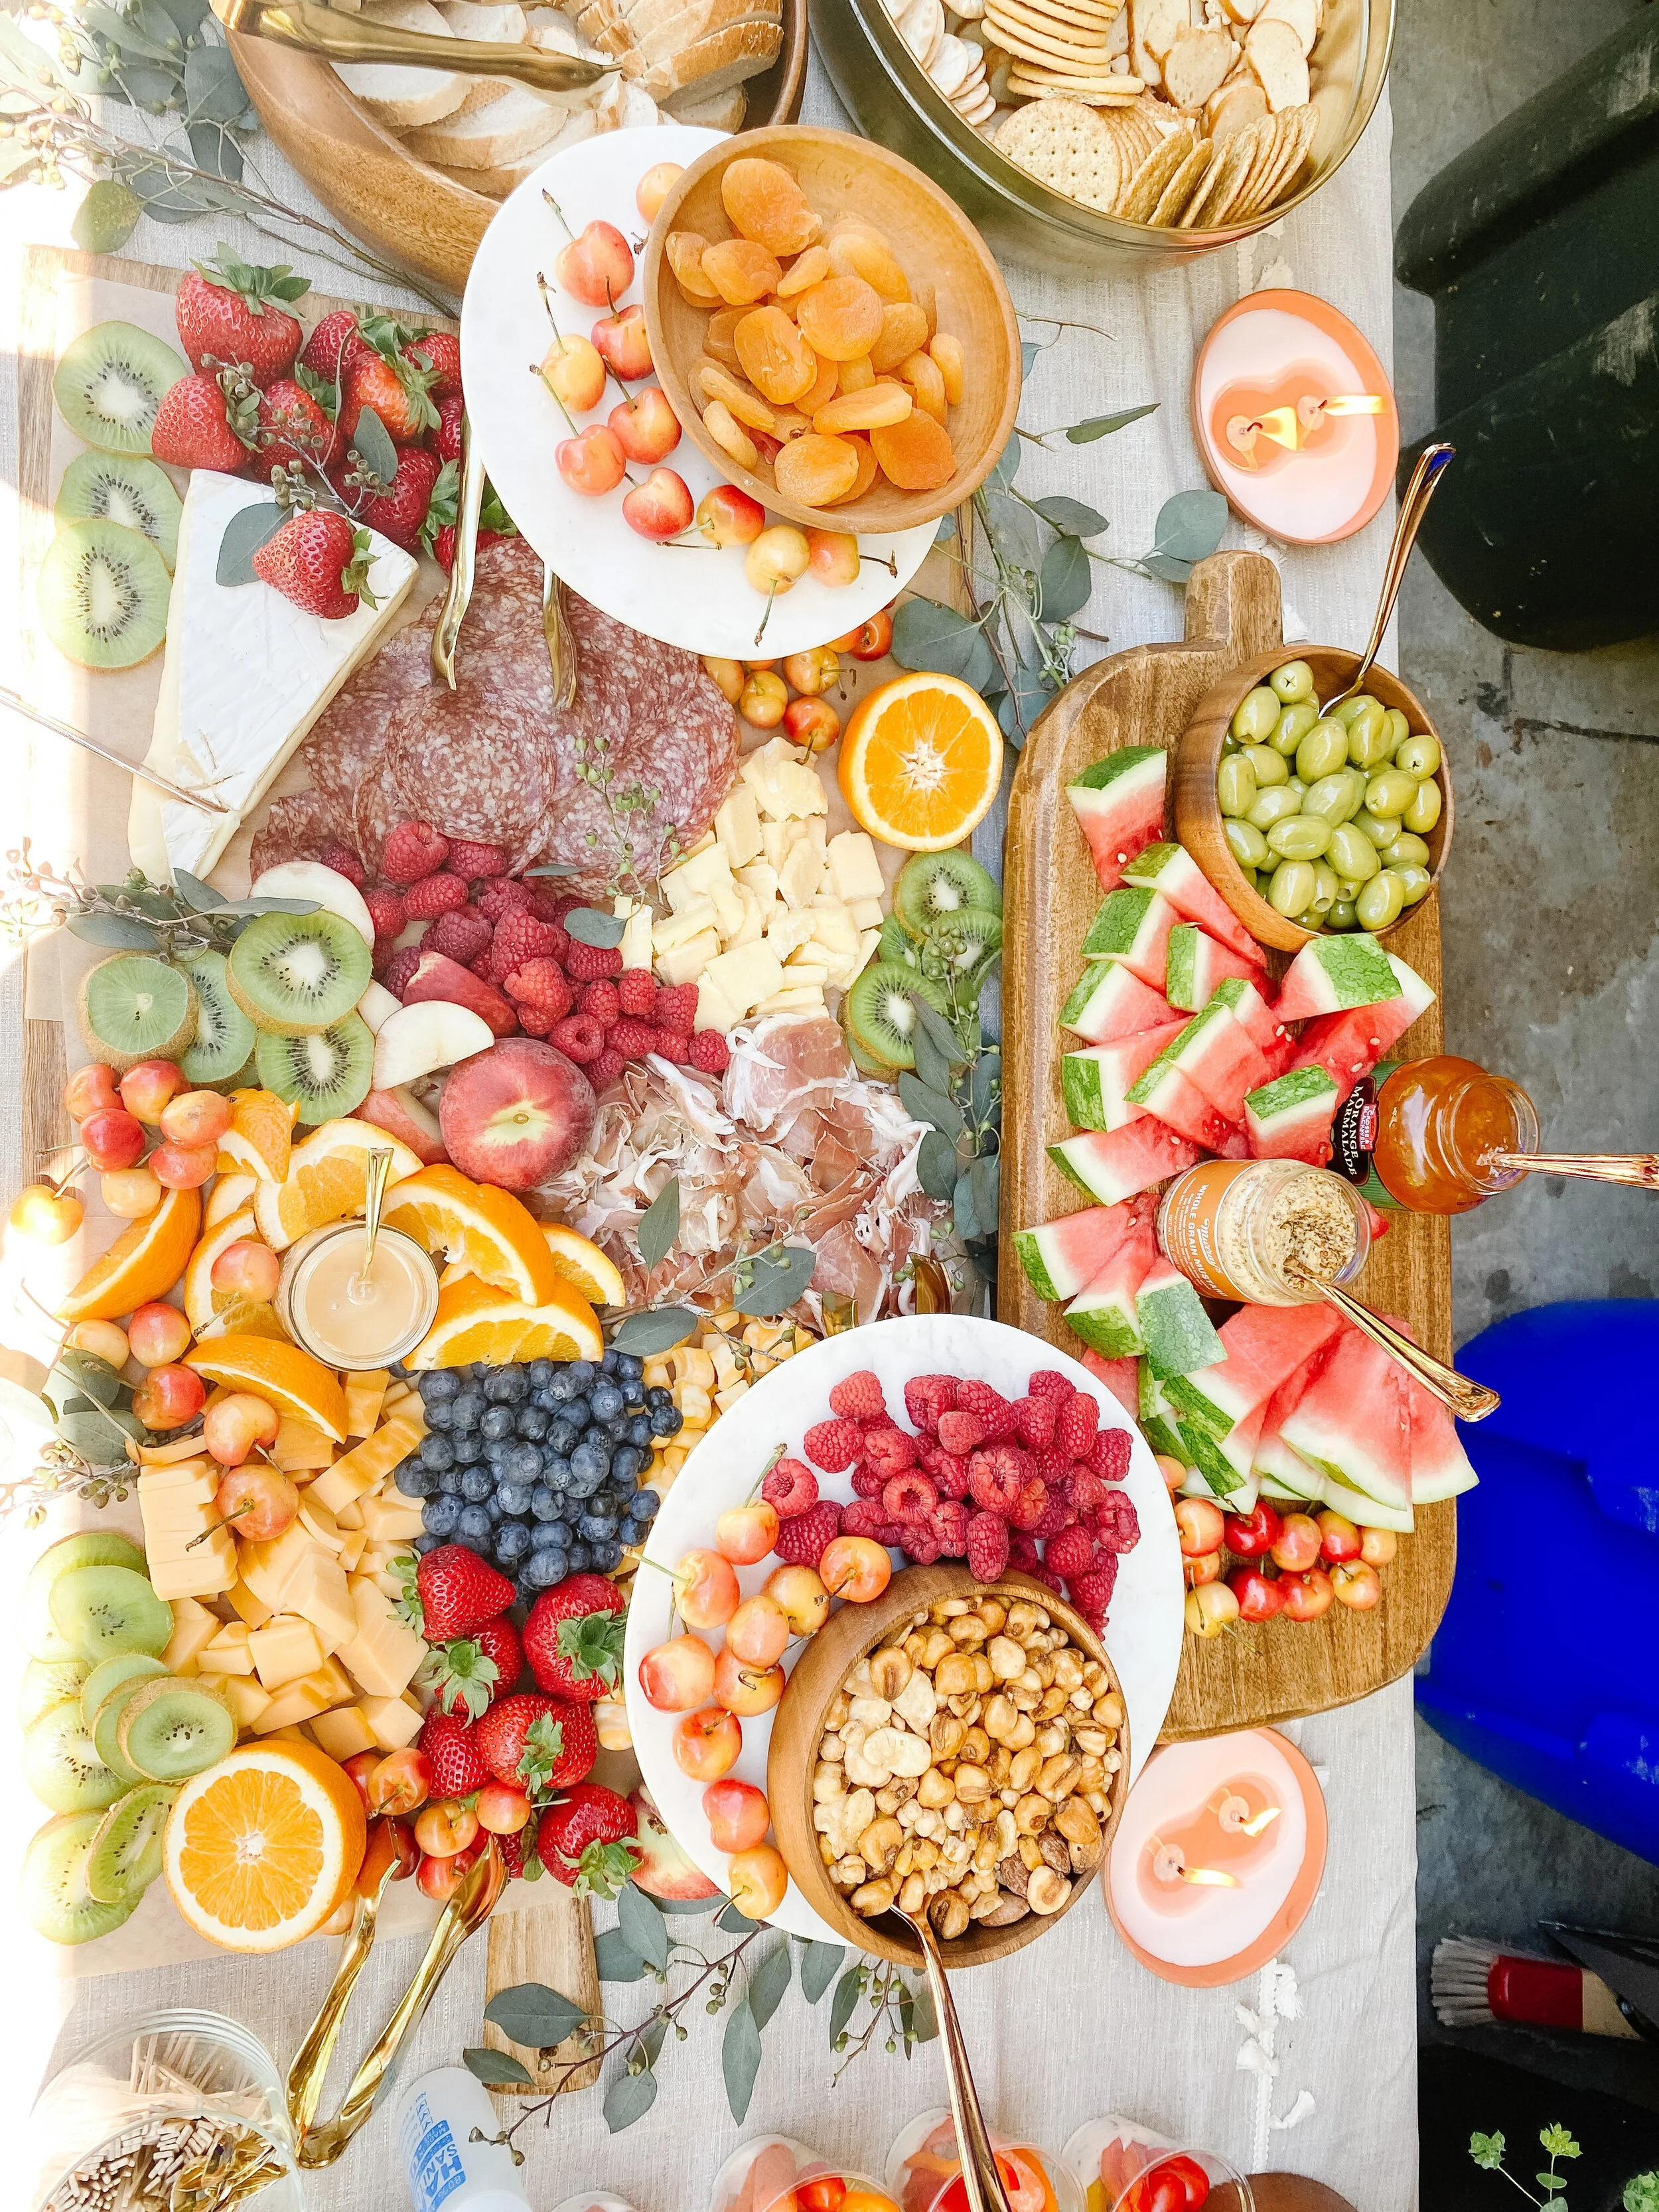
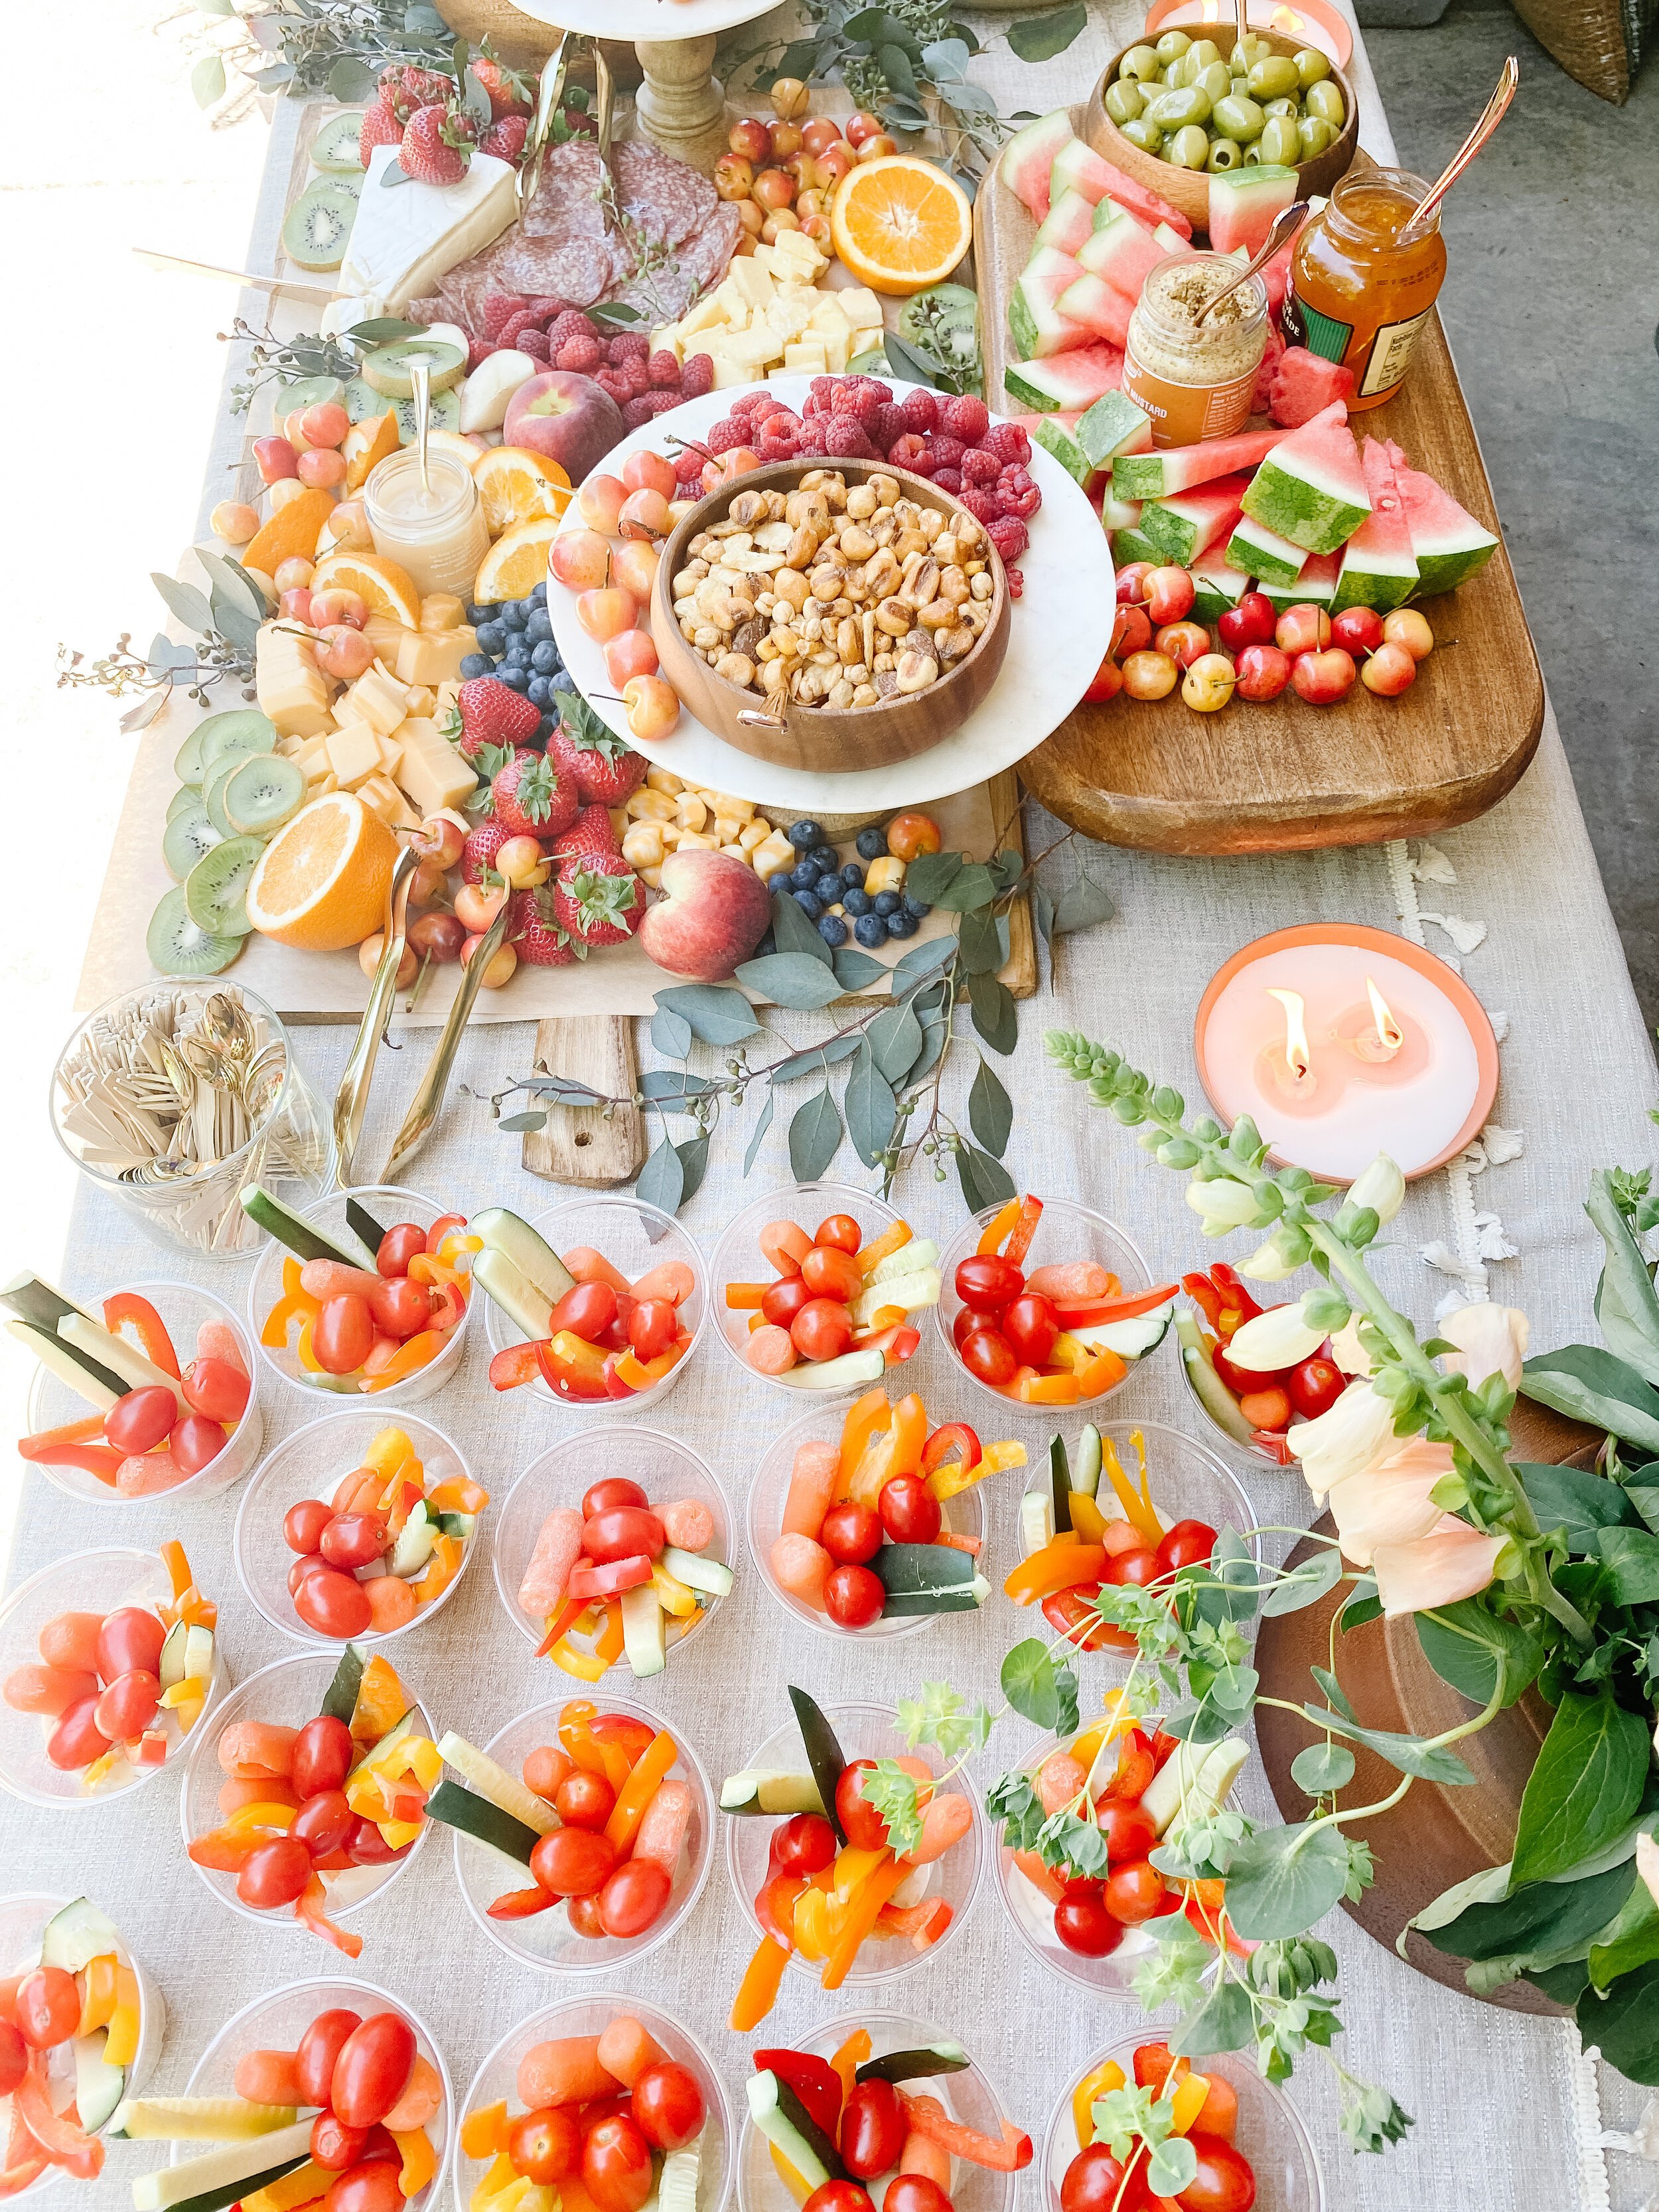
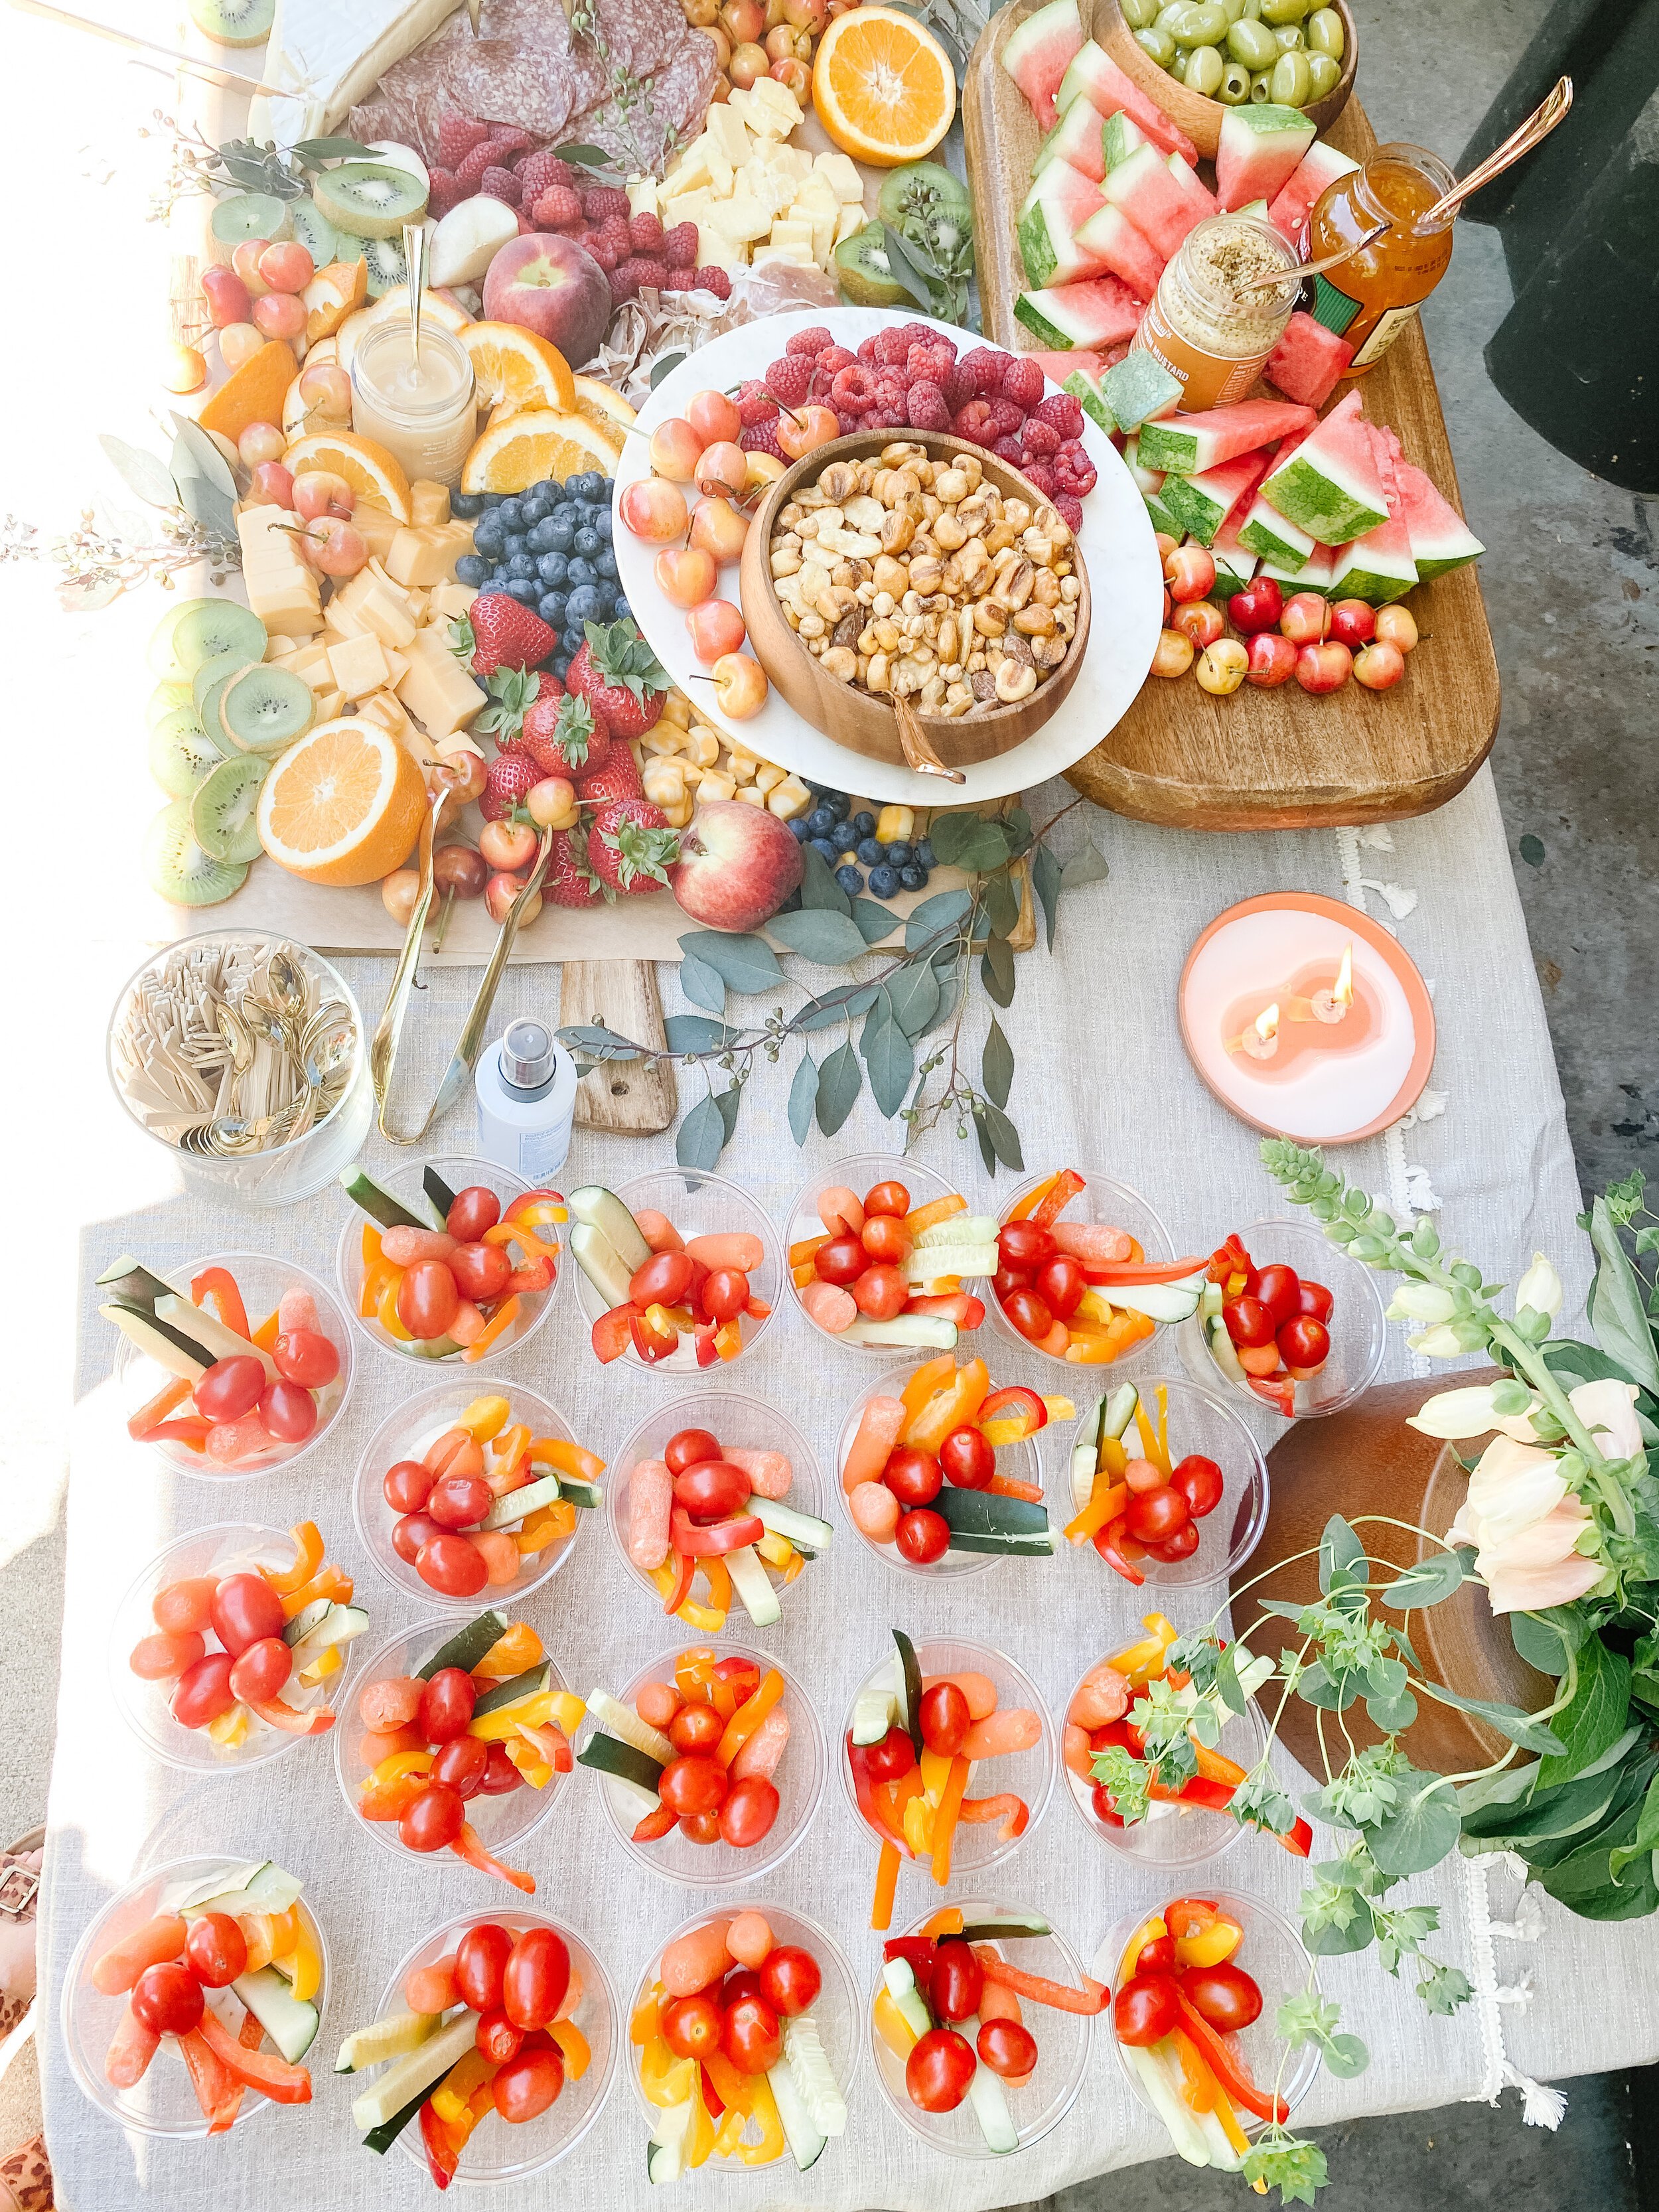
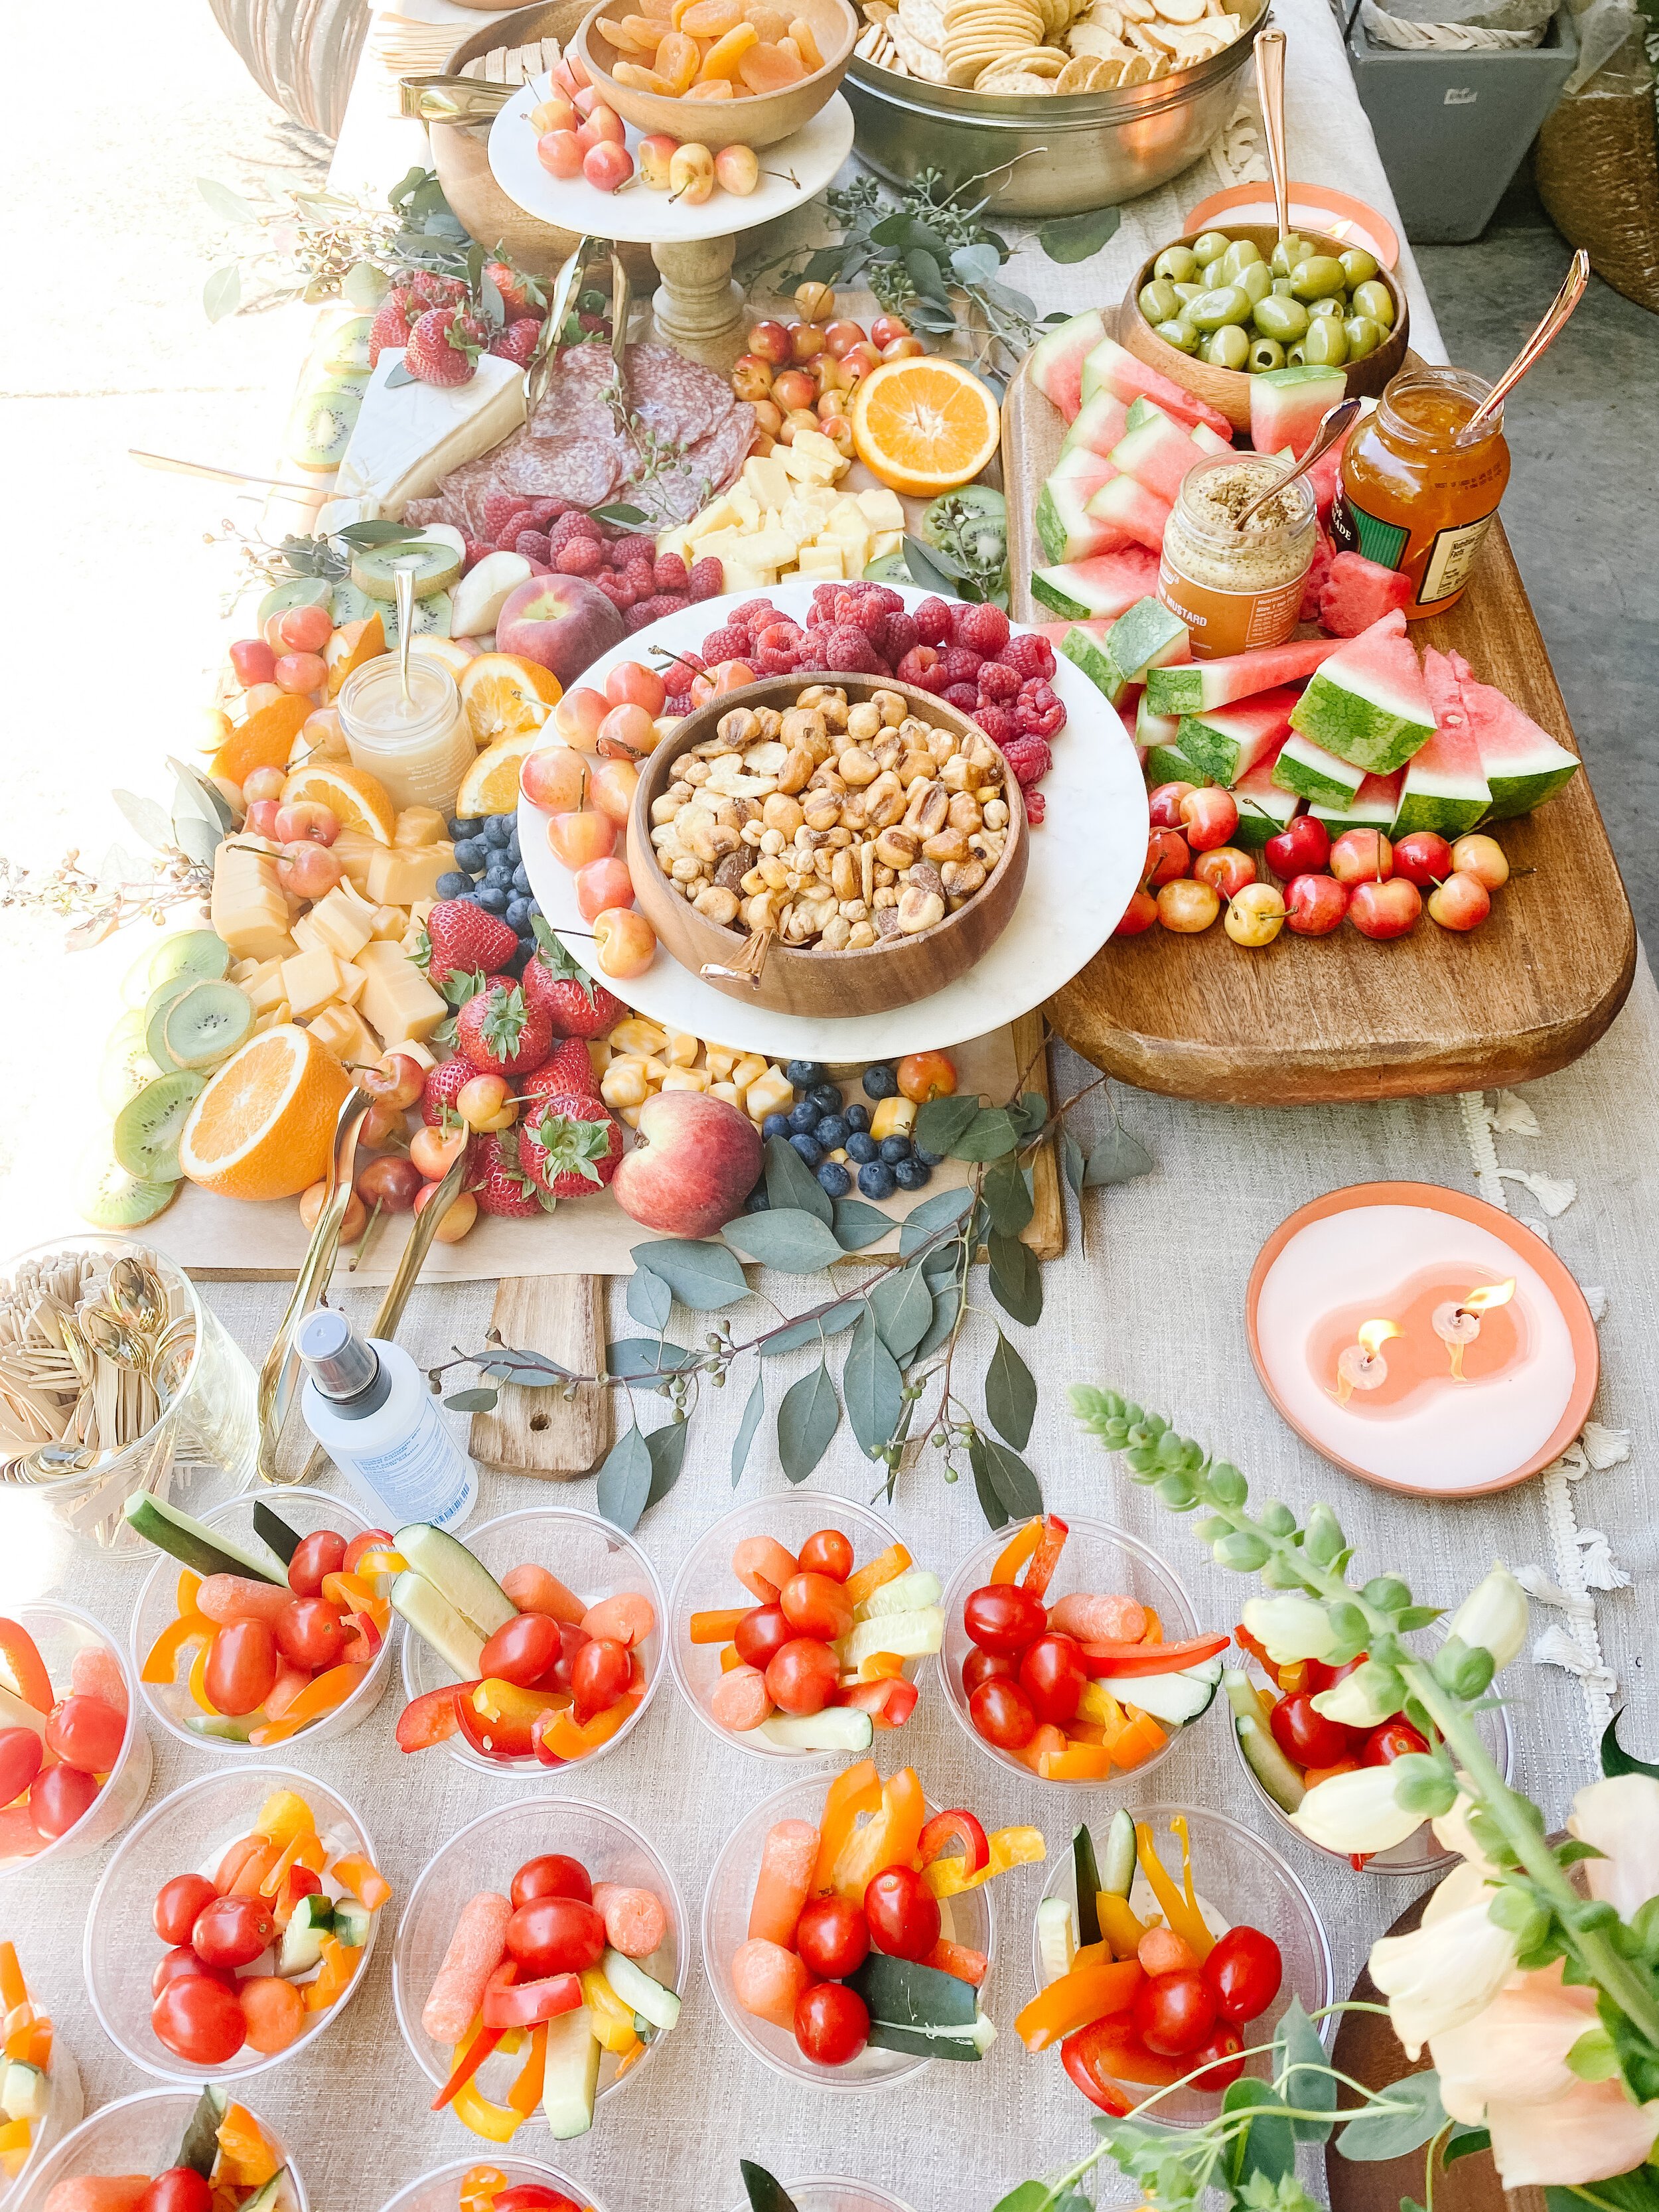
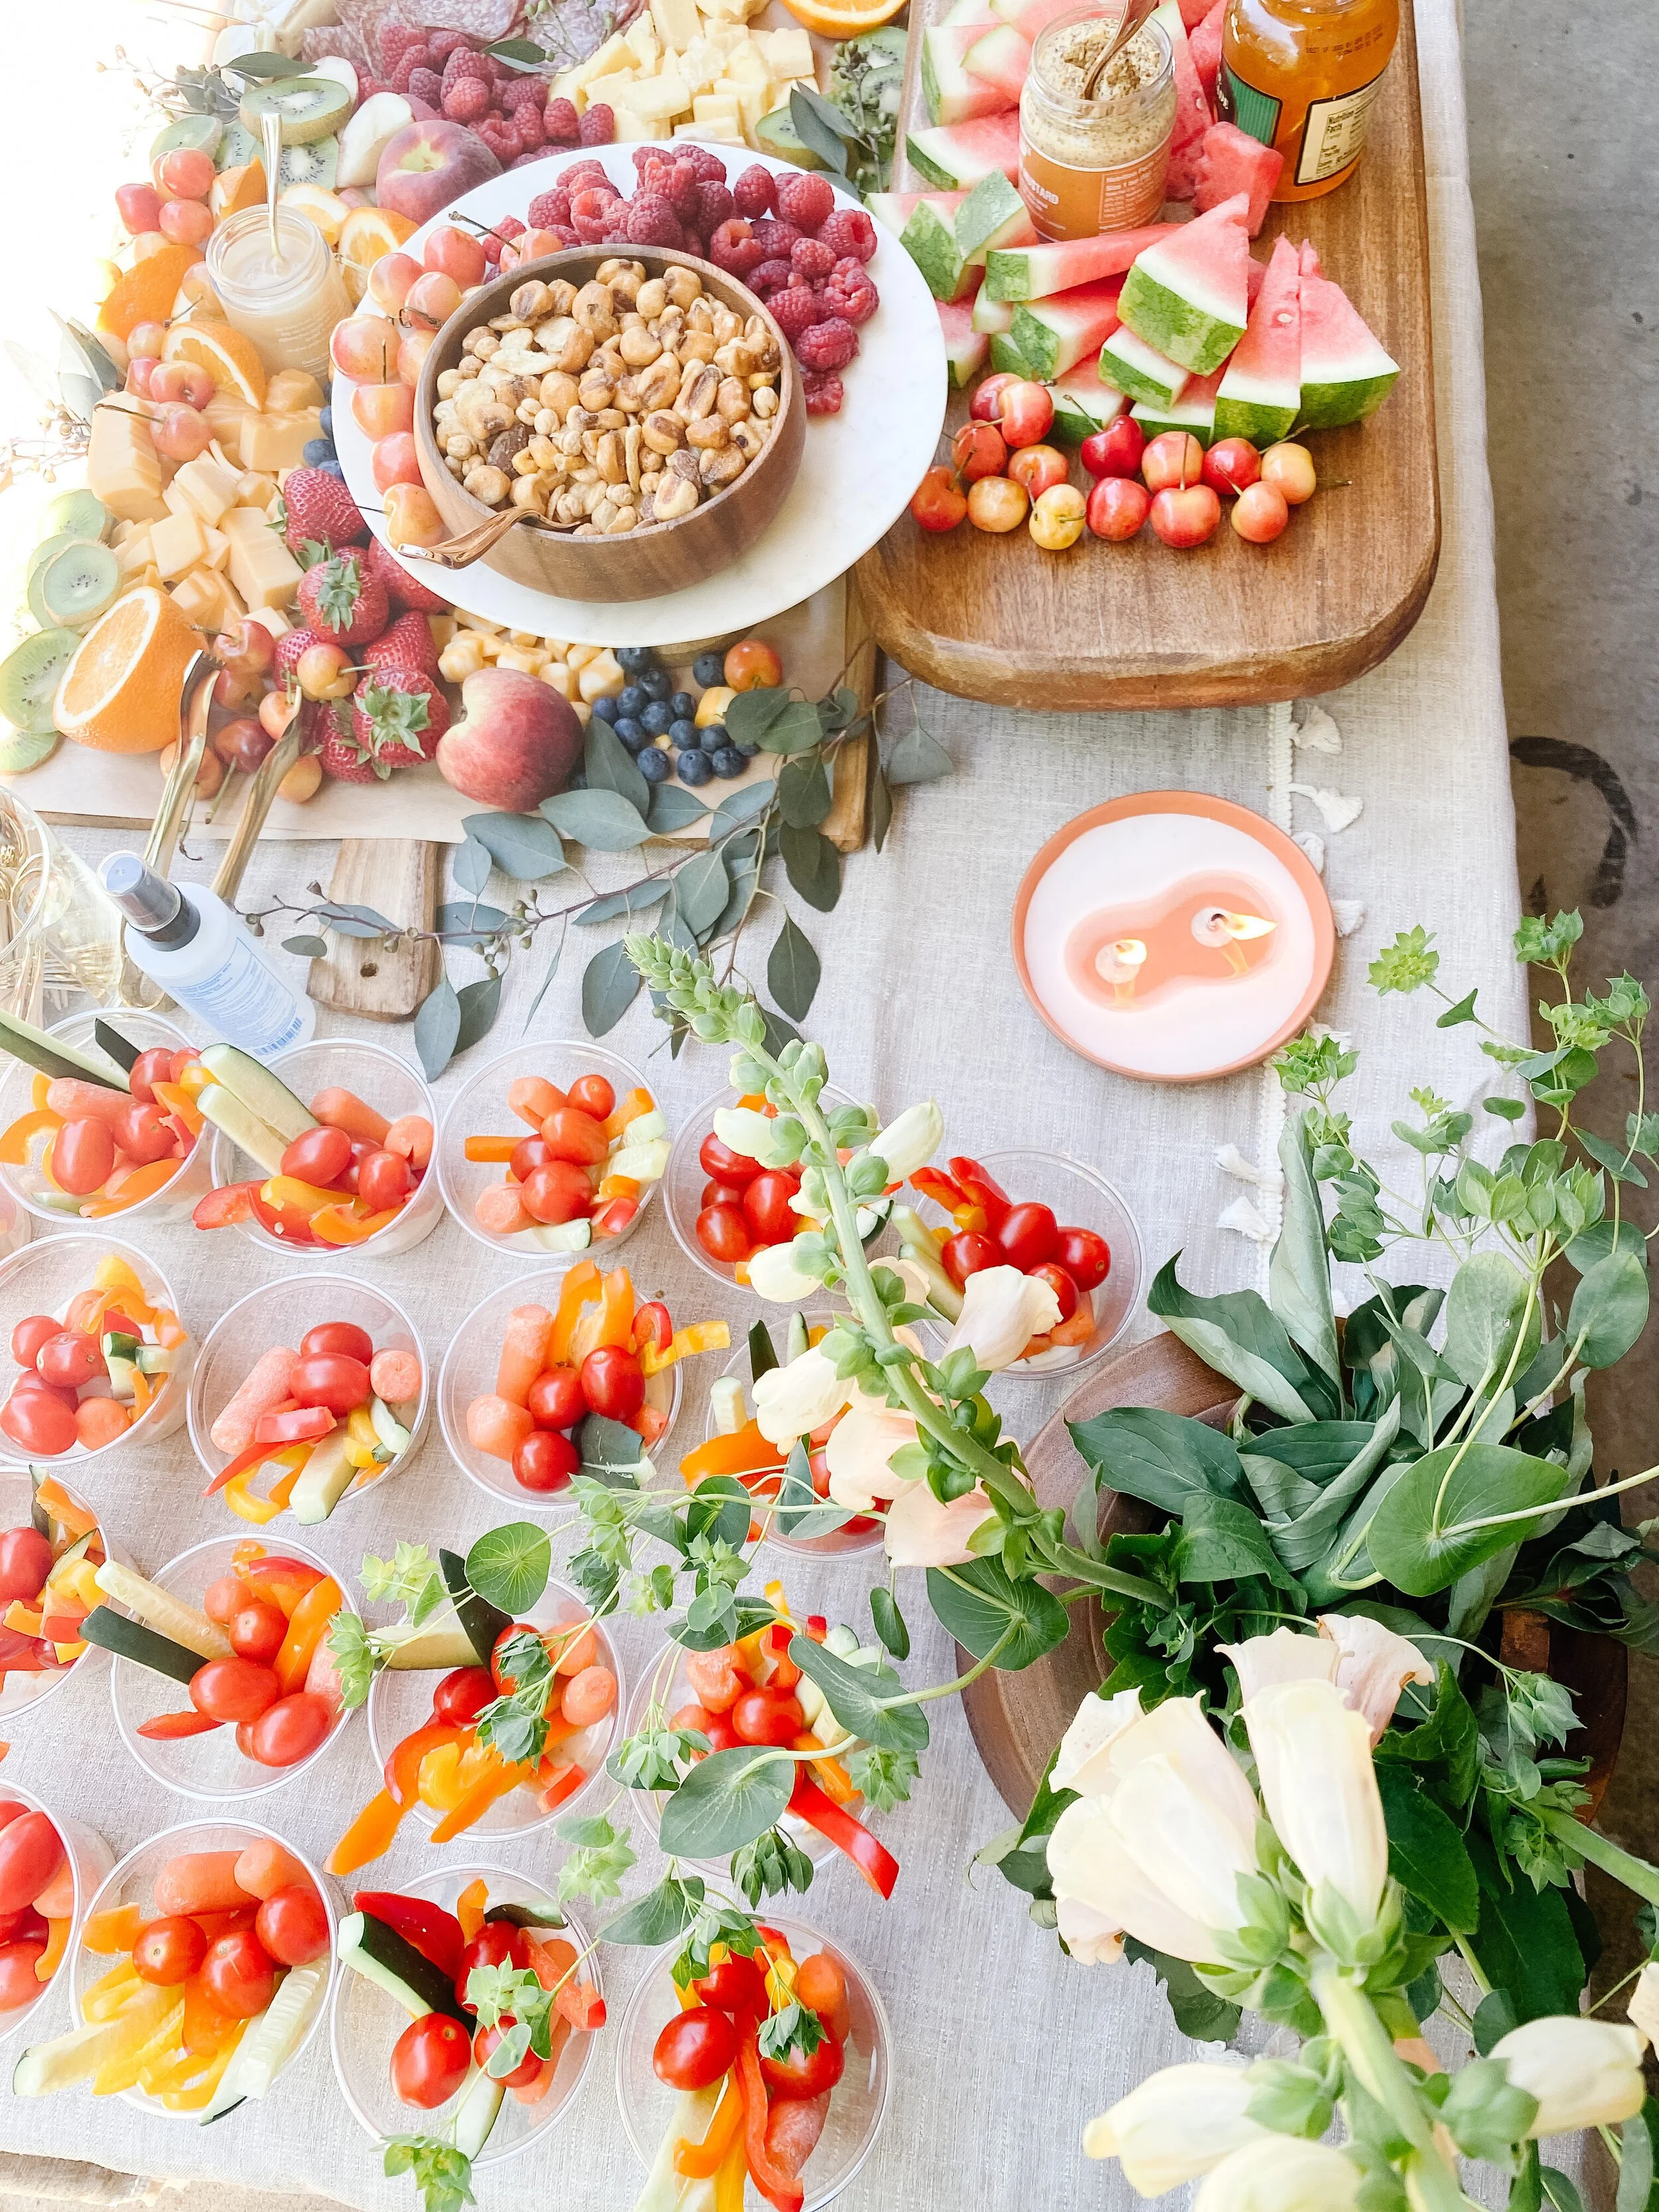
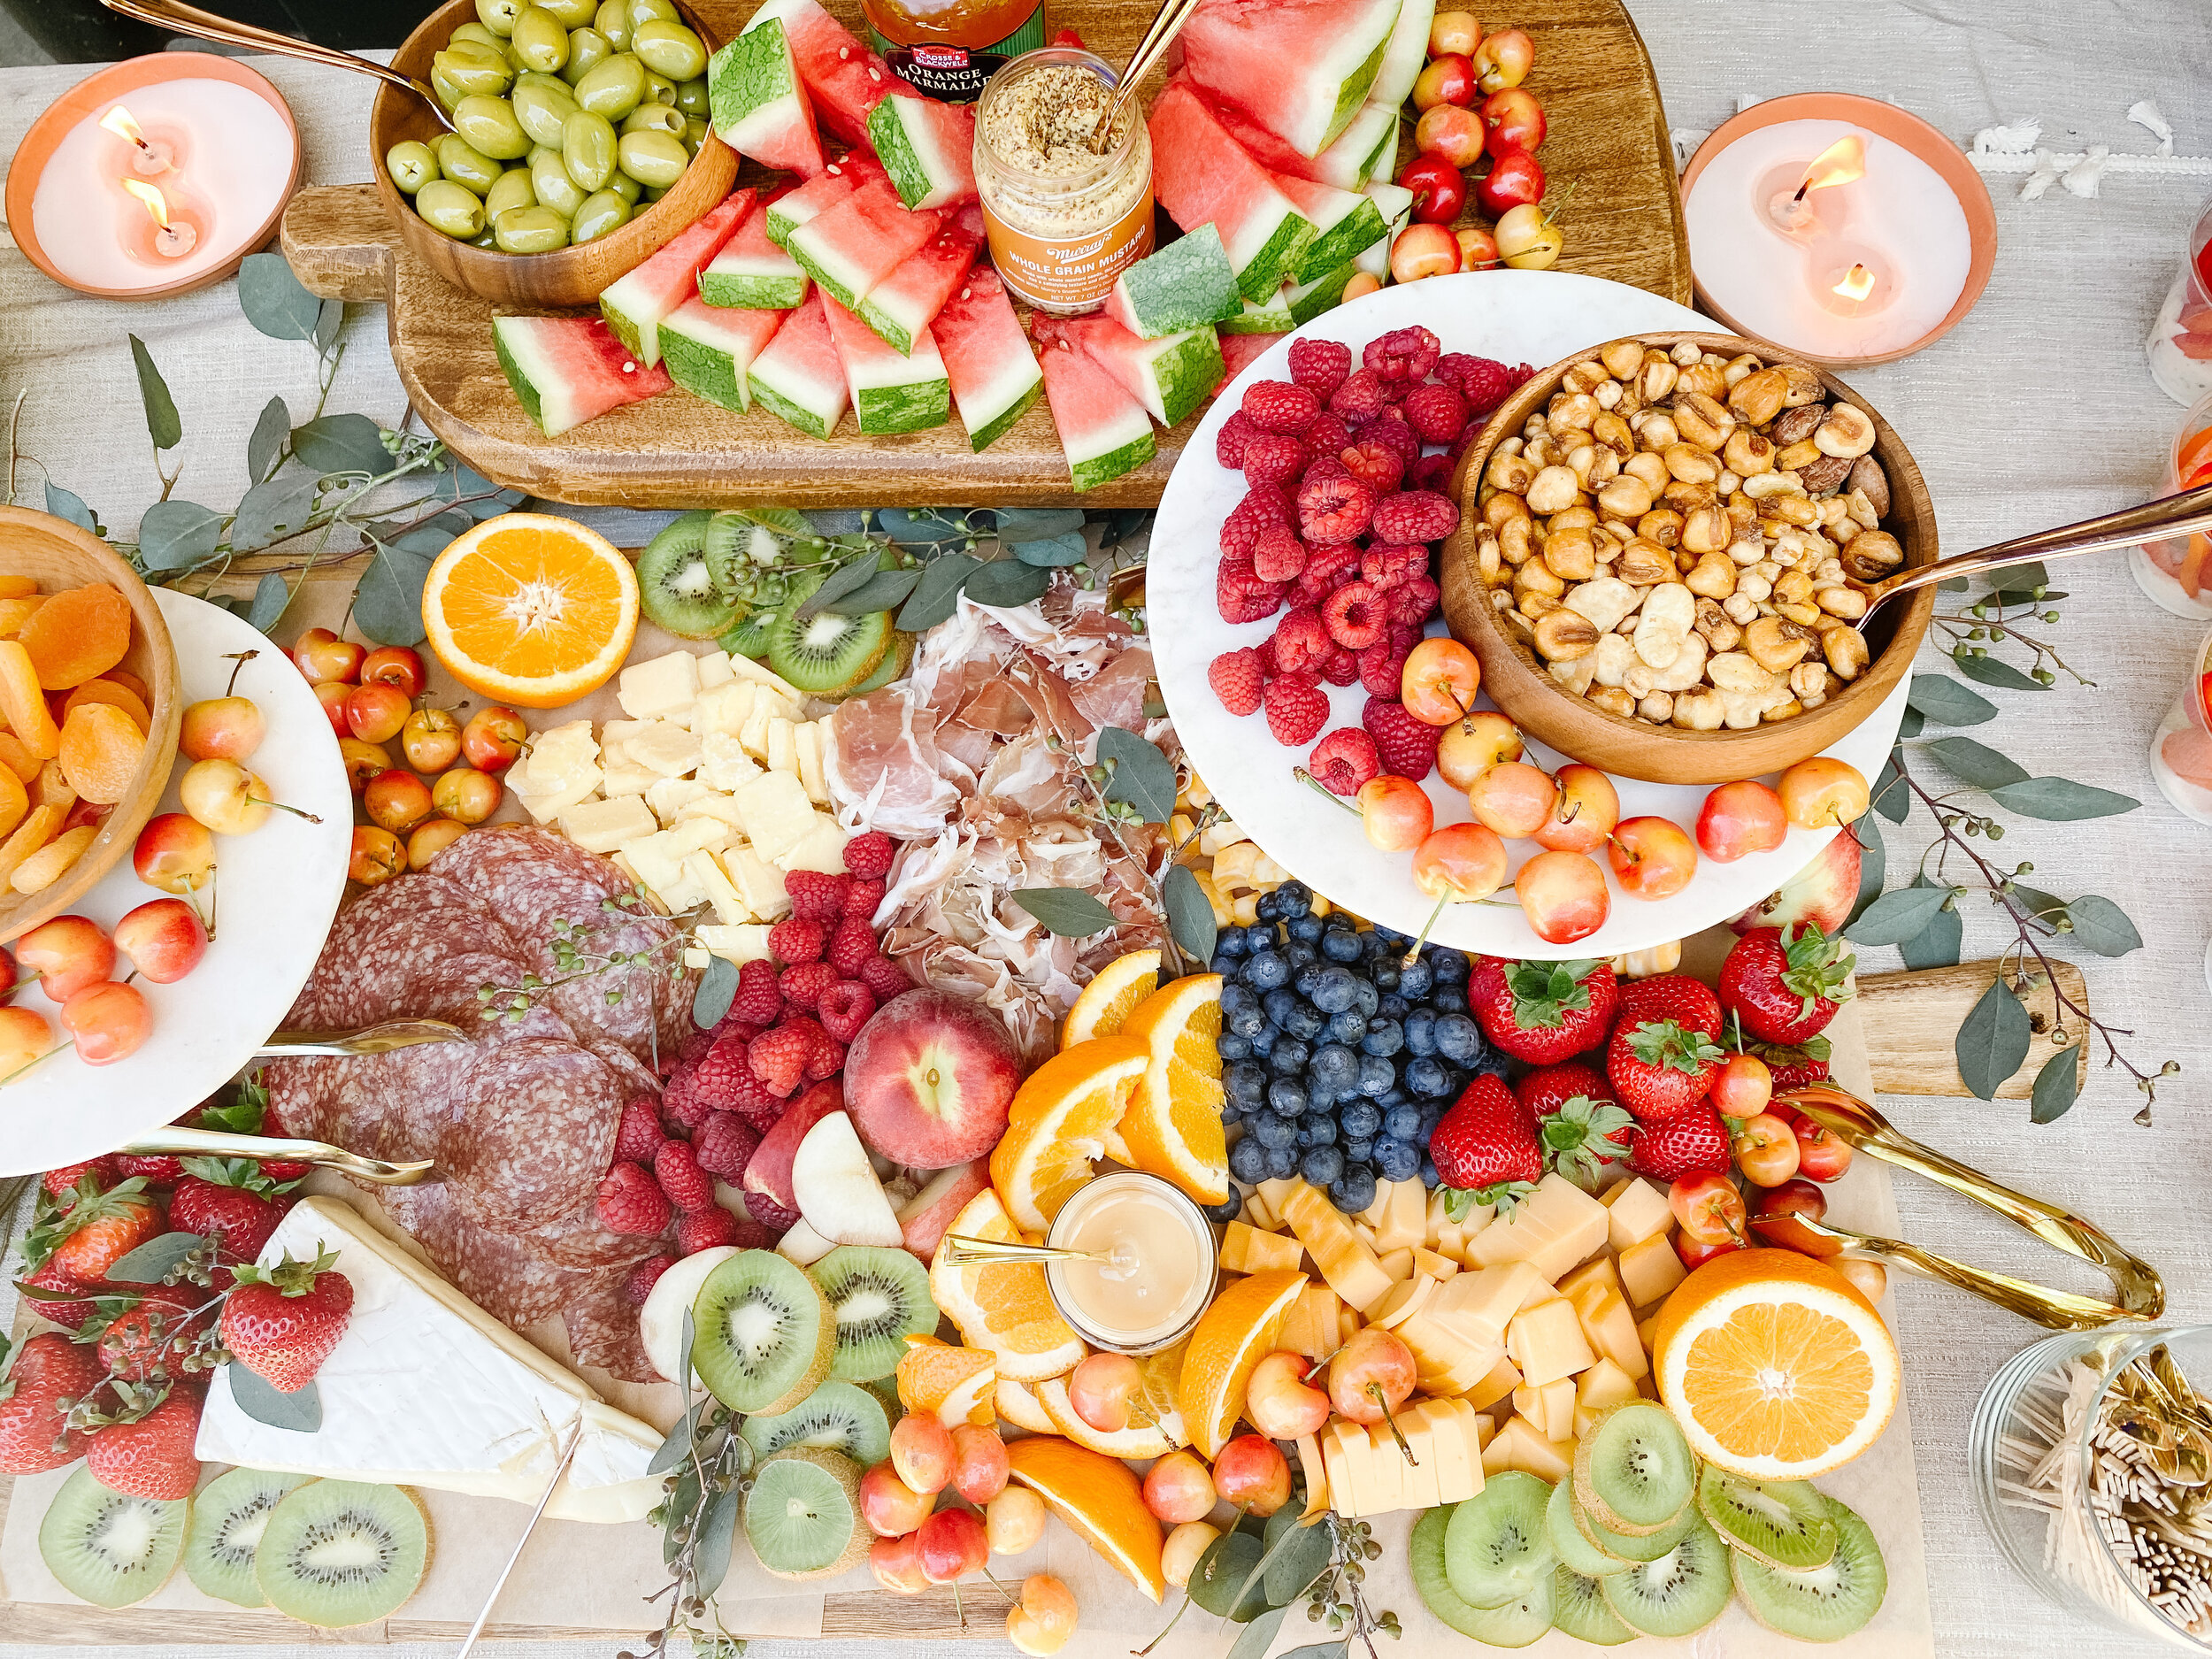
Watermelon
Cherries
Blueberries
Raspberries
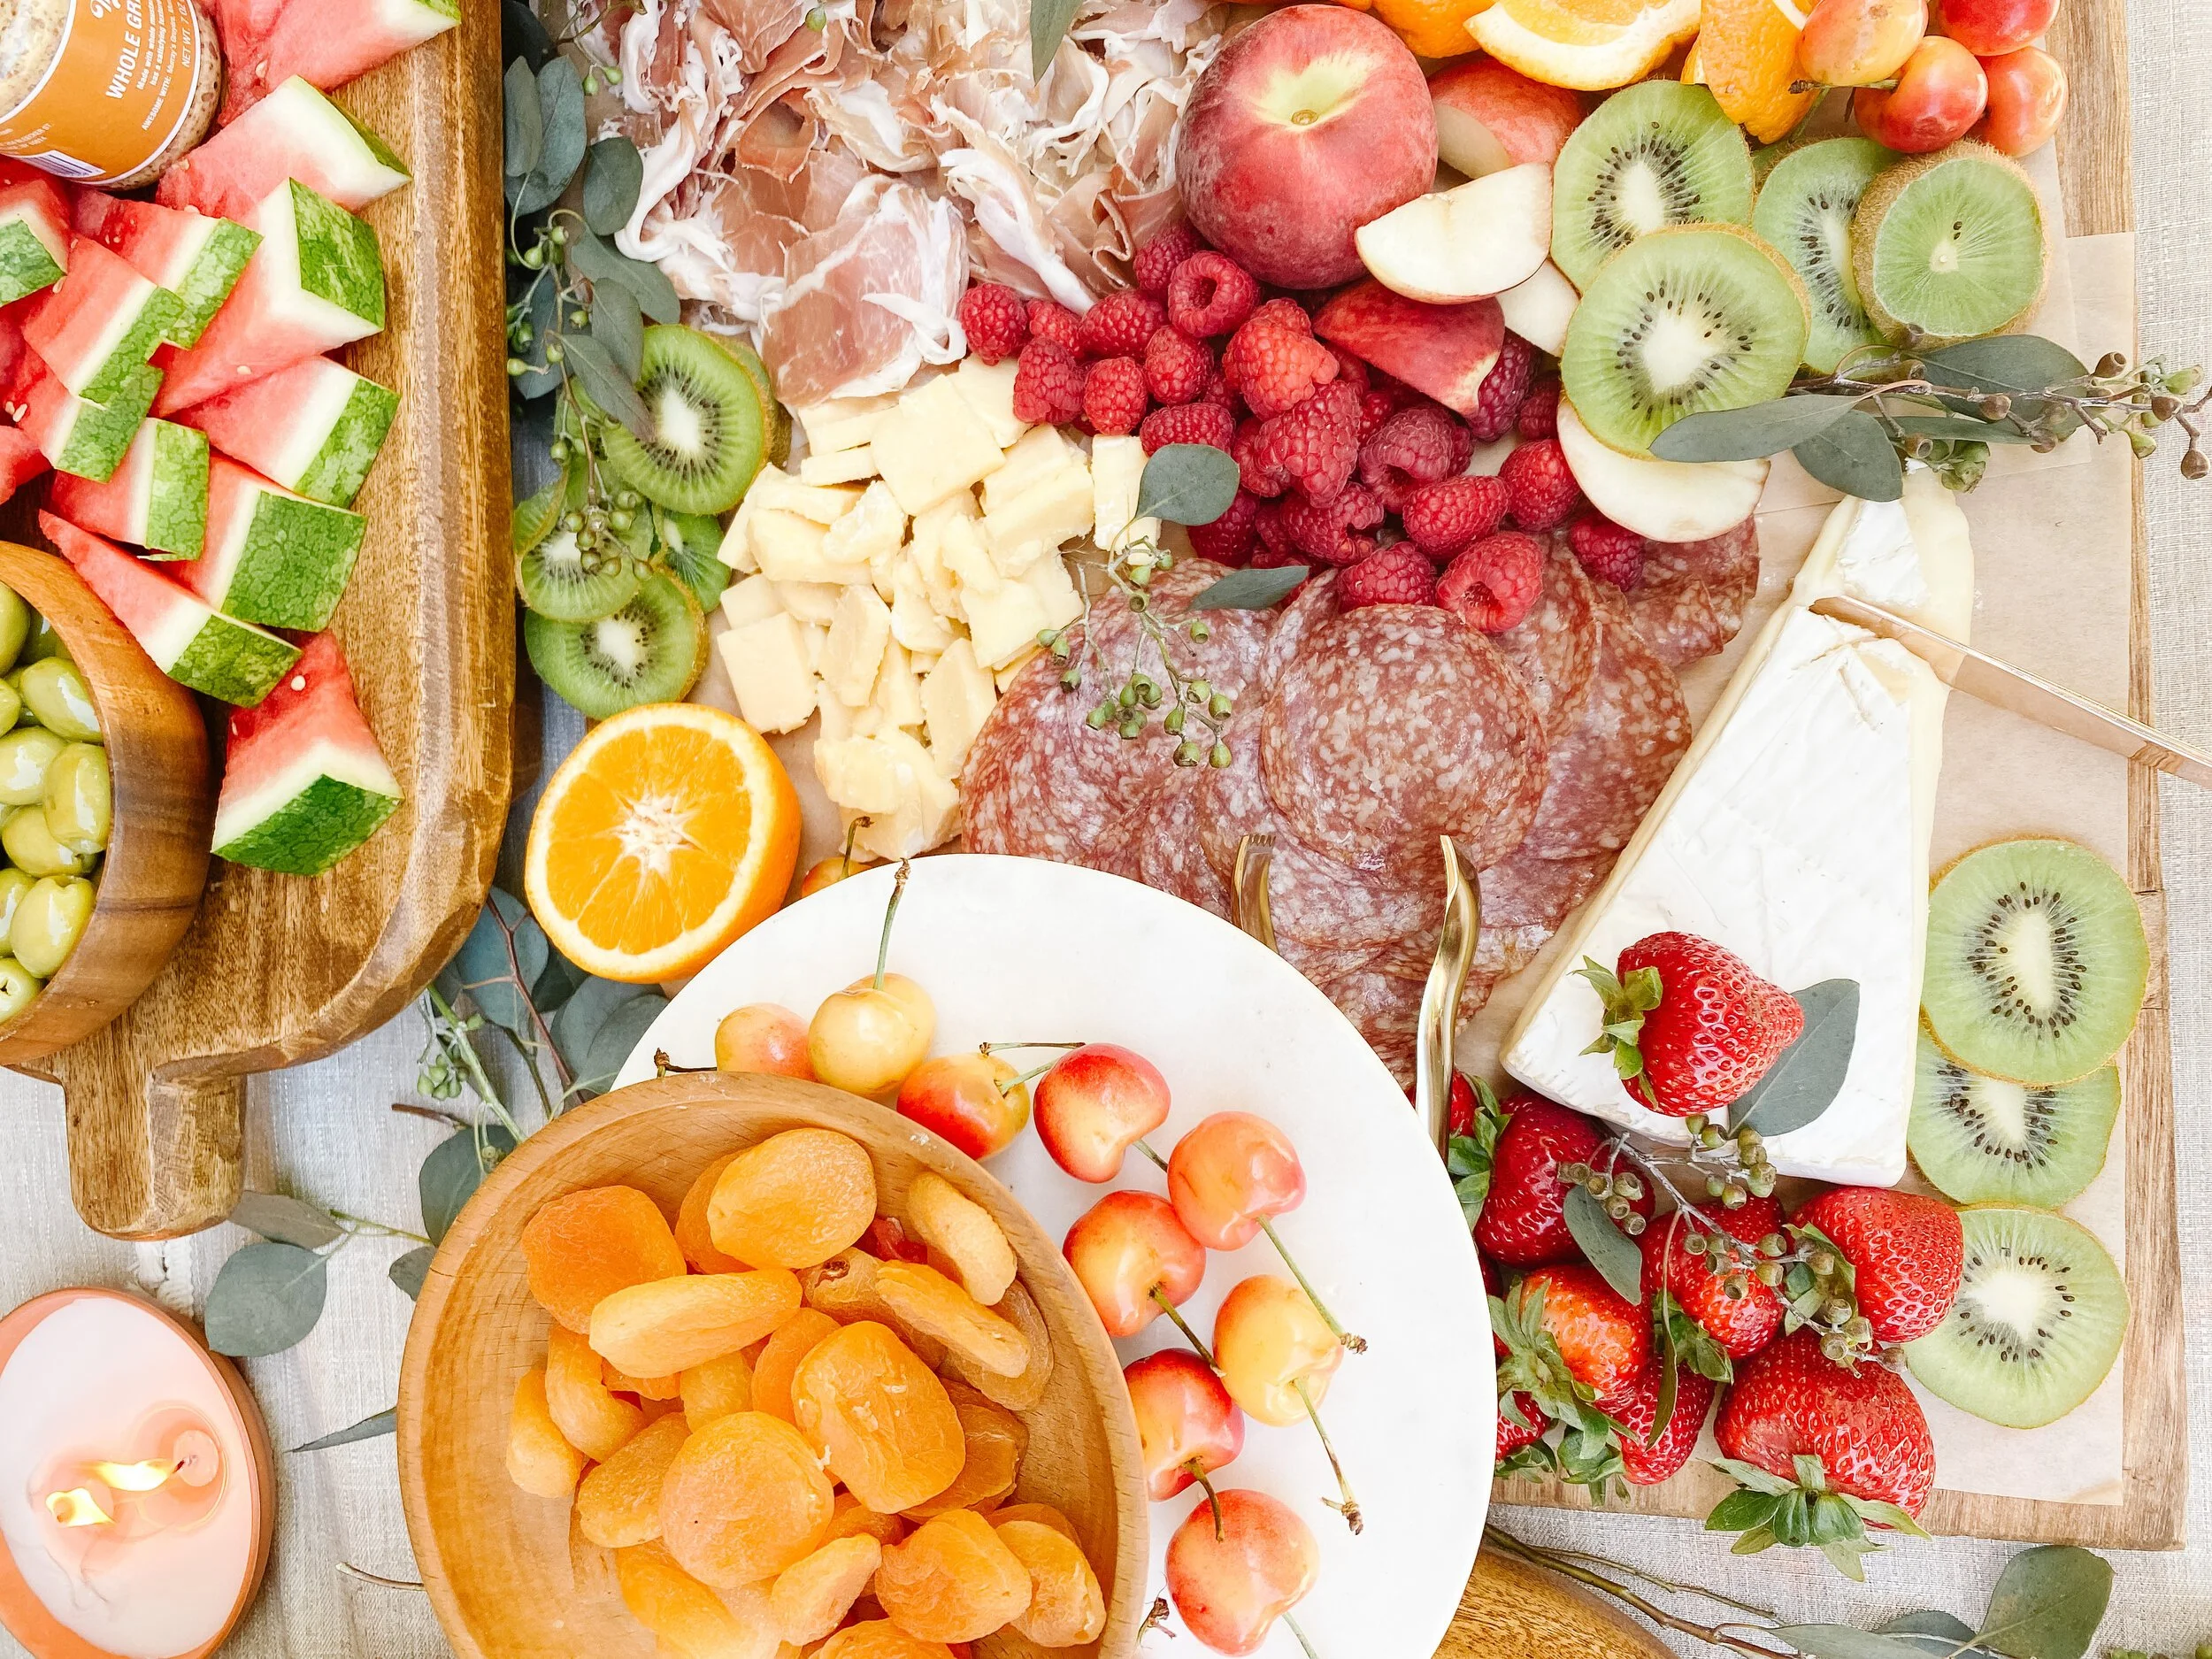
Strawberries
Oranges
Peaches
Kiwi
Green Olives
Salami
Prosciutto
3 kinds of cheese (I used smoked gouda, sharp cheddar, and brie)
Whole grain mustard
Honey
Nuts of your choice
Orange marmalade
Dried apricots
Eucalyptus stems (for garnish)
2-3 kinds of crackers of your choice
French bread slices
Setting up the area: For my spread I used a regular 6 ft folding table with a table cloth on top. I covered about 3/4 of the table with the charcuterie spread and then also had room left over to display a few additional appetizer options. I used an XL bread board for a base with 2 cake stands stacked on top as well as a pedestal breadboard in the back to create some different levels. You could do this with a variety of different items you may have (wood boxes, crates, trays, any kind of pedestals/ cake stands, etc.), or you can make the entire spread flat on the table! I used several wooden bowls to corral the crackers and bread, but you could also add that to your spread too if you wanted to make it even larger.
Prep: Cut up the watermelon, peaches, kiwi, and oranges into bite sized pieces/slices, leaving some larger chunks uncut for display. Cut the cheddar and gouda cheese into bite sized pieces (you can serve the brie as-is with a nice for cutting/spreading).
Arranging: I always start by placing the largest items first which in this case, were the items in bowls. I used small wooden bowls for the nuts, olives, dried apricots, and crackers/bread (you could use any kind of bowl to match your theme/spread). Space these in different areas across the board so that there’s lots of space in between each. Then I added the jarred items: mustard, jam, and honey, placing them directly on the board since they were all in pretty glass jars (you could also empty them into another small bowl if that’s not the case), evenly spacing them throughout. Be sure to put a small serving spoon in each. Next I added the cheese and meats each in their own little piles toward the center of the board, again leaving some space in between. Now you can add the fruits, one by one. Keep in mind color and try to disperse that evenly (for example don't put all the red fruits right next to each other). You don’t have to put all of each fruit in one pile/spot but instead you can have a few piles throughout to disperse the different colors and textures.
Finish by adding some eucalyptus stems around the edges of the board and to fill in any holes/blank spots. I also like to add some tongs, forks, and knives throughout for serving.