One Room Challenge: Playroom Makeover Week 4 Update: DIY Stenciled Wallpaper using Silhouette Cameo
Well I feel like I don’t have a ton of progress to share this week even though I actually HAVE made a ton of progress this week, it’s just all about halfway done and not very attractive for photos! We are kind of in the phase of the makeover where I have about 10 projects going at once and the room is a hot mess: paint cans everywhere, ladders, toys and regular decor thrown everywhere, walls stripped down and covered in painter’s tape. But despite the mess we are making a little more progress every day!

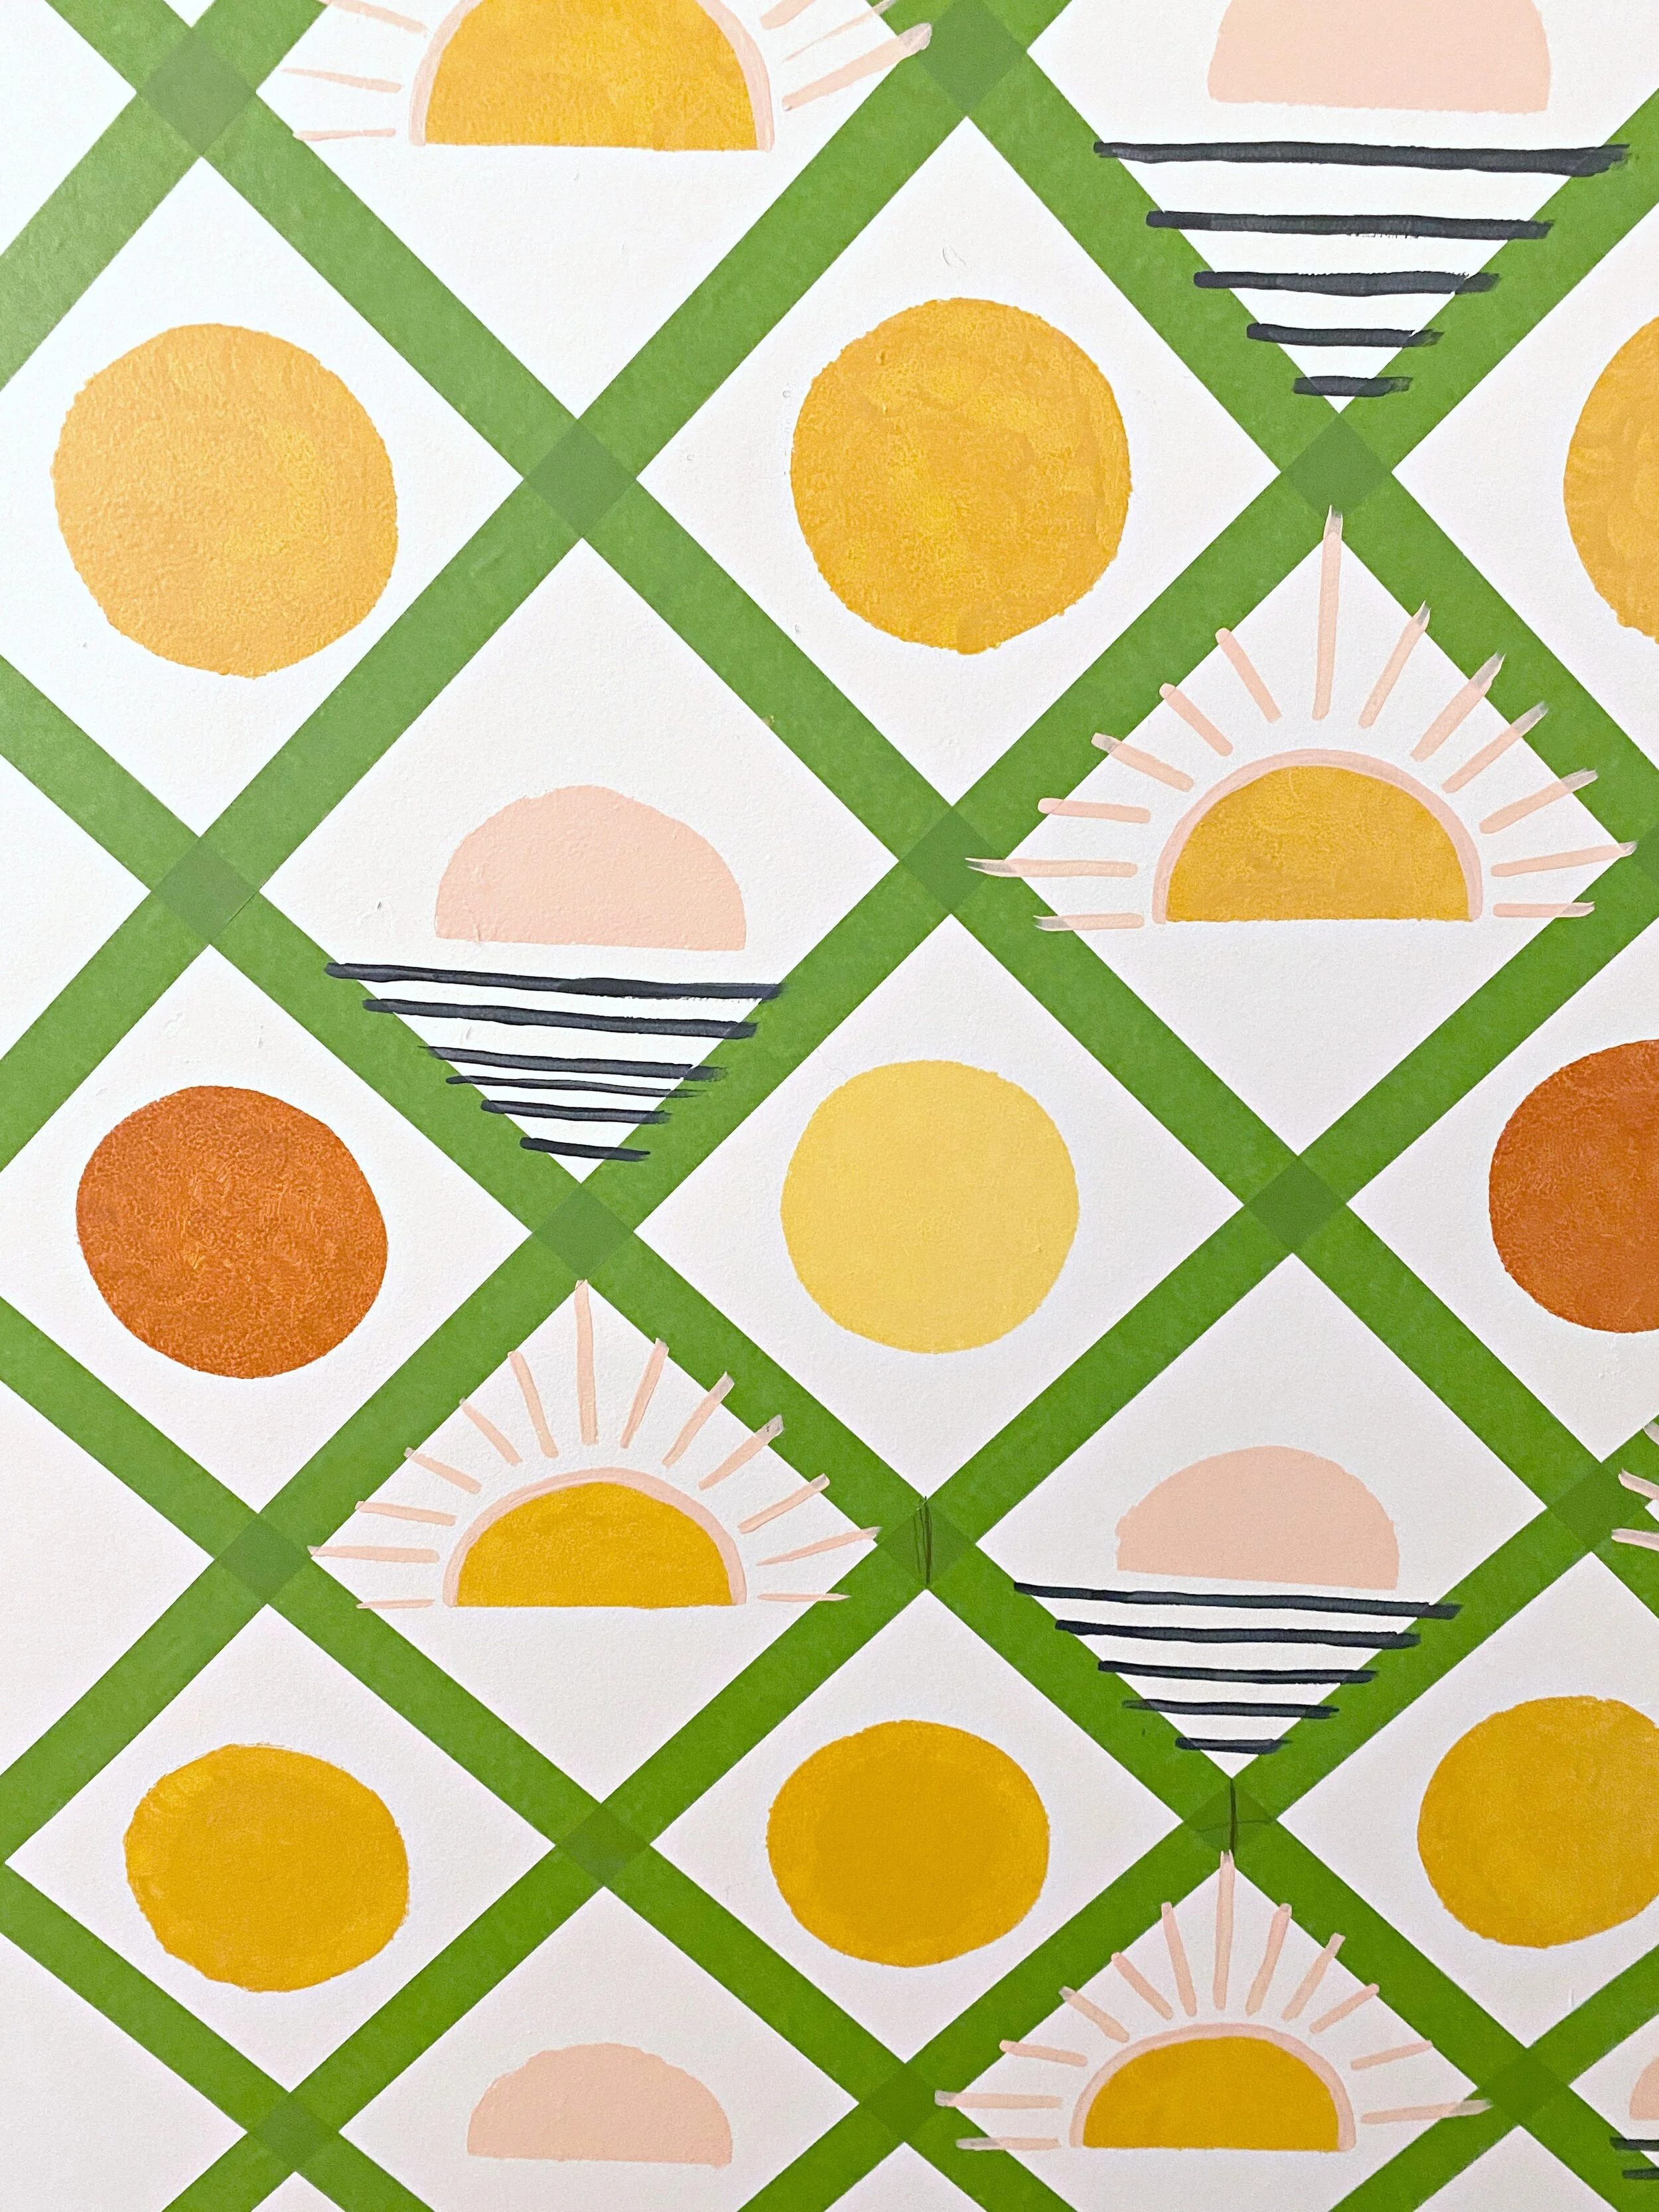
The big news this week is that I started on my DIY stenciled faux wallpaper. It has been an adventure to say the least! I had to try several methods before I found the right materials and overall execution plan that was going to work best. Since I kind of made this whole idea up, there was no instructions or anything for me to follow and I was really just making it up as I went along. Below you’ll seen my inspiration wallpaper that I fell in LOVE with, only come to find out it comes in tiny pieces for $50 a pop (and I would have needed at least 10 if not more). So I had the brilliant idea to make my own stencil of this design and paint it on the walls myself. I wanted to use my Silhouette Cameo (which I’ve owned for several years now and have barely used!) to make the stencil.

So the first step was getting the design right in the Silhouette Cameo Studio program on the computer. I was able to save the image of the wallpaper and upload it, and then with some tweaking enlarge the design to the size I wanted and trace the edges out. I then printed a couple test stencils on both chipboard and dura-lar stencil material of the entire design. I went to Sherwin Williams and grabbed a bunch of paint chips and compared them to my photo of the wallpaper until I found just the right combination. Next, I taped my duralar stencil to the bottom corner of the wall and painted away using small round stencil sponge brushes. I let it dry and then peeled the stencil away and unfortunately there was a lot of bleeding happening particularly in the super detailed areas. Also I realized through this test run that the overall design pattern was WAY too small for the wall and I needed to enlarge it about 2-3X the size. So it was back to the drawing board (aka my computer and Silhouette).
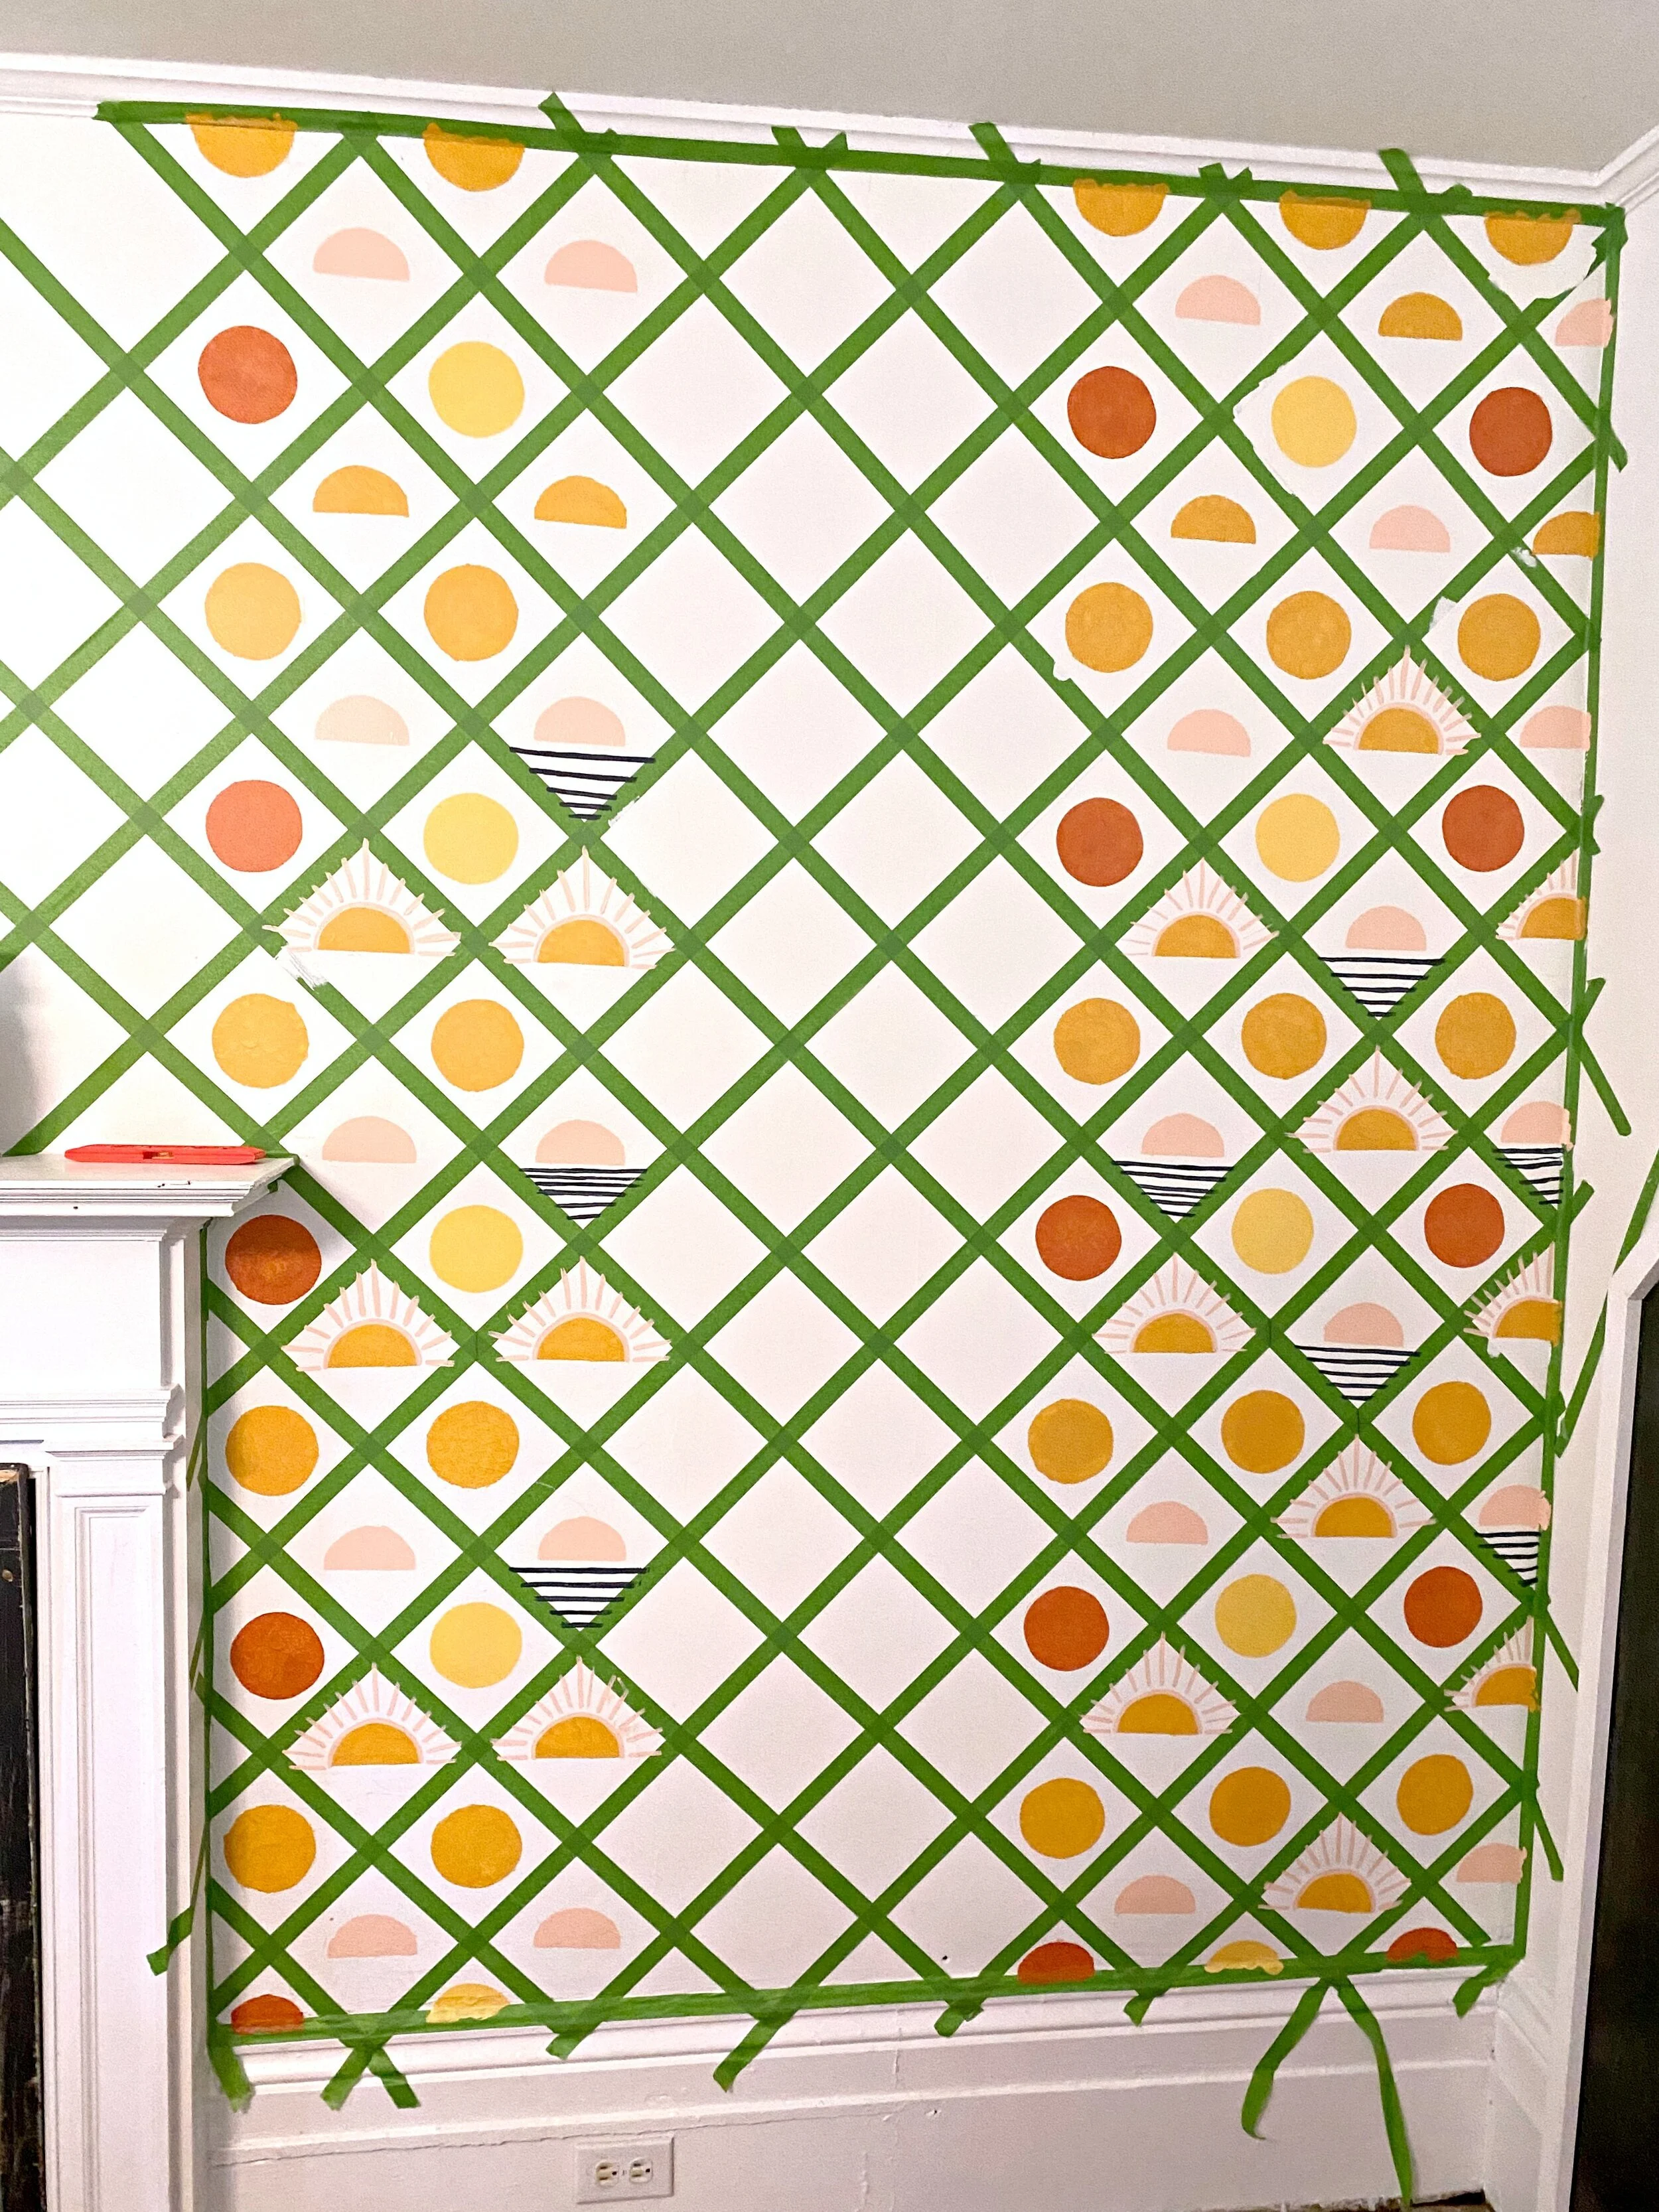
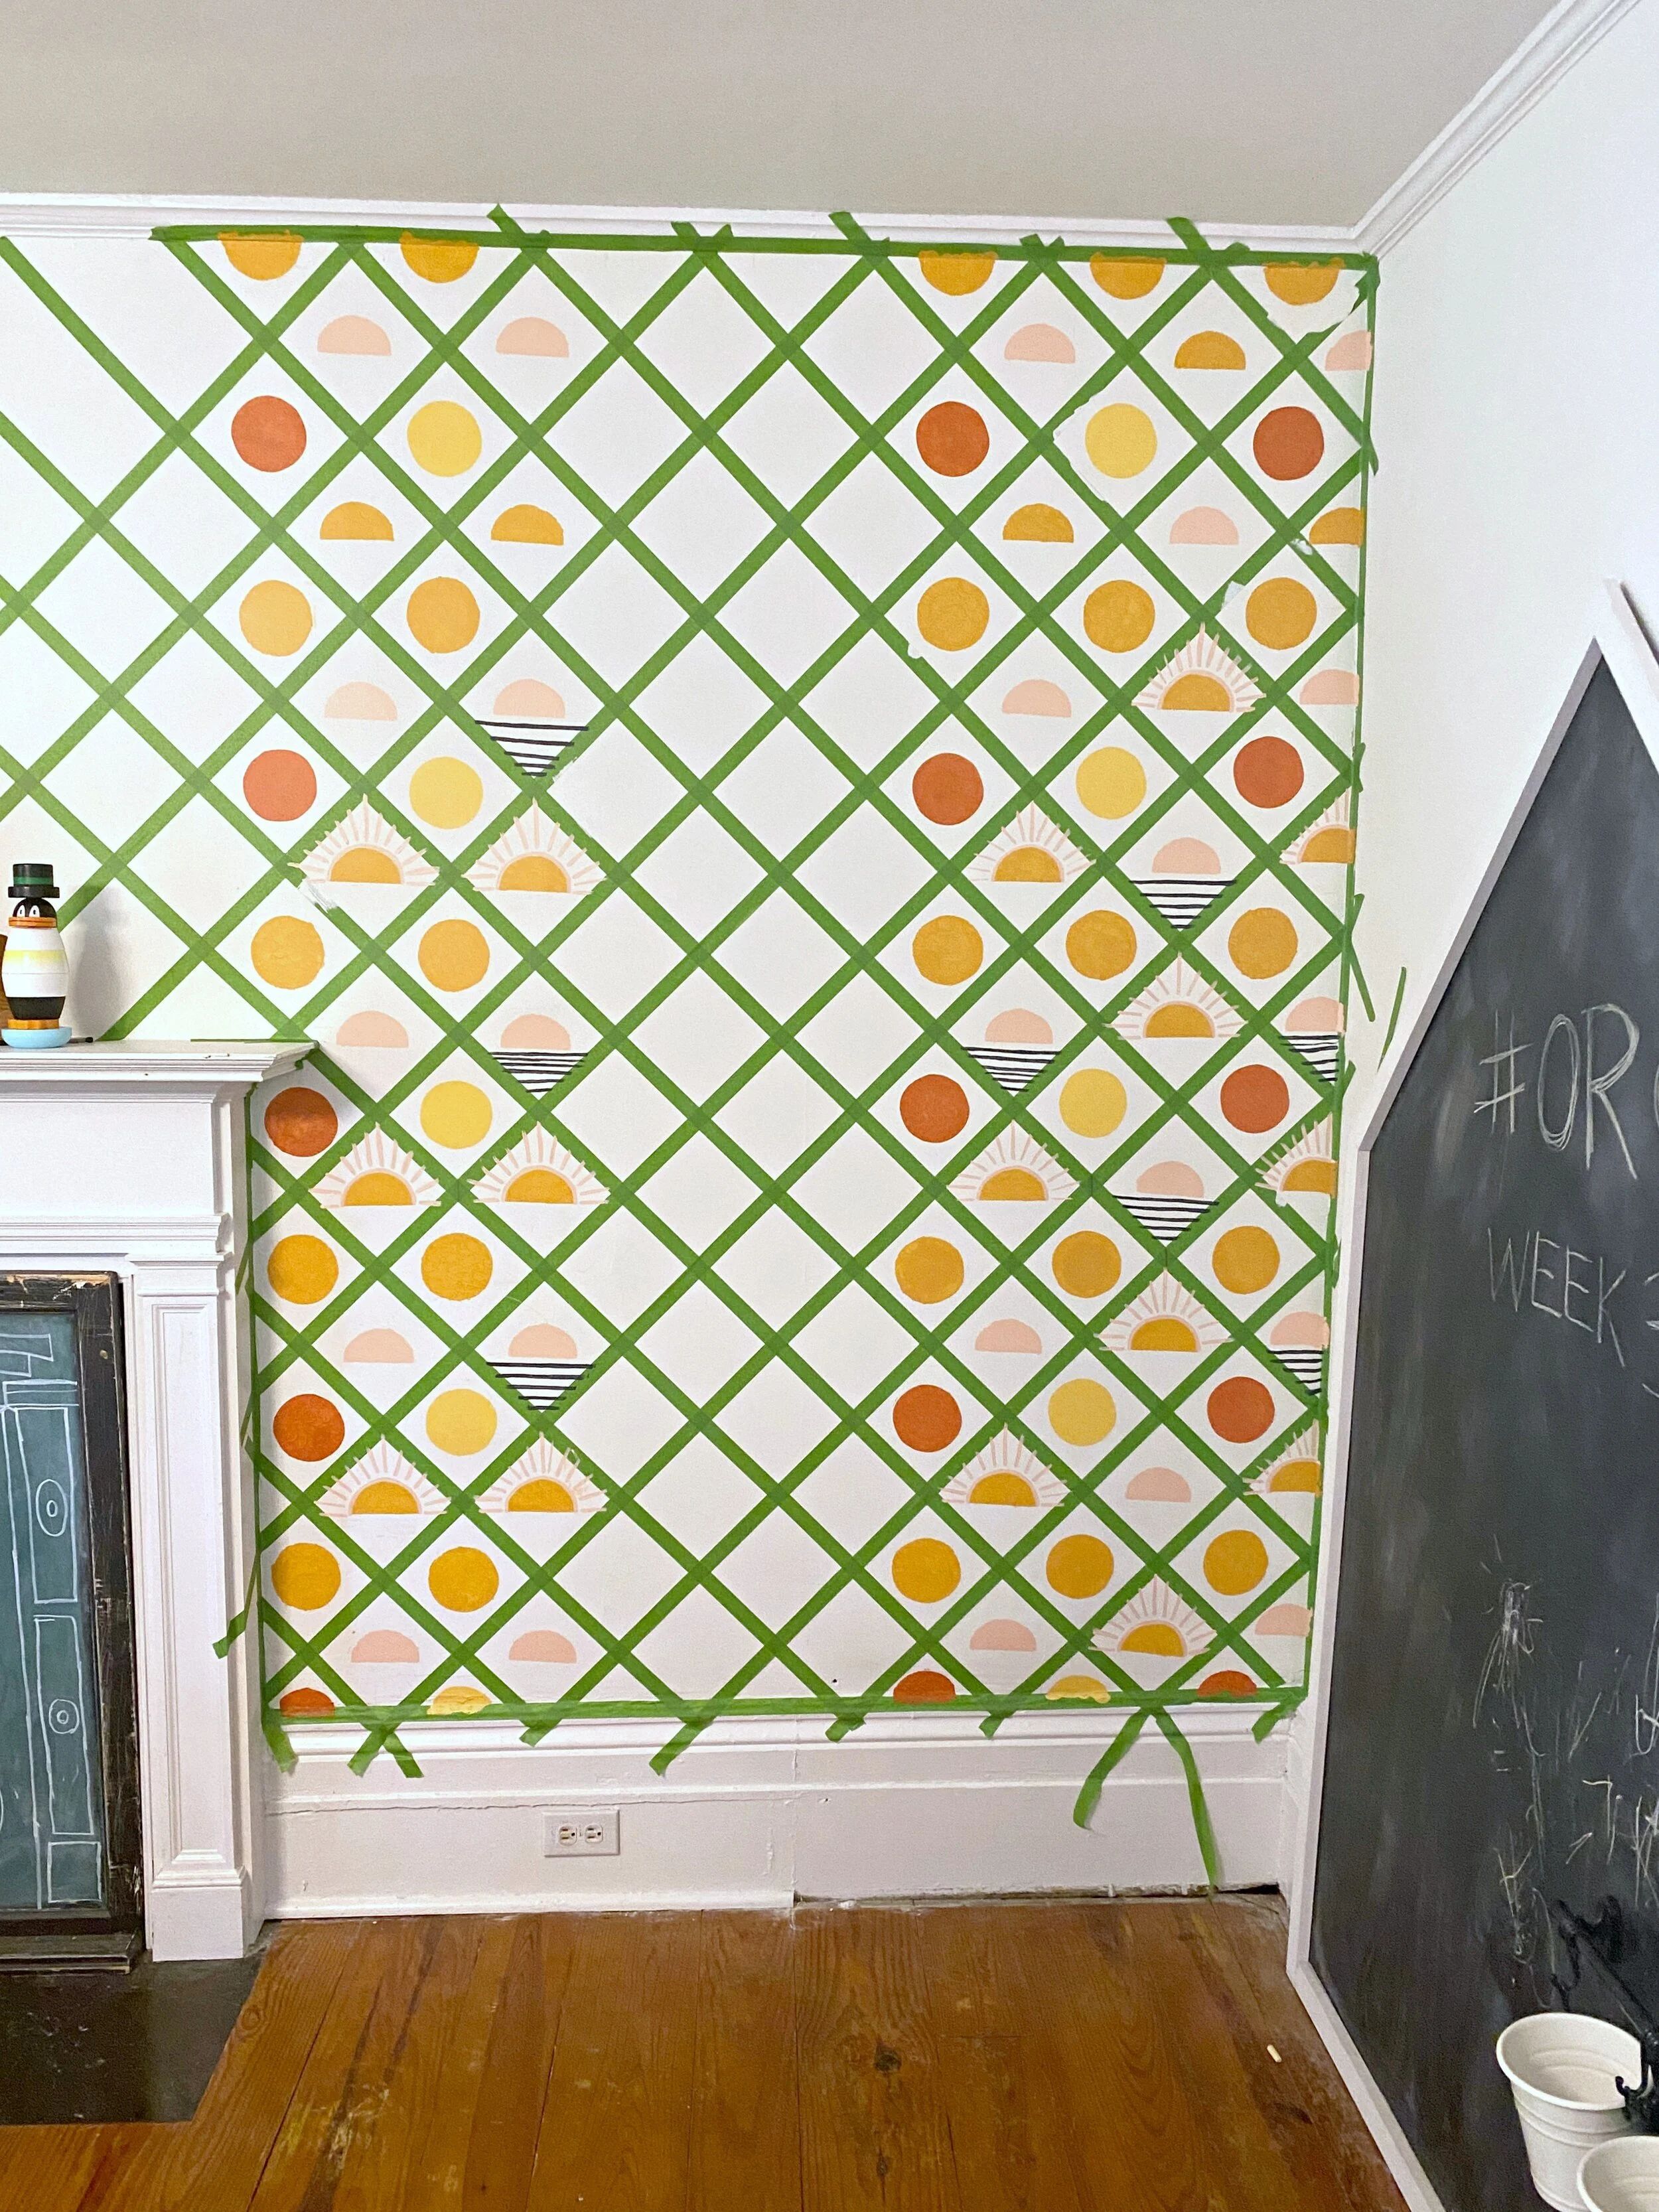
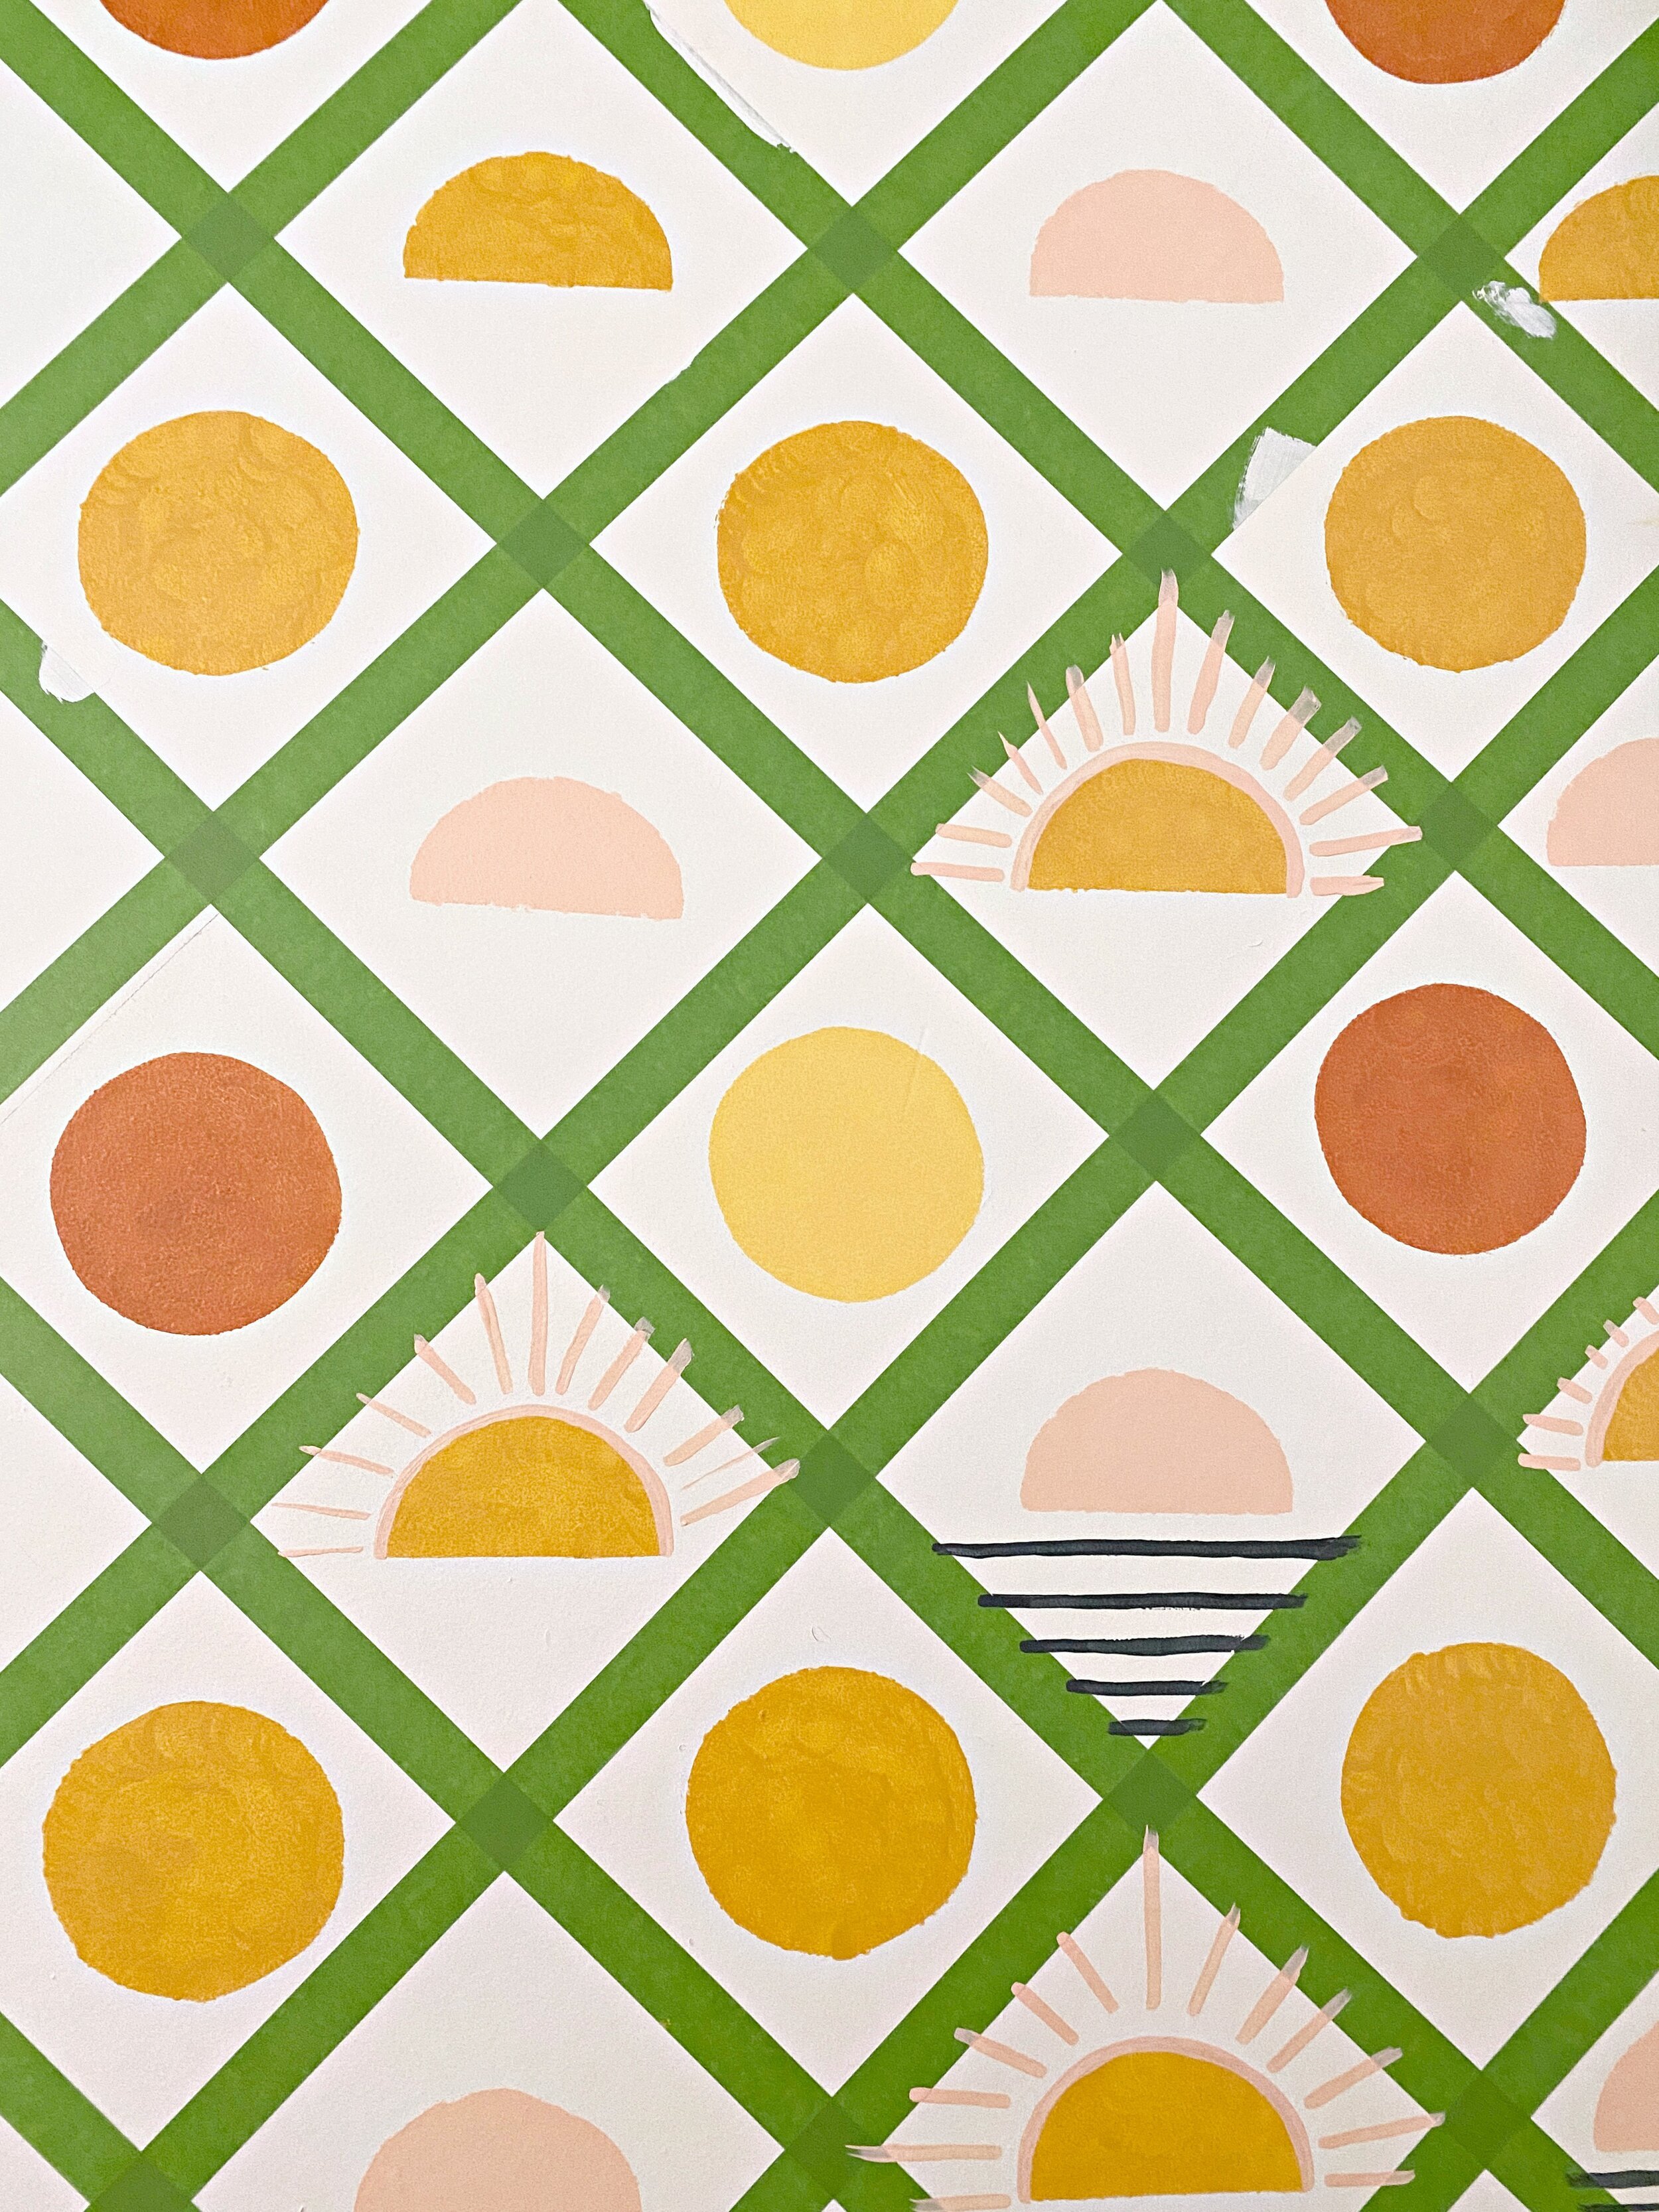
I studied the design and realized that the rays and line details on the stencil were just going to be too small to get exact without any bleeding so it would be much easier for me to just handpaint those. So now the only other shapes that were left were circles and half circles, repeating over and over. There is kind of a lattice pattern that separates each section so I realized I could just tape that off with thin painters tape and I’d be good to stencil away the circle and half circle shapes! I decided to cut several stencils of those shapes so I could have one for each color and quickly repeat them.
The longest part of the process is the taping off because you have to figure out just the right measurements for your design. So after taping off some test areas to get an idea of size, I decided I wanted each of my sections (which are in the shape of diamonds) to be 8 inches tall. It REALLY helps if you have two people and you can move pretty fast taping that way. My husband took the right side and top side of the wall and I took the left/bottom. We started at the top right hand corner and placed the tape there then used a level to get a 45 degree angle going down to the opposite wall. I held the other side of the tape on the left side and we carefully adjusted until we had it perfectly at a 45 degree angle. This gave us our starting point and now we could measure 8 inches off of that either way and continue taping end to end. So my husband would use a ruler and measure 8 inches down (from the edge of the last tape), place the top end of the next piece of tape, then I would measure 8 inches down on my side and he would stretch the tape to me. I would carefully place my end right on the pencil line I made, 8 inches below the edge of my last tape. From there you just repeat and repeat the process down the wall then across the top until the entire wall is taped in a diamond pattern!
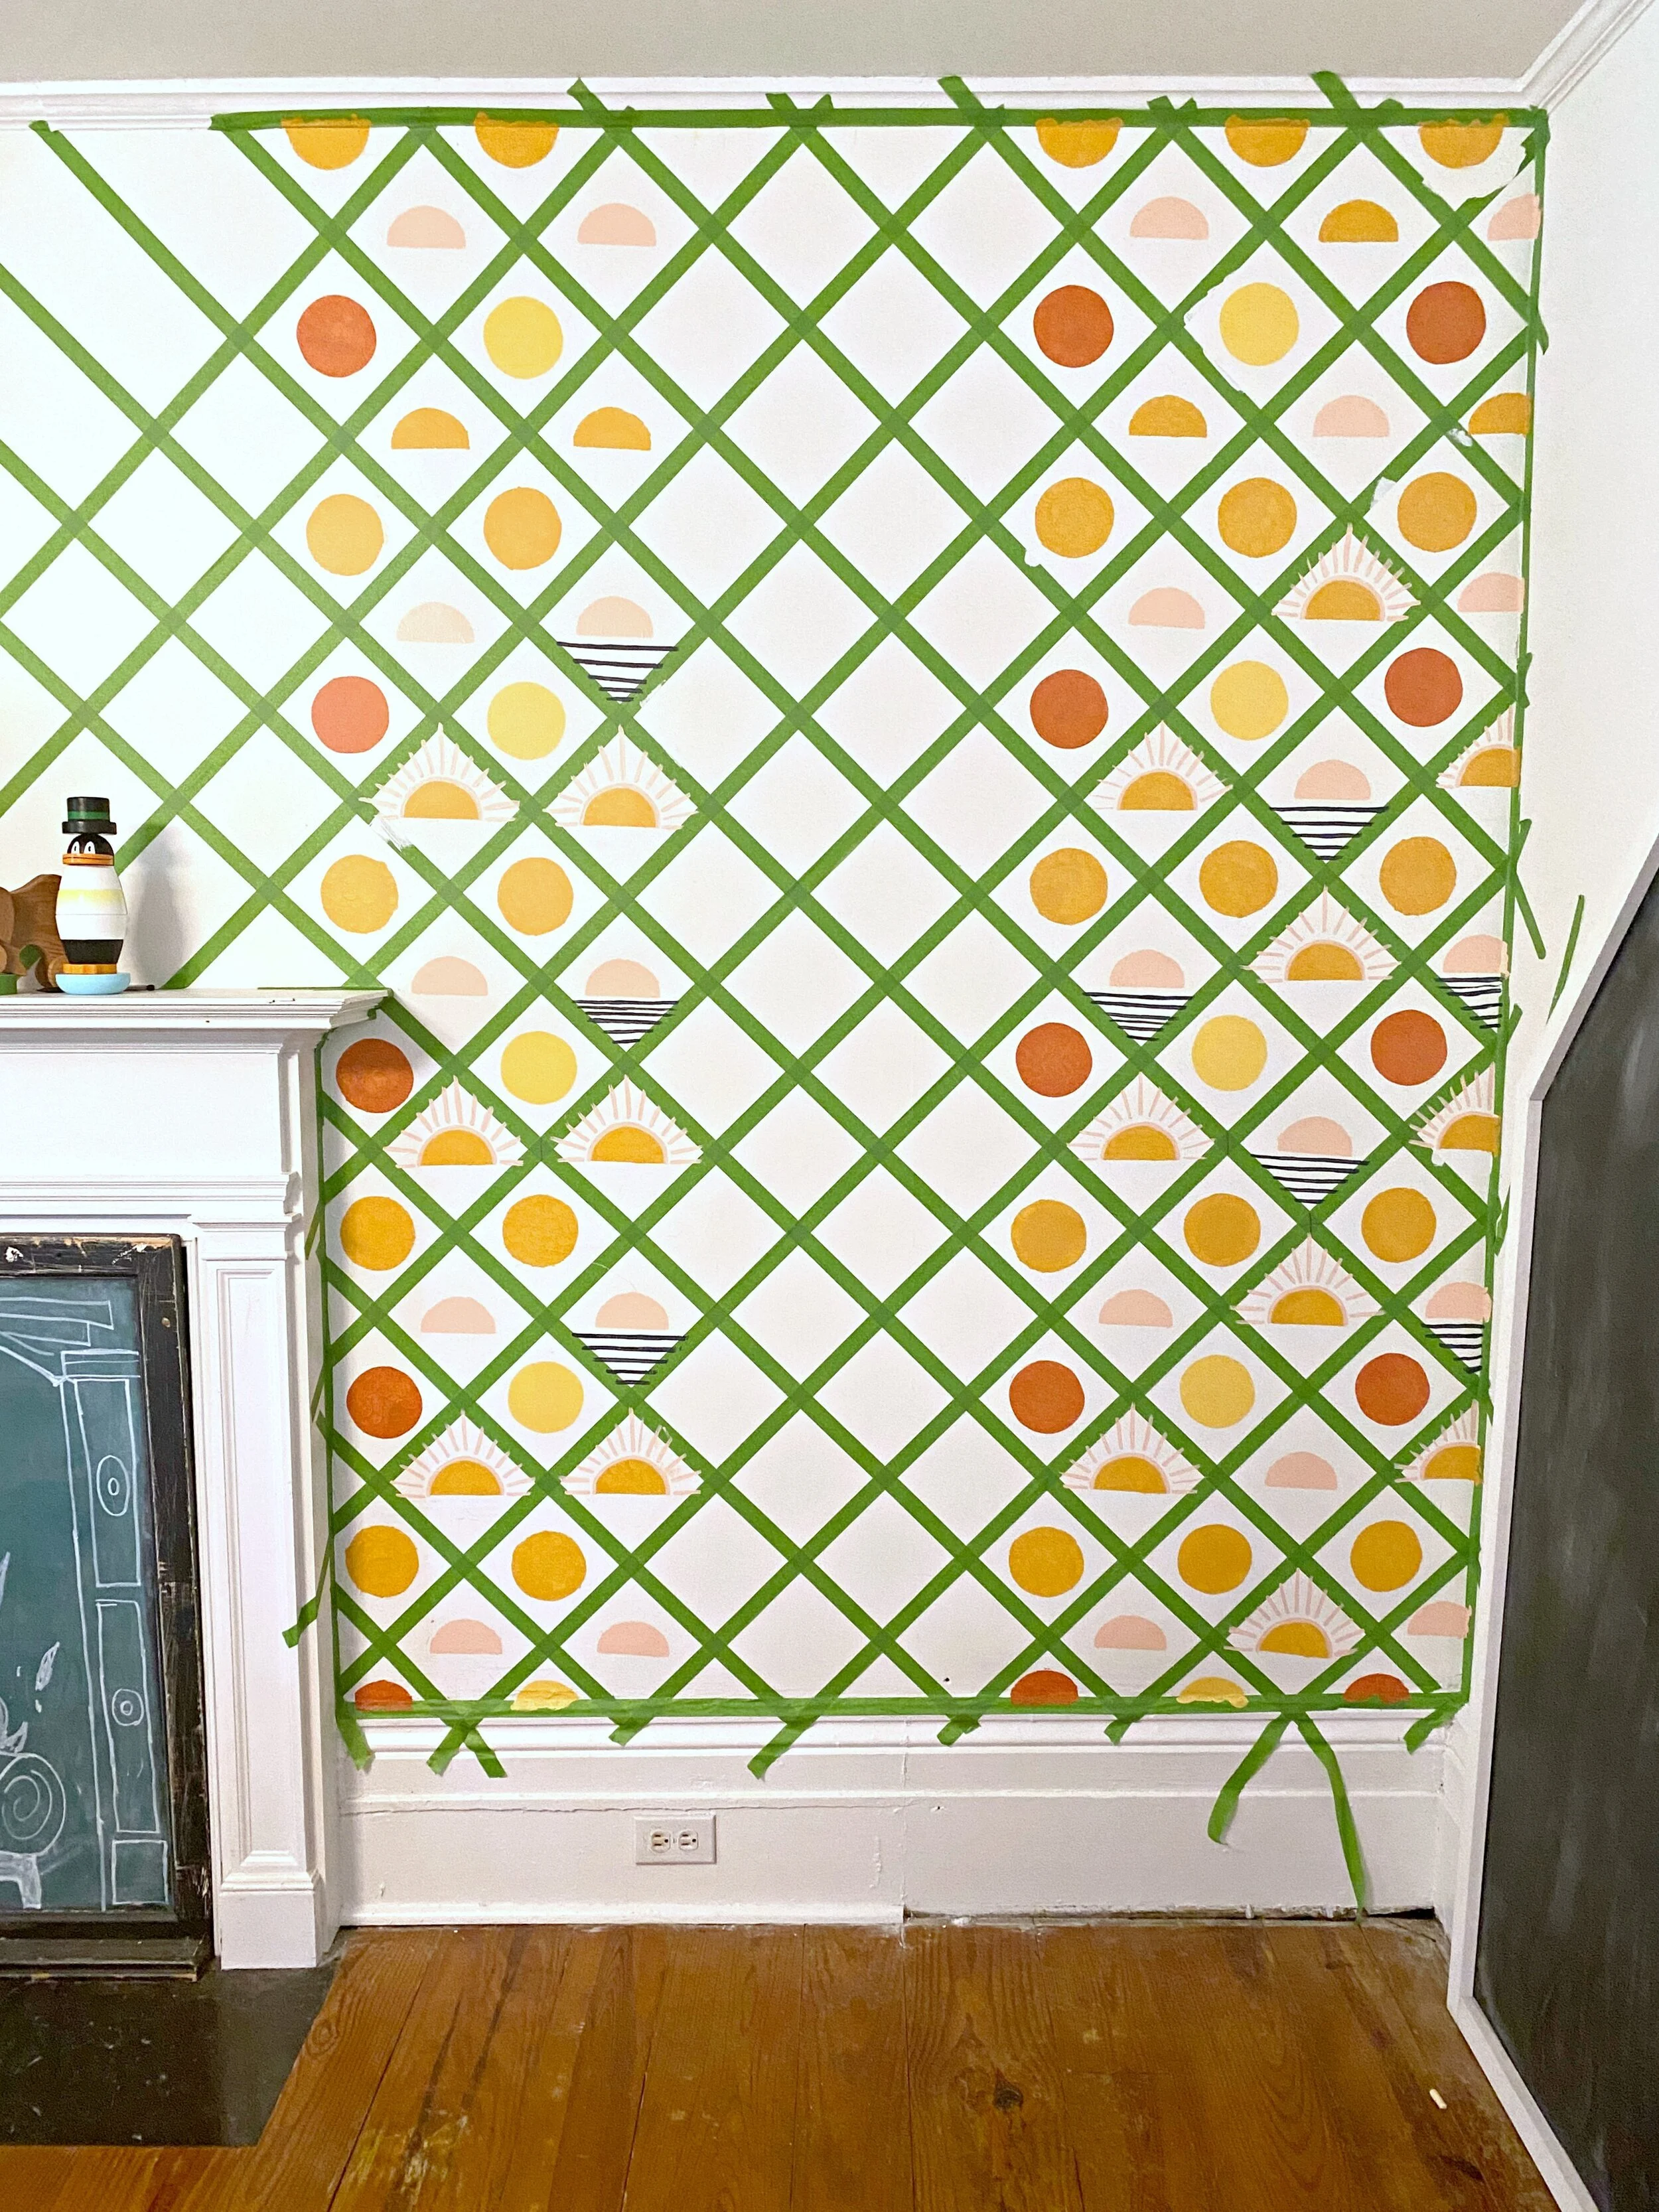
After we completed the taping, it was time to start painting! I started out with chipboard stencils but then tried the dura-lar again and it did produce a much cleaner design AND it had the ability to be quickly rinsed and washed off so I could use the same stencil for multiple colors. I did use painters tape most of the time to hold the stencil in place although a couple times I got brave and just held it with my hand. I still used the same round sponge stencil brushes and they worked well and I do think they hep provide a cleaner edge. So far I’ve completed all the circle/half circles which took me about 1 hour for this half of the wall. Next I’m going to do the rays/lines (all freehand) which I am estimating will take me about the same amount of time. I picked up some nicer, super thin detail paint brushes for that and tested out a few sections today. I think it’s turning out really well so far and I already CAN’T WAIT to peel that painter’s tape off and see the finished product!
I decided to do just one portion of the wall at a time and finish it completely before moving on because I figure I will learn a lot each step of the way and hopefully I can get more efficient and exact as I keep going! I will definitely do another post when it’s all complete linking everything I used and all the final details of the process as well! Thanks so much for following along and (cross your fingers) MAYBE I’ll have a finished wall to show you next week!
Be sure to follow along here to see all the One Room Challenge posts easily in one place! You can also follow the hashtag #oneroomchallenge on Instagram to discover all the projects and progress!
You can follow my playroom makeover project and see all the past posts together by clicking here.
xoxo
Emily