Easter Cheeseboard

If you’ve been following me for any length of time, you know I absolutely love putting together cheeseboards for any occasion and any holiday! Of course, I also had to put one together for Easter and loved the fun spring colors and foods I was able to incorporate into this one. If you are hosting an Easter gathering for your family or friends, this is a perfect way to serve a variety of snacks and is fairly easy to assemble too. Check out the pictures, ingredient list, and directions below!
xoxo,
Emily

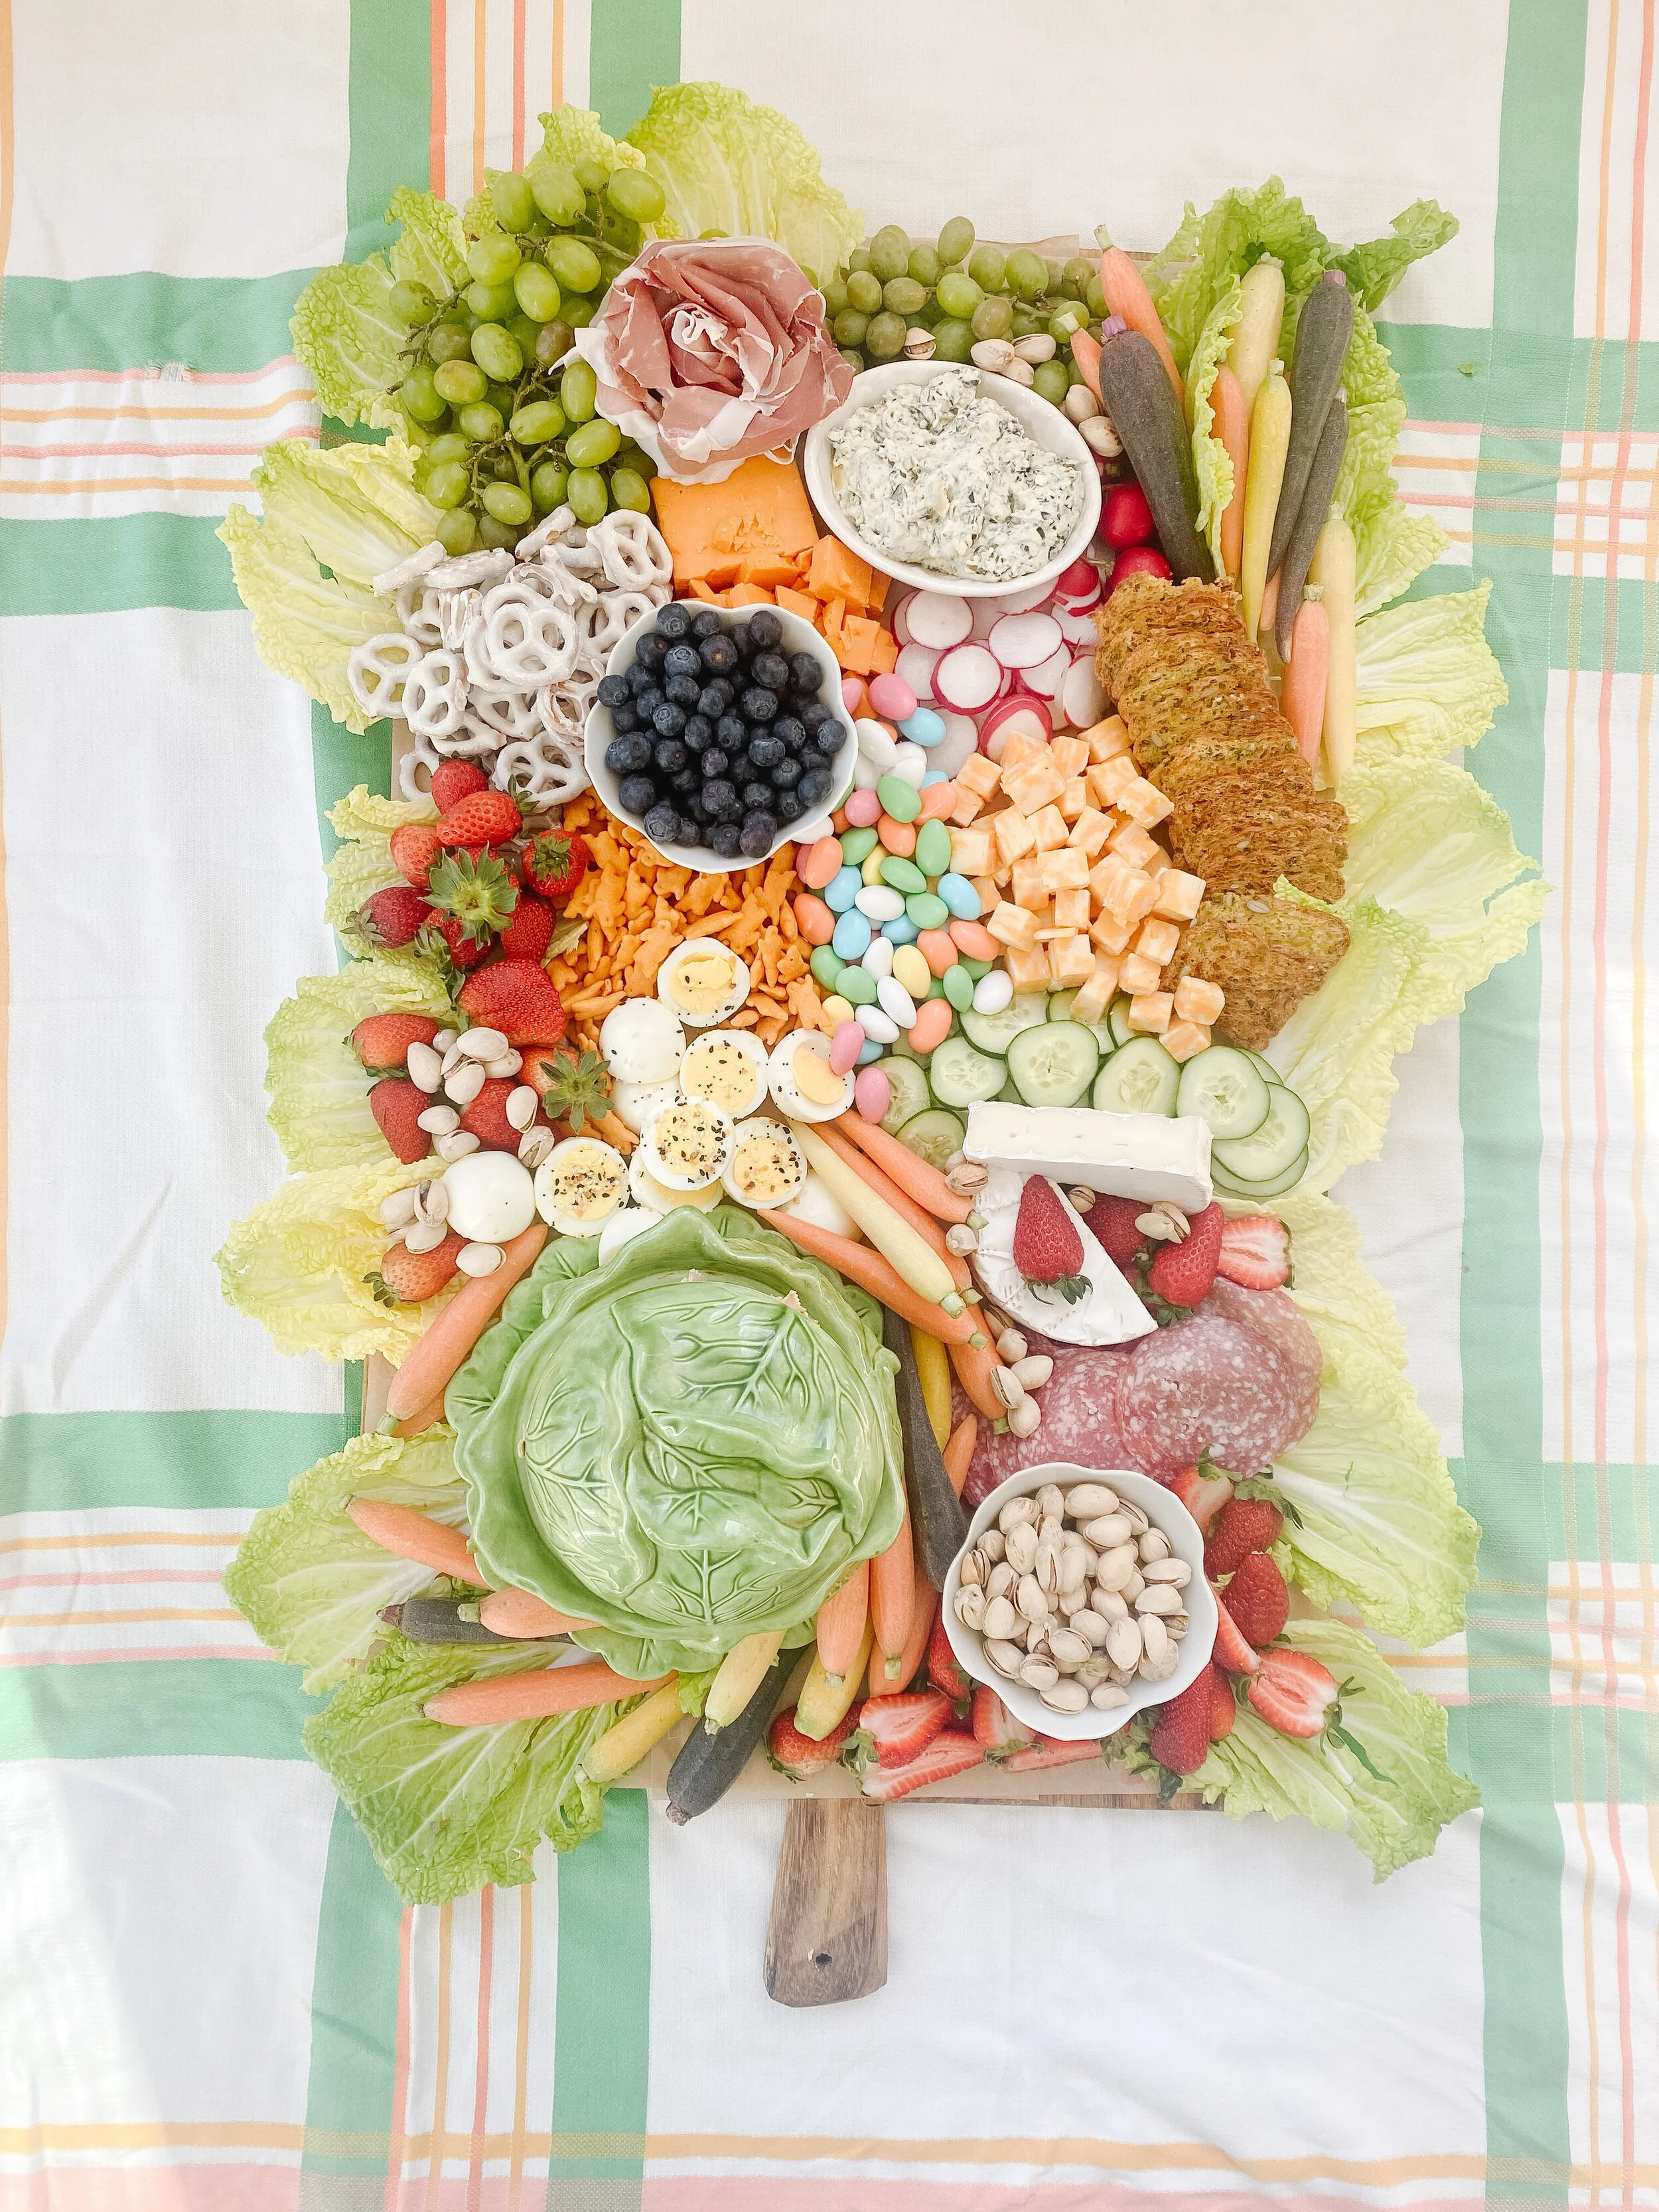
Strawberries
Blueberries
Green grapes
Head of Lettuce/cabbage - I broke the pieces off separately to go around the outside of the board to add texture and to fit the Easter theme
Rainbow Carrots
Cucumber
Radish
Prosciutto
Salami
Brie Cheese - any soft cheese of your preference will do
Sharp Cheddar Cheese - any harder block of sharp cheese will do (I tried to choose one that was more on the orange side for color)
Colby Jack cheese cubes
Annie’s brand cheddar cheese bunny shaped crackers
Hard boiled eggs (optional: sprinkled with Everything Bagel seasoning)
Spinach and artichoke dip (this one is my favorite)
Pistachios
2-3 different kinds of crackers of your choice (I used these + these and also added a bowl of pita chips beside the board when serving)
White chocolate or yogurt covered pretzels
Mini egg candies - you can use any you like, but my favorites are Reese’s mini peanut butter eggs or Cadbury mini eggs
I started by placing the leaves of lettuce around the outside of my board. This is only for styling, not to eat so it doesn’t matter if other food items or bowls are placed on top of them. I think it looks best to let it hang over the edge a little bit!
Next I place my bowls in scattered spots around the cheeseboard. I loved getting to incorporate my vintage cabbage and tulip bowls- so fun for spring! You can use any bowls you may have that fit the spring theme or plain glass or white.
Start by filling in the larger black areas with main food groups. I started this process by knowing I wanted the carrots to be a main focal point and positioned them around the largest bowl and on the other corner of the bowl. I try to place the largest food items first and make sure that the colors are spread out throughout.
Next, fill in with the items like grapes, cheese, meats, etc. - any food item that is more medium size.
Save the smallest items for the end to sprinkle in and fill any holes- candy, pretzels, cheese cubes, pistachios, etc.