DIY 90's Style Puff Paint Halloween Sweatshirts for Kid's + Adults
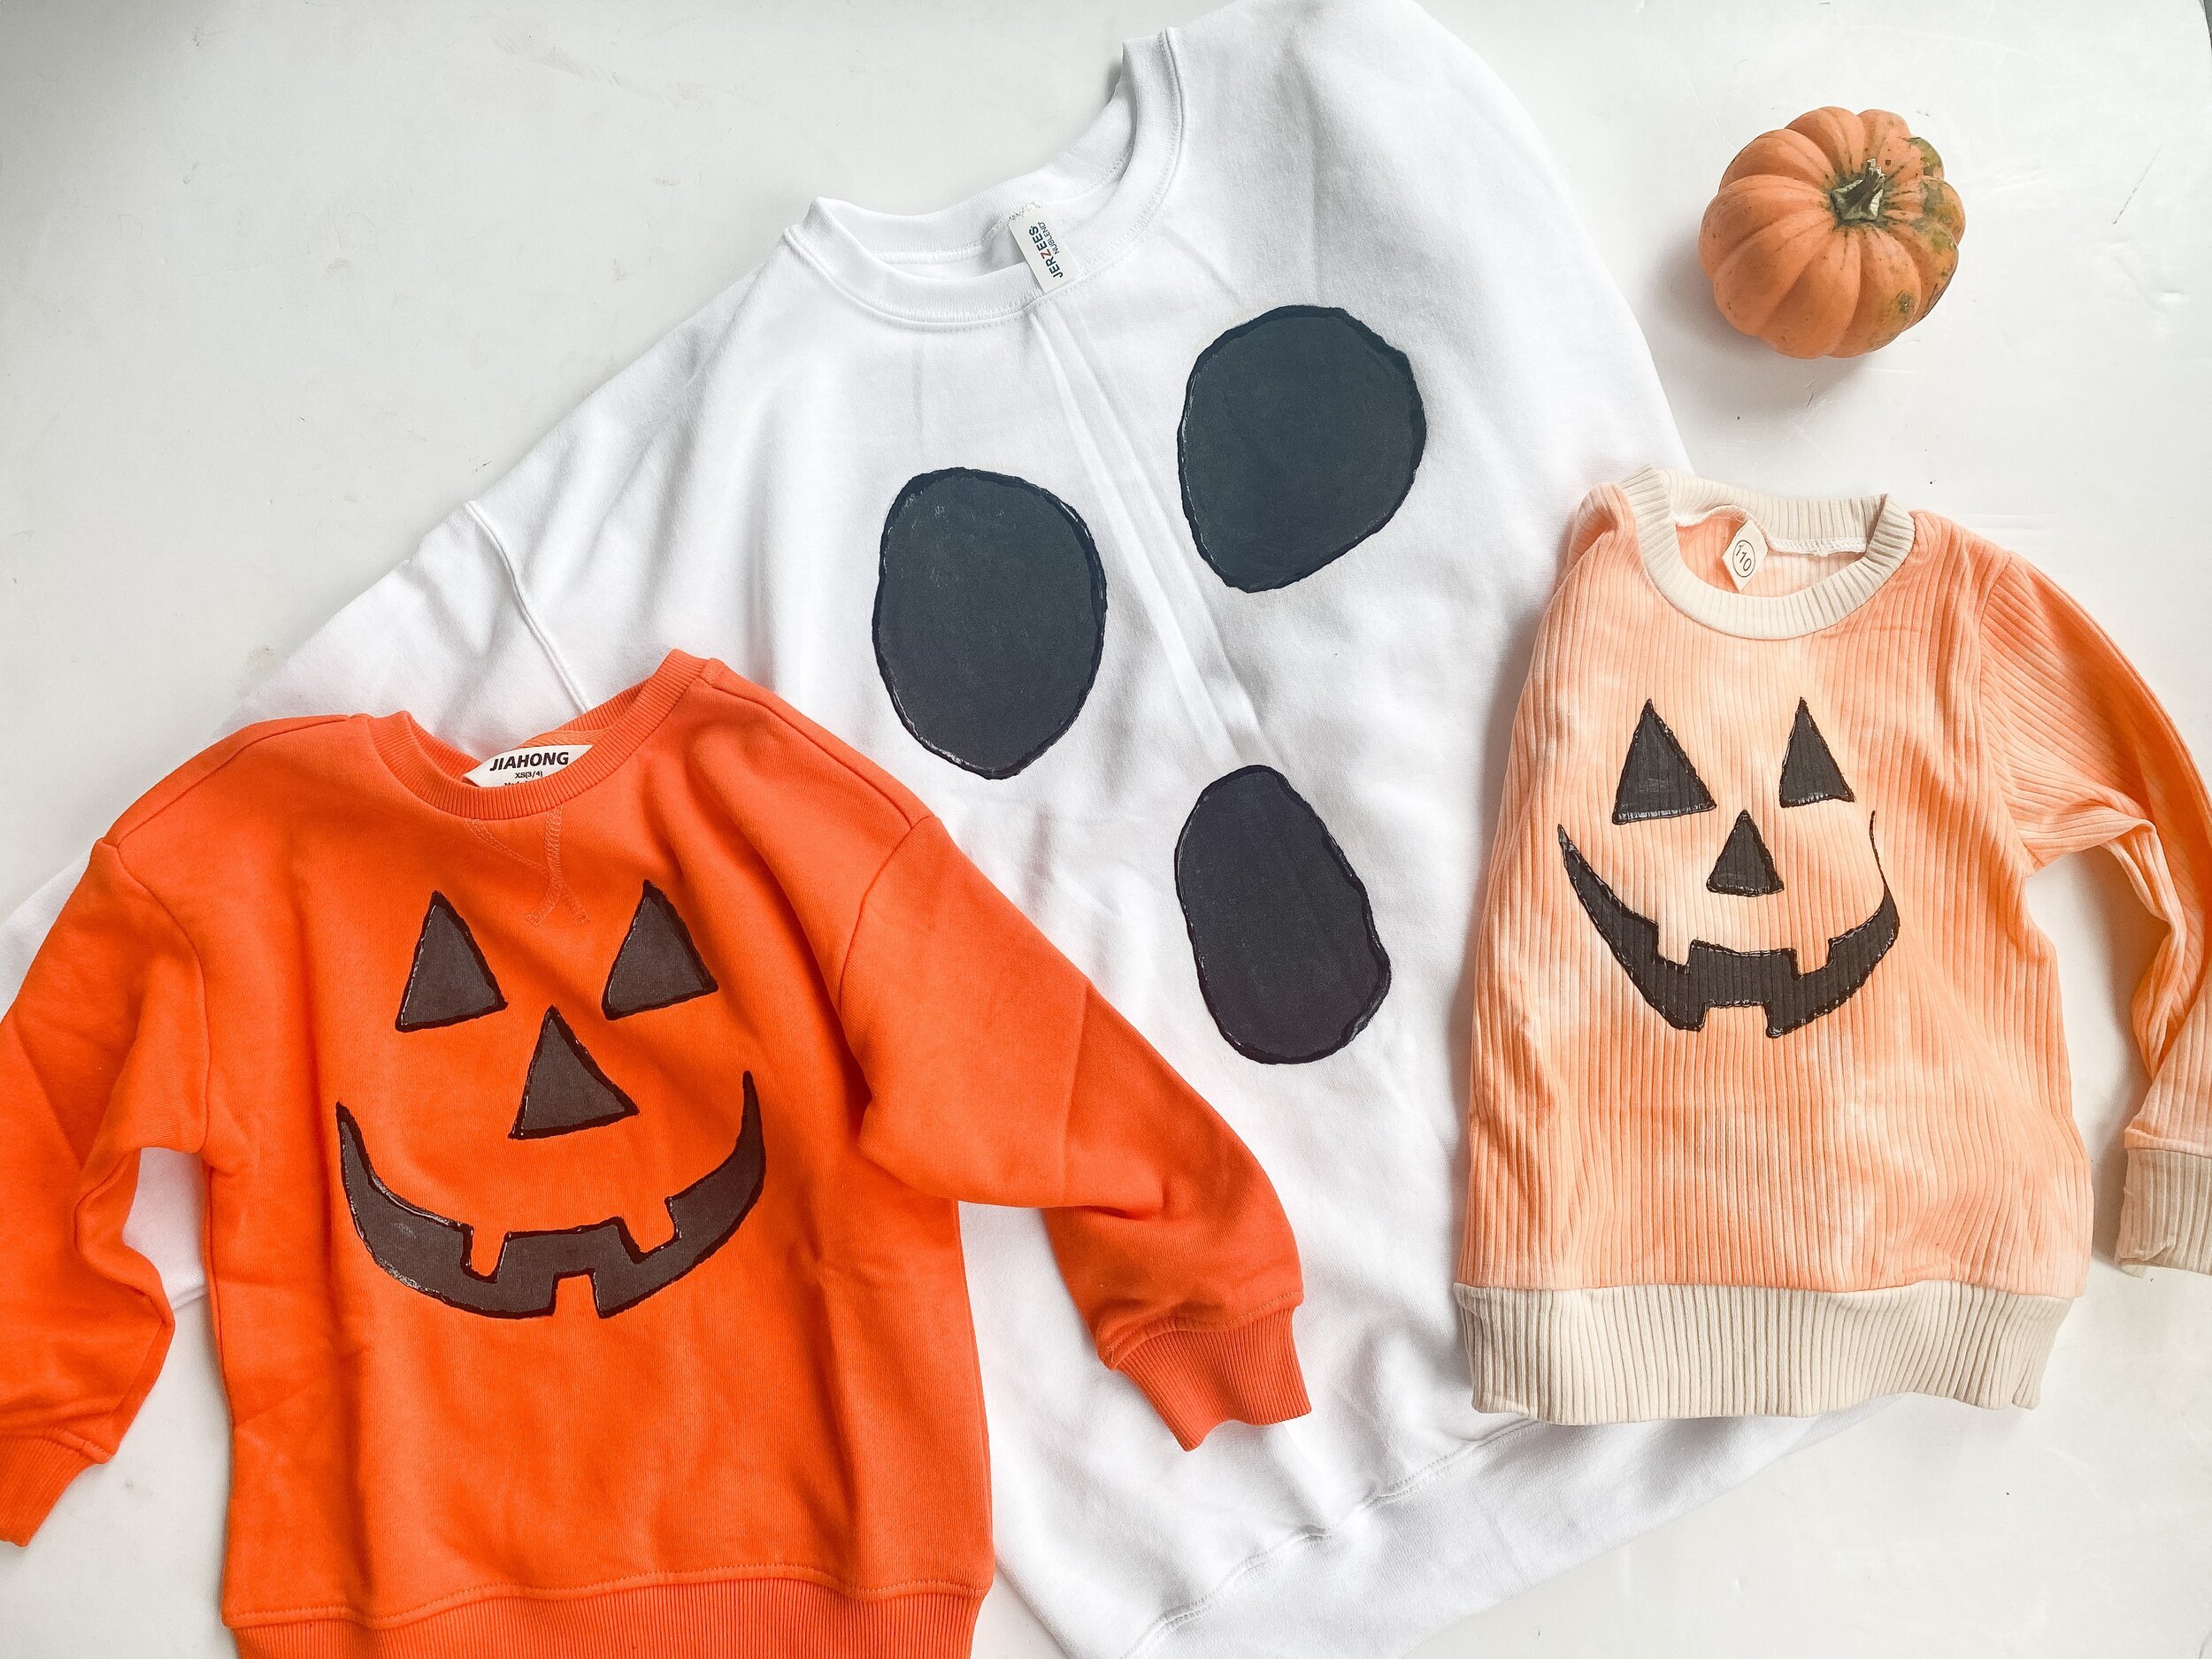
Y’all know I love anything throwback and holiday themed, especially if it is reminiscent of my childhood. I remember having so many of these tacky-but-adorable puff paint sweatshirts growing up for holidays that my mom or Memaw would make for my sister and I (usually matching!). After sharing some of my favorites from my collection earlier this year, and seeing how many of you also loved and remembered these, I decided we should bring the tradition back and make our own! I ordered everything needed from Amazon and was able to make a few different versions of these classic Halloween sweatshirts quickly and easily for me and JW! It was so fun and now I’m excited to do some for Christmas too. I’ve linked all the instructions and supplies you need below (with shopping links) including some of my favorite sweatshirts that are perfect for this from Amazon.
Have fun!
xoxo
Emily
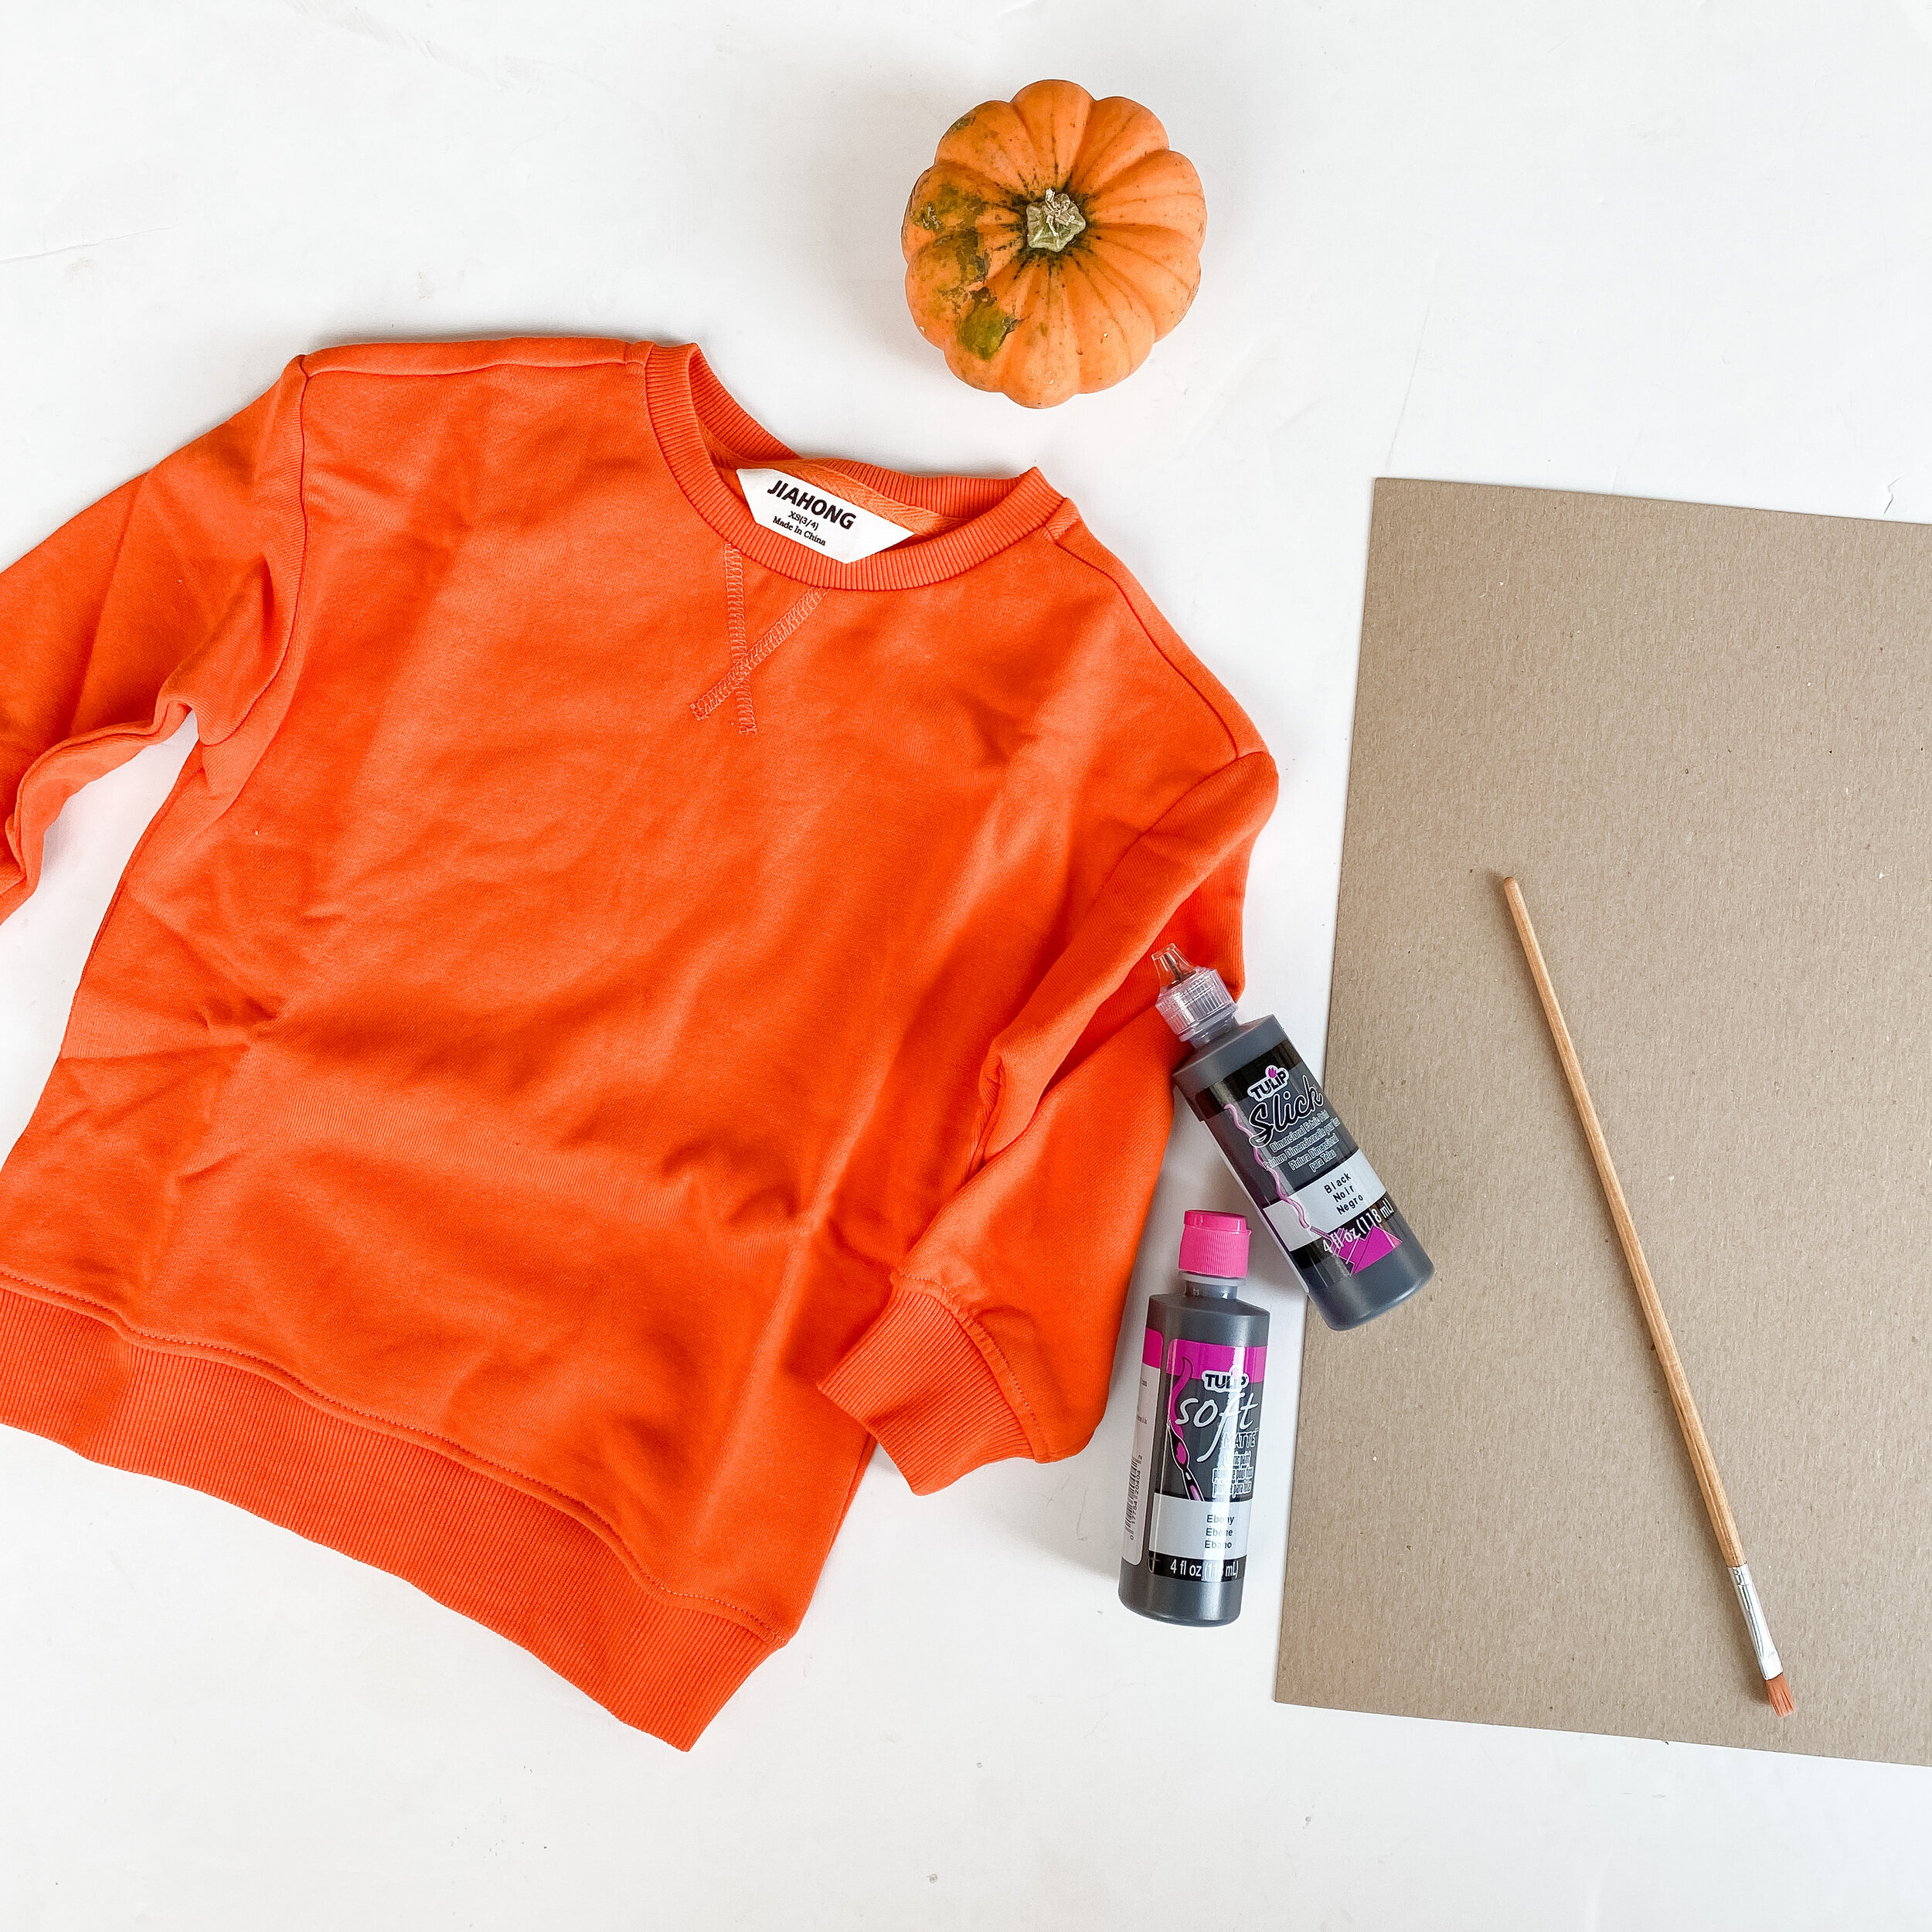
small/medium flat tip paint brush
3-D “puff-paint” black fabric paint
sweatshirt or t-shirt of your choice (ones I used linked below- make sure it’s cotton blend)
piece of cardboard about the size of your shirt
safety pins/sewing pins (optional)
paper plate or scrap paper to practice on and hold paint
chalk, pencil, or washable fabric marker to outline design (optional- I used chalk)

Start by placing your cardboard inside your shirt to use a smooth/solid background to draw/paint on. Make sure it’s plenty big enough that your entire design will easily fit inside of it. You can pin the cardboard to the shirt for extra security with the safety/sewing pins if you don’t want it to move at all.
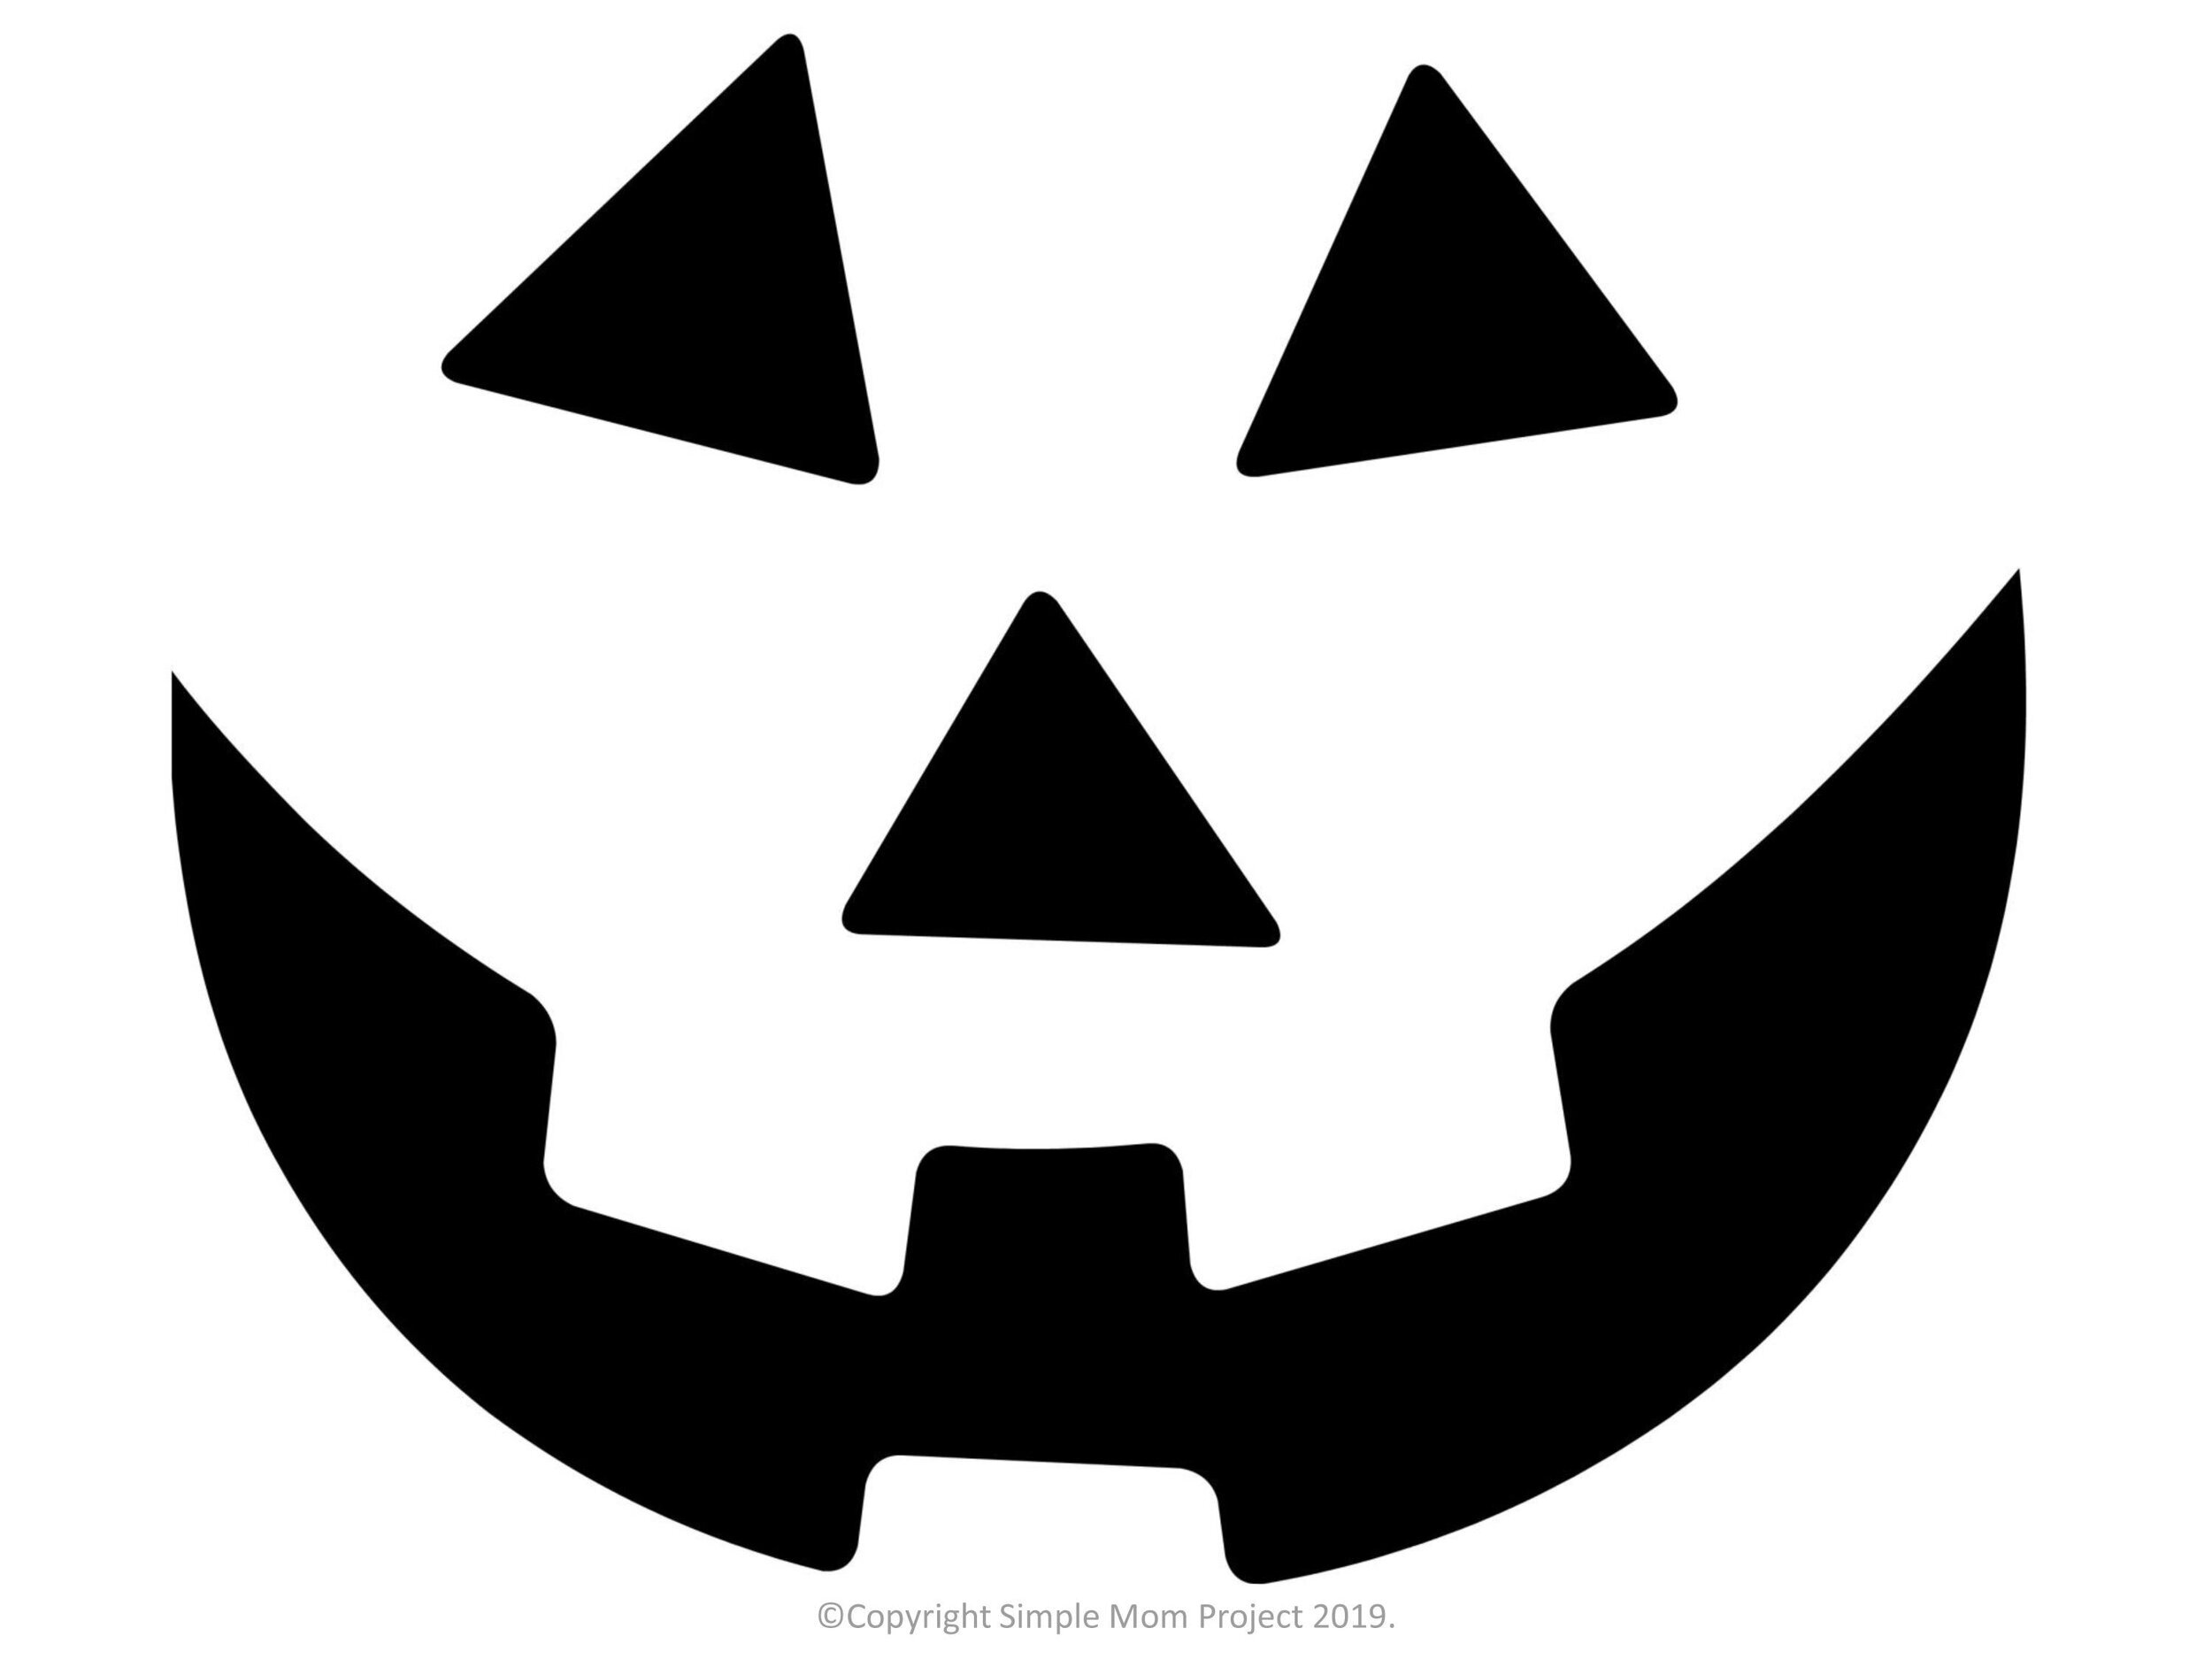
Practice your design on the scrap paper or paper plate a few times with both types of paint to get a feel of how to use them (especially the puff paint). Below is a traditional pumpkin face pattern that I copied but you could also print one off to trace or make your own stencil using cardboard. The ghost face is also super easy and literally just three ovals!
Sketch out your design on the sweatshirt using your chalk, pencil, or washable marker. It will wash out so you don’t have to worry about messing up!
Next fill in your sketched design with the paintbrush and flat fabric paint making sure it’s completely filled in and solid black. You may need to do a couple coats.
Finally carefully outline your design with the puff paint. Again you can go over it a couple times to get the desired thickness you want (keep in mind it will flatten out a lot when it dries, so you want to make it extra puffy). Wipe off the tip of your puff paint each time you reach a corner or stopping point.
Keep the cardboard inside your shirt and move it to a safe place to dry flat completely (will take 6-8 hours to dry). You can wear it once it’s completely dry but don’t wash for at least 72 hours and be sure to wash inside out!