Back to School Ice Cream Social Party
Yesterday we celebrated the end of summer and back-to-school with a fun ice cream social at the Amsden! I had been wanting to throw a cute ice cream party all summer and had been collecting ideas on Pinterest for months. This was a super easy party to pull together for a crowd and something both kids and adults could enjoy together! Below I've listed everything you need to know about throwing your own ice cream social party!
xoxo
Emily
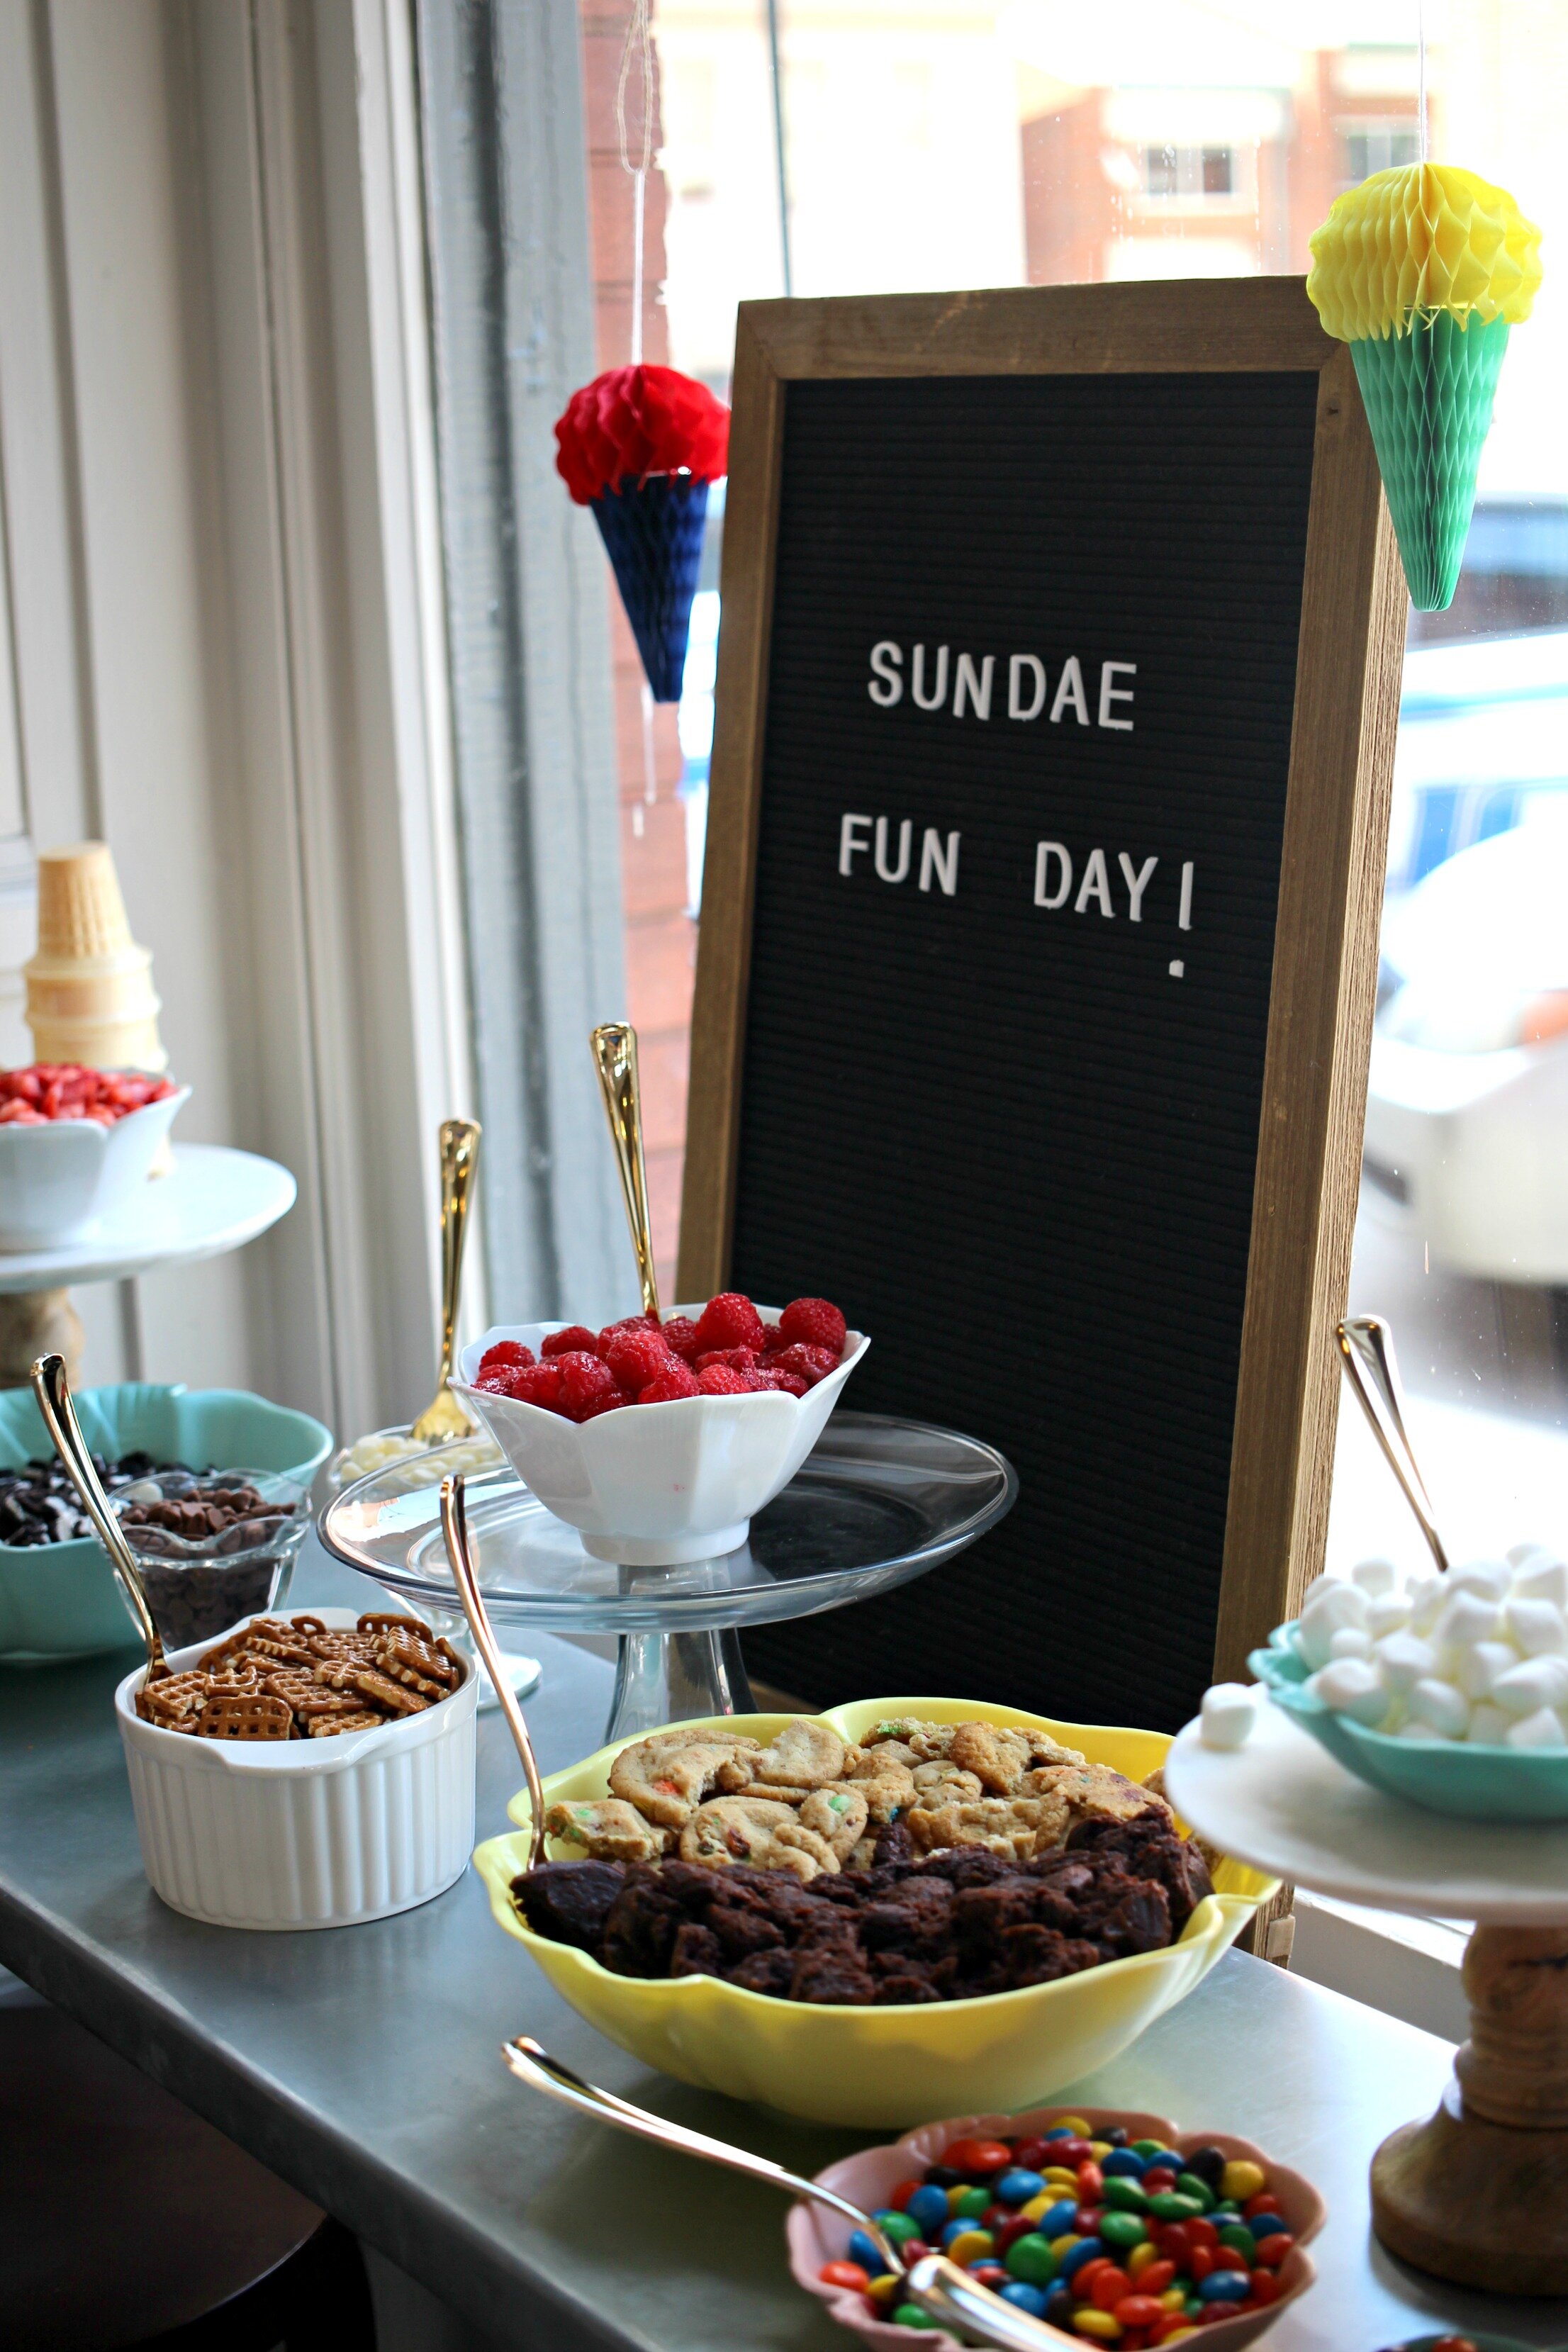
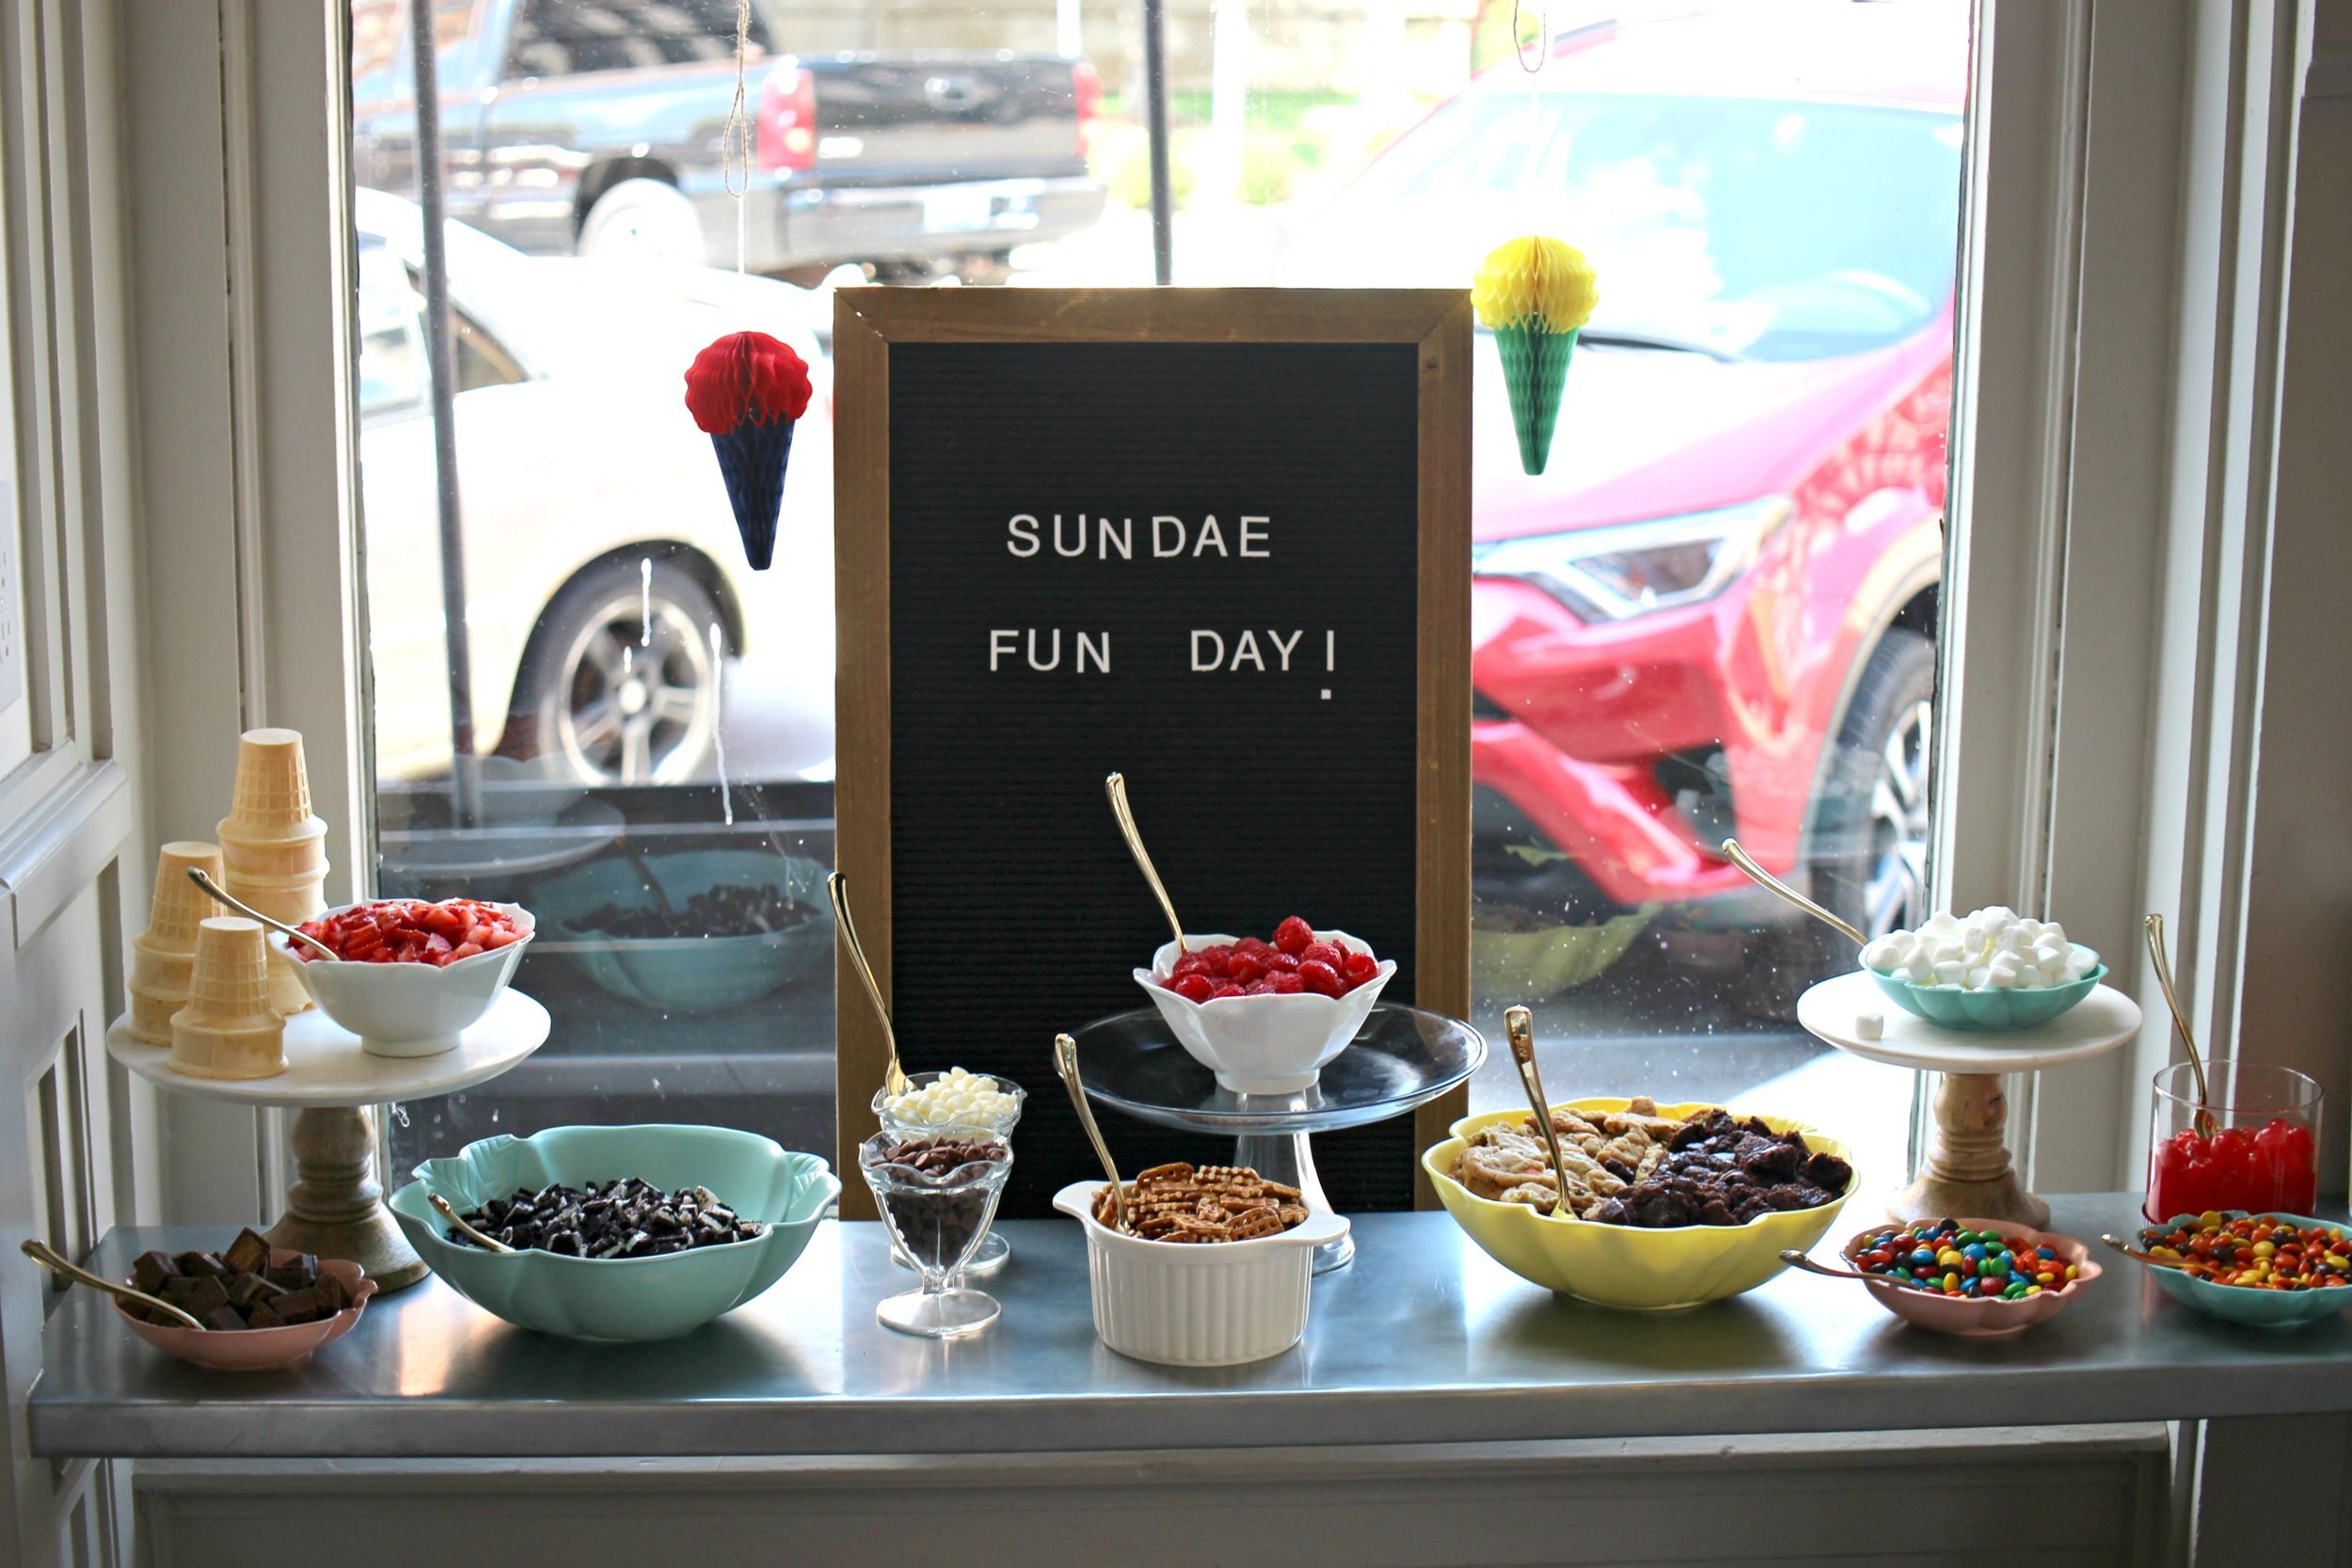
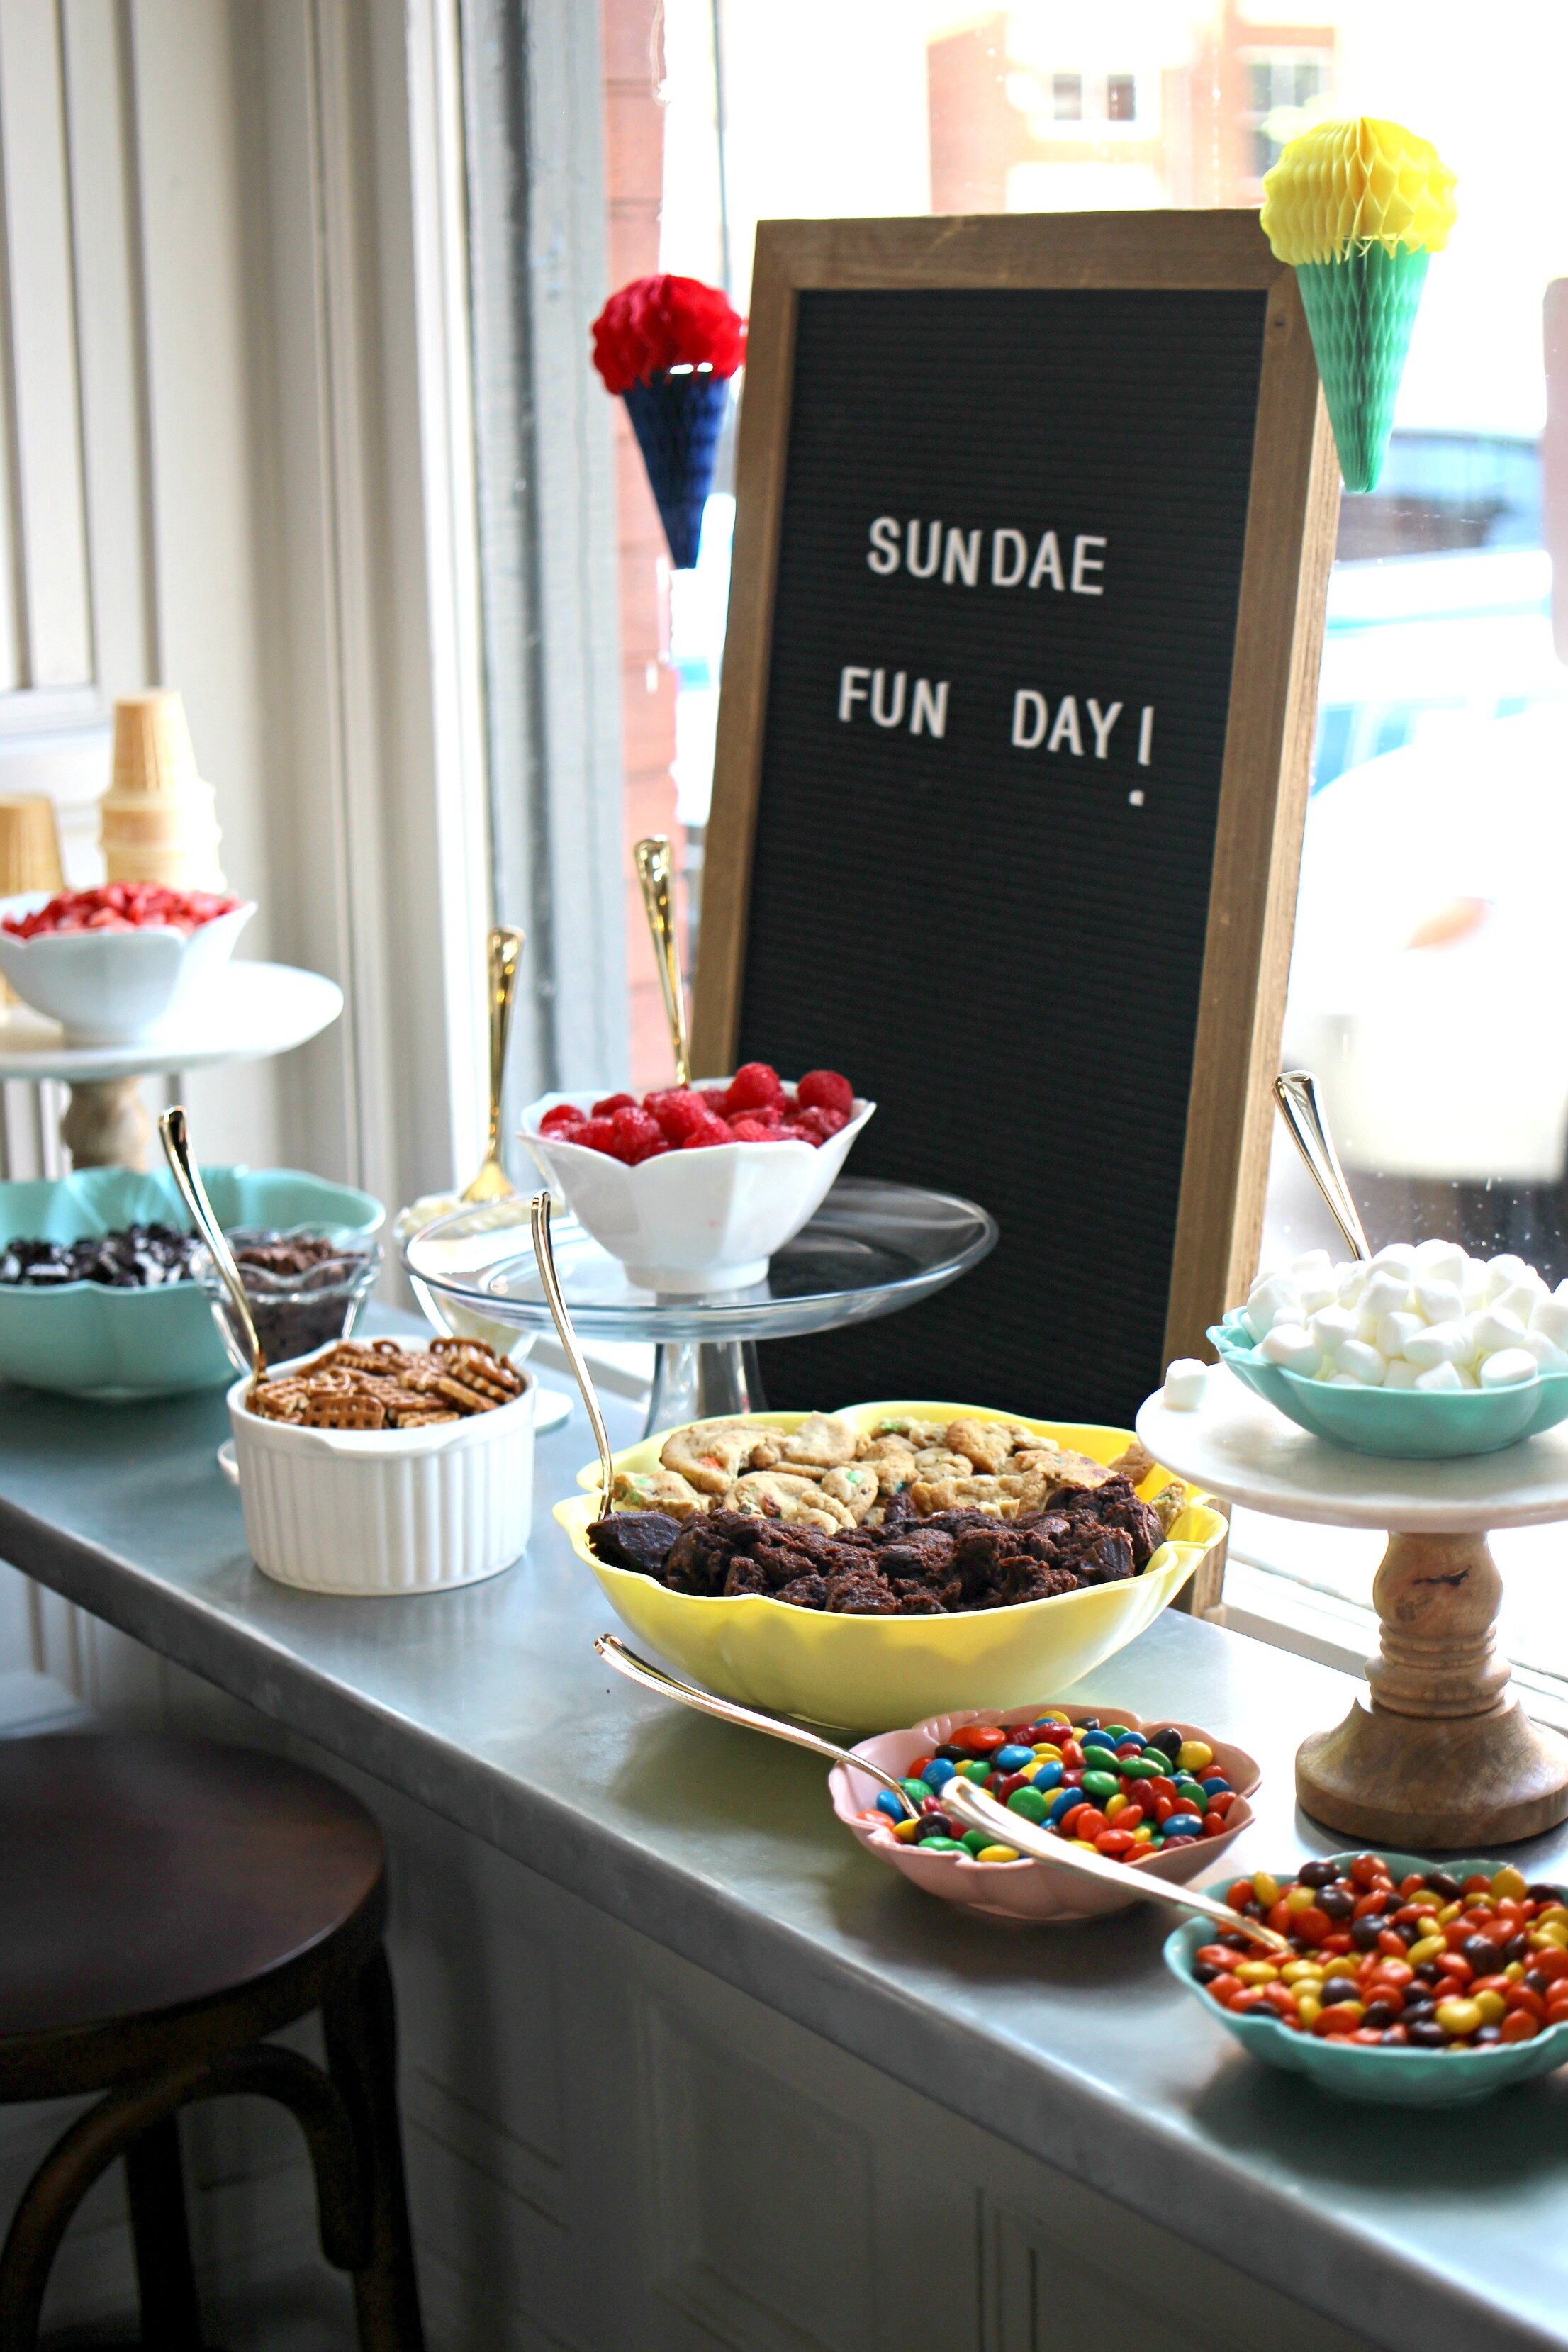
A build your own ice cream sundae bar is such a fun and interactive station to have for a party that kids will LOVE! All ages can participate and it is super easy to prep for and set up (much easier than making a full meal of food!).
To get started:
1. Make a list of toppings you want to include on your sundae bar (I shared all the toppings we used below!). The possibilities really are endless though and there's tons of ideas out there- so it can get overwhelming! I suggest doing some research and making a list before going to the grocery, and picking a number of toppings to limit your selection to. It's better to have plenty of a few toppings than a ton of options and run out of things during the party! Also you can definitely keep your ice cream choices simple if you are choosing to do a lot of toppings. We just stuck with vanilla and chocolate.
Toppings:
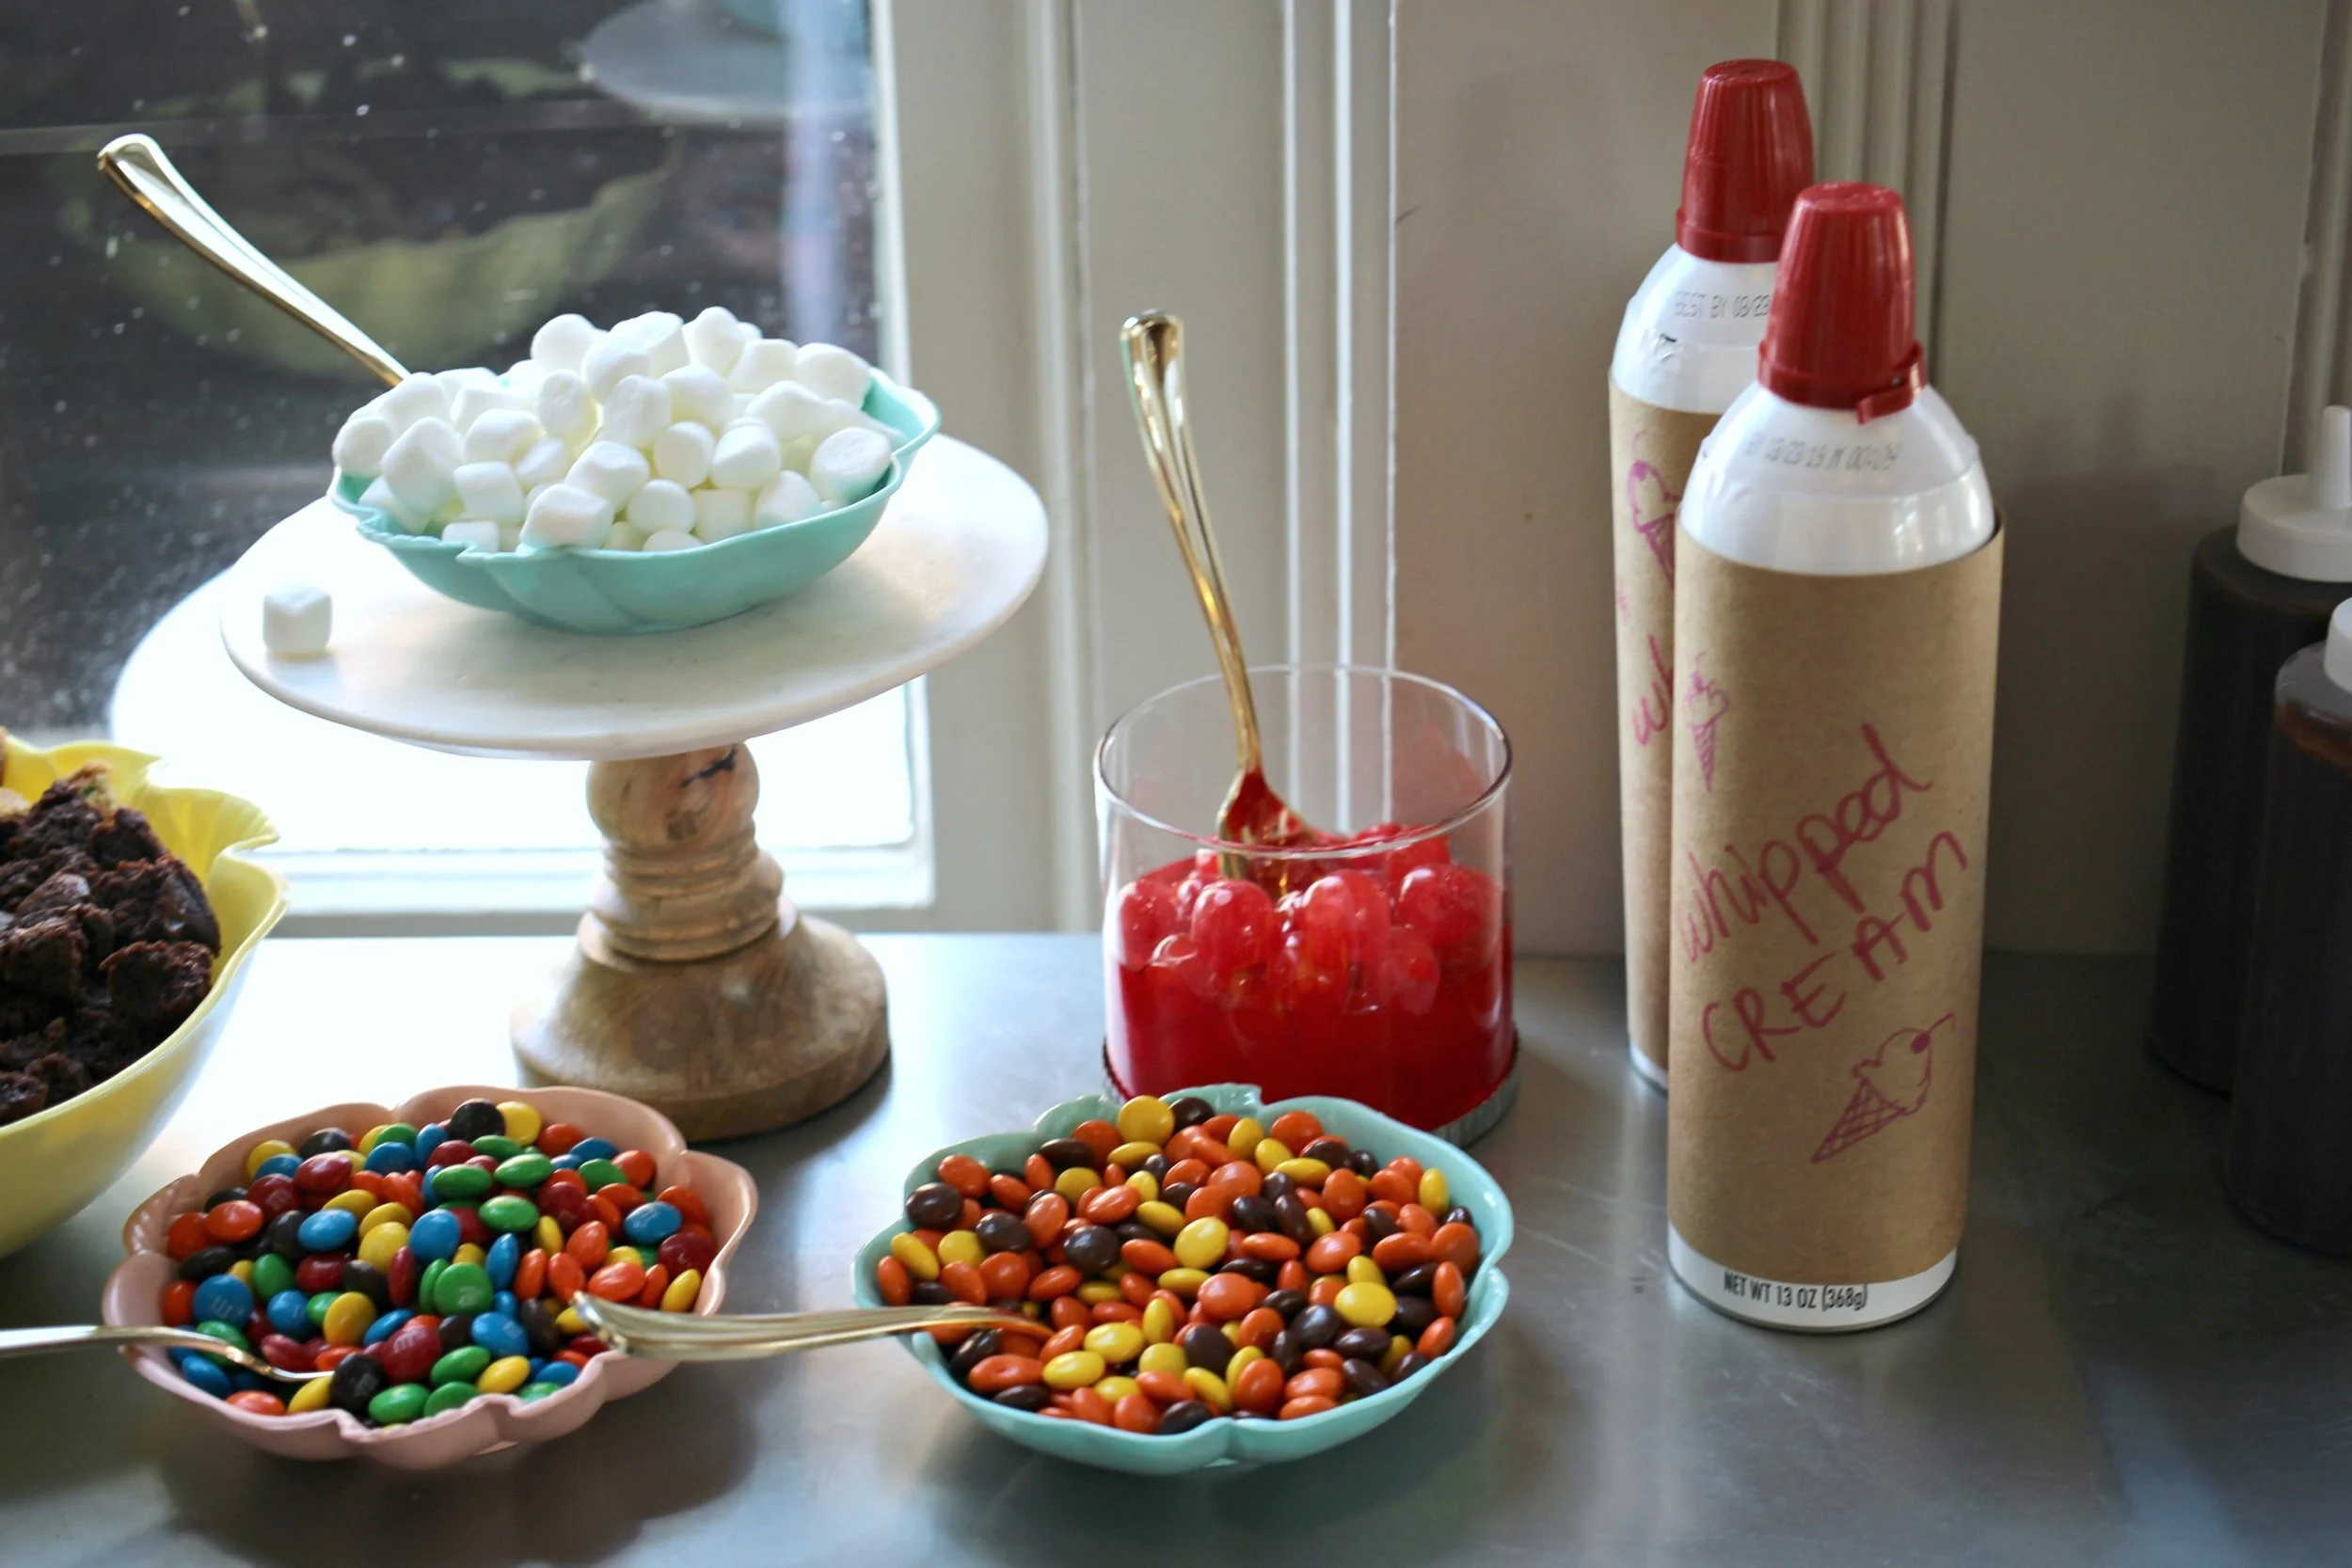
- M&M's
-Reese's Pieces
-Kit-Kat pieces
-Crushed oreo pieces
-Crushed M&M cookie pieces
-Brownie pieces
-Pretzel pieces
-Sprinkles
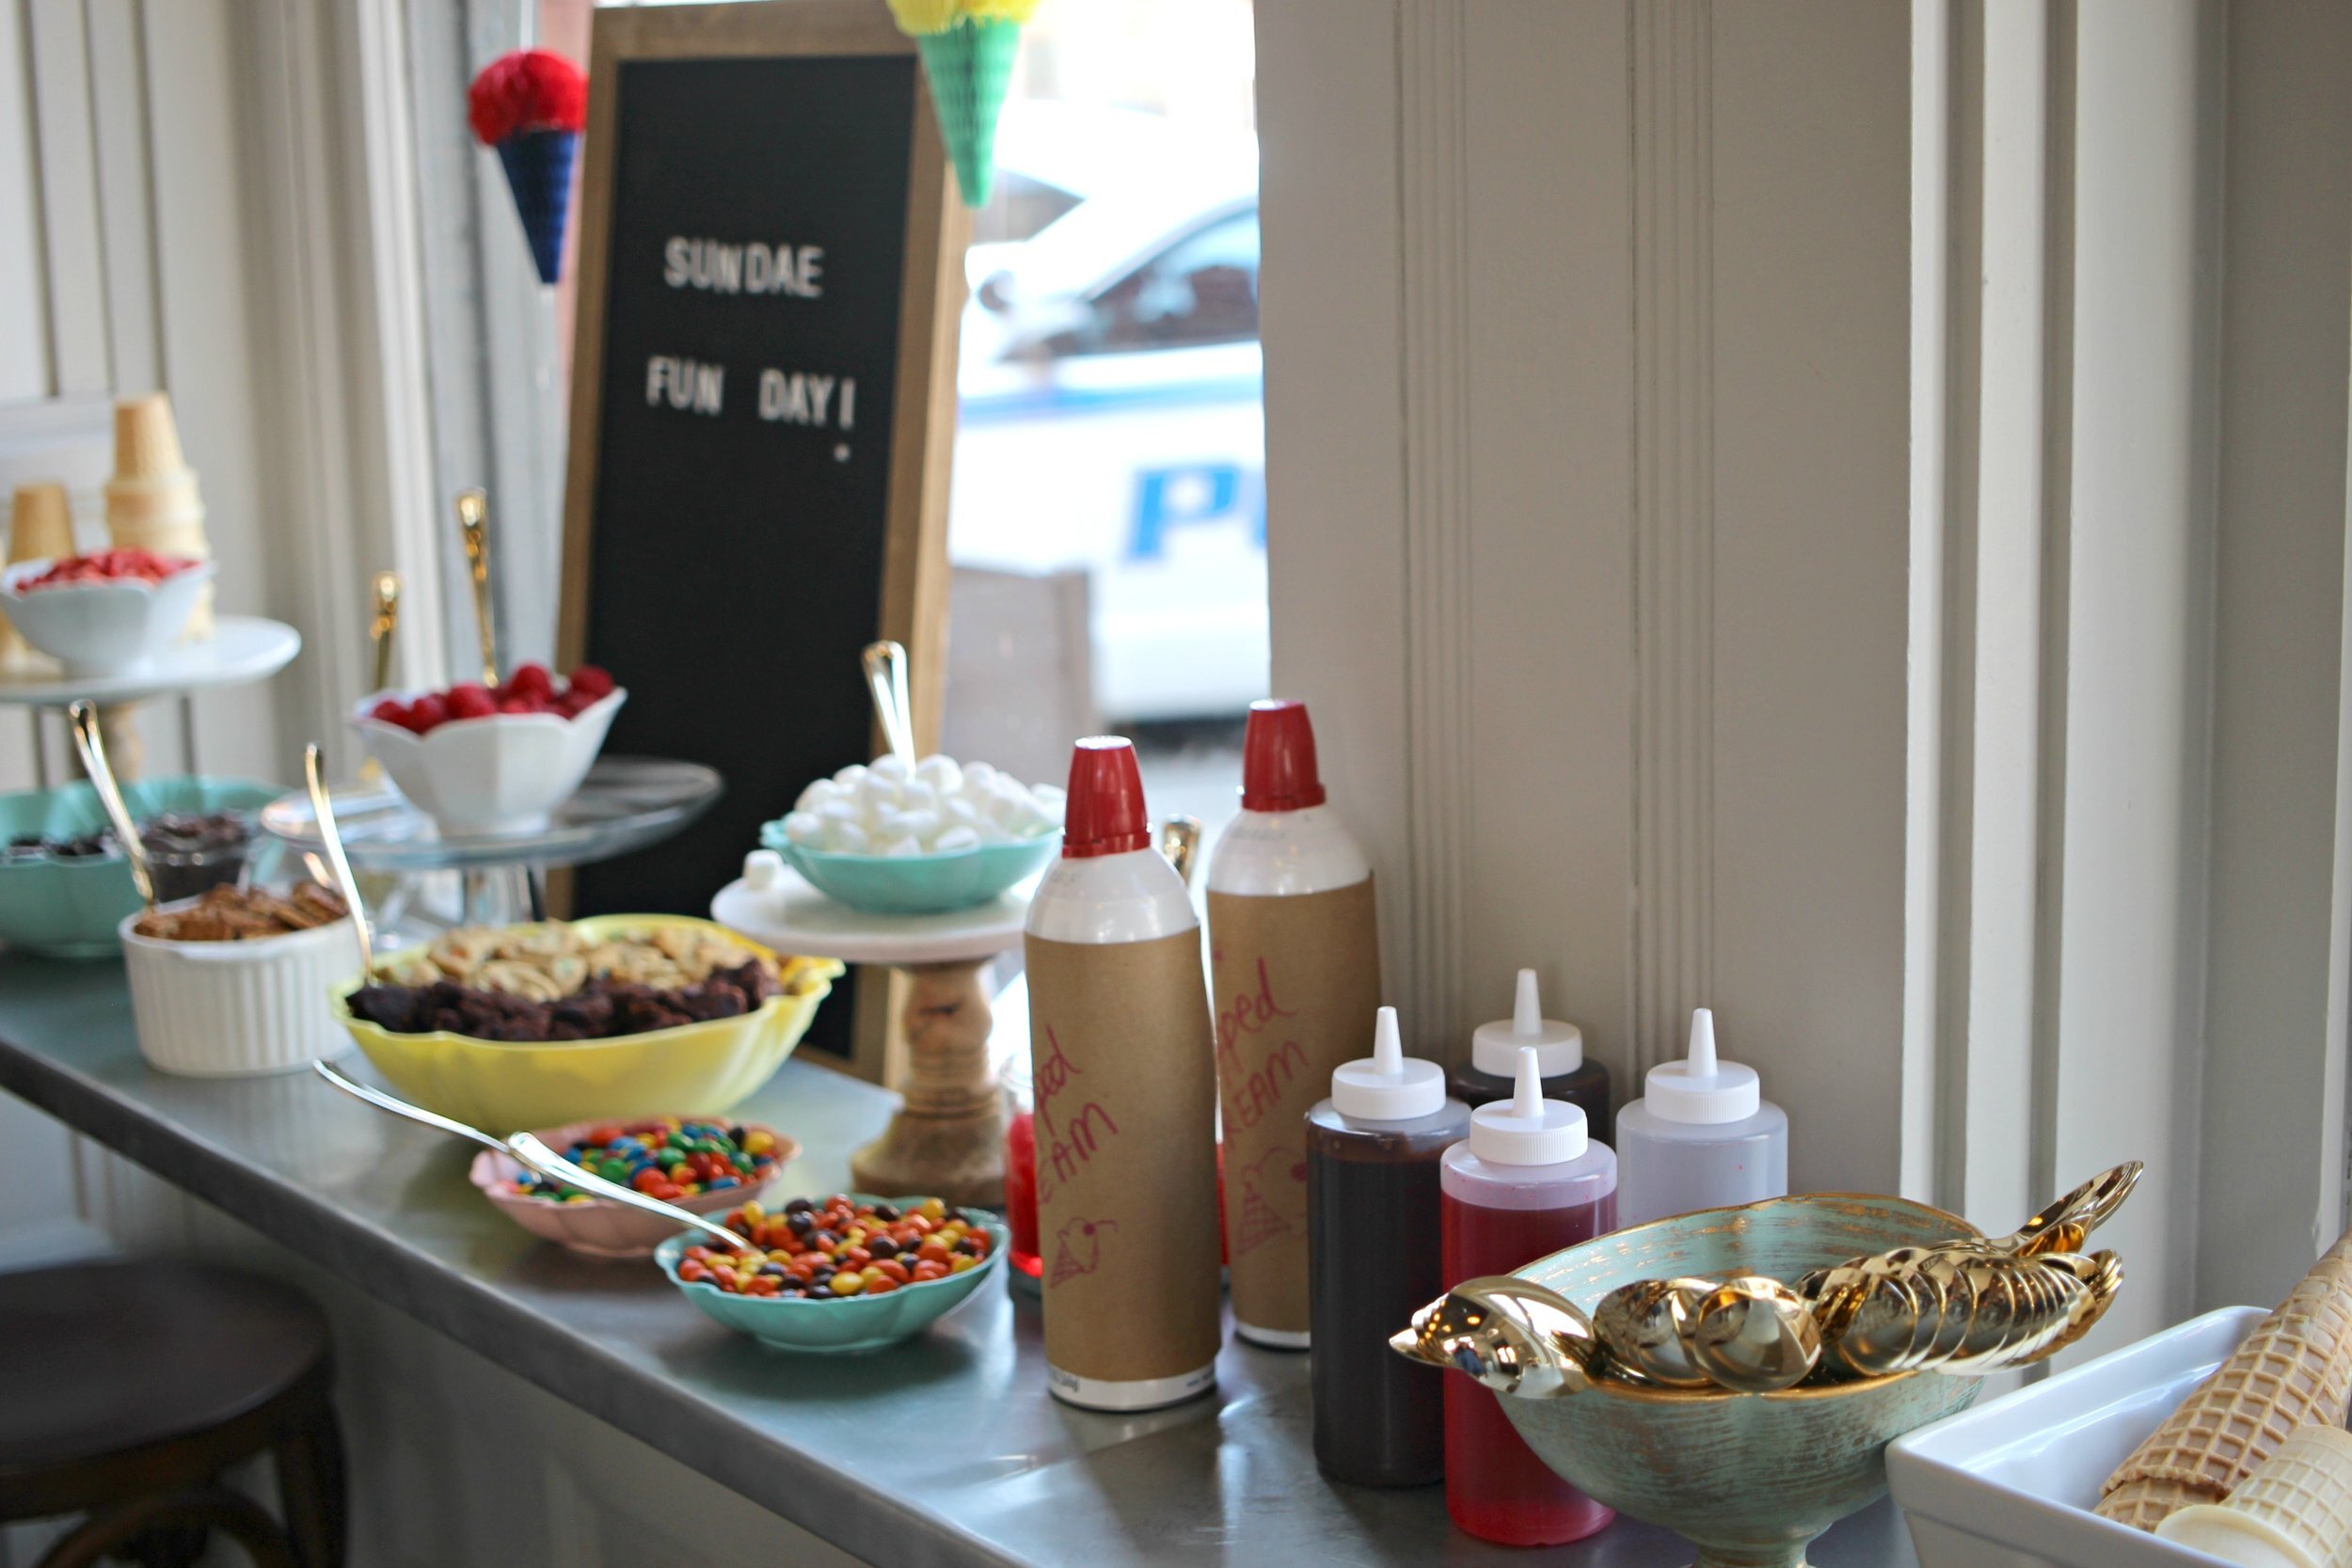
-Whipped Cream (I felt like the Whipped Cream label was clashing with my colors/theme, so I covered the label with kraft paper and made my own label!)
-Cherries
-Chocolate Sauce (we served both our sauces in clear plastic squeeze bottles- find them here)
-Strawberry Sauce
-Caramel Sauce
-Marshmallows
-Raspberries
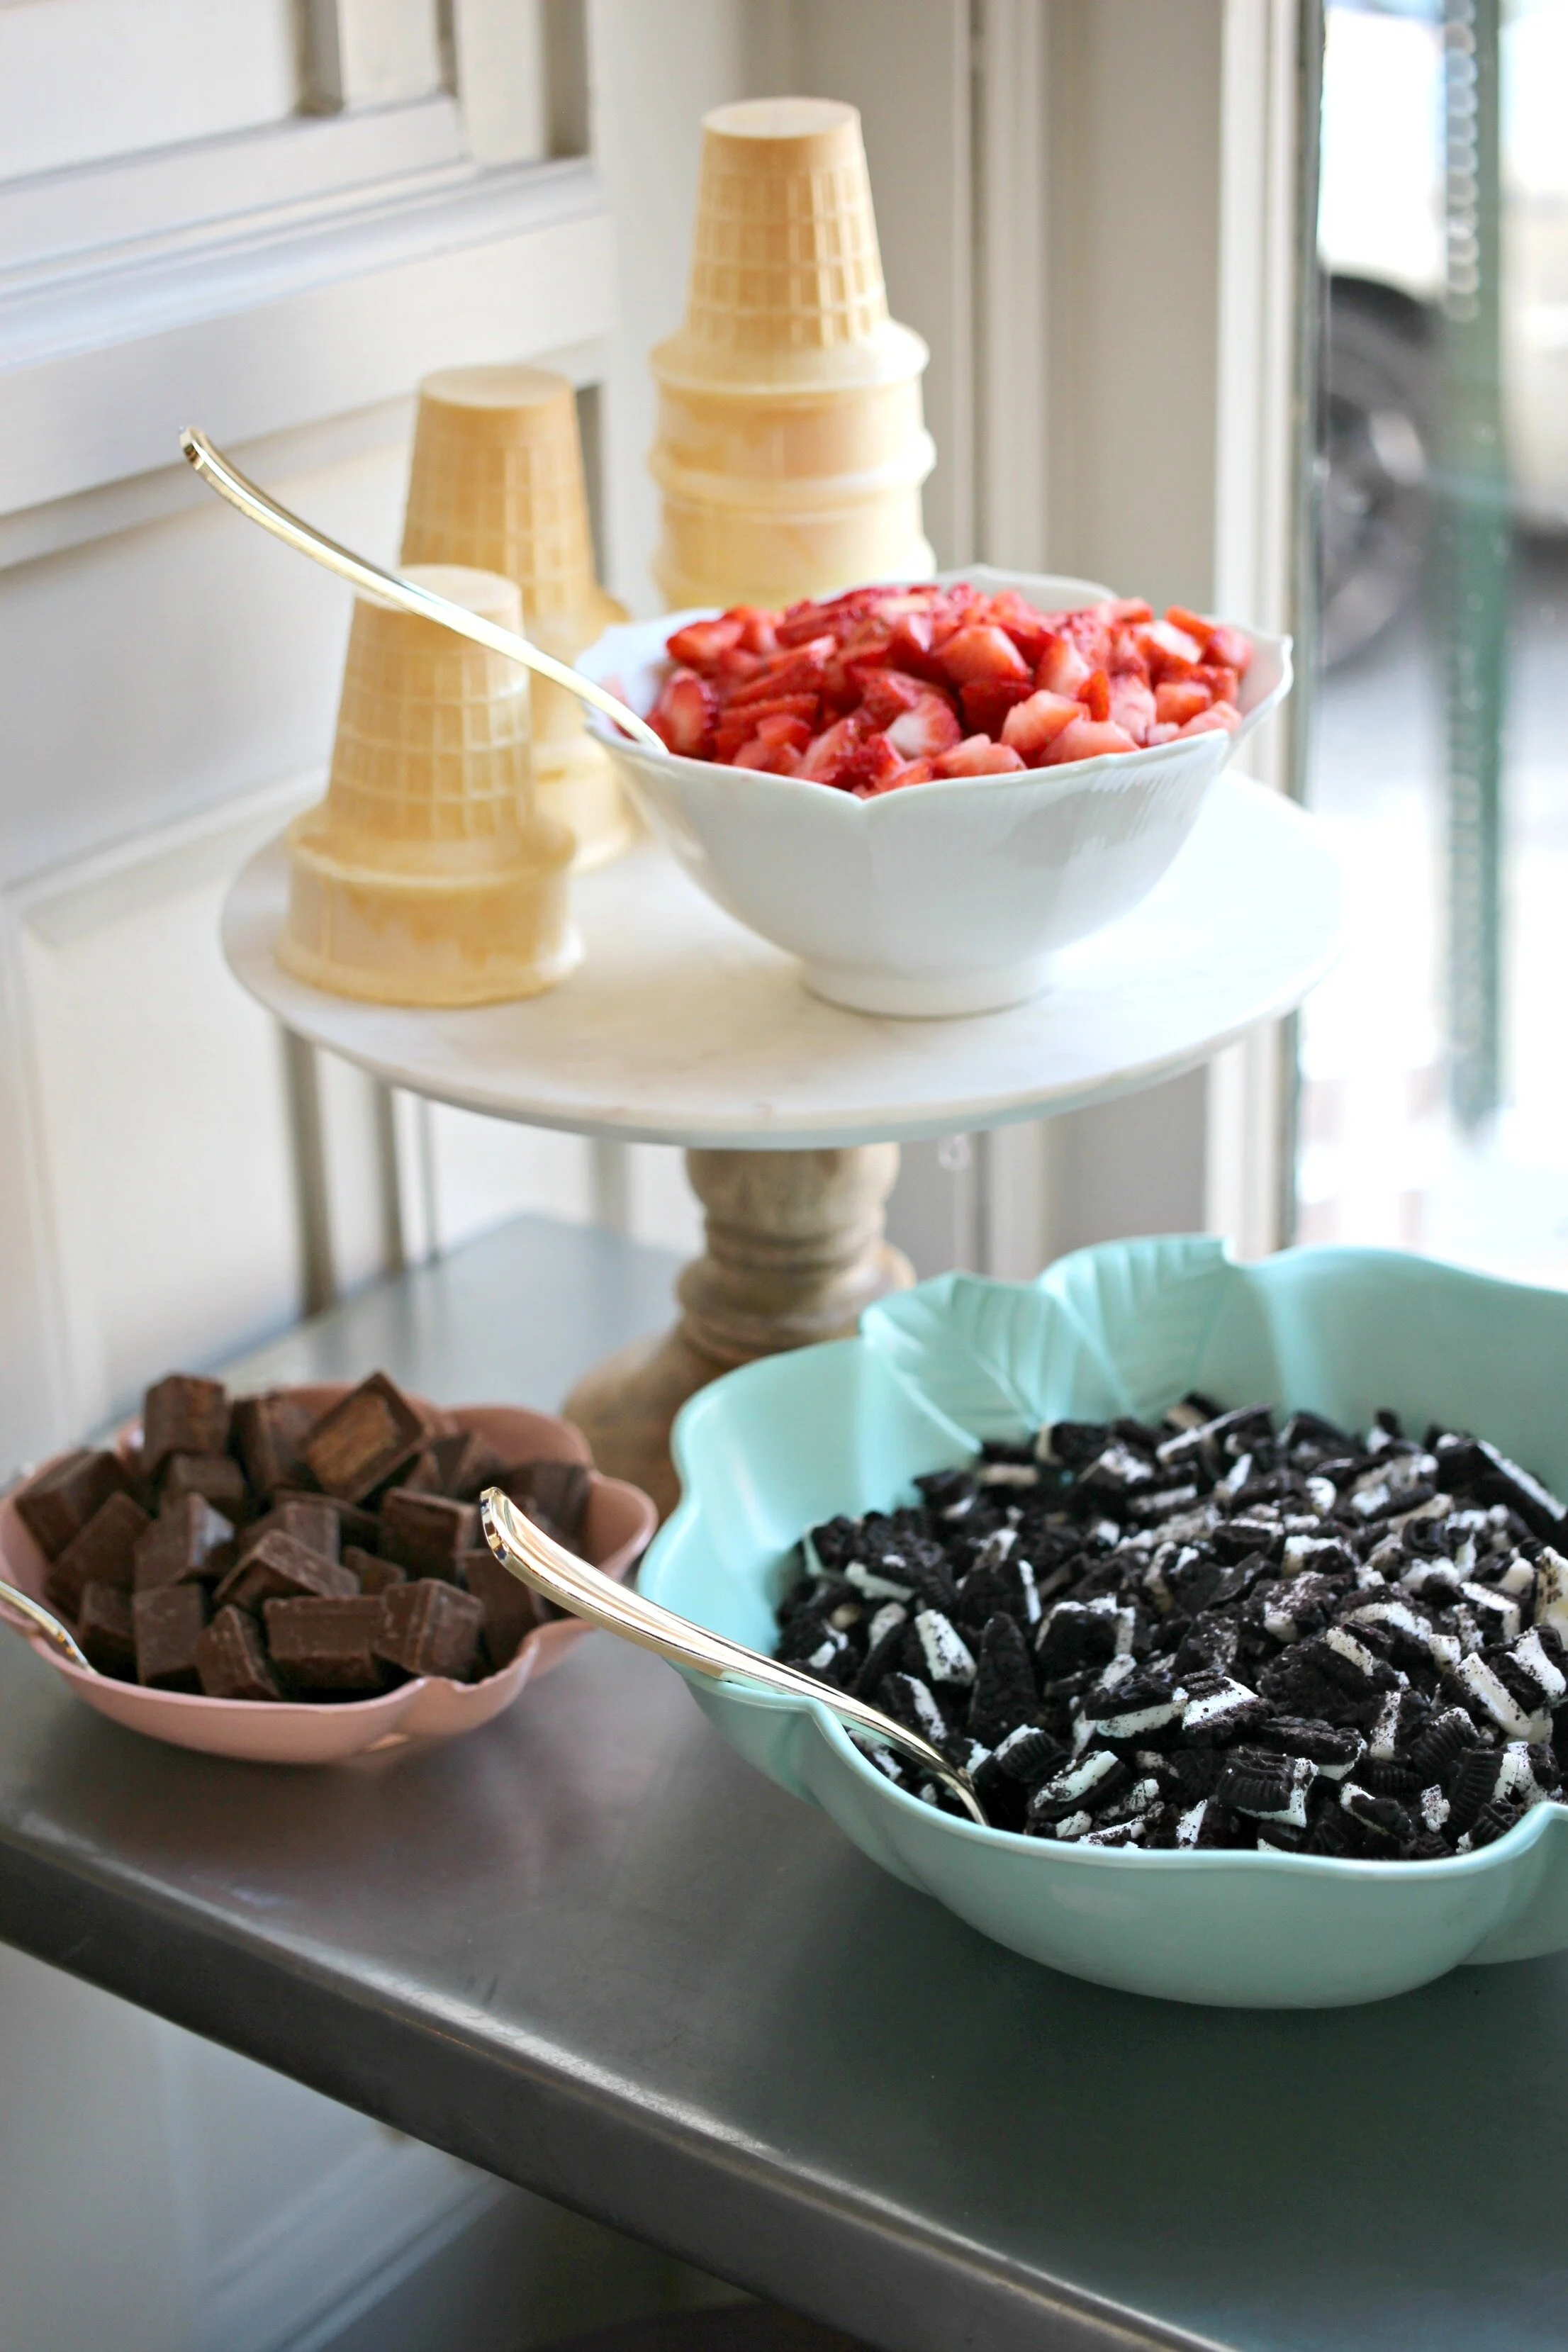
-Strawberries
-Chocolate Chips + White Chocolate Chips
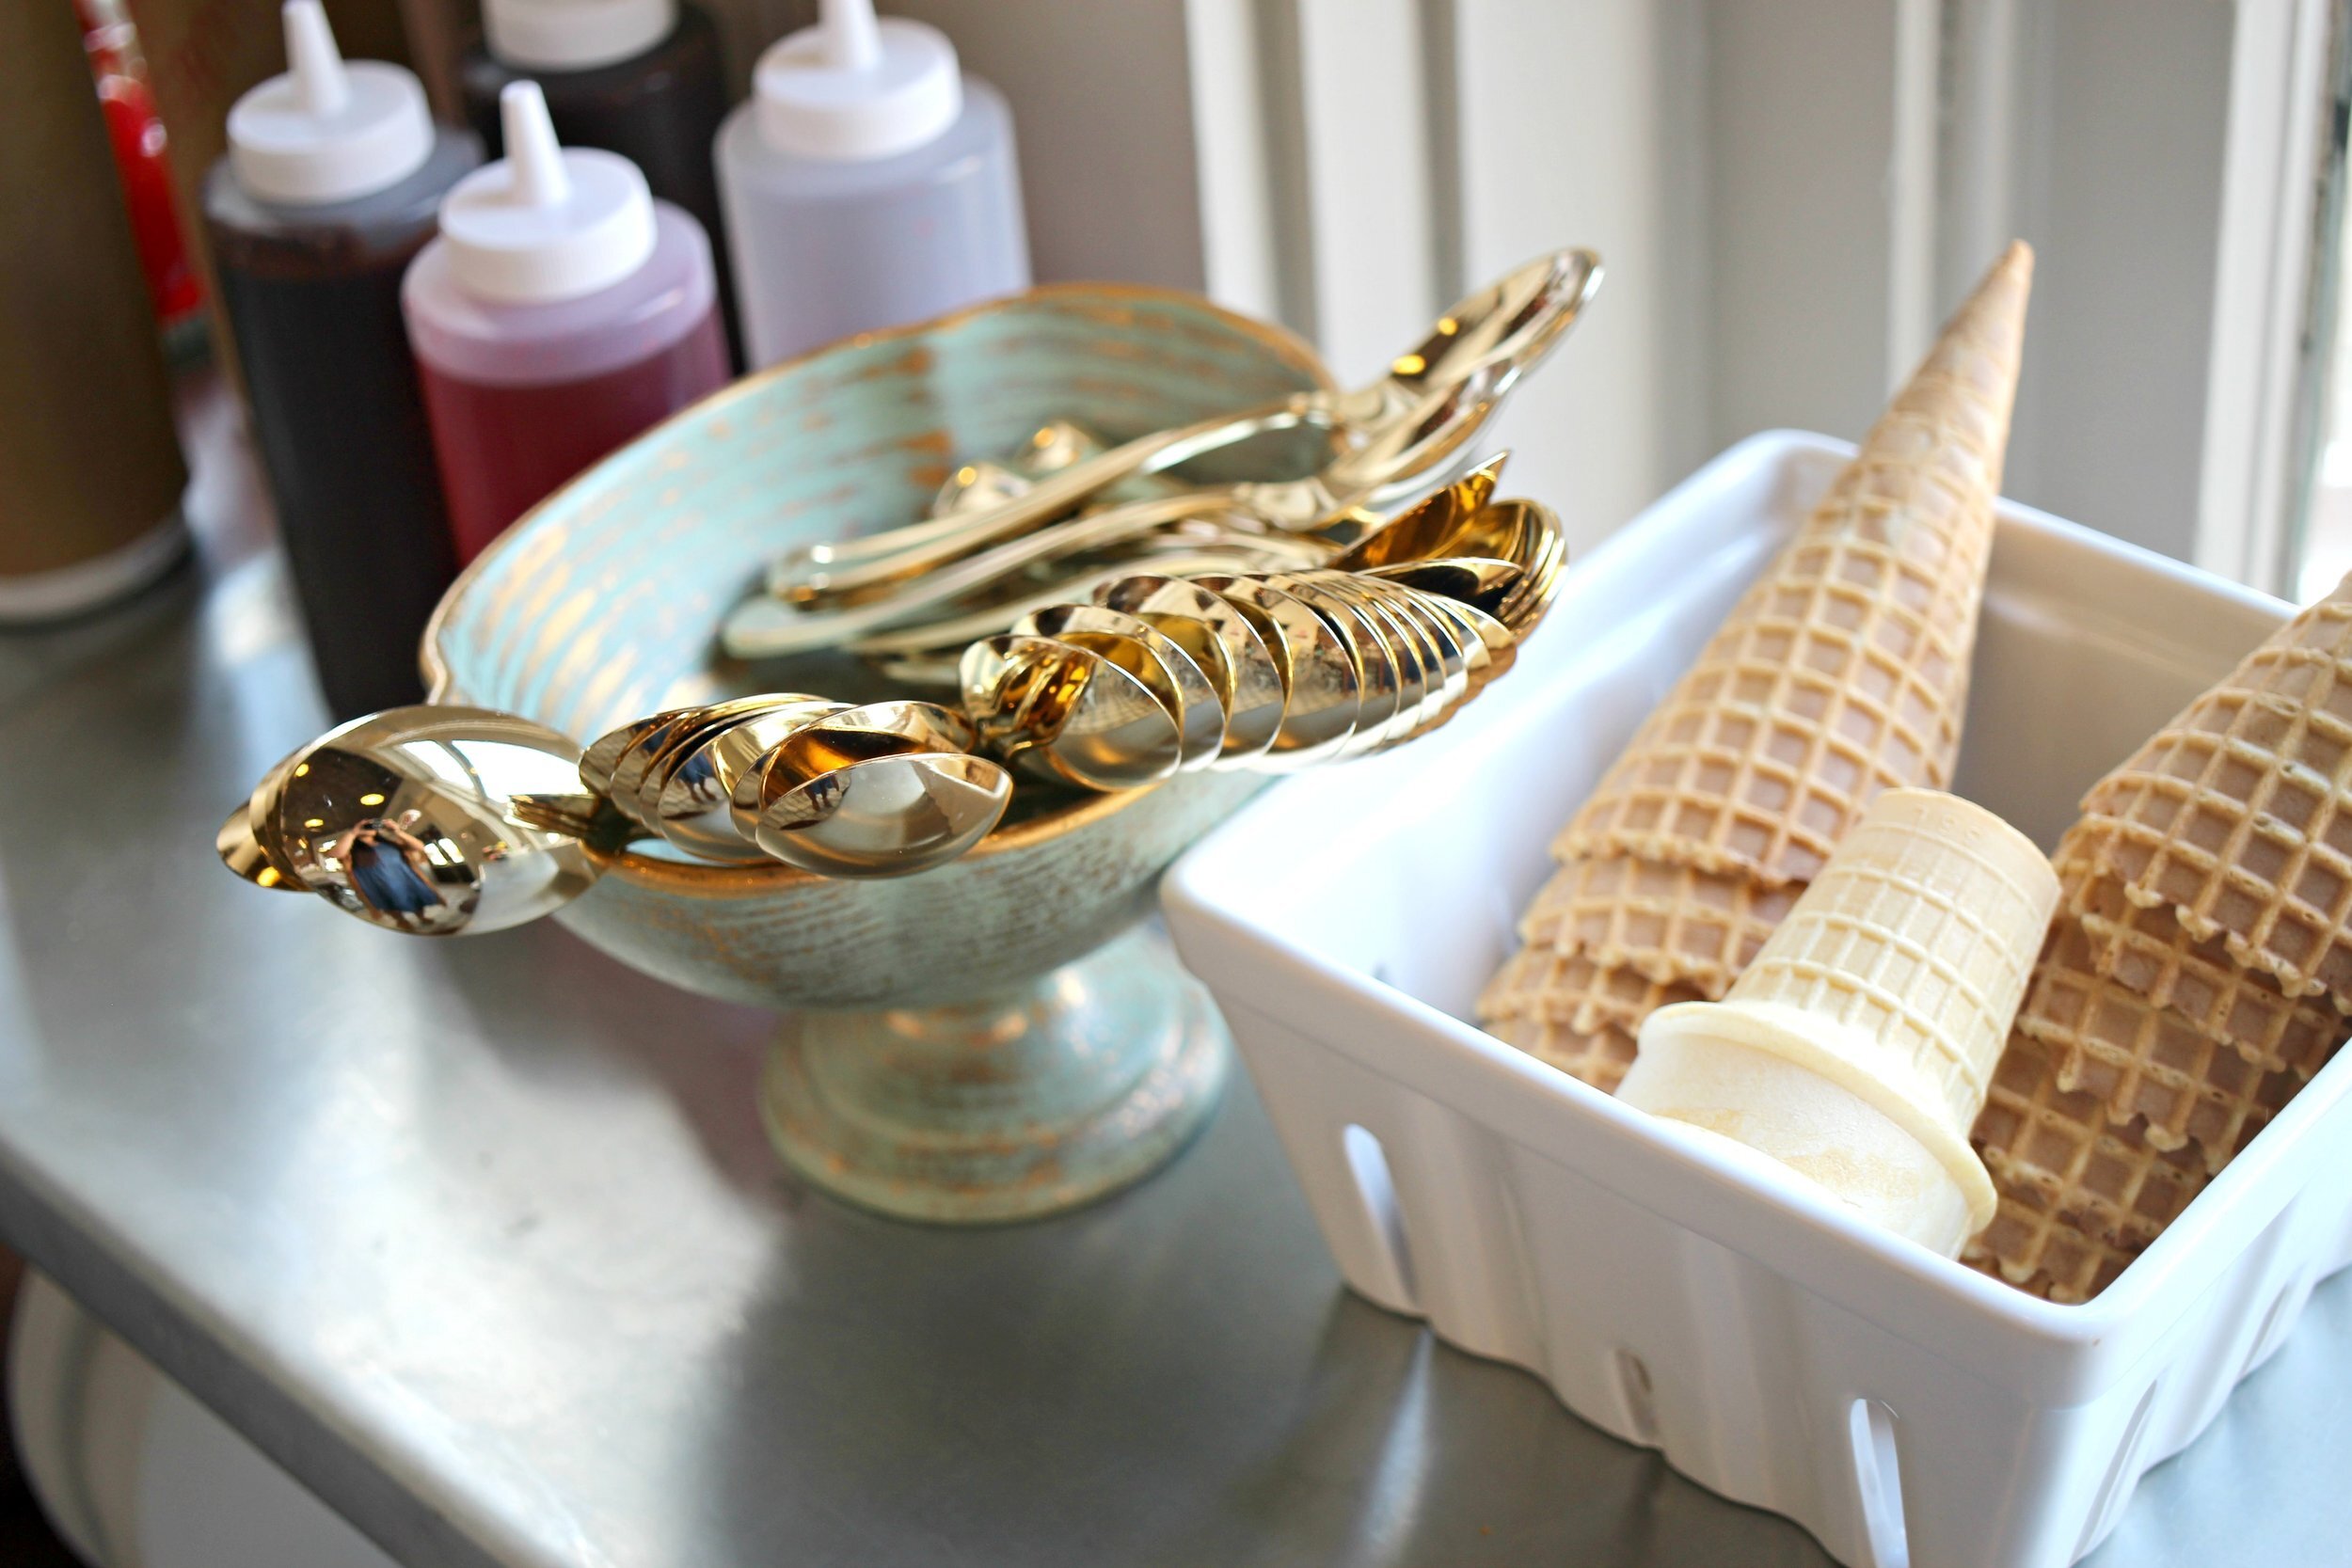
2. A few hours before the party, start prepping your set up by choosing bowls/containers for each topping. I chose a mix of pastel colored vintage bowls and white dishes to hold all my toppings, then I used the decorative gold plastic spoons as serving spoons in each topping. I also used a few cake plates and pedestals to prop the toppings up at different heights and levels so everything could be easily seen! Also don't forget to grab some kind of serving bowl, ice cream cones, and spoons for your guests to use (and you'll want to display these inside a cute dish or container too)!
Other items to add:
-Assorted icecream cones/waffle cones
-bowls for icecream
-spoons
-serving spoons or scoops
-cake plates/pedestals to arrange toppings
3. Arrange all your toppings together in one area and let guests serve themselves! We had our coffee shop employees scoop the icecream for customers, but for a regular party I would have just set the ice cream out in am ice-filled tub at the front of the sundae bar with scoops inside. Make sure everything is easy to grab and ready to serve! You can refill the bowls throughout the party as certain topping get low! Keep back up ice cream in the freezer and just put one or two containers out at a time, so they don't get too melty!
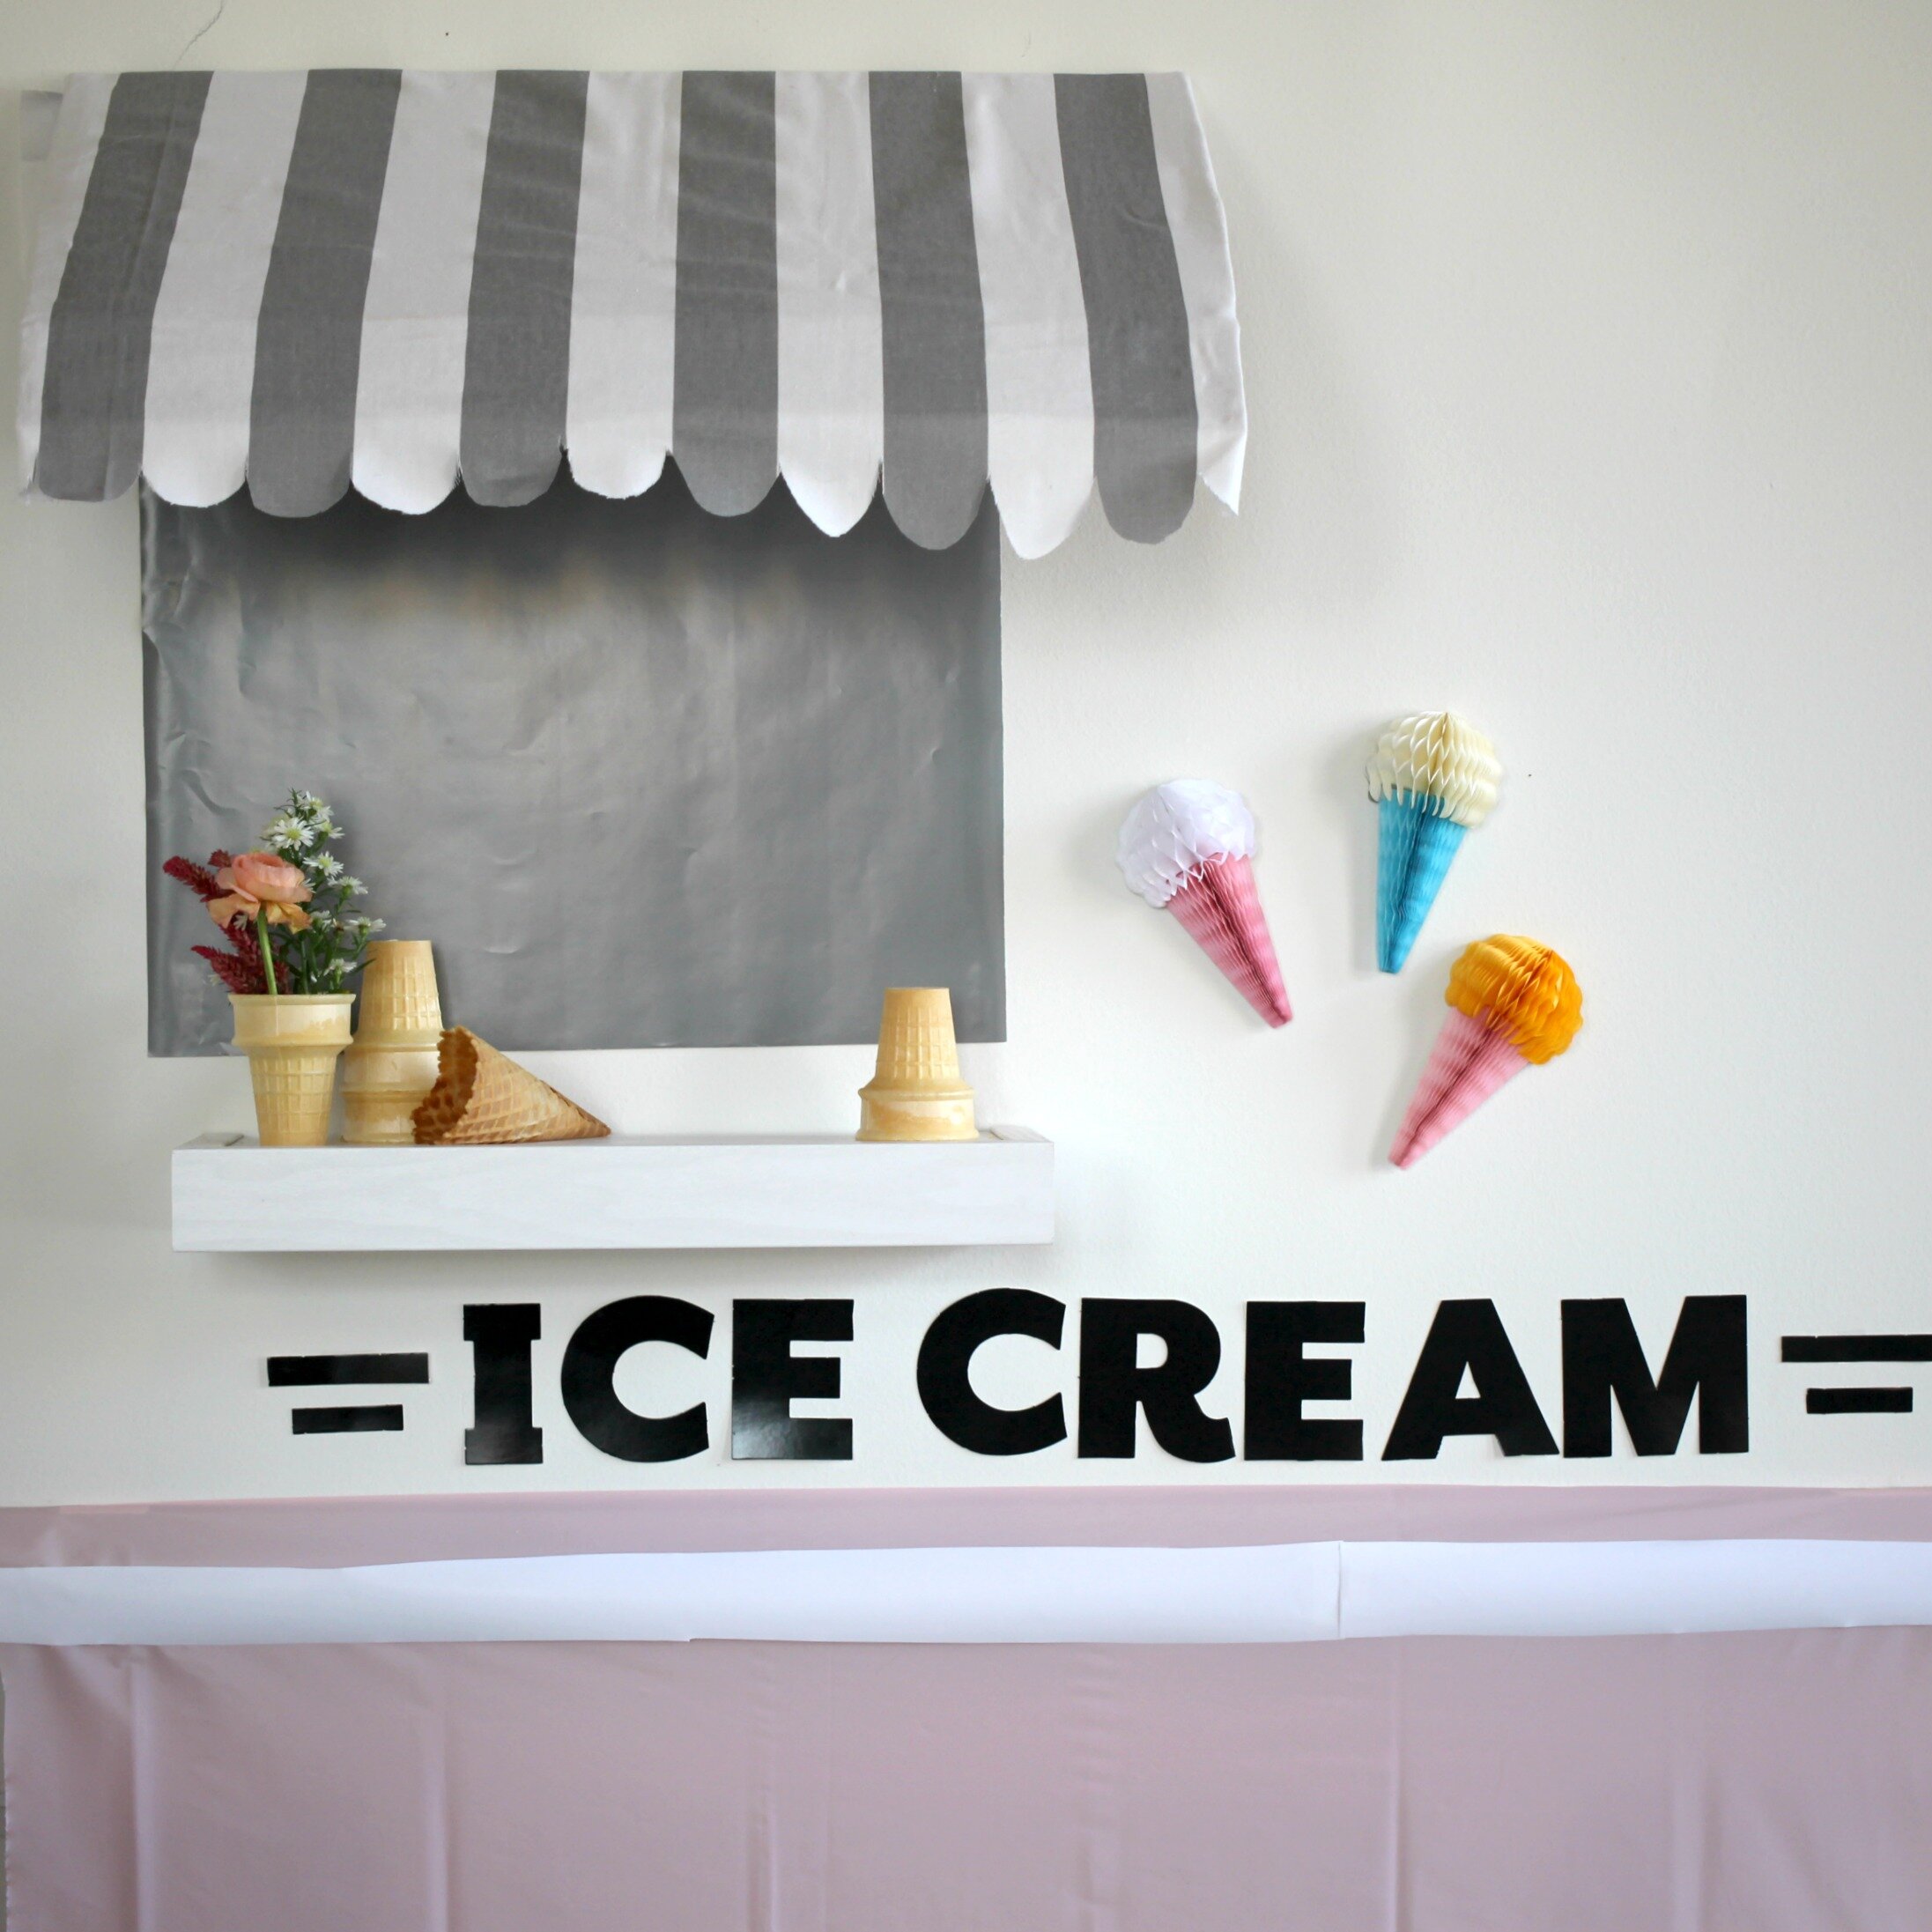
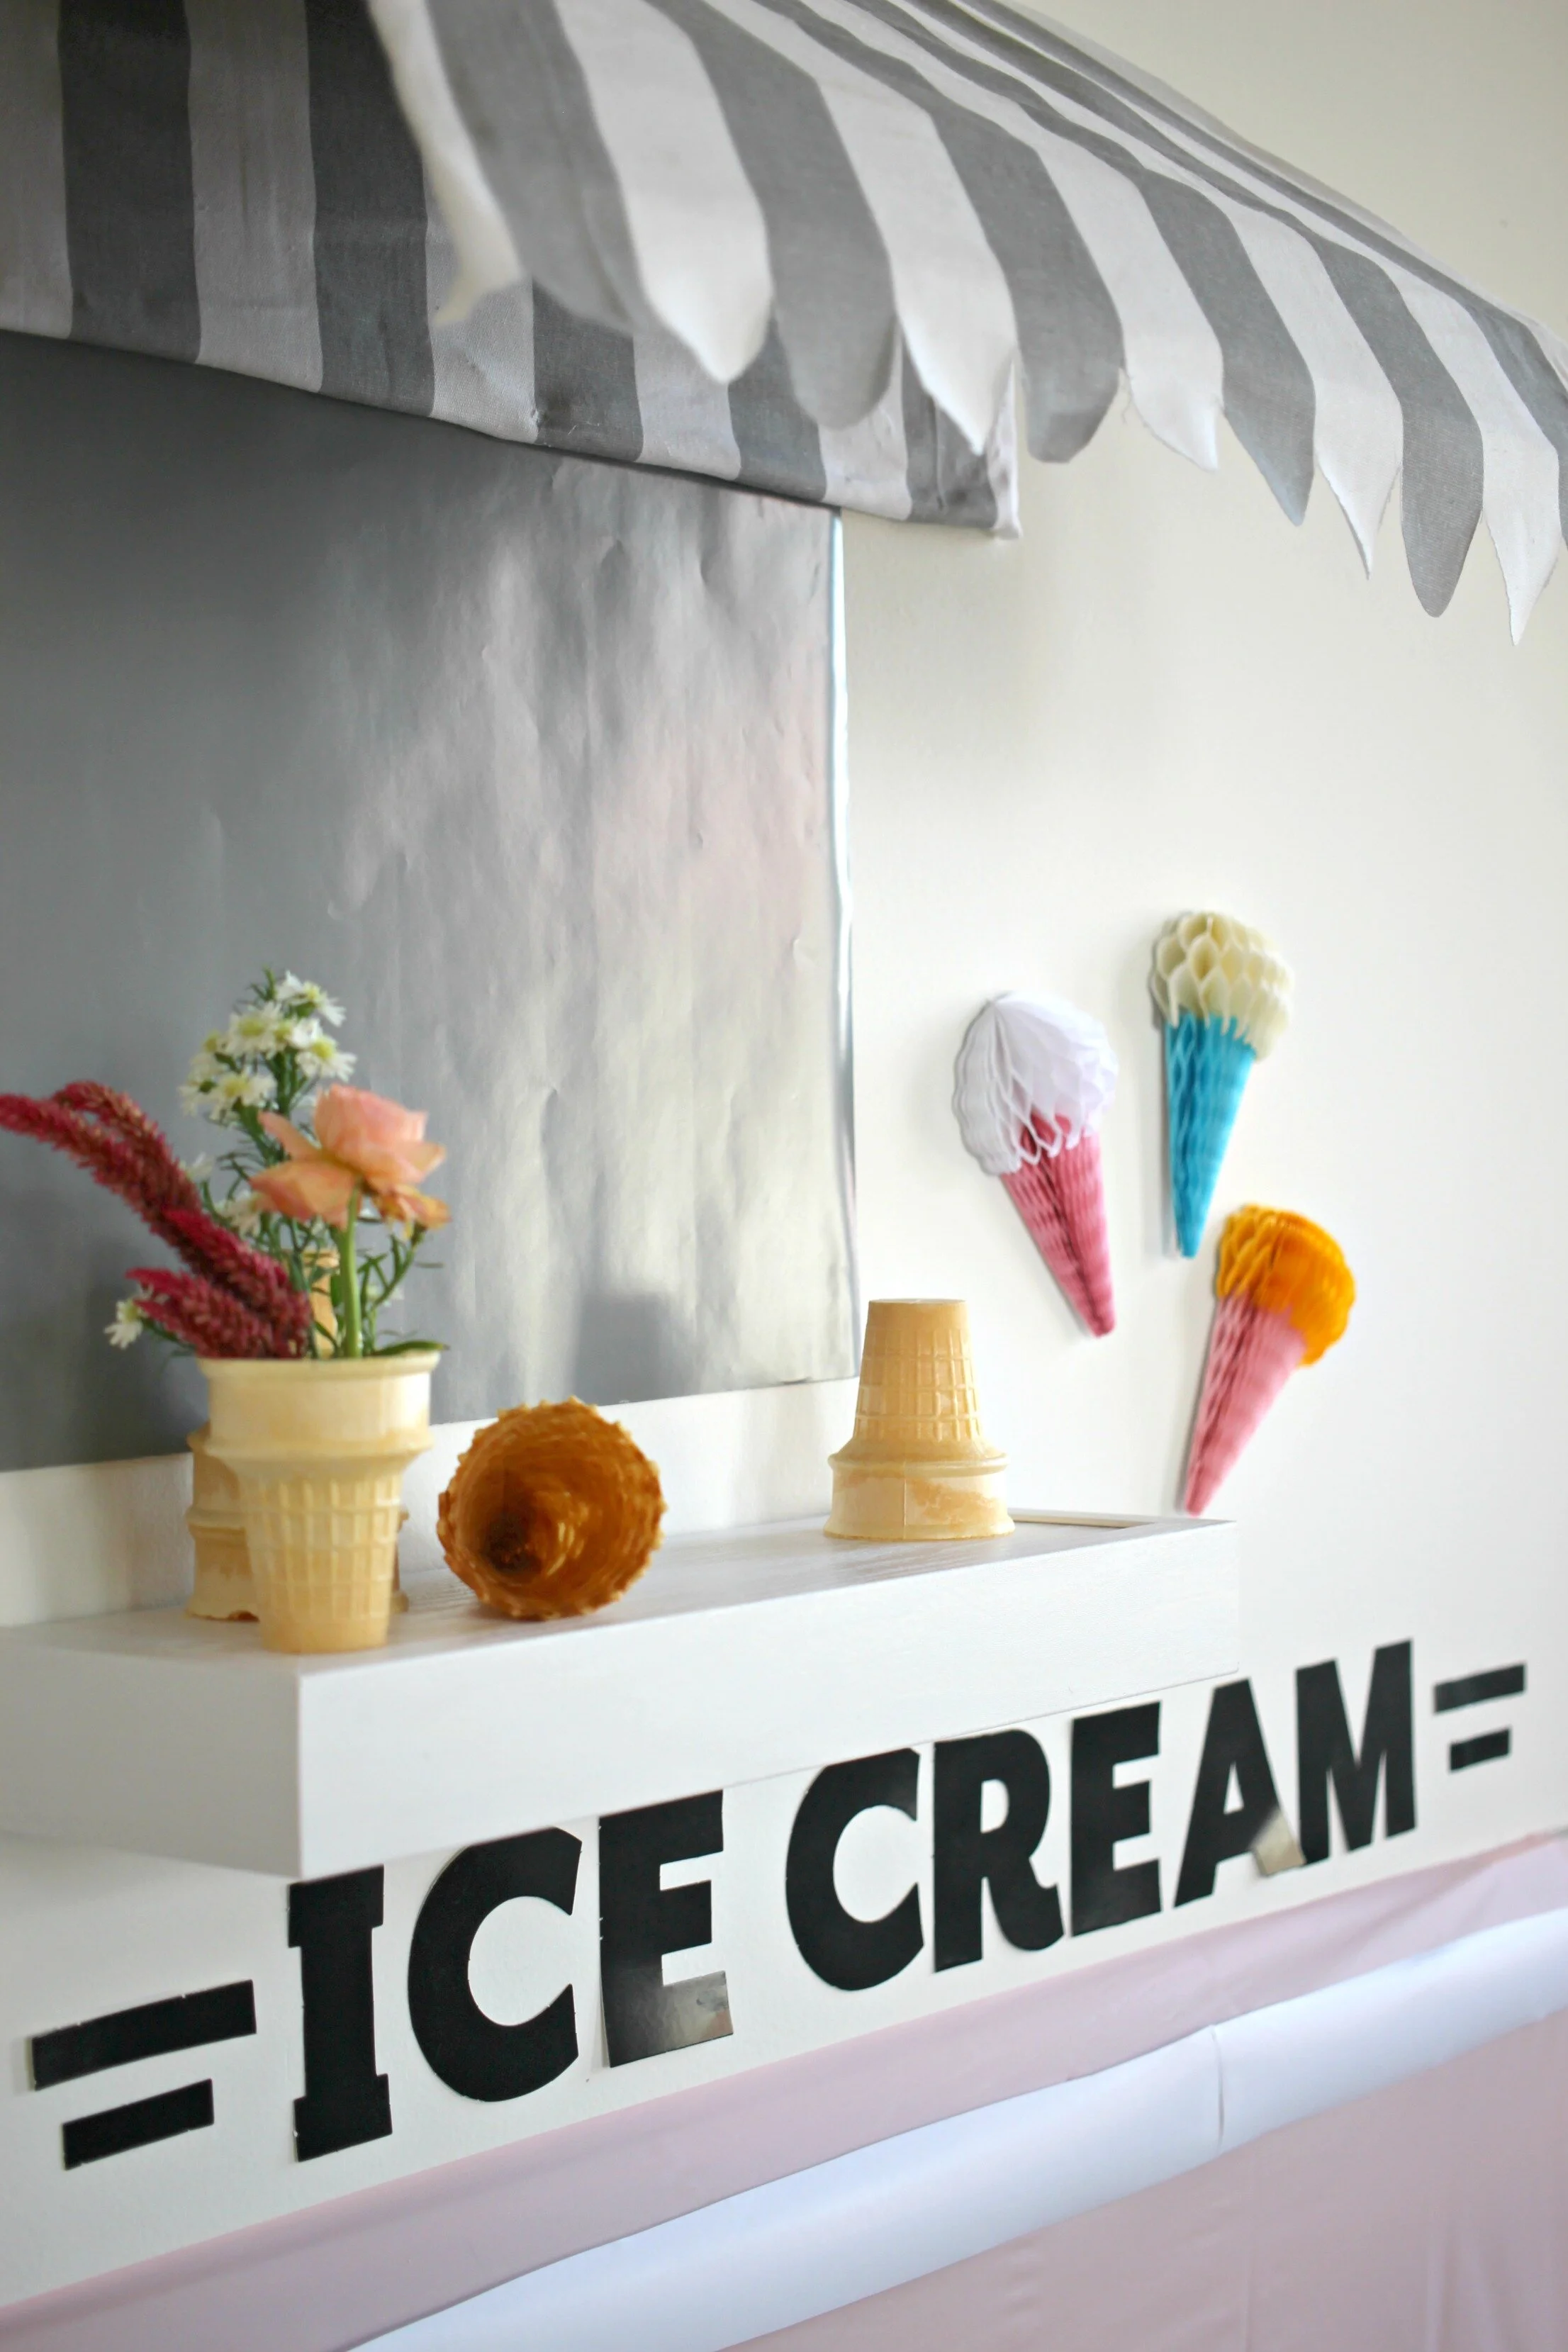
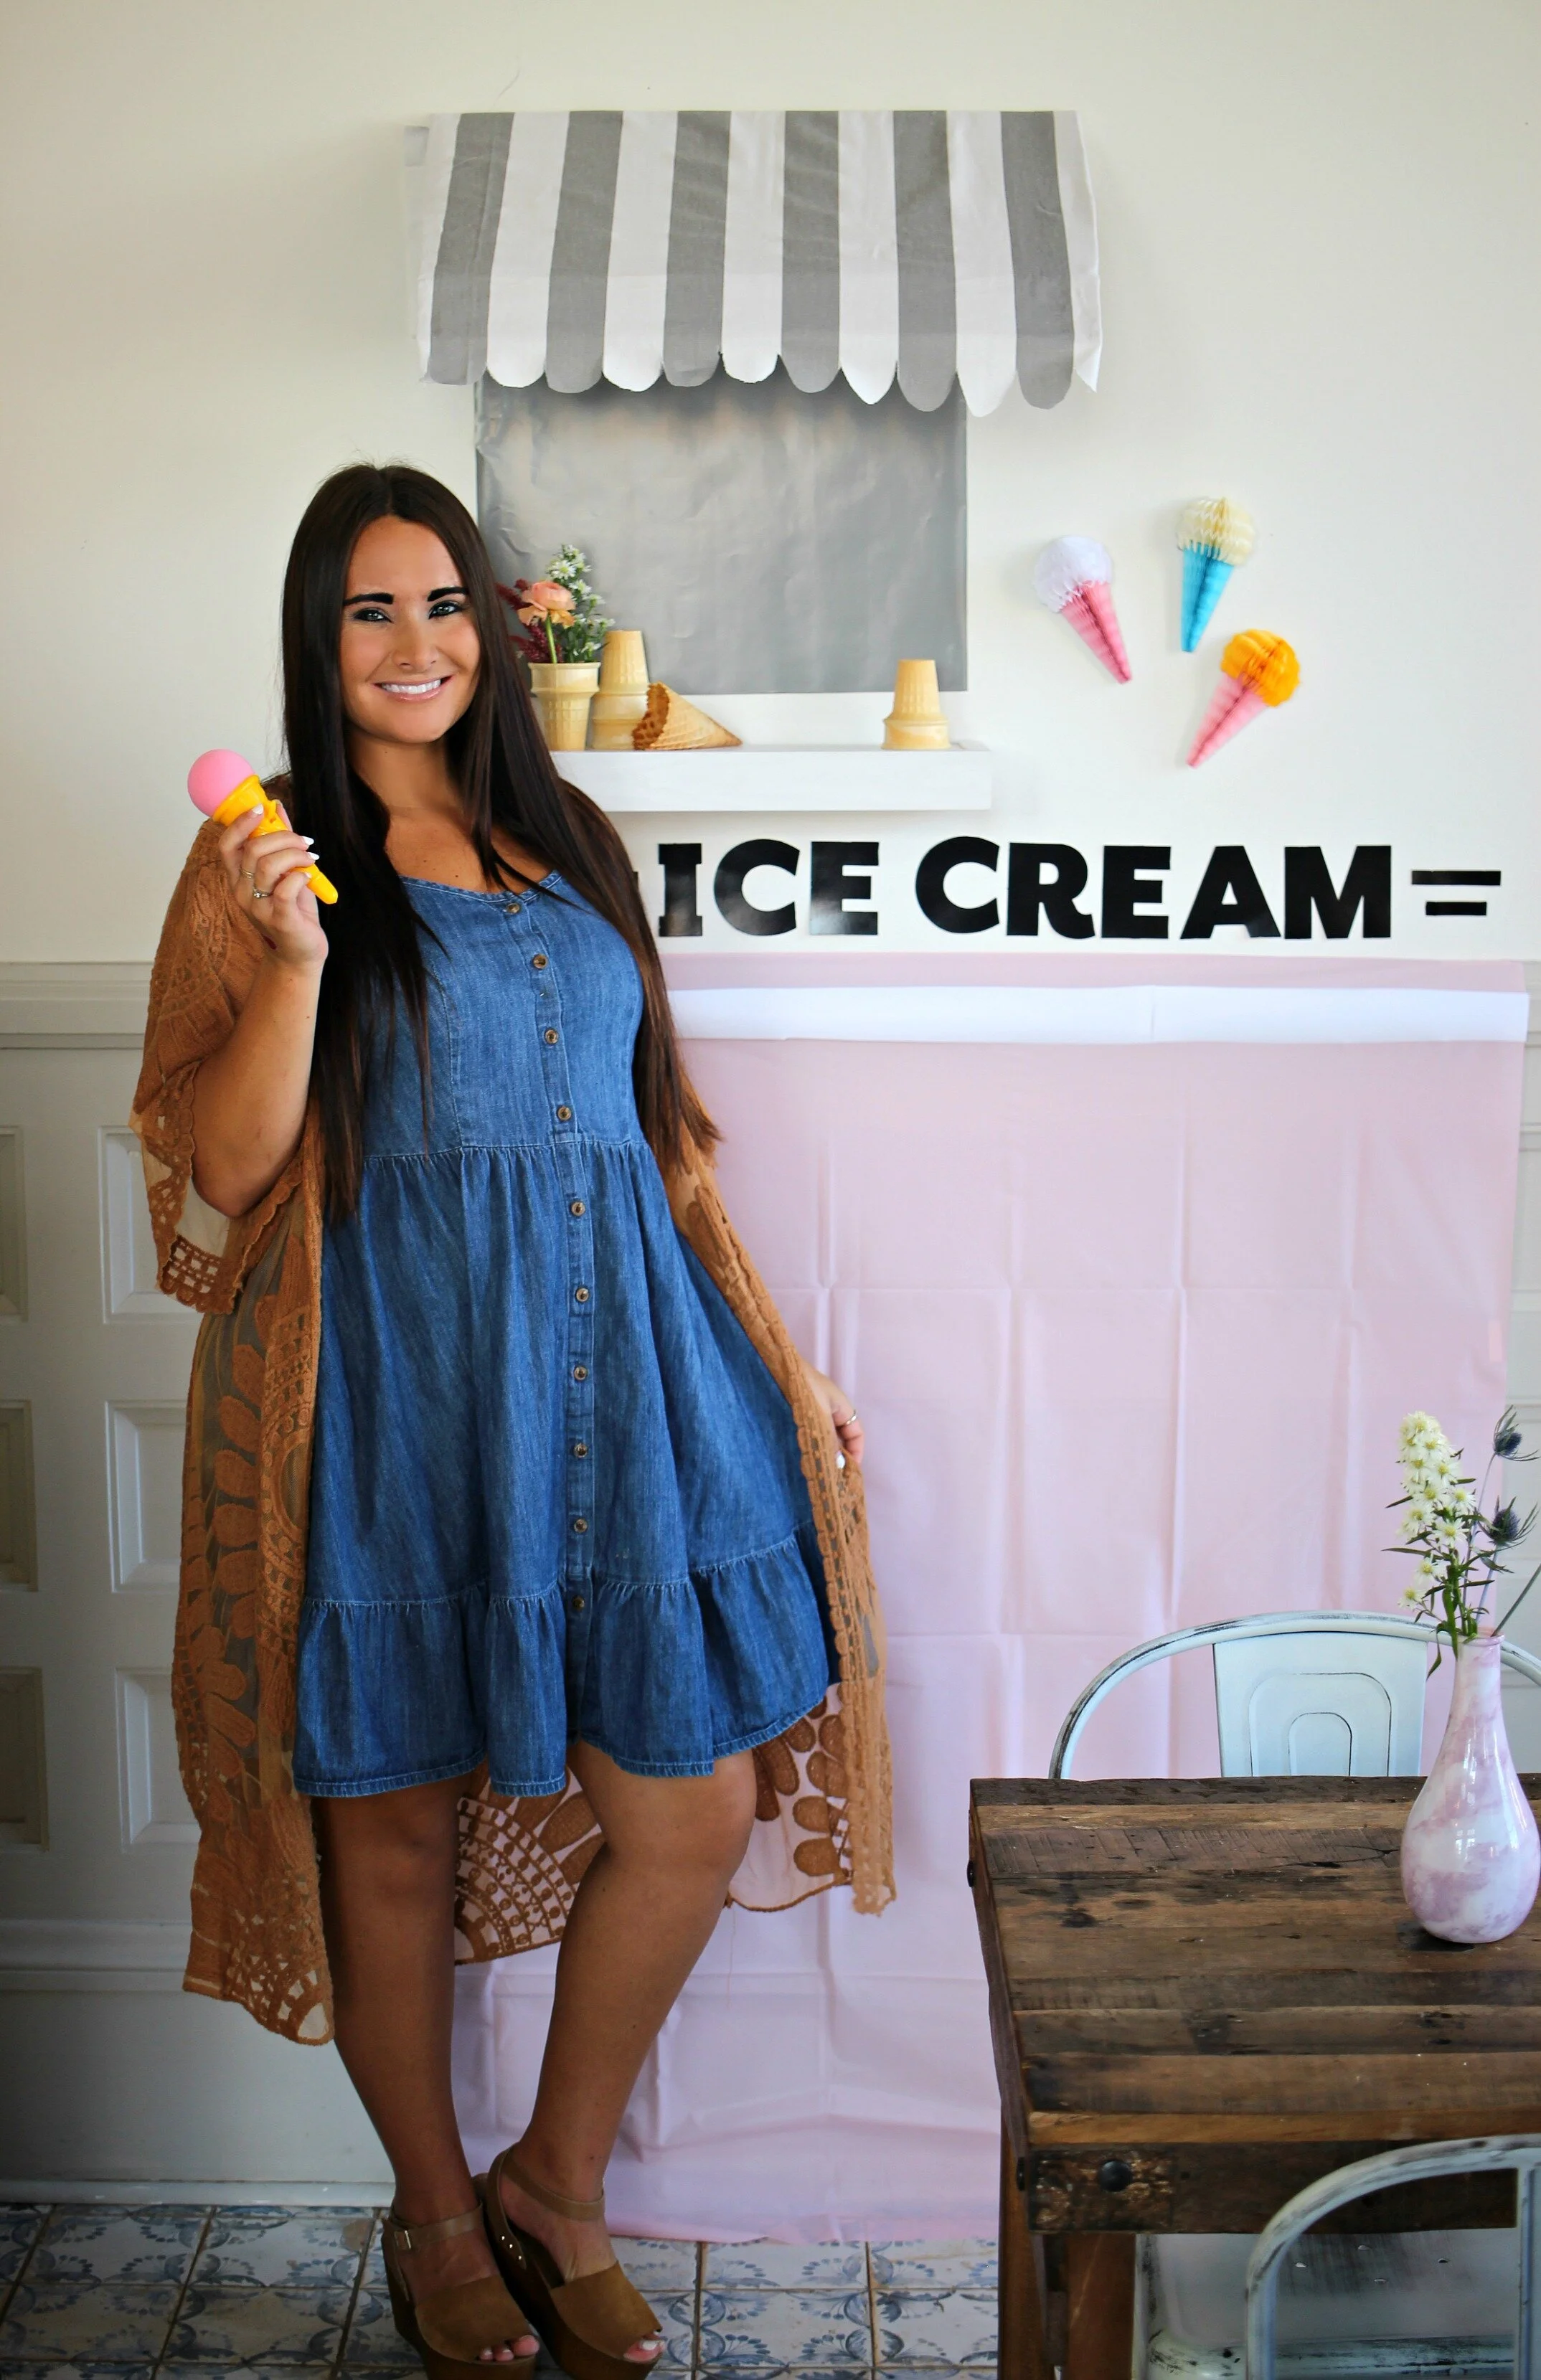
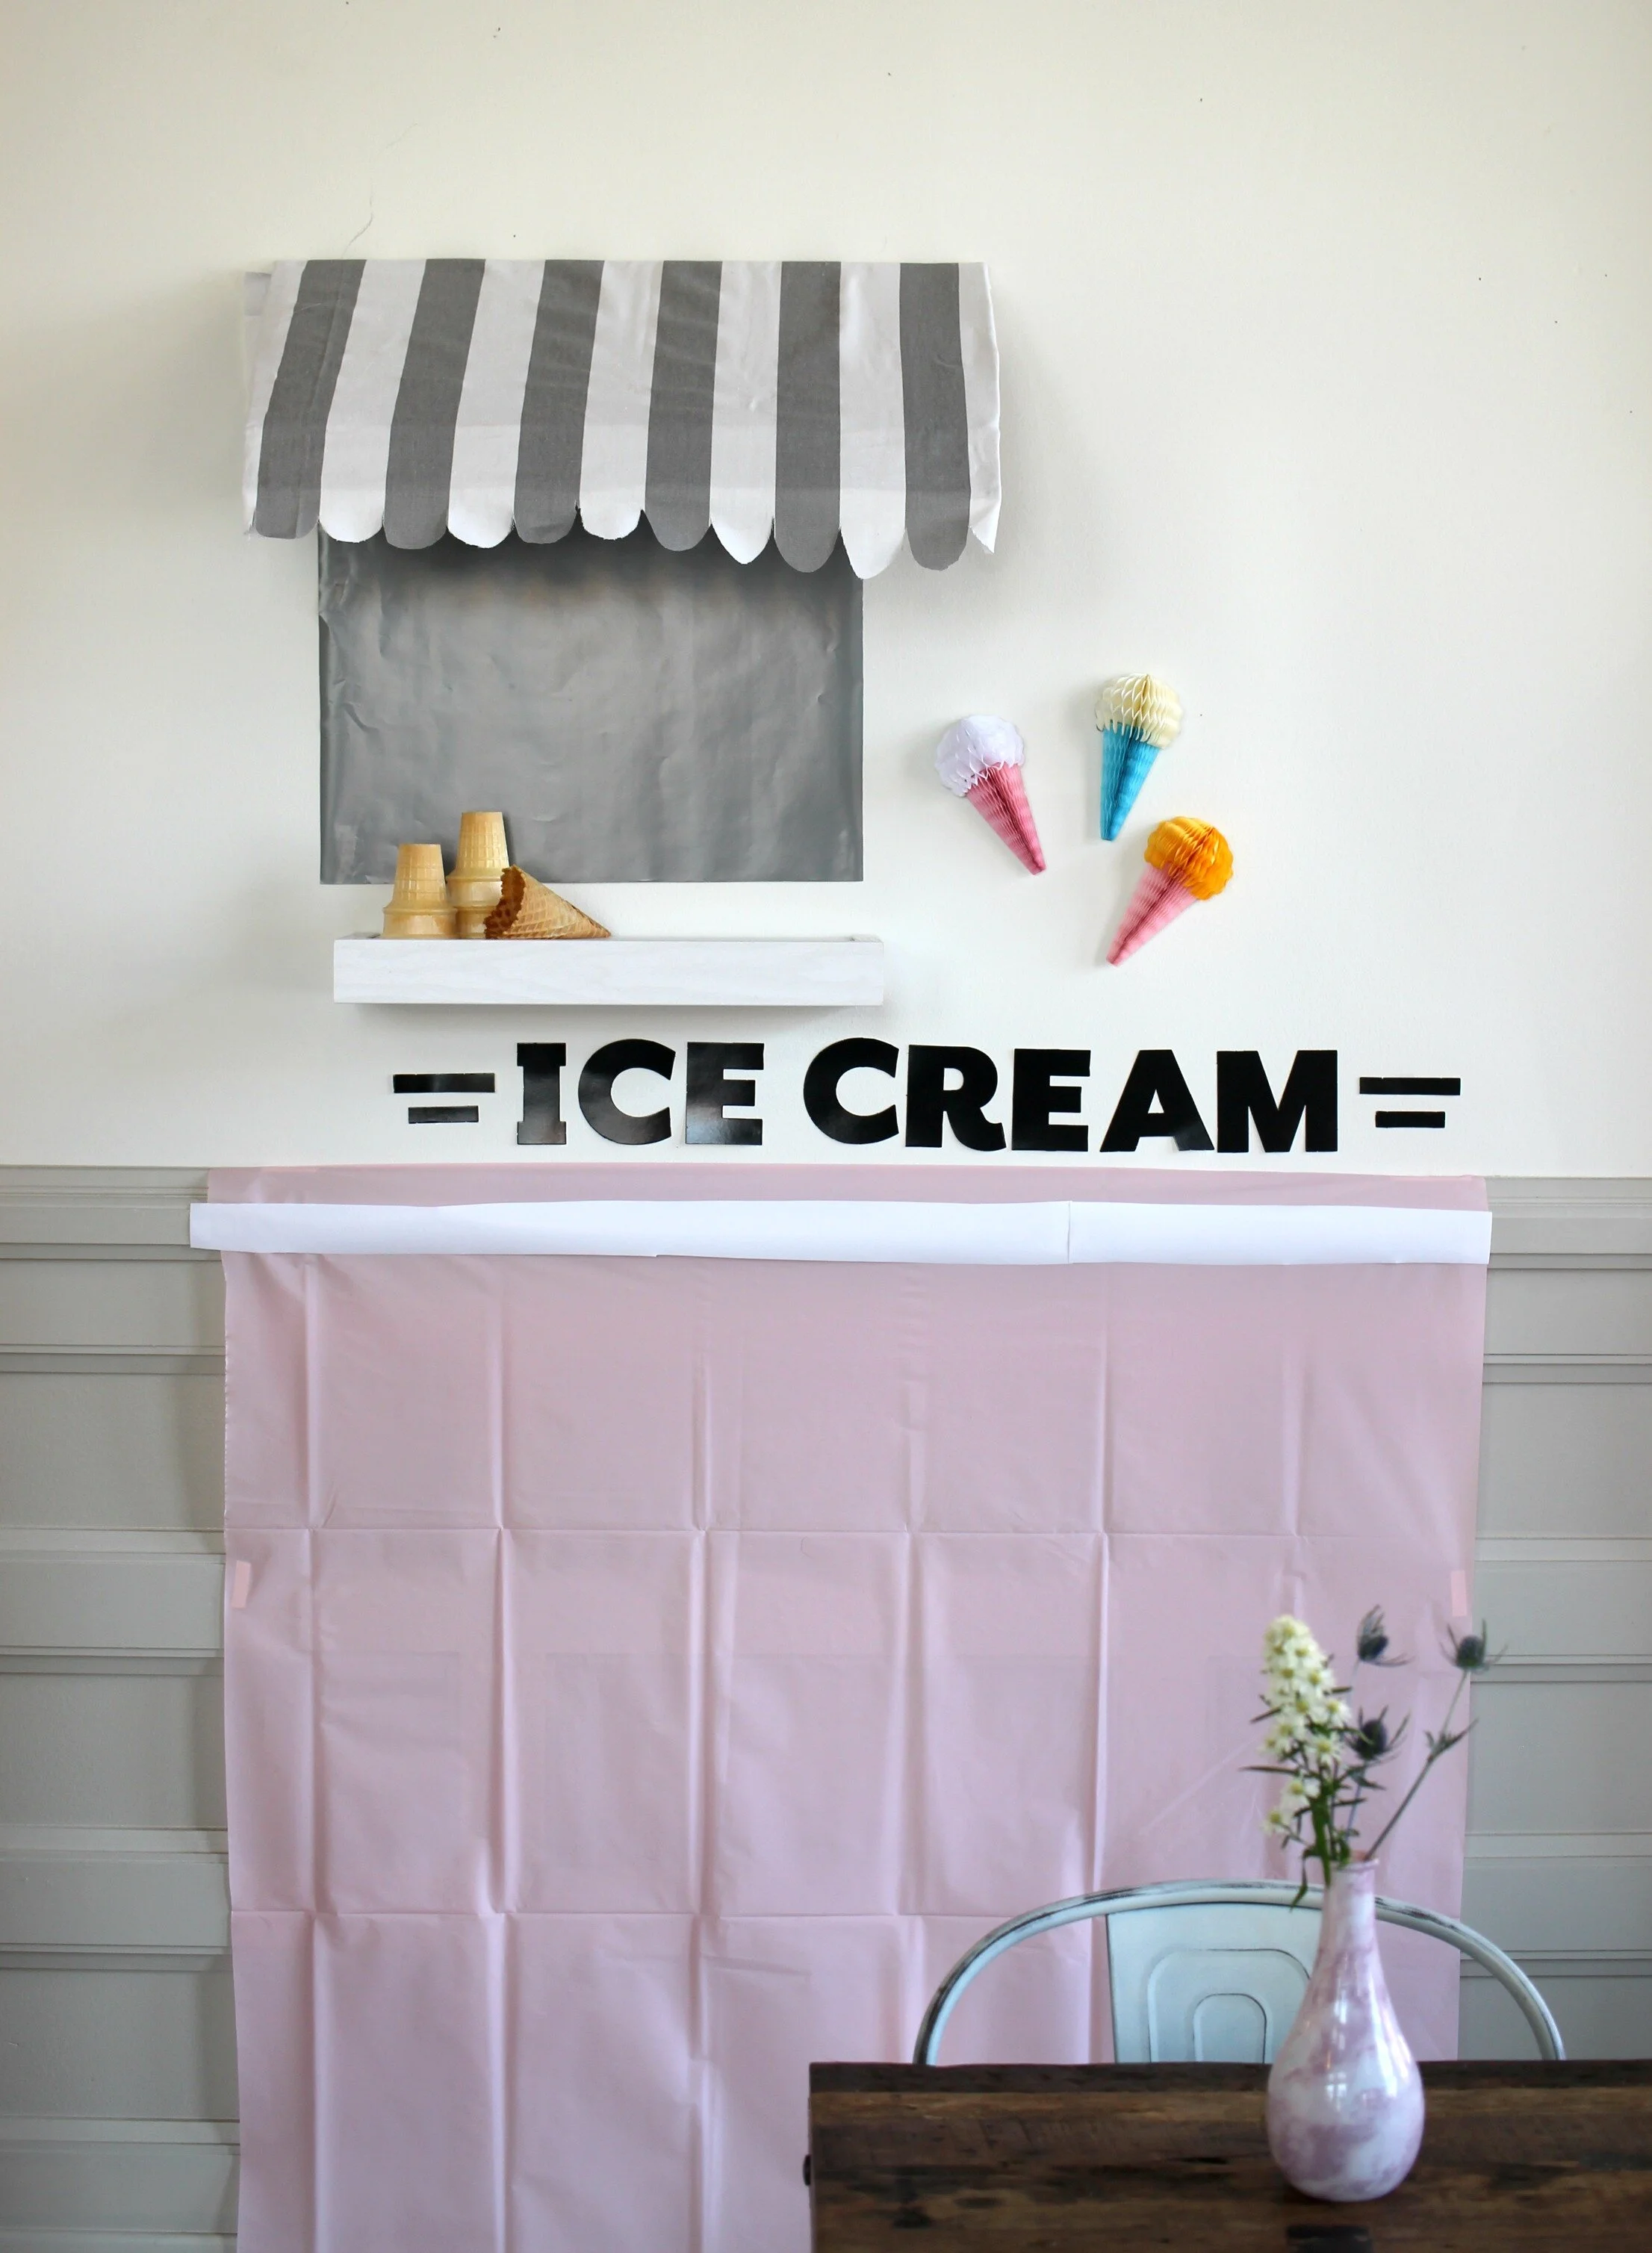
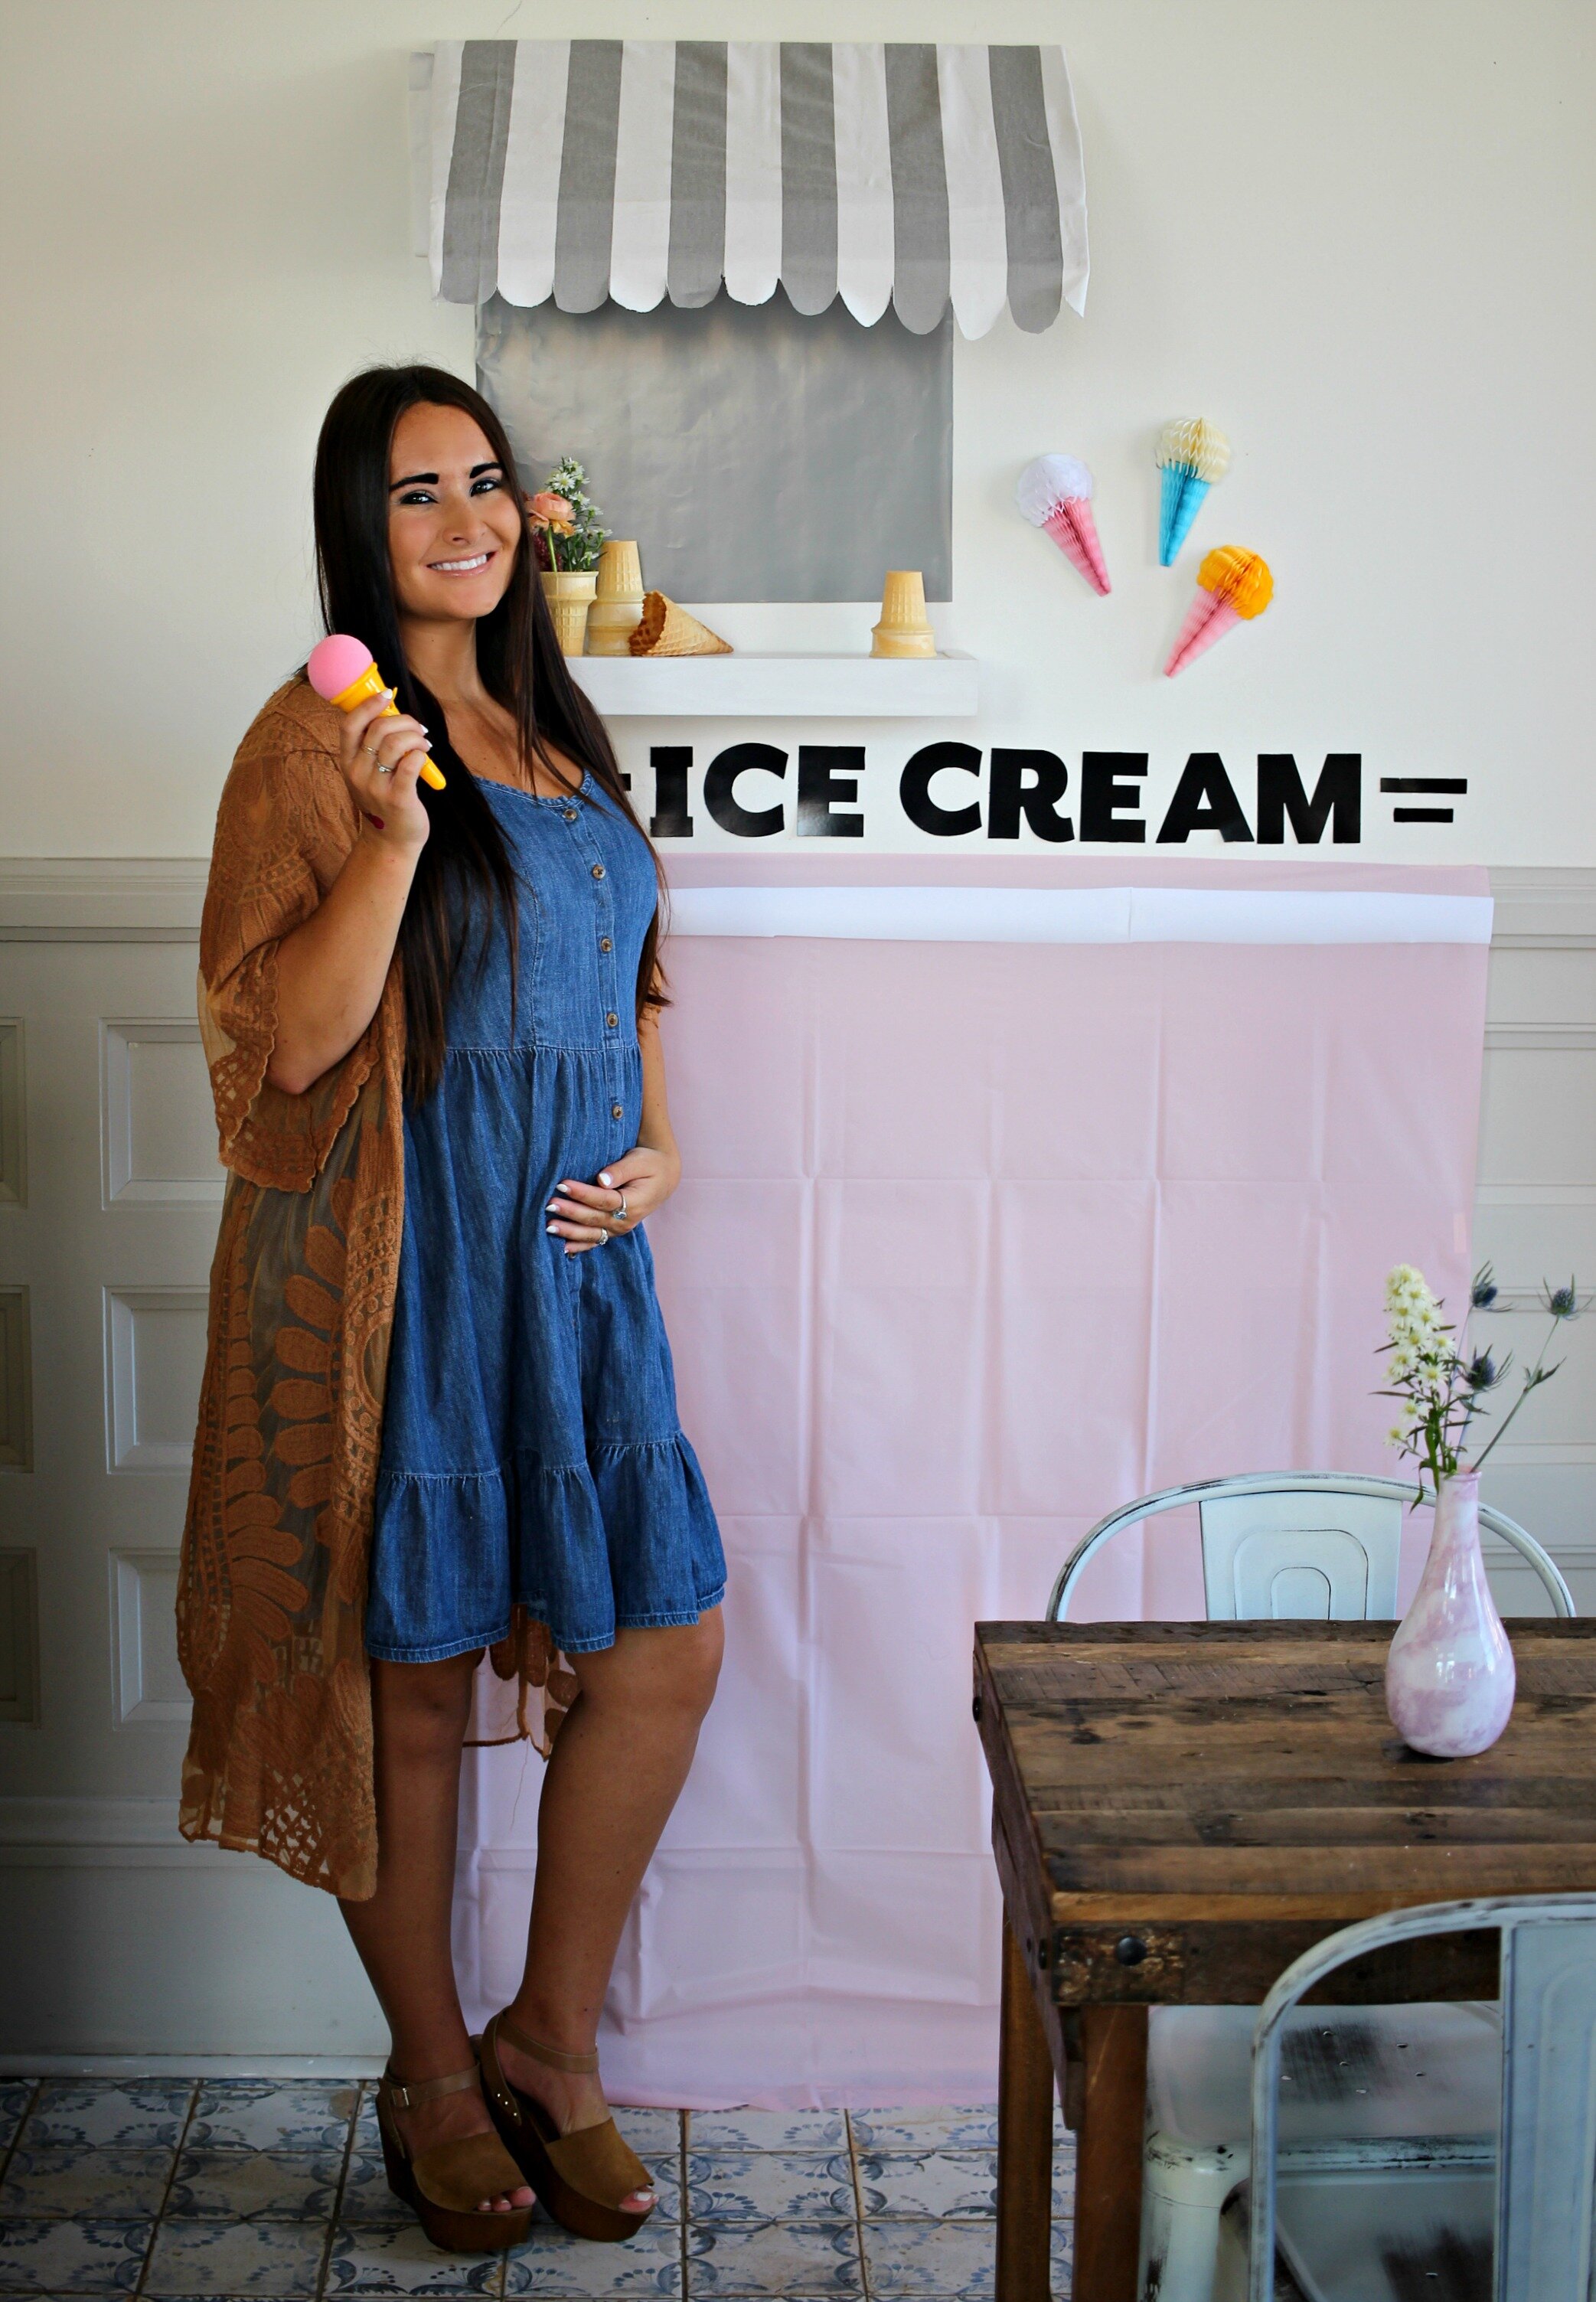
This was by far my favorite element of the ice cream social. I saw this idea from Oh Happy Day! and knew I just had to recreate it (get the full tutorial here)! It was so easy and such a cute centerpiece / photo backdrop for the party. A few changes that I made to the original tutorial:
1. I used a pink vinyl tablecloth instead of pink paper for the pink part of the backdrop (this was so much cheaper and just as easy to use- I got mine at Hobby Lobby,)
2. I didn't use any kind of special seamless paper for the rest of the backdrop, just solid colored wrapping paper that I also got at Hobby Lobby (all of these I found in the party section).
3. Since our ceilings are SO high, I couldn't hang the awning from the ceiling using fishing line, so I made a free-standing awning out of cardboard and striped fabric that we just attached to the wall. I found the gray and white striped fabric at Hobby Lobby and I just used a cardboard box (cut up), as the base. I hot glued the fabric to the cardboard so it was covered all sides and hung over the edge about 2 inches, then I cut the edge into the scallop trim. We just screwed the faux awning into the wall right through the cardboard and it held up perfectly! It's super easy to manipulate, cut, and fold cardboard into the shapes you want and it's also free if you just use an old box from your recycling pile!
1. I added these honeycomb tissue ice cream cones from Amazon (linked here).
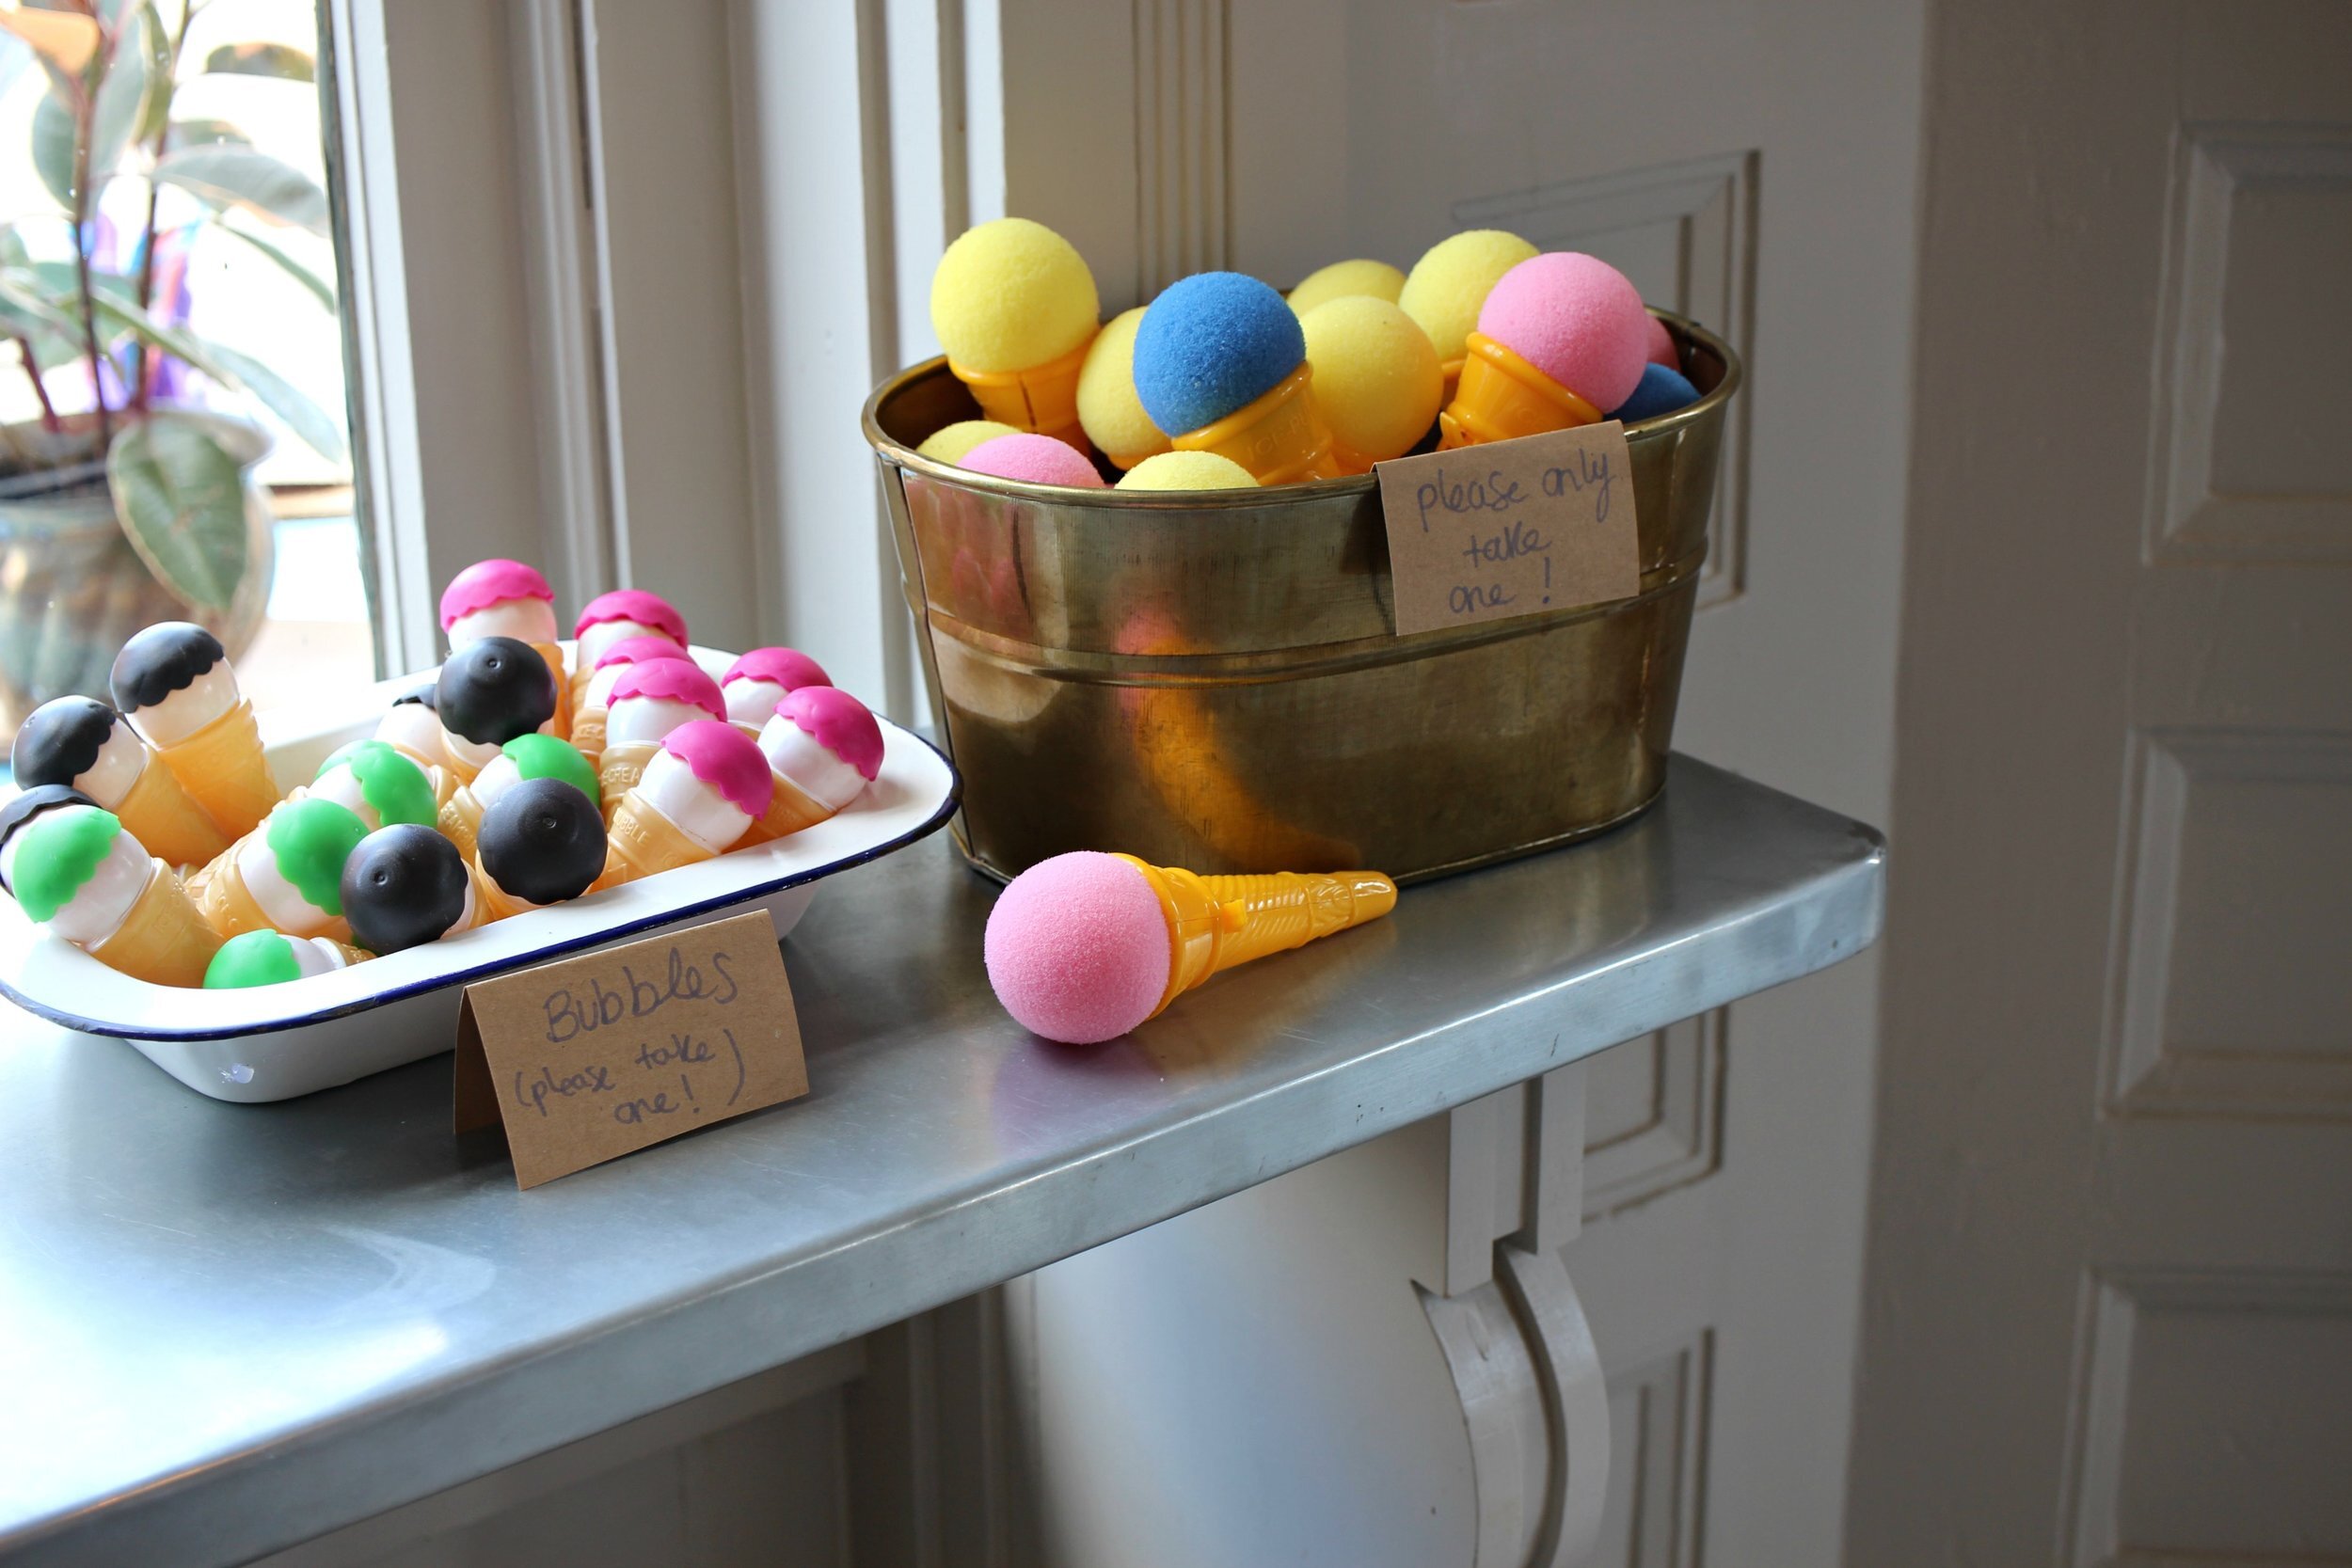
For prizes/party favors I filled one bucket with the classic toy ice cream shooters, which I found in dozen packs from Amazon (linked here); and then I filled another container with cute ice cream cone bubbles, also bought in bulk from Amazon (linked here). The kids all loved both of these prizes, especially the ice cream shooters which are always a hit and were one of my favorites too growing up!
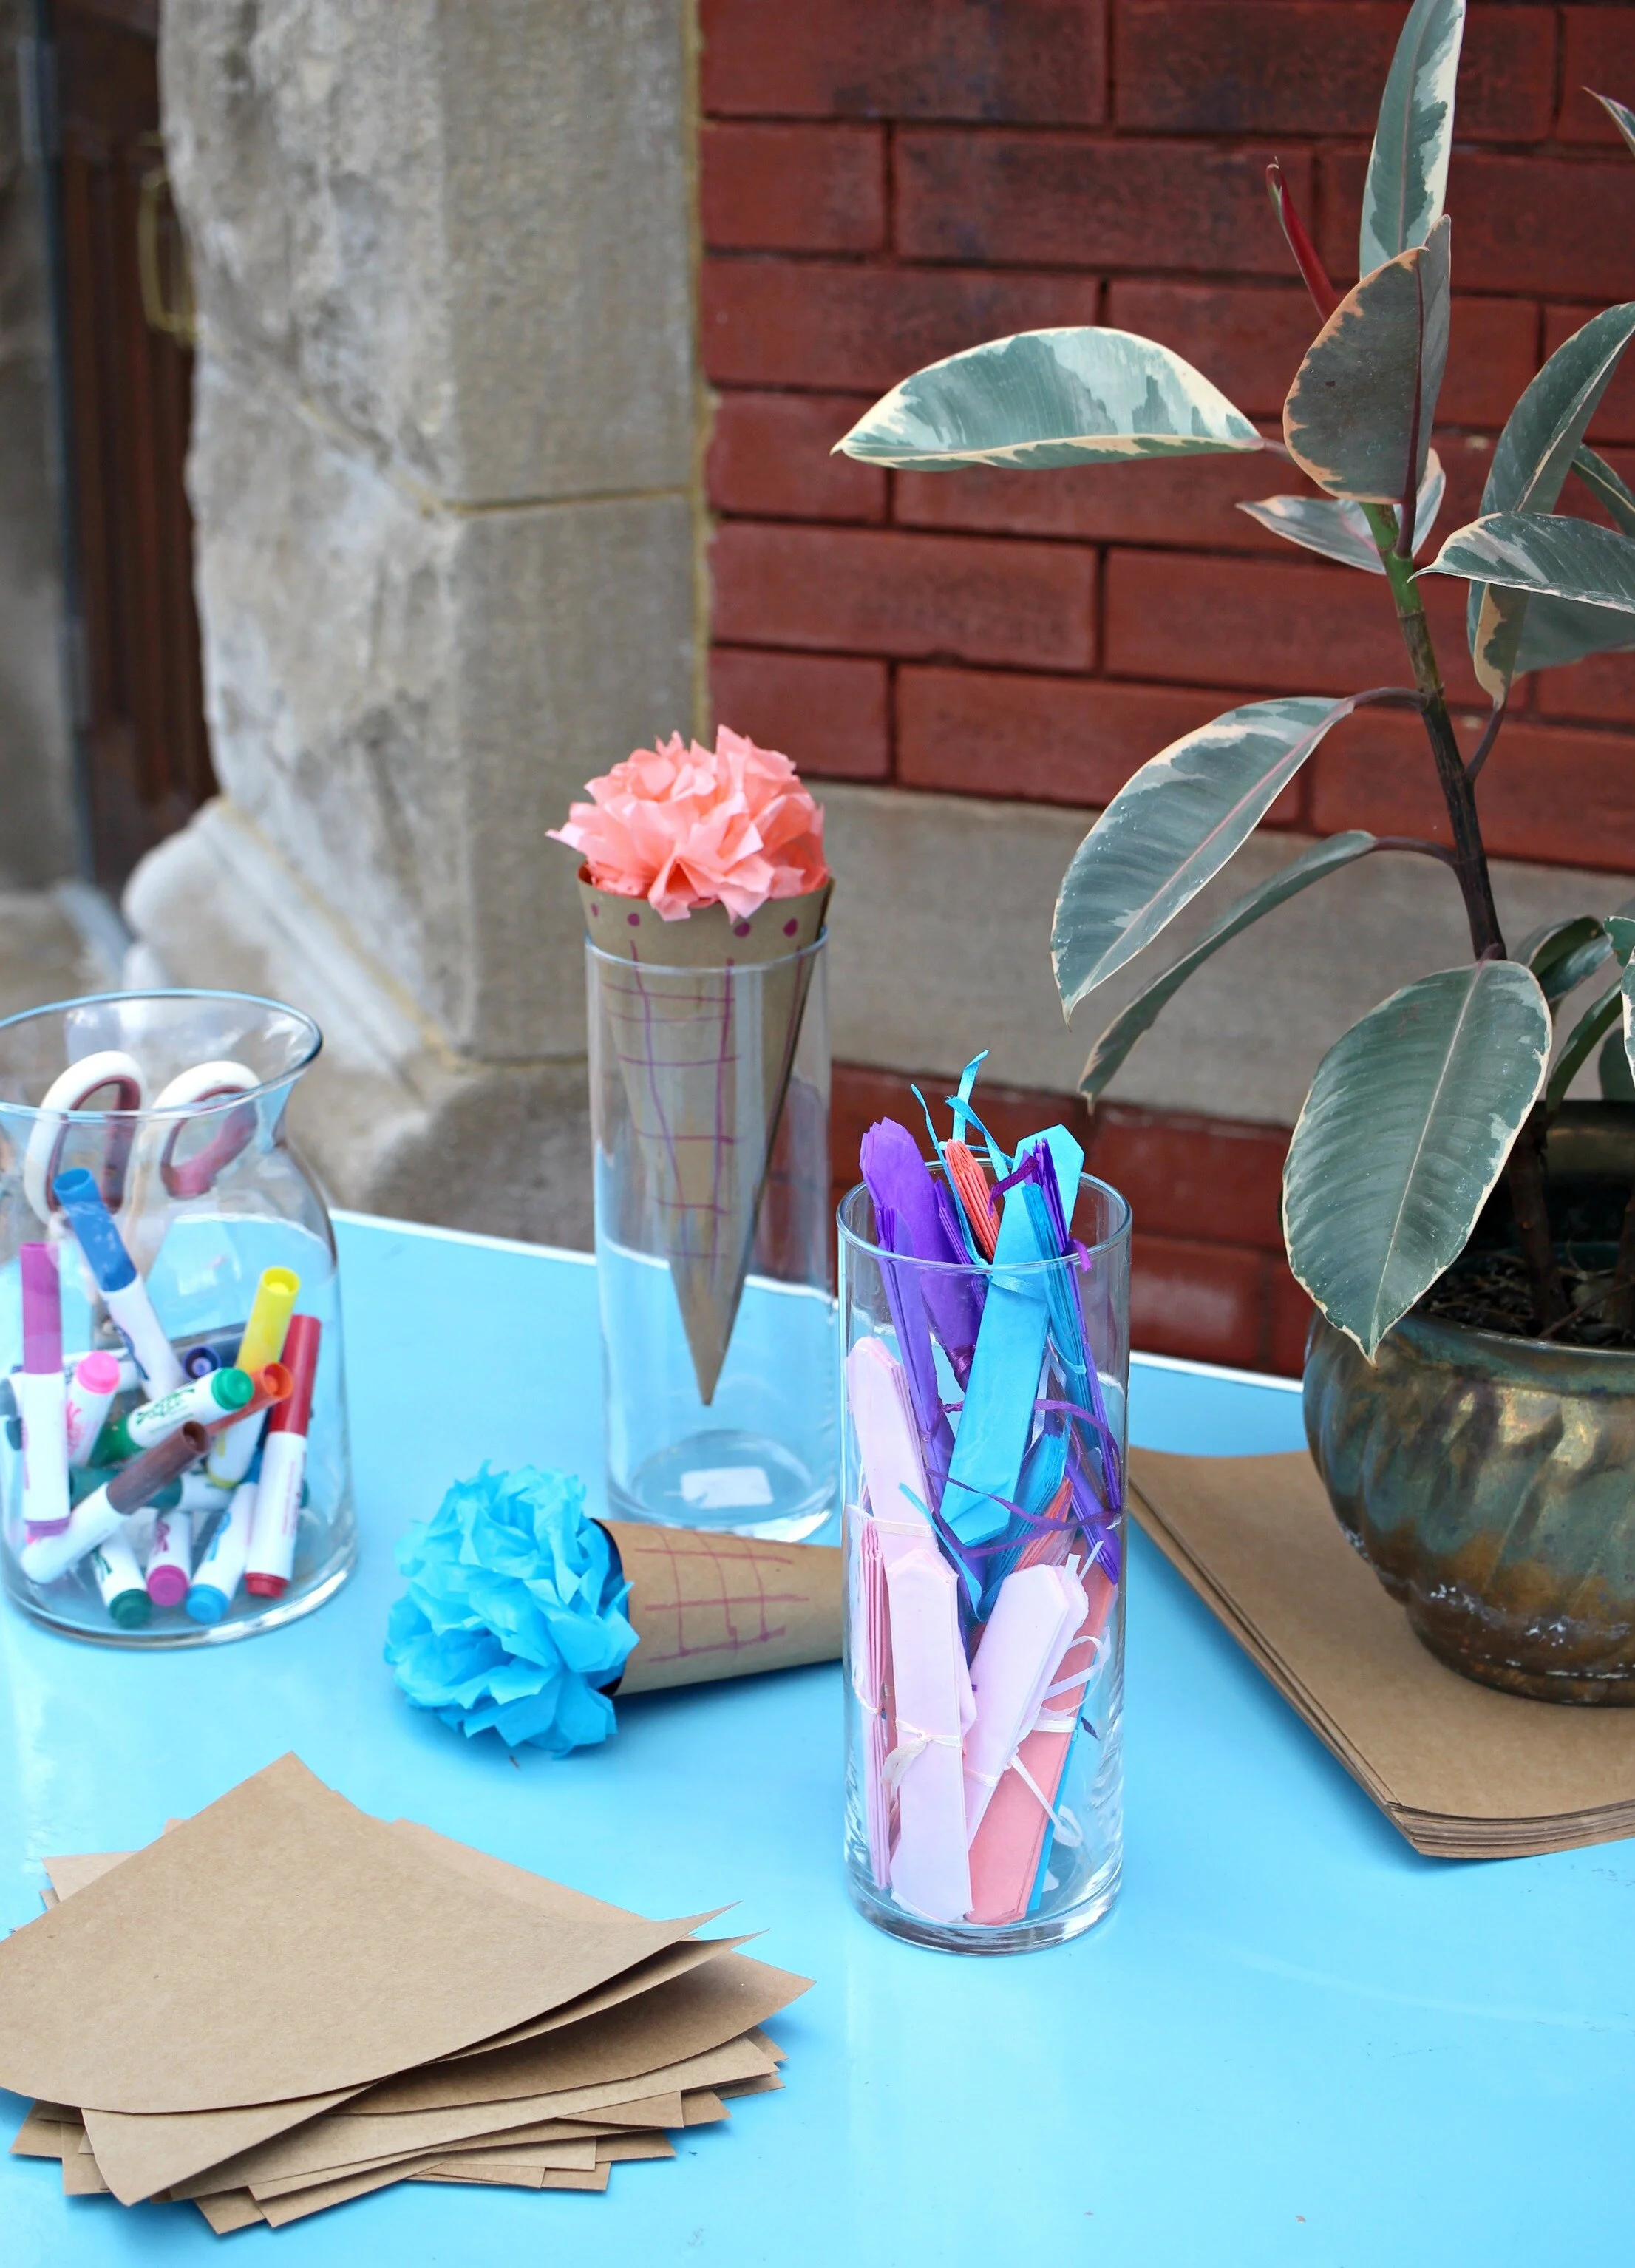
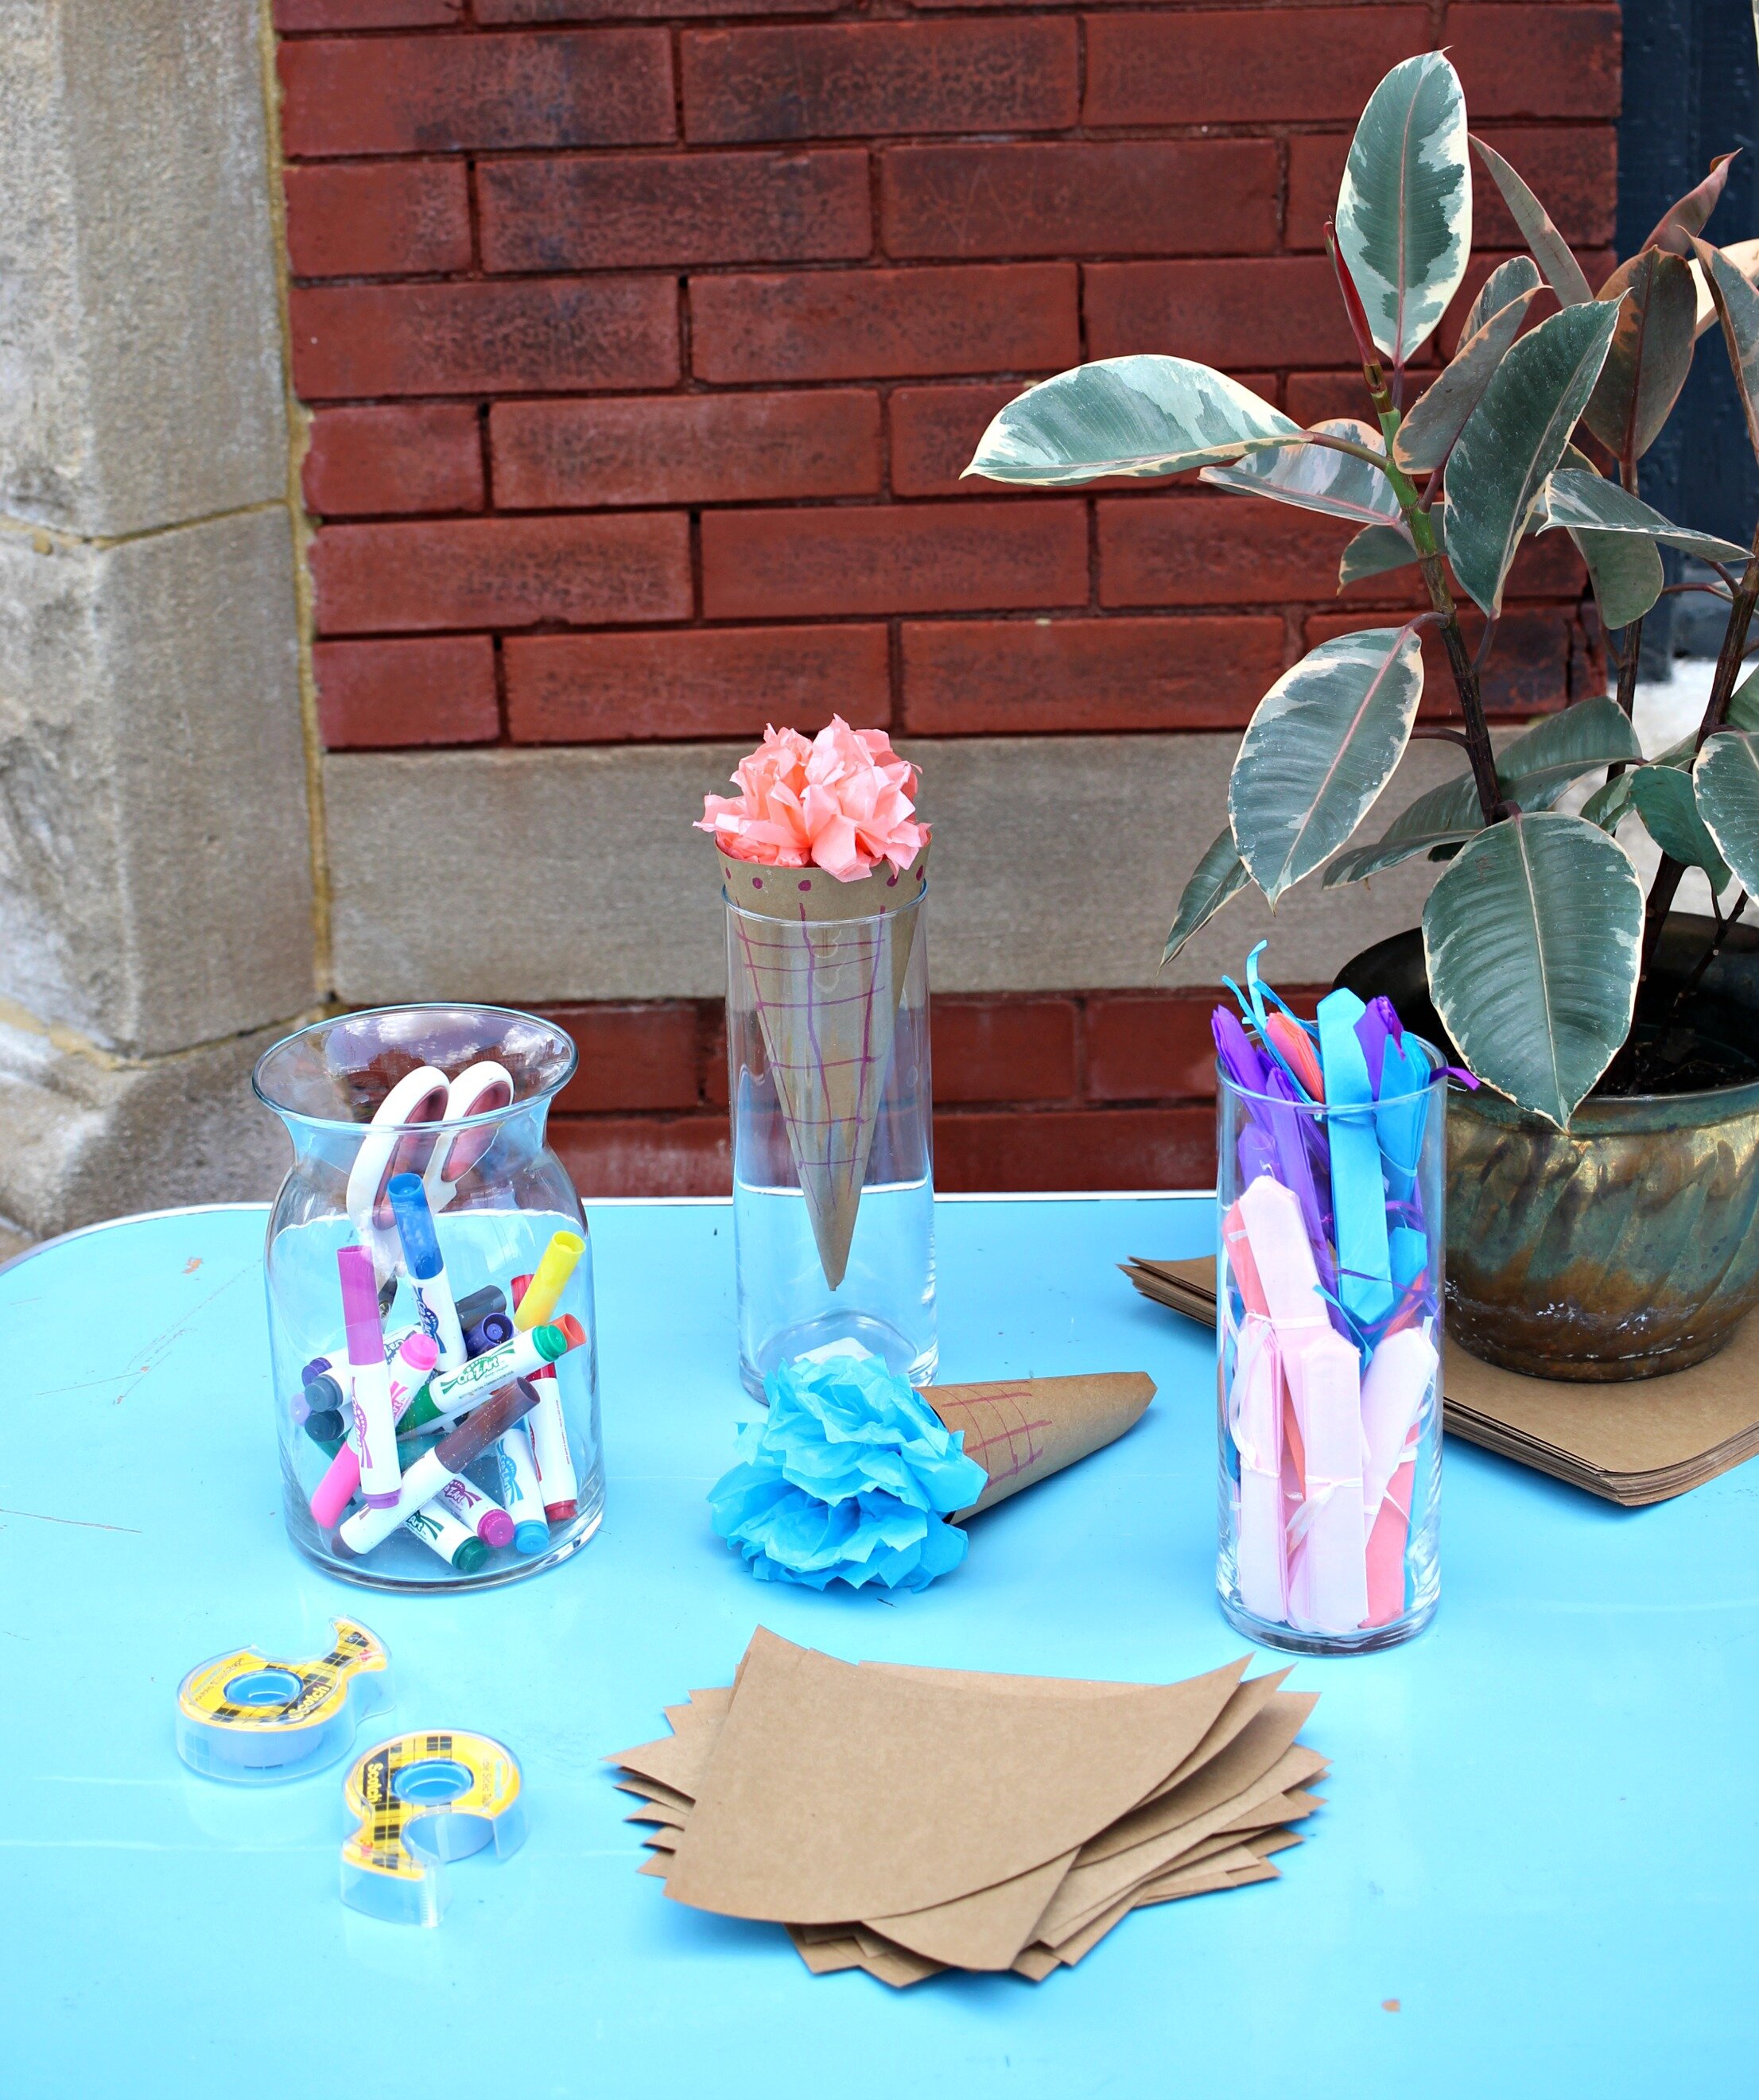
I also wanted to provide a craft/activity for the kids to work on after they ate their ice cream. I found this cute ice cream cone craft made with a paper cone and tissue pom pom ice cream on Pinterest (get the full tutorial here). I made a few changes to make this a little easier for a large crowd of kids of all different ages:
1. I allowed the kids to decorate/draw on the paper cone before we assembled it
2. We used packing tape and double sided tape to assemble the craft instead of hot glue. I think hot glue would have held better, but it is not really kid-friendly so I opted for the tape. I still had to help most kid's with the assembly but overall I still think tape was easier for such a large crowd of kids.
3. Instead of having the kids make tissue poms from scratch, I purchased these tissue paper pom garlands from Hobby Lobby, then I cut up the garland so all the pom poms were separated and individual (you can get 6 poms from each garland and they come in all different colors). Then all the kids had to do was "fluff" the pom pom and separate the tissue.
With these few changes I was able to cut down on materials to just what is shown below and make this craft a little easier for one adult to manage with lots of kids, all different ages, and all popping in at different times to work on the craft throughout the party!