Our Fixer Upper: Master Bath Before + After
I'm so excited to share our master bath progress! Besides the kitchen, this was probably the 2nd biggest transformation in the house. We basically gutted the entire bathroom and started from scratch. The biggest problem in here was that we had ZERO water pressure (and I mean just a trickle of water if that), coming out of the shower, tub faucet, or sink. One of our biggest expenses was replumbing the entire house with new PEX plumbing which is the latest innovation and best option in plumbing. We also got a new tankless hot water heater which is super energy efficient, takes up much less space, and provides basically an unlimited amount of hot water. We turned the old tub/shower into a large walk-in shower with two shower heads. We got lucky because the tub in here already had a unique layout that was kind of inset into the wall which worked perfectly space-wise for a walk-in shower. We also replaced all the flooring, moved the toilet, and replaced the vanity. Take a look at what our master bathroom looked like when we first purchased the house below:
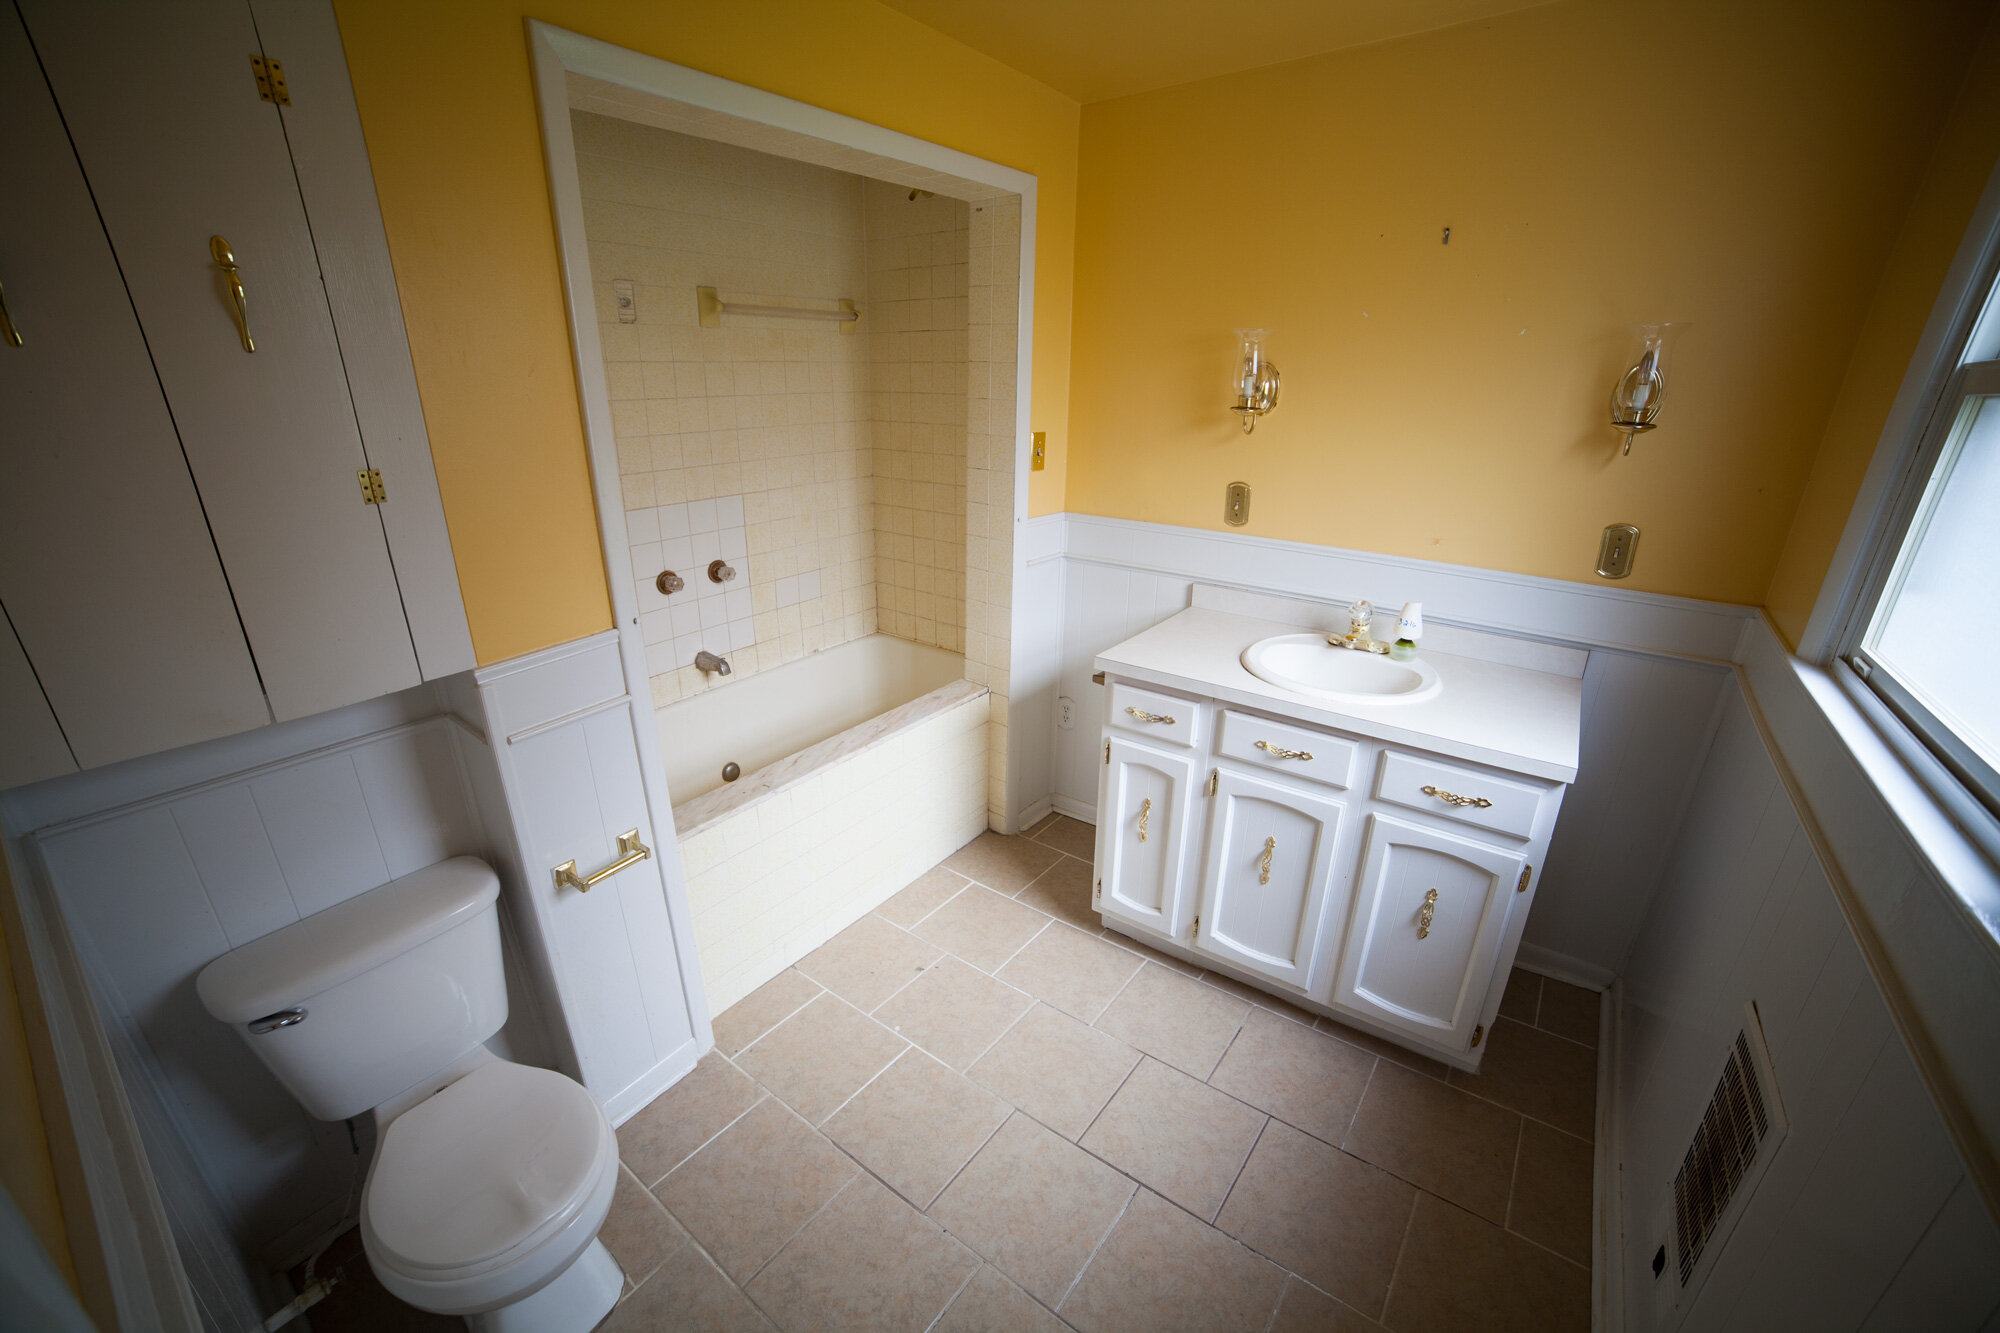
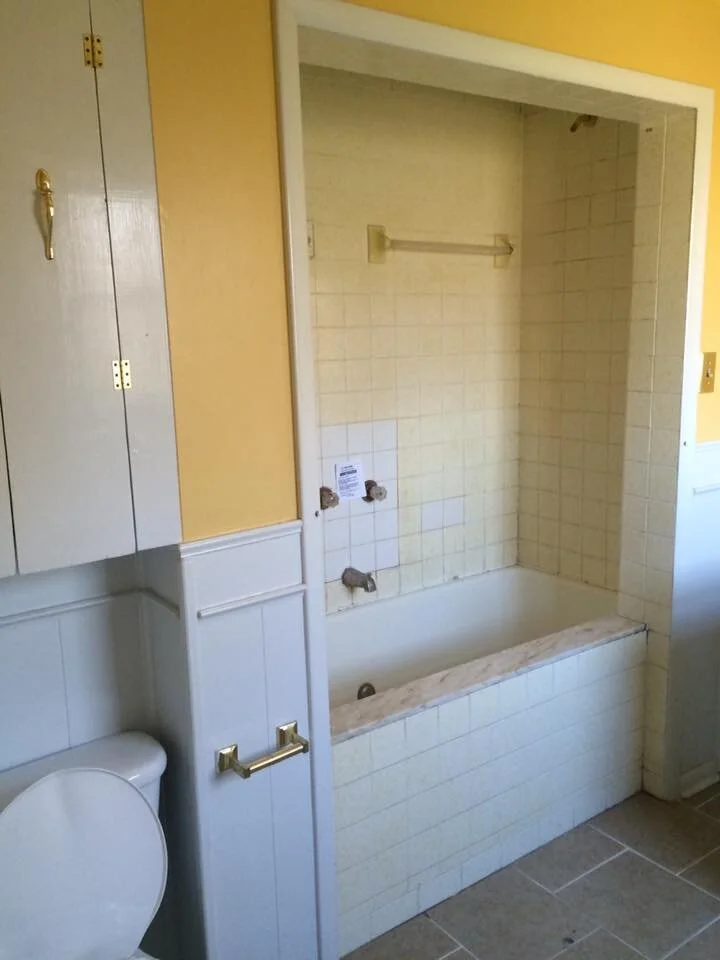
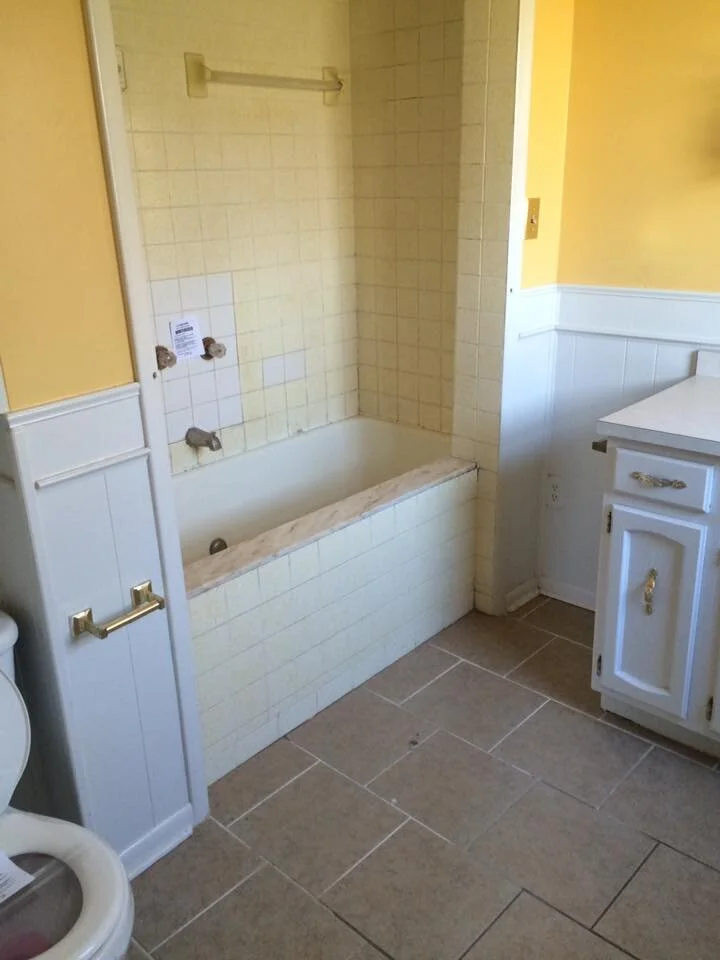
Above you can see the overall layout of the master bath. For the most part this stayed the same except for the toilet which we moved out of that awkward corner and onto the adjacent wall so it had more space around it. We also removed that built-in cabinet in the corner above the old toilet.
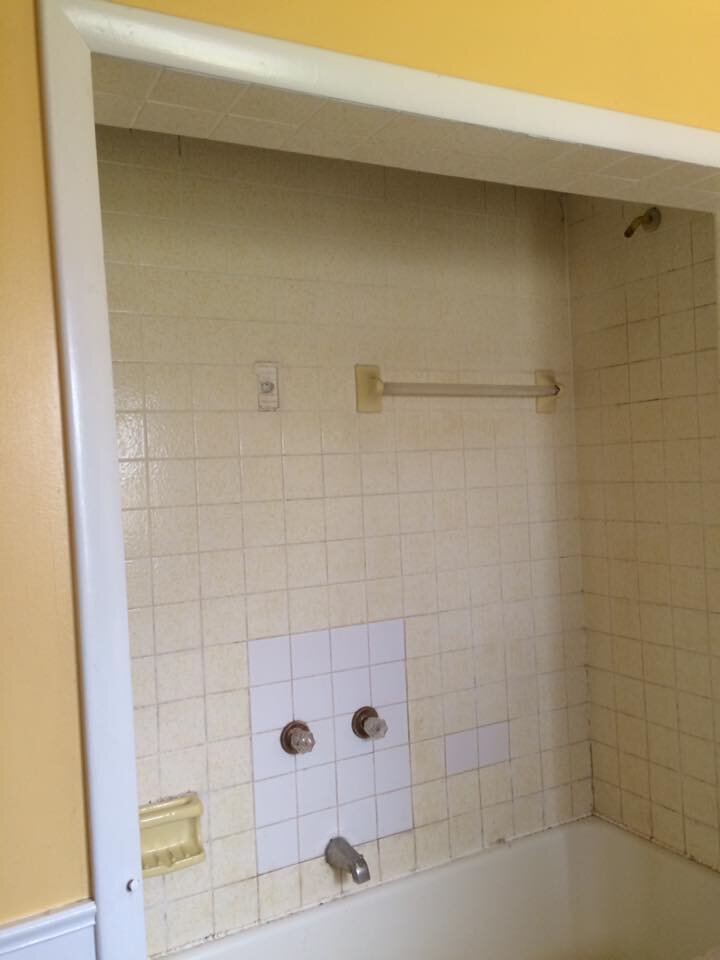
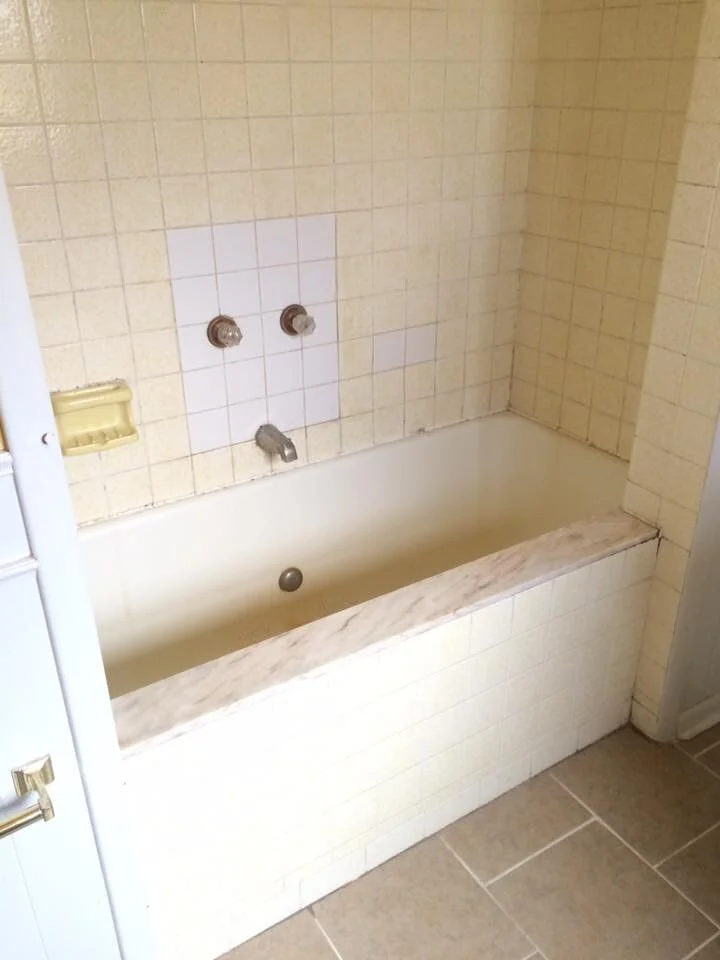
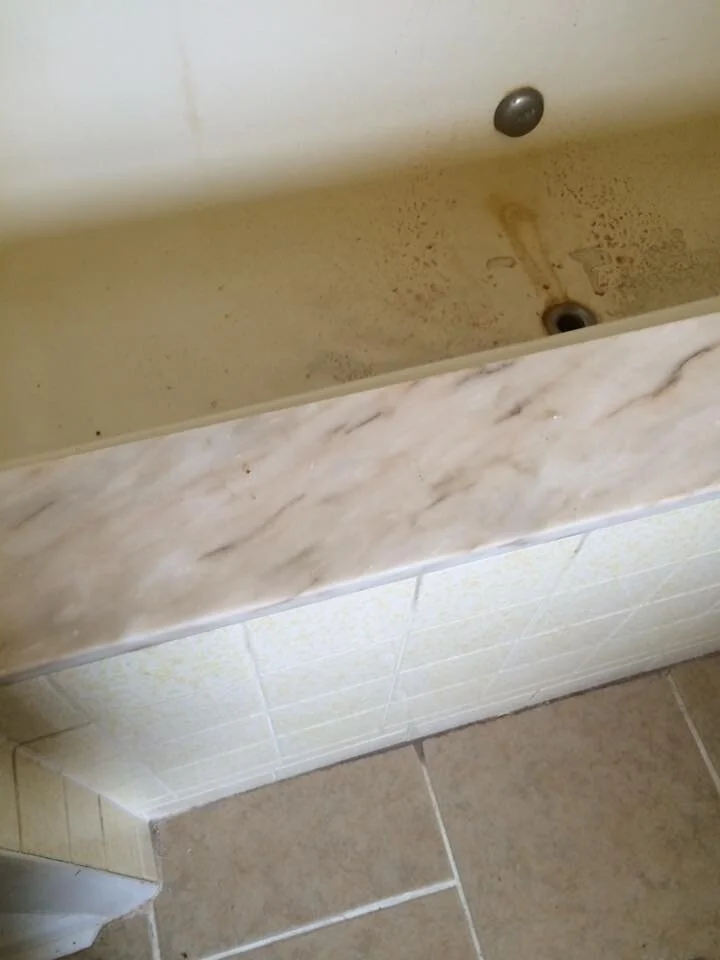
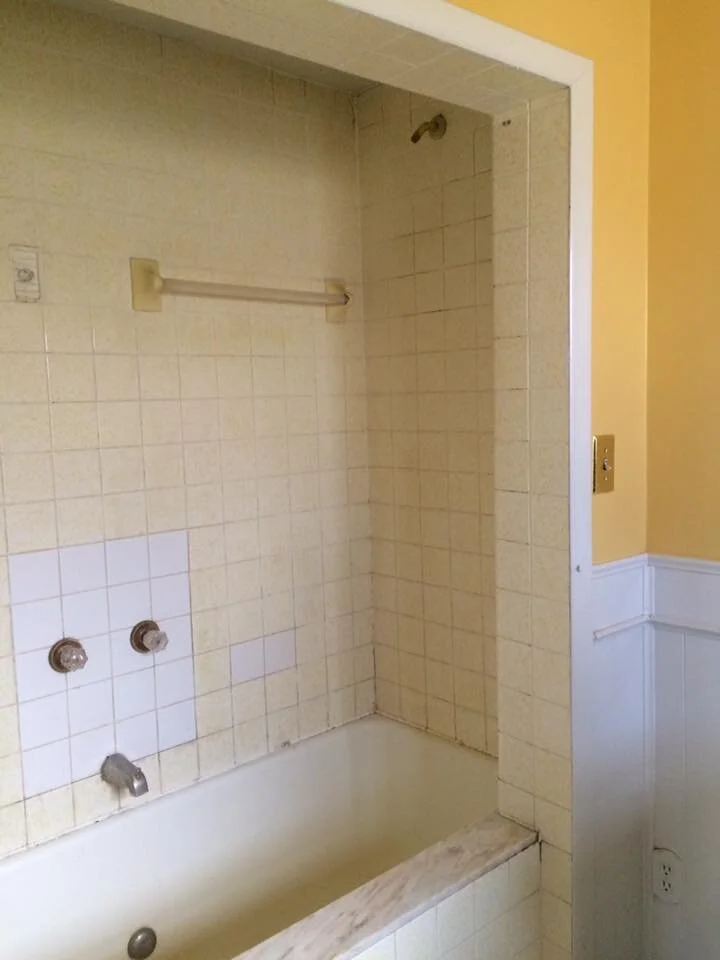
Here you can see the old tub/shower that was very outdated and not in the best shape.
The tub ledge that leads into the shower was super tall and took quite an effort to step over! By converting this space into a walk-in shower we were able to take advantage of the space better, push the walls back a bit more, and remove that awkward feature.
The flooring also wasn't in great shape and many of the tiles were loose or cracked.

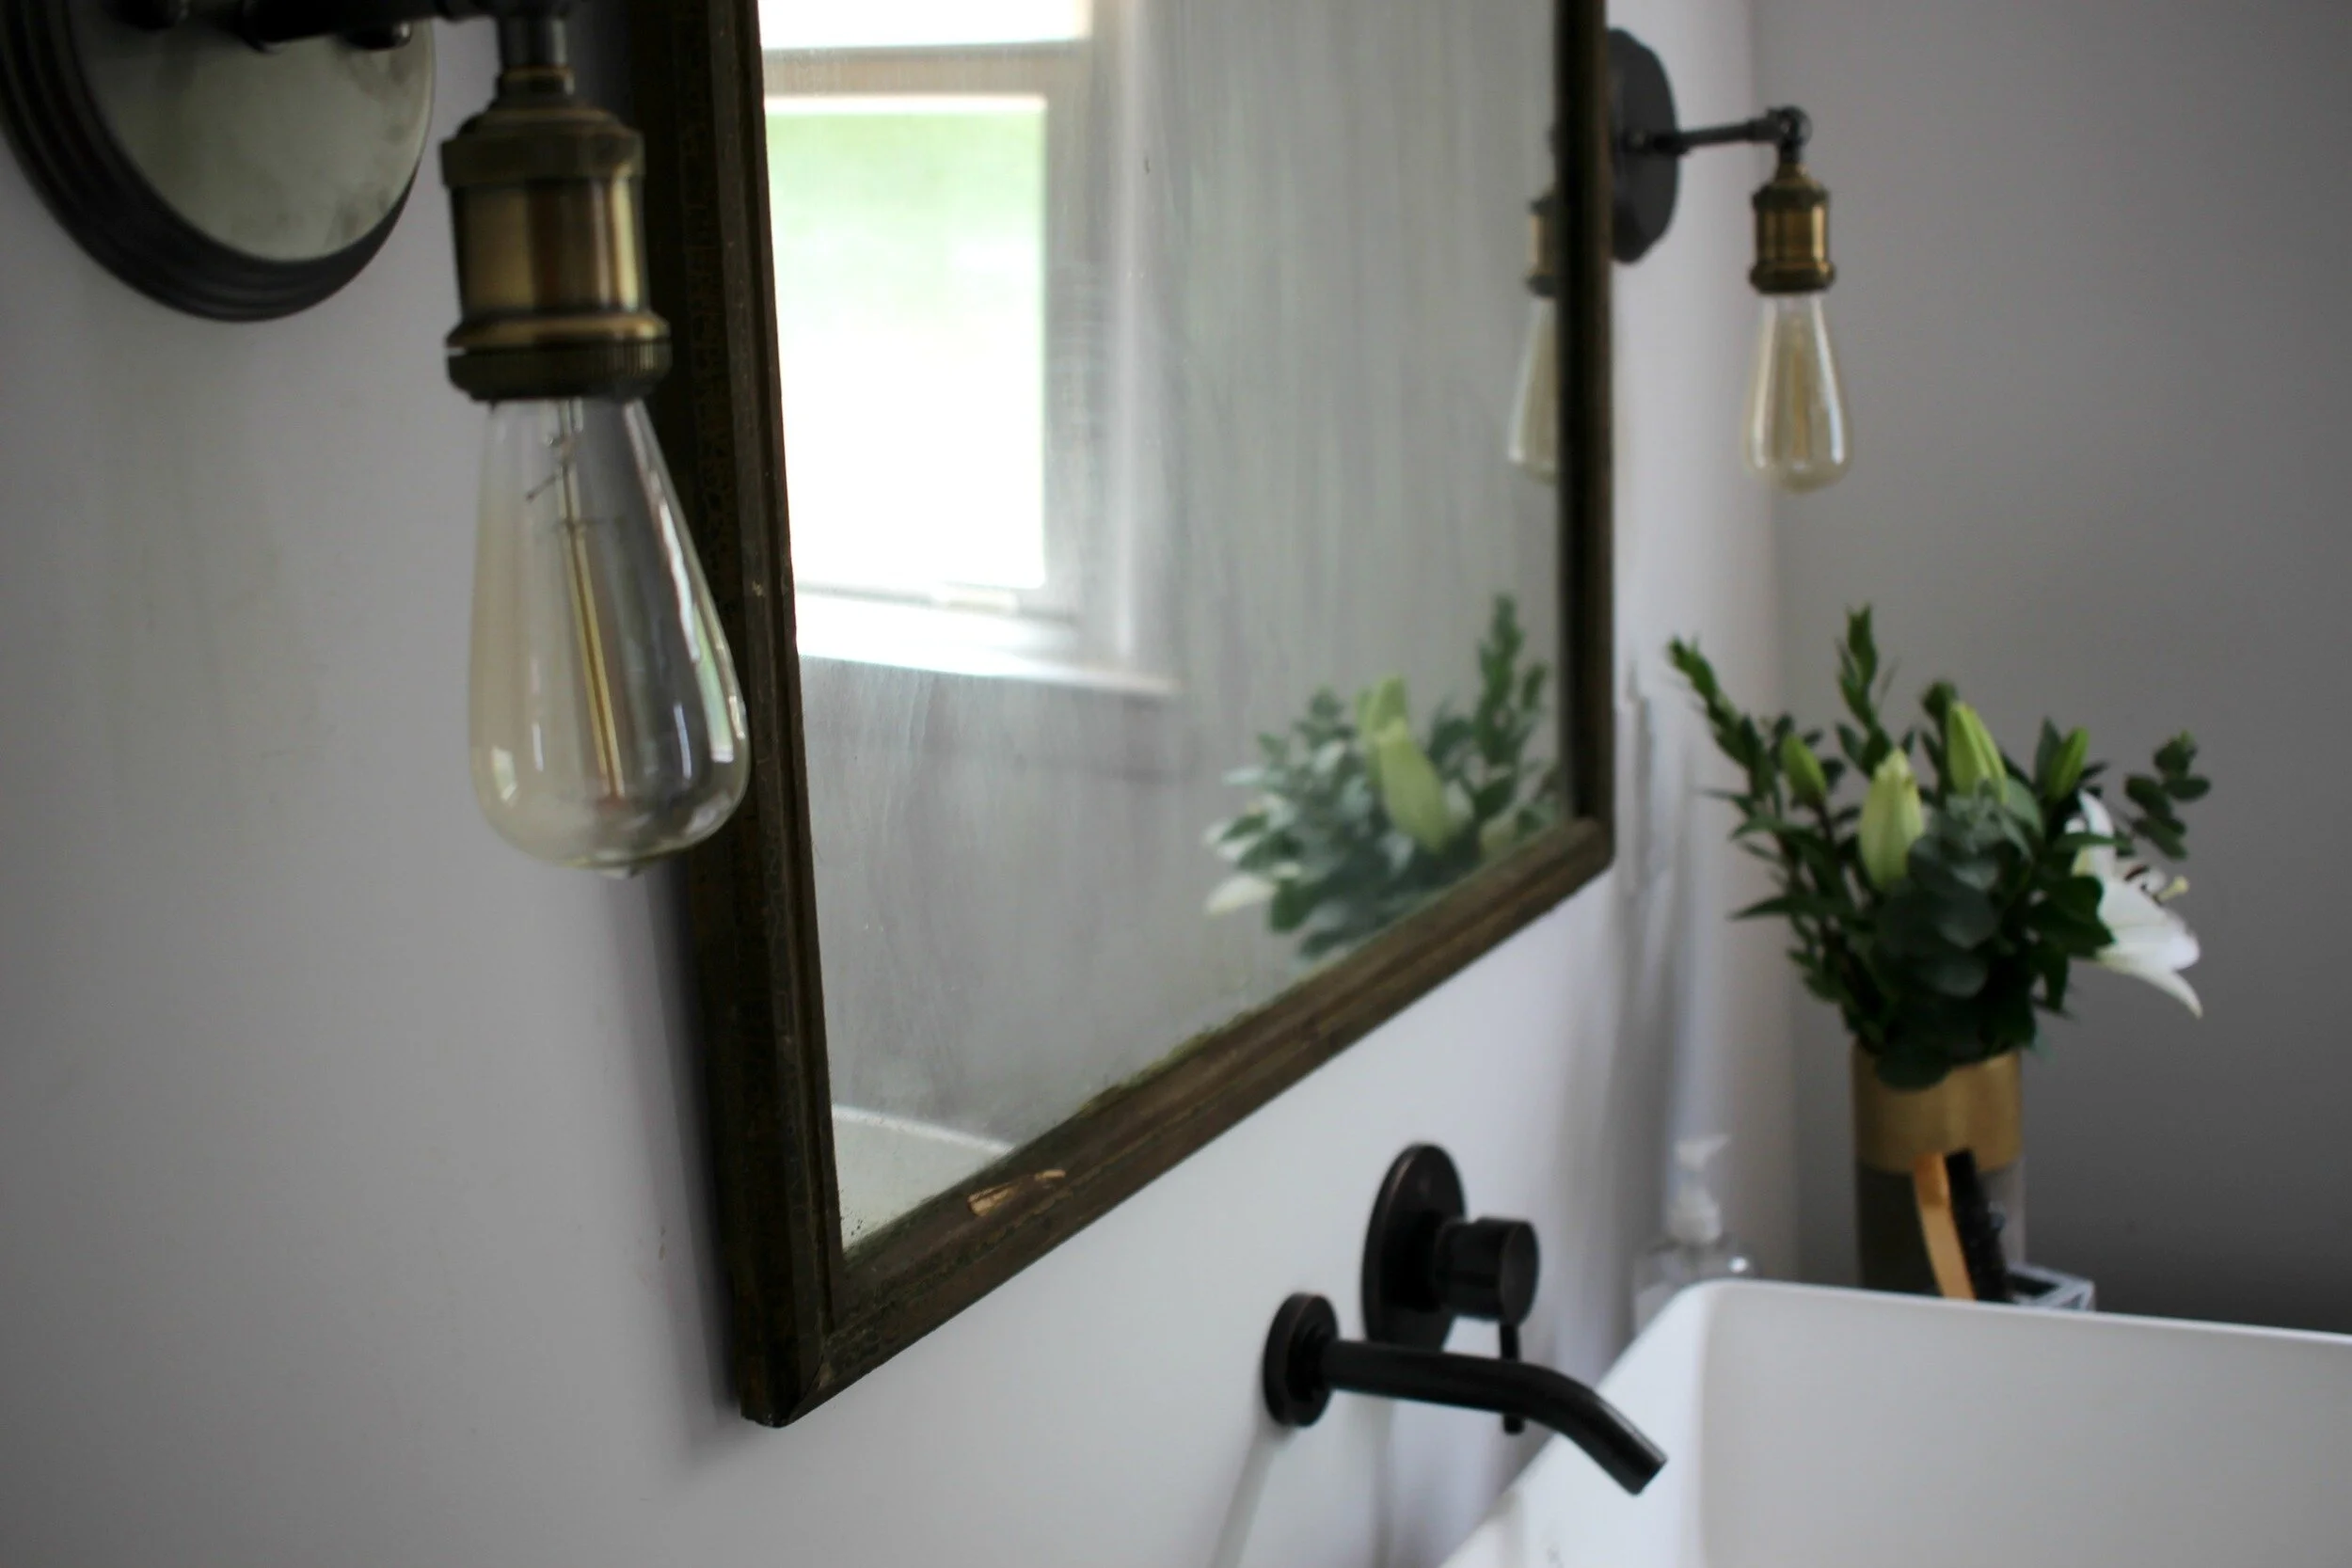
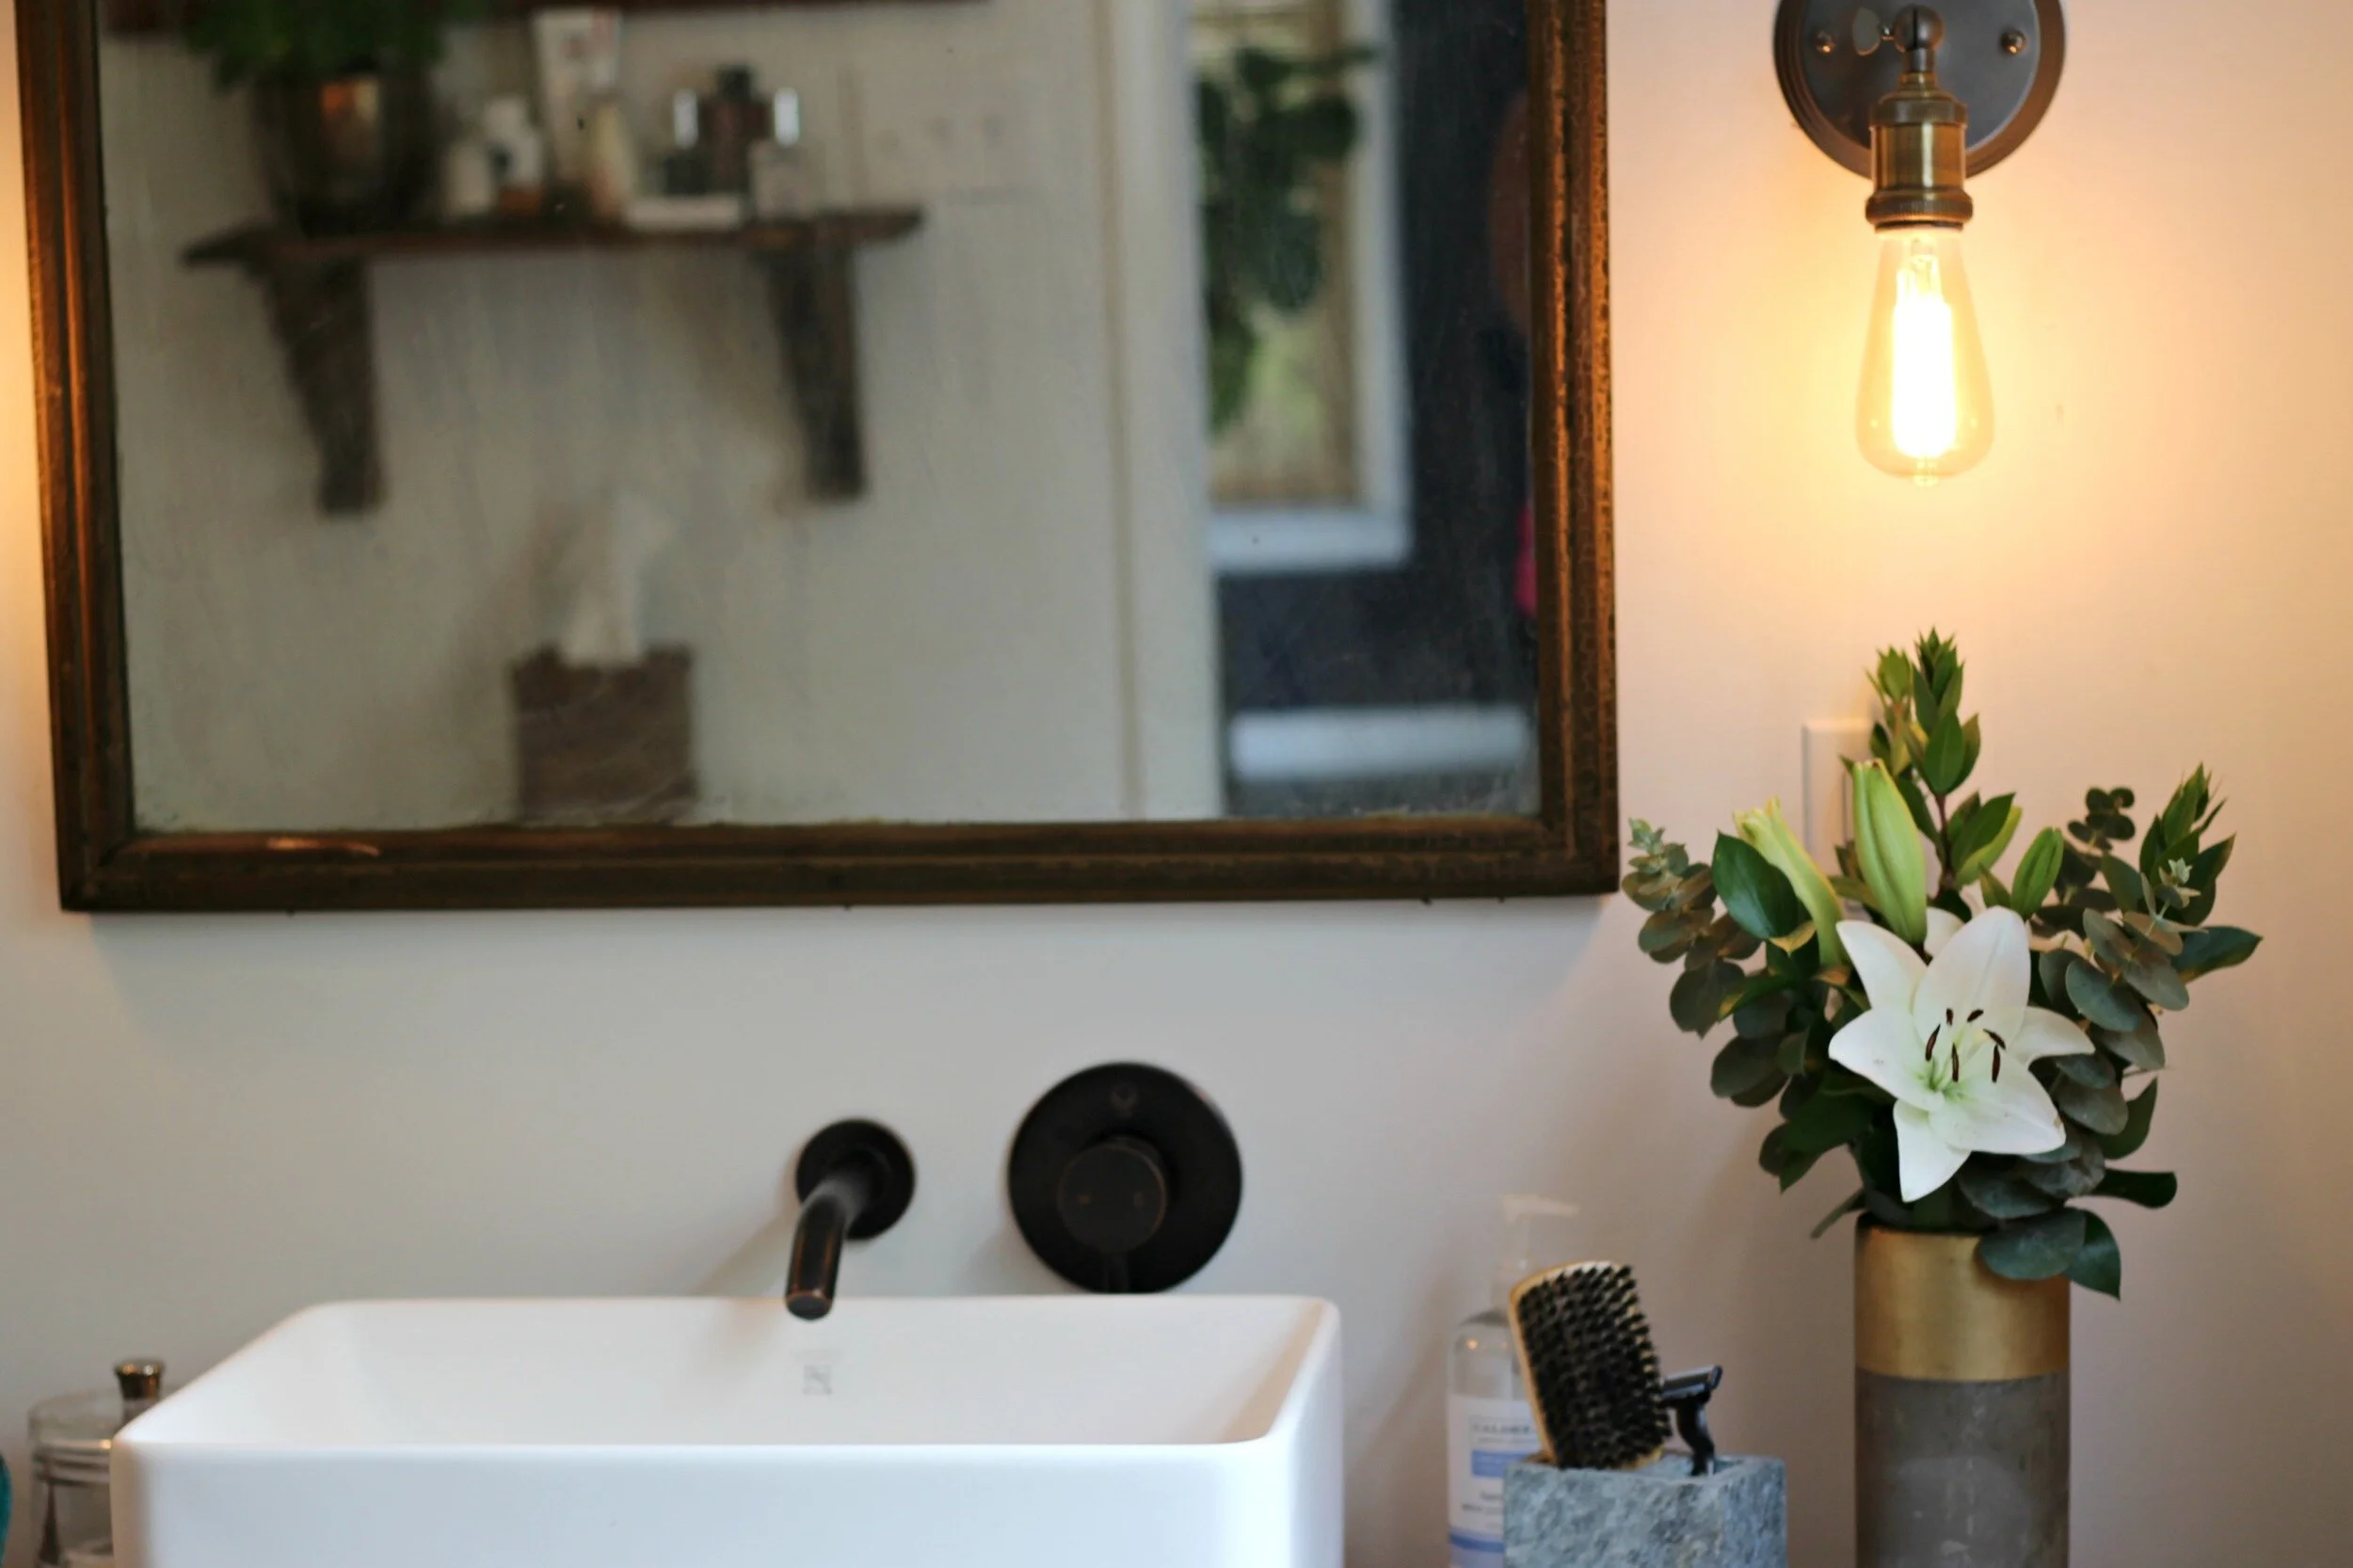
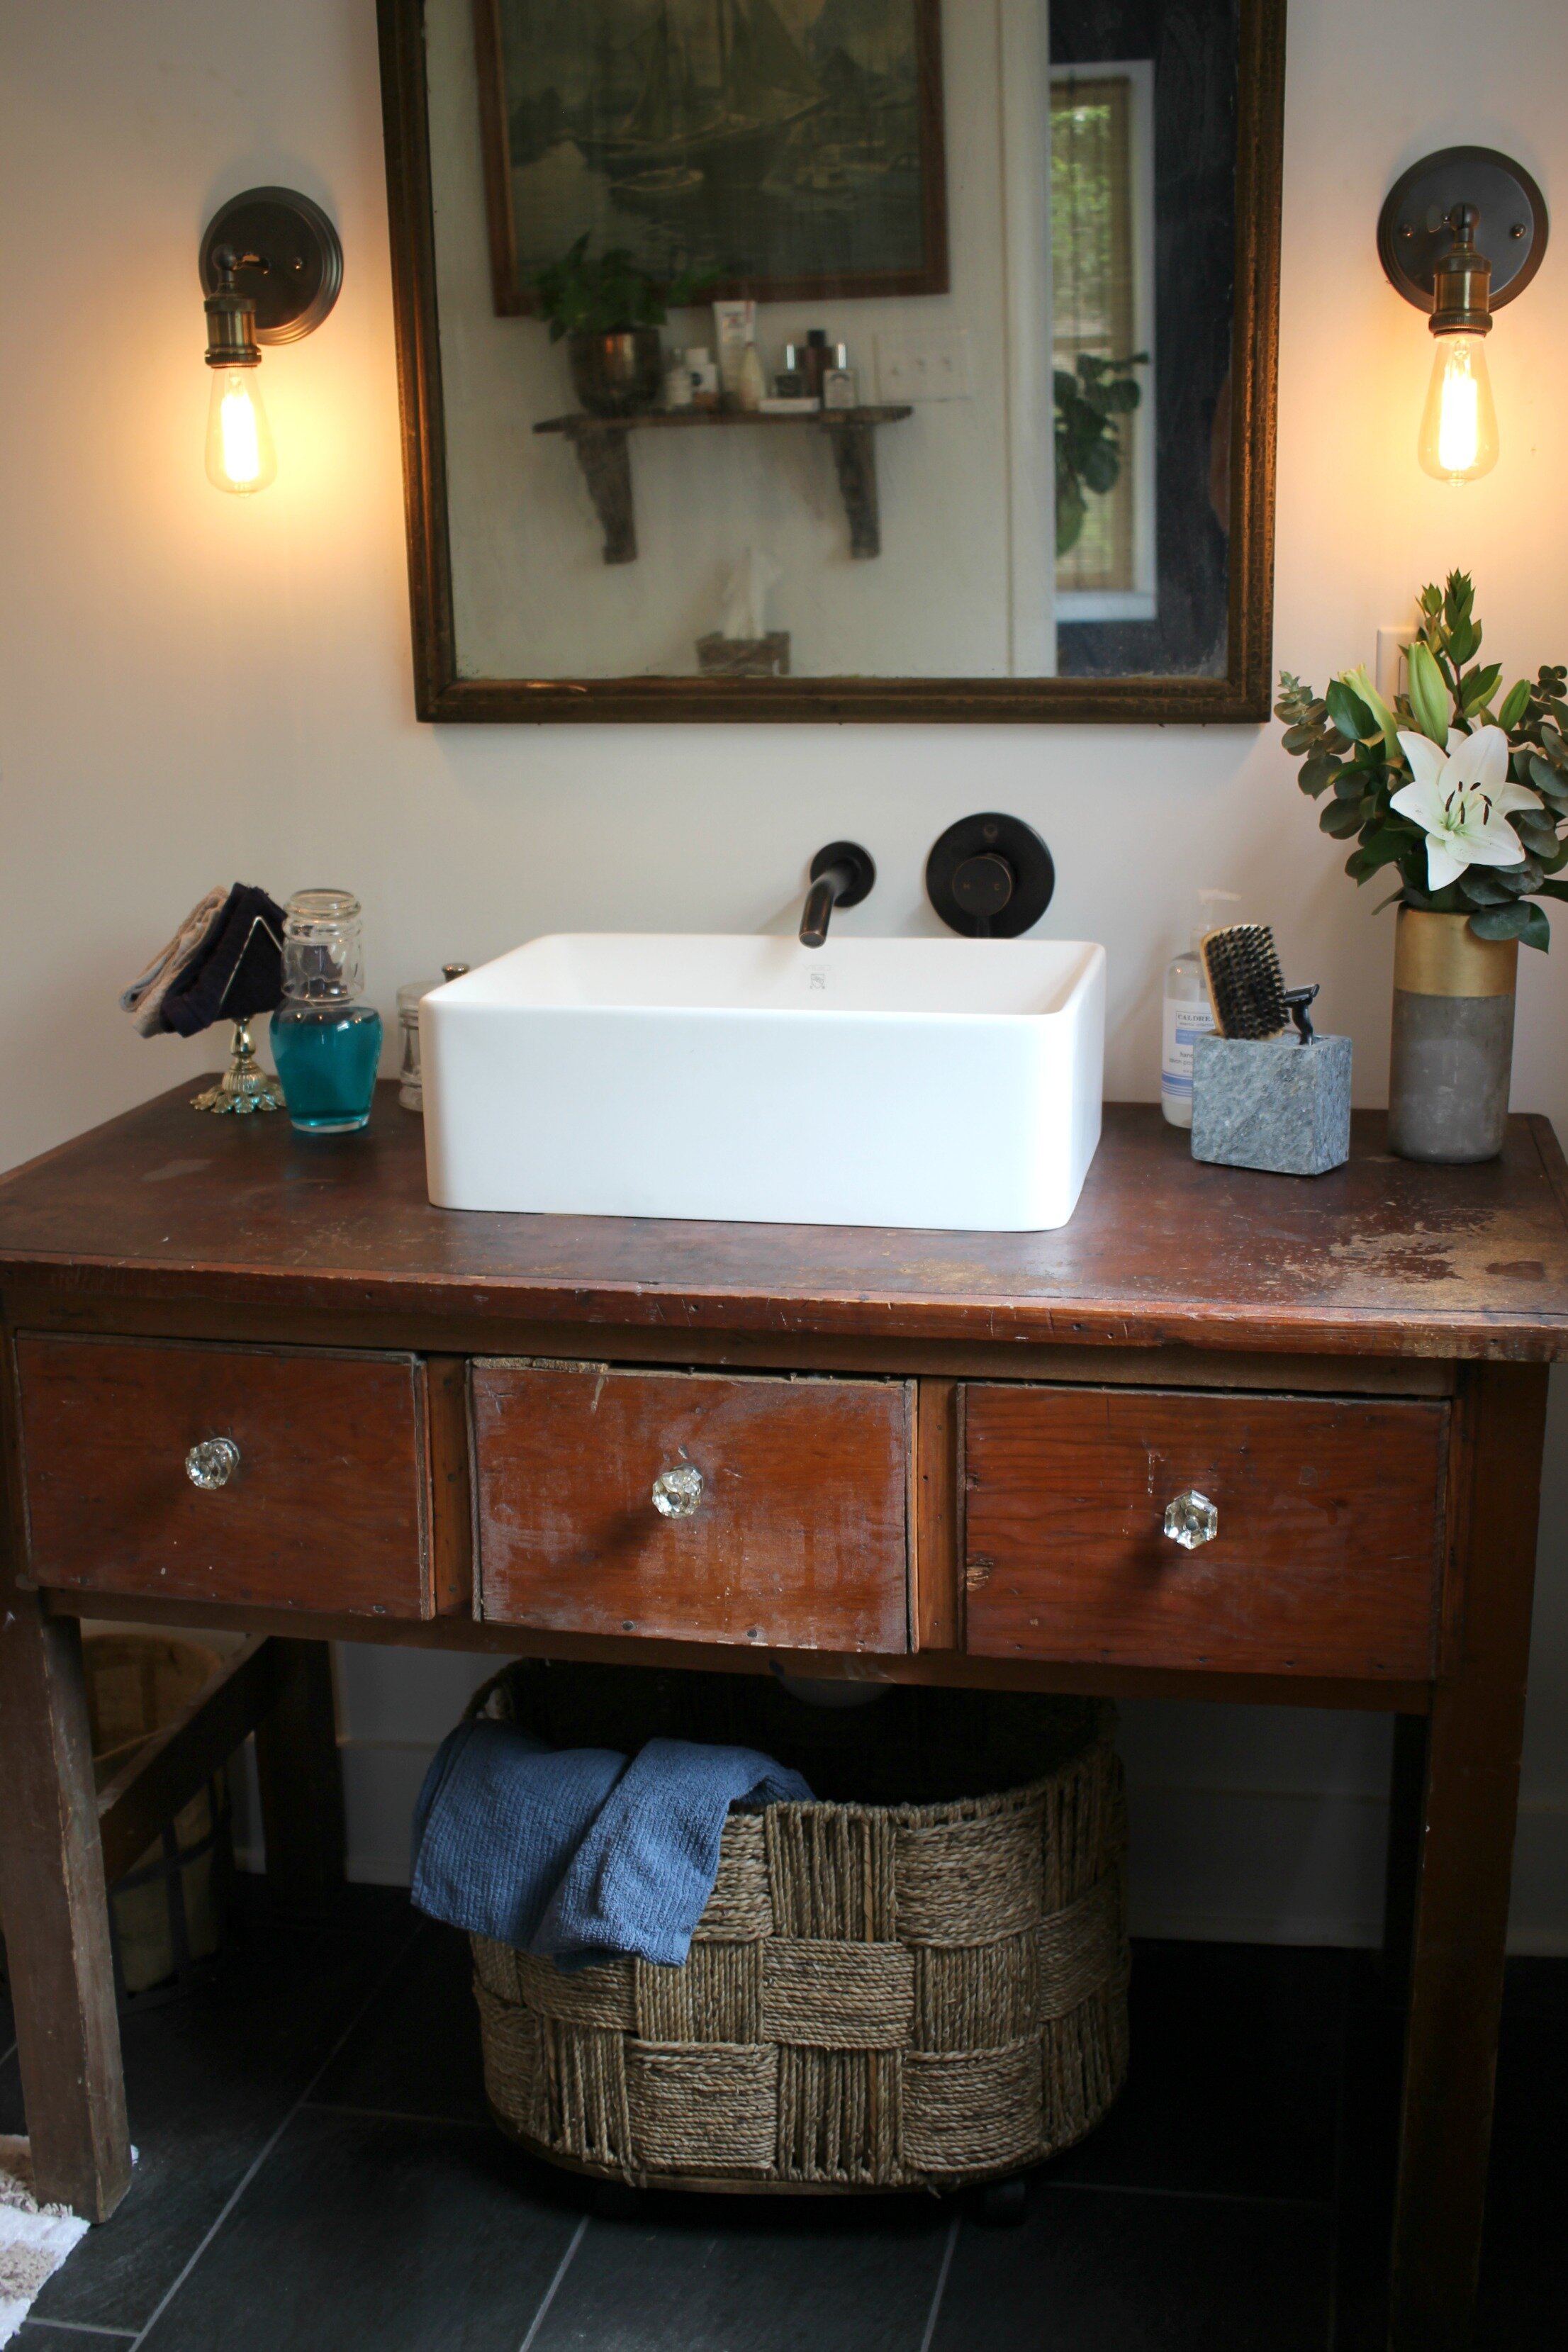
The vanity was a good size for the space and I didn't necessarily mind the style but I really wanted something with a little more character. I kept the sconces that were placed on each side above the vanity and updated them with more industrial looking lights.

Above you can see the progress after they demo'd the entire tub and started tearing out the walls to work on the plumbing.
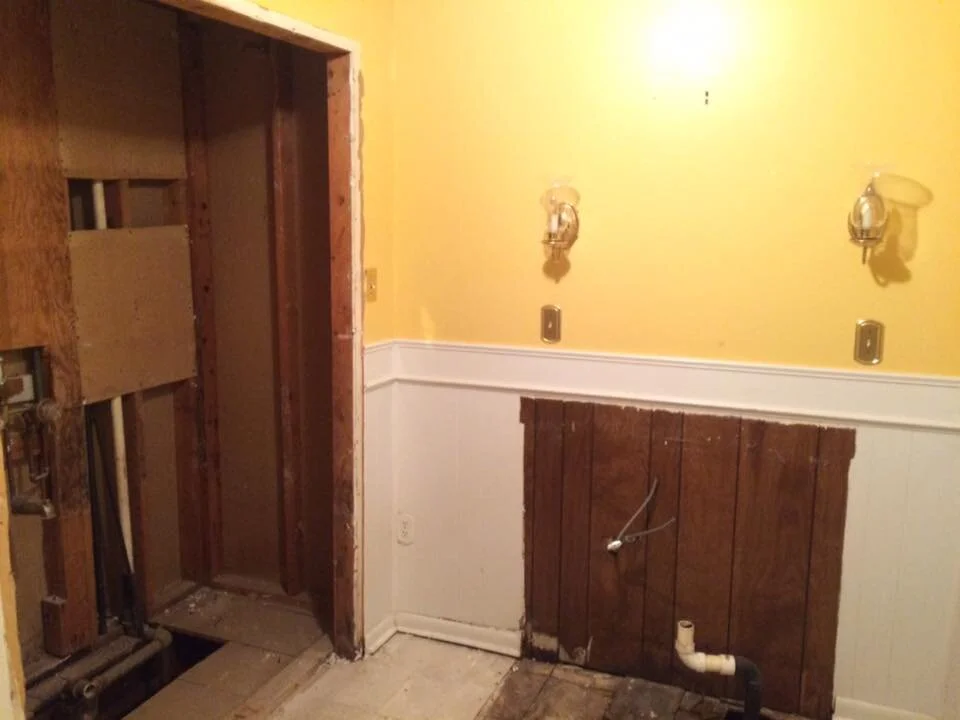
More demo progress in the master bath before any plumbing work was started. After the plumbing was redone we had to hang new drywall over all the opened up walls.
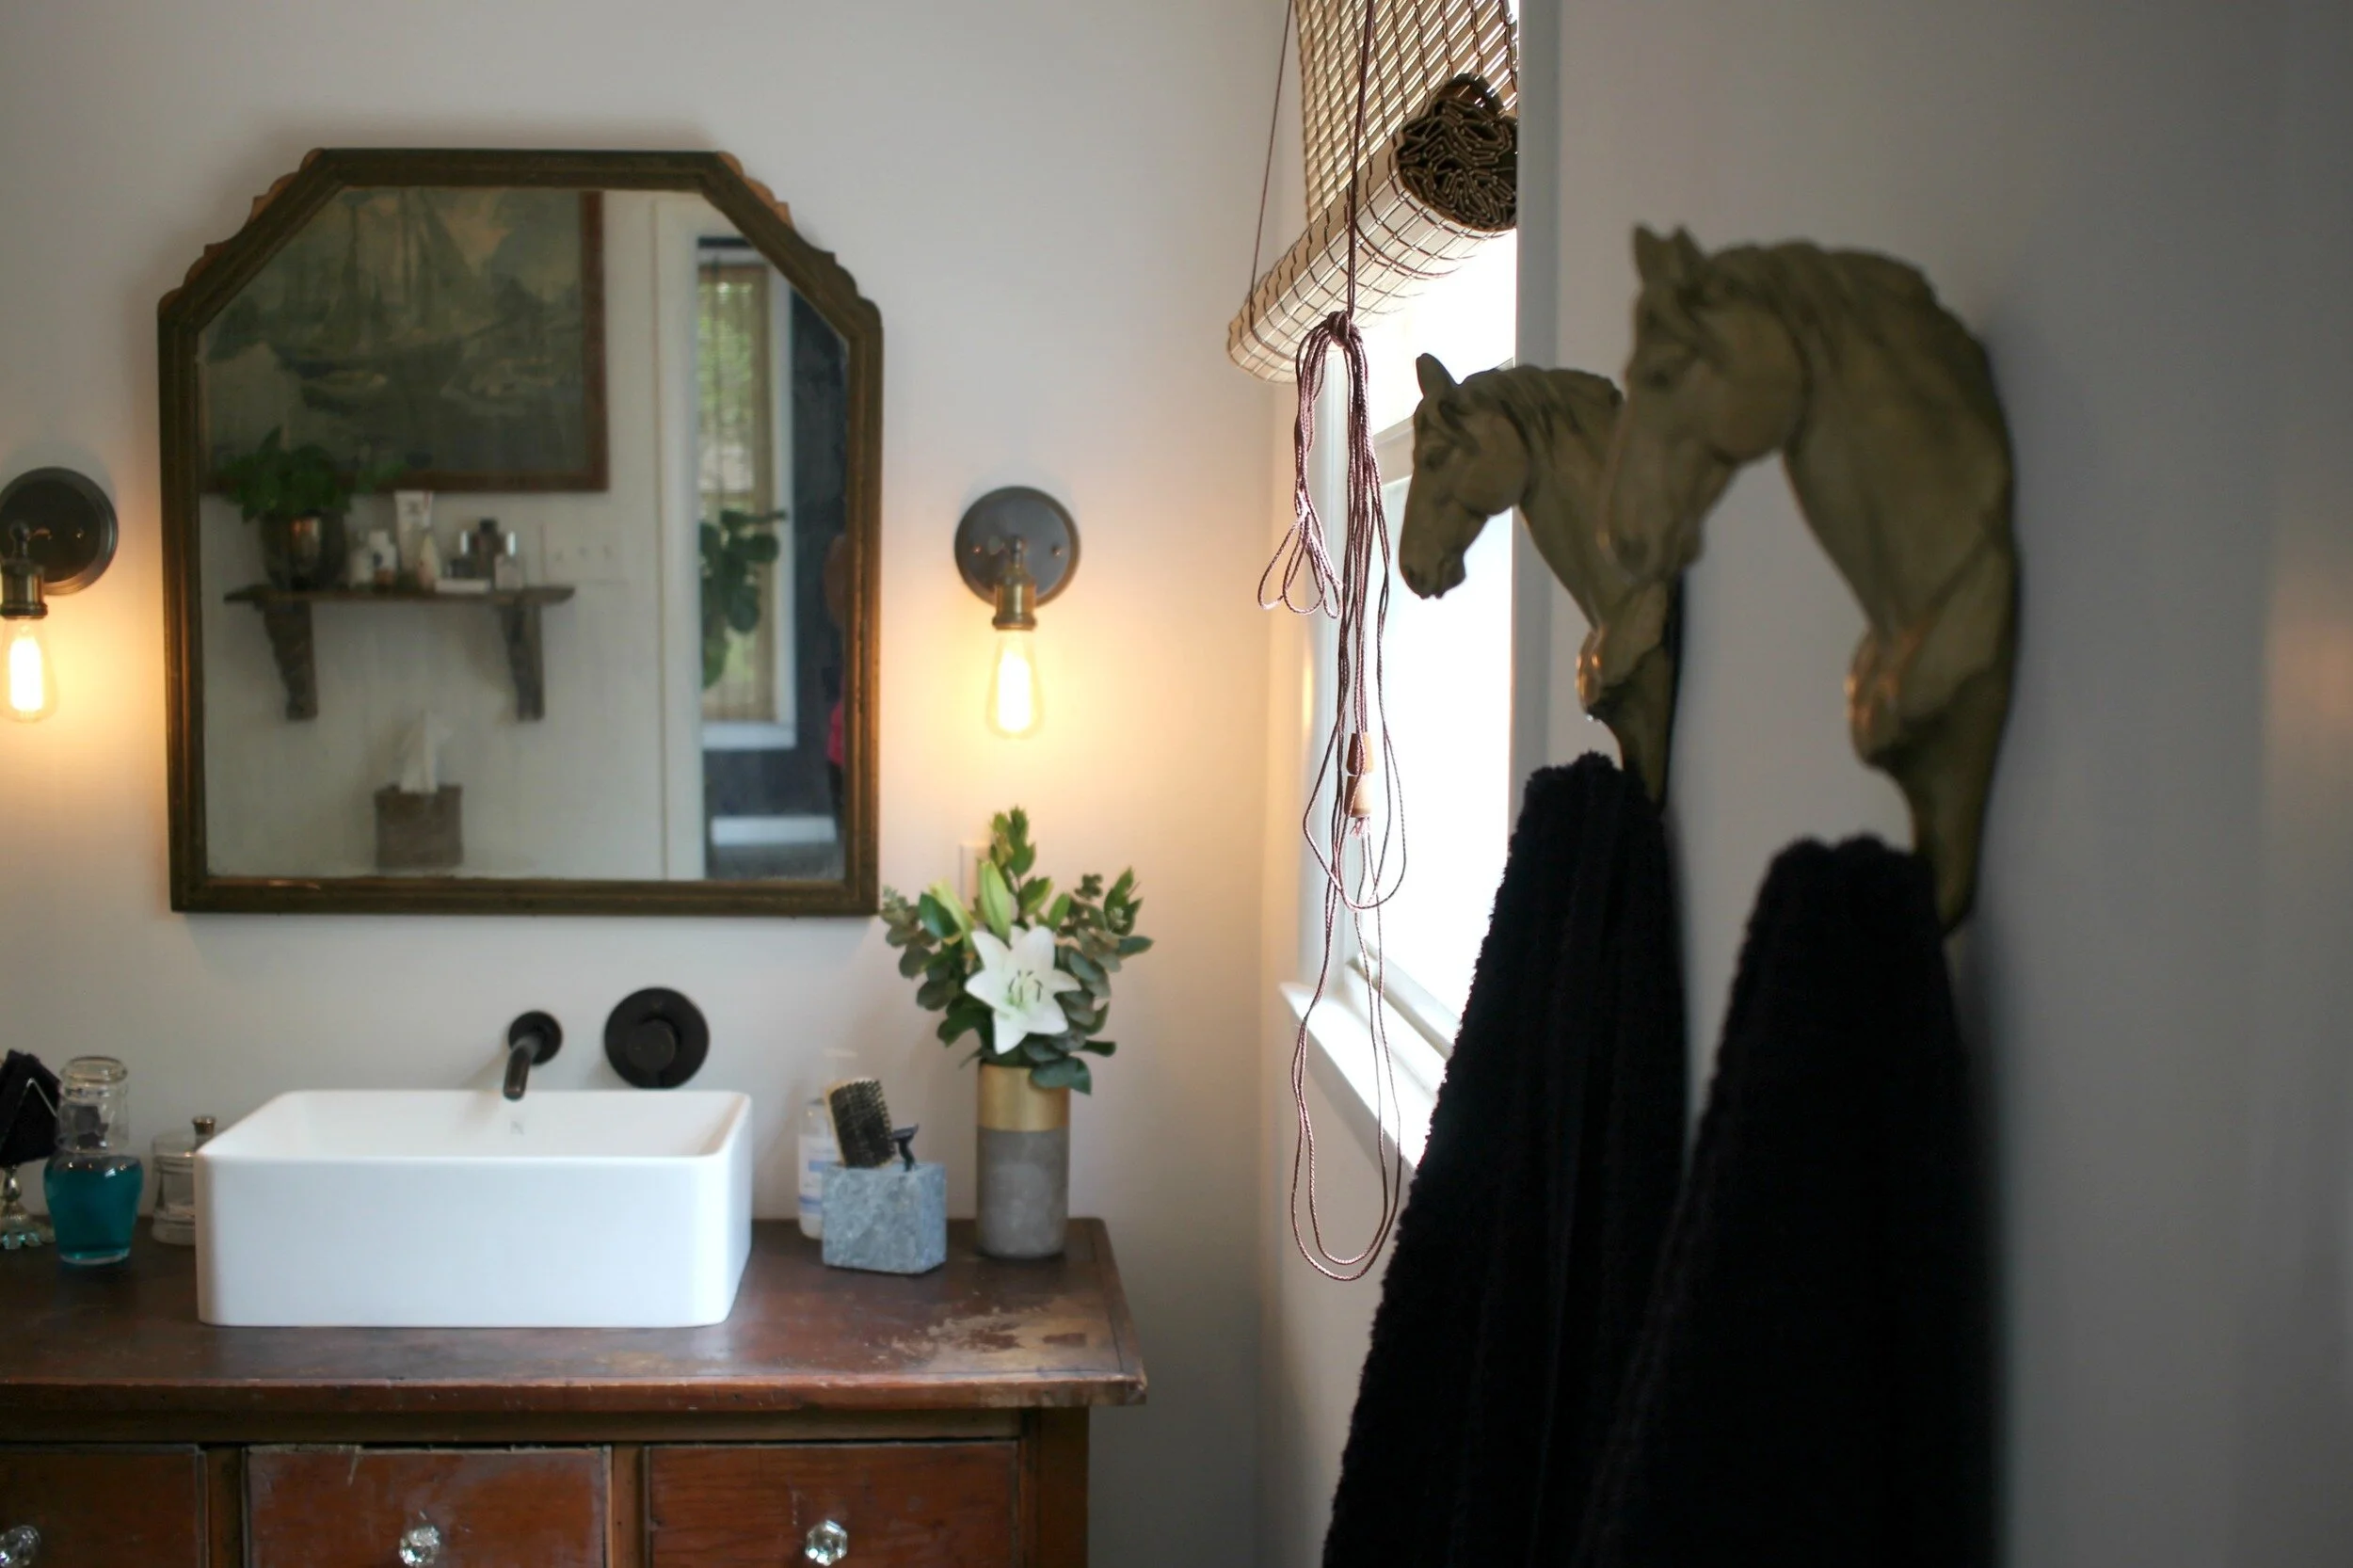
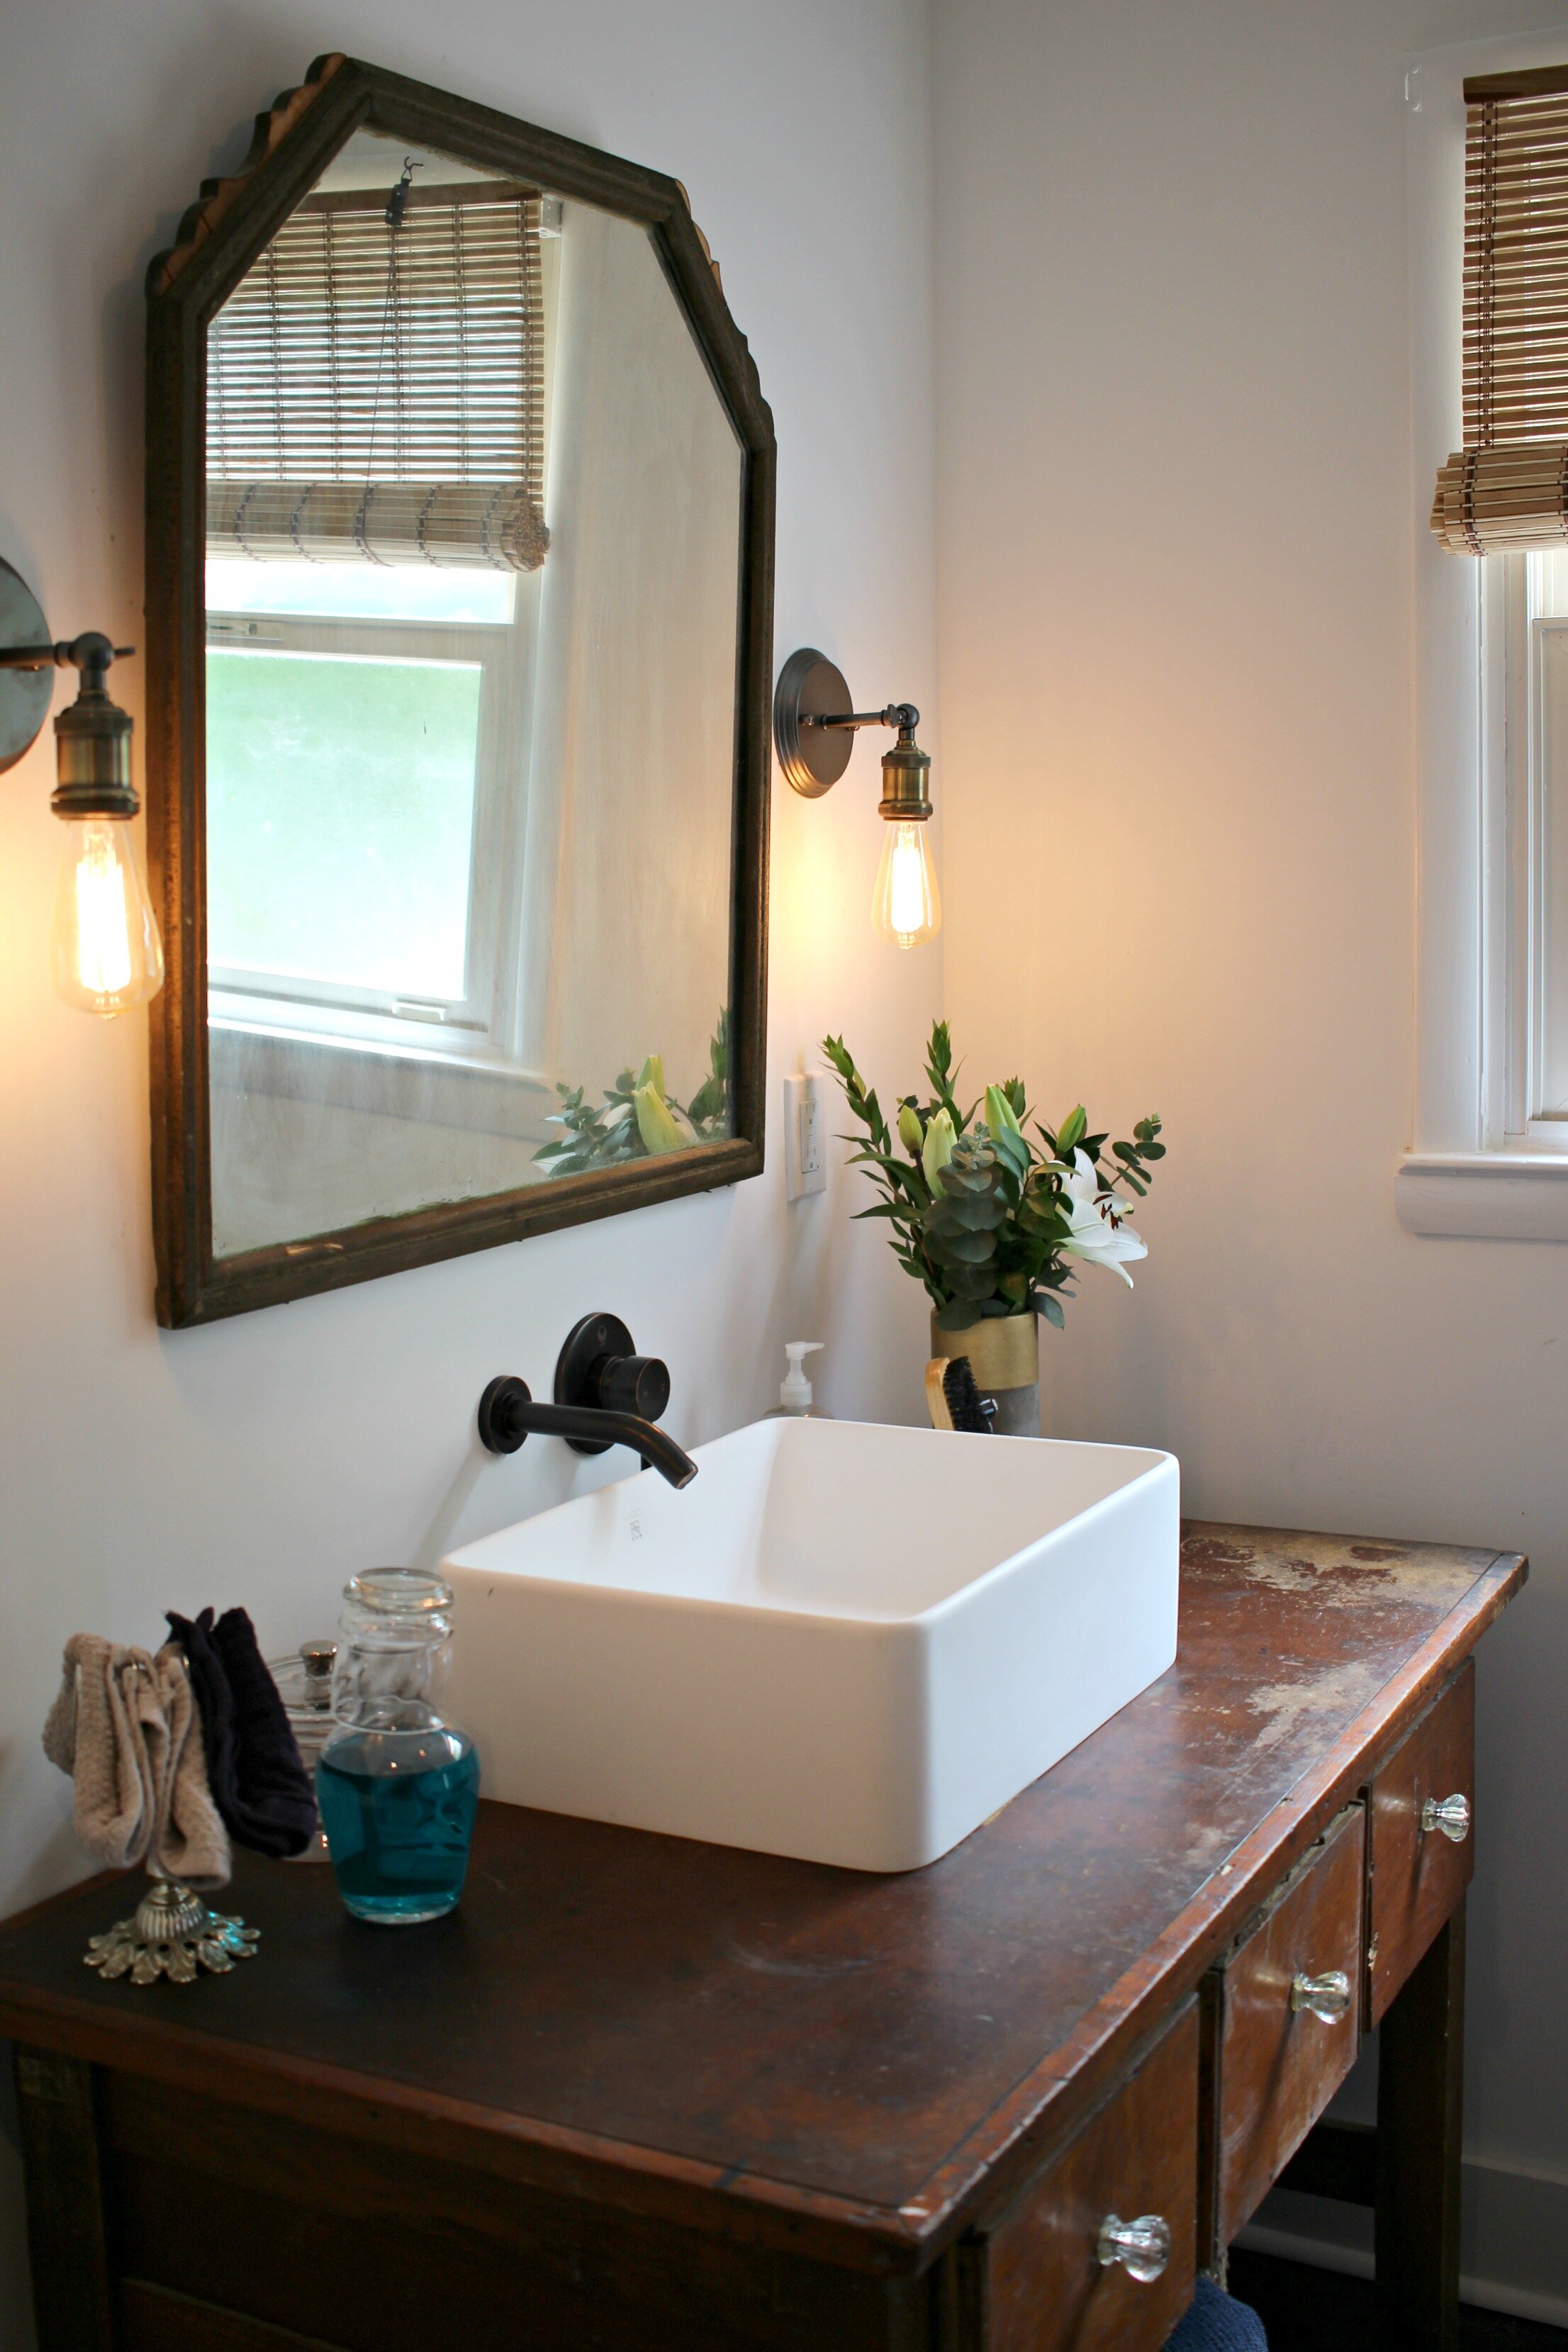
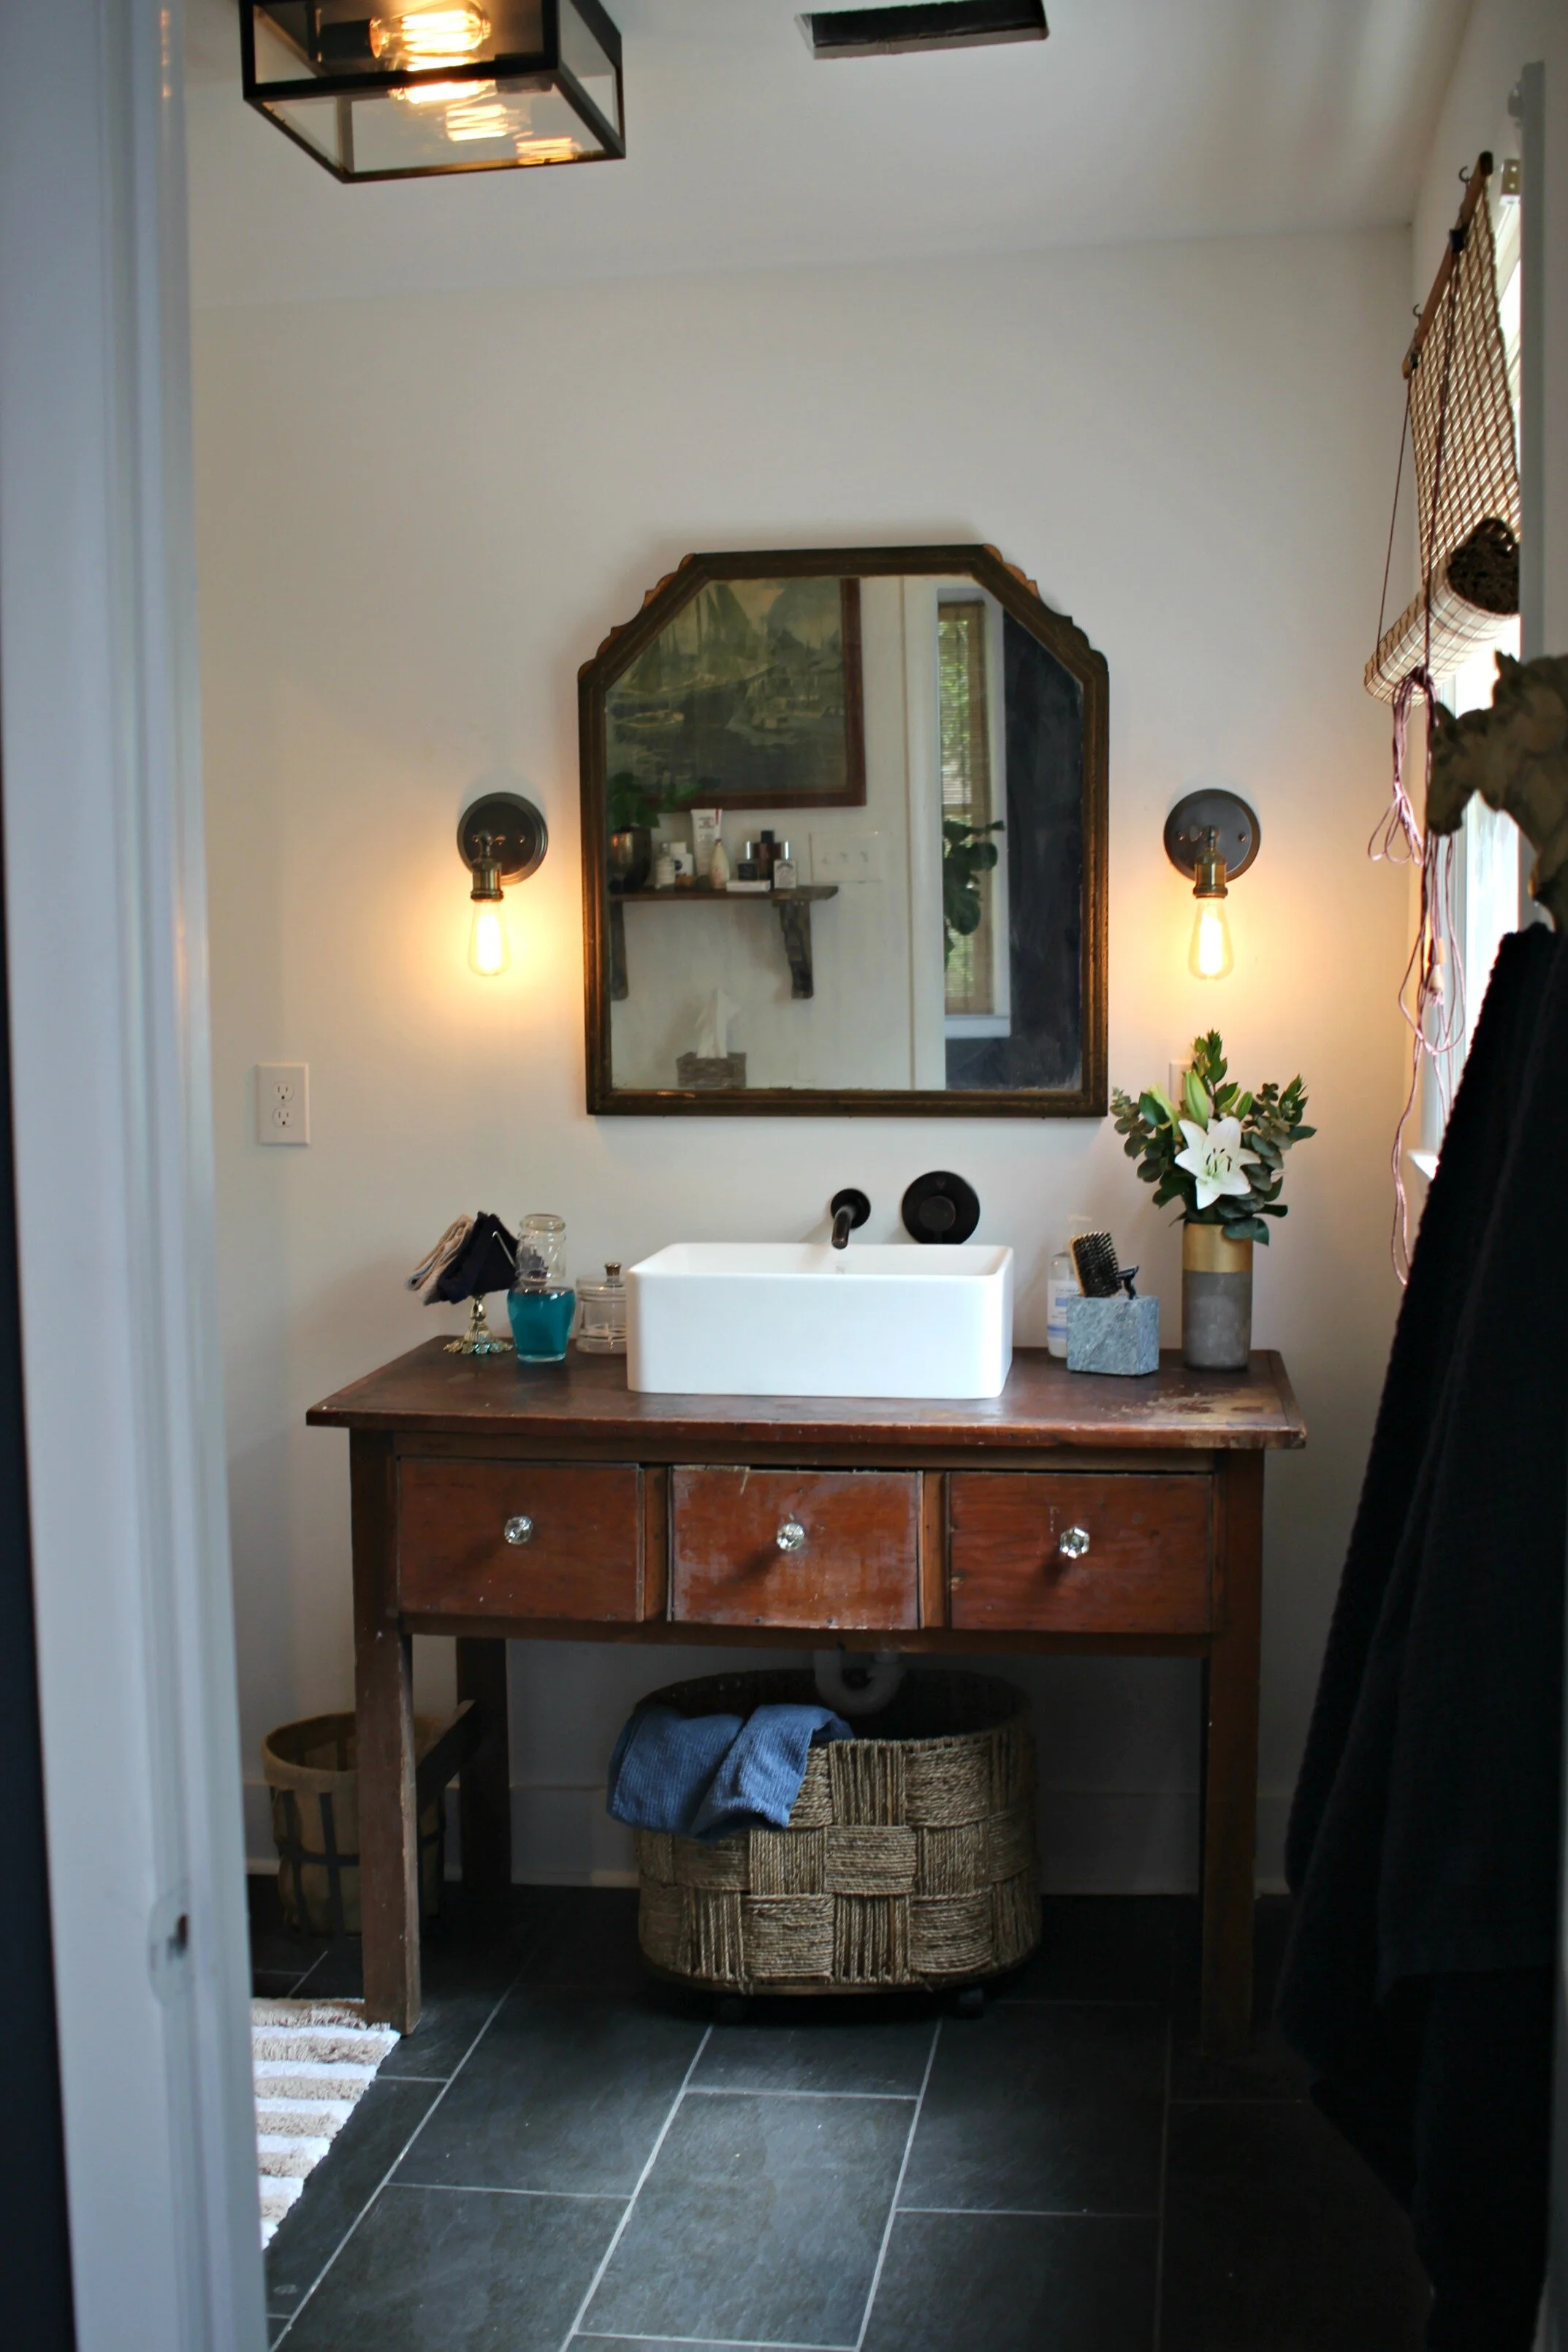
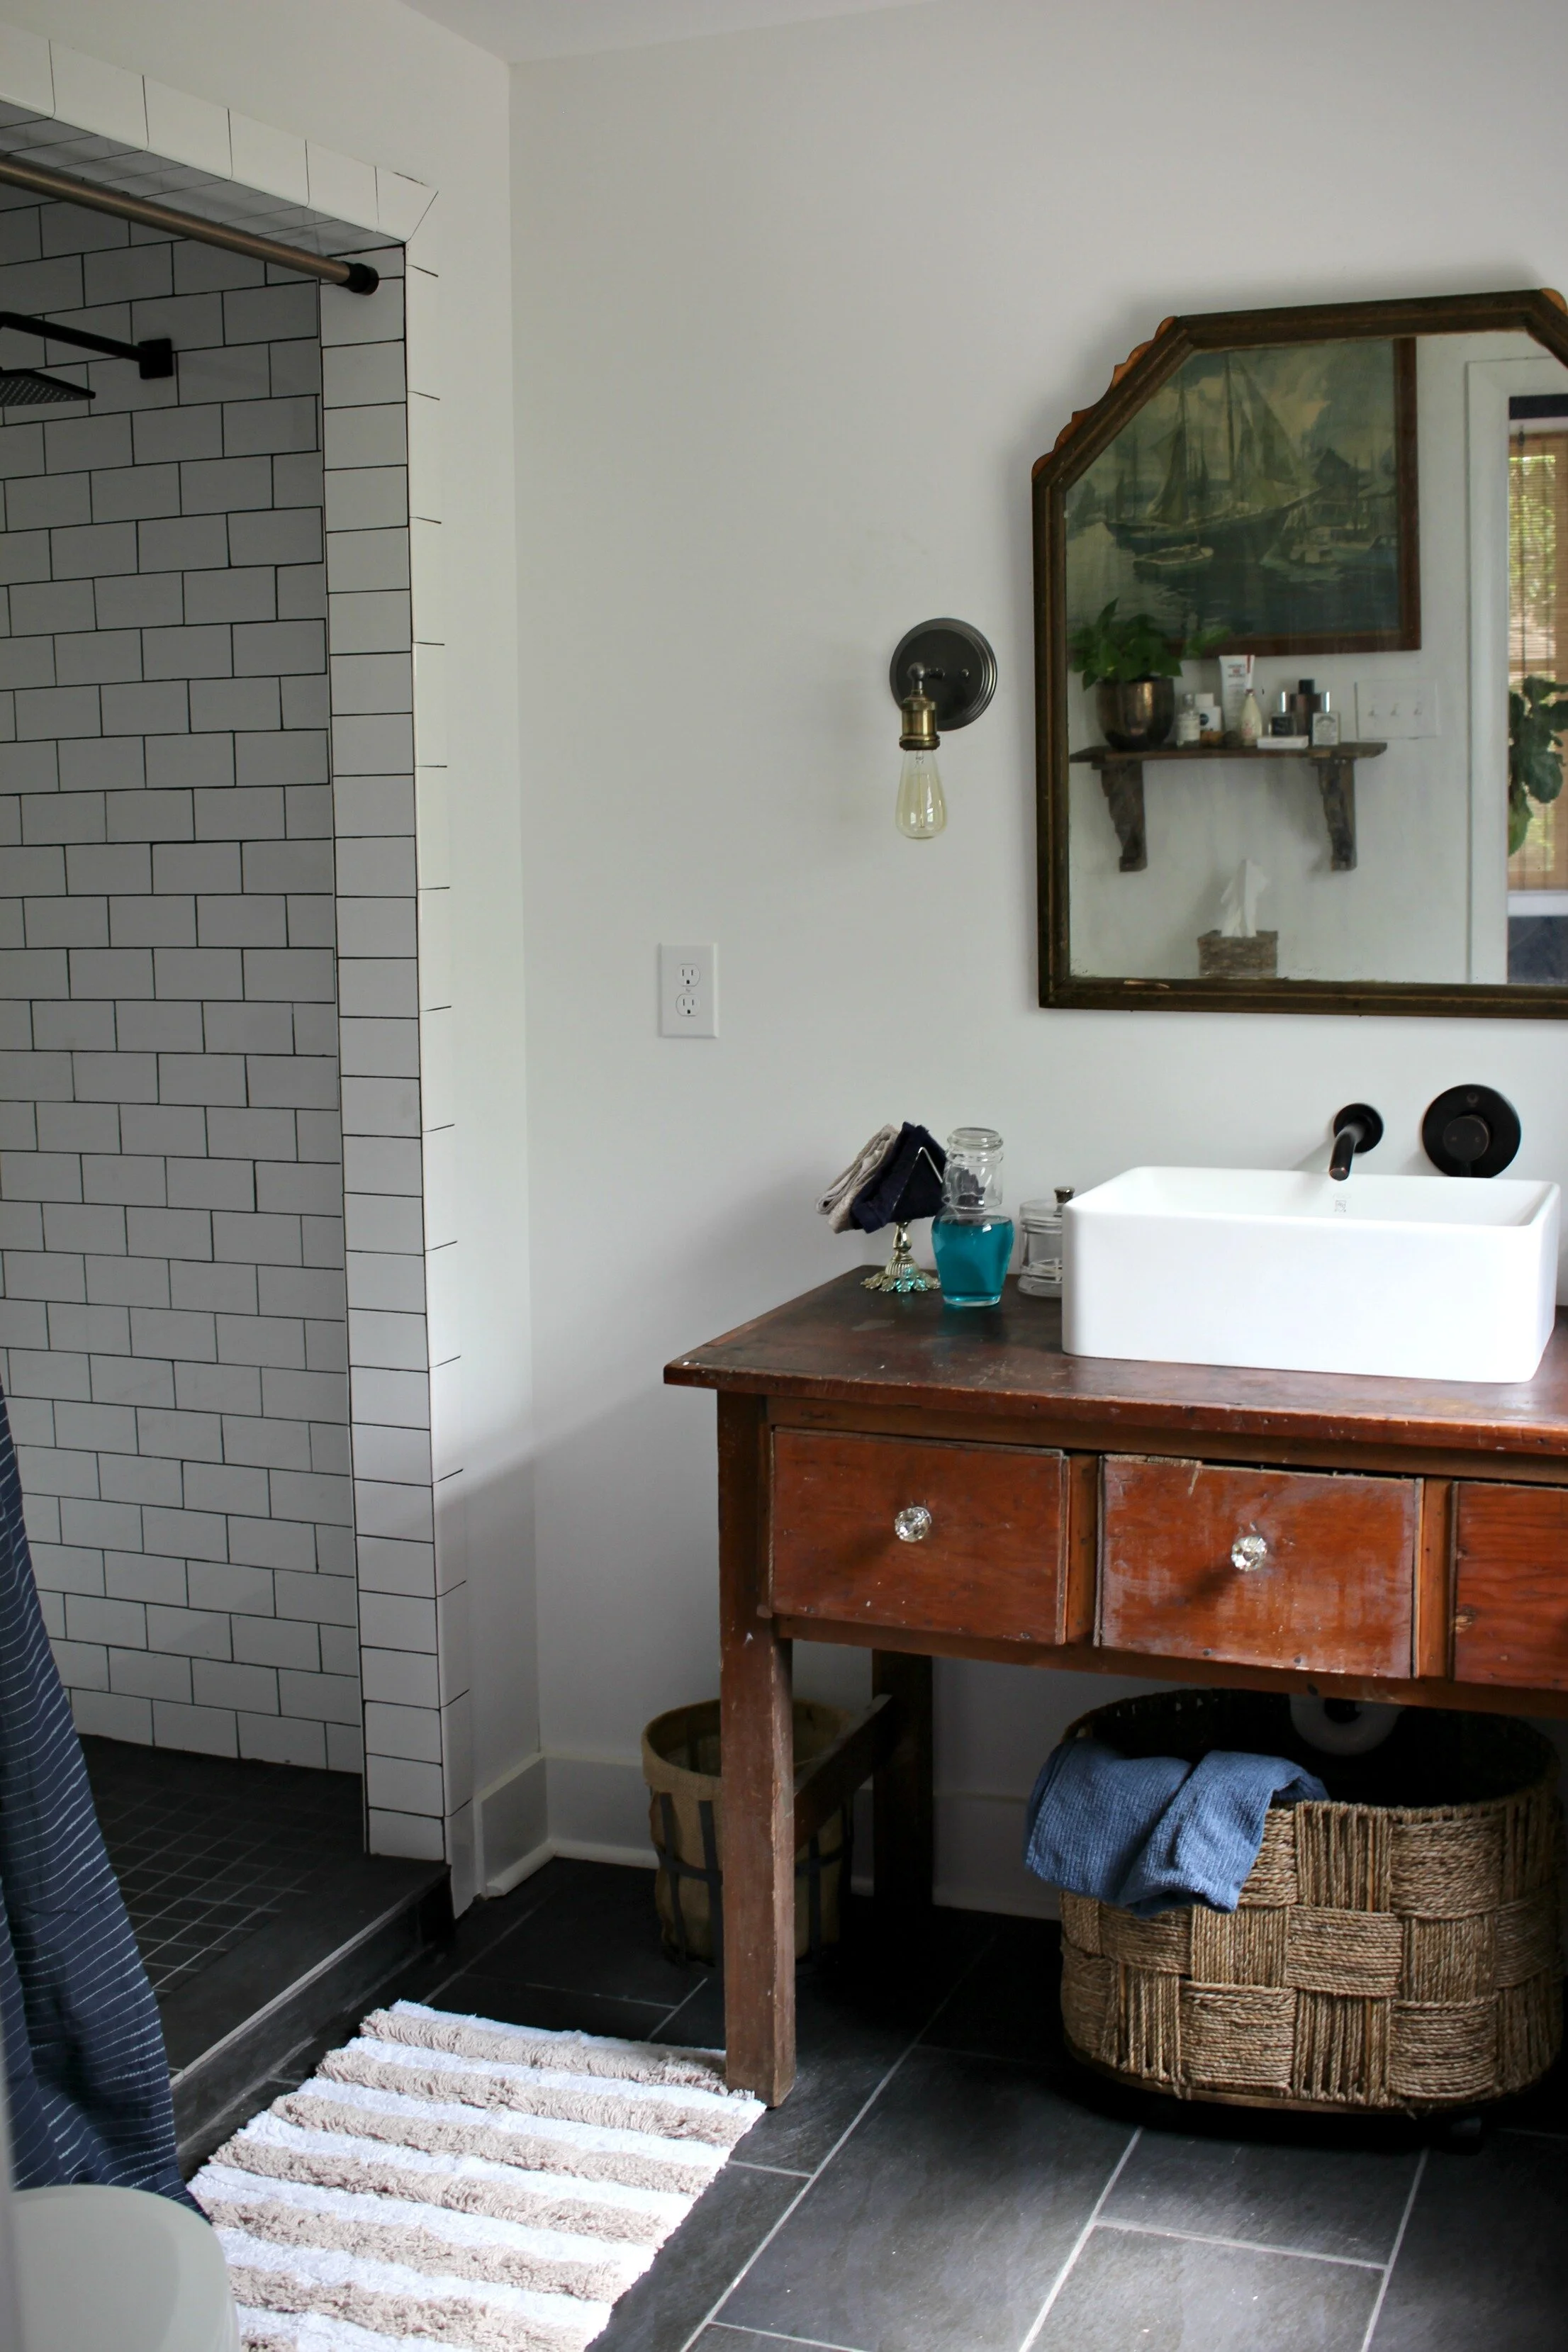
Here is the finished master bath as of today (still a few finishing touches/decorating to do). We are so happy with how it turned out and love how all the finishes came together!
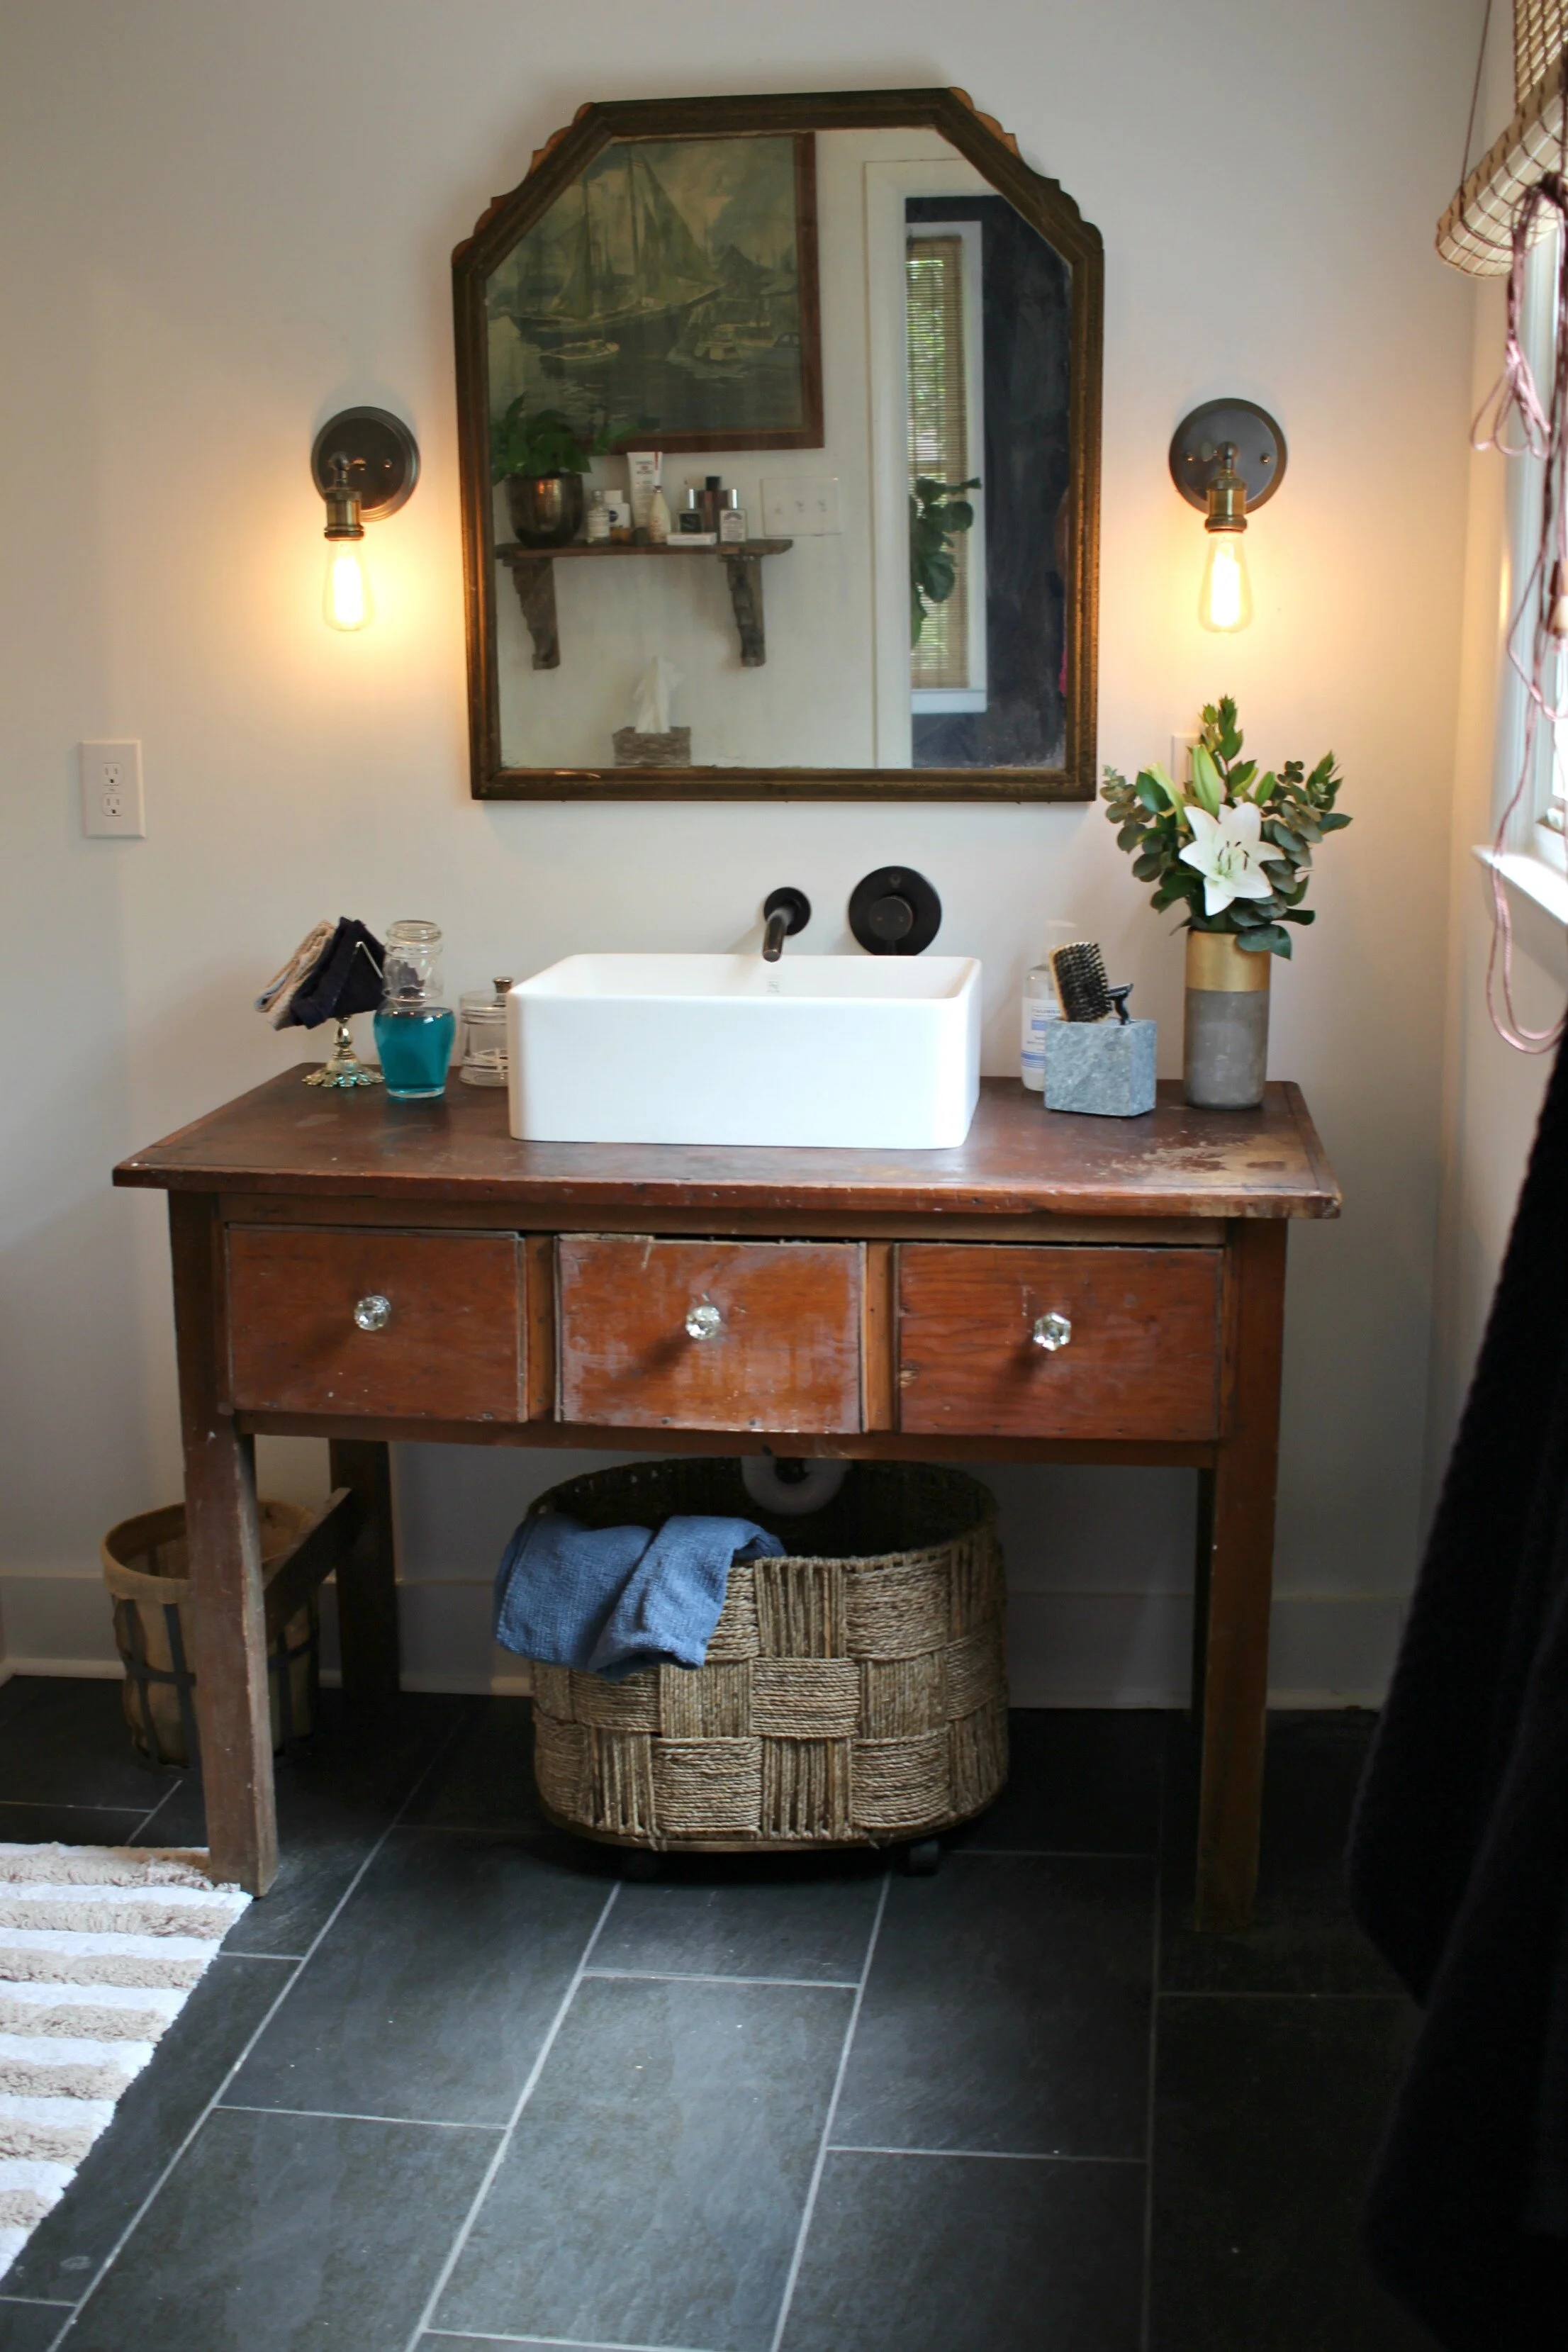
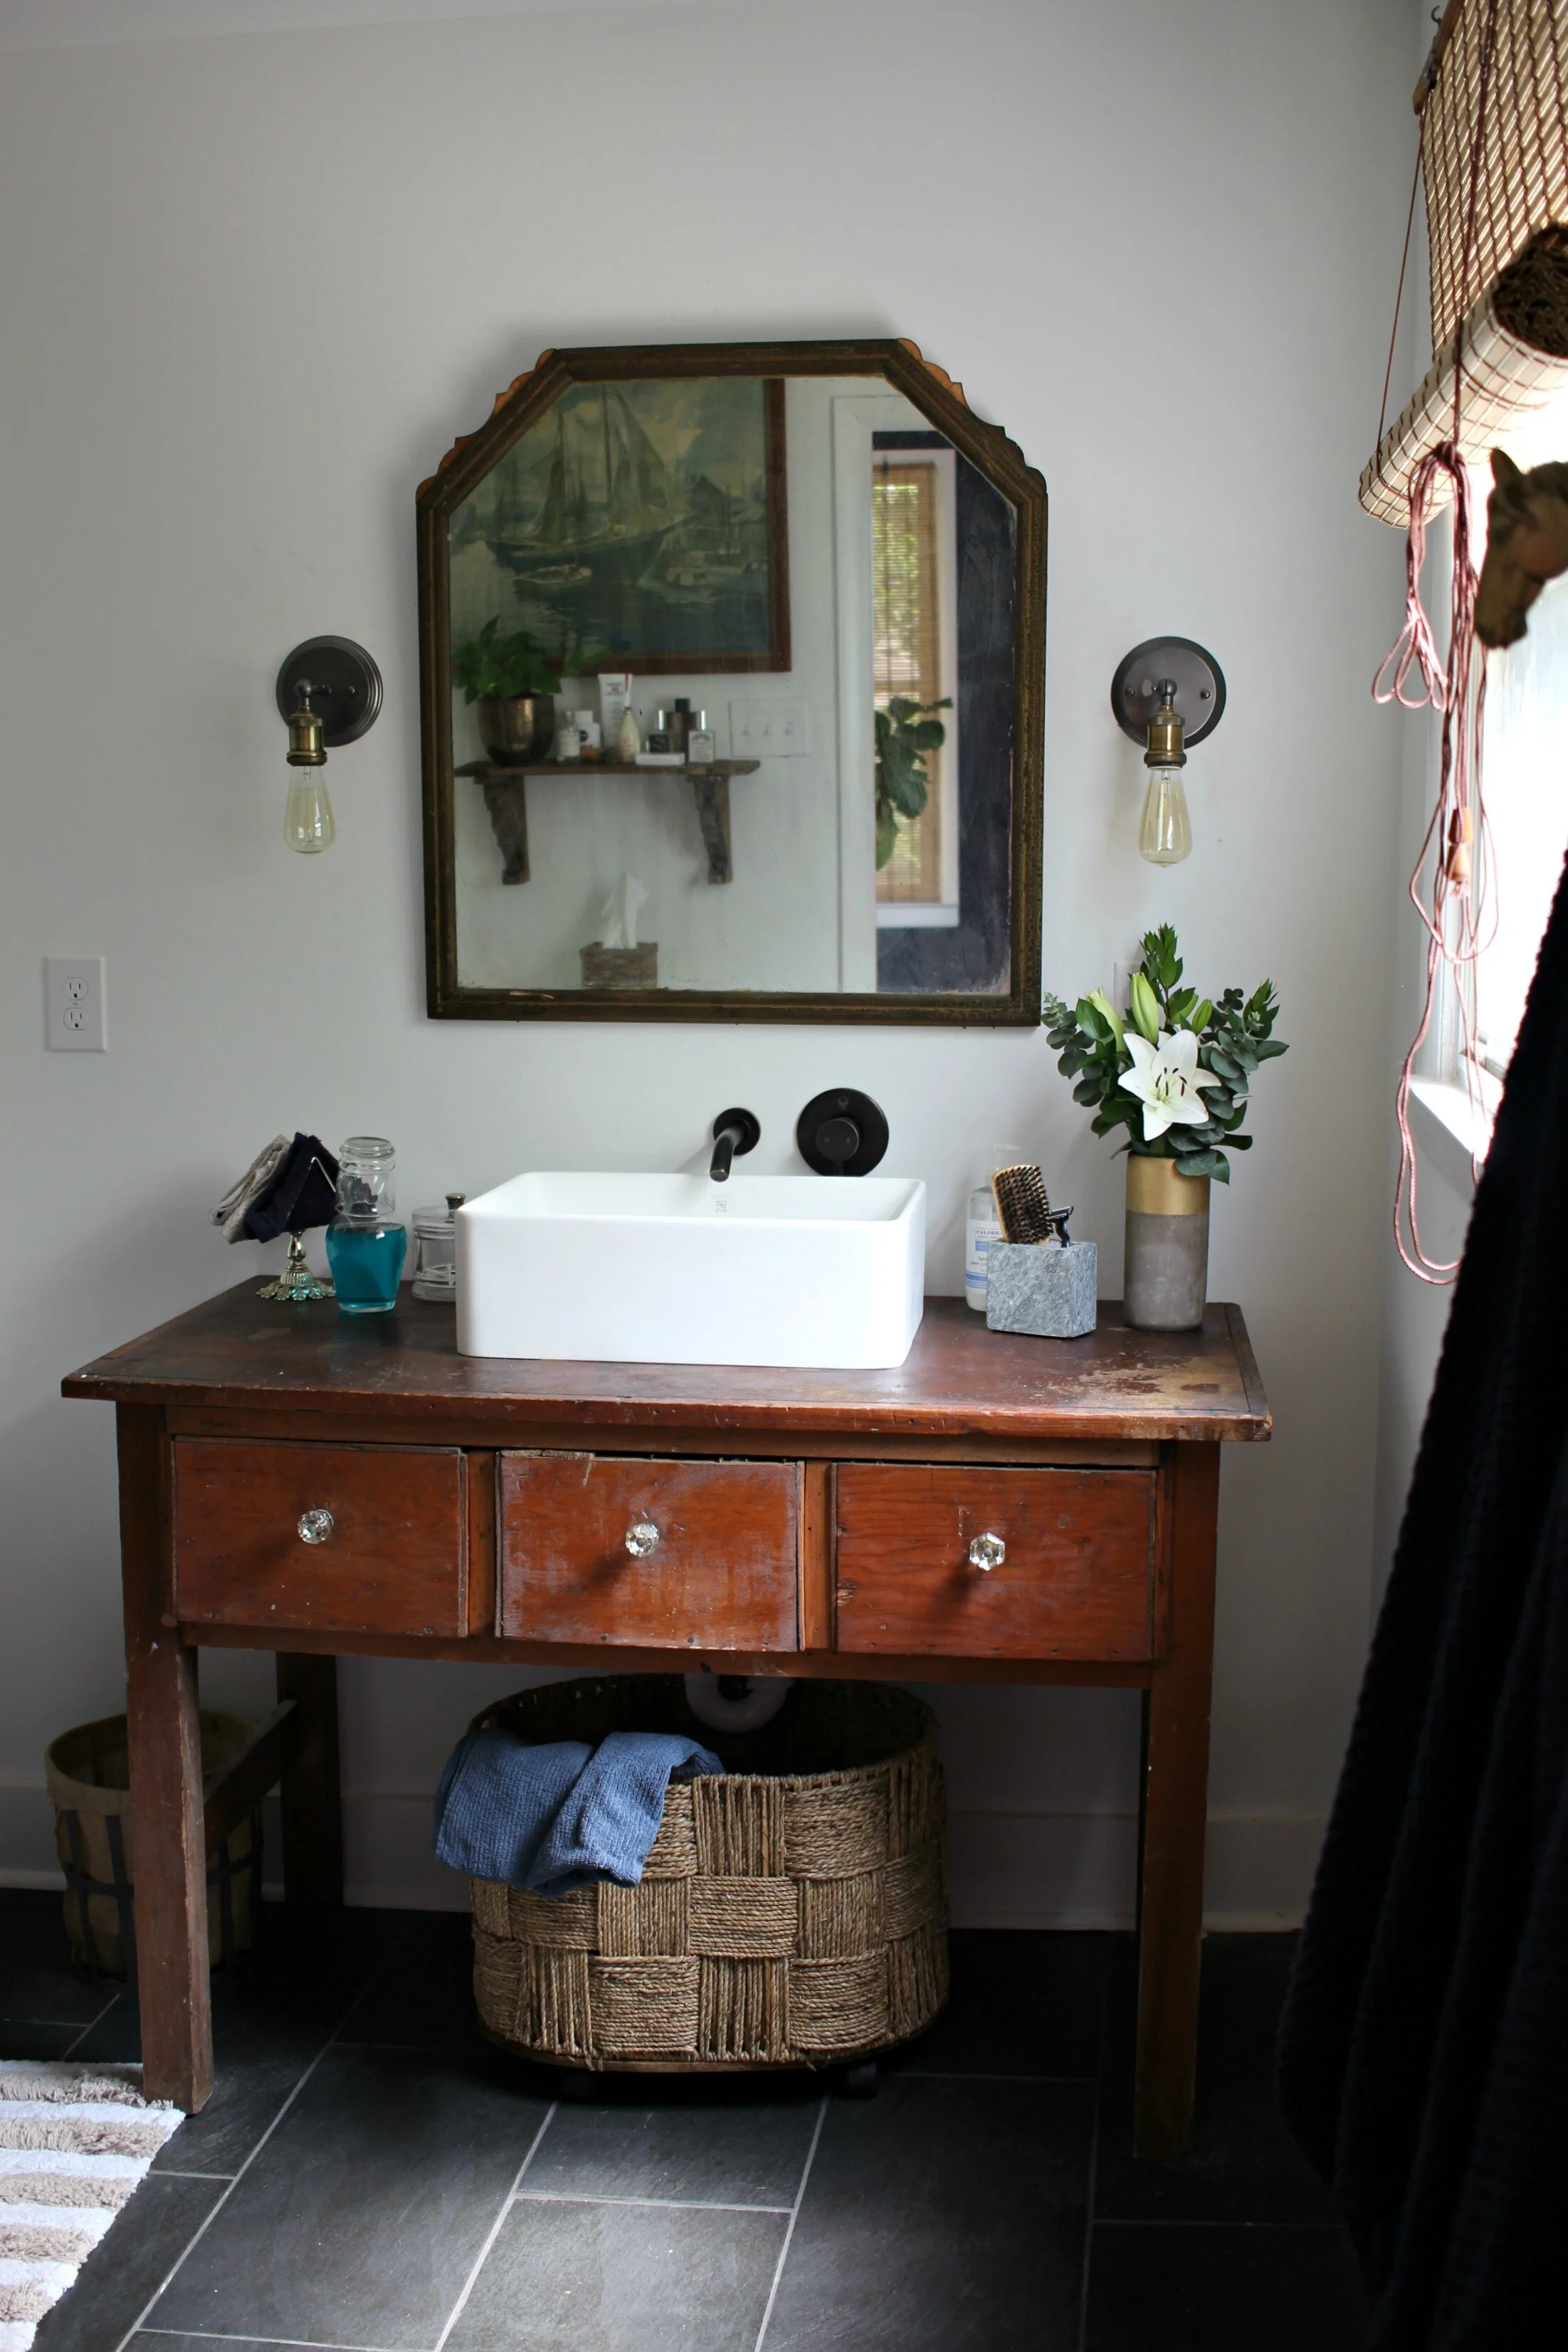
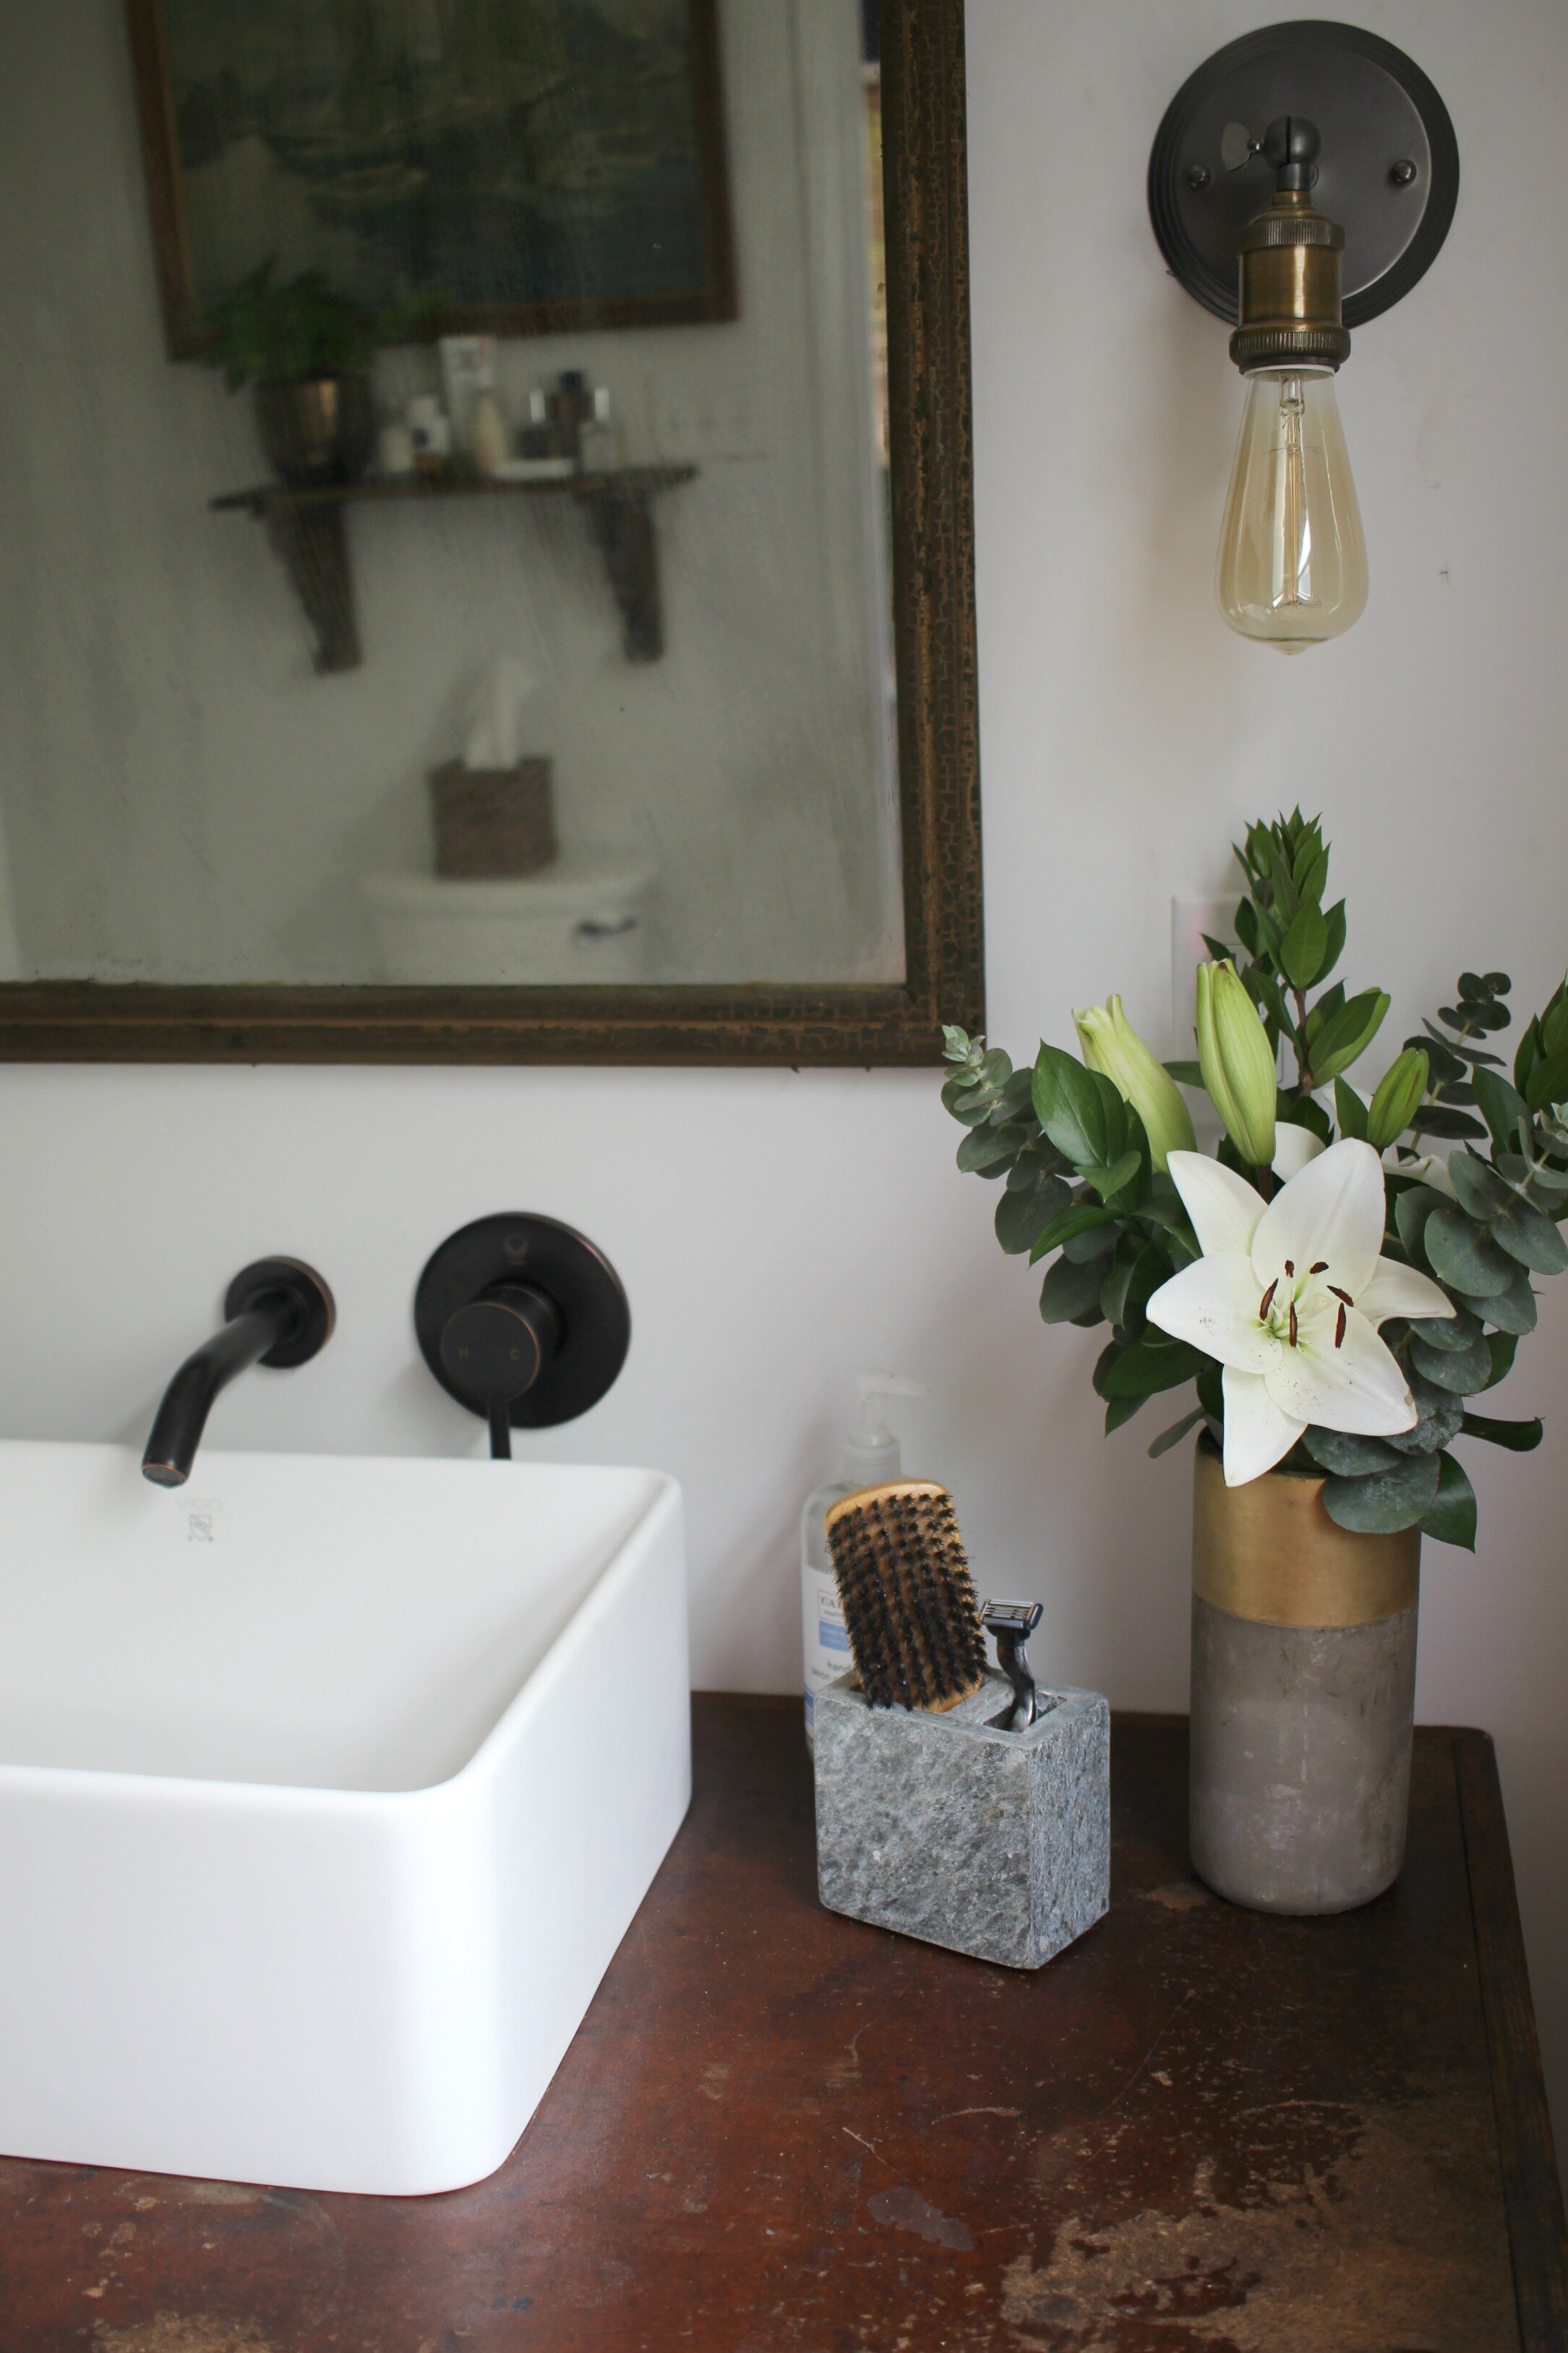
This vanity is one of my favorite features of the bath. I love the character it adds and how the rustic style contrasts with some of the super modern finishes and glossy subway tile. This vanity was an old antique sideboard that I have used in various rooms in our old house. It was my first thought when trying to find a vanity piece for this space and thankfully it fit perfectly! It is also so nice to have these huge drawers for extra storage.

These sconces were a STEAL at under $40 each (I had been planning on buying some similar ones on Wayfair for over twice that price and then stumbled across these). I like the super simple yet industrial style and the oil rubbed bronze finish also fits in perfectly with our other fixtures. The old wood mirror is another item that I already had (it was left in my brother-in-law's barn and he let me take it!) and it was the perfect size for the vanity.
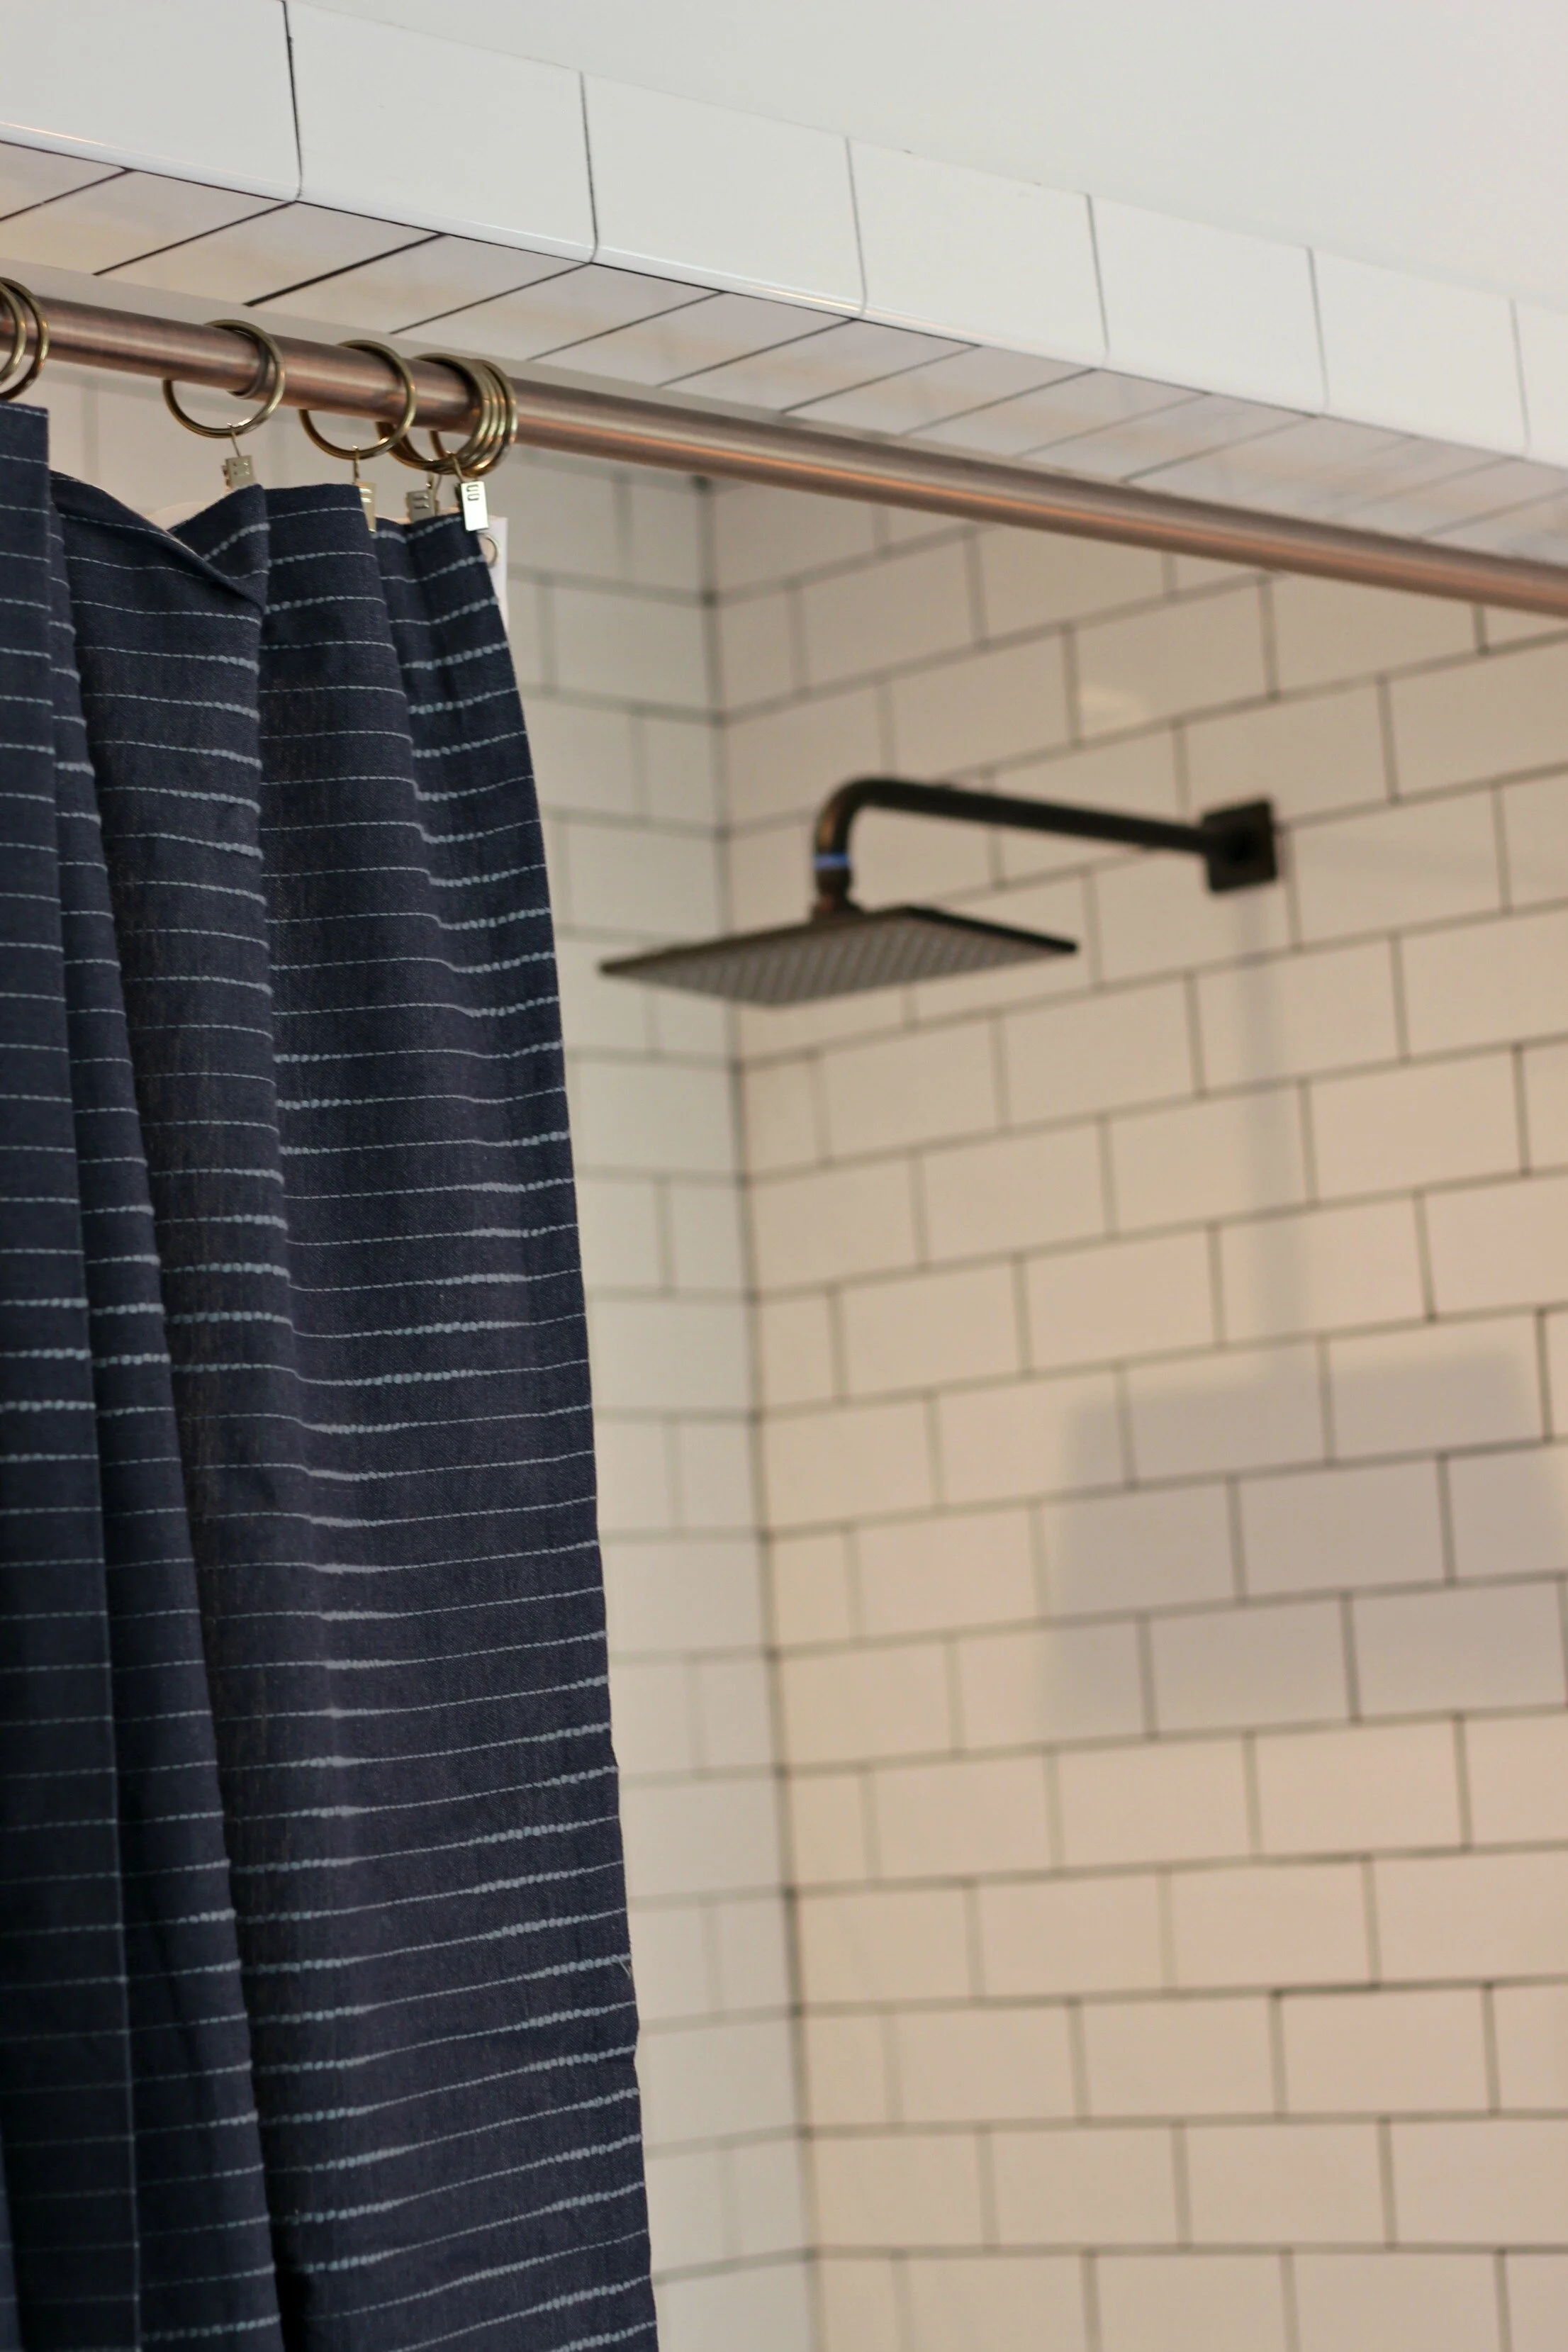
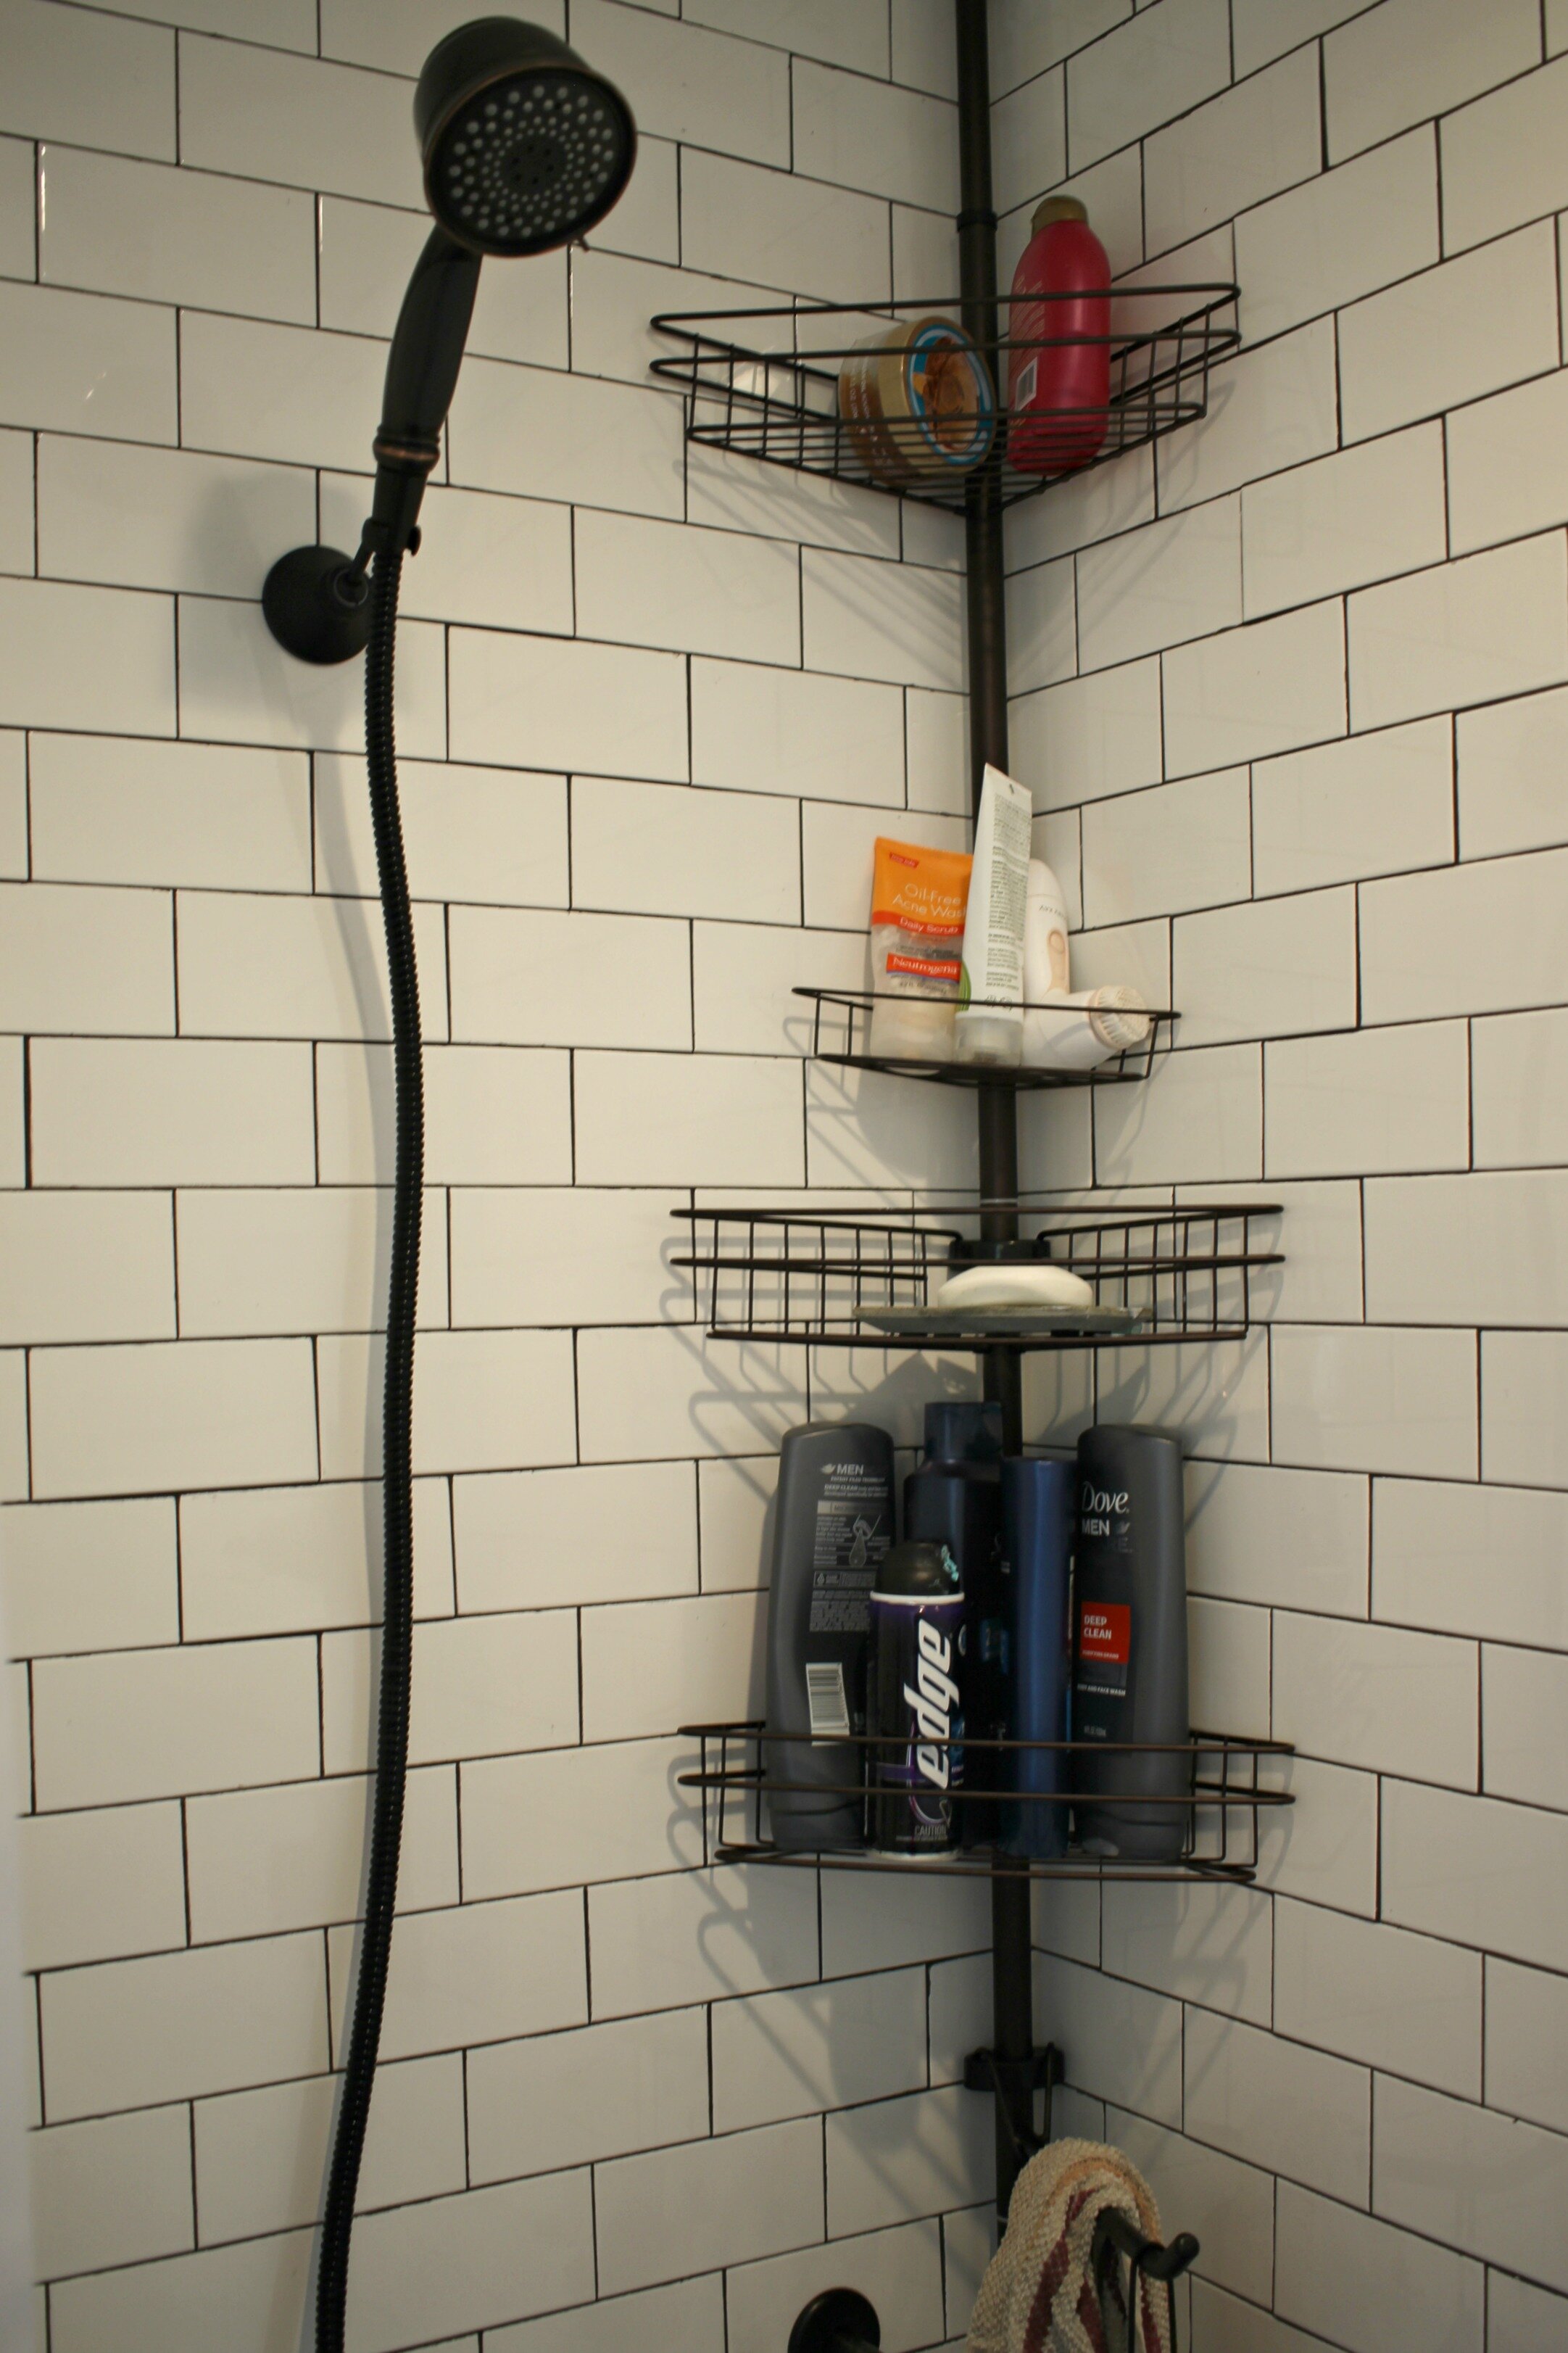
Here's a look at the new shower which is so clean and modern- such a change from the previous tub! We went with my favorite white subway tile with dark grout in here with oil rubbed bronze fixtures. Like I mentioned in my post about our master bath plans, we would like to eventually get a seamless glass shower door but right now we did not have enough money left in the budget. One of my biggest challenges in decorating this space was finding a shower curtain for the extra long, not-standard-size opening. I was able to find an extra-long shower curtain liner on Amazon but there are not many attractive options for decorative extra-long shower curtains. I had an idea to try a regular curtain and use curtain clip rings to hold both the curtain and liner together. I was able to find a curtain and rings that fit perfectly over my tension rod at Target and I'm pretty pleased with the look! It slides easily and works just like a regular shower curtain!
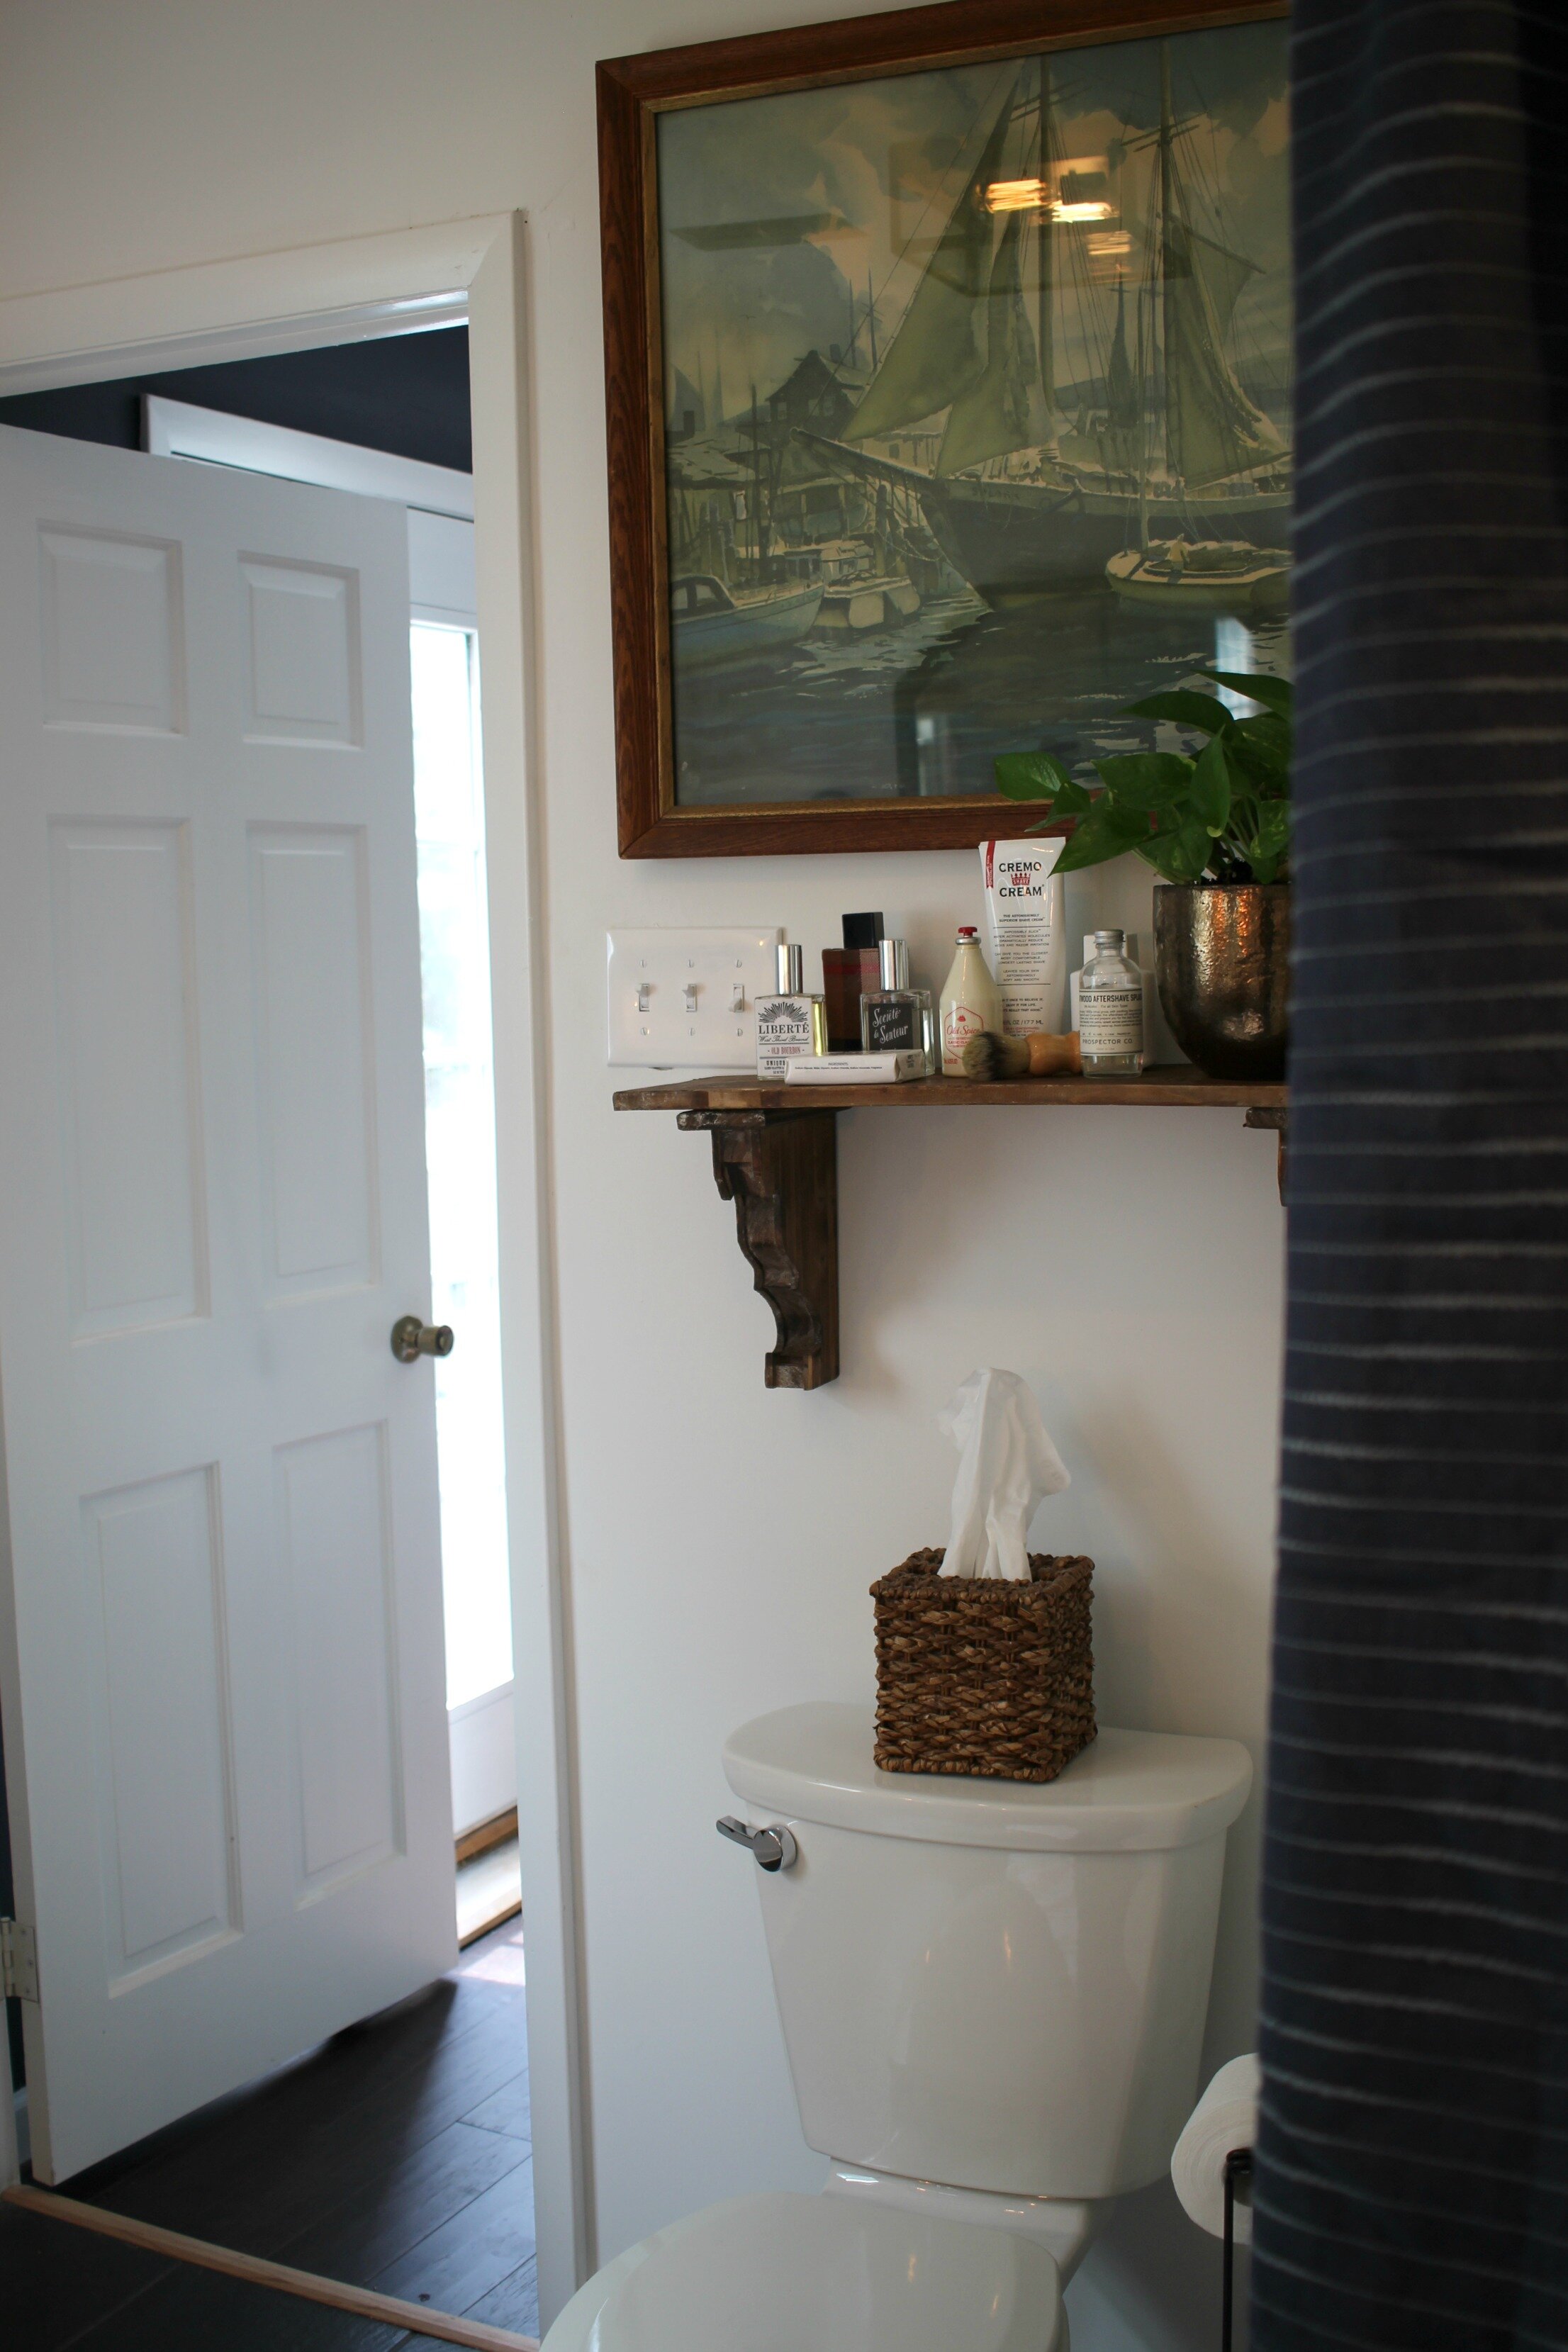
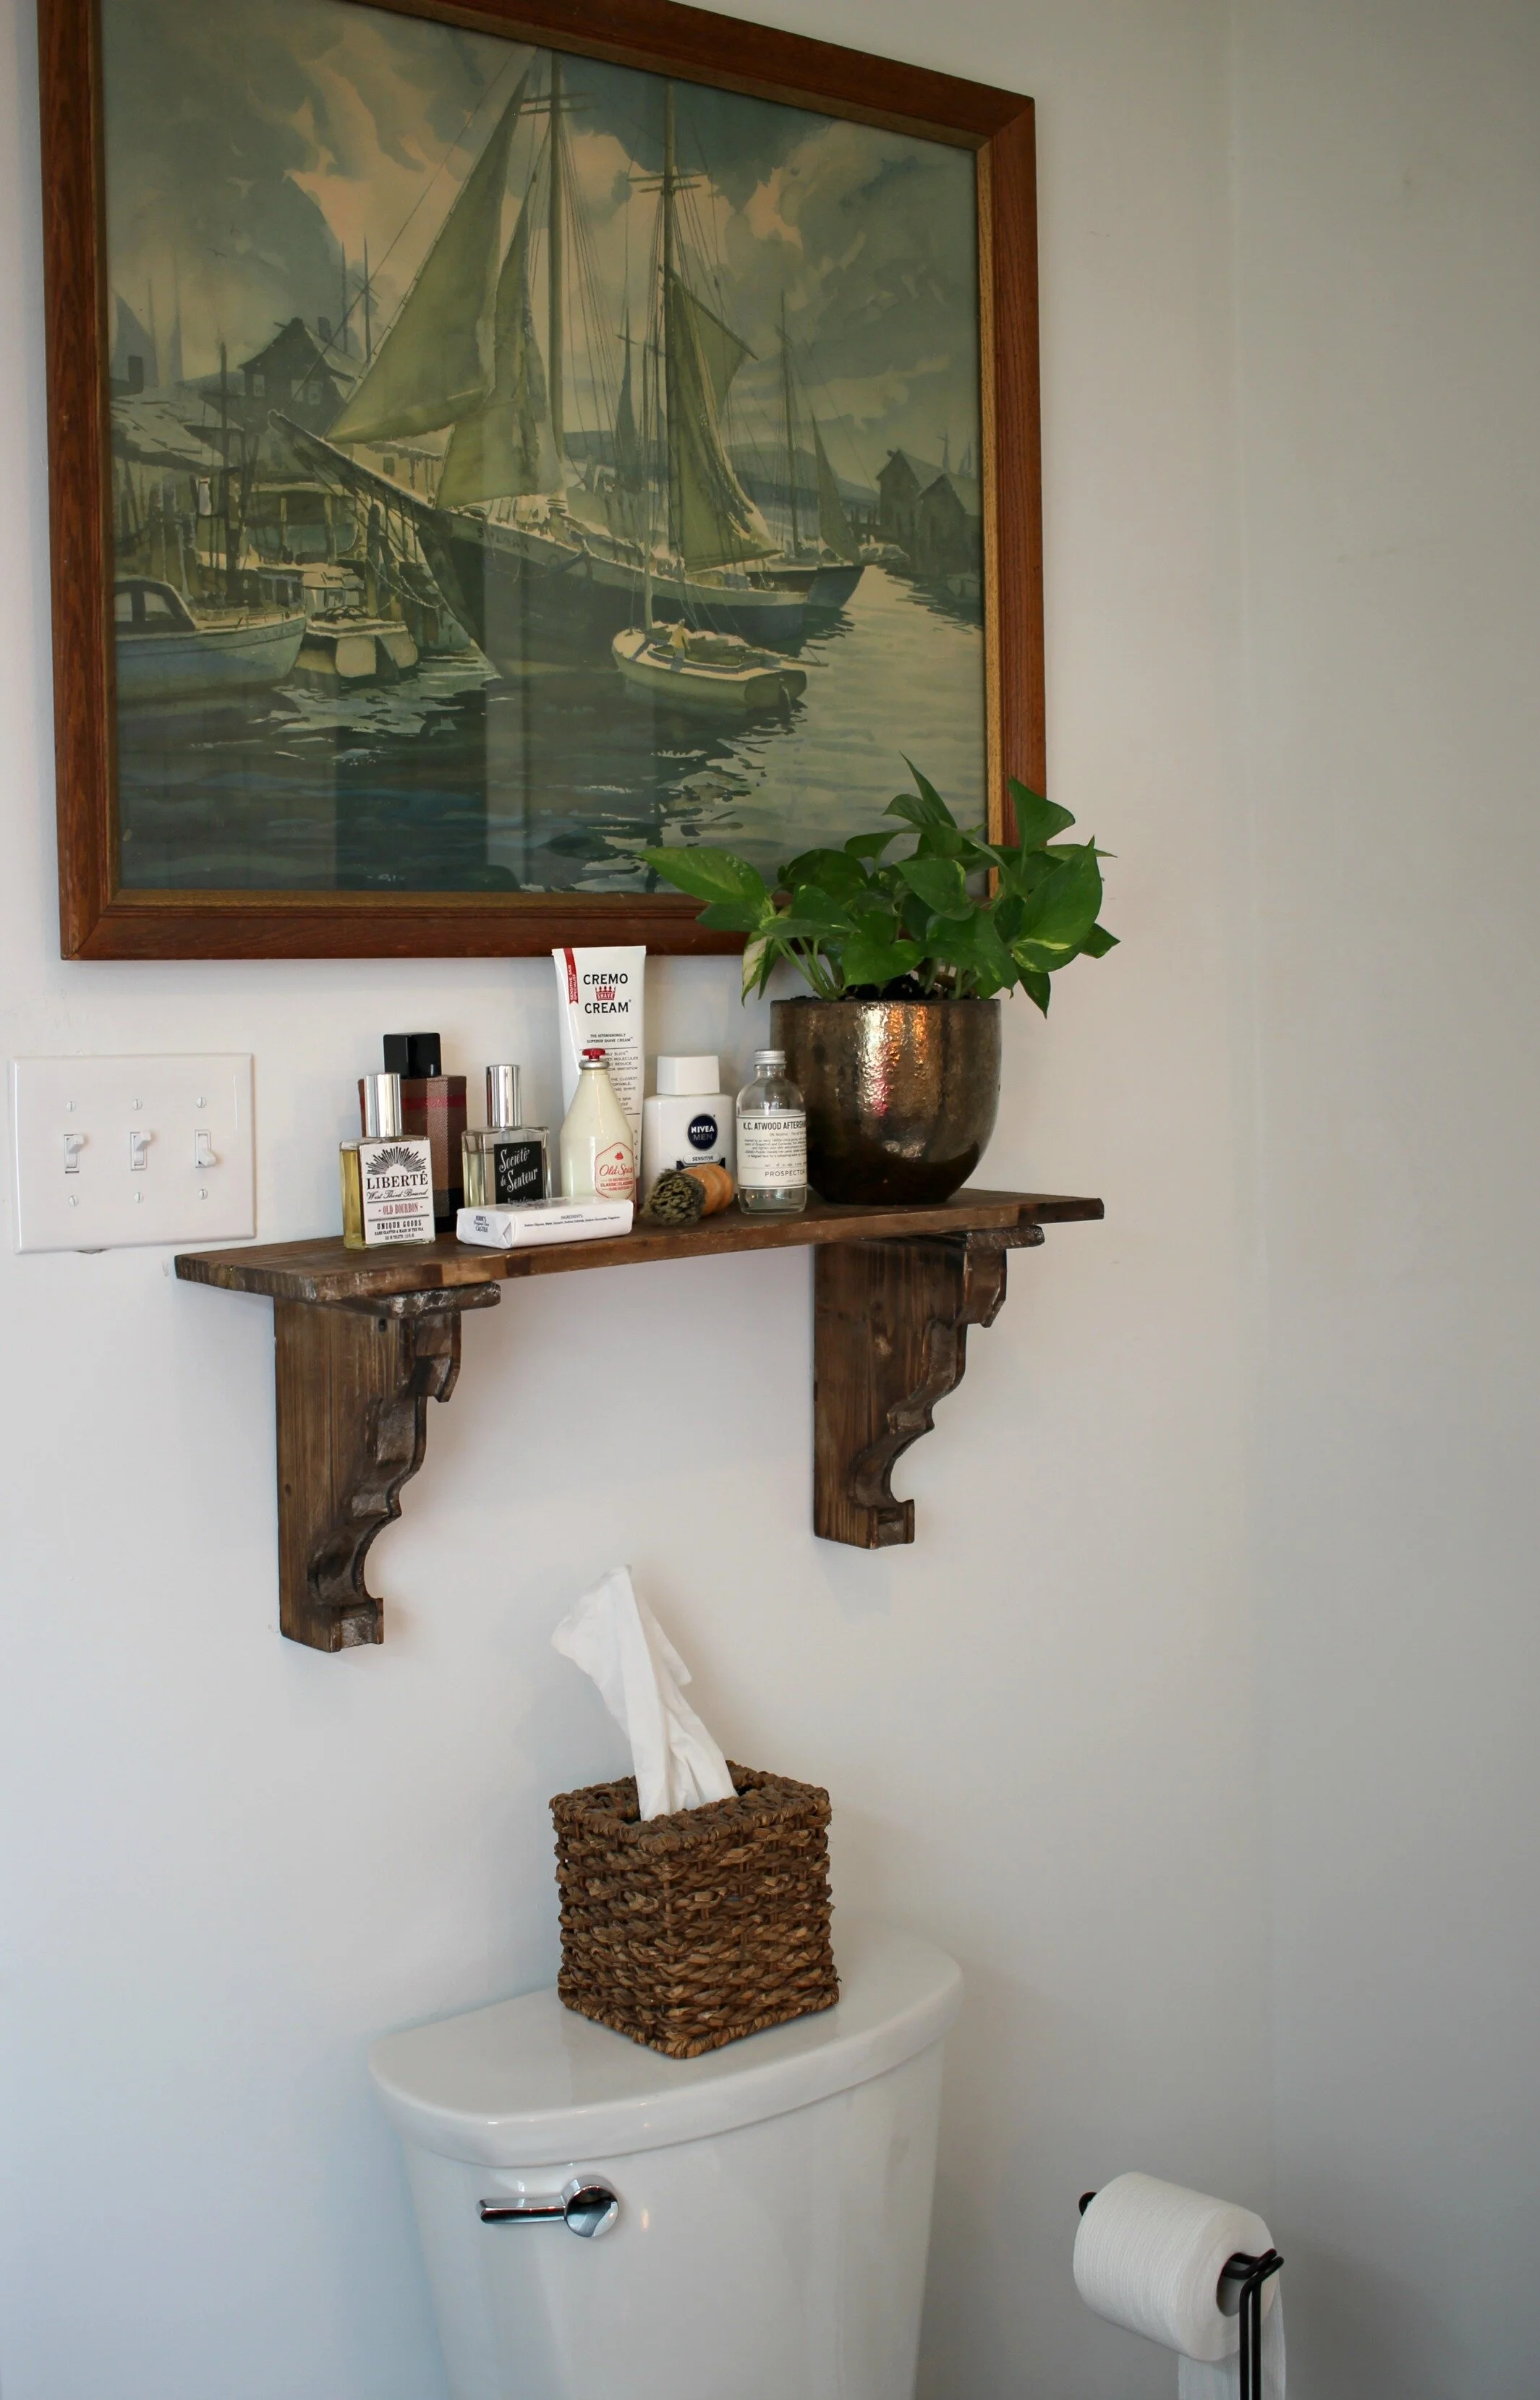
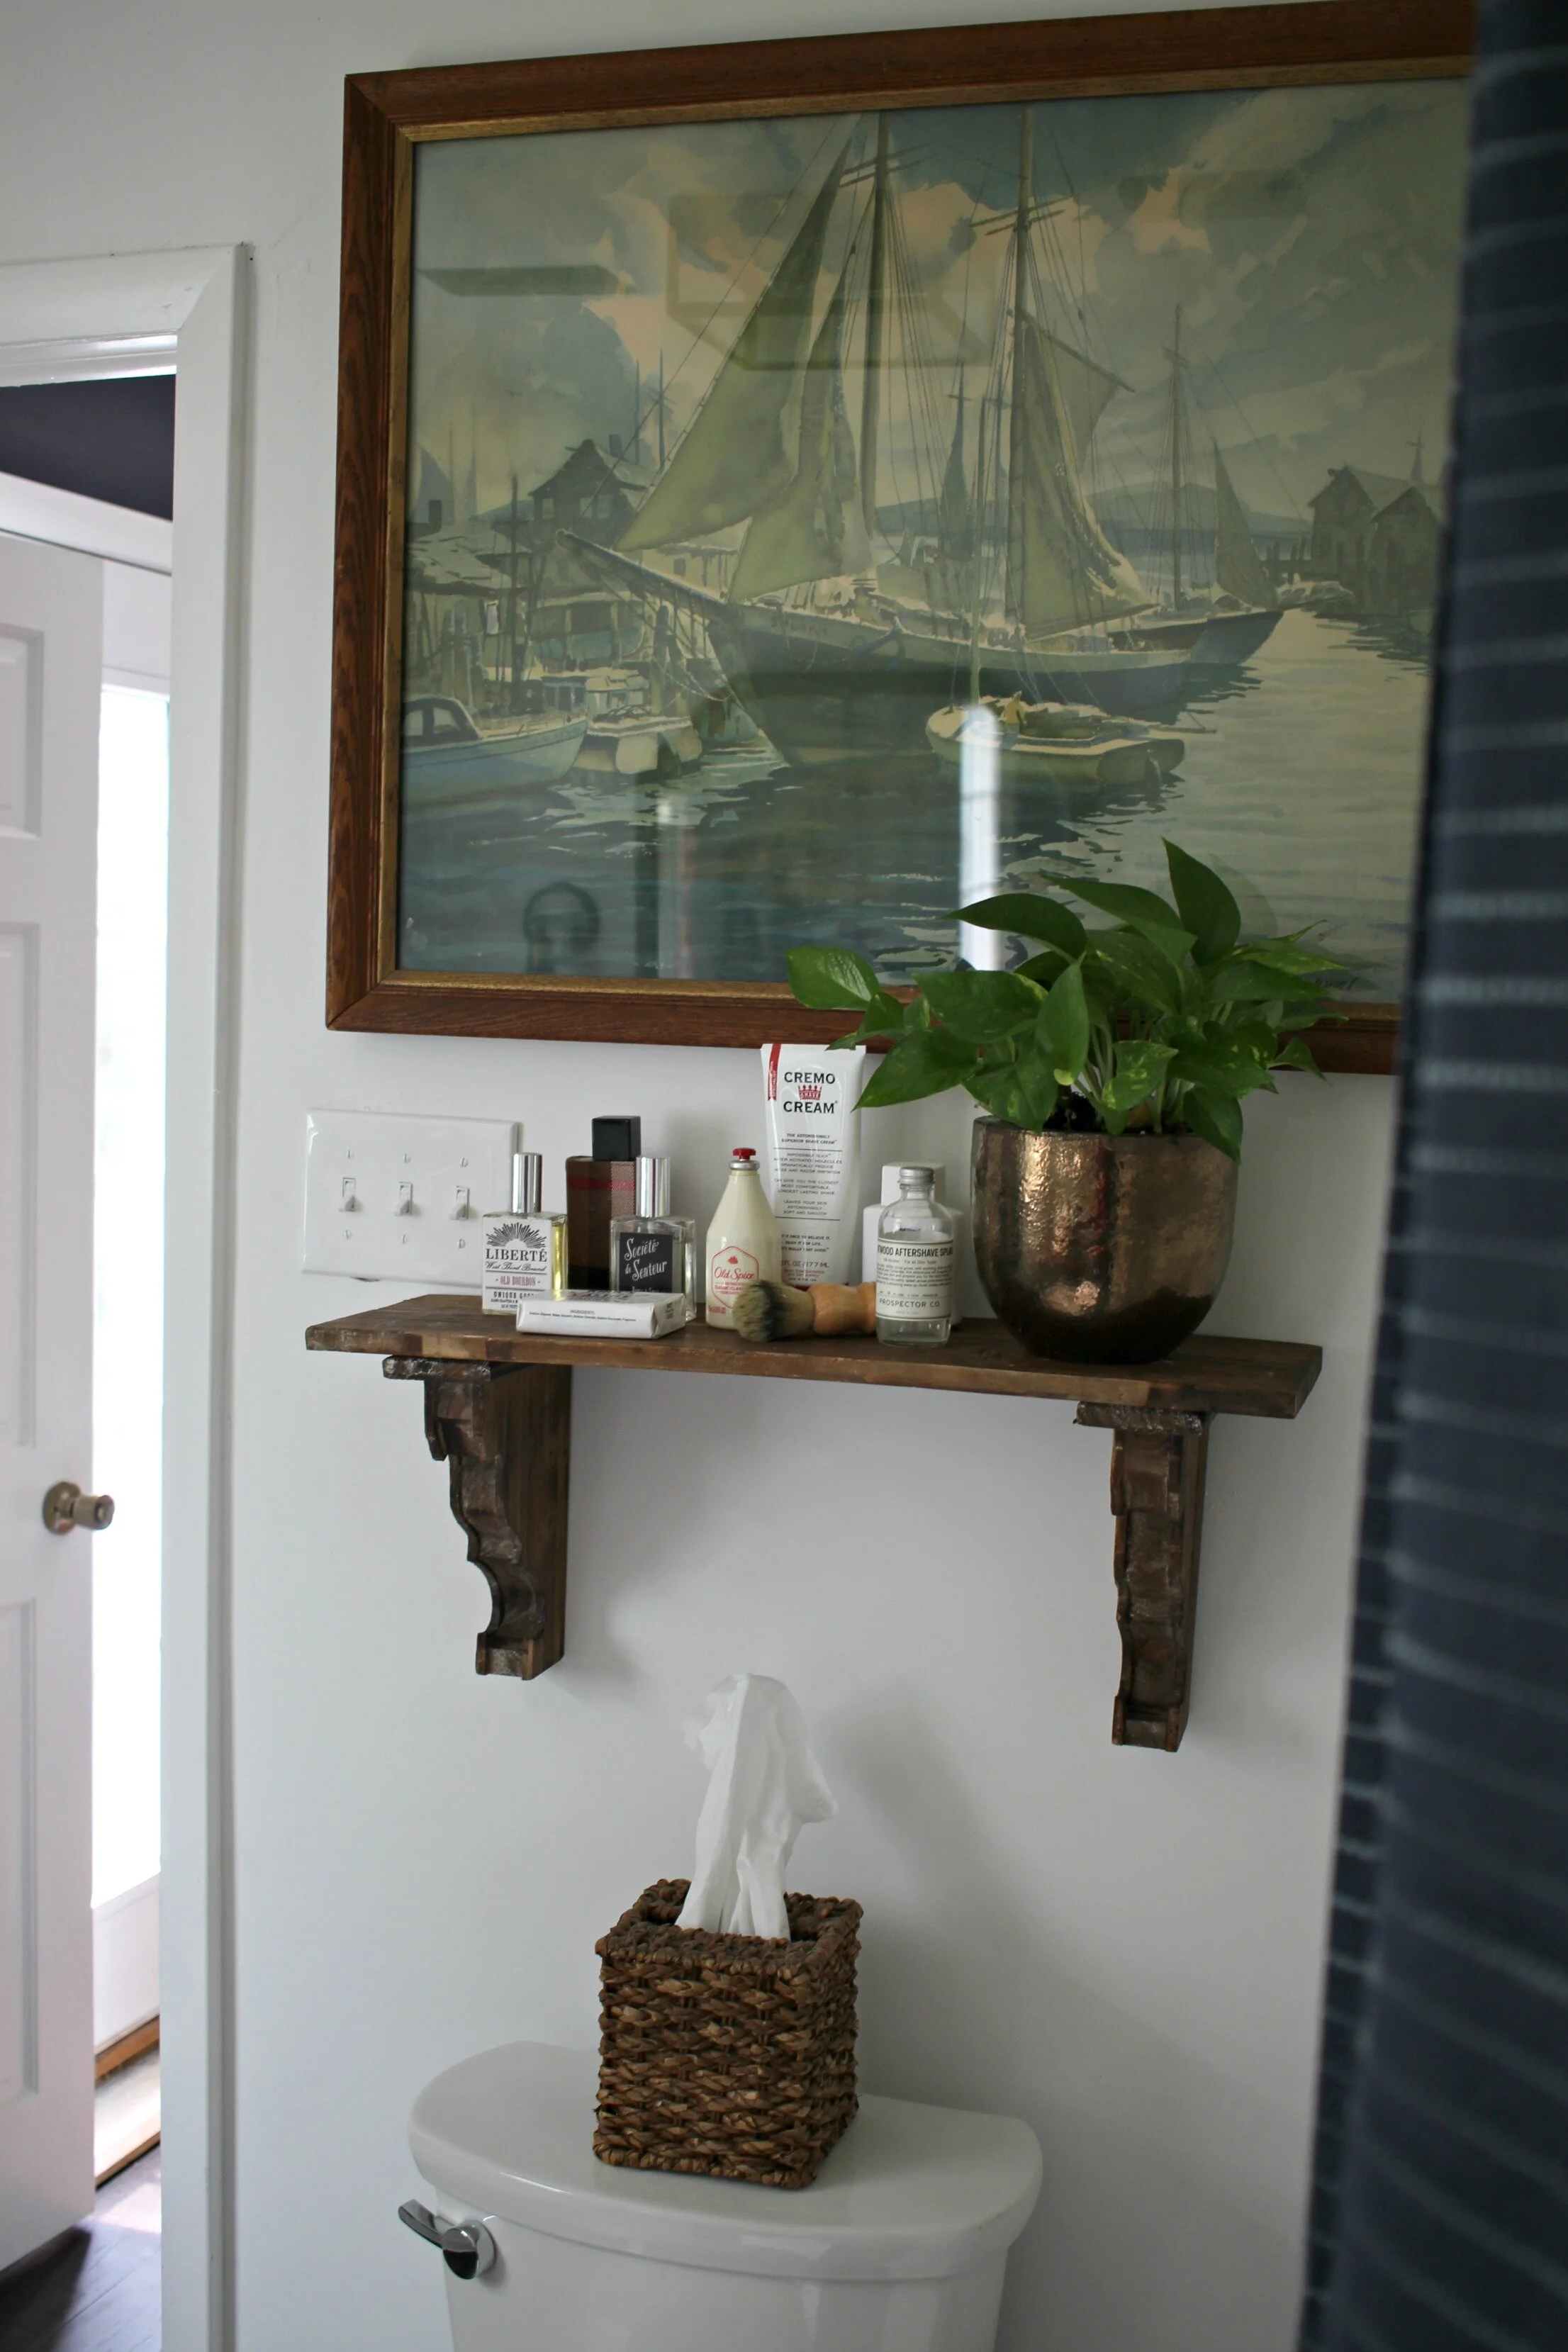
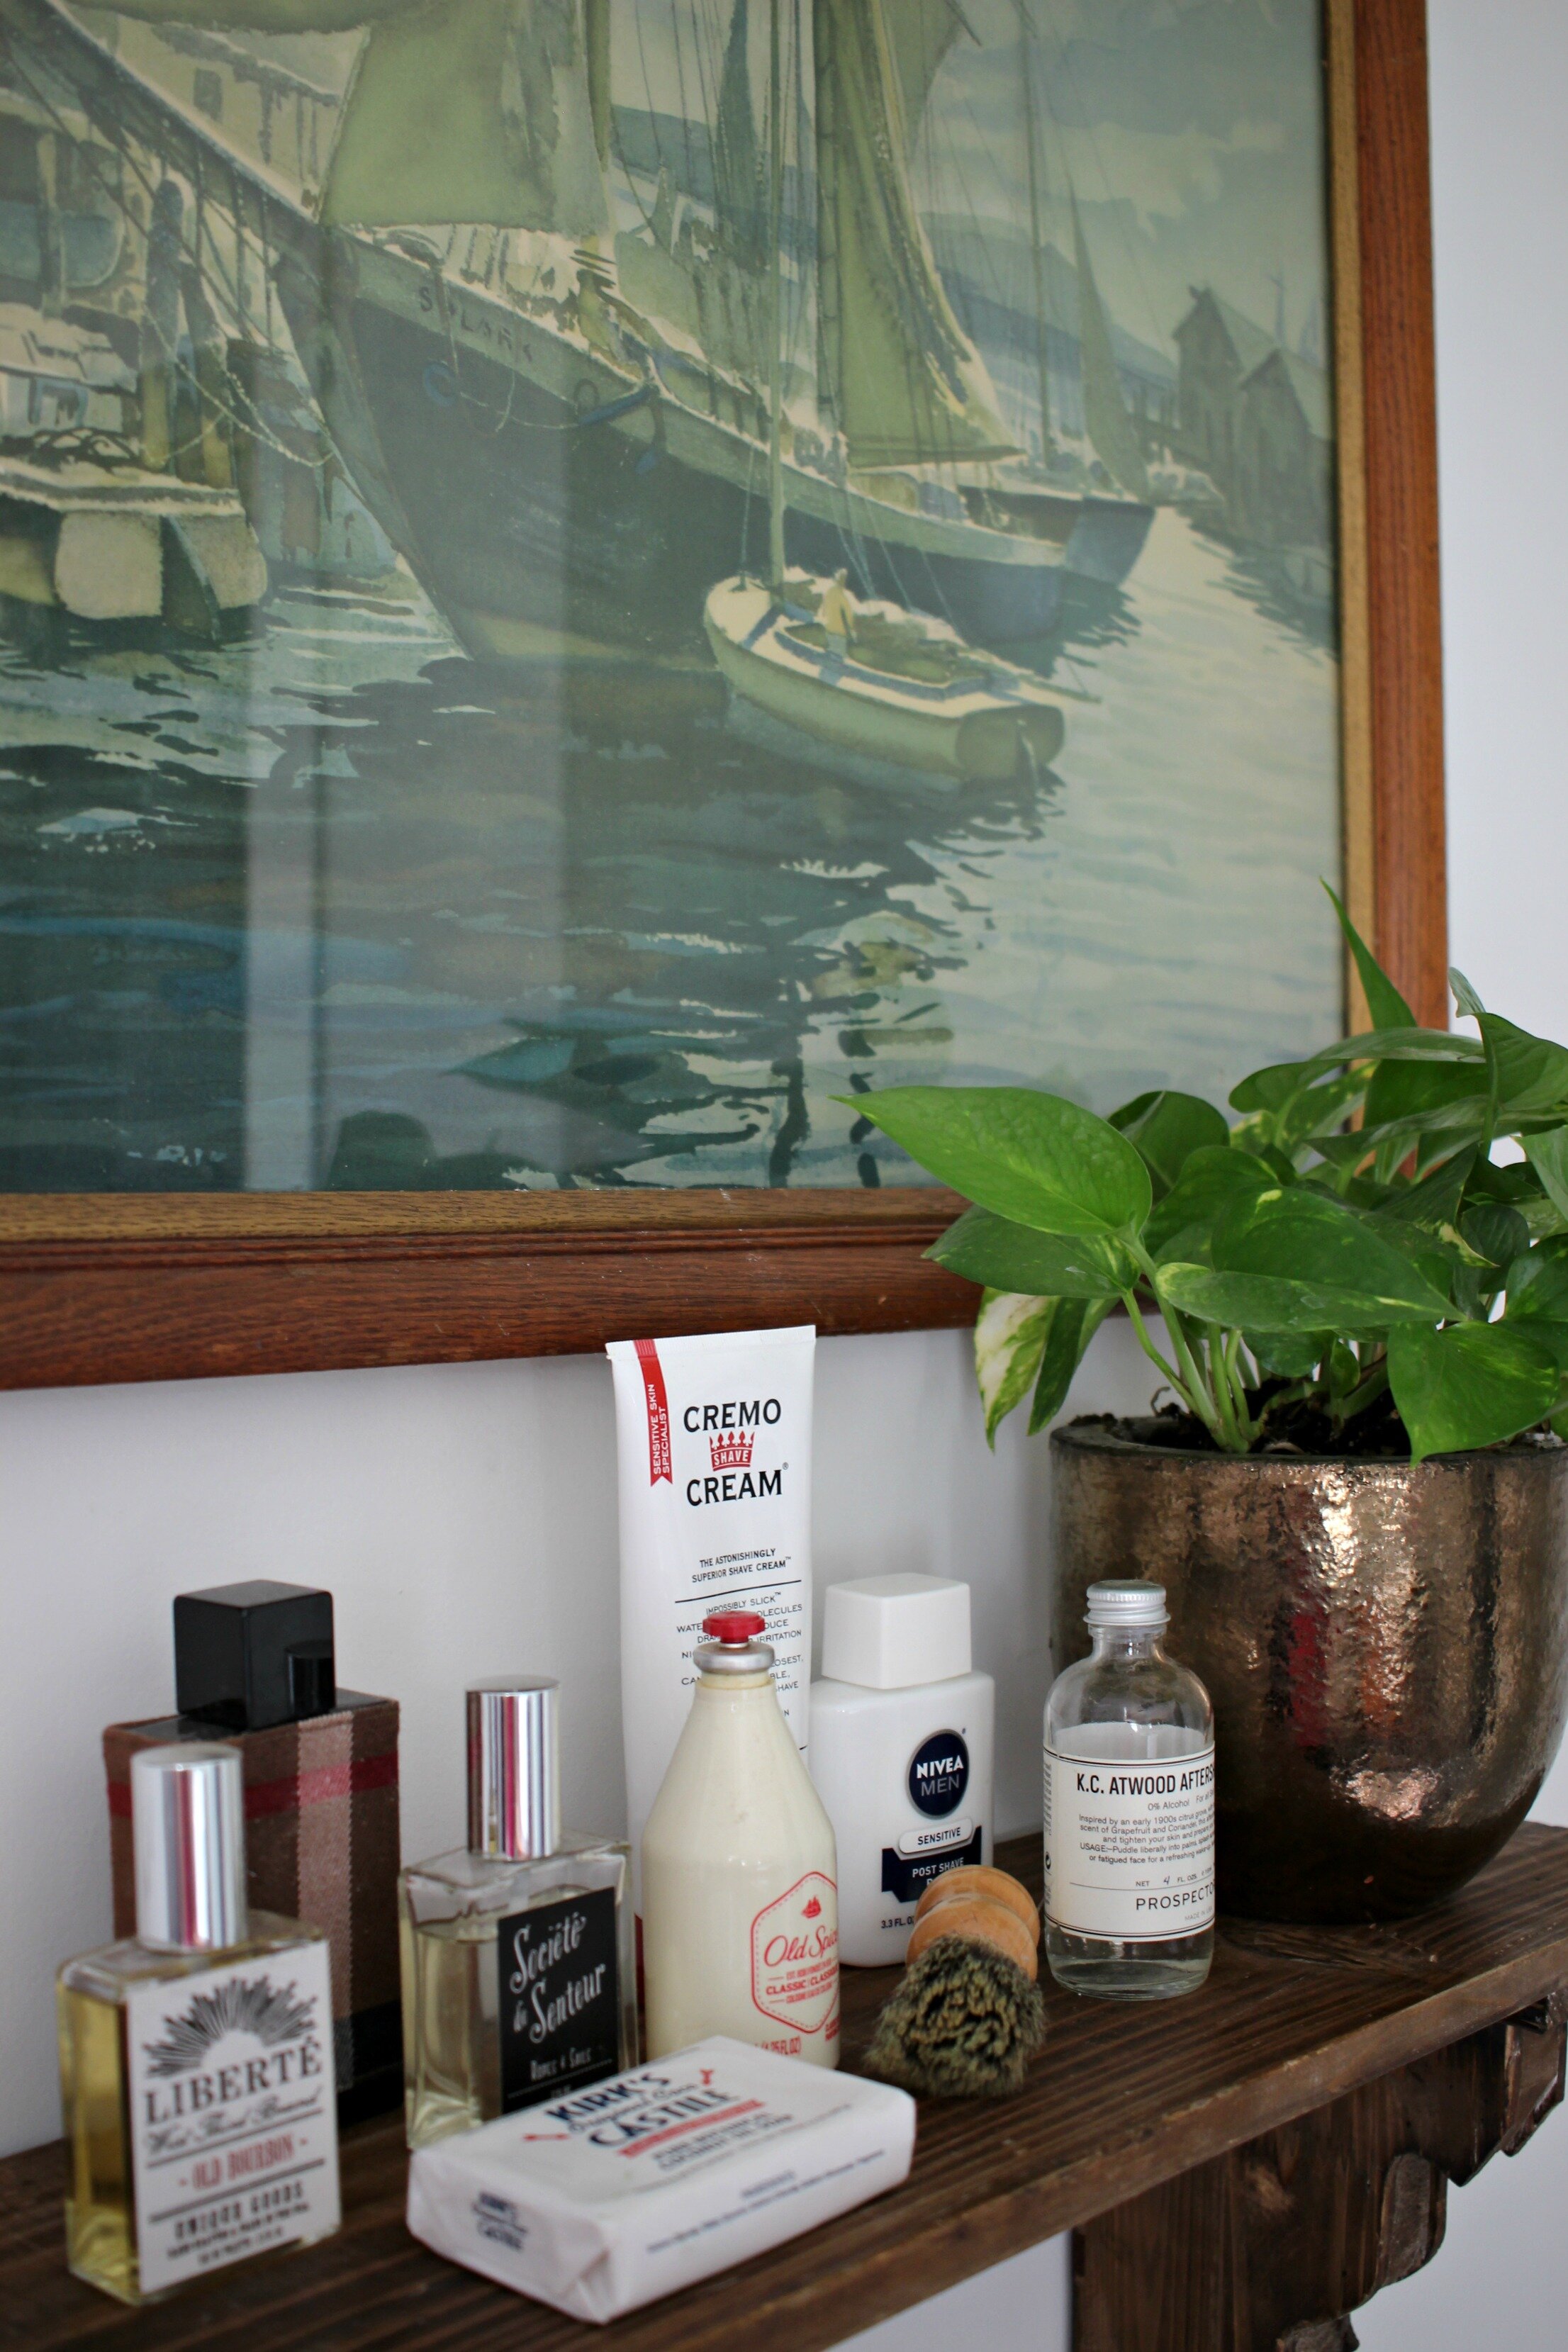
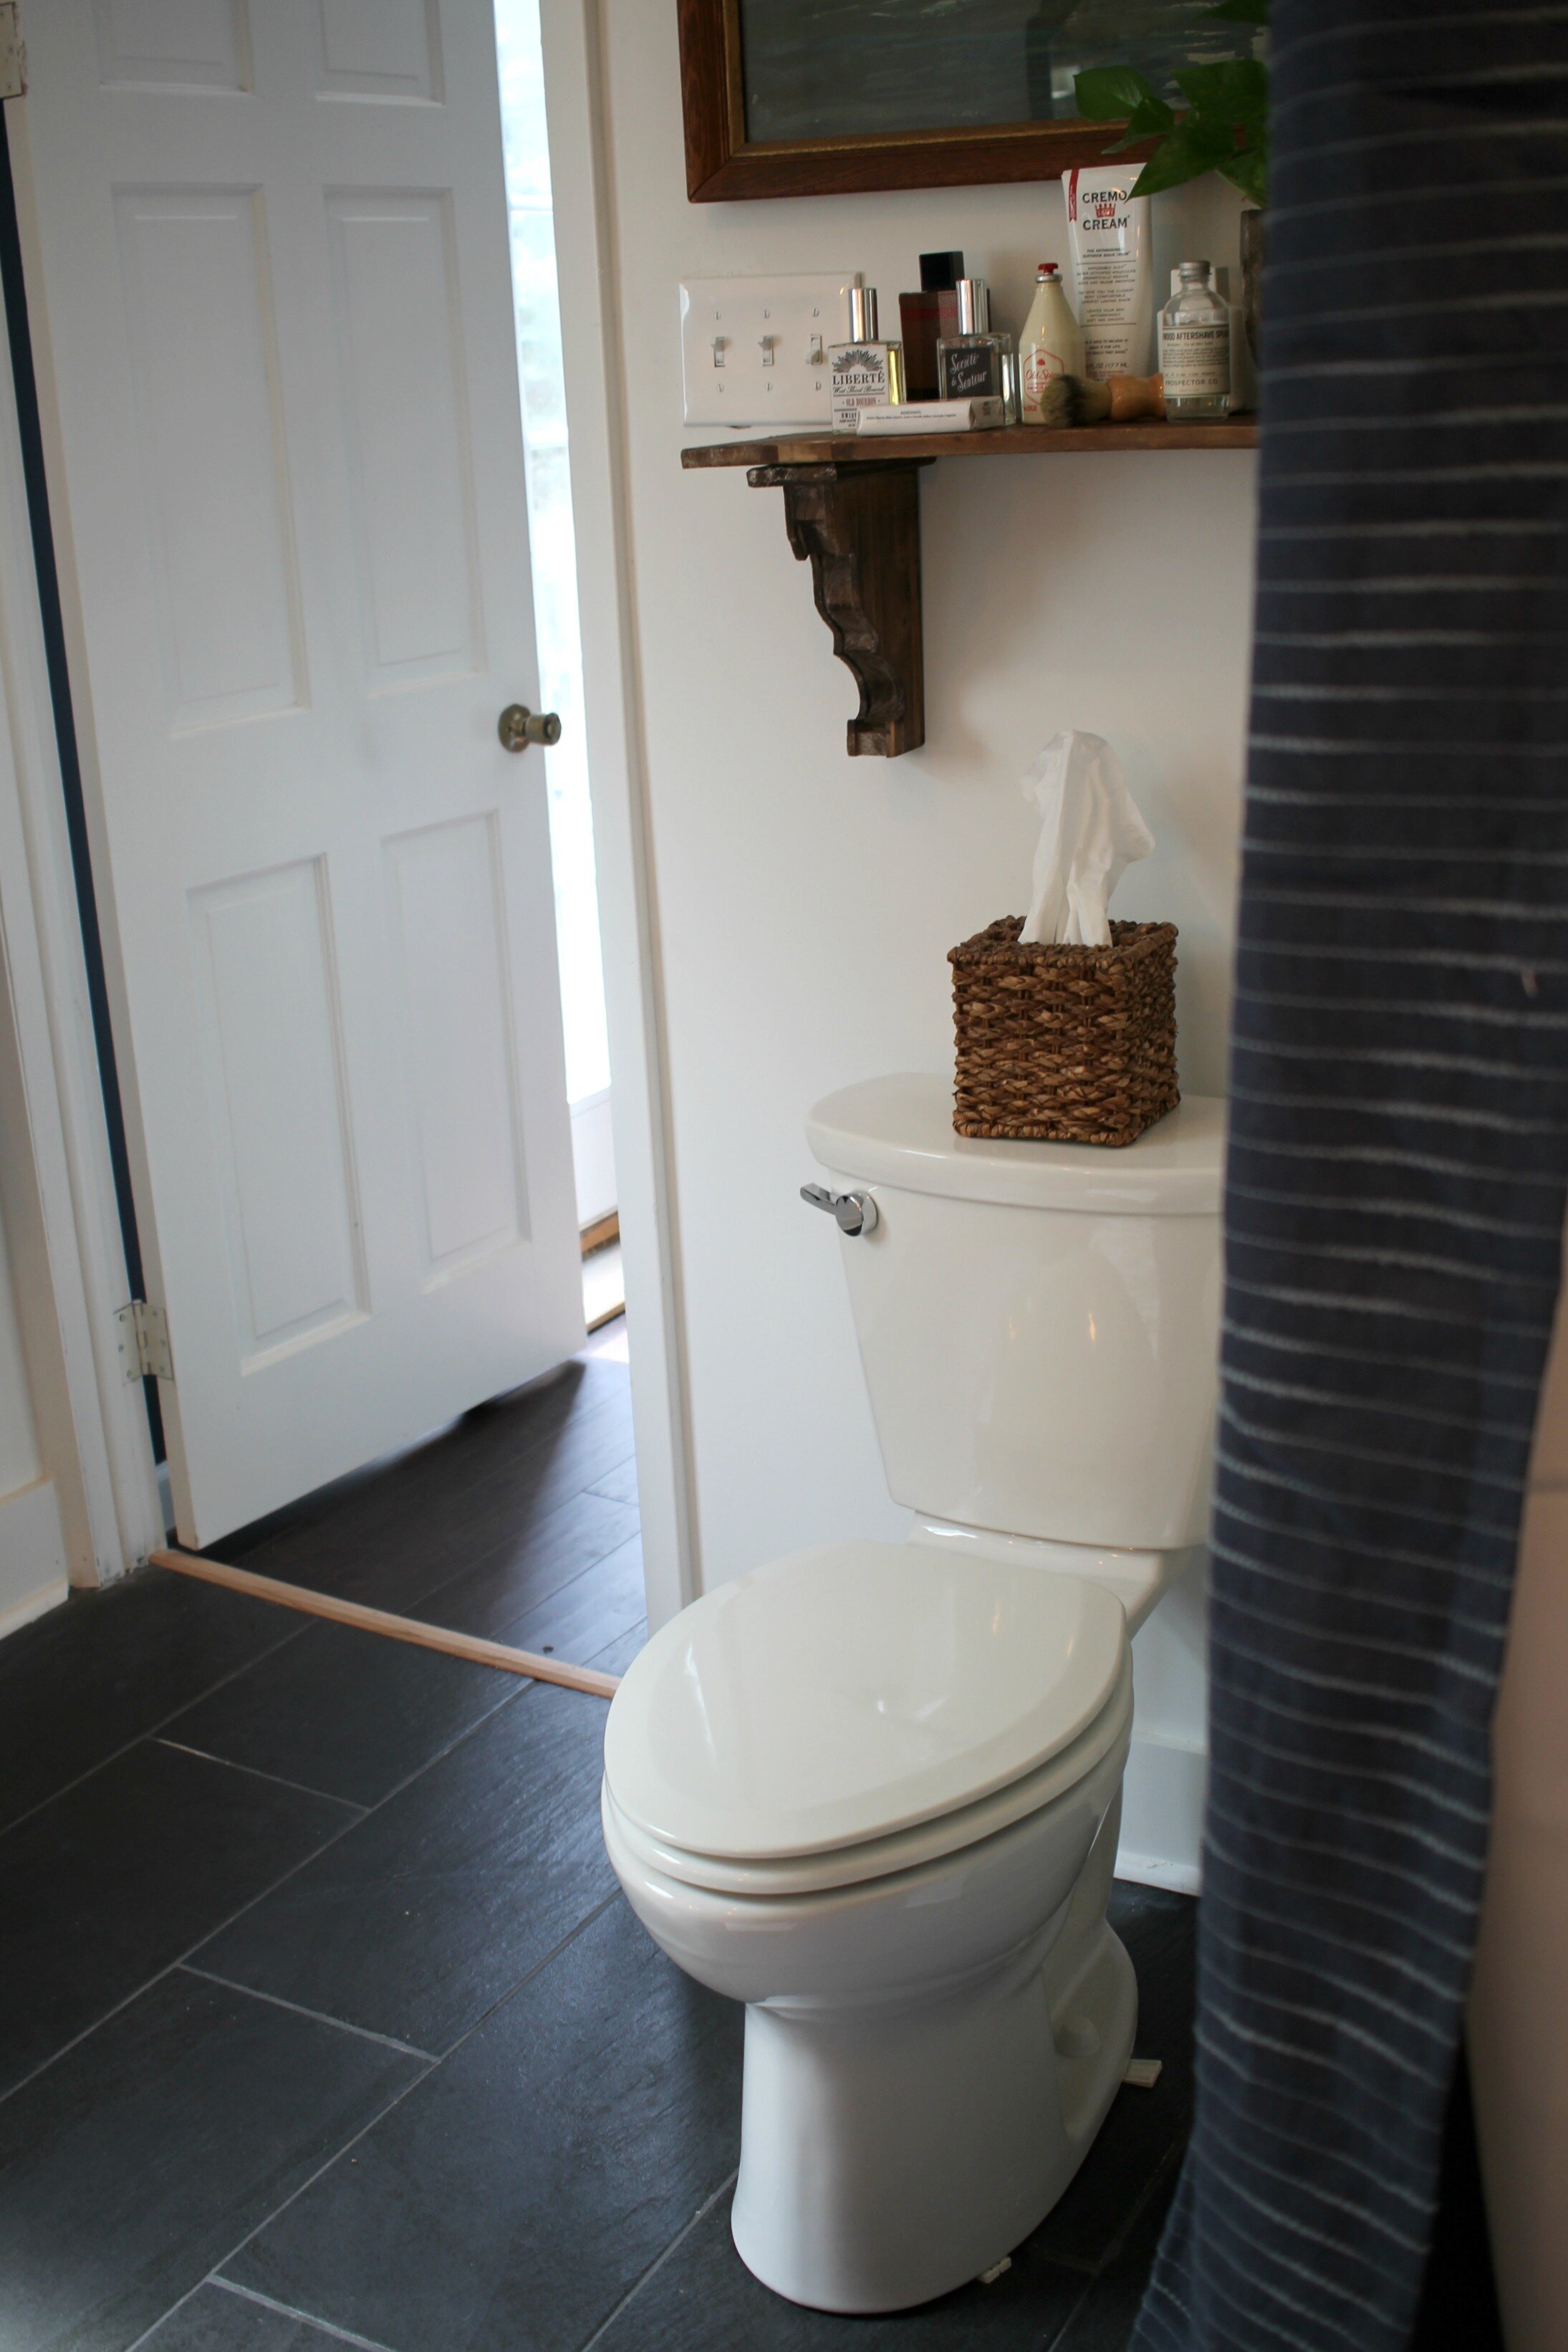
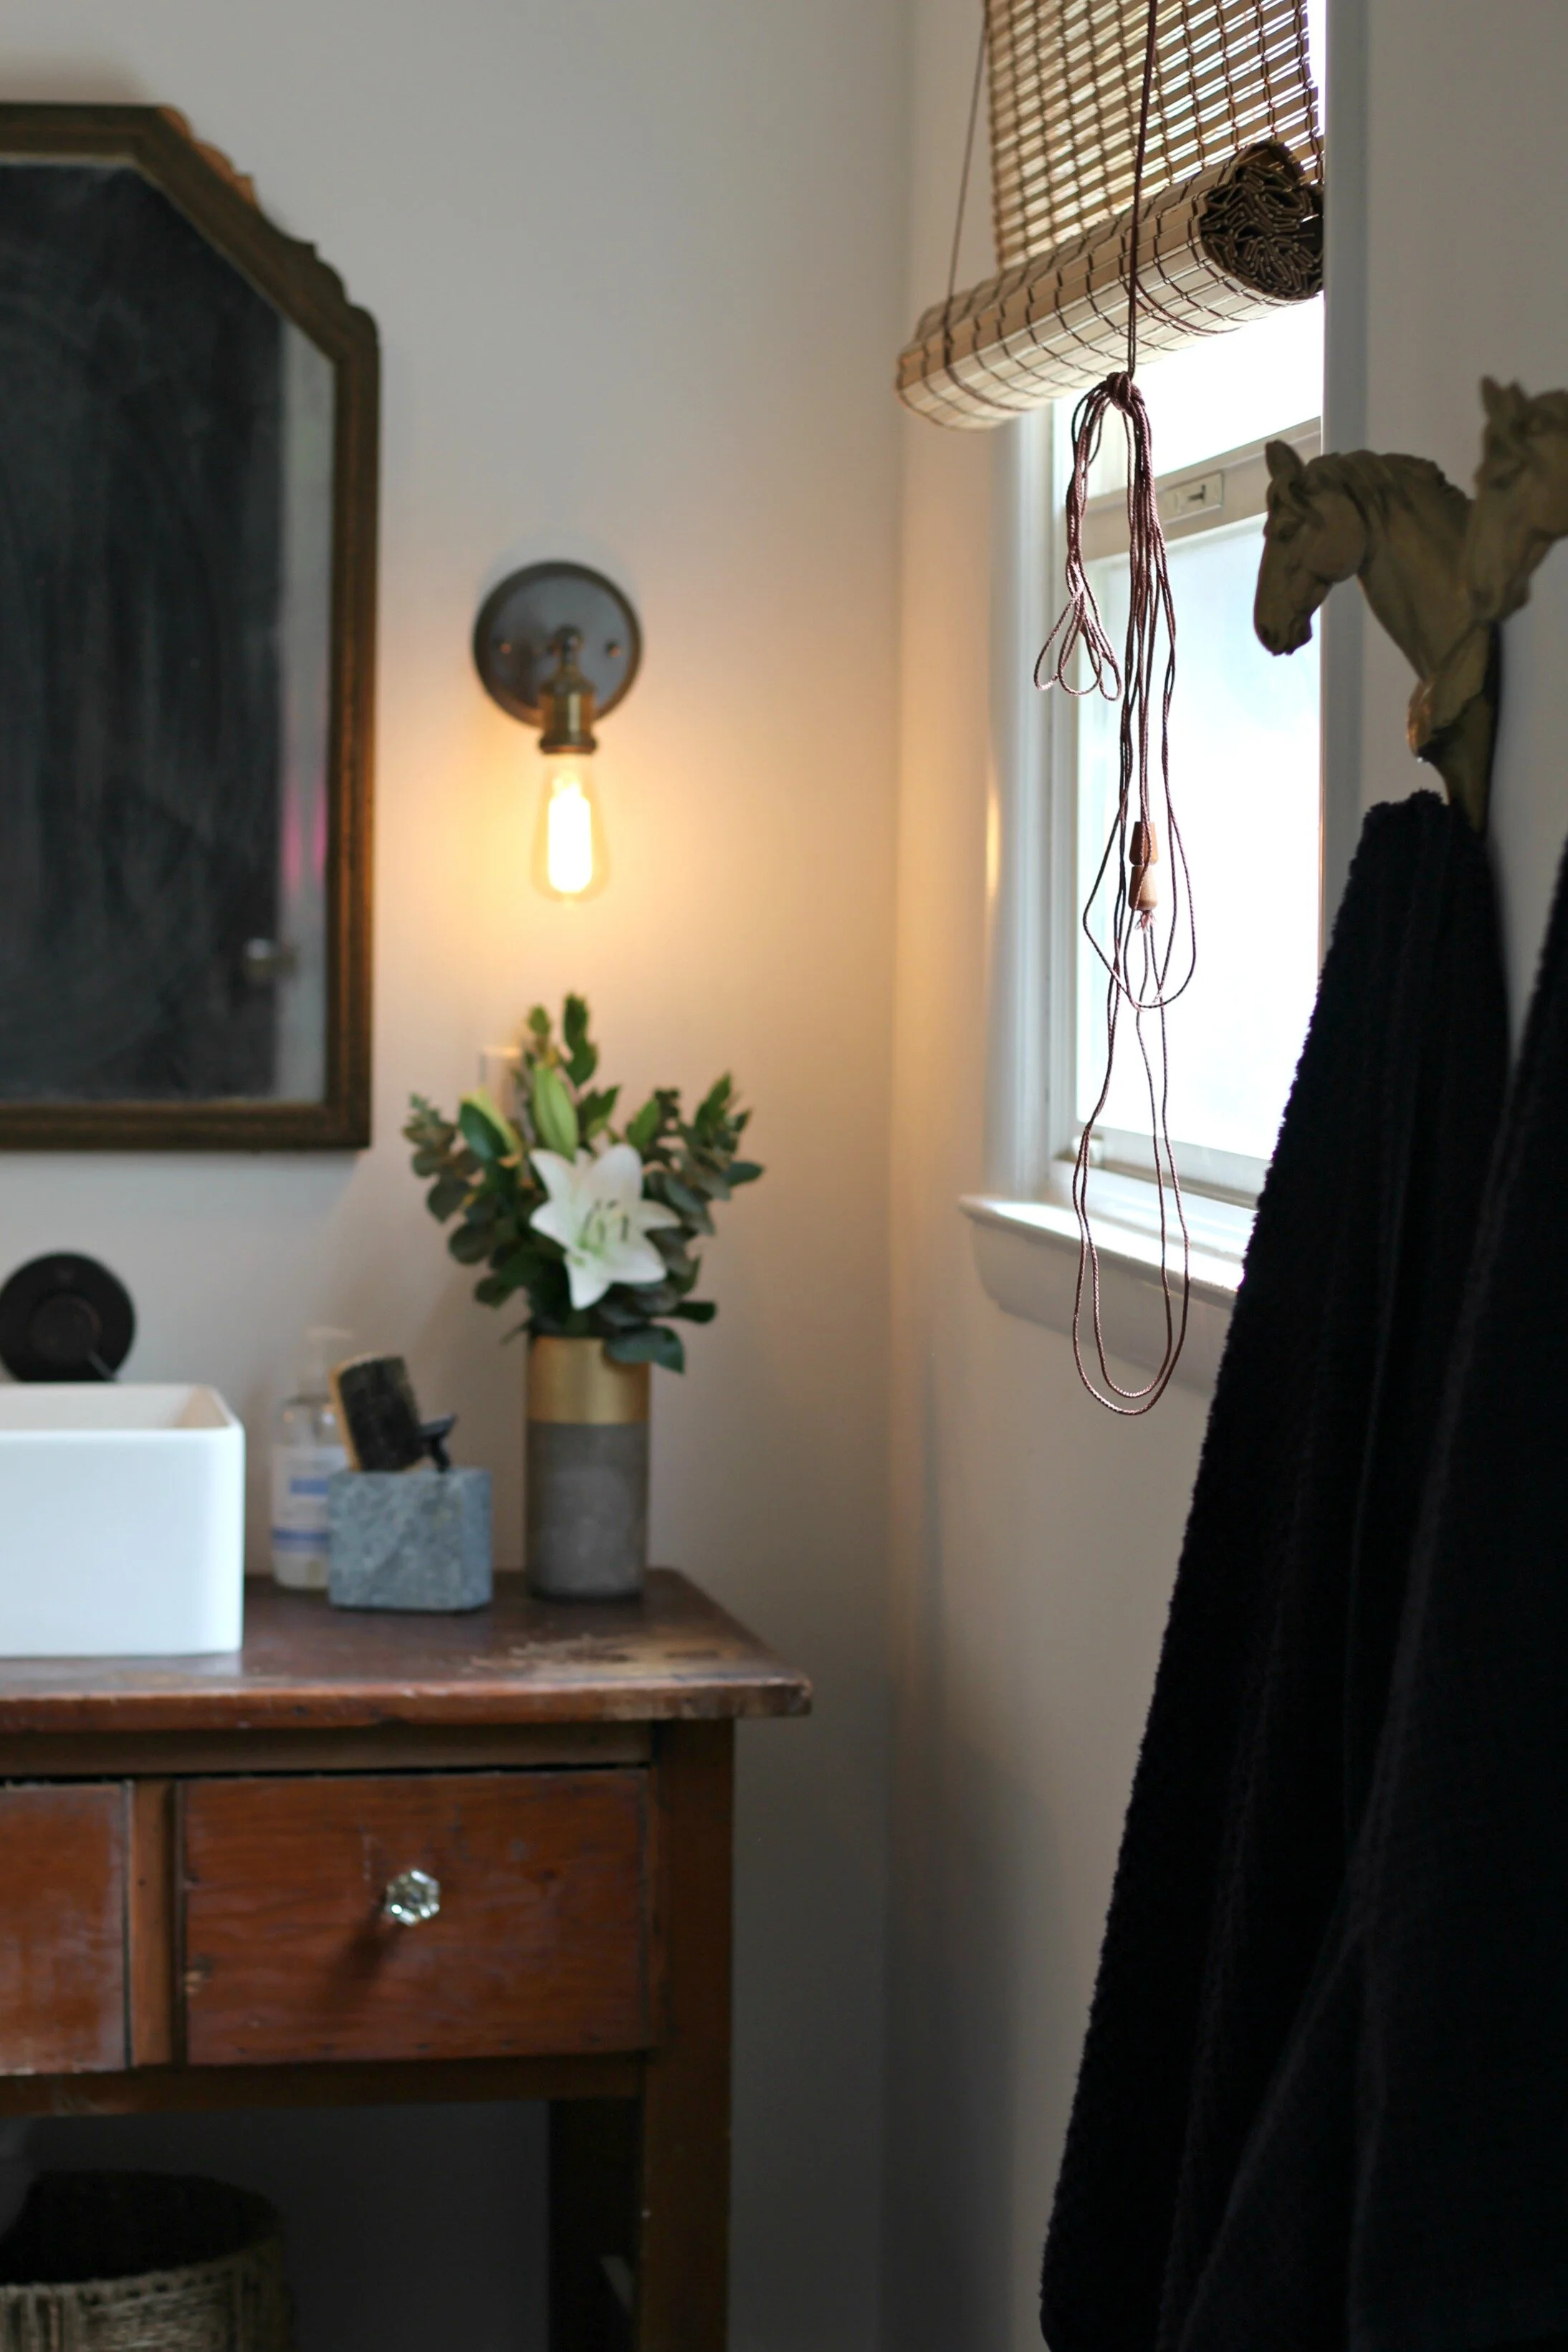
Here's a look at where the toilet was re-positioned. It looks so much better and it's hard to believe it was ever tucked into that corner to begin with. I added a little shelf above it and vintage painting to break up all the white. I found this vintage sailboat painting while we were moving and had completely forgotten that I had it in the attic! I love the colors and wood frame for this space.
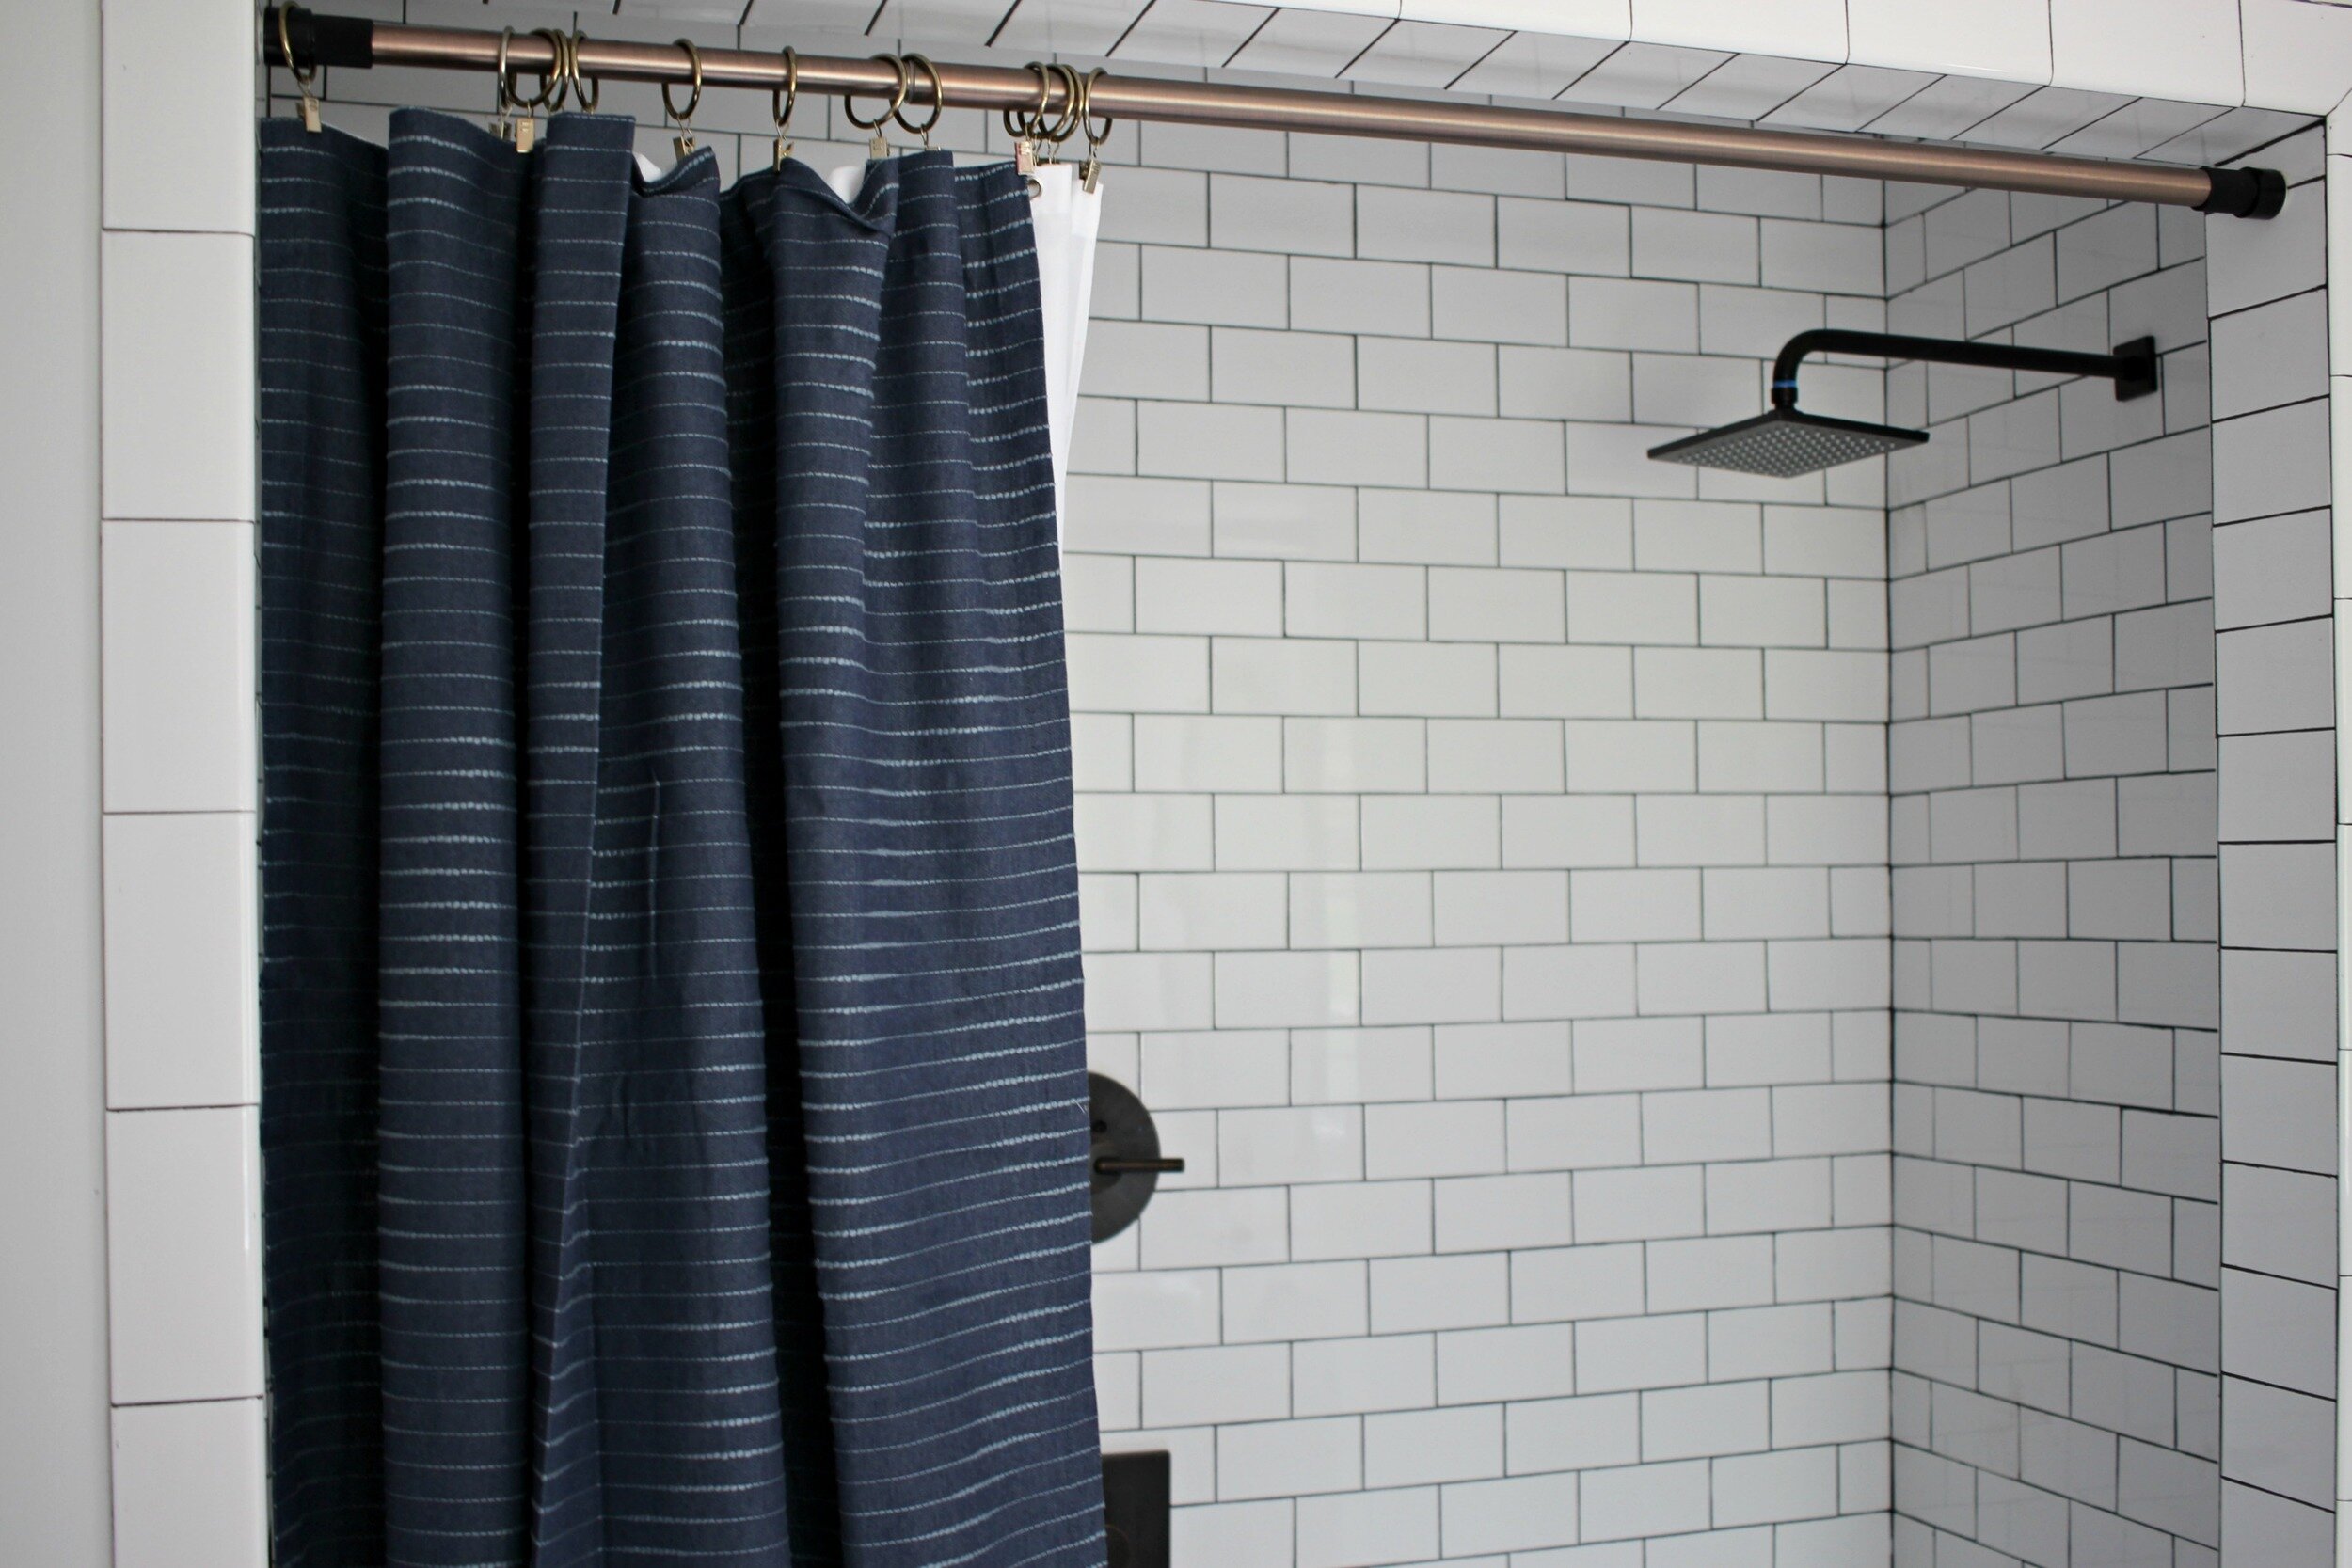
Another view of the shower- I had originally tried a neutral shower curtain but decided I definitely needed a pop of color against all the white tile. This Nate Berkus curtain has a little bit of texture and matches the other navy tones I have going on in the room. I also love the super modern, minimal look of our main shower head. It was a little bit of a splurge but I think it was worth it because the rain shower head feels so spa-like and the look is so unique compared to other shower heads I was looking at.

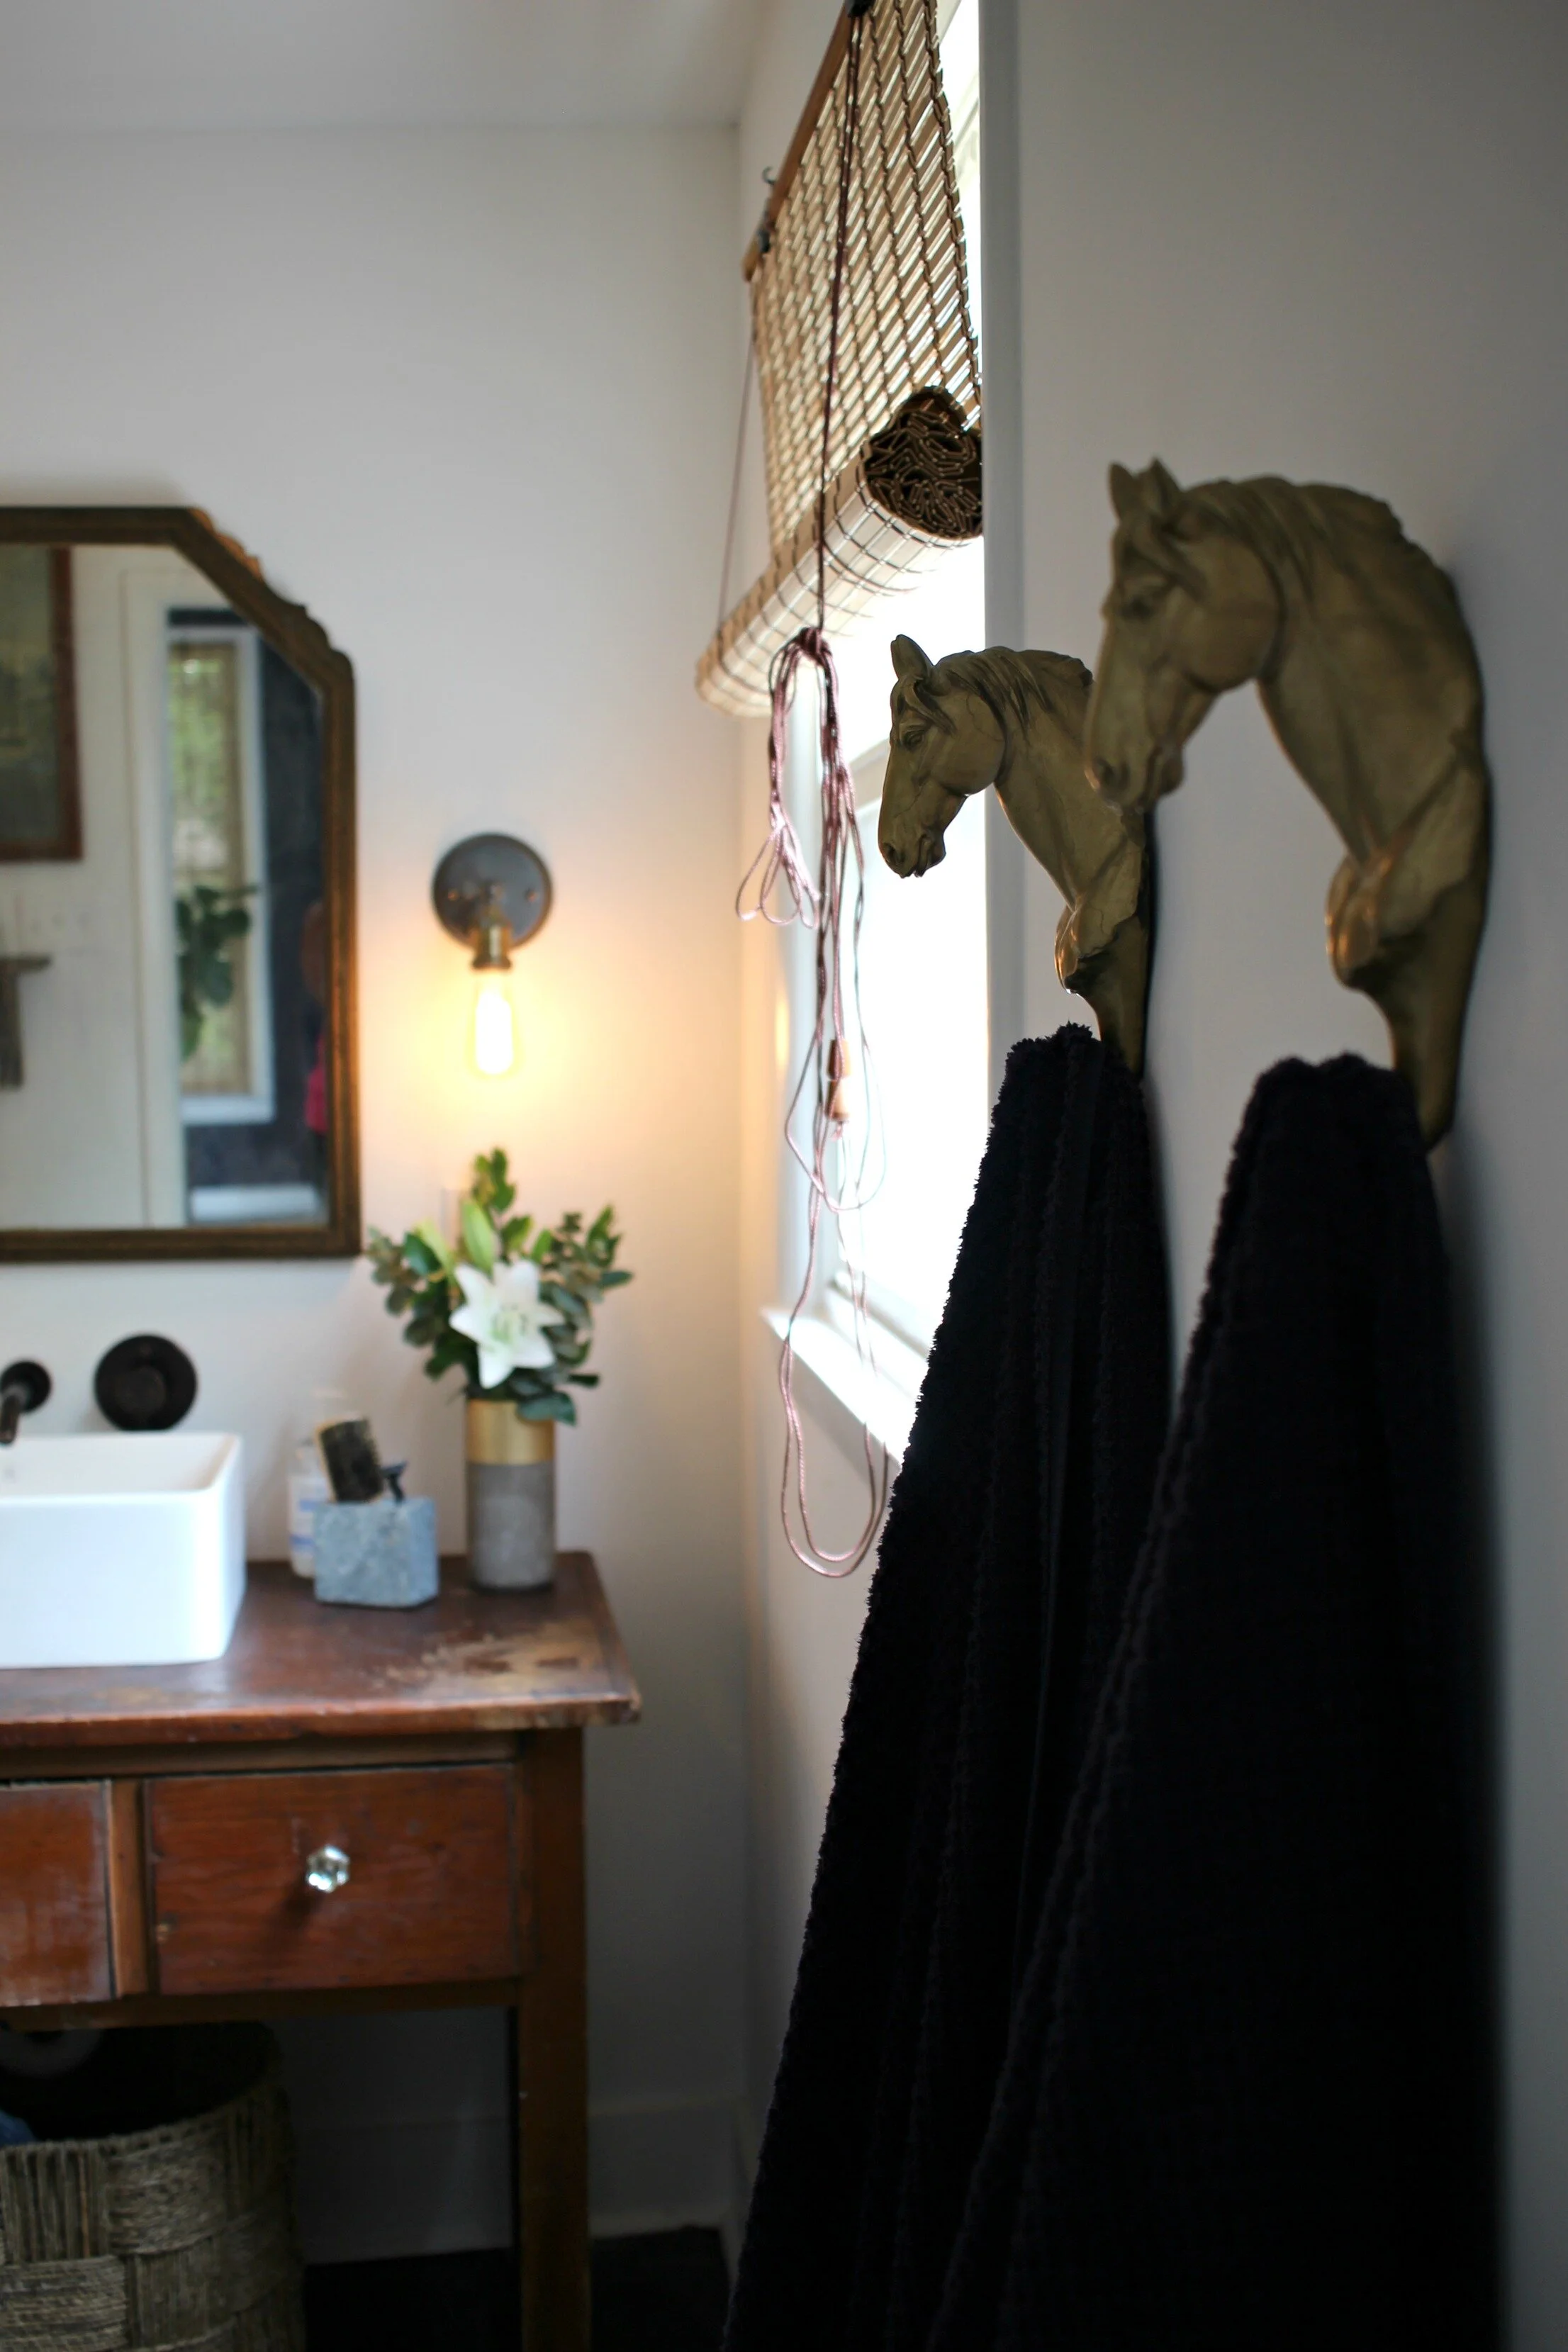
These horse hooks were another thing I re-purposed from our old house. I got them from At Home and just spray painted them gold- they are perfect for holding towels! I also went with my favorite bamboo shades (again) for the window. The glass is frosted so we don't necessarily need a window treatment but I thought this added some texture and made it look a little more finished.

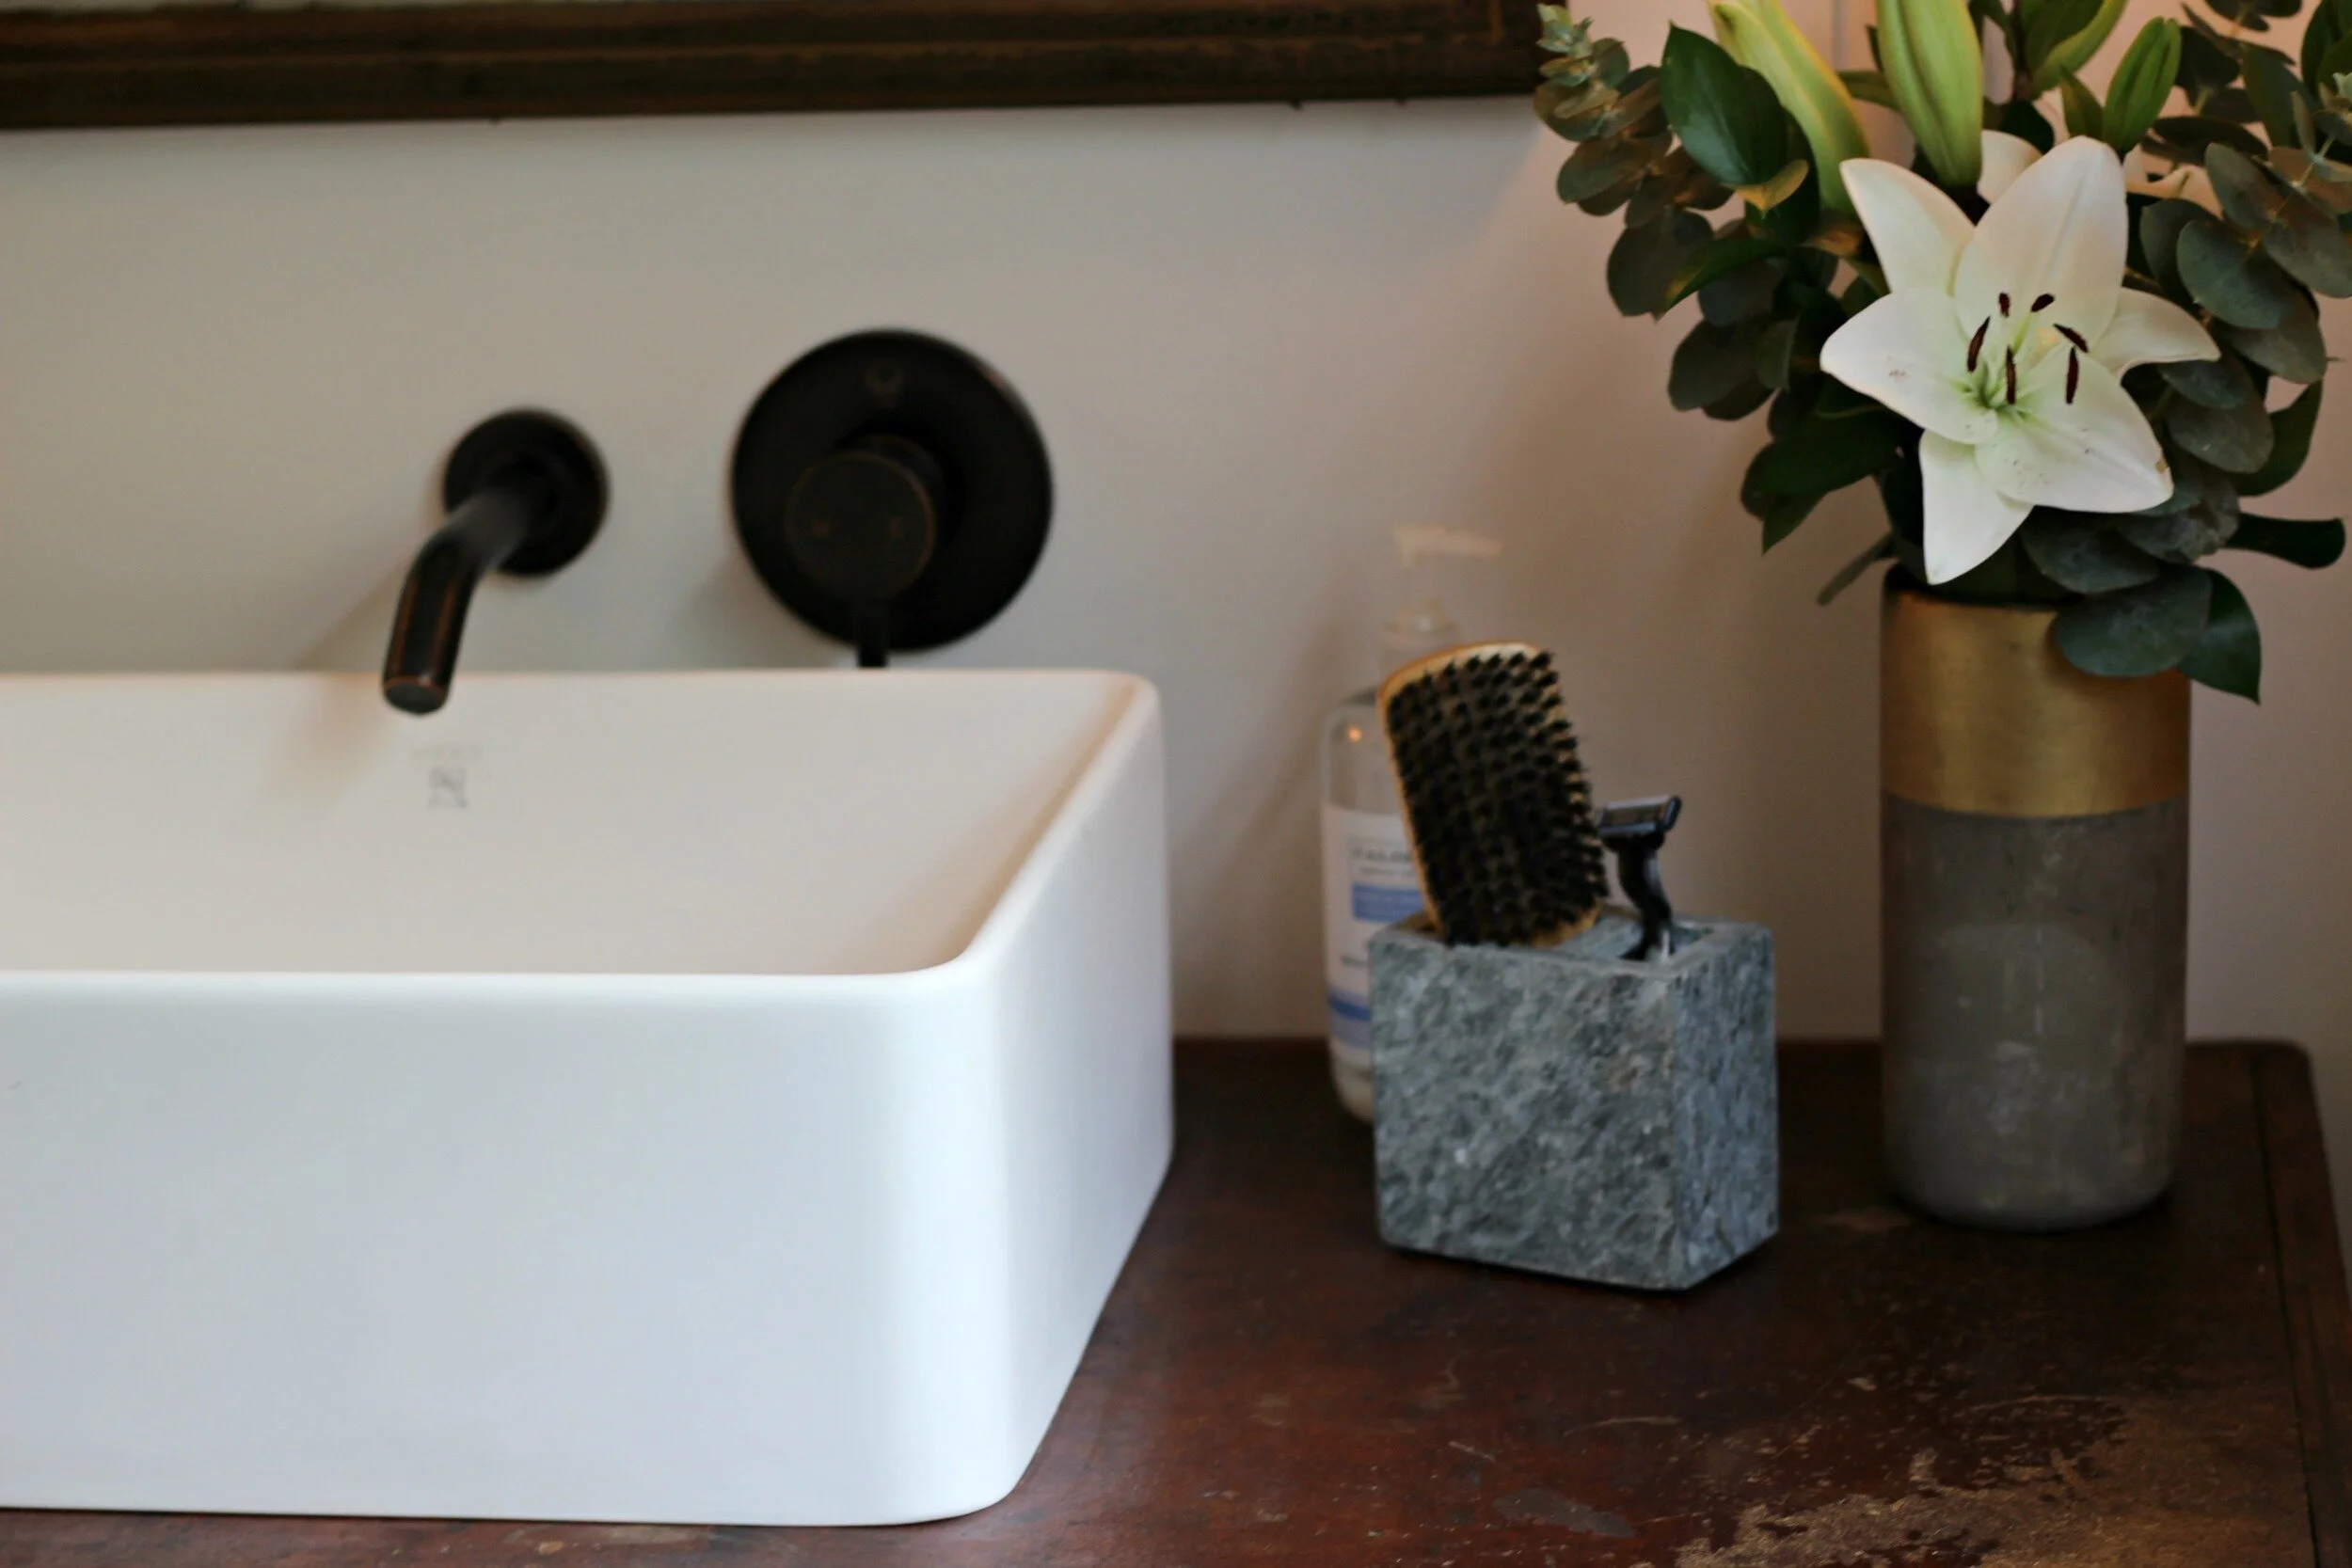
I had been saving pictures for years of old pieces of furniture re-purposed into vanities with vessel sinks on top. I immediately knew this is what I wanted to do in this bathroom and I also liked the unique touch of a wall mount faucet. I think it perfectly matched the style of our other fixtures as well. You can find our vessel sink here and sink faucet here. I like this sink because it has clean lines and is much deeper and more substantial than most vessel sinks.
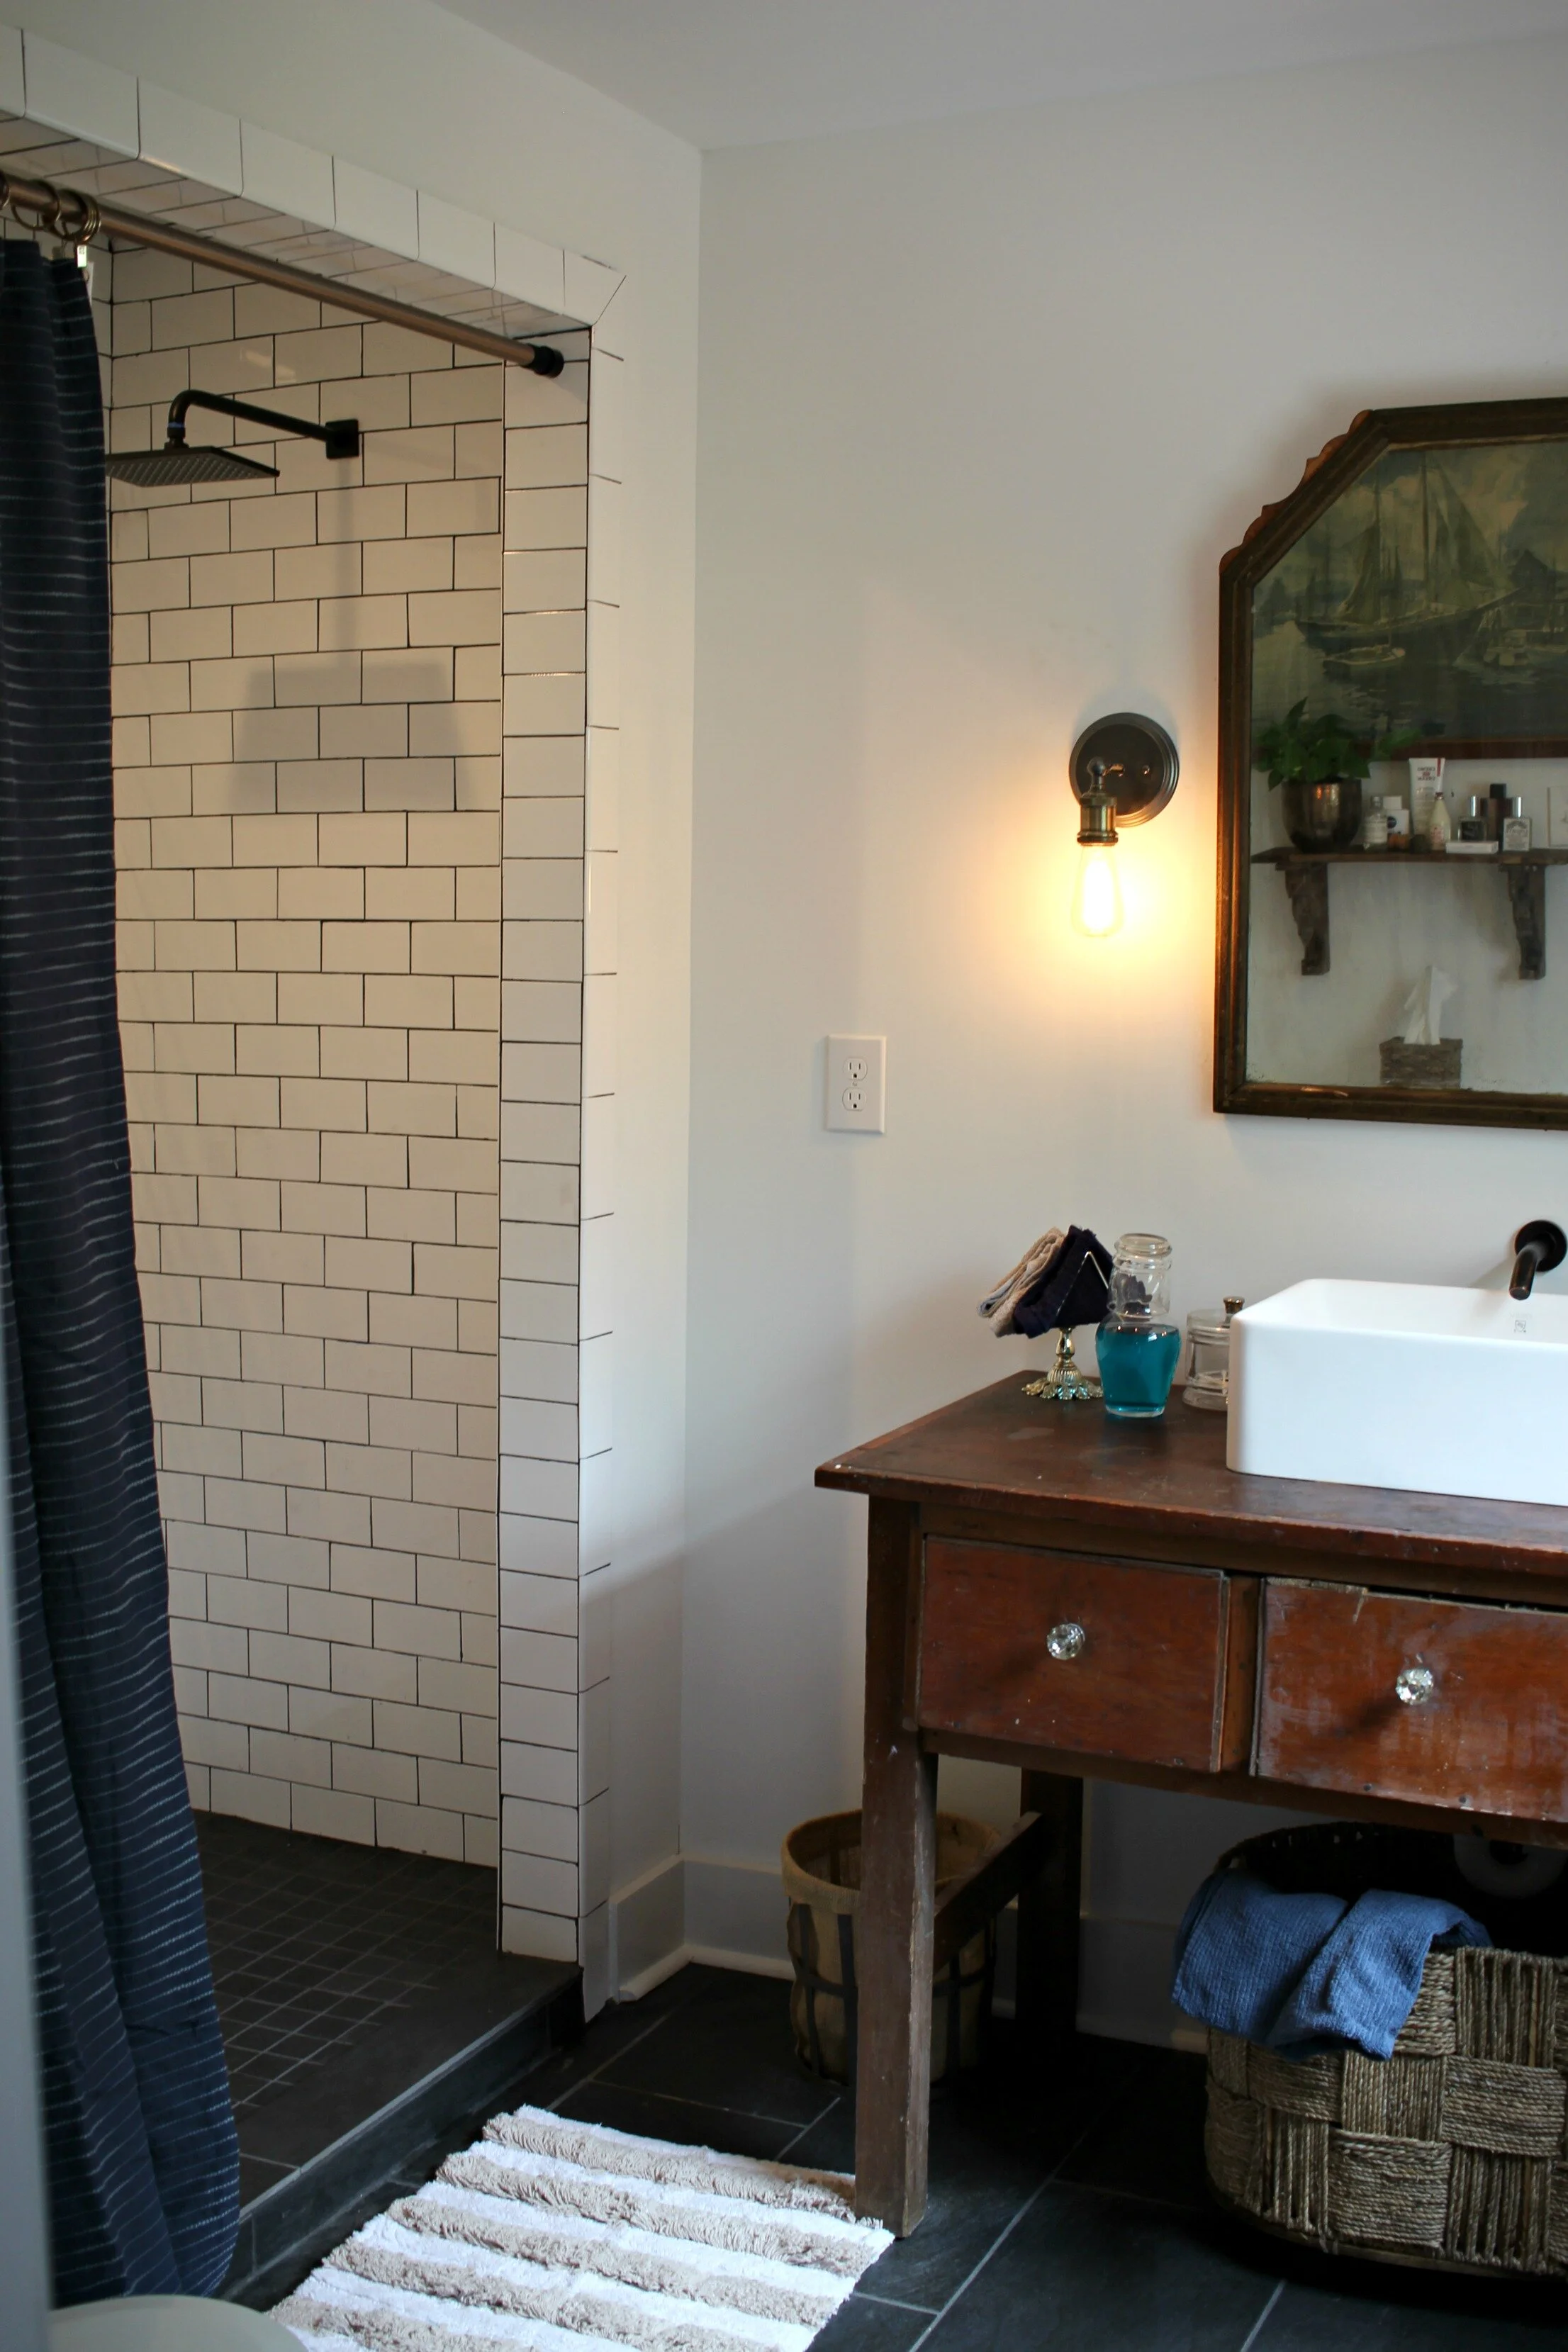
Another big change was the flooring- we went with the same slate-look ceramic tile we did in the kitchen and mudroom downstairs. I really like the look of the dark floors and how it flows into the shower. We purchased all our tile from Louisville Tile Company which has a showroom in Lexington that you can visit anytime. We were on a tight budget for all the tile so everything we used is within their most affordable price range.
One more finishing touch I have yet to add is some open shelving in this little corner crevice (where the toilet/old cabinet built-in used to be). I would love to do some distressed wood floating shelves floor to ceiling (like this).
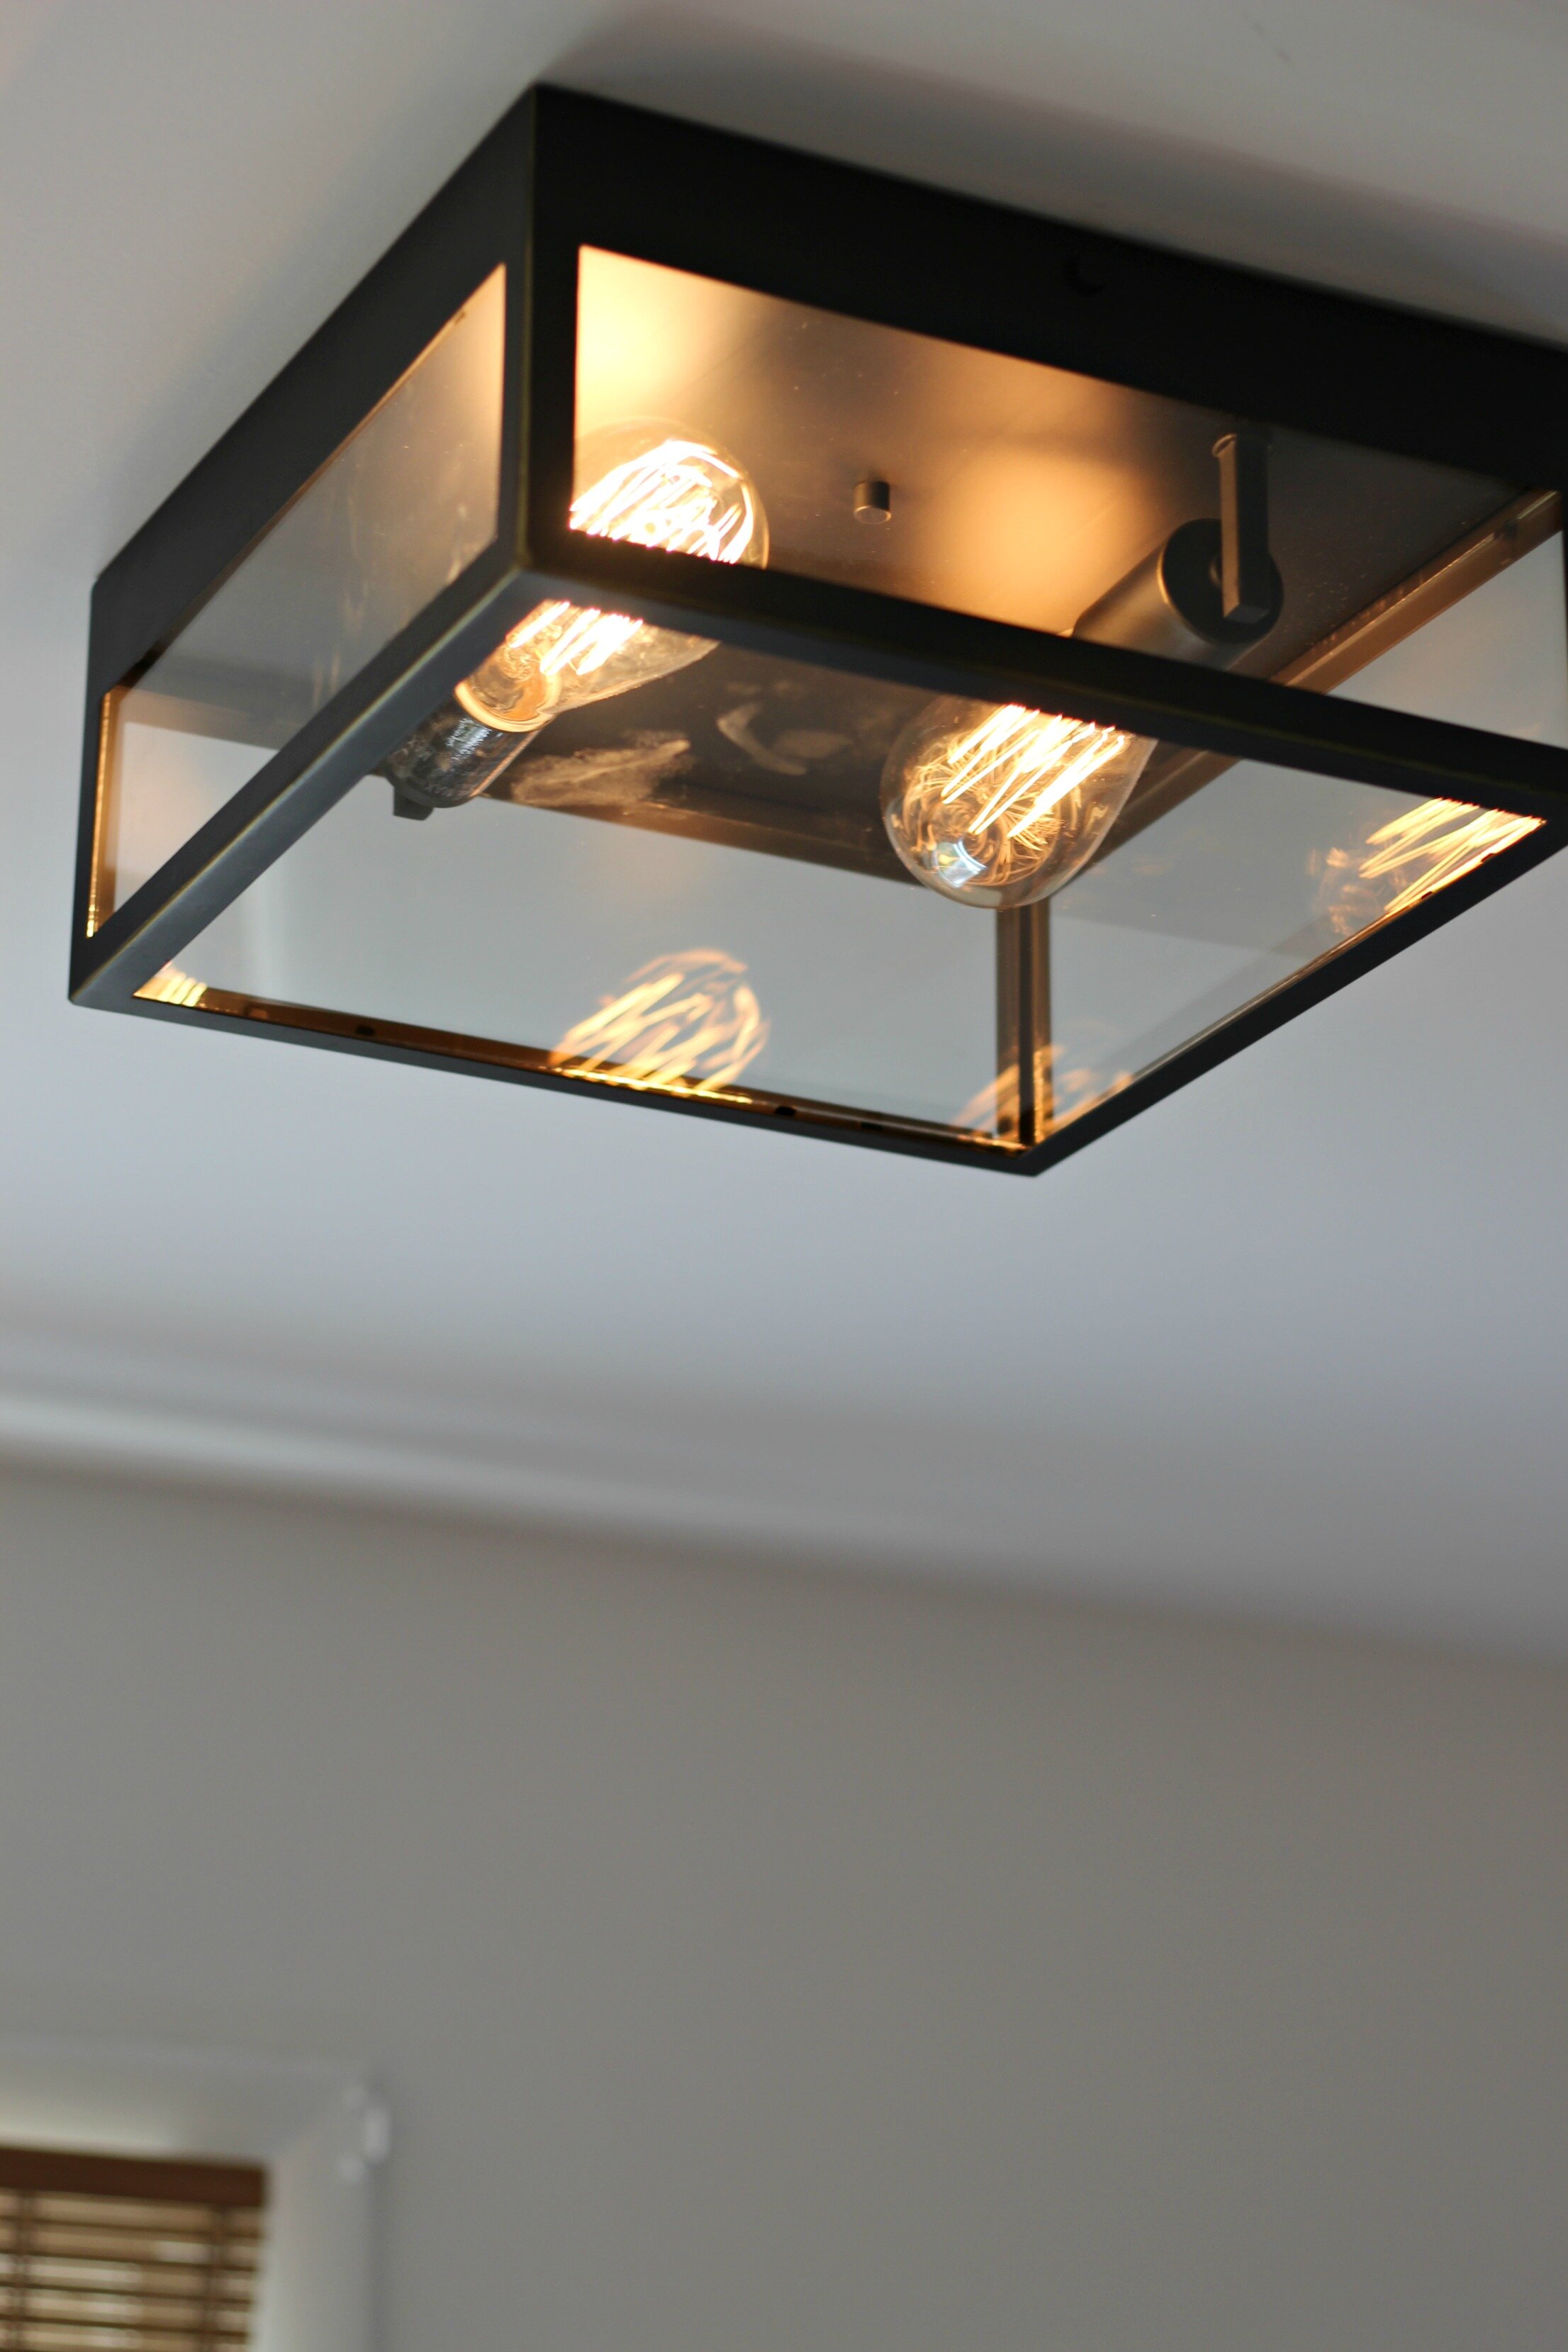
Here's a close-up of our ceiling light that I used in several different rooms throughout the house. This super-affordable flush-mount option is from Lowe's and it looks even better in person!
This entire room (walls, trim, and ceiling) also got a fresh coat of paint (Sherwin Williams "Pure White"), which in addition to all the new drywall really made it feel brand new!
A huge shout-out to TJH Construction Company for making this entire master bath look so good! They completed the entire renovation (down to installing my old vanity so that it was perfectly level!) We can't thank everyone enough who was part of making our dream master bathroom possible (we still feel like we're on vacation at a fancy hotel every time we use this)! If you would like to shop any of the features or fixtures I used in our bathroom, check out my sources list at the end of this post. Stay tuned for more before and afters from the rest of Our Fixer Upper journey!
xoxo
Emily

- Construction: TJH Construction Company
- Tile (floor + subway tile): Louisville Tile Company
- Wall + trim color: Sherwin Williams "Pure White"
- Main shower head: Delta Vero from Lowe's in Venetian Bronze
- Handheld shower head: Wayfair
- Vessel sink: Lowe's
- Sink faucet: Wayfair
- Ceiling light: Lowe's
- Sconces: Bulbs.com
- Shower curtain: Nate Berkus for Target
- Shower curtain liner: Amazon
- Shower curtain rod: Target
- Curtain clips: Target
- Horse towel hooks: At Home (spray painted gold)
- Corner shower caddy with basket storage: Target
- Bath mat: Nate Berkus for Target
- Bamboo shades: Big Lots